

Page 1
12"
HEIGHT
15"
WIDTH
23 3/4
DEPTH
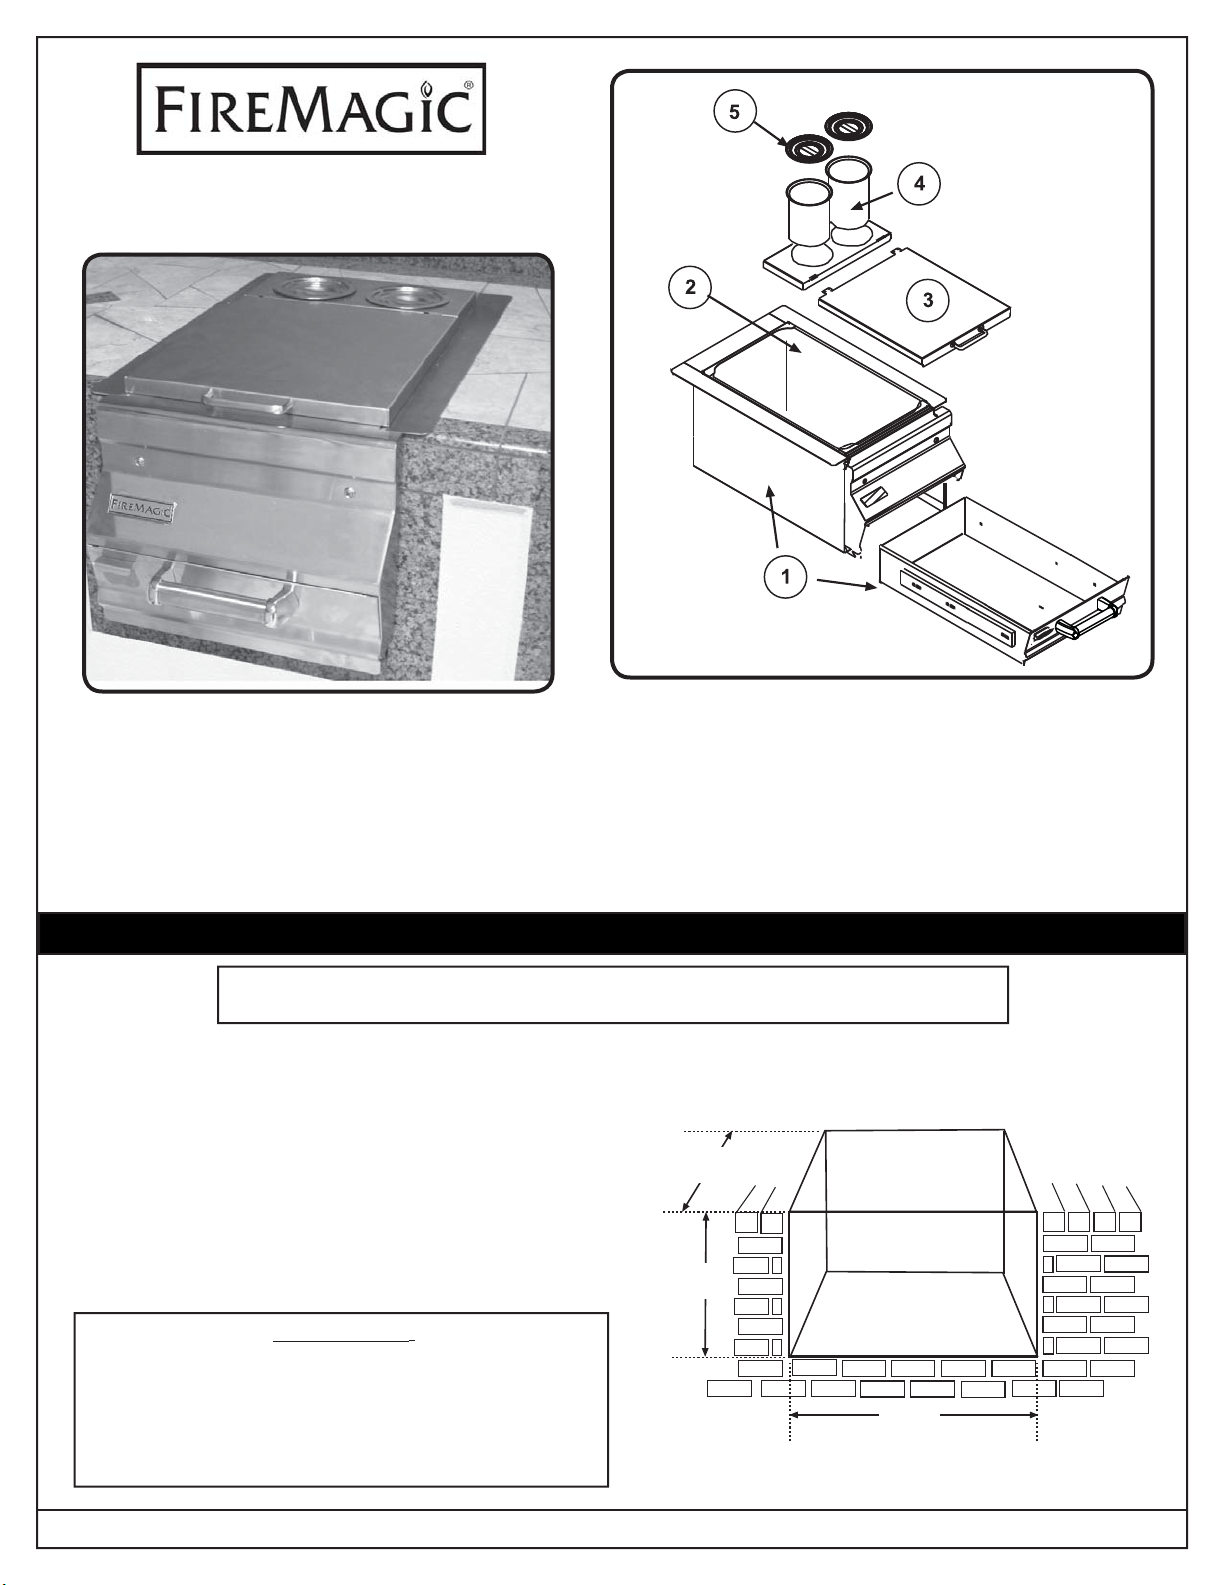
BAR CADDY
SLIDE-IN MODEL #1D-S0
Shown with cover in place and
optional trim kit (part #3807)
2. 1D-S-09 Splash pan 21"x 13"x 6" (1)
3. 1D-S-06 Cover (1)
4. 1D-S-03 Condiment/bottle holder (with cap) (2)
1. 1D-S-05 Drawer (1)
BEFORE INSTALLATION, CHECK
THAT YOU HAVE ALL OF THE
5. 1D-S-08 Condiment/bottle holder cap (2)
6. 1D-S-04 Insulation (not shown) (5)
PARTS AS LISTED TO THE RIGHT.
INSTALLATION INSTRUCTIONS
NOTICE TO INSTALLER: Please leave these instructions with the consumer.
NOTICE TO CONSUMER: Please retain for future reference.
Before installation, ensure the opening dimensions
are correct (Fig. 1). Then simply slide the bar caddy
assembly into place in the cut-out area. Place the 5
pieces of insulation inside the caddy, on the bottom
and against the sides. Place the splash pan inside
the caddy, and put the caddy top and cover in place.
Insert the holder pans and their pan lids.
It is now ready for use.
TO USE AS A FOOD WARMER, SEE REVERSE.
WARNING
Improper installation, adjustment, alteration, service
or maintenance can cause injury or property damage.
Refer to this manual. For assistance or additional
information consult a qualifi ed, professional installer
or service agency.
INSTALLATION OPENING:
Front to Back Depth 22-3/4 "
Width 14-1/4", Height 12"
22 3/4"
depth
12"
height
14 1/4"
width
Fig. 1.
Cut out dimensions for bar caddy
REV 4 - 1405290830
Robert H. Peterson Co. • 14724 East Proctor Avenue, • City of Industry, CA 91746
1
L-C2-164
Page 2
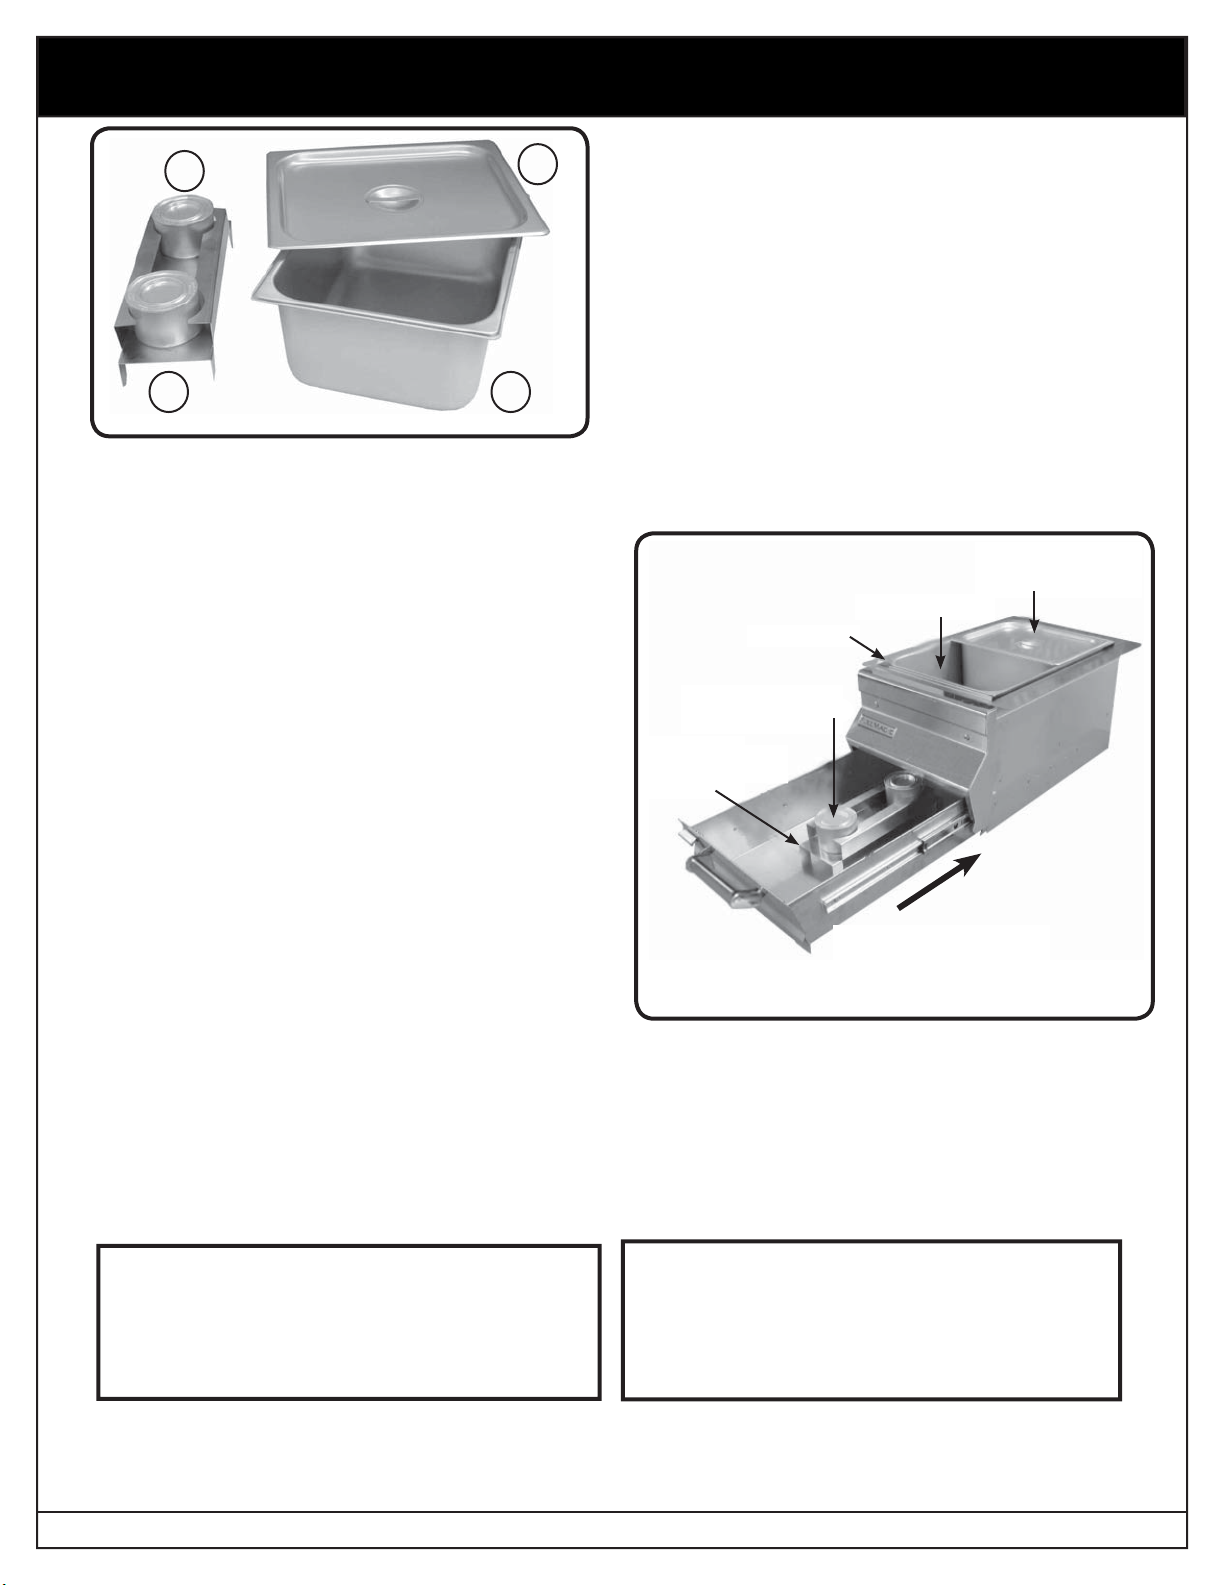
OPTIONAL BAR CADDY HEATER ACCESSORY
Model # 3565
2
To install and operate, follow these simple steps:
4
31
1. Support, can (1)
2. Chafi ng dish fuel (2)
3. Steamer pan, 1/2 size (2)
4. Lid steamer, 1/2 pan (2)
BEFORE INSTALLATION CHECK THAT YOU
HAVE ALL THE PARTS AS LISTED ABOVE.
Note: Refer to the PARTS LIST above and
on page 1 of this instruction manual
to identify the items listed below.
Step 1.
Step 2.
Step 3. Fill the splash pan with approximately 2"-3"
Step 4.
Step 5.
Important: DO NOT BURN CHAFING DISH FUEL
Step 7.
Where installed, remove the bar caddy cover, the bar caddy top, condiment/bottle holder pans, their
caps, and splash pan.
Remove the insulation from inside the bar
caddy.
warm water. Gently place both steamer pans
(Item 3) into the splash pan.
Fit can support (Item 1) into the slots in the
drawer (see Fig. 2). Ensure it is secure.
Removing the lids, place the two supplied
chafi ng dish fuel cans (Item 2) into the can
support.
WITH DRAWER OPEN.
Place desired food to be warmed in the
steamer pans & fi t the lids (Item 4).
Water in here
Splash pan
Place chafi ng dish
fuel in support
Fit can
support in
drawer
When fuel is secure and
lit, close the drawer
Steamer pan and
lid (food in here)
Fig. 2 Optional heater accessory
CAUTION: The water in the splash pan will get hot and is a scald and burn hazard.
Do not attempt to empty it until it is cooled.
TO EXTINGUISH the chafi ng dish fl ame, open drawer & carefully replace fuel lid; fl ames will go out.
Note: For any subsequent uses, always read and follow safety warnings & lighting instructions supplied
with the fuel.
CAUTION: BURN HAZARD
Important: DO NOT LEAVE CHAFING DISHES
BURNING UNATTENDED.
During & immediately after use the
chafi ng dishes will be hot. Do not handle
until cold.
Do not leave children unattended around
the bar caddy during & immediately after
use.
To reuse as a drink and condiment cooler, remove the can support from the drawer and remove the
steamer pans and lids from the splash pan. Remove the splash pan. Replace the insulation, splash
pan, caddy top, cover, and condiment/bottle holders. Fill the splash pan with ice.
Robert H. Peterson Co. • 14724 East Proctor Avenue, • City of Industry, CA 91746
REV 4 - 1405290830
2
L-C2-164
 Loading...