

Page 1
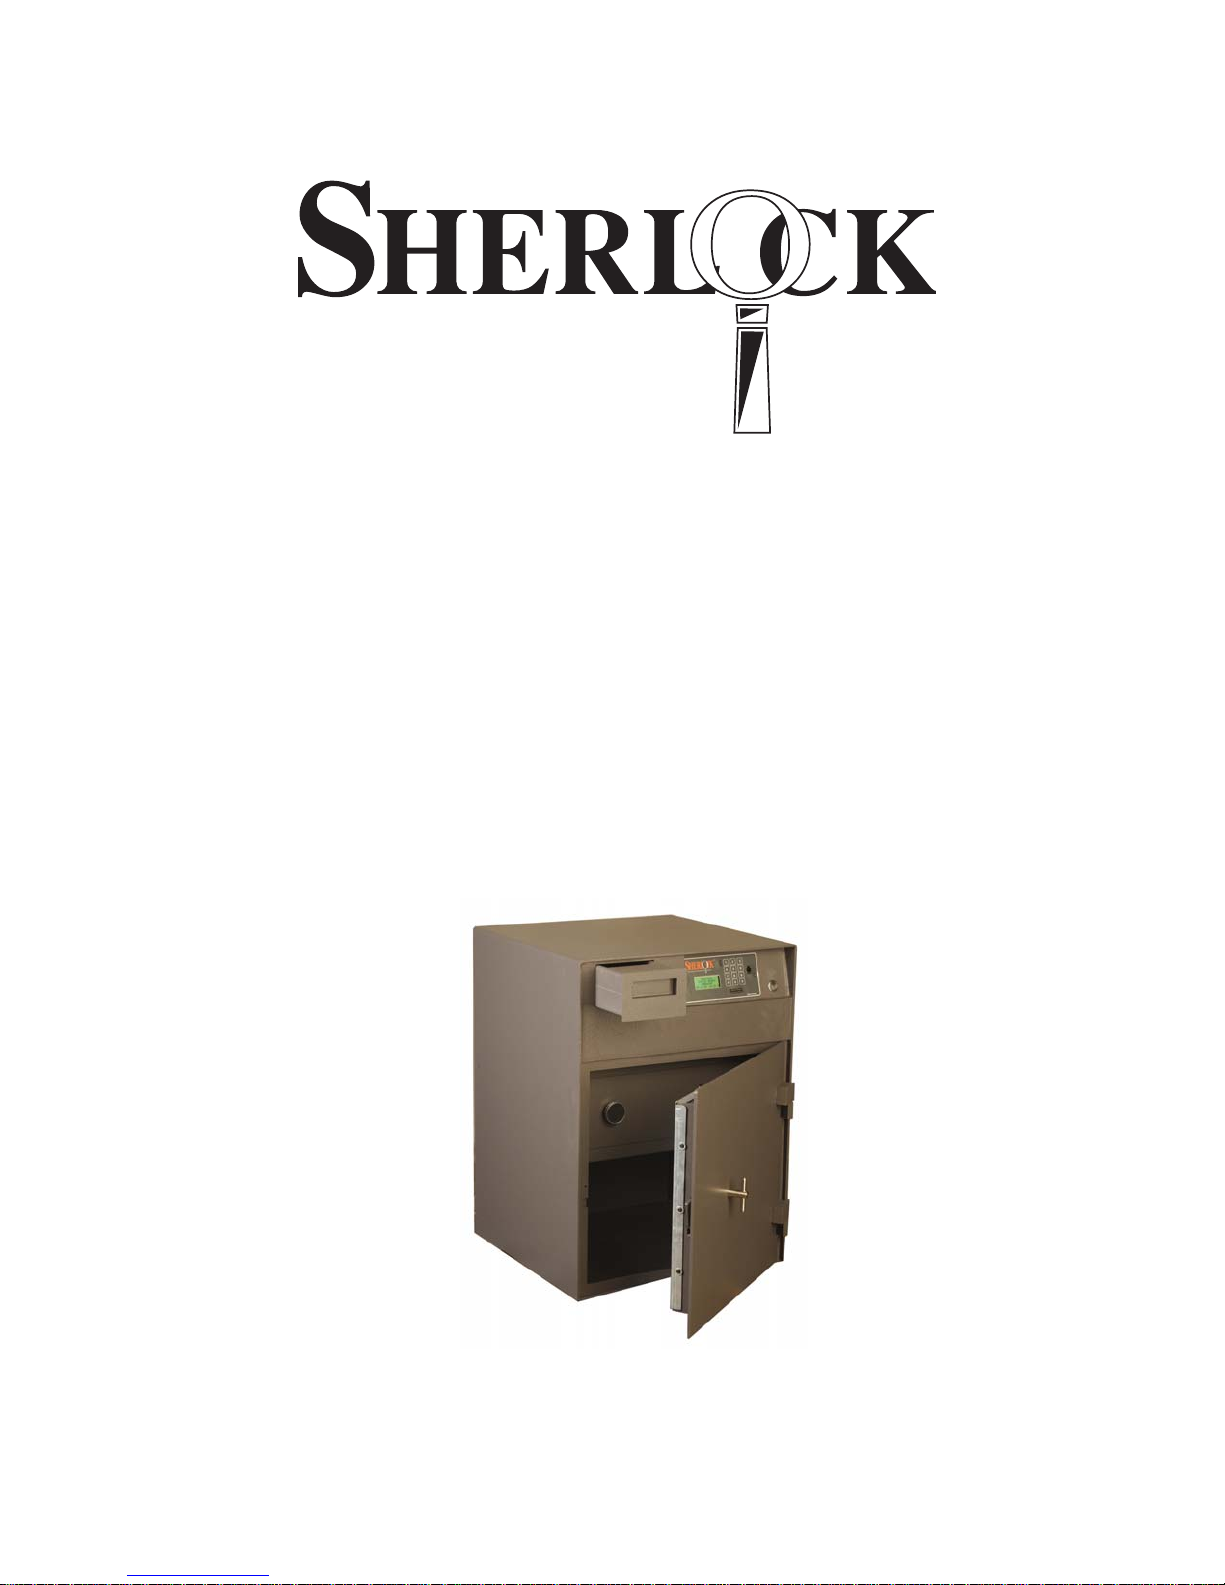
The smartest safe lock in the business.
OPERATOR’S MANUAL
™
The smartest safe lock in the business.
OPERATOR’S MANUAL
FOR THE
21
SHERLOCK KEYED ENTRY
ELECTRONIC LOCK SYSTEM
Fire King
SECURITY PRODUCTS
FOR THE 21ST CENTURY
®
© 2002 Fire King Security Products, LLC.
Sherlock™ is a trademark of Fire King International Inc.,
101 Security Parkway, New Albany IN 47150
Phone 812-948-8400 Fax 812-948-0437
REV 073102
P/N 800530
Page 2

22
OPERATOR’S MANUAL
The smartest safe lock in the business.
CONTENTS
Section Title ................................................................................ Page
1.0 Introduction ........................................................................................................... 1
1.1 Scope of Document ............................................................................................... 1
1.2 Sherlock Overview ................................................................................................ 1
1.3 Applications .......................................................................................................... 1
2.0 Features ................................................................................................................ 1
2.1 Audit Trail .............................................................................................................. 1
2.2 Time Delay ............................................................................................................ 1
2.3 Timelock ............................................................................................................... 2
2.4 System Clock ........................................................................................................ 2
2.5 Users .................................................................................................................... 2
2.5.1 Employees ............................................................................................................ 2
2.5.2 Store Manager ....................................................................................................... 2
2.5.3 Area Manager ....................................................................................................... 3
2.5.4 Owner/Super ......................................................................................................... 3
2.5.5 Auditor .................................................................................................................. 3
2.5.6 Armor Car .............................................................................................................. 3
2.5.7 User 40: System ................................................................................................... 3
2.5.8 Employee Key Count ............................................................................................ 3
2.6 Positive User Identification .................................................................................... 3
2.7 External Power Supply .......................................................................................... 3
2.8 Display Module ..................................................................................................... 3
2.9 Lock Module ......................................................................................................... 3
3.0 Operation .............................................................................................................. 4
3.1 Idle Screens .......................................................................................................... 4
3.1.1 System Ready ...................................................................................................... 4
3.1.2 Timelocked ........................................................................................................... 4
3.2 Change PIN ........................................................................................................... 4
3.3 Opening Doors ...................................................................................................... 5
3.3.1 Open Outer Door ................................................................................................... 5
3.3.2 Open Inner Door .................................................................................................... 6
3.3.3 Armor Car Access ................................................................................................. 7
3.4 Keys and Users .................................................................................................... 8
3.4.1 Delete Keys .......................................................................................................... 8
3.4.2 Add Employees .................................................................................................... 9
3.4.3 Add Area Manager and Above ............................................................................. 10
3.4.4 Employee Key Count ............................................................................................ 11
3.5 Adjust Daylight Savings ........................................................................................12
3.6 Set System Clock..................................................................................................13
3.7 Set Inner Door Delay and Access Time .................................................................14
3.8 Set Timelock ......................................................................................................... 15
3.9 View Audit Trail......................................................................................................16
3.10 Printing Data .........................................................................................................17
4.0 Service ..................................................................................................................18
4.1 Troubleshooting .....................................................................................................18
4.2 Preventative Maintenance ..................................................................................... 18
4.3 Warranty ...............................................................................................................19
4.3.1 Things that Void Warranty ..................................................................................... 19
4.3.2 Duration of Warranty.............................................................................................. 19
4.4 Obtaining Warranty Service................................................................................... 20
4.4.1 Inside USA, Fire King Security Products Safes ..................................................... 20
4.4.2 Inside USA, Other Fine Brands ............................................................................. 20
4.4.3 Outside USA ......................................................................................................... 20
Page 3
The smartest safe lock in the business.
OPERATOR’S MANUAL
1.0 INTRODUCTION
Sherlock is an electronic lock package and this manual documents its operation.
1.1 SCOPE OF DOCUMENT
This manual provides all of the information you need to operate and administrate the Sherlock electronic lock.
This document specifically covers the keyed version of Sherlock supporting one or two doors. This document
provides the operating instructions for all users, up to and including the owner.
1.2 SHERLOCK OVERVIEW
Sherlock is an intelligent lock package made up of a display module (outer board), a lock control module
(inner board), power supply, and interconnecting cables. Electronic keys are assigned to employees, along
with PINs (personal identification numbers). Up to 27 keyed employee level users may be enrolled at one
time, plus managers and special purpose keys. Sherlock may be programmed to restrict access to the safe
using time delays and timelocks. An audit trail records all user activity. This log may be displayed or printed.
Sherlock supports advanced features such as timeout penalty for entering the wrong PIN too many times.
1
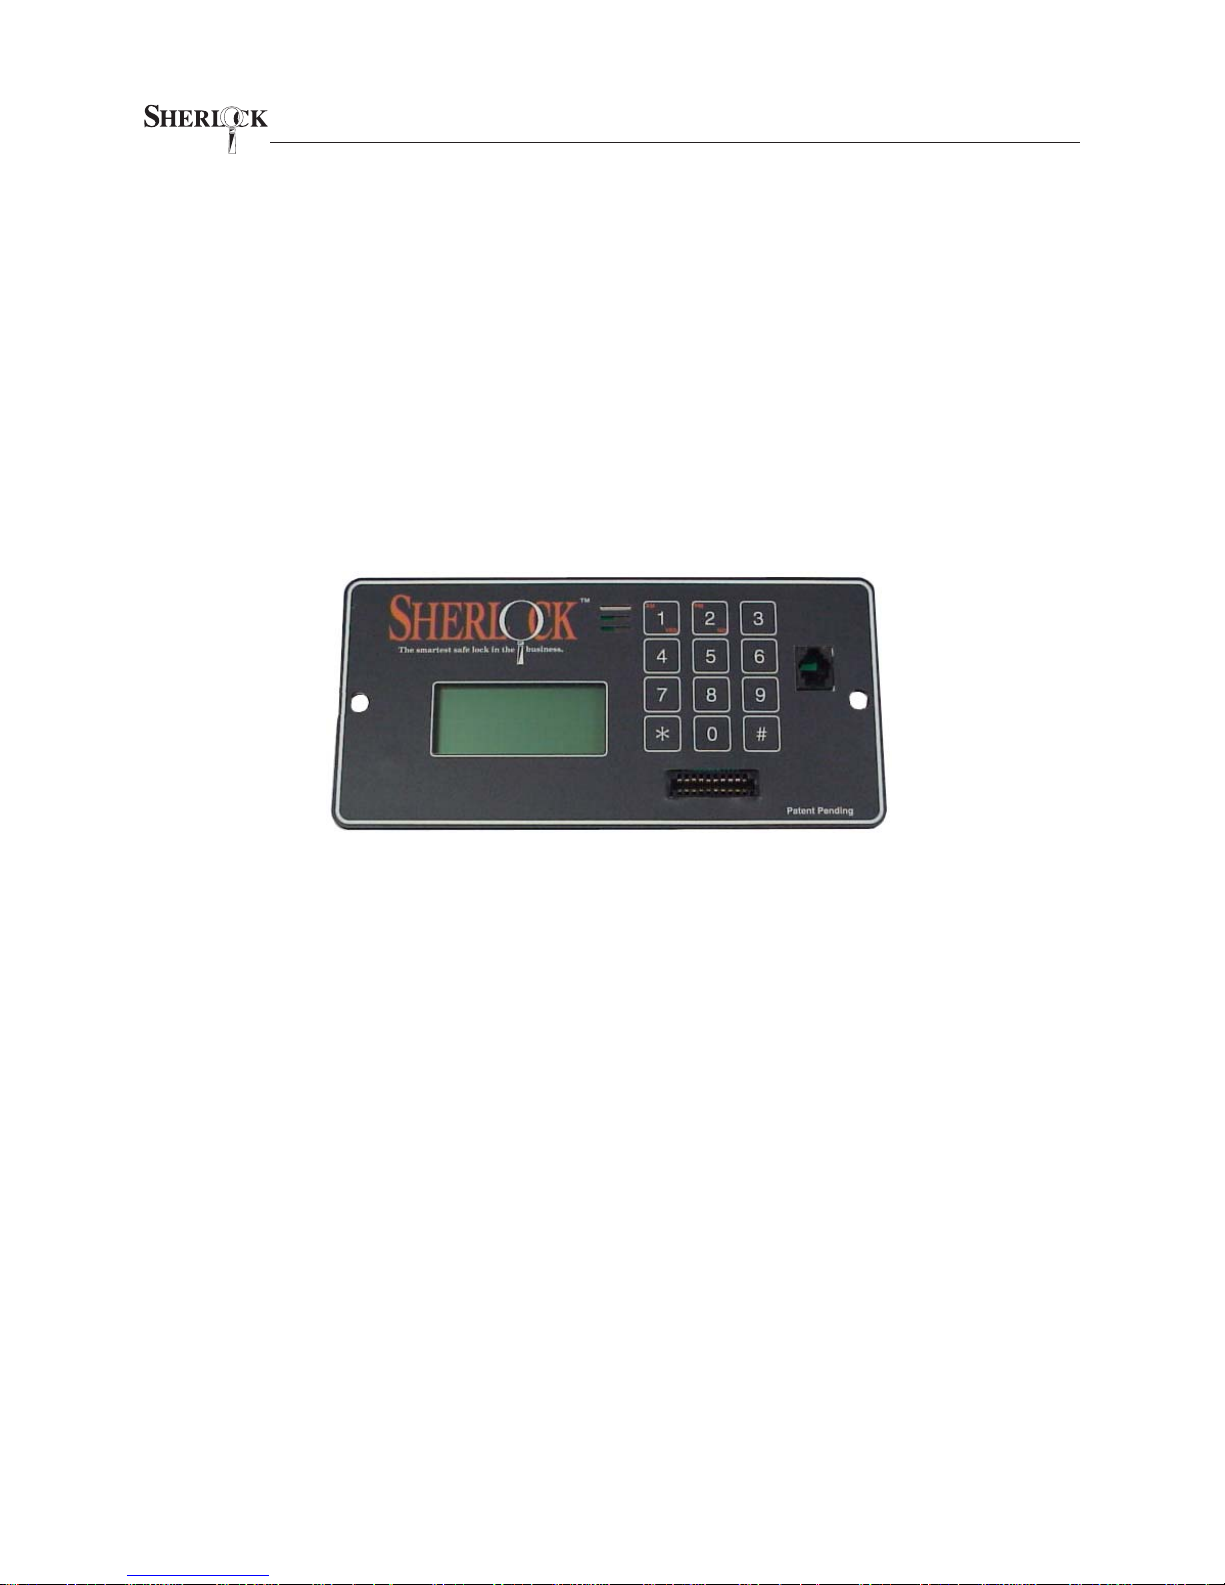
Sherlock Keypad
1.3 APPLICATIONS
Sherlock is designed for applications restricting safe access to certain hours with a log of user access.
Sherlock is setup to provide more restricted access to the high-value inner compartment while allowing
broader employee access to tills and change stored in the outer compartment. Sherlock requires an enrolled
key with a valid PIN number to grant access during authorized hours. Proper application of signs combined
with this technology provides maximum employee safety and theft protection. The audit trail is a log that can
be used to obtain a detailed history of employee activity to determine who entered the safe and when.
2.0 FEATURES
2.1 AUDIT TRAIL
The Audit Trail is a 2000 line record of operational history. Everything that any user does is recorded in this
log. This includes safe entry, door opening, and programming changes. The audit trail may be displayed or
printed. Employee keys and the Store Manager key may used to view the audit trail. The Area Manager and
Owner may also print the audit data.
2.2 TIME DELAY
The purpose of an inner door time delay is to protect employees during a robbery while still allowing controlled access for legitimate purposes. Most robbers are not willing to stay in a store long enough for delay to
time out. They will take what they can from the outer compartment, but will leave drop money. Only the Owner
key has permission to edit the inner door delay (the factory default is 15 minutes). When a delay is set, the
inner door may be accessed after the delay is satisfied by logging in a second time during a period called
the Access Time. Also programmable, the default access time is 5 minutes. Once the access time has
expired, the delay must once again be satisfied before the door may be accessed again.
Page 4
2
OPERATOR’S MANUAL
The smartest safe lock in the business.
2.3 TIMELOCK
The purpose of a timelock is to completely prevent safe access during specified hours. This not only keeps
a burglar out, and keeps employees honest by not allowing them the opportunity to enter the safe outside of
authorized business hours. The Area Manager or Owner key is required to edit timelocks. The Store Manager
and Audit keys, however, may be used to view timelock settings. By default, the safe goes into timelock at
11:59 pm each day and comes out of timelock at 8:00 am each day. Each day can be set separately to
accommodate opening and closing schedules. Note that timelock operates on a 24 hour clock. Any time after
12:00 midnight is considered the next day. Each day has 3 time slots that can be programmed (initial lock
time, unlock time, and last lock time). This allows the safe to be timelocked after midnight, unlocked in the
morning, and locked again prior to midnight. To disable the capability to lock during the AM or PM, “99:99”
must be programmed into that time slot. The times that are programmed into the timelock can be viewed on
the display screen or printed on a printer.
2.4 SYSTEM CLOCK
The system clock is essential to proper operation of timelock, delays, and audit data. The day, date and time
may only be set by the Area Manager or Owner keys. Daylight Savings Time, however, can be adjusted by
the Store Manager only.
2.5 USERS
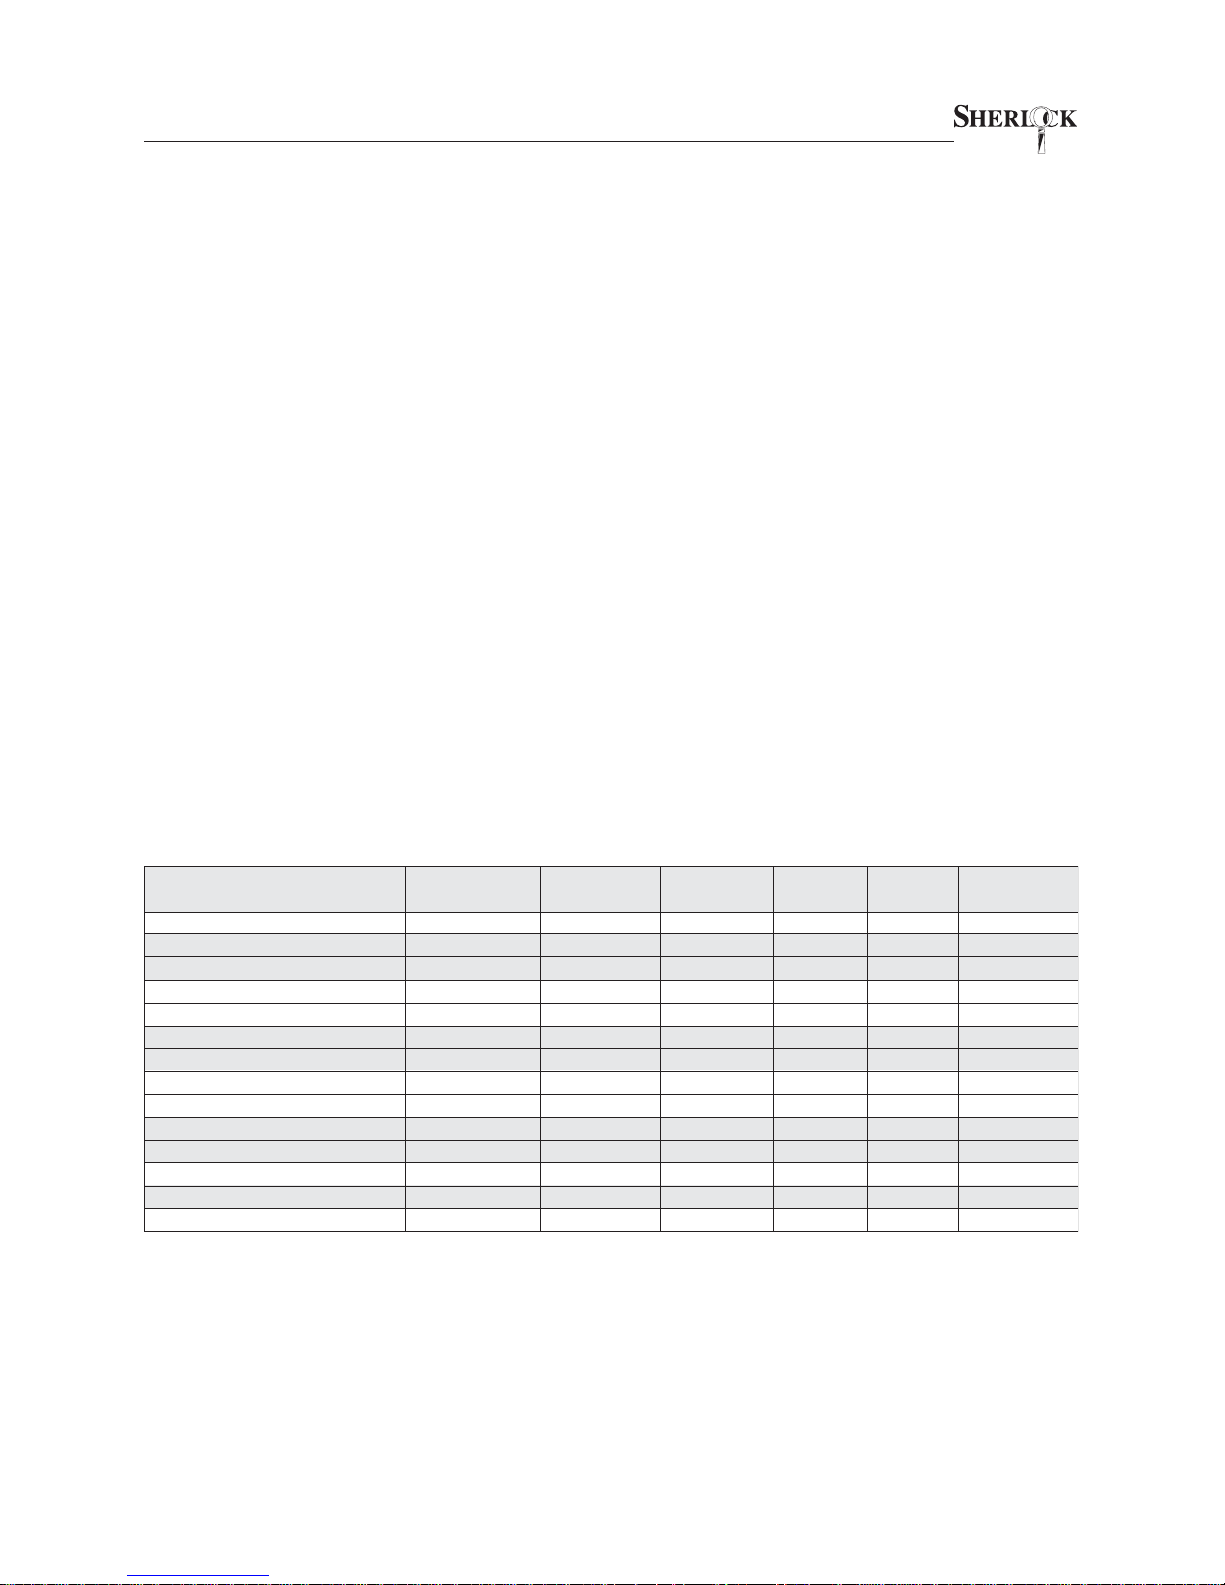
Up to 27 Employee keys may be enrolled in the Sherlock, plus managers. Users are identified by an electronic key and four-digit PIN. While up to 27 Employee keys may be enrolled, only one key of each of the
other key types may be enrolled at any time. For example, you cannot have two Store Managers keys
enrolled in the same safe, but you will usually have an Area Manager and a Store Manager both enrolled. The
Sherlock Key Chart illustrates the permissions of each key type. Note that key type 28 is not listed (key type
28 is reserved for factory use only). In general, only your company’s loss prevention management may order
replacement keys. Keys are encoded by the factory for key type. The Key Count feature is used to see which
user numbers are currently assigned to keys.
FUNCTION:
OPEN SAFE DOORS
VIEW AUDIT DATA
PRINT AUDIT DATA
VIEW KEY COUNT
PRINT KEY COUNT
DELETE KEY
ADD KEY
VIEW TIMELOCK
SET TIMELOCK
SET DAY/DATE/TIME
ADJUST DAYLIGHT SAVING
SET INNER DOOR DELAY
CHANGE PIN CODE
BYPASS DELAY & T/L
EMPLOYEE
USERS 01 - 27
X
X
X
STORE MGR
USER 29
X
X
X
X
X
X
X
AREA MGR
USER 30
X
X
X
X
X
X
X
X
X
X
OWNER
USER 31
X
X
X
X
X
X
X
X
X
X
X
AUDIT
USER 32
X
X
X
X
X
X
ARMOR CAR
USER 33
X
Sherlock Key Chart
2.5.1 Employees
Employee Keys are assigned to Users 01 through 27 and have permission to access doors, view the audit
log, and may change their own PIN number. These keys are enrolled by the Area Manager or Owner keys.
2.5.2 Store Manager
The Store Manager key (User 29) may open doors, change their own PIN, delete keys, view audit data, view
key count, or view timelock settings, and adjust daylight savings. This is the highest level key is normally
retained by store personnel. These keys are enrolled by the Area Manager or Owner keys.
Page 5

The smartest safe lock in the business.
OPERATOR’S MANUAL
2.5.3 Area Manager
The Area Manager key (User 30) cannot open safe doors, but can view or print audit and key data, change
clock and timelock settings, and may enroll or delete other keys. This key is purchased as an Area Manager
Key and is self enrolling with verification from an enrolled employee key.
2.5.4 Owner/Super
The Owner key (User 31), sometimes called a “super” key, has the same permissions as the Area Manager
with the additional ability to change the inner door delay. This key is normally retained by the company
security manager. This key is purchased as an Owner (Super) Key and may be enrolled by an Area Manager
key.
2.5.5 Audit
The Audit key (User 32) has only the ability to view or print audit and key data and view timelock settings.
This key is purchased as an Audit Key and may be enrolled by an Area Manager or Owner key.
2.5.6 Armor Car
The Armor Car key (User 33) has the unique ability to override time delay and timelock. Whenever the Armor
Car key logs in, an Employee key or Store Manager key must immediately log in to open the doors. This
allows nearly instant access to the Armor Car carrier while still making a specific user responsible for allowing
the armor car carrier to make the pickup. Armor Car may not perform any other function. This key is purchased as an Armor Car Key and may be enrolled by an Area Manager or Owner key.
3
2.5.7 System
Certain events logged in the audit trail cannot be assigned to a specific user, such as a time locked and time
unlocked. These entries will appear in the audit trail assigned to User 40, or System.
2.5.8 Employee Key Count
Users 29 to 32 may check the key count to see what user numbers are currently assigned to keys. A user
number that has been enrolled with a key is marked “Y” while unused user numbers marked with a “N.” It
should be noted that enrolling a key to a position already taken will cause the old key to be automatically
deleted from the system (replaced by the new key). Note that user numbers 31 and above will not appear.
2.6 POSITIVE USER IDENTIFICATION
PIN numbers are used to verify keys. Each user’s PIN is four digits long and must be entered whenever the
key is presented. Any user may change their own PIN at any time. Note: if the Owner’s PIN is ever lost,
contact Fire King Security Products Technical Service for assistance. If an incorrect PIN is entered 5 times
consecutively, the unit will go into a 10 minute penalty period where no keypad or key input is accepted. This
prevents continuously attempting different PIN numbers until finding one that works.
2.7 EXTERNAL POWER SUPPLY
Internal circuitry is powered by an external 5 to 12 V
only) with 9 VDC output is provided with your safe. Outside North America, your dealer can provide you with
the proper power supply adapter. The power supply is external to the safe so that if it ever fails, the power
supply can be serviced or replaced without entering the safe.
supply. A standard 120 VAC adapter (North America
DC/AC
2.8 DISPLAY MODULE
The display module (outer board) provides an LCD display and a standard numeric keypad with soft touch
membrane, key port, and RJ11 data port for printer output. A speaker is provided to signal the user when
certain action is required, certain events are complete, or when some other special condition exists.
2.9 LOCK MODULE
A small circuit board mounted inside the protected interior of the safe communicates with the display module
via internal cable. This inner board stores encrypted key and PIN data. It also energizes the electronic locks
when conditions are met.
Page 6
4
OPERATOR’S MANUAL
3.0 OPERATION
3.1 IDLE SCREENS
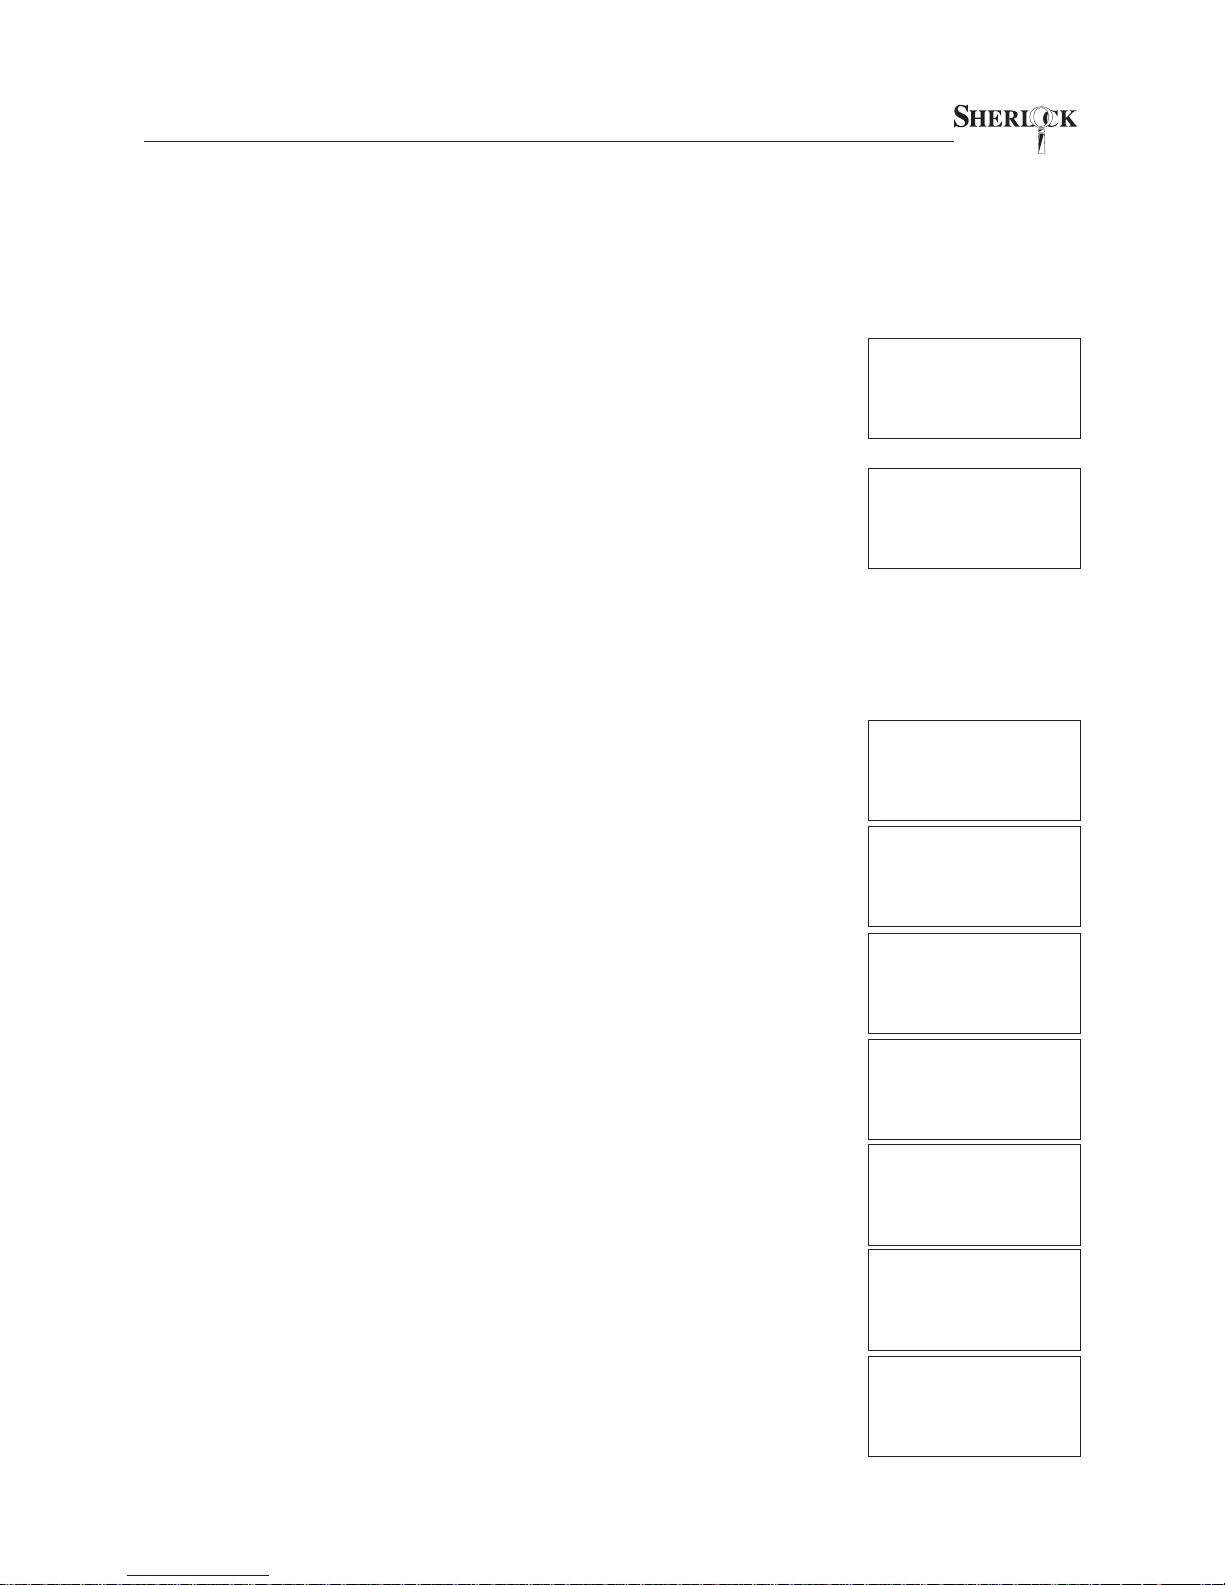
When the screen is in an idle state it will indicate either “System Ready” or
“Timelocked.”
The smartest safe lock in the business.
3.1.1 System Ready
Normal access is allowed whenever the screen indicates “System Ready.” Remember, if a delay is set on the inner door, that delay must still be satisfied in
order to open the inner door.
3.1.2 Timelocked
When the screen says “Timelocked” then the safe cannot be opened except
with the armor car key (User 33). Aside from timelock, all other functions operate normally.
3.2 CHANGE PIN
Any enrolled user (except Armor Car key) can change their own PIN at any time.
Although Sherlock does not require you to change your PIN, we recommend
that all users change their PIN on a regular basis to minimize the chance of their
PIN data being “shared” by others.
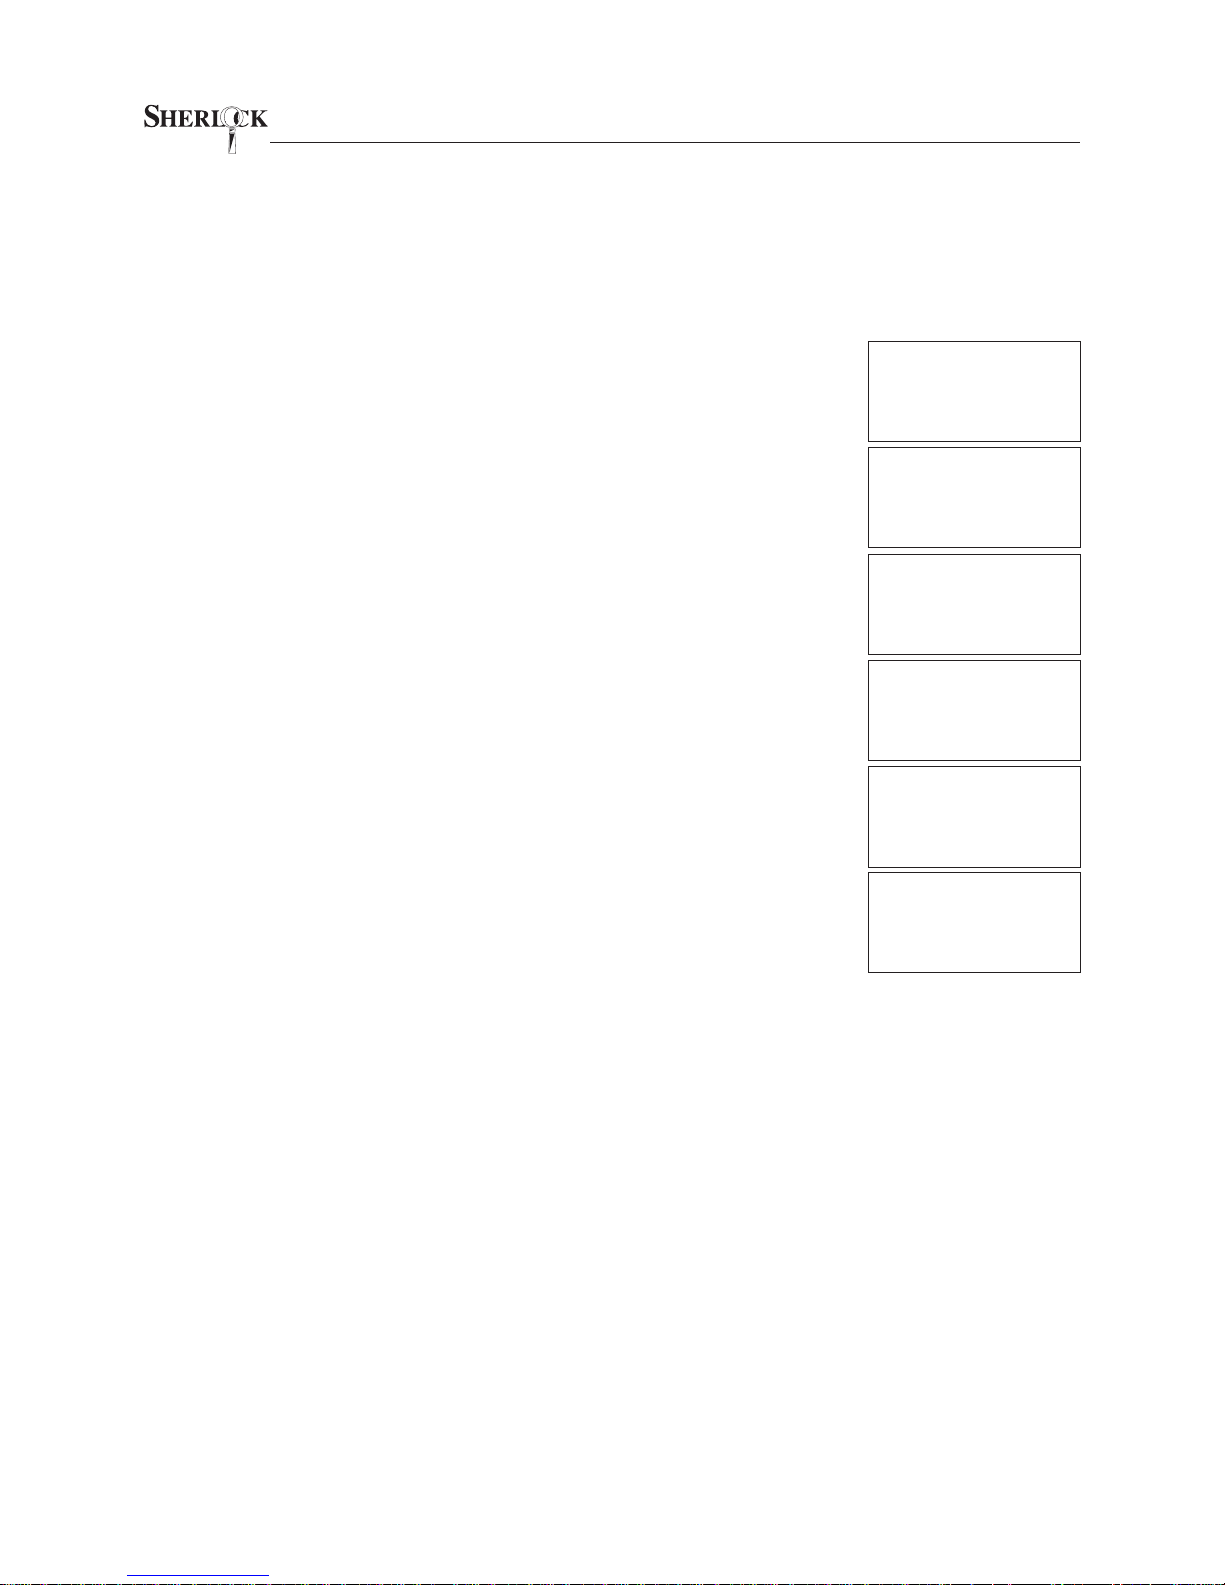
1. Present key. If you see “NOT A VALID KEY,” see your manager to
have your key enrolled.
2. Enter the appropriate 4 digit PIN code. If you see “INVALID CODE”,
you have either entered the incorrect PIN code or the User Number
needs to be added to the lock. See your manager.
NOTE: If an invalid PIN code is entered 5 consecutive times, the lock
will delete the key from the system.
3. Employees select ADMINISTRATION (press “2”) or Managers select KEYS (press “2”).
Sherlock
SYSTEM READY
MONDAY
07/22/02 08:40 A
Sherlock
SAFE TIMELOCKED
MONDAY
07/22/02 08:40 A
USER #01
CODE? ____
PRESS # TO EXIT
07/22/02 08:40 A
USER #01: SAFE=1
ADMINISTRATION=2
ADMIN: AUDIT=1
PIN # CHANGE=2
4. Employees select PIN# CHANGE (press “2”) or Managers select
CHG PIN# (press “1”).
5. Enter the new 4 digit PIN code.
6. Re-enter the new 4 digit PIN code.
7. The PIN code has been changed. The unit confirms by displaying
the message PIN # CHANGED REMOVE KEY. Remove your key
and the normal idle display will return. The safe is now ready for
normal use.
ENTER NEW PIN
CODE? ____
REENTER NEW
CODE? ____
PIN# CHANGED
REMOVE KEY
Sherlock
SYSTEM READY
MONDAY
07/22/02 08:40 A
Page 7
The smartest safe lock in the business.
OPERATOR’S MANUAL
3.3 OPENING DOORS
A common capability of safe users is the ability to open doors. Note that when
the safe is timelocked, no access is permitted unless the Armor Car user is
available.
3.3.1 Open Outer Door
The outer door may be opened at any time, except when the idle display indicates Safe Timelocked. During timelock refer to Section 3.3.3 for Armor Car
access. Only Employee and Store Manager keys may open safe doors.
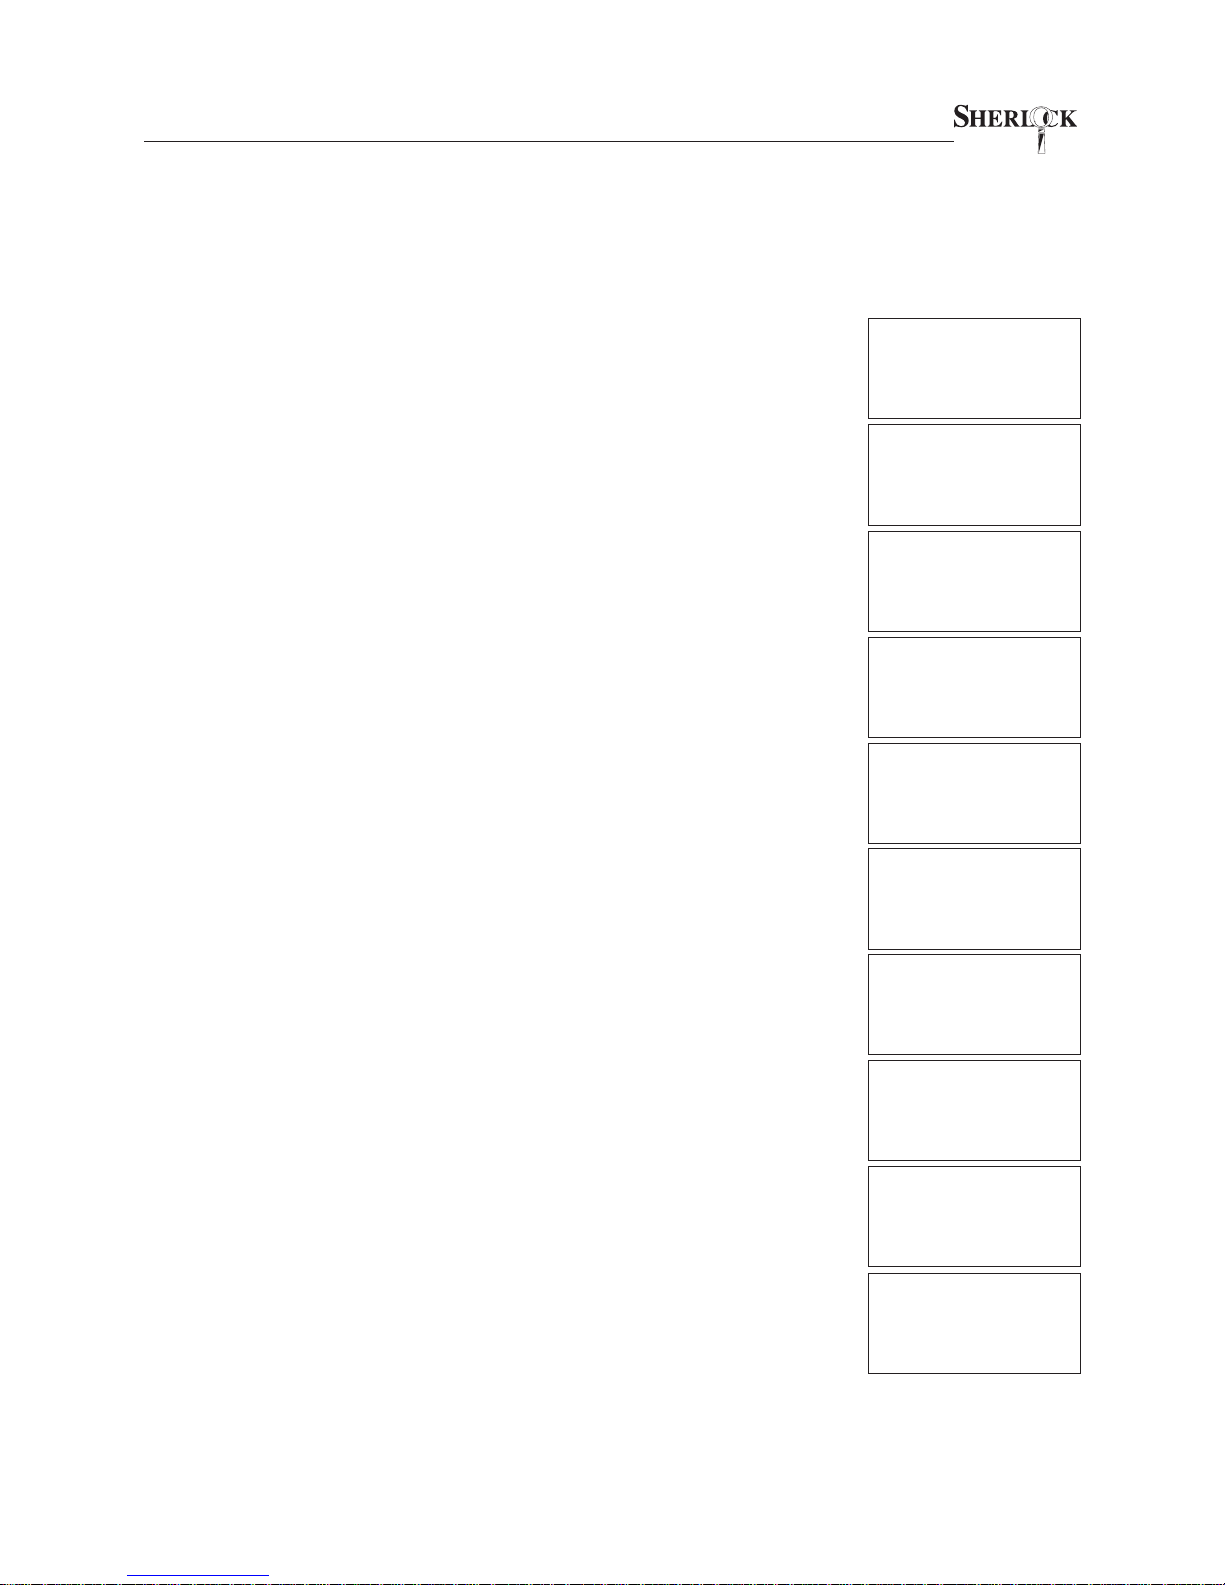
1. Present key.
2. Enter your 4 digit PIN code.
3. Select SAFE (press “1”).
5
USER #01
CODE? ____
PRESS # TO EXIT
07/22/02 08:40 A
USER #01: SAFE=1
ADMINISTRATION=2
4. Select OUTER (press “1”).
5. While SAFE UNLOCKED is flashing on the display, the safe outer
door can be opened by turning the handle.
6. After approximately 5 seconds, the lock automatically relocks and
you are reminded to remove your key.
7. Close the safe door and make sure the handle rotates to the closed
and locked position. The safe is again ready for normal use.
SAFE ACCESS
OUTER=1 INNER=2
SAFE UNLOCKED
MONDAY
07/22/02 08:40 A
Sherlock
REMOVE KEY
MONDAY
07/22/02 08:40 A
Sherlock
SYSTEM READY
MONDAY
07/22/02 08:40 A
Page 8
6
OPERATOR’S MANUAL
3.3.2 Open Inner Door
The inner door may be opened at any time, except when the idle display indicates Safe Timelocked. During timelock refer to Section 3.3.3 for Armor Car
access. If your inner door is programmed with a delay, you must log in once,
satisfy the delay requirements, then log in again during the access time to open
both of the safe doors. Sherlock automatically unlocks the outer door when it
unlocks the inner door so that you do not have to open the outer door separately. Only Employee and Store Manager keys may open safe doors.
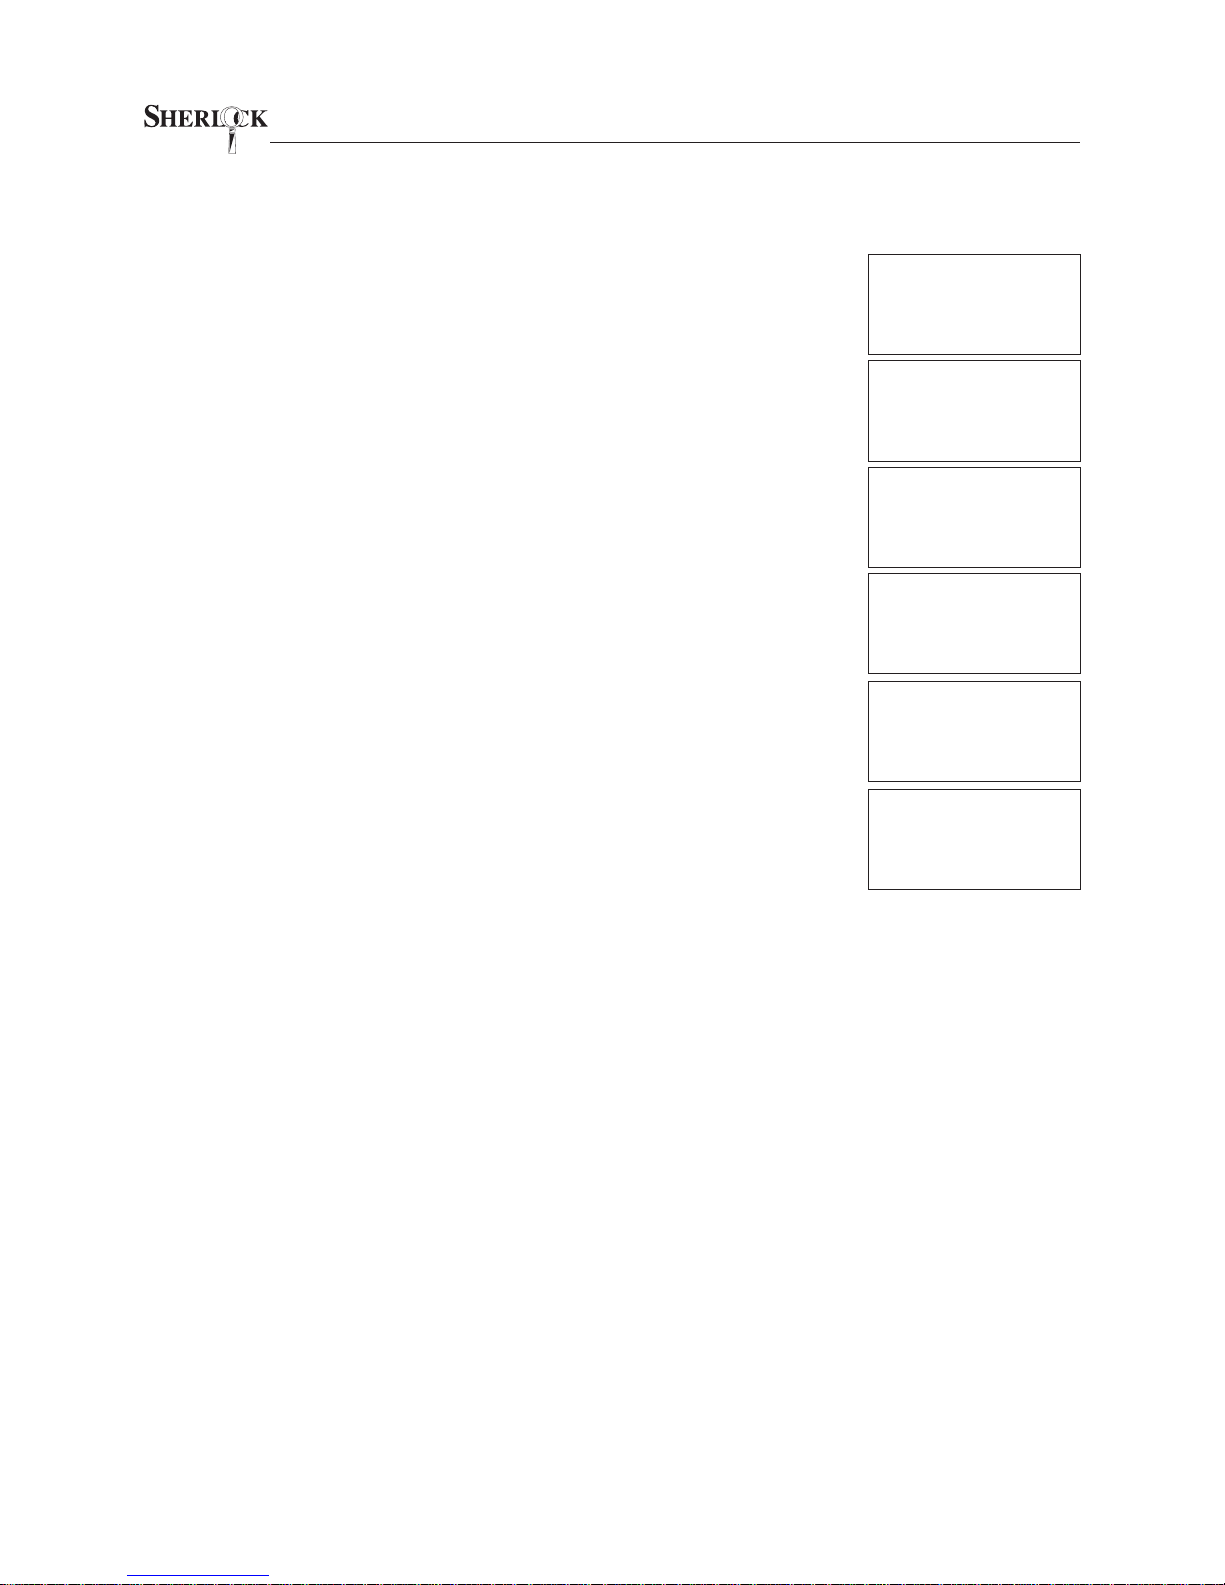
1. Present key.
The smartest safe lock in the business.
USER #01
CODE? ____
PRESS # TO EXIT
07/22/02 08:40 A
2. Enter your 4 digit PIN code.
3. Select SAFE (press “1”).
4. Select INNER (press “2”).
5. The delay will begin to count upward. To cancel the delay, press
“0.”
6. When the delay ends, the safe will beep and the access time will
begin. The access time will count up on the screen while idle until
the access time ends. You may terminate the access time count at
any time by pressing “0.”
7. During the access time repeat steps 1 through 2 above. The safe
will then indicate that it is unlocked and you may open both safe
doors. The safe will only remain unlocked for about 5 seconds. To
open, turn the handle and pull the outer door open, then reach in
and turn the inner door knob and pull the inner door open.
8. After the safe doors are closed you may immediately reopen them
as long as the access time is counting on the screen (follow Steps
1 through 2 above). You may terminate the access time count at
any time by pressing “0.”
9. Close both safe doors and make sure the outer door handle rotates
to the closed and locked position. Remove your key. The safe is
again ready for normal use.
10. Regardless of whether the doors are open or whether they have
been opened, the timer will reset when the access time ends and
the delay must be satisfied from the beginning before the inner
door may be opened again.
USER #01: SAFE=1
ADMINISTRATION=2
SAFE ACCESS
OUTER=1 INNER=2
TIME DELAY
00 MIN 03 SEC
CANCEL=0
07/22/02 08:40 A
READY INSERT KEY
00 MIN 03 SEC
CANCEL=0
07/22/02 08:55 A
USER #01
CODE? ____
PRESS 0 TO EXIT
07/22/02 08:55 A
SAFE UNLOCKED
MONDAY
07/22/02 08:55 A
Sherlock
REMOVE KEY
MONDAY
07/22/02 08:56 A
READY INSERT KEY
01 MIN 58 SEC
CANCEL=0
07/22/02 08:57 A
Sherlock
SYSTEM READY
MONDAY
07/22/02 09:00 A
Page 9
The smartest safe lock in the business.
OPERATOR’S MANUAL
3.3.3 Armor Car Access
The purpose of the Armor Car key is to allow immediate access to one or both
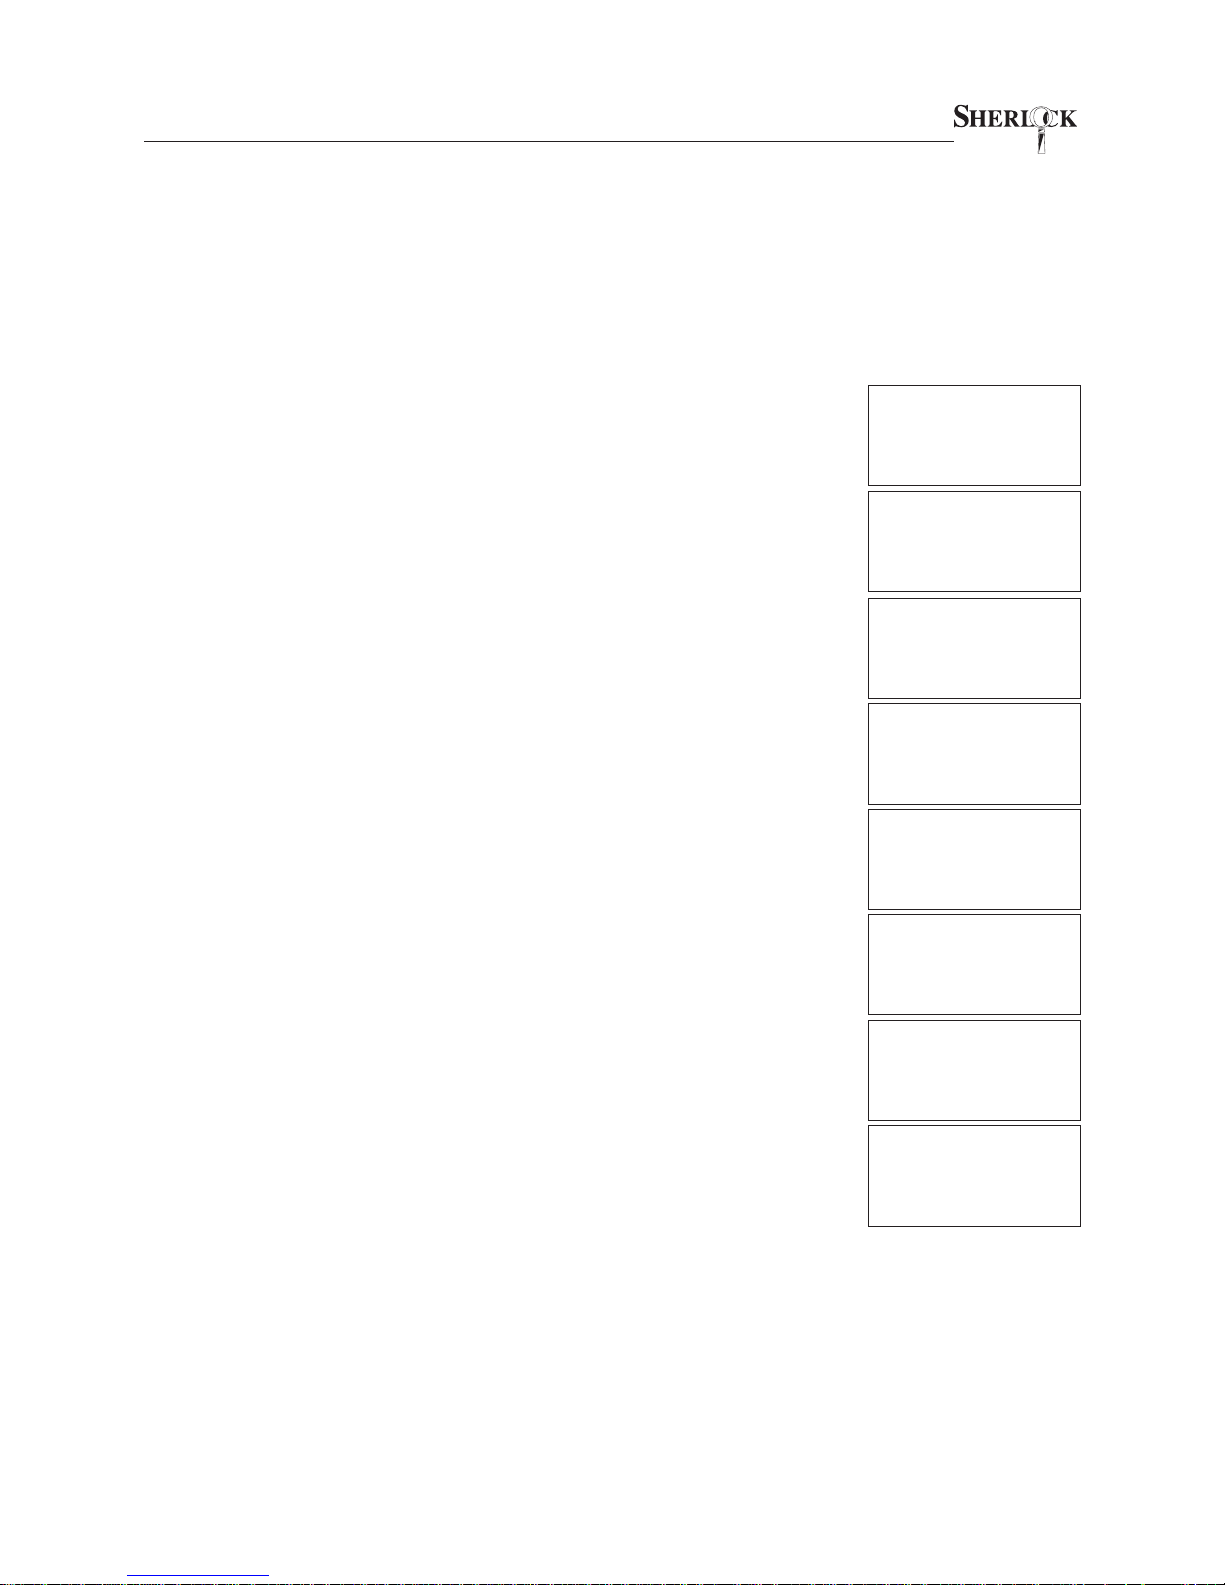
safe doors regardless of timelock and delay status.
1. Present Armor Car key.
2. Enter Armor Car 4 digit PIN code.
7
USER #33
CODE? ____
PRESS # TO EXIT
07/22/02 08:40 A
3. Present your key.
4. Enter your 4 digit PIN code.
5. The safe will then indicate that it is unlocked and you may open
both safe doors. The safe will only remain unlocked for about 5
seconds. To open, turn the handle and pull the outer door open,
then reach in and turn the inner door knob and pull the inner door
open. Remove your key.
6. Close both safe doors and make sure the outer door handle rotates
to the closed and locked position. The safe is again ready for normal use.
CONFIRM ARMOR
PRESENT KEY
07/22/02 08:40 A
USER #01
CODE? ____
PRESS # TO EXIT
07/22/02 08:40 A
SAFE UNLOCKED
MONDAY
07/22/02 08:40 A
Sherlock
REMOVE KEY
MONDAY
07/22/02 08:40 A
Sherlock
SYSTEM READY
MONDAY
07/22/02 08:40 A
Page 10
8
OPERATOR’S MANUAL
3.4 KEYS AND USERS
Refer to the key chart and Section 2.5 for more information about types of keys
and users. The Store Manager, Area Manager, and Owner keys are the only
keys with permission to delete other keys. This procedure shows an Area Manager key.
3.4.1 Delete Key
By deleting a user, their user number becomes available for assignment to a
new user. Meanwhile, it disables the user number. Managers may delete any
user except User 30.
1. Present key.
2. Enter your 4 digit PIN code.
3. If the user logging in is the Store Manager, select ADMINISTRATION (press “2”).
The smartest safe lock in the business.
USER #30
CODE? ____
PRESS # TO EXIT
07/22/02 08:40 A
ADMIN: AUDIT=1
KEYS=2 TIMES=3
TIMELOCK SET=4
4. Select KEYS (press “2”).
5. Select DELETE (press “2”).
6. Enter the two-digit user number to be deleted.
7. You will be prompted to verify your decision. To continue with deleting the user select YES (press “1”).
8. The display will briefly indicate the user is deleted, then will return
you to the Keys screen. Remove your key to return to the idle screen.
CODES:CHG. PIN=1
DELETE=2 ADD=3
EMP COUNT=4
DELETE #__
DELETE #01?
DELETE YES=1 NO=2
DELETE #01?
***DELETED***
CODES:CHG. PIN=1
DELETE=2 ADD=3
EMP COUNT=4
Sherlock
SYSTEM READY
MONDAY
07/22/02 08:40 A
Page 11
The smartest safe lock in the business.
OPERATOR’S MANUAL
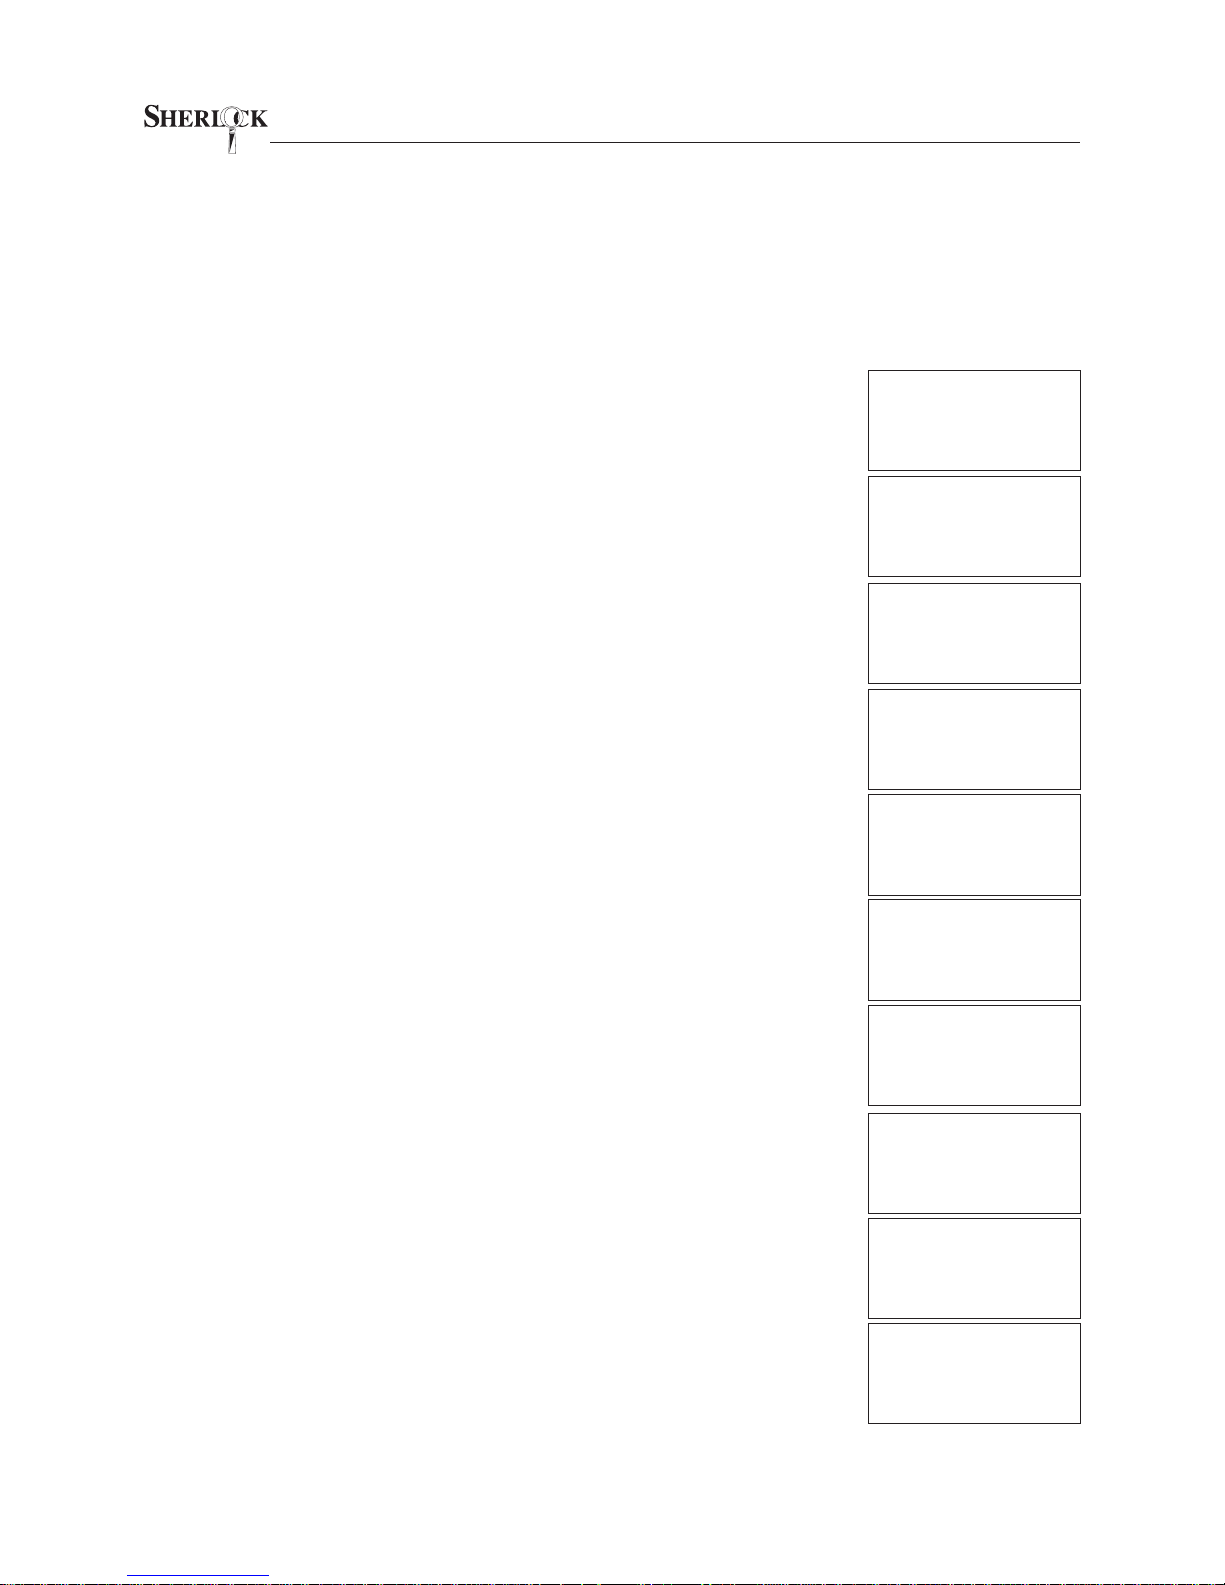
3.4.2 Add Employees
Add a key to the system by enrolling a key to an available user number. Check
the Key Count to determine which slots are available. Keys for level 29 and
below are standard Sherlock keys. The Store Manager key has added permissions because of User Number assignment only. Only the Area Manager (or
Owner/Super) key can enroll Users 01 through 29. This procedure assigns a
user number to a key and enables it with an active PIN. Once the key and PIN
are issued to the individual, that individual may change their own PIN. Keys for
the Area Manager and above are specially coded for their permission level and
require a different procedure.
1. Present Area Manager key.
9
USER #30
CODE? ____
PRESS # TO EXIT
07/22/02 08:40 A
2. Enter your 4 digit PIN code.
3. Select KEYS (press “2”).
4. Select ADD (press “3”).
5. Enter the two-digit User Number you are assigning to this key.
6. Remove the Area Manager key.
7. Insert the new key being enrolled.
8. Assign an initial four-digit PIN number for this user. Reenter this
PIN to verify the PIN assignment.
9. Remove the Employee key and the display will return to the normal
idle display.
ADMIN: AUDIT=1
KEYS=2 TIMES=3
TIMELOCK SET=4
CODES:CHG. PIN=1
DELETE=2 ADD=3
EMP COUNT=4
ENTER EMPLOYEE #
TO ADD __
REMOVE KEY
CANCEL=0
INSERT KEY
TO BE ADDED
CANCEL=0
ENTER NEW PIN
CODE? ____
CENCEL=0
REENTER NEW
CODE? ____
PIN # CHANGED
REMOVE KEY
Sherlock
SYSTEM READY
MONDAY
07/22/02 08:40 A
Page 12
10
OPERATOR’S MANUAL
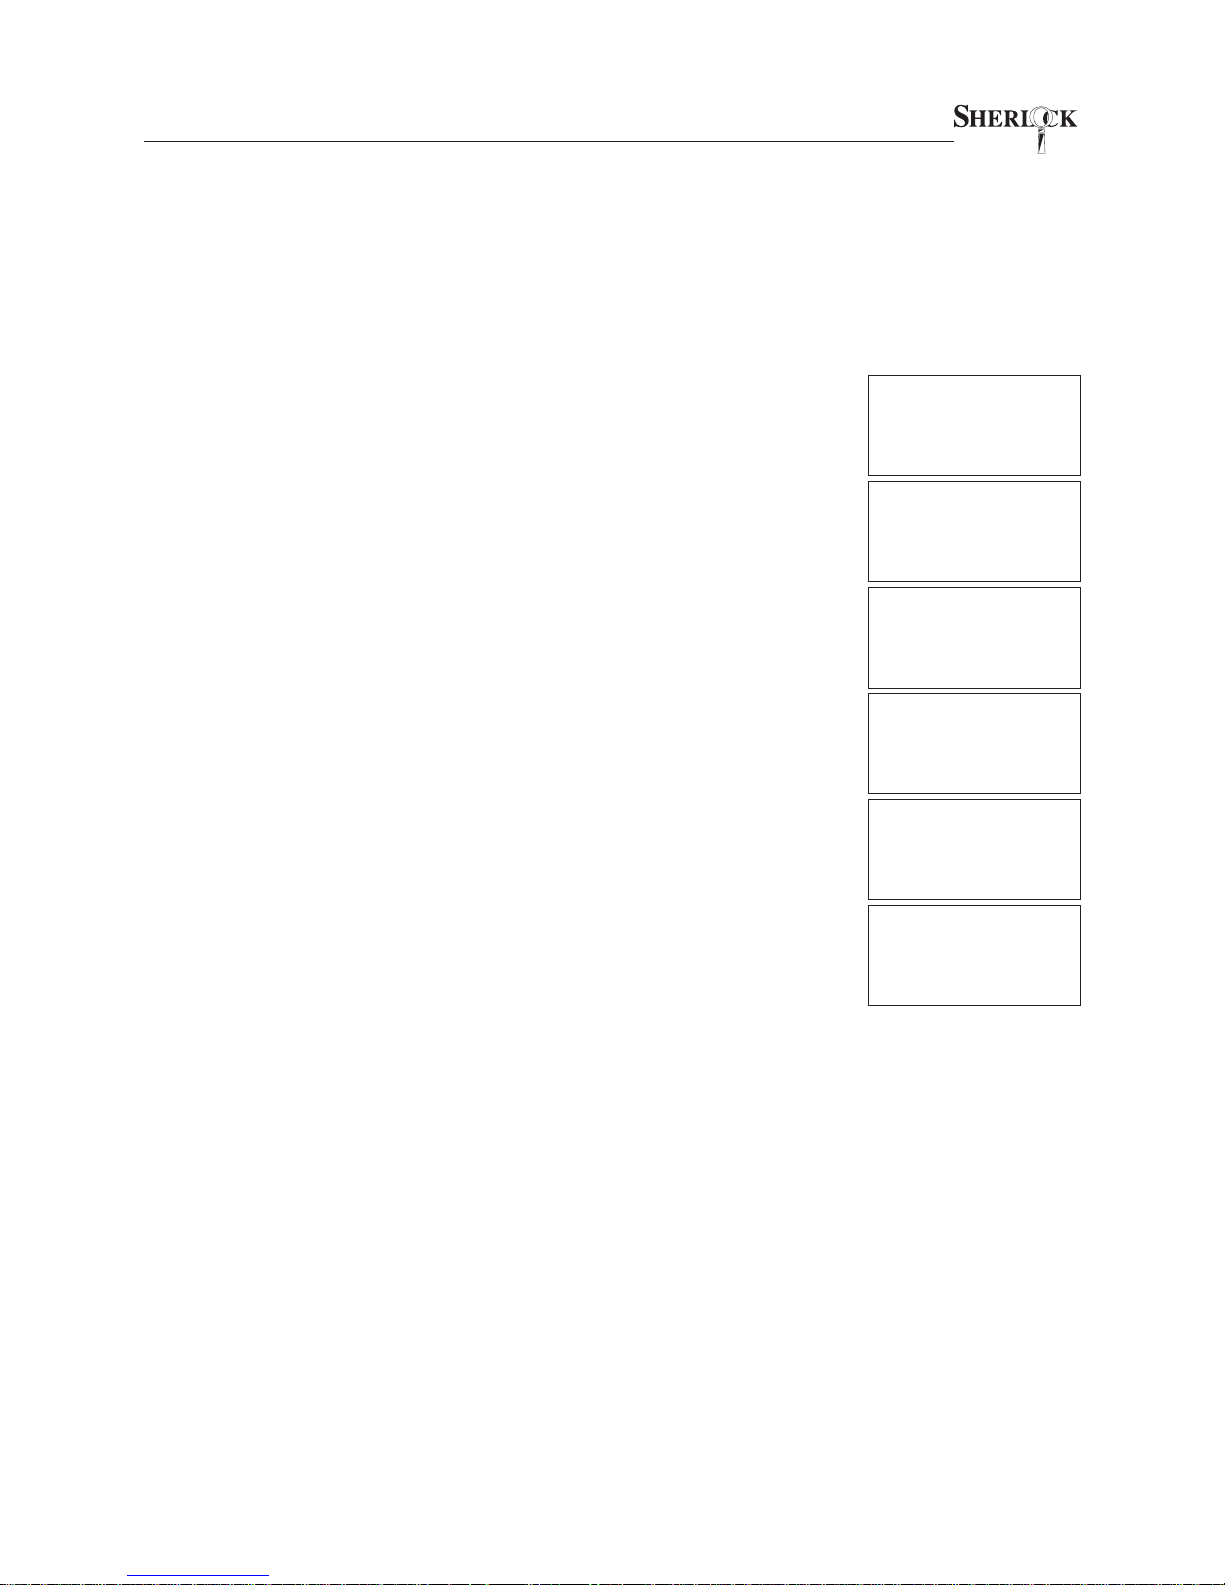
3.4.3 Add Area Manager or Above
The following procedure may be used to enroll a new (or replacement) Area
Manager key. Note that when a new Area Manager key is enrolled, it automatically replaces any previously enrolled Area Manager key. You must also have a
valid Employee key (01 to 29) to validate the new Area Manager key.
1. Present new Area Manager key.
The smartest safe lock in the business.
2. The display will indicate that the key is invalid.
3. To change the new key’s status to valid, select YES (press “1”).
4. Remove the new Area Manager key when prompted.
5. Present an enrolled Employee key.
6. Enter the 4-digit PIN for this key.
7. Remove the Employee key. The display will return to the idle screen.
INVALID A/M KEY
CHANGE YES=1 NO=2
07/22/02 08:40 A
REMOVE KEY
07/22/02 08:40 A
INSERT ANY
VALID KEY
07/22/02 08:40 A
USER #01
CODE? ____
PRESS 0 TO EXIT
07/22/02 08:40 A
REMOVE KEY
07/22/02 08:40 A
Sherlock
SYSTEM READY
MONDAY
07/22/02 08:40 A
Page 13
The smartest safe lock in the business.
OPERATOR’S MANUAL
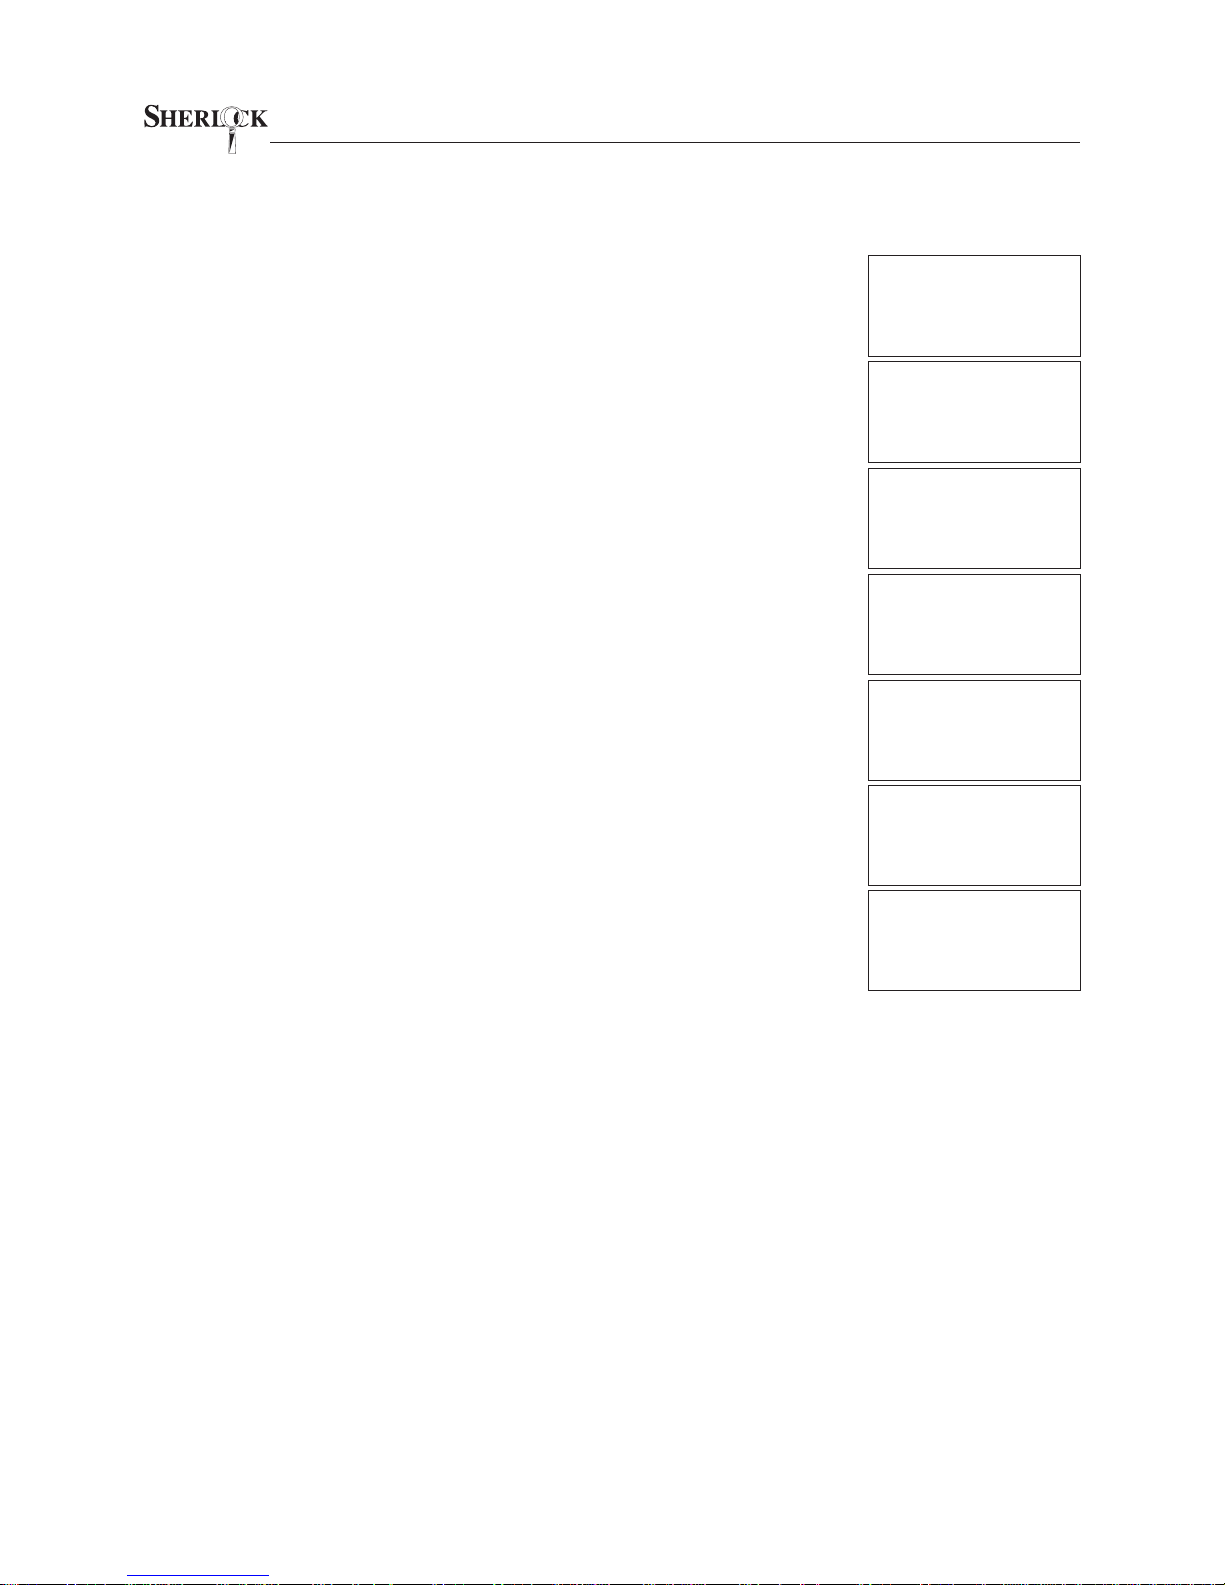
3.4.4 Employee Key Count
Use the Employee Key Count to check which user numbers are assigned to
keys. Users 29 through 32 may check the Key Count.
1. Present key.
2. Enter your 4 digit PIN code.
11
USER #30
CODE? ____
PRESS # TO EXIT
07/22/02 08:40 A
3. If the user logging in is the Store Manager, select ADMINISTRATION (press “2”).
4. Select KEYS (press “2”).
5. Select EMP COUNT (press “4”).
6. To view the count select LOOK (press “1”).
7. The display will show a chart with User Numbers 01 to 30 arranged
as three rows of 10 each representing 01 to 10, 11 to 20, and 21 to
30 respectively. If a key is assigned to the User Number it will be
indicated with a “Y.” If no key is assigned to the User Number, it will
be indicated with a “N.”
8. Remove your key to return to the idle screen.
ADMIN: AUDIT=1
KEYS=2 TIMES=3
TIMELOCK SET=4
CODES:CHG. PIN=1
DELETE=2 ADD=3
EMP COUNT=4
EMPLOYEE COUNT
LOOK=1 PRINT=2
EMP# 1234567890
1-10 YYNNNYNNNN
11-20 NNNNNNNYYY
21-30 NNNNNNYNYY
CODES:CHG. CODE=1
DELETE=2 ADD=3
COUNT=4 EXIT=5
Sherlock
SYSTEM READY
MONDAY
07/22/02 08:40 A
Page 14
12
OPERATOR’S MANUAL
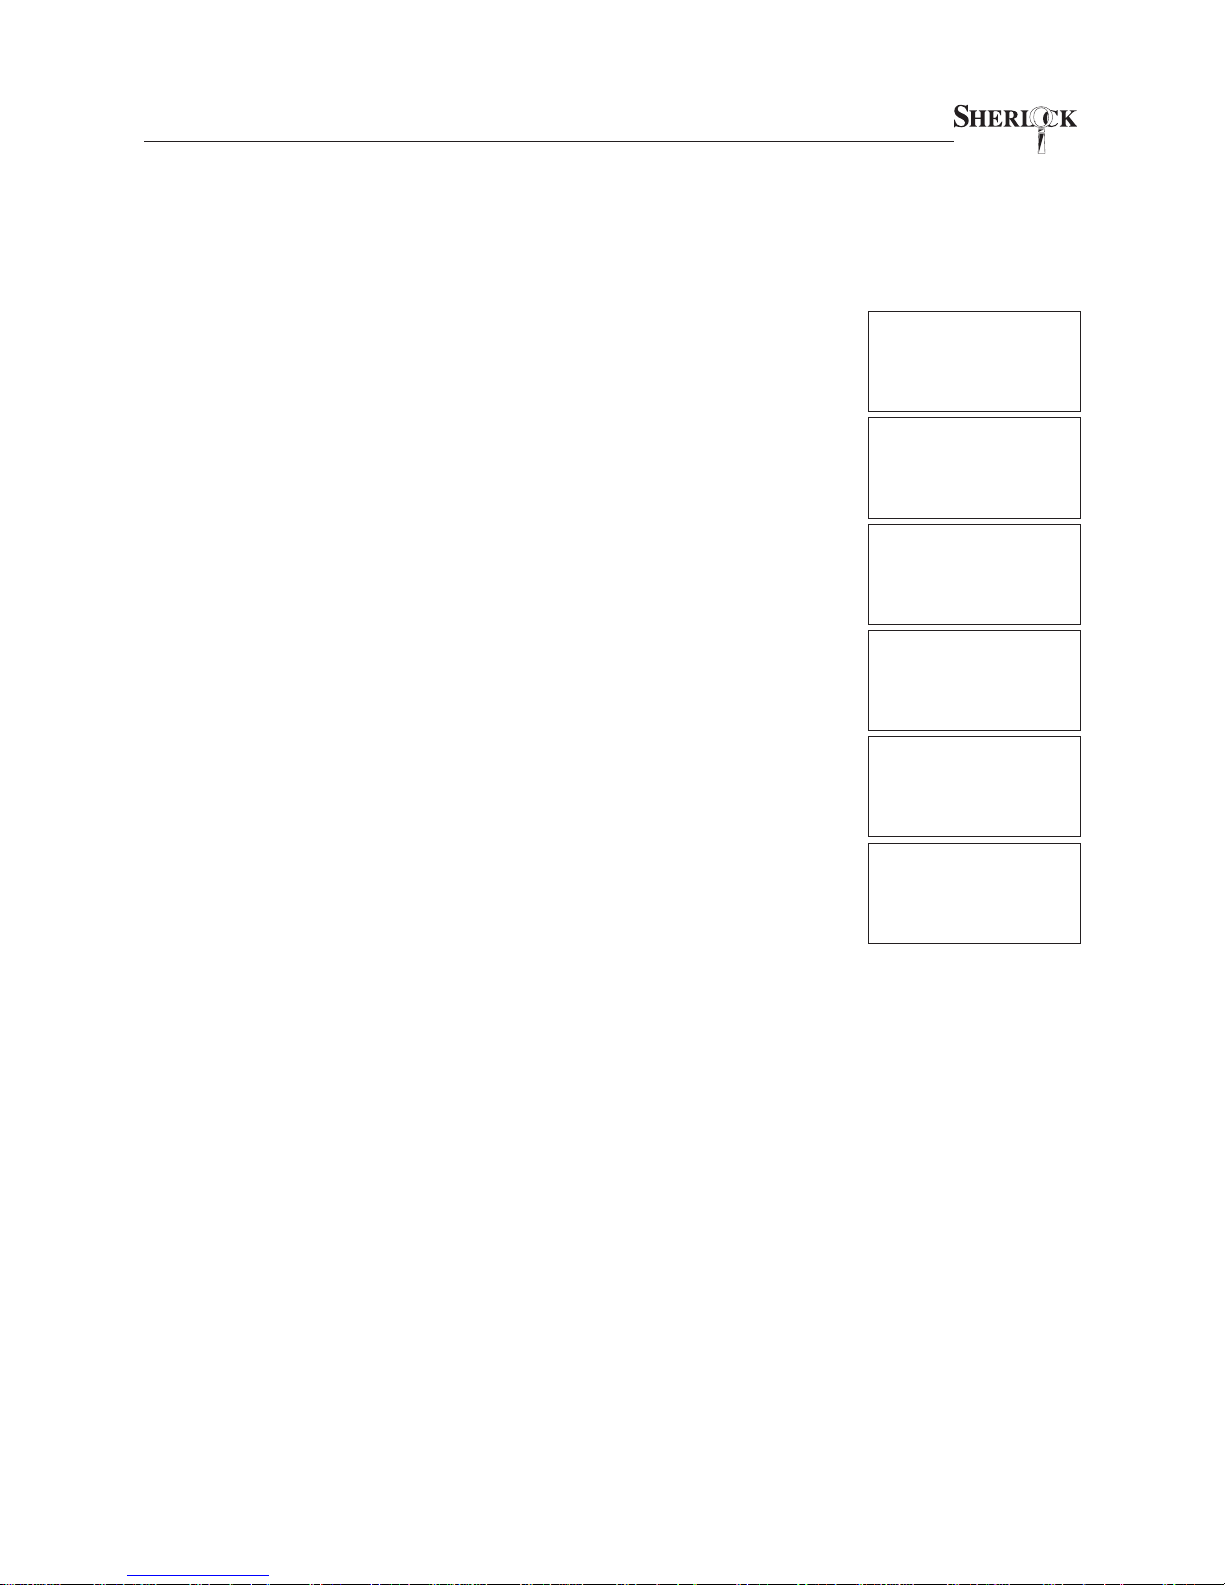
3.5 ADJUST DAYLIGHT SAVINGS
The daylight savings time adjustment feature is only available to the Store Manager (User 29). The option will only appear on the menu in April and October,
and will automatically be removed from the display once it has been used. Do
not activate the DST adjustment between 11 PM and 1 AM to ensure there are
no conflicts with the date and day of week. DST should be adjusted at the start
of business on the Sunday when DST takes effect.
1. Present Store Manager key.
The smartest safe lock in the business.
USER #29
CODE? ____
PRESS 0 TO EXIT
04/22/02 09:40 A
2. Enter your 4 digit PIN code.
3. Select ADMINISTRATION (press “2”).
4. Select DST (press “6”).
5. The display will indicate that time has changed, then will prompt
you to remove your key.
6. Remove your key to return to the idle screen.
USER 29: SAFE=1
ADMINISTRATION=2
ADMIN: AUDIT=1
PIN# CHANGE=2
DEL KEY=3 T/L=4
EMP CNT=5 DST=6
TIME ADJUSTED
Sherlock
REMOVE KEY
SUNDAY
04/22/02 08:40 A
Sherlock
SYSTEM READY
MONDAY
07/22/02 08:40 A
Page 15
The smartest safe lock in the business.
OPERATOR’S MANUAL
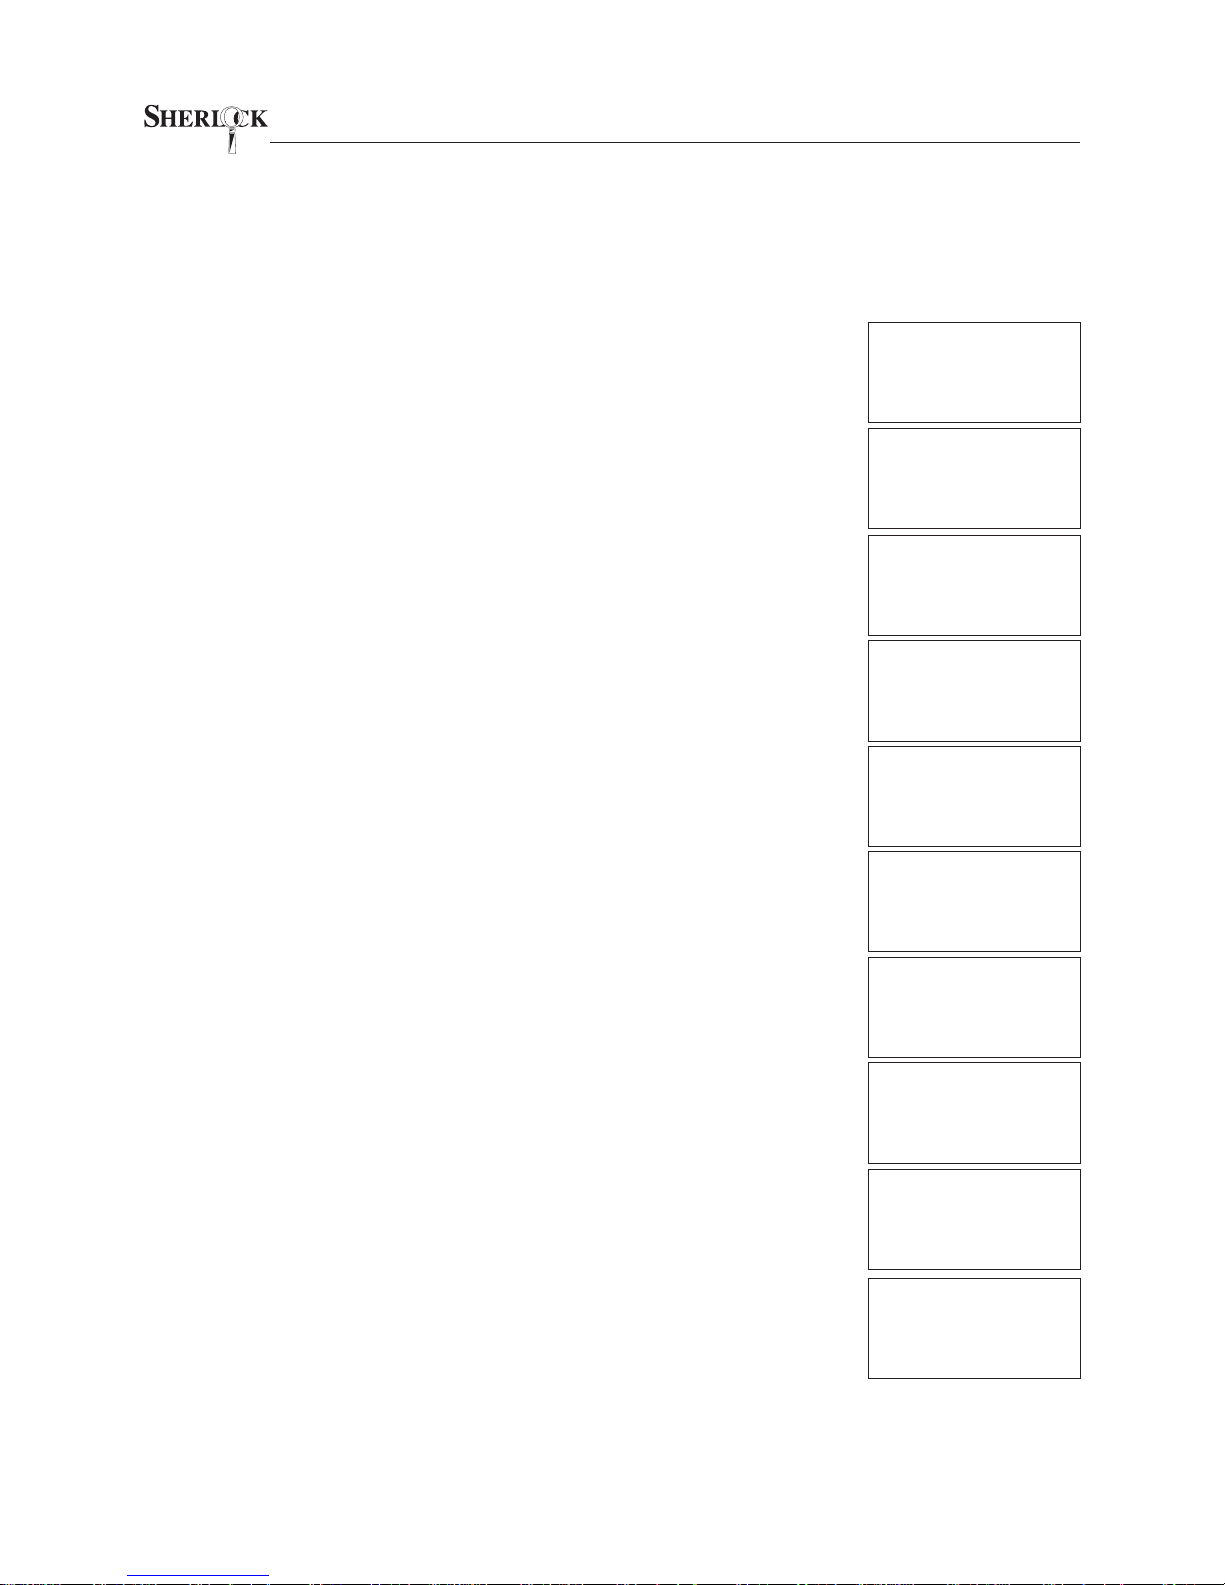
3.6 SET SYSTEM CLOCK
One of the most important features for system security, usability, and even
employee safety is the system clock. The clock ensures that the timelock activates during the proper hours. This protects people as well as contents and
ensures employees have appropriate access during business hours. Only the
Area Manager (or Owner/Super) key has permission to change the system clock.
1. Present Area Manager or Owner/Super key.
2. Enter your 4 digit PIN code.
3. Select TIMES (press “3”).
4. If using Owner/Super key, select TIME DELAY (press “1”).
13
USER #30
CODE? ____
PRESS 0 TO EXIT
07/22/02 08:40 A
ADMIN: AUDIT=1
KEYS=2 TIMES=3
TIMELOCK SET=4
5. The day of the week will be shown. To scroll through the days of the
week press “2,” if necessary, then press “1” to accept the day of
the week shown.
6. The time of day will be shown. If the current time is correct, press
“1.” To change the time setting press “2.”
7. If you selected to change the time, enter the new time. This must
be a value between 01:00 and 12:59. Enter “1” for AM and “2” for
PM after the time value.
8. The date will be shown (MM/DD/YY format). If the current date is
correct, press “1.” To change the date setting press “2.”
9. If you selected to change the date, enter the new date. This must
be entered in MMDDYY format.
10. Remove your key and you will automatically return to the idle screen.
Verify that the correct day of the week, date and time are displayed.
TIME/DATE=1
TIME DELAY=2
MONDAY
OK=1 CHANGE=2
OK=1 CHANGE=2
CURRENT 08:40 A
AM=1 PM=2
NEW __:__ _
CURRENT 08:40 A
CHANGED
OK=1 CHANGE=2
CURRENT 07/22/02
CHANGED
__/__/__ NEW
07/22/02 CURRENT
Sherlock
REMOVE KEY
SUNDAY
04/22/02 08:40 A
Sherlock
SYSTEM READY
MONDAY
07/22/02 08:40 A
Page 16
14
OPERATOR’S MANUAL
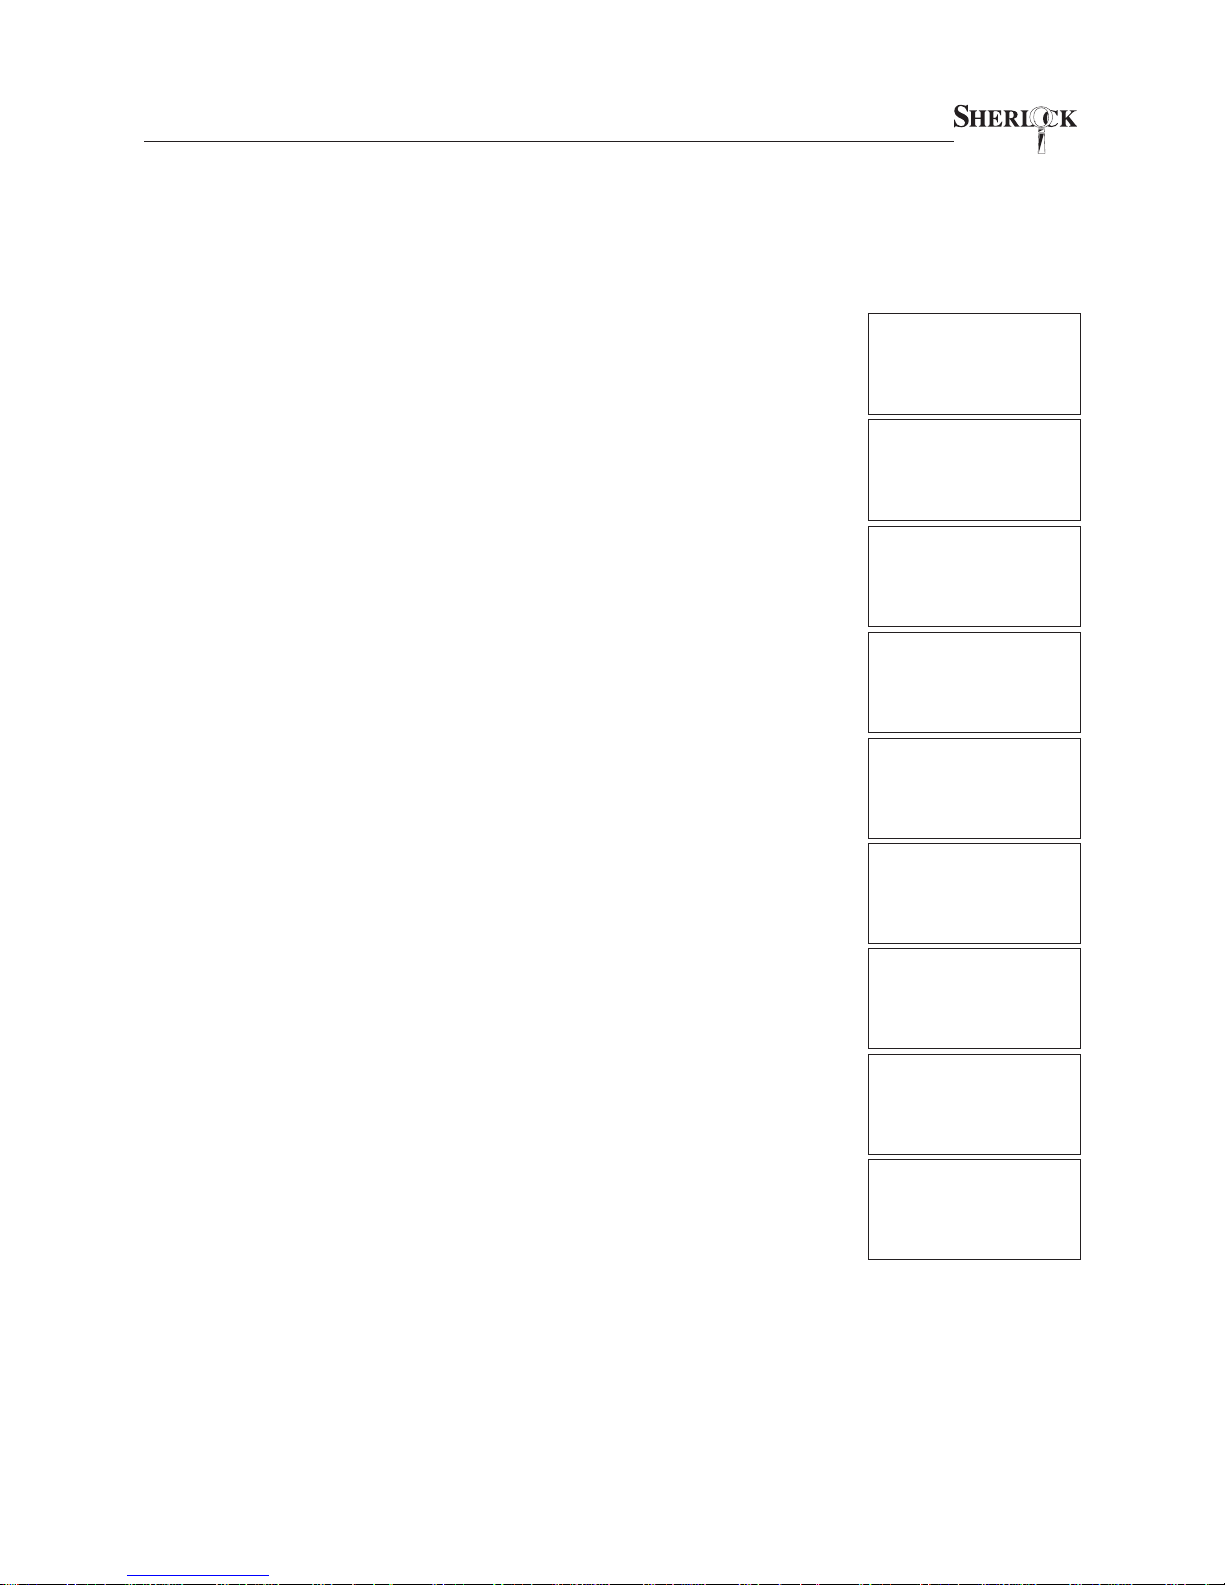
3.7 SET INNER DOOR DELAY AND ACCESS TIME
The delay time is the waiting period you must satisfy before opening the inner
door. Access time is period following completion of the delay during which
users may immediately open the inner door. The Owner/Super (User 31) is the
only key with permission to edit the inner door delay and access times.
The smartest safe lock in the business.
1. Present Owner/Super key.
2. Enter your 4 digit PIN code.
3. Select TIMES (press “3”).
4. Select TIME DELAY (press “2”).
5. The current delay will be shown. To change the delay press “1.”
Press “2” to accept the delay shown.
6. If you chose to change the delay, enter the new delay (the old delay
will be shown below). Note that the minimum delay is 2 minutes.
7. The current access time will be shown. To change the access time
press “1.” Press “2” to accept the access time shown. Note that the
minimum access time is 2 minutes.
8. If you chose to change the access time, enter the new access time
(the old access time will be shown below).
9. Remove your key return to the idle screen.
USER #31
CODE? ____
PRESS # TO EXIT
07/22/02 08:40 A
ADMIN: AUDIT=1
KEYS=2 TIMES=3
TIMELOCK SET=4
TIME/DATE=1
TIME DELAY=2
TIME DELAY
CURRENT 15 MIN.
CHANGE YES=1 NO=2
NEW __ MIN.
CURRENT 15 MIN.
ACCESS TIME
CURRENT 05 MIN.
CHANGE YES=1 NO=2
NEW __ MIN.
CURRENT 05 MIN.
Sherlock
REMOVE KEY
MONDAY
07/22/02 08:40 A
Sherlock
SYSTEM READY
MONDAY
07/22/02 08:40 A
Page 17
The smartest safe lock in the business.
OPERATOR’S MANUAL
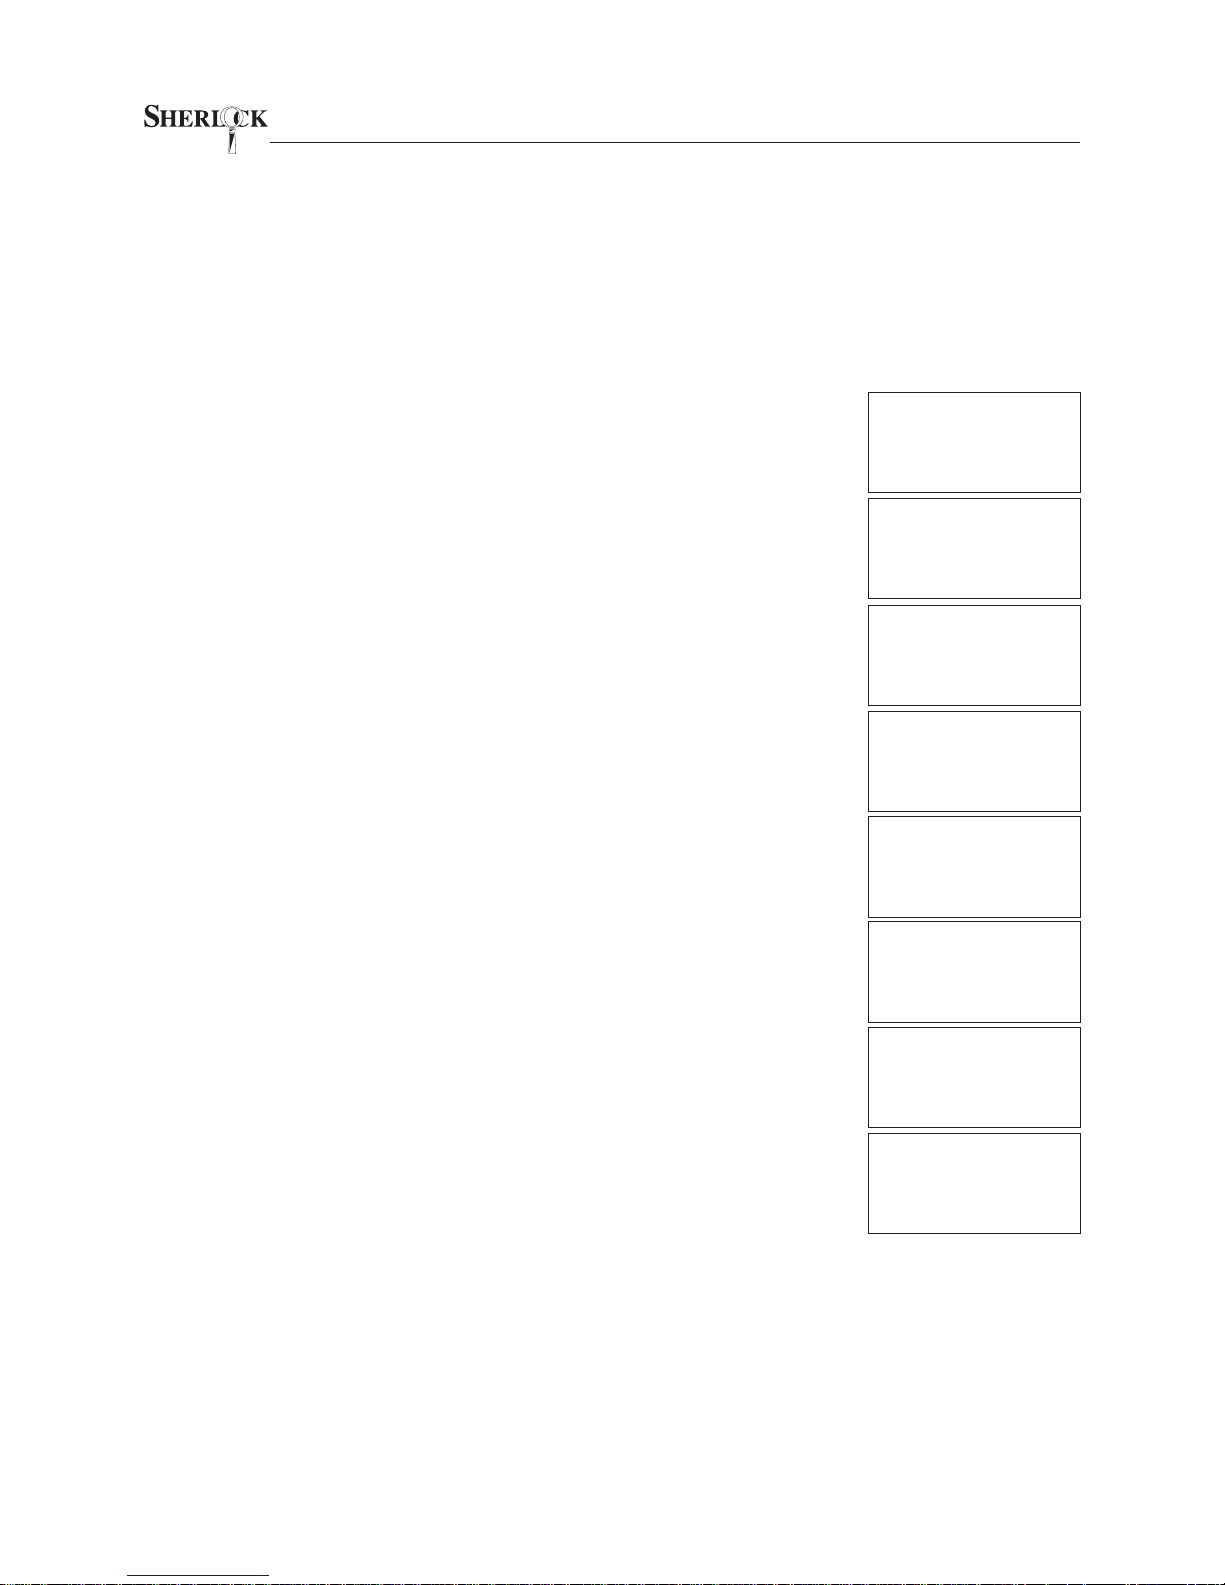
3.8 SET TIMELOCK
Timelock prohibits access to the safe during the hours specified. Timelock
settings include a lock time, unlock time, and a second lock time. Having two
lock times allows for starting timelock after midnight if the previous day does
not go into timelock before midnight. The second lock time allows the timelock
to take effect before midnight. Enter 99:99 for either lock time to disable that
lock time. The Area Manager (or Owner/Super) key is required to edit timelocks.
1. Present Area Manager or Owner/Super key.
2. Enter your 4 digit PIN code.
3. Select TIMELOCK SET (press “4”).
4. Select LOOK (press “1”).
5. The timelock settings for Sunday are displayed first. To make a
change select CHANGE (press “2”). To keep the settings for this
day of the week and move to the next day select NEXT (press “1”).
In this example the first lock time is 99:99 because the previous
night locked prior to midnight. If the safe is not going to lock before
midnight, set the second lock time to 99:99 and set the proper first
lock time on the next day of the week.
6. If you choose to change the timelock settings, AM and PM will be
displayed at the bottom of the screen and the cursor will go to the
beginning of the first lock time. Enter the time desired. Remember
to use 12-hour time and select AM (“1”) or PM (“2”) for each line.
7. When all lines are entered NEXT and CHANGE will again appear at
the bottom of the screen. Select NEXT (press “1”) to go to Monday.
Repeat Steps 6 through 8 until all days are set. When you reach
Saturday the display will instead say REVIEW and EXIT to let you
know you have cycled through all days.
8. To end editing, select EXIT (press “2”) and remove your key.
15
USER #30
CODE? ____
PRESS # TO EXIT
07/22/02 08:40 A
ADMIN: AUDIT=1
KEYS=2 TIMES=3
TIMELOCK SET=4
TIMELOCK SETTING
LOOK=1 PRINT=2
SUN LOCK 99:99 AM
UNLOCK 08:00 AM
LOCK 11:59 PM
NEXT=1 CHANGE=2
SUN LOCK 99:99 AM
UNLOCK 08:00 AM
LOCK 11:59 PM
AM=1 PM=2
SAT LOCK 99:99 AM
UNLOCK 08:00 AM
LOCK 11:59 PM
REVIEW=1 EXIT=2
Sherlock
REMOVE KEY
MONDAY
07/22/02 08:40 A
Sherlock
SYSTEM READY
MONDAY
07/22/02 08:40 A
Page 18
16
OPERATOR’S MANUAL
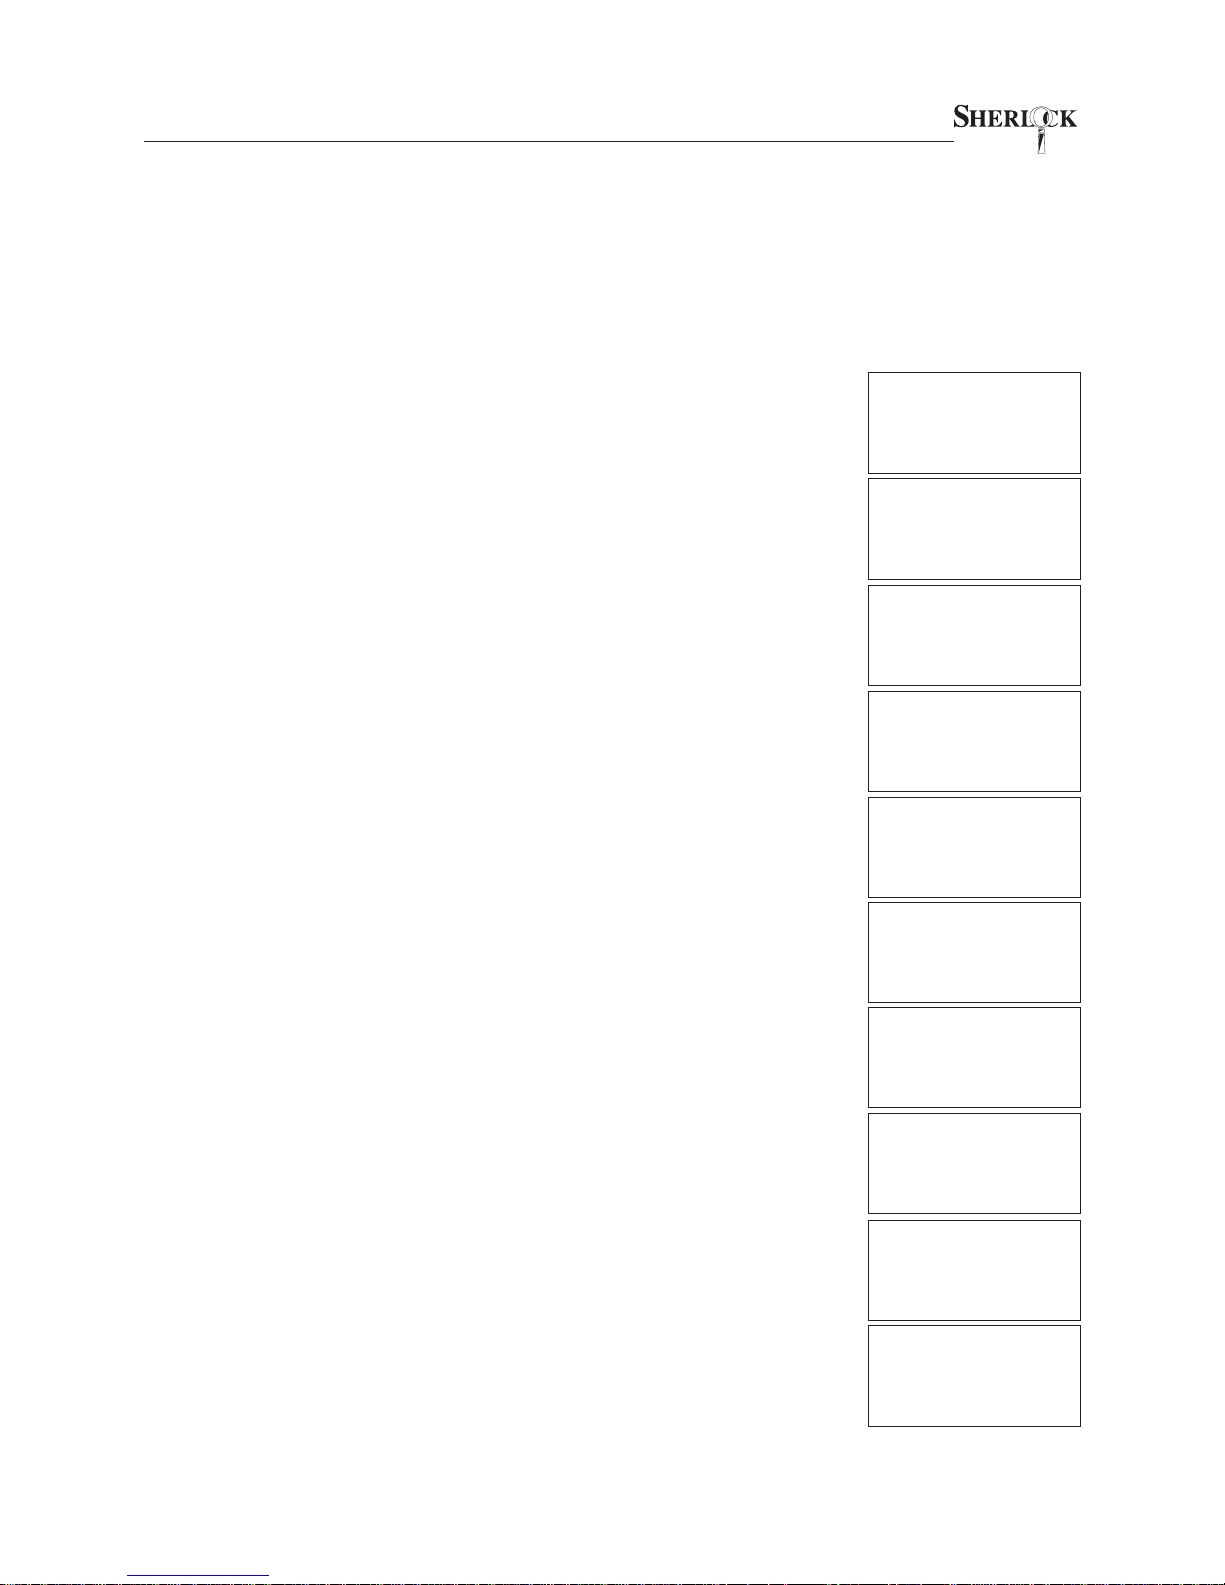
3.9 VIEW AUDIT TRAIL
The data logged in the audit trail sets Sherlock apart from other lock packages
because you can look back through the last 2000 actions taken and see who
did what, and when. Everything is recorded. For example, if User 06 opens the
outer door, the audit trail will show the exact time and date that User 06 opened
the door. It will also show when the door was shut and if a violation was involved. System events such as power cycles are also recorded. The Store
Manager and above may review the audit trail.
1. Present key.
2. Enter your 4 digit PIN code.
The smartest safe lock in the business.
USER #30
CODE? ____
PRESS # TO EXIT
07/22/02 08:40 A
3. Select AUDIT (press “1”).
4. Select DISPLAY AUDIT (press “2”).
Print audit is not available to
Store Manager.
5. The display will indicate the first date of the audit trail to display. To
accept this setting select OK (press “1”) or to change the start date
select CHANGE (press ”2”) and enter a new date (MMDDYY format).
6. The display will next indicate the last date of the audit trail to display. To accept this setting select OK (press “1”) or to change the
start date select CHANGE (press ”2”) and enter a new date
(MMDDYY format).
7. Starting with the first entry on the start date, the screen will display
the audit data, one entry at a time. Select NEXT (press “1”) to scroll
forward through the entries. Select EXIT (press “2”) and remove
your key to stop scrolling and return to normal operation.
ADMIN: AUDIT=1
KEYS=2 TIMES=3
TIMELOCK SET=4
PRINT AUDIT=1
DISPLAY AUDIT=2
START 07/01/02
OK=1 CHANGE=2
ENTER DATE TO
START __/__/__
THRU 07/21/02
OK=1 CHANGE=2
ENTER DATE TO
THRU __/__/__
DATE 07/01/02
07:25A KEY #06
OUTER DOOR UNLK
NEXT=1 EXIT=2
Sherlock
REMVOE KEY
MONDAY
07/22/02 08:40 A
Sherlock
SYSTEM READY
MONDAY
07/22/02 08:40 A
Page 19
The smartest safe lock in the business.
OPERATOR’S MANUAL
3.10 PRINTING DATA
Users with appropriate permission may print audit trail data, timelock setup
data, and employee key count data. A standard serial line printer must be
connected to Sherlock via the front panel RJ11 connector. Connect the printer
and ensure it has power, paper, ribbon, etc., before attempting to print. Sherlock data output is 2400 baud, 8 data bits, no parity, 1 stop bit. The following
procedure includes the additional steps which you will need to follow whenever
printing, regardless of which data you are printing.
17
1. After choosing to PRINT, your data (audit, timelock, or employee
count) you will be prompted to connect the printer. Make sure the
printer is connected and ready to print.
2. Select READY (press “1”) to begin printing. If a problem occurs
and you need to cancel the procedure, select RESET (press “2”).
3. Once printing begins you may manually stop the printing by pressing any number.
4. If the display indicates NO PRINTER CHECK, there is a problem
with the printer or its data connection. Check your hardware setup
and select RETRY (press “1”) when you believe your setup is correct.
5. When Sherlock has finished printing a message will appear briefly
on the screen to advise you, then remove your key and it will return
to its normal idle display.
CONNECT PRINTER
READY=1 RESET=2
PRINTING AUDIT
CANCEL = ANY KEY
MONDAY
07/22/02 08:40 A
NO PRINTER CHECK
RETRY=1 RESET=2
AUDIT PRINTOUT
COMPLETE
MONDAY
07/22/02 08:40 A
Sherlock
SYSTEM READY
MONDAY
07/22/02 08:40 A
Page 20

18
OPERATOR’S MANUAL
The smartest safe lock in the business.
4.0 SERVICE
You are encouraged to familiarize yourself with Sherlock. Understanding its features and characteristics will
drastically diminish the need for assistance. However, should you experience difficulties, you may call 1-800-
452-4655 (812-948-8400 outside USA) to speak to a factory technician. This telephone number is monitored 24hours a day. Although you may experience a reasonable delay during evenings and holidays, a technician
will return your call promptly. Do not call your local locksmith for service! Service must be coordinated and
approved by Fire King Security Products to be covered under warranty conditions.
4.1 TROUBLESHOOTING
PROBLEM CORRECTIVE ACTIONPROBABLE CAUSE
Safe will not allow access
to any authorized employees.
Time lock.
Sherlock is equipped with a
timelock feature.
Lost PIN. Sherlock uses the employee PIN
as an assurance against unauthorized use. The factory does not
have access to your PIN, nor can
your user number be made functional without it.
Error Message: Invalid
Key.
The key contacts are dirty, it is
not enrolled or has been damaged.
Message:
ERROR DELAY
Your PIN was entered incorrectly
five consecutive times.
If the safe has entered the time lock period, you must wait for the time lock period to expire in order to access the safe
(usually the next day). Only User 29 or User
30 can edit the timelock settings.
Contact your supervisor for further assistance. Suggested action is to re-enroll the
affected user number with a new PIN.
Clean the key contacts with a pink eraser.
If the key still indicates invalid, check the
employee key count for an open User Number and attempt to reenroll the key. If the
key will not enroll, replace the key. If no
keys respond or if all keys indicate invalid,
contact Fire King Security Products Technical Support.
Sherlock will not respond to your touch for
10 minutes.
No display and no response to keypad touch.
The most likely cause is loss of
AC power. Check the power supply is plugged in and that the outlet is providing power. Check that
the power supply is plugged into
the safe.
4.2 PREVENTATIVE MAINTENANCE
Your Sherlock electronic lock system should provide you with years of trouble free performance. We do
recommend that you regularly wipe the keypad and display with a soft cloth with rubbing alcohol (use
sparingly). Use rubbing alcohol and a cotton swab to clean keypad key contacts. Use a pink eraser to clean
keys. Do not attempt to wash your safe’s hinges or other moving parts and never use any cleaning chemicals, water, or other liquids on exposed electronics.
Plug in the power supply and ensure the
outlet has power. If Sherlock remains inoperable, call the Fire King Security Products Technical Service department.
Page 21

The smartest safe lock in the business.
OPERATOR’S MANUAL
19
4.3 PRODUCT WARRANTY
The warranty statement below applies to safes manuafactured by Fire King Security Products and sold
under the brand names FireKing, NKL, Gary or Meilink. When installed on other brands, the warranty is
provided by that safe manufacturer. If Sherlock is installed as an upgrade to an existing product, regarless
of the brand, the parts carry a 90 day warranty from date of purchase.
FIRE KING SECURITY PRODUCTS
ONE YEAR LIMITED WARRANTY
If a mechanical, electronic, or operable part of the Sherlock electronics
malfunctions or breaks down during normal use, Fire King Security Products will, at our option, repair or replace such part free for a period of one
year from the date of installation. External devices, not manufactured by
Fire King Security Products (such as transformers and UPS devices), are
warranted for ninety (90) days from date of installation..
Warranty Service is available by contacting your dealer or by contacting
Fire King Security Products at 800-452-4655 (812-948-8400 outside USA).
Fire King Security Products reserves the right to have its representative
inspect any product or part to honor any claim, and to receive a purchase receipt or other proof of original purchase before any warranty
service is performed.
This warranty is limited to the terms stated herein. All expressed and
implied warranties including the merchantability and fitness for a particular purpose are excluded, except as stated above. Fire King Security
Products disclaims all liabilities for incidental or consequential damages
resulting from the use of this product, or arising out of any breach of this
warranty. Some states do not allow the exclusion or limitation of incidental or consequential damages, so the above limitation may not apply to
you. This warranty gives you specific legal rights, and you may have
other rights as well, which vary from state to state.
4.3.1 Things That Void Warranty
Your warranty will be void if you misuse or abuse the safe or electronics, apply incorrect power source,
remove or substitute parts, use the product in an application it was not intended for, or use any sort of sharp
object to press the keypad. Unauthorized service will also void your warranty.
4.3.2 Duration of Warranty
Your warranty, as stated above, applies to safes manufactured by Fire King Security Products. This includes
FireKing, Meilink, NKL and Gary brand names. When Sherlock electronics are sold as an upgrade to an
existing safe, the parts are covered by a 90 day parts warranty. For safes sold with Sherlock where the safe
brand is not manufactured by Fire King Security Products, the warranty is provided by that safe manufacturer.
Page 22

20
OPERATOR’S MANUAL
The smartest safe lock in the business.
4.4 OBTAINING WARRANTY SERVICE
Sherlock is manufactured by Fire King Security Products and may be distributed on FireKing, NKL, Gary, or
Meilink brands by Fire King Security Products. Sherlock may also be installed on virtually any safe. Warranty
conditions vary depending on safe brand and country.
4.4.1 Inside USA, Fire King Security Product Safes (FireKing, NKL, Gary or Meilink Brands)
Contact Fire King Security Products at 800-452-4655 or 812-948-8400. We will verify your warranty status and
dispatch a qualified local safe technician to repair your safe . Contacting a locksmith directly will void your
warranty. When you contact Fire King Security Products be prepared to provide your safe serial number as
well as contact information.
4.4.2 Inside USA, Other Fine Brands
Contact your safe manufacturer for warranty service.
4.4.3 Outside USA
Contact your local distributor for assistance.
101 Security Parkway — New Albany IN 47150
Ph 800-452-4655 or 812-948-8400, Fax 812-948-0437
Fire King
SECURITY PRODUCTS
FOR THE 21ST CENTURY
www.fireking.com
®
 Loading...