

Page 1

Instruction Manual
Infrared Heater
Please read these instructions carefully before using your new heater
Page 2
Before each use check:
• that the thermostat is switched on
• that there is no damage to the wiring
• that the heater is plugged in
Warning:
It can be dangerous to install heater near curtains and other combustible materials.
Never wrap the power cord around the heater as this can damage it.
If the power cables have any damage do not use them.
Any damage must be fixed by trained professionals.
If you wish to fit more than one heater do this entirely separately.
3. Installation
3.1 Installation Instructions
Installation on the wall: Attention! The appliance must be installed on the solid surfaces like
concrete and metal.
Never install on flammable surfaces!
See pages 4-7 to come up with the most appropriate installation method for your heater.
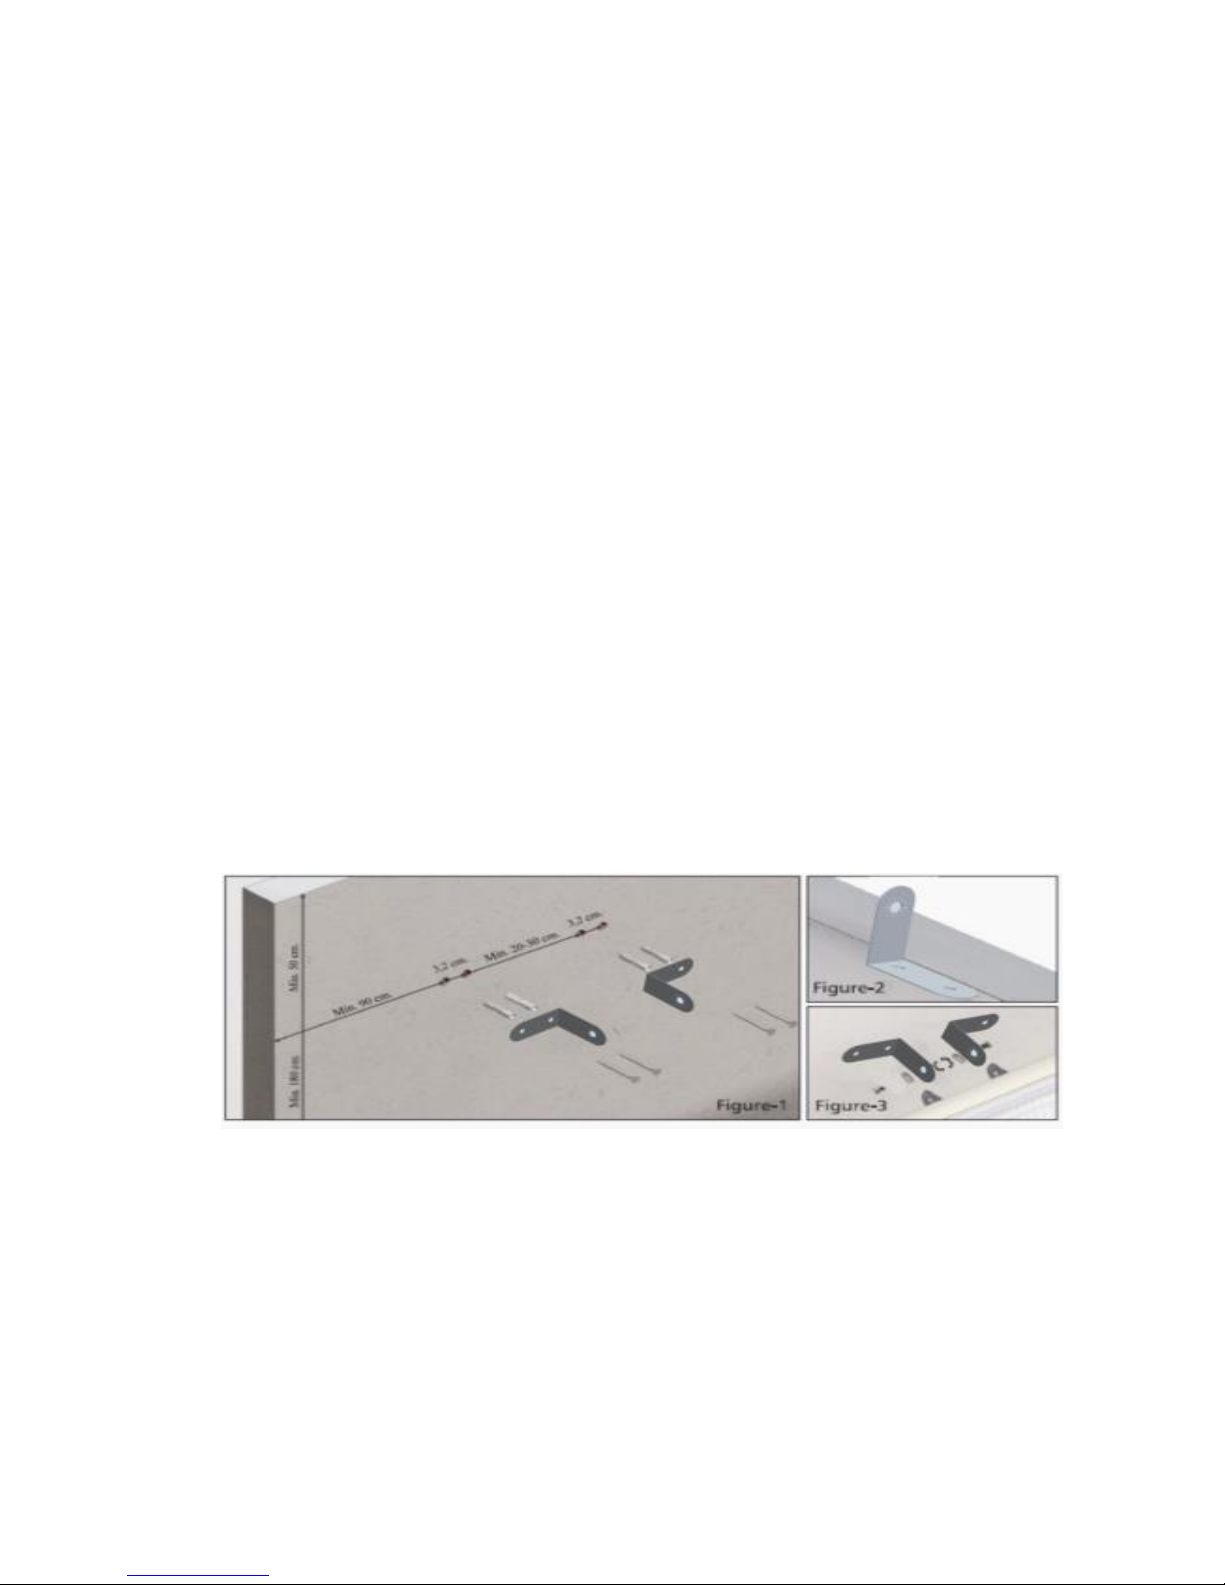
Drill four 8mm diameter holes on the wall to the place where the unit will be placed with the
distance shown in (Figure-1).
Insert the 8mm diameter wall plugs, supplied with the unit, into the holes.
Mount two of the L shaped legs on the wall using the 4×35screws supplied with the unit.
Mount the other L legs on the unit using the M5 screws and the small wrench as shown in
(Figure-2). (corresponding nuts are already built in on the body of the unit)
Page 3
Mount and fix the L shape legs on the wall and on the unit respectively, using the M8×13
bolts and nuts and the washers as shown in (Figure-3) and tighten by using the wrench
supplied.
Figure-4
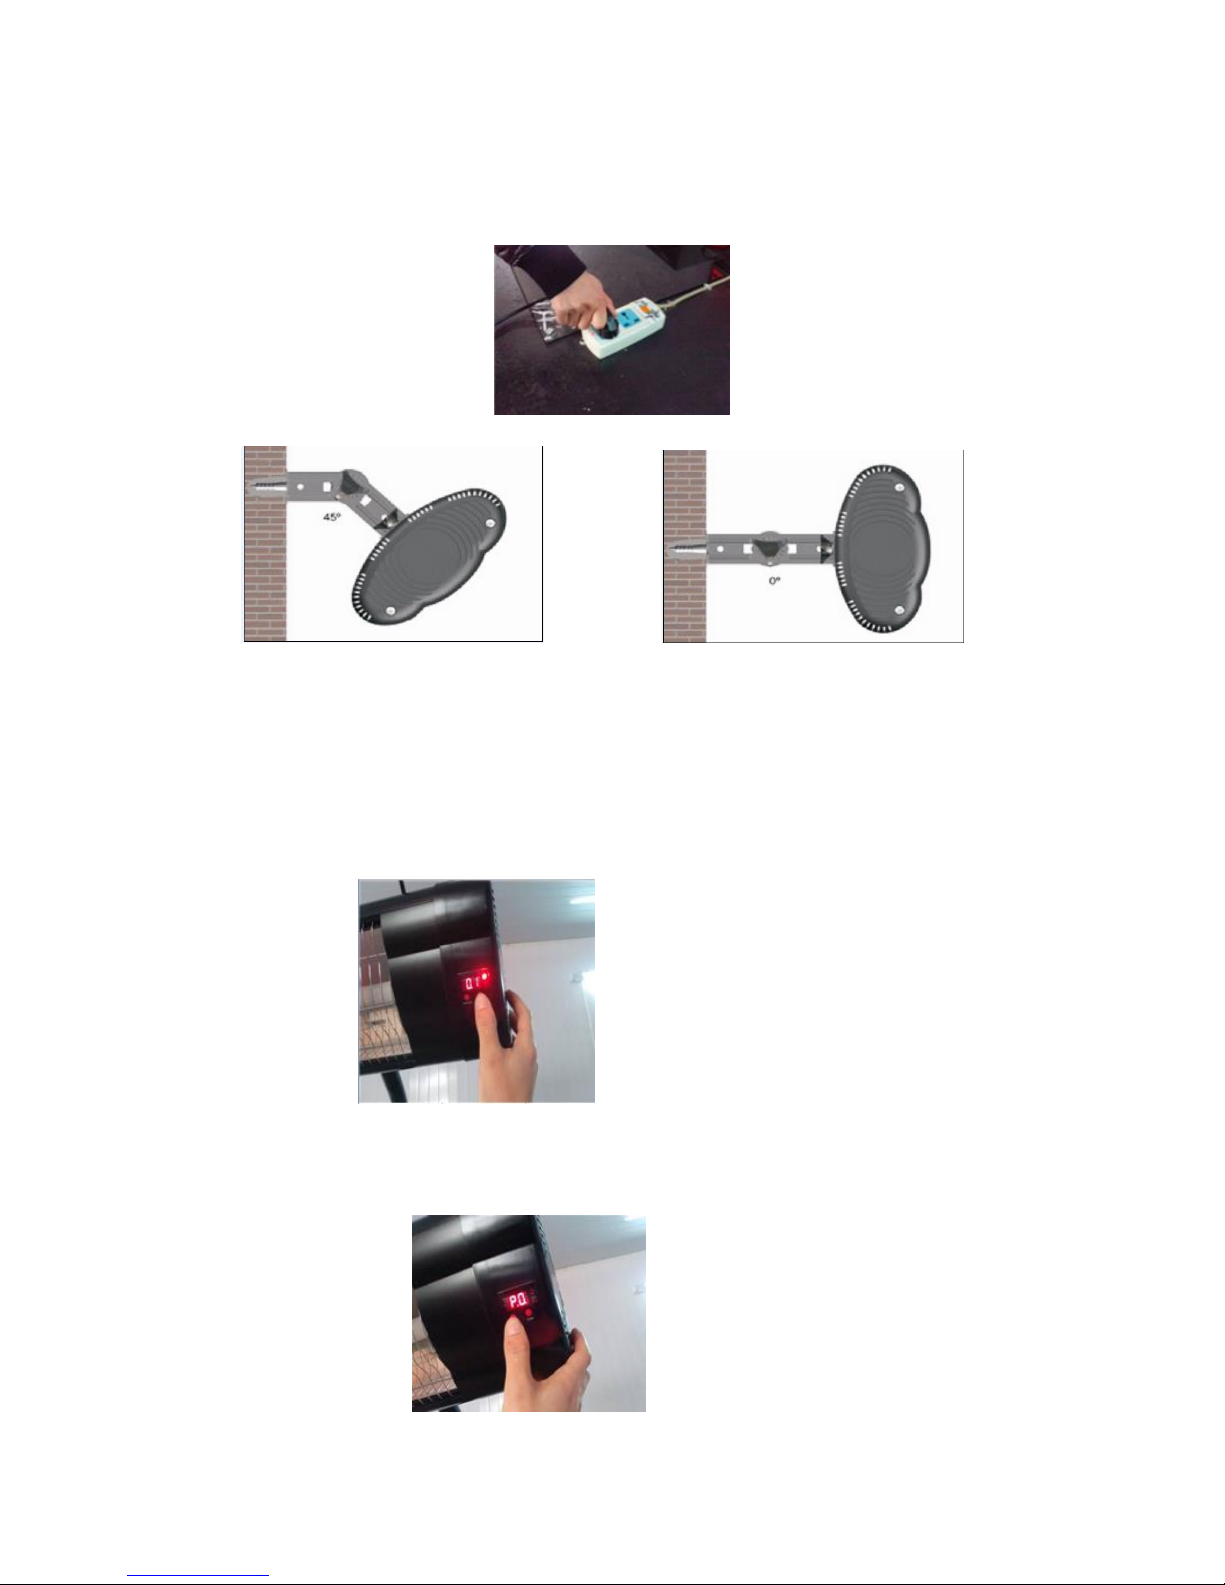
Depending on the area to be heated the angle of the unit can be adjusted between 0-45
degrees by the help of M8 Bakelite head bolt and nut fixture.
Before operating the unit joints should be checked once again.
4. Using steps
Step 1:Connect the power line and the power strip
Step 2:Press Open/Close once,the digital screen shows P.0
Page 4

Step 3:Press Open/Close second,the digital screen shows P.1,the function of a file
connected
Step 4:Press Open/Close third,the digital screen shows P.2,the function of two file
connected
Step 5:Press Open/Close forth,the digital screen shows P.3,the function of three file
connected
Step 6:After the function is on,1-24 hours timing shutdown can be adjusted arbitrarily,
the digital screen showing 0.1 indicates timing one hour,showing 0.2 indicates timing two
hour.
7. Operating Instructions
7.1 Definitions of the Buttons on the Remote Control
The functions of the heater may be controlled via the buttons on your remote control and
LCD screen. You may also control some of the functions of your heater through the
buttons on the front side of the heater.
Page 5

Remote Control
1. Power indicator When in use, press any button, the red indicator will flash.
2. On / Off
Switches on or off the heater or stands it by.
3. First gear
After turn on the heater, you can choose low heating.
4. Second gear
After turn on the heater, you can choose moderate heating.
5. Third gear
After turn on the heater, you can choose high heating.
6. Timer Off
Switches off the heater in present time and starts stand by mode.
Warning!
Insert the batteries of your remote control.
7.2 Operation of the Remote Control
Inserting Batteries
Insert 2AAA / Alkaline type batteries into your Remote Control.
1- Flip the backside of the remote control and pull out battery cover. Insert the batteries
in accordance with the instructions and polarity of the batteries.
2- Change the batteries in the same way depicted above.
Page 6

Notice:
1- Replace the old batteries with the same type batteries. Otherwise, your heater may
not function well.
2- Pull out the batteries in case of long terms of disuse to prevent leakage which may
impair your remote control.
7.2 Operation of the Remote Control
1. Turn on the power, the buzzer on the products will beep once, the digital screen and the
indicator is no show. At this time, press On / Off button to make it in stand by mode.
2. Press the function button to choose the power level. P0 indicator appears on the screen,
and the indicator flashes three times, indicating that the appliance is in stand by mode. P1
indicator appears on the screen, and the indicator flashes three times, indicating that the
appliance is in low-grade mode. Press the function button again to mid-grade, the buzzer
will beep once, P2 indicator appears on the screen, and the indicator flashes three times,
indicating that the appliance is in mid-grade mode. Press the function button again to
high-grade, the beeper will beep once, P3 indicator appears on the screen, and the
indicator flashes three times, indicating that the appliance is in high-grade mode. Press
the function button again, you can choose low, medium and high gear, P0 indicator
appears on the screen, and the indicator flashes three times, indicating that the appliance
is in stand by mode. Continuously press the function button, “P0 - P1 - P2 - P3 - P0”
appears on the digital tube as a circulation , corresponding to the appliance mode is
“Stand-by ---Low-grade---Mid-grade---High-grade---Stand-by”.
3. In stand by mode, press the timer button, the appliance can set time from 1 to 24 hours.
After set the time, the indicator next to the digital tube will light up, it means that the
appliance has been selected timer function. "0" indicates time not set.
4. When the appliance is on working, the digital screen always shows the power state
(P1-P2-P3). The timer setting, when the indicator lights up, it means that the machine has
been set a timer function from 1 to 24 hours. To view the regular time, press the timer
button, the appearing time is the present setting time, at this time the indicator also flashes
three times continuously, indicating that the appliance enters into the timer setting state.
Page 7

7.3 Manual Operation
Control through the main module on the heater:
P0 indicator appears on the screen when the heater is switched on and it is in stand by
mode.
The 1st digit on the screen illustrates P symbol while 2nd digit illustrates power level mode
from 1 to 3.
The button number 1 on the heater functions as ON / OFF. The heater starts operating at
the power level mode at which it has been switched off.
Press the button number Temi on the heater to adjust power mode.
P0 appears on the screen when pressed ON / OFF button and the power level mode (P1,
P2,P3) can be adjusted through the buttons on the remote control.
Press ON / OFF button on the remote control or the heater itself to switch off the heater.
The heater starts functioning in stand by mode after electricity cut.
LED keeps flashing in case of a program set by remote control.
Buzzer signal is given following each command.
LED
Power level indicator
P
ON/OFF/Power mode button Timer button
Page 8

Care and maintenance
Ensure that the heater is disconnected and cleaned periodically.
To clean the heater:
1. Disconnect the power cable
2. Remove the safety bars
3. Wipe the front with a soft damp cloth. Use a gentle detergent. Be careful to clean the surface very
carefully without leaving finger prints or scratches.
Warning: some cleaning products would damage the heater.
Technical specification
• Power supply 220V - 240V ~ 50Hz
• Wattage max 2000w
• Remote control 7m
Unpack the halogen heater making sure that all the items are present and that
there are no components left in the box and that the heater head is free from
any packing material.
Using the detailed drawing follow the steps to assemble your halogen heater.
Do not connect the halogen heater to the electrical supply until all the assembly
is complete.
Do not connect the halogen heater to the electrical supply if any of the
components or the power cord is damaged in any way.
If in doubt contact your supplier.
Primrose
info@primrose.co.uk
Tel: 0118 9035210(UK)
Tel: 0044 118 9035210(outside of UK)
 Loading...