

Page 1

OPERATING AND INSTALLATION INSTRUCTIONS
BUILT-IN VITROCERAMIC HOB
FXVT 60
Page 2

2
DESCRIPTION OF THE HOB 3
SAFETY INSTRUCTIONS 4
INSTALLATON 6
Locating Your Built-in Hob 6
Electrical Connection of Your Hob 8
USAGE 10
Turn On and Turn Off The Appliance 11
Select Heater 11
Turn on dual- and triple zones 12
Set Cooking Level With and Without Heat Boost 12
Turn Off Individual Heaters 13
Timer Function 14
Key Lock 16
TOUCH CONTROL SAFETY FUNCTIONS 17
Sensor Safety Cut Off 17
Over Temperature Switch Off 17
Operating Time Limitations 17
Residual Heat Functions 18
CLEANING AND CARE 19
.......................
......................................................
...........................................
............................................................................................
...............................................
............................................................
.................................................................................
..........................................................
............................................................
................................................................................
.........................................................................................
....................................................................
.....................................
...........................................................
........................................................
....................................................................
................................................................
...............................................................
..................................................................................
CONTENTS:
Page 3
3
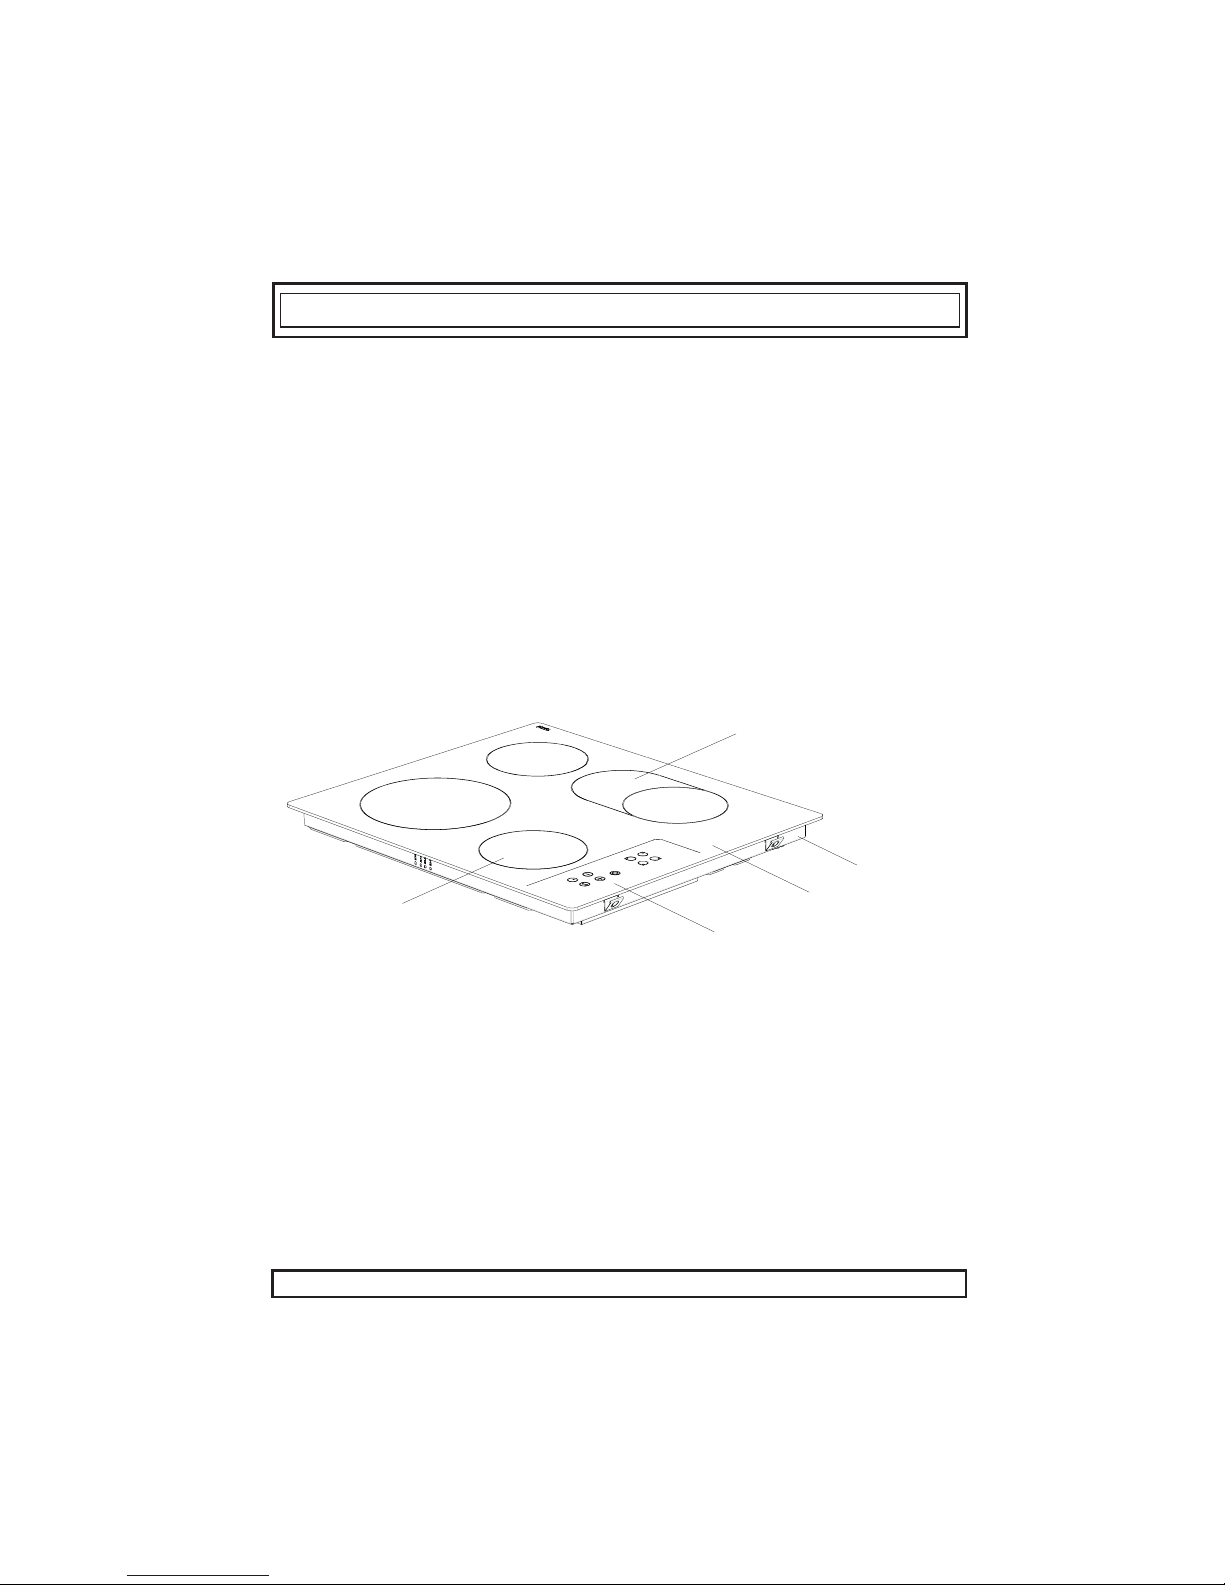
DESCRIPTION OF THE HOB
OVAL ZONE
HEATER
HOB
FRAME
VITROCERAMIC
SURFACE
TOUCH CONTROL
PANEL
SINGLE ZONE
HEATER
Dear Customer,
It is important that you should read this manual for best performance and
to extend the life of your appliance. We recommend you to keep this manual
for future reference.
Your new hob is guaranteed and will give lasting service. This guarantee
is only applicable if the appliance has been installed and operated in
accordance with the operating and installation instructions detailed in this
manual.
Note: Appearance of your hob maybe different than the model shown above
due to its configuration.
Page 4

PART 2 SAFETY WARNINGS
4
READ THESE INSTRUCTIONS CAREFULLY AND COMPLETELY BEFORE USING YOUR
APPLIANCE, AND KEEP IT IN A CONVENIENT PLACE FOR REFERENCE WHEN NECESSARY.
THIS MANUAL IS PREPARED FOR MORE THAN ONE MODEL IN COMMON. YOUR APPLIANCE
MAY NOT HAVE SOME OF THE FEATURES THAT ARE EXPLAINED IN THIS MANUAL. PAY
ATTENTION TO THE EXPRESSIONS THAT HAVE FIGURES, WHILE YOU ARE READING THE
OPERATING MANUAL.
General Safety Warnings
- This appliance can be used by children aged
from 8 years and above and persons with
reduced physical, sensory or mental capabilities
or lack of experience and knowledge if they
have been given supervision or instruction
concerning use of the appliance in a safe way
and understand the hazards involved. Children
shall not play with the appliance. Cleaning and
user maintenance shall not be made by children
without supervision.
- WARNING: The appliance and its accessible
parts become hot during use. Care should be
taken to avoid touching heating elements.
Children less than 8 years of age shall be kept
away unless continuously supervised.
- WARNING: Unattended cooking on a hob with
fat or oil can be dangerous and may result in
fire. NEVER try to extinguish a fire with water,
but switch off the appliance and then cover
flame e.g. with a lid or a fire blanket.
- WARNING: Danger of fire: do not store items
on the cooking surfaces.
Page 5

5
- WARNING: If the surface is cracked, switch off
the appliance to avoid the possibility of electric
shock.
- For hobs incorporating a lid, any spillage
should be removed from the lid before opening.
And also the hob surface should be allowed to
cool before closing the lid.
- The appliance is not intended to be operated
by means of an external timer or separate
remote-control system.
- Do not use harsh abrasive cleaners or sharp
metal scrapers to clean the oven door glass and
other surface since they can scratch the surface,
which may result in shattering of the glass or
damage to the surface.
- Do not use steam cleaners for cleaning the
appliance.
- Your appliance is produced in accordance with all applicable local and international standards and
regulations.
- Maintenance and repair work must be made only by authorized service technicians. Installation and
repair work that is carried out by unauthorized technicians may endanger you. It is dangerous to alter or
modify the specifications of the appliance in any way.
- Prior to installation, ensure that the local distribution conditions (nature of the gas and gas pressure or
electricity voltage and frequency) and the requirements of the appliance are compatible. The
requirements for this appliance are stated on the label.
- CAUTION: This appliance is designed only for cooking food and is intended for indoor domestic
household use only and should not be used for any other purpose or in any other application, such as
for non-domestic use or in a commercial environment or room heating.
- All possible security measures have been taken to ensure your safety. Since the glass may break, you
should be careful while cleaning to avoid scratching. Avoid hitting or knocking on the glass with
accessories.
- Ensure that the supply cord is not wedged during the installation. If the supply cord is damaged, it
must be replaced by the manufacturer, its service agent or similarly qualified persons in order to prevent
a hazard.
Page 6
6
Installation Warnings
- Do not operate the appliance before it is fully installed.
- The appliance must be installed by an authorized technician and put into use. The producer is not
responsible for any damage that might be caused by defective placement and installation by
unauthorized people.
- When you unpack the appliance, make sure that it is not damaged during transportation. In case of
any defect; do not use the appliance and contact a qualified service agent immediately. As the
materials used for packaging (nylon, staplers, styrofoam...etc) may cause harmful effects to children,
they should be collected and removed immediately.
- Protect your appliance against atmospheric effects. Do not expose it to effects such as sun, rain,
snow etc.
- The surrounding materials of the appliance (cabinet) must be able to withstand a temperature of min
100°C.
7KHWHPSHUDWXUHRIWKHERWWRPVXUIDFHRIWKHKREPLJKWULVHVGXULQJWKHRSHUDWLRQ7KHUHIRUHDERDUG
PXVWEHLQVWDOOHGXQGHUQHDWKWKHSURGXFW
During usage
- Do not put flammable or combustible materials, in or near the appliance when it is operating.
- Do not leave the cooker while cooking with solid or liquid oils. They may catch fire on condition of
extreme heating. Never pour water on to flames that are caused by oil. Cover the saucepan or frypan
with its cover in order to choke the flame that has occured in this case and turn the cooker off.
- Always position pans over the centre of the cooking zone, and turn the handles to a safe position so
they cannot be knocked or grabbed.
- If you will not use the appliance for a long time, plug it off. Keep the main control switch off. Also
when you do not use the appliance, keep the gas valve off.
- Make sure the appliance control knobs are always in the "0" (stop) position when it is not used.
During cleaning and maintenance
- Always turn the appliance off before operations such as cleaning or maintenance. You can do it after
plugging the appliance off or turning the main switches off.
- Do not remove the control knobs to clean the control panel.
TO MAINTAIN THE EFFICIENCY AND SAFETY OF YOUR APPLIANCE, WE RECOMMEND YOU
ALWAYS USE ORIGINAL SPARE PARTS AND TO CALL ONLY OUR AUTHORIZED SERVICE
AGENTS IN CASE OF NEED.
Page 7
6
INSTALLATION
The electrical connection of this hob should be carried out by an
authorised service personal or a qualified electrician, according to the
instructions in this guide and in compliance with the current regulations.
· Prior to installation, ensure that the local distribution conditions and the
adjustment of the appliance are compatible.
· The laws, ordinances, directives and standards in force in the country of
use are to be followed (safety regulations, proper recycling in accordance
with the regulations, etc.)
Locating your built-in hob
· After removing the packaging material from the appliance and its accessories,
ensure that the hob is not damaged. If you suspect any damage, do not use
the appliance and contact an authorised service personal or a qualified
electrician immediately.
· This built-in hob is to be inserted into a cut out of a worktop. It will be
electrically connected with the switch box below, especially provided for this
purpose.
Page 8
7
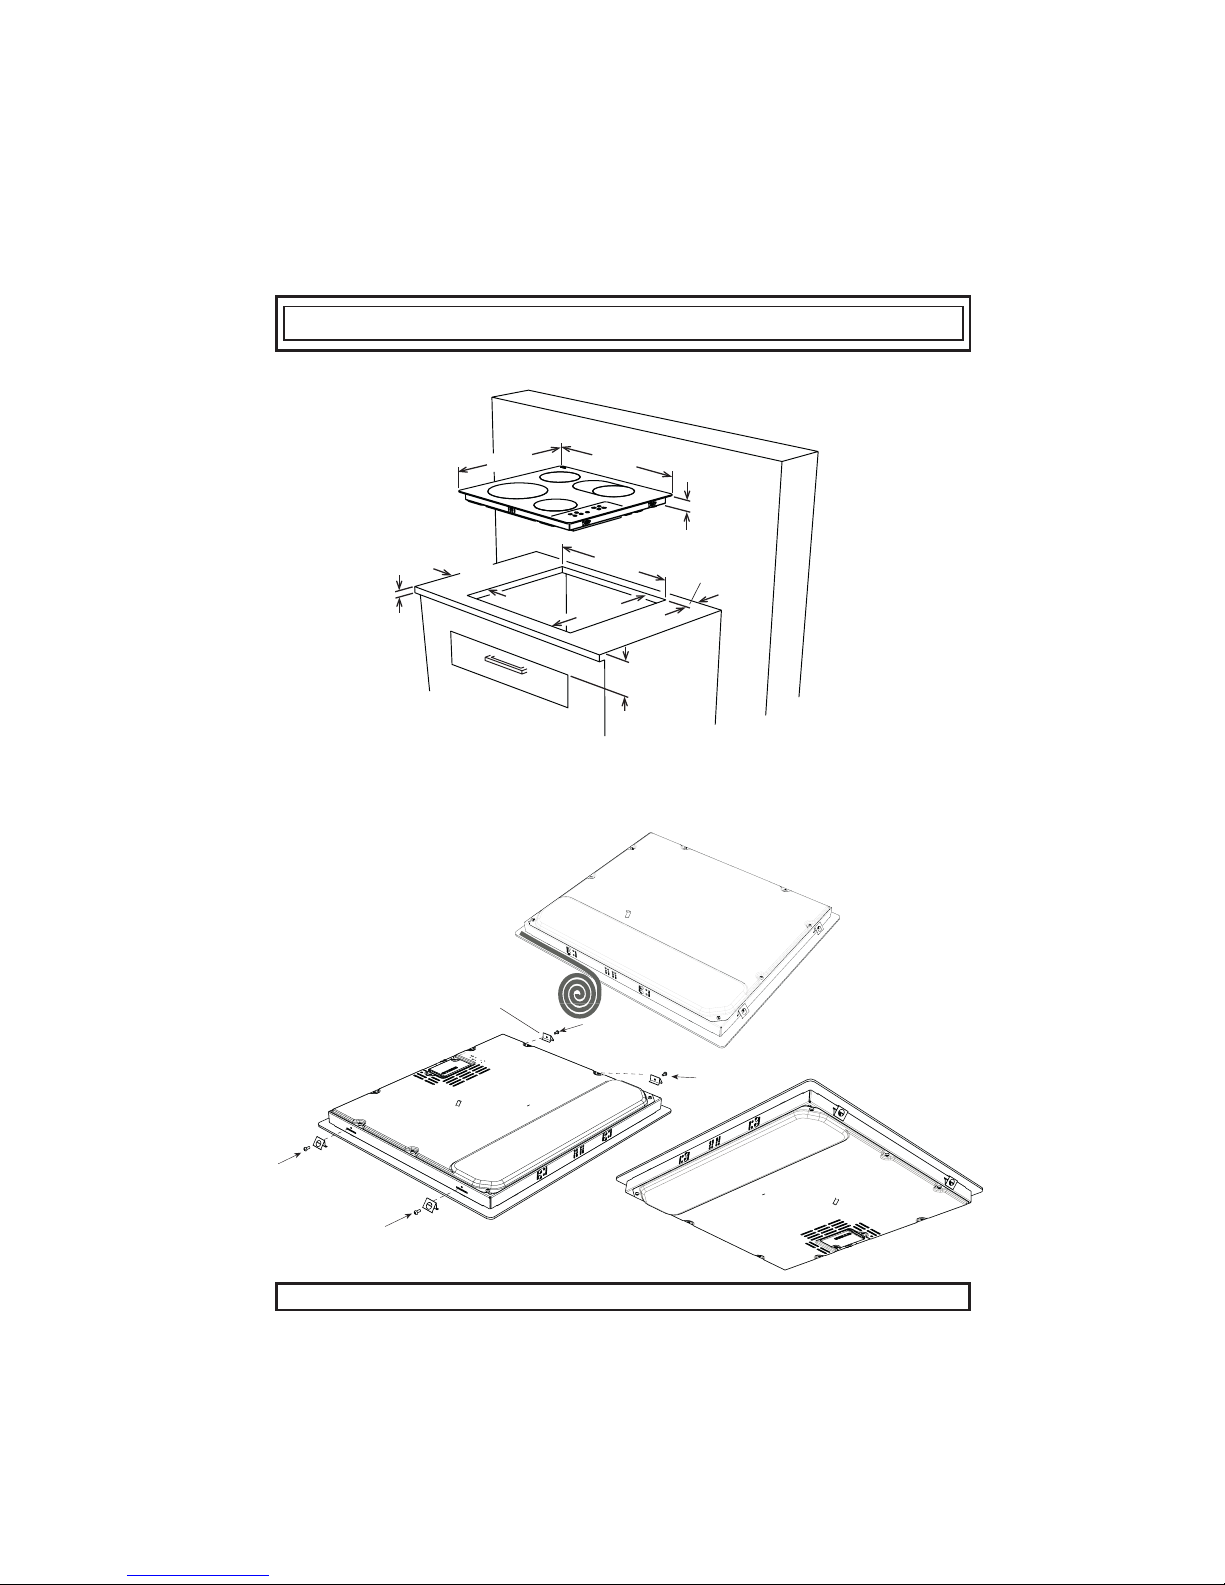
· Create an opening with the dimensions shown in the picture below.
· Apply the one-sided self-adhesive sealing tape supplied all the way round
the lower edge of the cooking surface along the outer edge of the glass
ceramic panel. Do not stretch it.
worktop mounting bracket
· Screw the 4 worktop mounting brackets on the side walls of product.
520mm
590mm
42mm
560mm
490mm
Min.
60mm
Min.
150mm
Min.
130mm
Min.
25mm
Page 9

8
Electrical connection of your hob
· Before proceeding with the electrical connection, verify that the current carrying
capacity of the system and the socket is adequate for the maximum power rating of
the hob.
. Electrical installation of the residence and the electrical current plug in use must
be earthed and conform with safety regulations.
· If there is no dedicated hob circuit and fused switch, they must be installed by a
qualified electrician before the hob is connected.
· Fused switch must be easily accessible once the hob has been installed.
· Do not use adaptors, multiple sockets and/or extension leads.
· This appliance conforms with the requirements ofthe following EEC Directives:
1. Vitroceramic hob EEC/73/23 and 93/68, EEC/89/336 relating to radio
interference,
2. EEC/89/109 relating to contact with foods.
· A circuit breaker with a contact opening of at least 3mm, rated 20A and delayed
functioning type must be installed inside the supply circuit.
Page 10
9
· During installation, please insure that isolated cables are used. An incorrect
connection might damage your appliance. The guarantee will not cover such
damages.
· All repairs must be carried out by an authorised service personal or a
qualified electrician.
· Unplug your appliance before each maintenance. For reconnection, follow
the connection diagrams strictly.
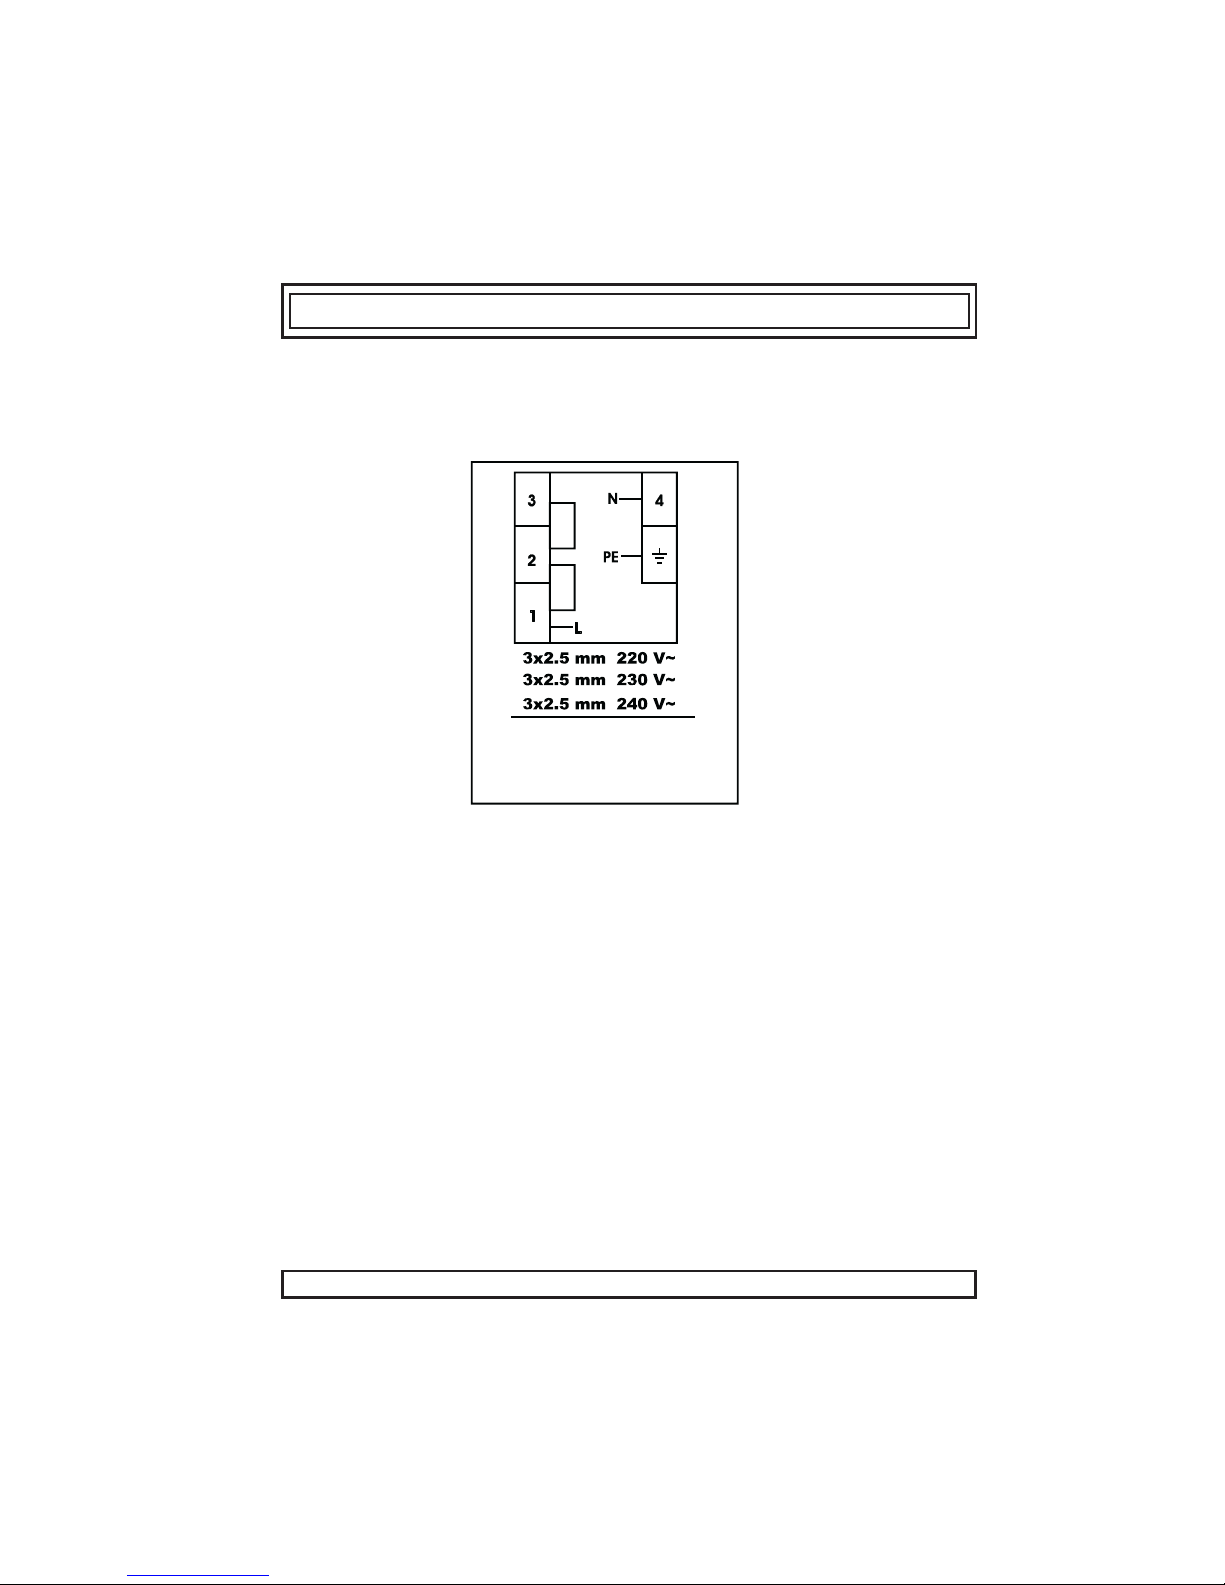
* This appliance must be earthed.
* For this connetion a power lead
of wire type H05VV-F should be
used.
2
2
2
· For the touch controlled vitroceramic hob, the cable must be H05VV-F 3X2,5
mm² / 60227 IEC 53. You will find the connection diagram shown on the
bottom of your appliance.
Page 11
10
USAGE
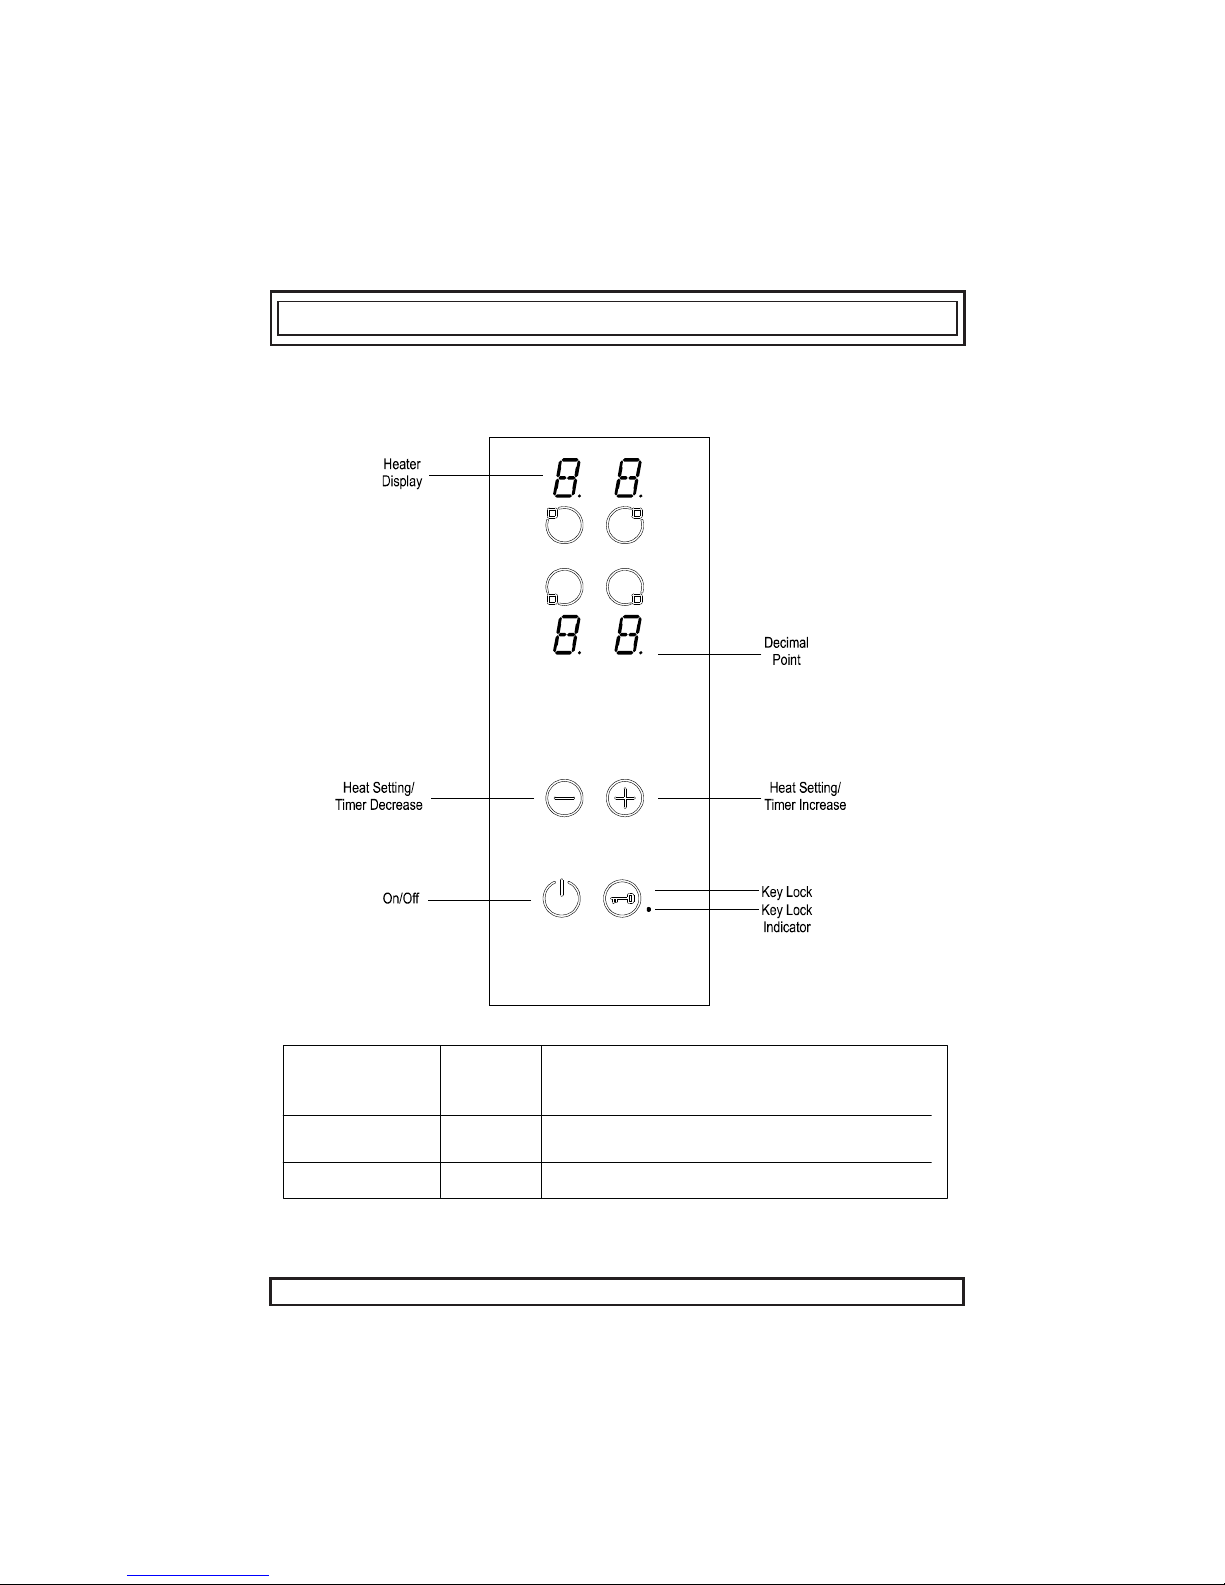
The appliance is operated by touching buttons and the functions are confirmed
by displays and acoustic signals.
Mode Descriptions
Stand-By-Mode S-Mode
The mains are applied to the hob control
and all heater displays are off or a residual
heat display is active.
Operating-Mode
B-Mode
At least one heater display shows a heat
setting between ´0`and ´9`
Lock Mode
VR-Mode
The hob control is locked.
Page 12
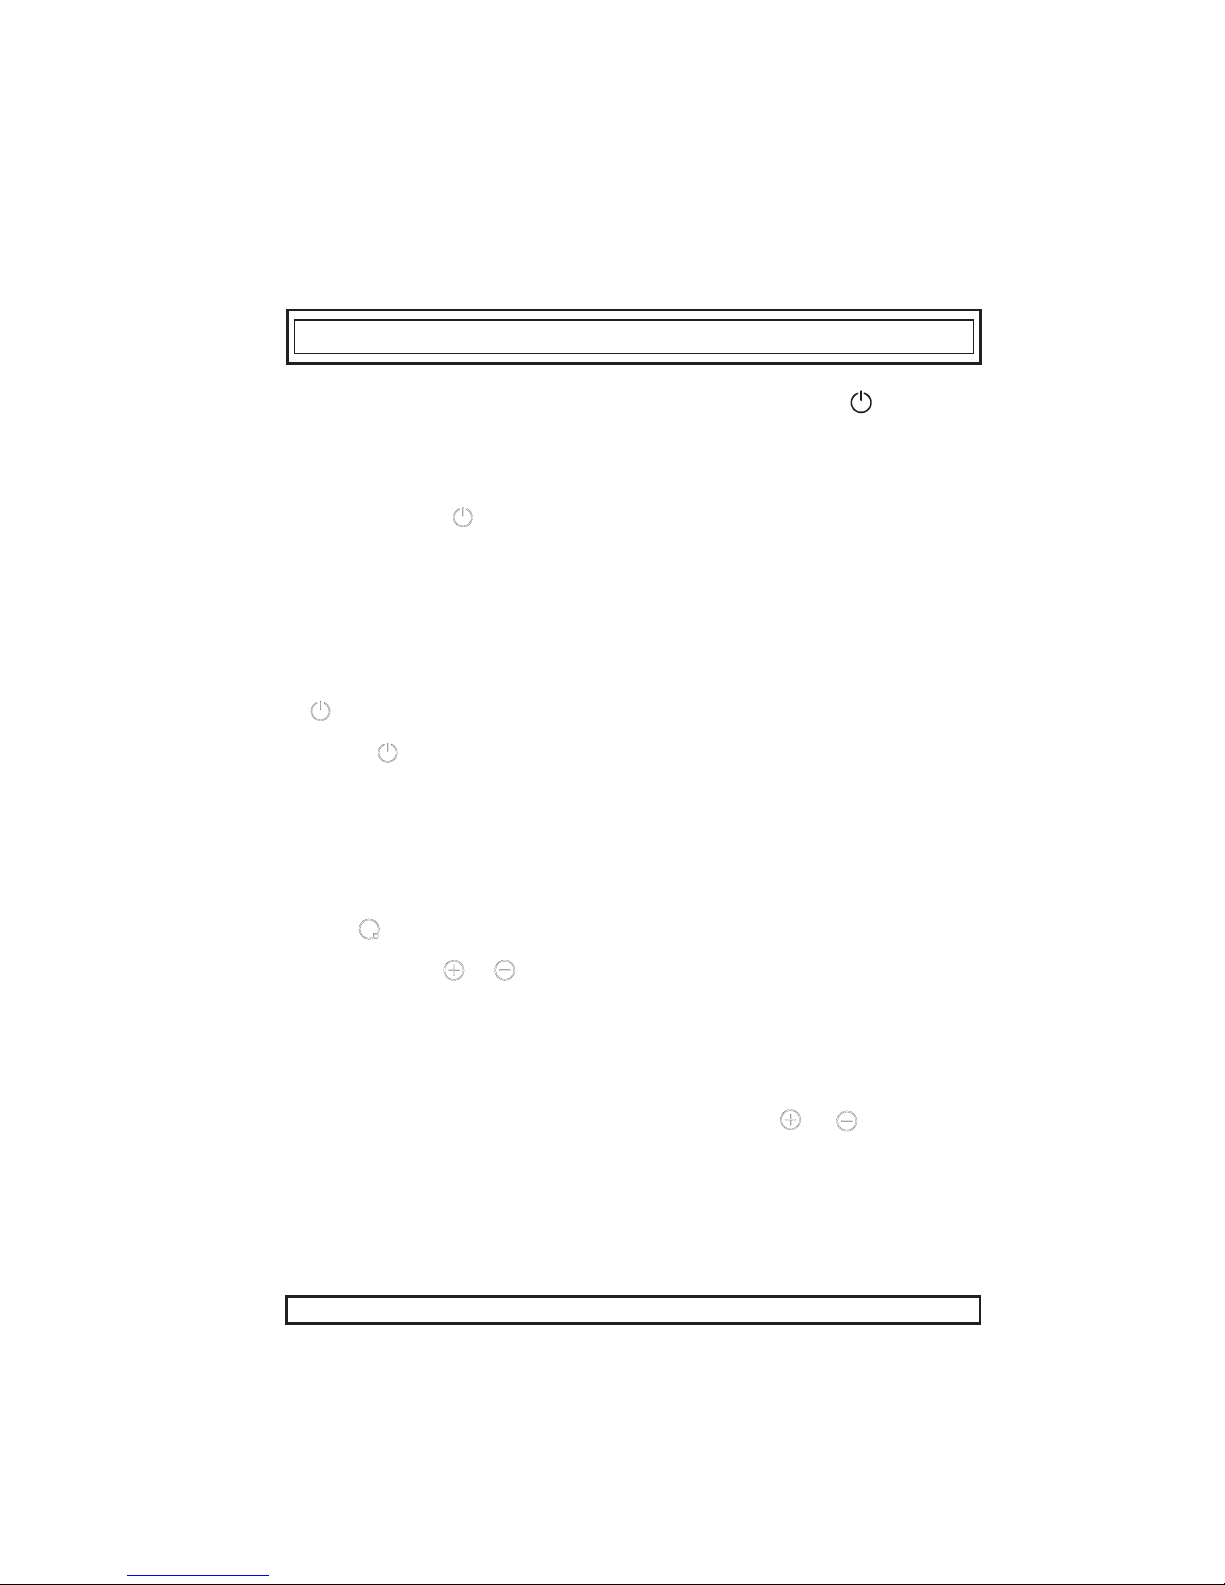
Turn On and Turn Off The Appliance
If the appliance is in Stand-By-Mode, it is put in Operating-Mode by pressing
the On/Off button at least 1 second. A buzzer signal indicates the successful
operation acoustically.
On all heaters a ´0` appears and all Decimal Point of the heater flashes (1
sec on, 1 sec off).
If there is no operation within 10 sec, the display of all heaters will turn off. If
the displays are turned off, the heater will be set into Stand-By-Mode.
If is pressed more than 2 sec (in Operating-Mode), the appliance is switched
off and is set into the S-Mode again. The appliance can be turned off by
pressing at any time; even if other buttons are pressed simultaneously.
If there is a residual heat of a heater remaining, this will be indicated in the
correspondent heat setting Heater Display.
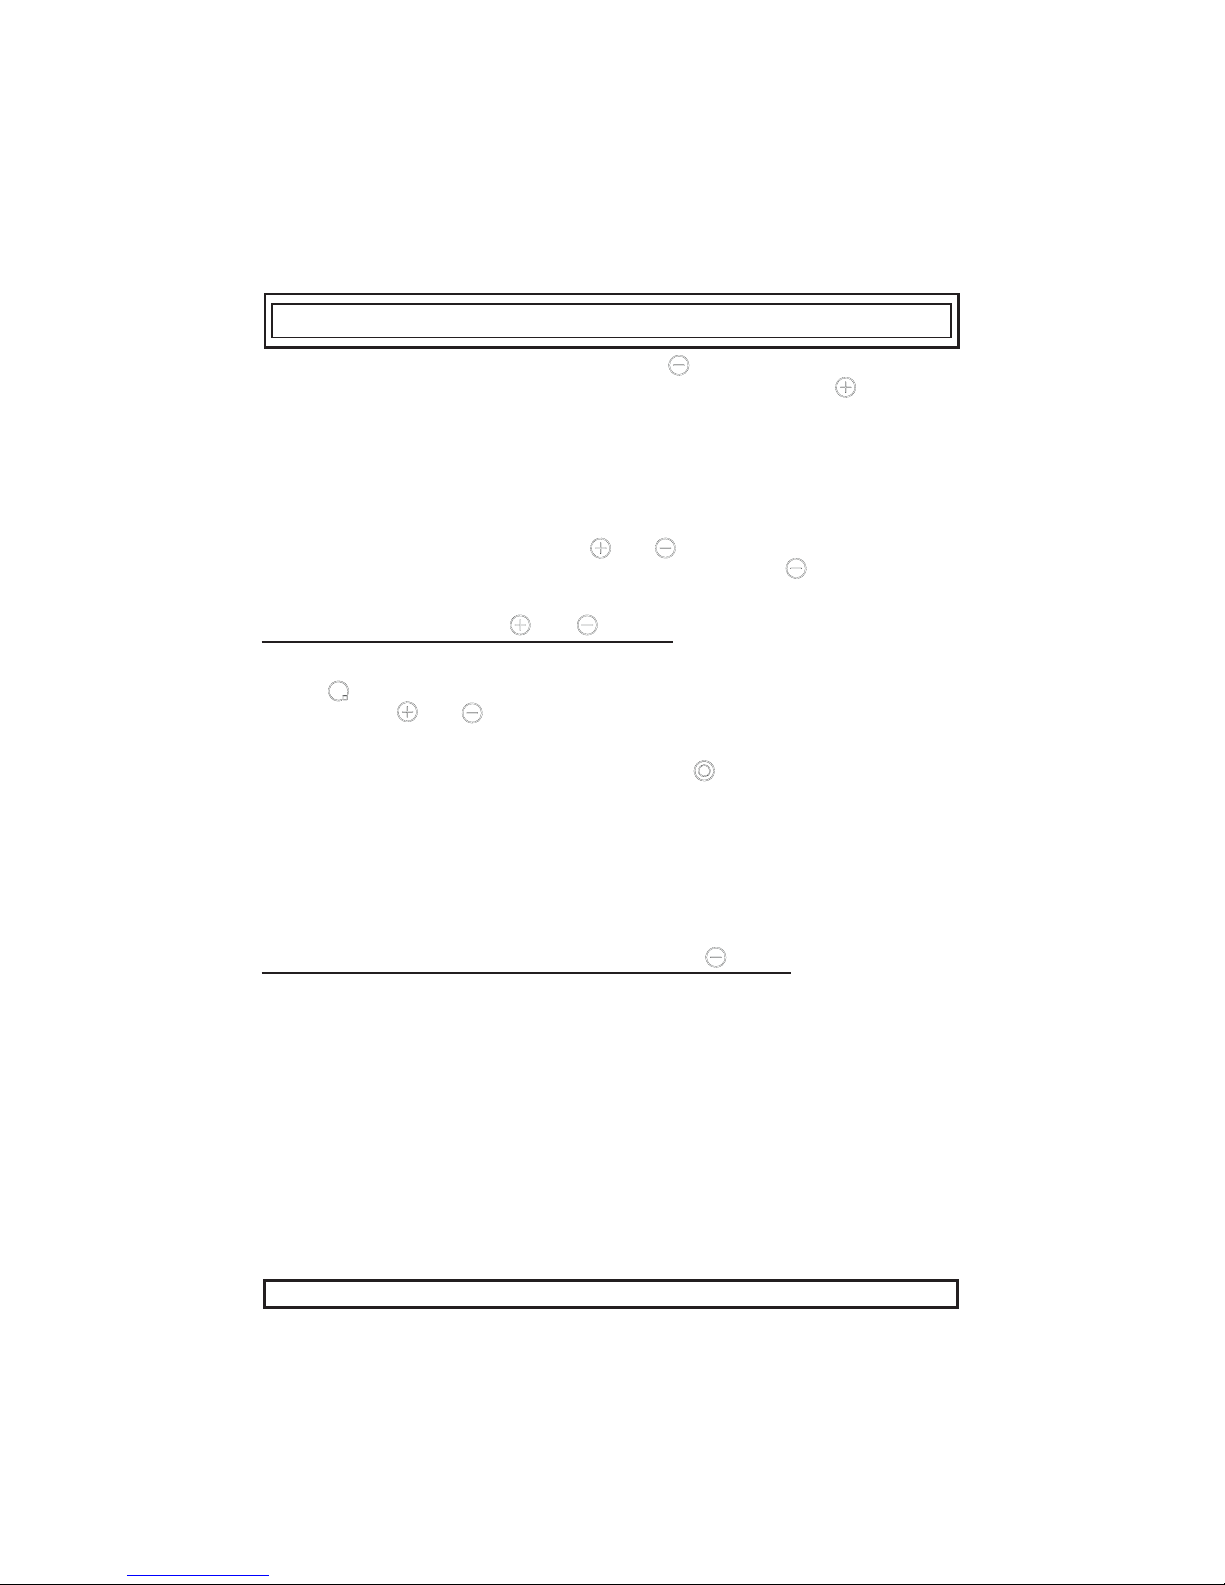
Select Heater
If a single heater is chosen with the corresponding Active/Deactive Heater
Button , the Decimal Point of the related Heater Display flashes. For the
selected heater, you can set the heat level between 1-9 by touching the Heat
Setting Buttons or .
The buttons must be pressed within 3 sec, otherwise the heater selection is
erased and heat setting dot will disappear (Decimal Point). If there is no further
operation within 10 sec, the heater falls back into the S-Mode.
The heat setting can always be changed by pressing or between level
1-9.
Each button operation or each display change is quitted by a buzzer signal.
Page 13
12
Turn on dual- and triple zones (available only in some models)
Turn on the dual zone
The activation of the dual zone is done after selecting the desired heater by
actuating . This is confirmed by a buzzer signal. At the same time, the
corresponding Dual Zone Indicator goes on statically. Touching for a second
time, the status of the dual zone toggles: it changes from dual zone on to dual
zone off and back again.
The extension zone can be activated only, after a level between 1-9 is set on
the basic zone of the heater.
Turn on triple zones
A dual or triple zone can only be switched on, if the basic zone of a heater
is set to level 19 and the heater is selected, the dot is on.
If is pressed, the buzzer signal sounds and the Dual Zone Indicator is
statically on. If is pressed once again, there is another acoustical signal
and the triple heater is switched on. The Triple Zone Indicator will be illuminated
and the triple zone will be energized.
After touching once again, the triple zone of the heater will be switched
off again. Each operation causes a status change of the dual/triple zones
following in this manner (Dual zone on, triple zone on, all extended zones off,
dual zone on, triple zone on, dual zone on, etc. ...)
Set Cooking Level With and Without Heat Boost
Every heater is equipped with heat boost functionality.
If the heat boost is active, than the heater will be pressed with maximum
power for the period of the heat boost time, that is dependent from the selected
heat setting. This is indicated through a flashing ´A`, alternating with the heat
setting value (e.g. 0,5 sec ´A` and 0,5 sec ´9`) in the heater display. Once the
heat boost time ended only the heat setting will be indicated.
When a heater is activated, pressing in the cooking level 9 activates the
booster. After boost setting, ´A` will be indicated alternating. Means level 9
and heat boost is active now.
Page 14
13
The heat boost can be turned off by pressing until heat setting ´0` appears.
If the heat boost should be used, it can always be activated by actuating
again if the heat setting is set to level 9. In the heat display flashes A/9.
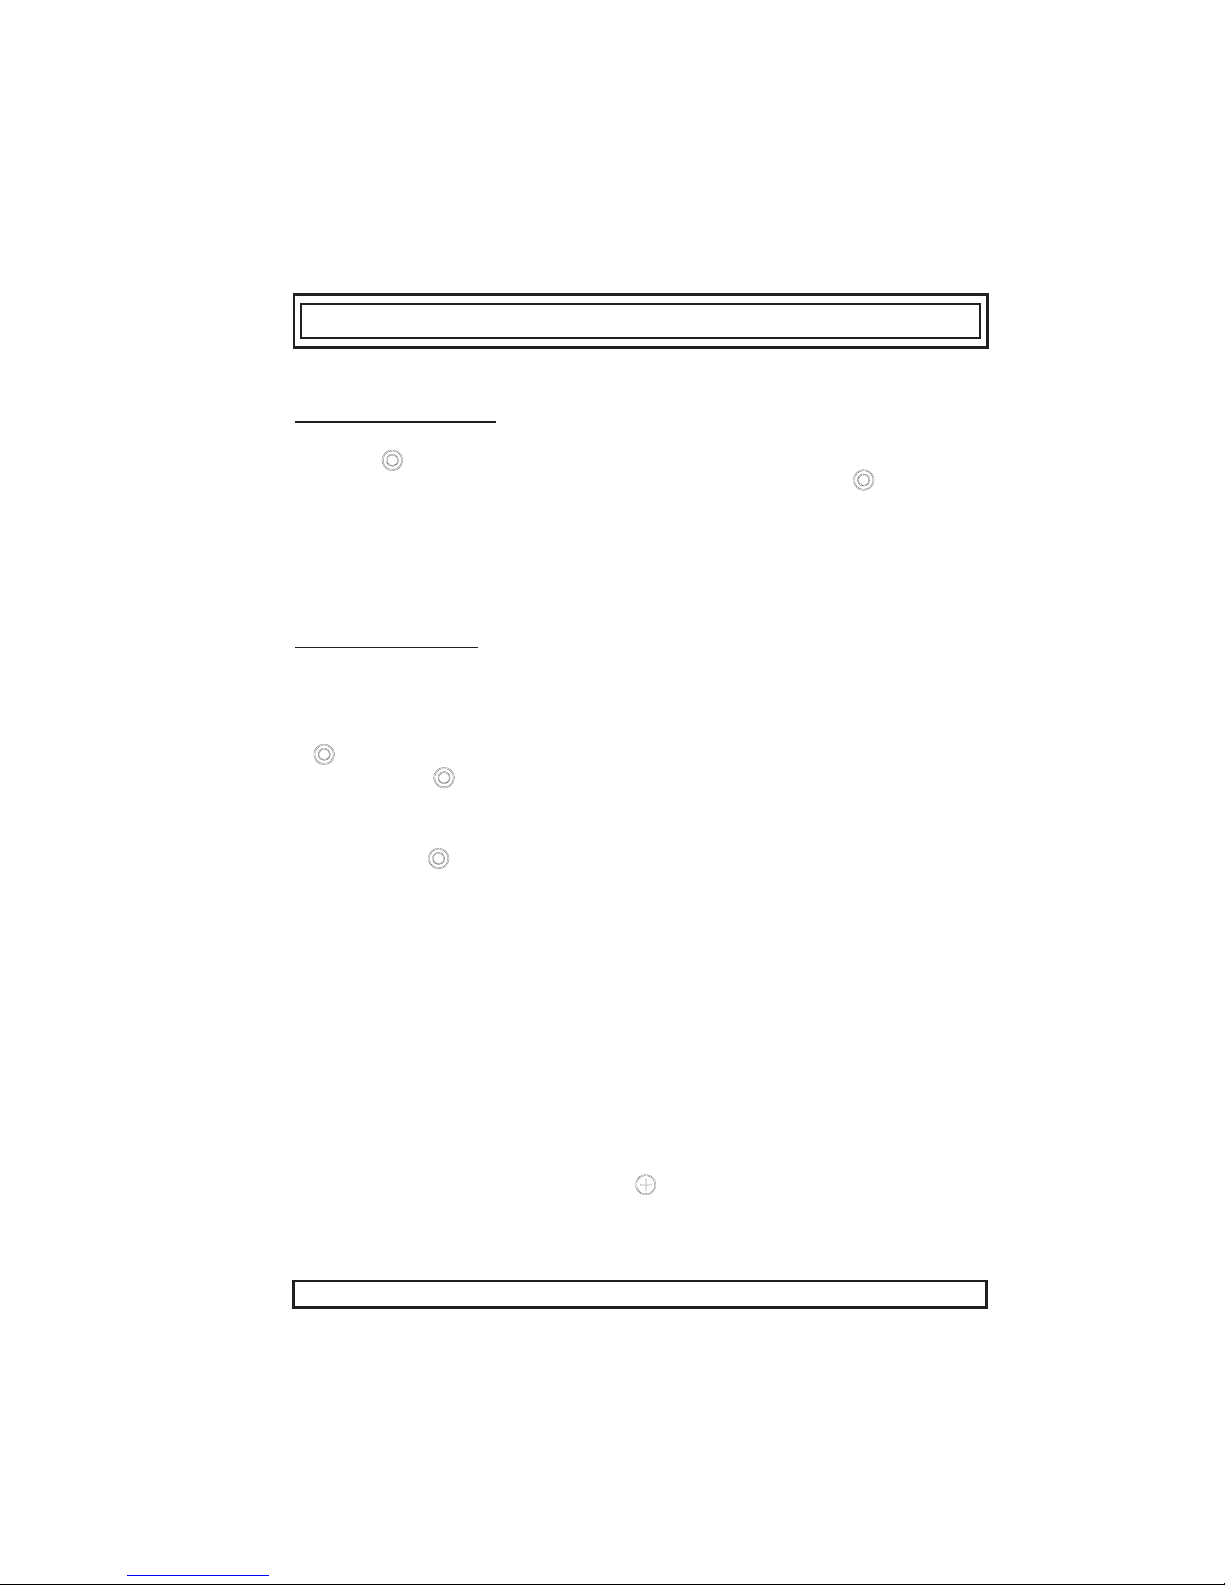
Turn Off Individual Heaters
A selective heater can be turned off with 3 different ways:
· Simultaneous operation of and buttons
· Reduction of the heat setting to 0 by operating button
· Use of timer turn off function for the corresponding heater
Simultaneous operation of and buttons
The corresponding heater must be chosen with the Active/Deactive Heater
Button , the Decimal Point of the related Heater Display flashes. To turn
off the heater, and must be pressed at the same time. A buzzer signal
sounds and ´0` appears in the heat setting display.
An assigned Dual/Triple Zone Selection button also disappears if it is
active.
If the timer is active for the selected button, then ´0` will appear in the heater
display and also the related timer Cooking Zone Indicator Timer Function and
the Timer Display is turned off.
If there is a residual heat for this heater remaining, this will be indicated by
a static display ´H` in the heat setting display.
Reduction of the heat setting to ´0` by operating button
The heater can also be turned off by reducing the operated heat setting to
´0`.
When Heater Display indicates ´0`, an associated Decimal Point of the heater
will also be turned off.
Turning off an acitive heater, not only the ´0` appears in the Heater Display,
but also the related timer Cooking Zone Indicator and the Timer Display is
turned off.
If there is a residual heat for this heater remaining, this will be indicated by
a static display ´H` in the heat setting display.
Use of timer turn off function for corresponding heater (available only in some
models)
Page 15
14
After reaching a remaining time of 0 minutes, the timer stops the linked heater,
showing the ´0` shown in the Heater Display and shuts down Timer Display.
In the Timer Display is shown ´00`. The related timer Cooking Zone Indicator
disappears.
An assigned Dual/Triple Zone Indicator also disappears if it is active.
Additionally the buzzer indicates acoustically the timer run out. After confirmation
of the timer run out by touching any button, the buzzer goes silent.
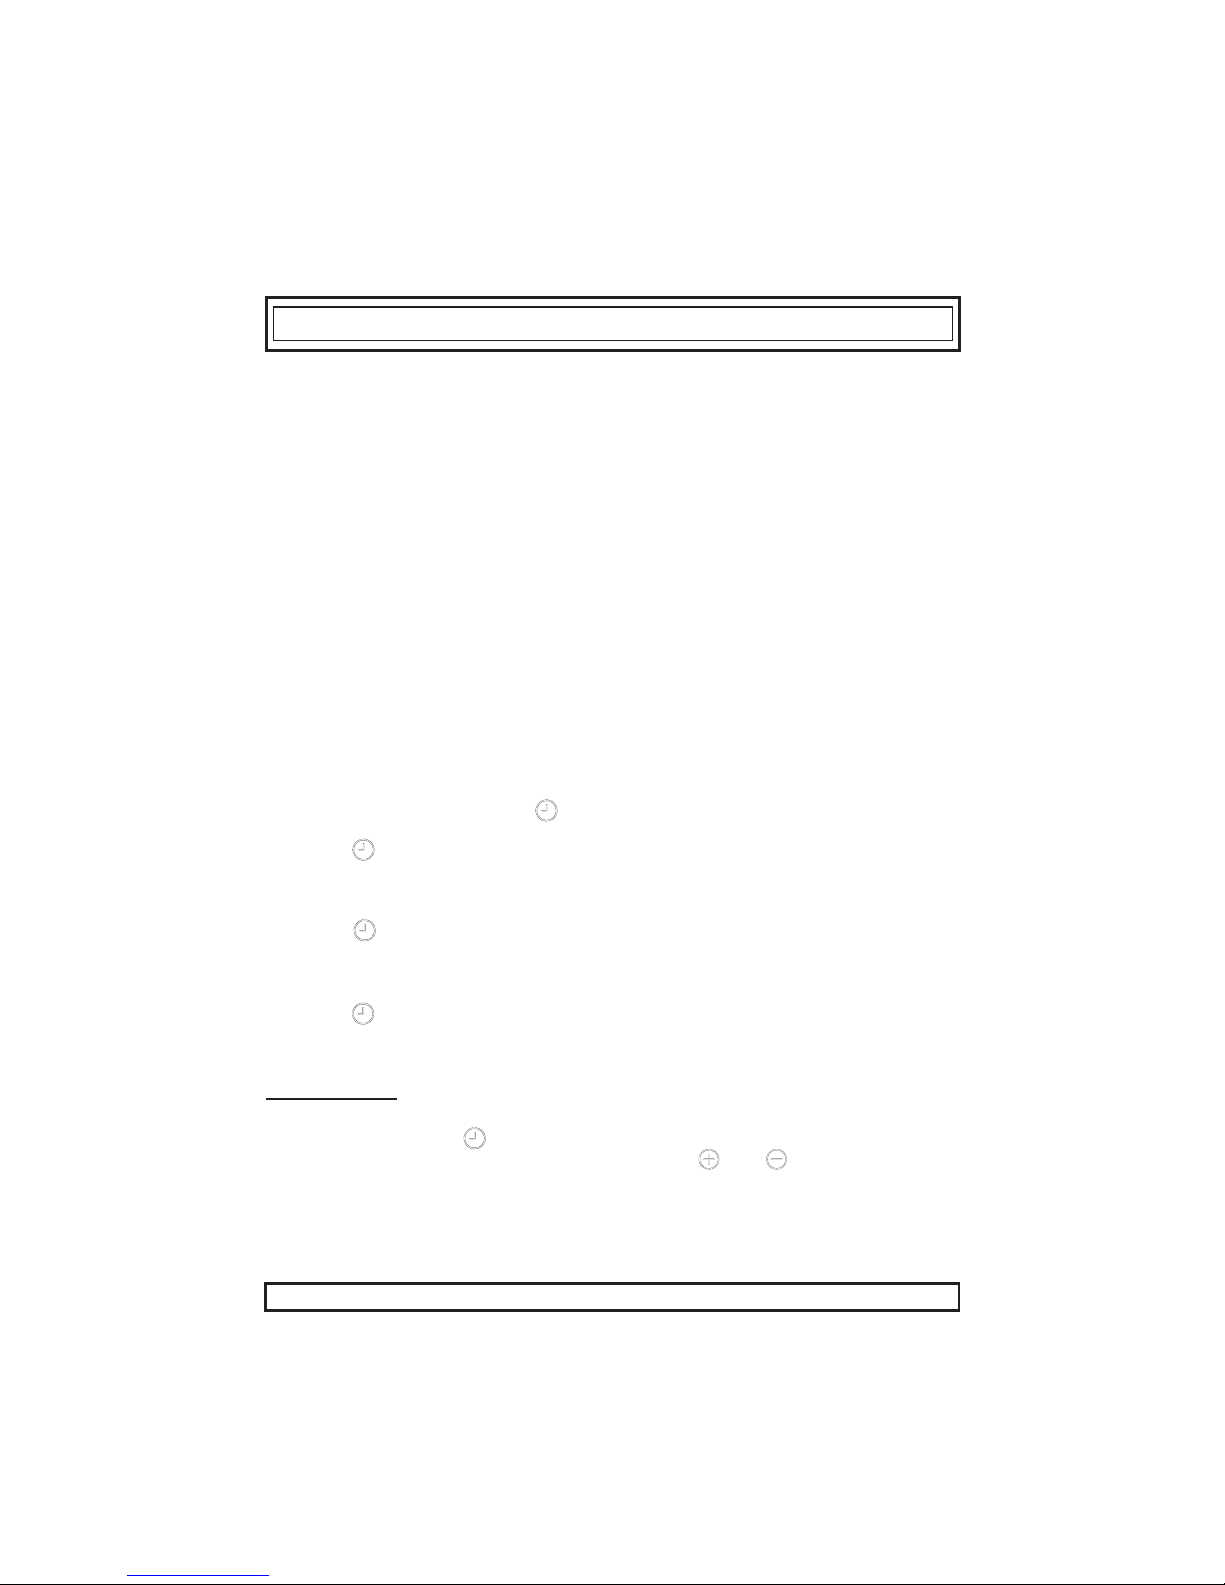
Timer Function (available only in some models)
The timer provides following features:
The control can run max. 4 heater assigned timers and 1 minute minder (which
is assigned to no heater) simultaneously.
All timers can be used only in B-Mode. A heater timer can only be assigned
to a active heater, running in levels between 1-9. The minute minder is
independent of any heater.
In order to use both functions, timer function must be activated by the
Active/Deactive Timer button .
Touching for the fist time after activating the heaters, the control proposes
the minute minder (no Cooking Zone Indicator is flashing, they are all on or
off).
Touching for the second time, the control proposes the assignment to one
of the activated heaters by flashing Cooking Zone Indicator. Now the timer
to the linked timer signalised.
Touching again, the next timer in the in the clockwise direction, is proposed
for assignment of the next active heater. And so on
Minute Minder
No matter whether a heater is activated or not, the minute minder can be
operated by touching . The appearing ´00` shows that timer is active and
the dot in the right Timer Display indicates that and are now linked for
setting the timer value.
The minute minder is selected when all Cooking Zone Indicators are statically
on or off (no Cooking Zone Indicator is flashing).
Page 16

15
With and , the timer value can be set.
After successful setting of the minute minder time, the timer starts to decrement
the time.
The minute minder will not be stopped by switching off the appliance or
activating the key lock function, it will proceed increasing the minutes until
run out indication.
After reaching the ´00` of the timer, buzzer indicates the run out of time.
To stop the buzzer you have to confirm the `run out` by touching any buton.
Heater timer
Heater timers can be set only for activated heaters (heater level must be set
between 1-9)
First touch of , the minute minder is activated. After touching for the
second time, the timer is assigned to the activated heater. The proposed
assignment is indicated by the related Cooking Zone Indicator, who is flashing.
Touching again after activating the fist heater timer, the control recommends
the next active heater assigned to the timer in the clockwise direction. The
assignment recommendation is indicated by the flashing Cooking Zone
Indicator.
Touching and , the timer value for the heater can be set.
The running timer of the first set heater timer is indicated by the statically
lighting Cooking Zone Indicator.
Touching once again further timers can be assigned to other activated
heaters.
10 sec after the last operation, the timer display changes to the timer that will
run out next.
The assignment of that timer is displayed always by a flashing Cooking Zone
Indicator. How many timer are running you can identify by the number of
Cooking Zone Indicator that are statically on.
By toggling , you can display the timer values for the heater timer and the
minute minder. The assignment is always indicated by the flashing Cooking
Zone Indicator. If no Cooking Zone Indicator flashes, the minute minder time
is shown in the 2-digit Timer Display.
Page 17

All heater timers can be erased by switching off the appliance into the S-Mode
using . A minute minder will not be erased, it will proceed operation until
run out.
To erase a timer in Operation Mode, you first have to select the timer by
toggling until it is displayed. The value can be erased then in 2 different
ways:
. Decrement by touching until ´00` appears on the Timer Display.
. Touch and simultaneously for 0,5 sec until ´00` is shown in
Timer Display.
After reaching the ´00` of a heater timer, the assigned heater level will be set
to ´0`.
The heater timer or minute minder run out is indicated acoustically by a buzzer
tone. This will be erased by touching any button for acknowledgement.
Key Lock
Key lock functionality is for blocking and set the appliance into a save modus
during operation. Touch modifications as for example rise heat settings and
others should not be possible. It is only possible to switch the appliance off.
The lock function is active, if Key Lock is pressed at least 2 sec. This
operation is acknowledged by a buzzer. After successful operation of more
than 2 sec, the Key Lock Indicator flashes and the heater is locked.
The heater can only be locked in Operating Mode.
If the heater is locked, only can be operated, all other sensors are blocked.
If there is any other sensor operated in the blocked mode, the buzzer signal
sounds and the Key Lock Indicator flashes as indication for the activated key
lock functionality. Only the switch off by operation of is possible. But if you
switched off the appliance, you can not restart it again without unlocking.
After pressing 2 sec, the Key Lock Indicator disappears. Now, the hob
control is unlocked and can be operated in normal order.
16
Page 18

Child Lock
Child lock functionality is foreseen to lock the appliance in a complicated
Multi-Step process.
Child locking and unlocking is only available in the S-Mode.
First has to be pressed until the buzzer beeps, then the and have
to be pressed for at least 0,5 sec, but max 1 sec. simultaneously. Following
´L` is showed as a confirmation.
In the case the minute minder is still running, it will proceed until ´00` is
appliance is fully locked. None of the buttons can be used as long as the
appliance is locked.
Page 19

pressing until the beep, then the and have to be pressed
a confirmation for successful unlocking, ´L` symbol in the displays will be
erased immediately.
Page 20

TOUCH CONTROL SAFETY FUNCTIONS
The following safety functions are available to avoid unintended operations
of the hob control.
Sensor Safety Cut Off
To prevent the appliance from unwanted, random sensor operation, a sensor
monitoring is included.
In case of one or more buttons are pressed longer than 12 sec, the sensor
monitoring routine indicates acoustically that wrong operation (pot or other
object placed on the button, sensor failure, etc.) and switches off the
appliance.
The safety turn off causes that the hob control is turned off to the S-Mode.
An ´F` will flash in all heater displays.
If residual heat is present, it will be displayed in all other heater displays.
the acoustic signal will disappear.
Over Temperature Switch Off
Due to the placement of the control is very close to the heater in the middle
front of the hob, it can occur that a not correctly placed pot half on the
control and not sensed by the sensor safety cut off (not covering a button)
heats up the hob to a very high temperature, which makes the glass and
the buttons untouchable without get burned the finger.
Page 21

To prevent the hob control unit from damage, the control monitors all the
time the temperature and switches off in case of overheating emergency.
It is indicated in the heater 4 heater display with the letter ´t` for all the time
until the temperature decreases.
After the temperature falling, the ´t` displays will be erased and the hob
control unit falls back into the S-Mode. This means that the user can
reactivate the appliance by touching .
Operating Time Limitations
The hob control unit has a limitation of the operating time. If the heat
setting for this heater has not been changed for a certain time, than the
heater will turn off automatically (for 10 sec a ´0` is displayed, afterwards
the residual
heat). The limit of the operating time depends of the selected heat setting.
If a timer was associated with the heater than a ´00` will be displays on the
timer display for 10 sec. Afterwards the timer display turns off.
After an automatic turn off of the heater, as described above, the heater is
operable again and the maximum operating time for this heat setting is
applied.
Page 22

18
Residual Heat Functions
After all cooking processes there is some heat stored in the vitroceramic glass
called residual heat. The control can calculate roughly how hot the glass is
in the worst case. If the calculated temperature is higher than + 60 ° C, then
this will be indicated in the corresponding heater display after the heater or
the hob control was turned off. The residual heat display is shown as long as
the calculated heater temperature is > + 60 ° C.
The display of the residual heat has the lowest priority and is overwritten by
every other display value, during safety turn offs and displaying an error code.
After reapplying the supply voltage to the hob control after an interruption of
the supply voltage occurred, causes that the residual heat display flashes, if
the corresponding heater had a residual heat of greater + 60 ° C before the
power interruption occurred. The display will flash until the max. residual heat
time has expired or the heater will be selected and activated.
Page 23

Before cleaning the hob, first remove the plug from the electrical supply socket.
Then ensure that there is no residual heat stored in the appliance. Vitroceramic
glass is very resistant to high temperature and overheating. If there is residual
heat stored in the appliance, ´H` is flashing in the Heater Display. In order to
avoid burns, let the appliance cool down.
Remove all split food and fat with a window scrape. Then wipe the hob with
a suitable washing up liquid and a clean damp cloth. Rub the appliance using
a clean dry cloth.
If aluminium foil or plastic items are accidentally melt on the hob surface, they
should be immediately removed from the hot cooking area with a scraper.
This will avoid any possible damage to the surface. This also applies to sugar
or food containing sugar may be spilled on the hob.
In the event of other food melt on the hob surface, remove the dirt when the
appliance has cooled down. Use cleaner for glass ceramic or stainless steel
when cleaning the surface.
Do not use dishcloth or abrasive sponge to clean the vitroceramic surface.
These materials may damage the surface.
Do not use chemical detergents, sprays or spot removers on the vitroceramic
surface. These materials may cause fire or vitroceramic color fade. Clean
with water and washing up liquid.
CLEANING AND CARE
Cookware with rough bottoms should not be used since these can scratch
the glass ceramic surface. The bottom of the good cookwares should be as
thick and flat as possible. Before use, make sure that cookware bottoms are
clean and dry.
Always place the cookware on the cooking zone before it is switched on. If
possible, always place the lids on the cookware. Bottom of cookwares must
not be smaller or larger than the cooking zones, they should be at the proper
size as indicated below, not to waste energy.
19
CORRECT FALSE FALSE FALSE
Page 24

The symbol on the product or on its packaging indicates that
this product may not be treated as household waste. Instead it shall
be handed over to the applicable collection point for the recycling
of electrical and electronic equipment. By ensuring this product is
disposed of correctly, you will help prevent potential negative
consequences for the environment and human health, which could
otherwise be caused by inappropriate waste handling of this
product. For more detailed information about recycling of this
product, please contact your local city office, your household
waste disposal service or the shop where you purchased the
product.
Page 25

FXVT 60
Page 26

Page 27

Page 28

2. УКАЗАНИЯ ЗА БЕЗОПАСНОСТ
4
ПРОЧЕТЕТЕ ТЕЗИ ИНСТРУКЦИИ ВНИМАТЕЛНО И ДОКРАЙ, ПРЕДИ ДА ЗАПОЧНЕТЕ ДА
ИЗПОЛЗВАТЕ ВАШИЯ УРЕД И ГИ ДРЪЖТЕ НА УДОБНО МЯСТО ЗА БЪДЕЩИ СПРАВКИ, АКО Е
НЕОБХОДИМО.
ТОВА РЪКОВОДСТВО Е ИЗГОТВЕНО И ЗА ДРУГИ УРЕДИ С БЛИЗКИ ХАРАКТЕРИСТИКИ.
УРЕДЪТ ВИ МОЖЕ ДА НЯМА НЯКОИ ОТ ОПИСАНИТЕ ТУК ХАРАКТЕРИСТИКИ. ПРИ
ЧЕТЕНЕТО МУ, ОБЪРНЕТЕ ВНИМАНИЕ НА ТЕКСТА, КЪМ КОЙТО СА ПРИЛОЖЕНИ ФИГУРИ.
Общи указания за безопасност:
-Този уред може да се използва от деца,
навършили 8-годишна възраст и лица с ограничени
физически, сетивни и умствени способности или
липса на опит и познания, ако се надзирават или
са били инструктирани относно използването на
уреда по безопасен начин и осъзнават
опасностите. Децата не трябва да си играят с
уреда. Децата не трябва да почистват и обслужват
уреда без надзор.
-ПРЕДУПРЕЖДЕНИЕ: Уредът и частите му се
нагряват по време на използване. Внимавайте да
не докосвате горещите части. Децата,
ненавършили 8-годишна възраст, трябва да се
държат далеч от уреда и постоянно да се
наблюдават.
-ПРЕДУПРЕЖДЕНИЕ: Невнимателното готвене на
котлона с мазнина или масло може да бъде опасно
и а доведе до възникване на пожар. НИКОГА не се
опитвайте да газите огъня с вода, изключете уреда
и след топа покрийте пламъка с капак или одеало.
-ПРЕДУПРЕЖДЕНИЕ: Опасност от пожар: не
съхранявайте предмети върху печката.
-ПРЕДУПРЕЖДЕНИЕ: Ако повърхността е
напукана, изключете уреда, за да избегнете токов
удар.
Page 29

5
-Ако печката е с капак, отстранете всичко от него,
преди да го отворите. Оставете печката да изстине,
преди да затворите капака.
-Уредът не е предназначен за употреба с външни
таймери или отделна система с дистанционно
управление.
-Не използвайте агресивни абразивни средства за
почистване или остри метални стъргалки за
почистване на стъклената врата на фурната и
другите повърхности, тъй като те могат да
надраскат повърхността, което да доведе до
напукване на стъклото и повреждане на
повърхностите.
-Не използвайте уреди за почистване с пара за
почистване на уреда.
-Уредът ви е произведен в съответствие с всички приложими местни и международни стандарти и
регламенти.
-Дейностите по поддръжка и ремонт трябва да се извършват само от квалифицирани сервизни
техници. Дейностите по монтажа и ремонта, извършени от неквалифицирани лица, могат да
застрашат живота и здравето ви. Опасно е да променяте или модифицирате спецификациите на
уреда по какъвто и да е начин.
-Преди инсталацията проверете дали условията за поставяне на уреда (вид на газта и налягане
или електрическото напрежение и честота) и неговото регулиране са подходящи. Условията за
регулиране на уреда са посочени на етикета.
-ВНИМАНИЕ: Този уред е предназначен само и единствено за приготвяне на храна, както и за
вътрешна домашна употреба и не трябва да се използва за никакви други цели, като недомашна
употреба или в търговската сфера, или за отопление на стая.
-Взети са всички мерки за сигурност с цел гарантиране на вашата безопасност. Тъй като стъклото
може да се счупи, трябва да внимавате да не надраскате стъклото, докато го почиствате.
Внимавайте да не удряте или чукате стъклото с аксесоарите.
-Уверете се, че захранващият кабел не е приклещен. Ако захранващият кабел е повреден,
същият трябва да се смени от производителя, неговият сервизен специалист или друго
квалифицирано лице с цел предотвратяване на опасности.
Указания за монтаж
-Не използвайте уреда до приключване на пълния монтаж.
-Уредът трябва да се монтира и пусне в експлоатация от оторизиран квалифициран техник.
Производителят не е отговорен за повреди, които са следствие от неправилно поставяне и
монтаж от неоторизирани лица.
-При разопаковането на уреда се уверете, че същият не е повреден по време на транспортиране.
Ако откриете такива, не използвайте уреда, а веднага се свържете с оторизиран сервиз по
поддръжка. Тъй като материалите, използвани за опаковката (найлон, подшиващи телчета,
твърда пяна) могат да причинят нараняване на децата, те трябва да се отстранят незабавно.
Page 30

6
-Пазете уреда от атмосферни въздействия. Не го оставяйте под пряко въздействие на слънце,
дъжд, сняг, прах и др.
-Околните материали на уреда (кабинет) трябва да издържат на температура от минимум
100°C.
-Температурата на дъното на плочата може да се повиши по време на работа. За това, под
продукта трябва да се постави преграда.
По време на работа
-Не поставяйте леснозапалими или горими материали в или близо до уреда, докато същият
работи.
-Не се отдалечавайте от печката, ако готвите с твърди или течни мазнини. Те могат да
предизвикат пожар. Никога не изливайте вода върху пламъци, причинени от мазнина. Покрийте
съда или тигана с капак, за да потушите пламъците, които може да възникнат в този случай и
веднага изключете печката.
-Винаги поставяйте тиганите върху централната зона за готвене и завъртете дръжките в
безопасна позиция, така че да не могат да се свалят или сграбчат.
-Изключете уреда от мрежата в случай, че няма да го ползвате за дълъг период от време.
Оставете изключен главния прекъсвач. Също така, когато не използвате уреда, затваряйте
вентила на газта.
-Уверете се, че бутоните на уреда винаги са в позиция "0" (стоп), когато същият не работи.
По време на почистване и поддръжка
-Винаги изключвайте уреда преди почистване или техническо обслужване. Можете да го
направите след като изключите уреда от контакта или главните превключватели.
-Не сваляйте копчетата при почистване на контролния панел.
ЗА ЕФЕКТИВНОСТ ПРЕПОРЪЧВАМЕ ВИНАГИ ДА ИЗПОЛЗВАТЕ ОРИГИНАЛНИ РЕЗЕРВНИ
ЧАСТИ, А В СЛУЧАЙ, ЧЕ СЕ НУЖДАЕТЕ ОТ ТЯХ, СВЪРЗВАЙТЕ СЕ САМО С НАШИТЕ
УПЪЛНОМОЩЕНИ СЕРВИЗИ
Page 31

Page 32

520mm
590mm
42mm
560mm
490mm
Min.
60mm
Min.
150mm
Min.
130mm
Min.
25mm
Page 33

Page 34

Page 35

Page 36

Page 37

Page 38

Page 39

Page 40

34
Page 41

Page 42

Page 43

Page 44

Page 45

Page 46

Page 47

Page 48

Марка
Модел
Тип на котлона Електричество
Брой на зоните за готвене 4
Нагревателна технология - 1 Лъчист
Размер -1
cm
Ø14,5
Енергоконсумация - 1
Wh/kg
192,0
Нагревателна технология - 2 Лъчист
Размер -2
cm
Ø14,5
Енергоконсумация - 2
Wh/kg
192,0
Нагревателна технология - 3 Лъчист
Размер -3
cm
Ø18,0
Енергоконсумация - 3
Wh/kg
192,0
Нагревателна технология - 4 Лъчист
Размер - 4
cm
Ø18,0
Енергоконсумация - 4
Wh/kg
192,0
Енергоконсумация на котлона
Wh/kg
192,0
Котлонът съответства на EN 60350-2
Съвети за спе стяване на ене ргия
Котлон
- Използвайте д омакински съдове с плоска основа.
- Използвайте д омакински съдове с подходящ размер.
- Използвайте д омакински съдове с капак.
- Минимизирайте количеството на течноститите или мазнините.
- При завиране на течността намалете нас тройката.
FXVT 60
 Loading...