

Page 1
Hydro Tracker™
GPS Device Instructions
Page 2
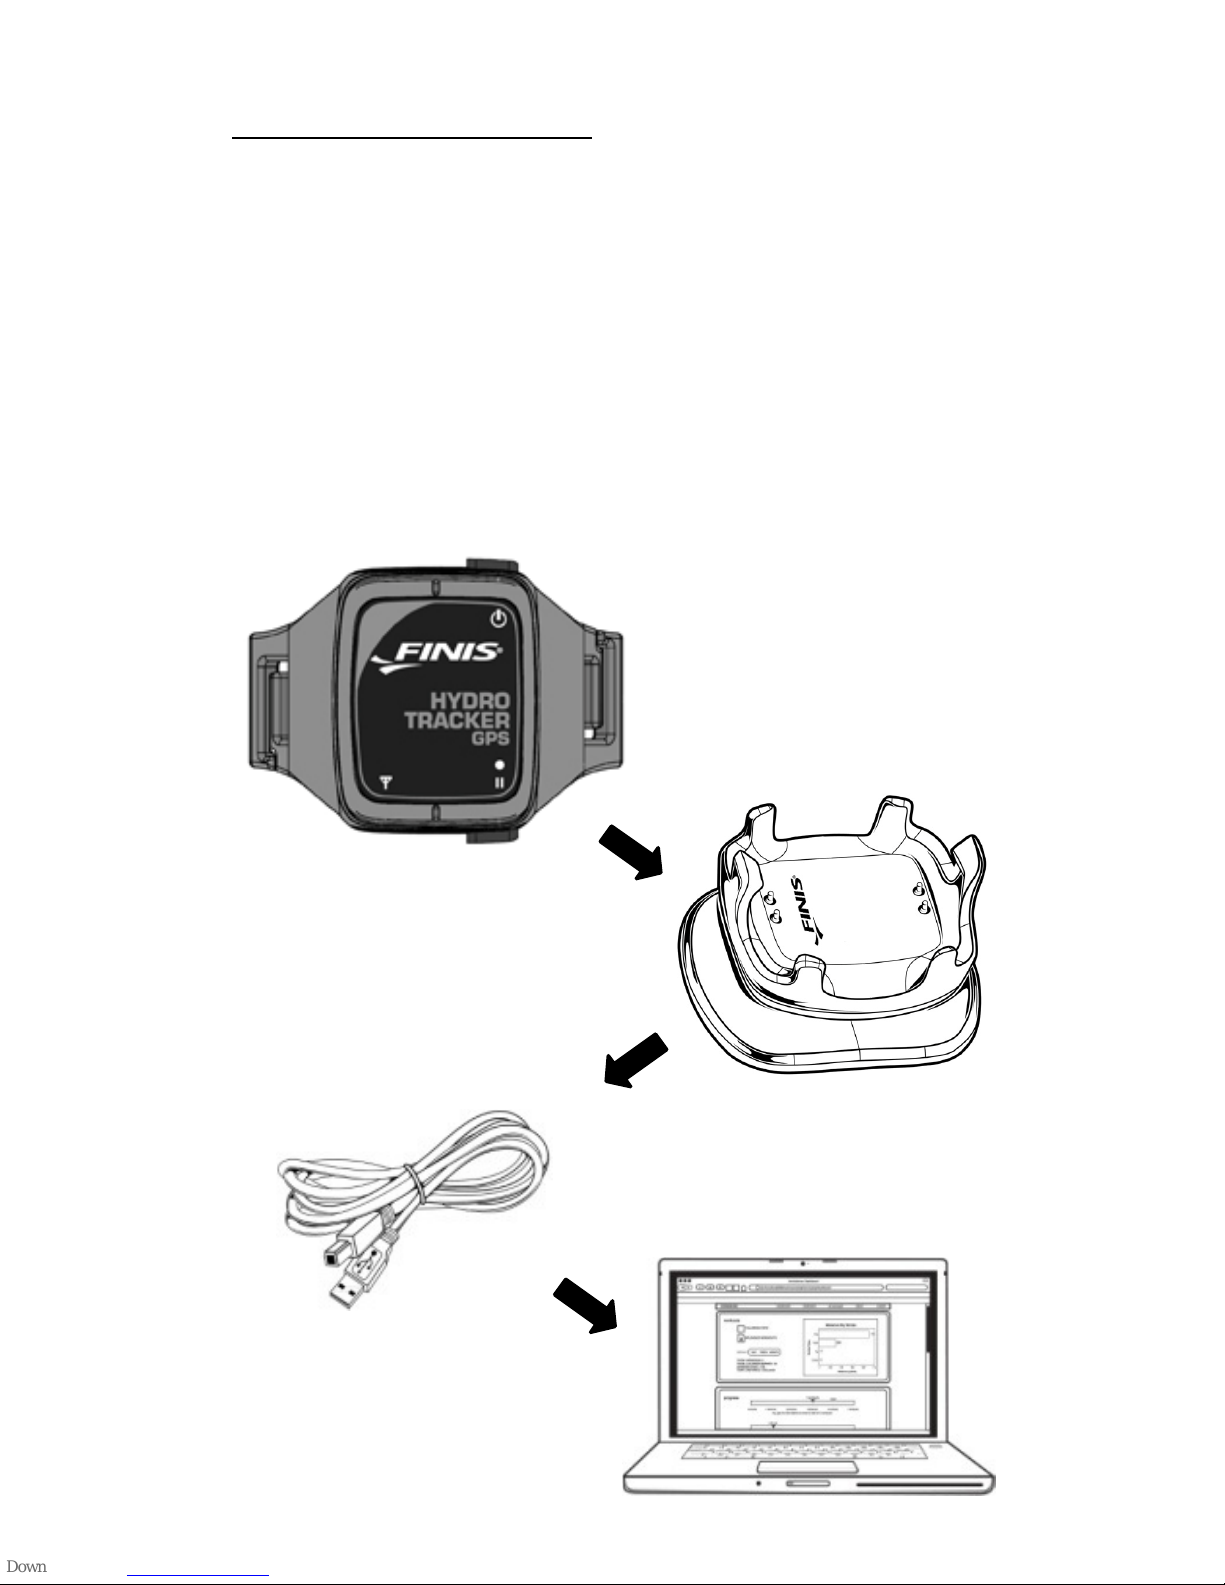
What is Included?
Hydro Tracker™ GPS Unit
Docking Station & Cord
Armband
Instruction Booklet
2
Page 3

Setup your Hydro Tracker™ & Free
Streamline Training Log Account
Charge Up
Before using the Hydro Tracker™, you will need
to charge the device for at least 2 hours.
1) Make sure your device is powered OFF and
no lights are flashing.
2) Fit your Hydro Tracker™ in the docking
station provided. Match up the FINIS®
logos so that the docking cable protrudes
from the bottom of the device.
3) Connect the docking cable to your
computer's USB port.
4) Your Hydro Tracker™ will begin charging.
The device will flash while it charges.
Register for a FINIS Account
1) While your Hydro Tracker is connected and
charging, launch your web browser and go
to: FINISinc.com/streamline
2) From there you can learn more about the
Streamline Training Log and get started by
creating a free user account & password.
3) Once you are logged in, navigate back to
the main Training Log page and download
the Streamline Bridge software (see next
page) for your MAC or PC.
3
Page 4
Download & Install the Streamline Bridge
The Streamline Bridge is a piece of software
that runs on your computer to transfer your
workout files from the device to the Streamline
Training Log.
1) Go to FINISinc.com/streamline and on the
main page you will see a download icon:
2) Click on the download icon to start the
install.
a. A small .exe file will download to your
computer.
b. Once fully downloaded, double-click
this .exe file and select “RUN” to start
the install process.
c. Click “Continue” to select the default
installation location
Note: The Streamline Bridge software is both
PC and MAC compatible.
4
Page 5

Introduction to the Streamline Bridge
1) After installing the Streamline Bridge
software, open and run the application:
From your desktop or program list,
double-click the small swimmer icon
to launch the Bridge.
2) The Streamline Bridge window will load
and you will be prompted to enter your
user name (email) and password.
3) Make sure that you have a live internet
connection, and the Hydro Tracker™ is
correctly plugged into your computer’s
USB port.
4) Enter your user name (email) and
password you created during the FINIS
online registration and click LOGIN.
5) As you record workouts on your Hydro
Tracker™ device, they will appear in the
main table, showing the time, distance,
and speed of the workout.
6) From the Bridge home screen you can:
Clear all the workouts on the device
Upload any new workouts (see pg. 13)
Click the DEVICE SETTINGS link to
view the battery level and change the
sampling rate of the device
Understand the remaining capacity
on the device
Link directly to your online workouts
Toggle between metric and imperial
measurements
5
Page 6

Adjust the Sampling Rate
1) Using the Streamline Bridge software,
click on the DEVICE SETTINGS link from
the home screen
2) You will be taken to a new screen with an
input to change the sampling rate.
3) Suggested rates are provided below:
Activity
Suggested Rate
(seconds)
Swim
4
Walk
3
Run
2
Bike
1
Ski
1
4) Enter a new value in the box and hit the
CHANGE button.
5) Your Hydro Tracker will be updated
automatically with the new sampling rate.
Battery Level Indicator & Device ID
Using the Streamline Bridge, under the DEVICE
SETTINGS you can see the battery level and
specific ID number for your Hydro Tracker™.
6
Page 7
Using your Hydro Tracker™
Once you have charged and setup your Hydro
Tracker™, un-dock the device and it will
automatically turn ON.
Navigation
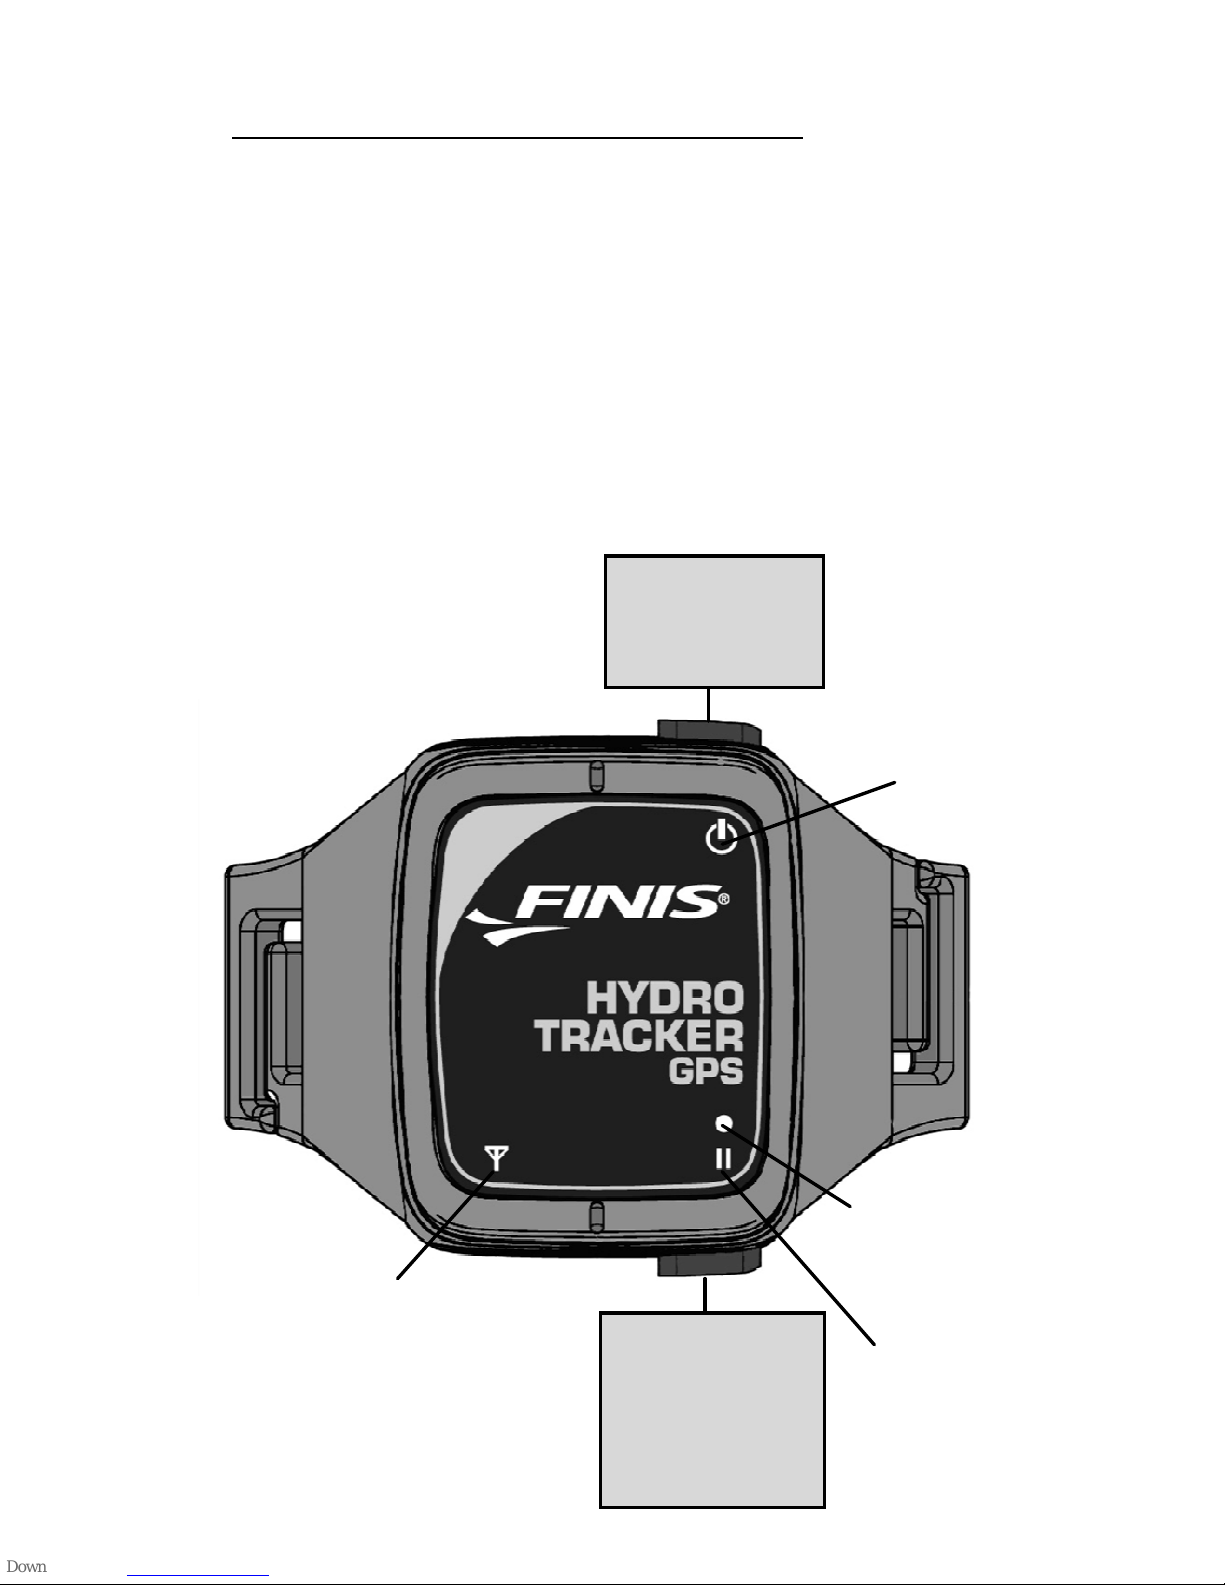
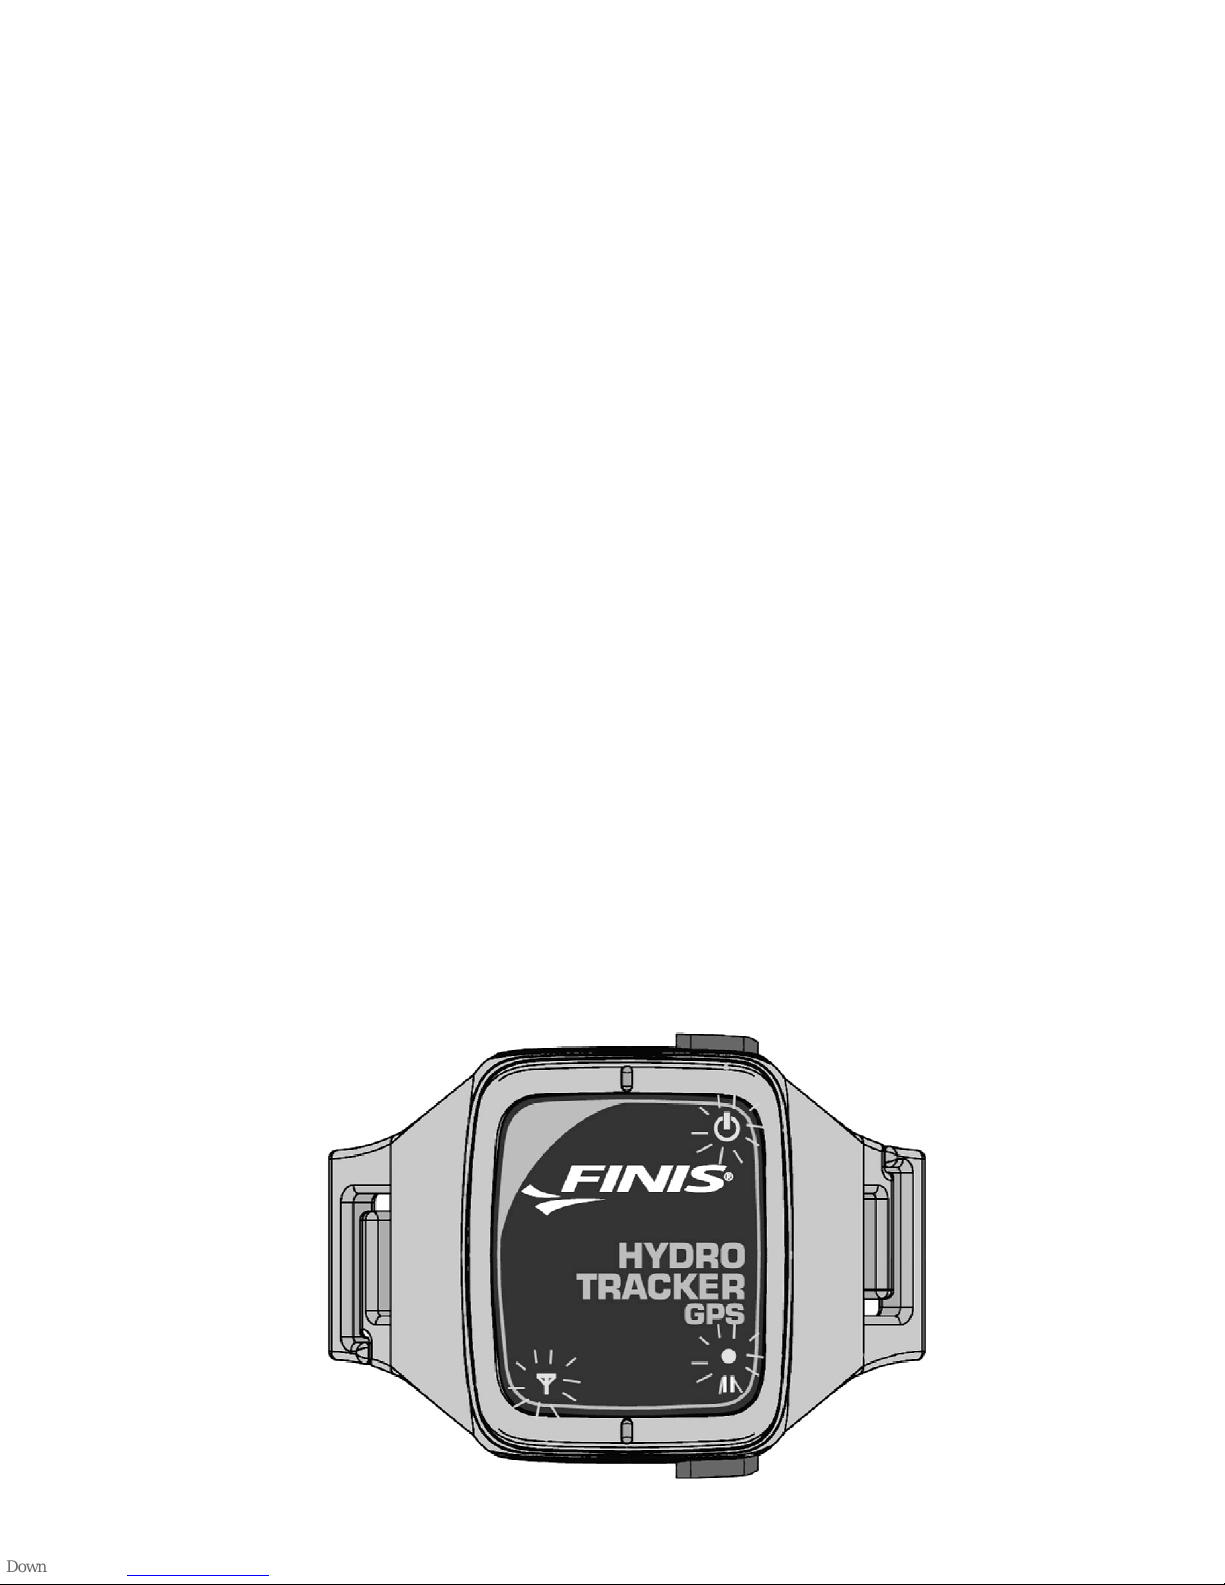
The Hydro Tracker™ uses a simple design that
consists of 2 buttons and 4 light indicator icons:
POWER
Button
PAUSE
/
RECORD
Button
POWER
Icon
RECORD
Icon
PAUSE
Icon
SIGNAL
Icon
7
Page 8

Power ON/OFF
To turn the Hydro Tracker™ ON:
1) Press and hold the [POWER] button for 3
seconds and then release.
2) The LED’s will start to flash every 3
seconds.
To turn the Hydro Tracker OFF:
1) Press and hold the [POWER] button for 5
seconds and then release.
2) The LED’s will stop flashing.
3) Watch the device for 3-5 seconds to make
sure the flashing has stopped.
Tip: To conserve battery power, power your
device OFF while it is not being used.
8
Page 9
Record a Workout
When the Hydro Tracker™ is turned ON, it is
automatically placed in PAUSE mode, and it will
start searching for a satellite signal.
1) Before recording a workout, make sure
that the Hydro Tracker™ has acquired the
GPS satellite signal. Note it may take
several minutes to acquire the signal,
especially the first time you use the
device. You will know when a signal is
achieved as the satellite LED will change
color from red to green.
2) Once you have acquired a green satellite
signal, press and hold the
[PAUSE/RECORD] button for 2 seconds
and then release.
3) The LED indicator will switch from
PAUSED to RECORDING. The workout is
now live so you better get moving!
POWER
- on
RECORD - on
SIGNAL
- green
9
Page 10

Pausing and Saving a Workout
As soon as you start recording, the Hydro
Tracker™ is constantly saving your workout
data.
To pause and create a new workout file:
1) Press and hold the [PAUSE/RECORD]
button for 2 seconds.
2) The LED indicator will switch from
RECORDING to PAUSED.
3) Your workout is automatically saved.
4) Press and hold the [PAUSE/RECORD]
button again for 2 seconds to start
recording a new workout.
Note: Pausing creates a whole new workout file.
You cannot resume or add to a previous workout
file once you pause because the final data
metrics would be skewed.
When you have completed your workout:
1) Stop recording and pause the device
by pressing and holding the
[PAUSE/RECORD] button for 2 secs.
2) Your workout is automatically saved.
3) Turn OFF the device by pressing the
[POWER] button for 5 seconds.
4) The next time you turn the device ON,
a new workout file will be created.
10
Page 11
Wearing the Device for Swimming
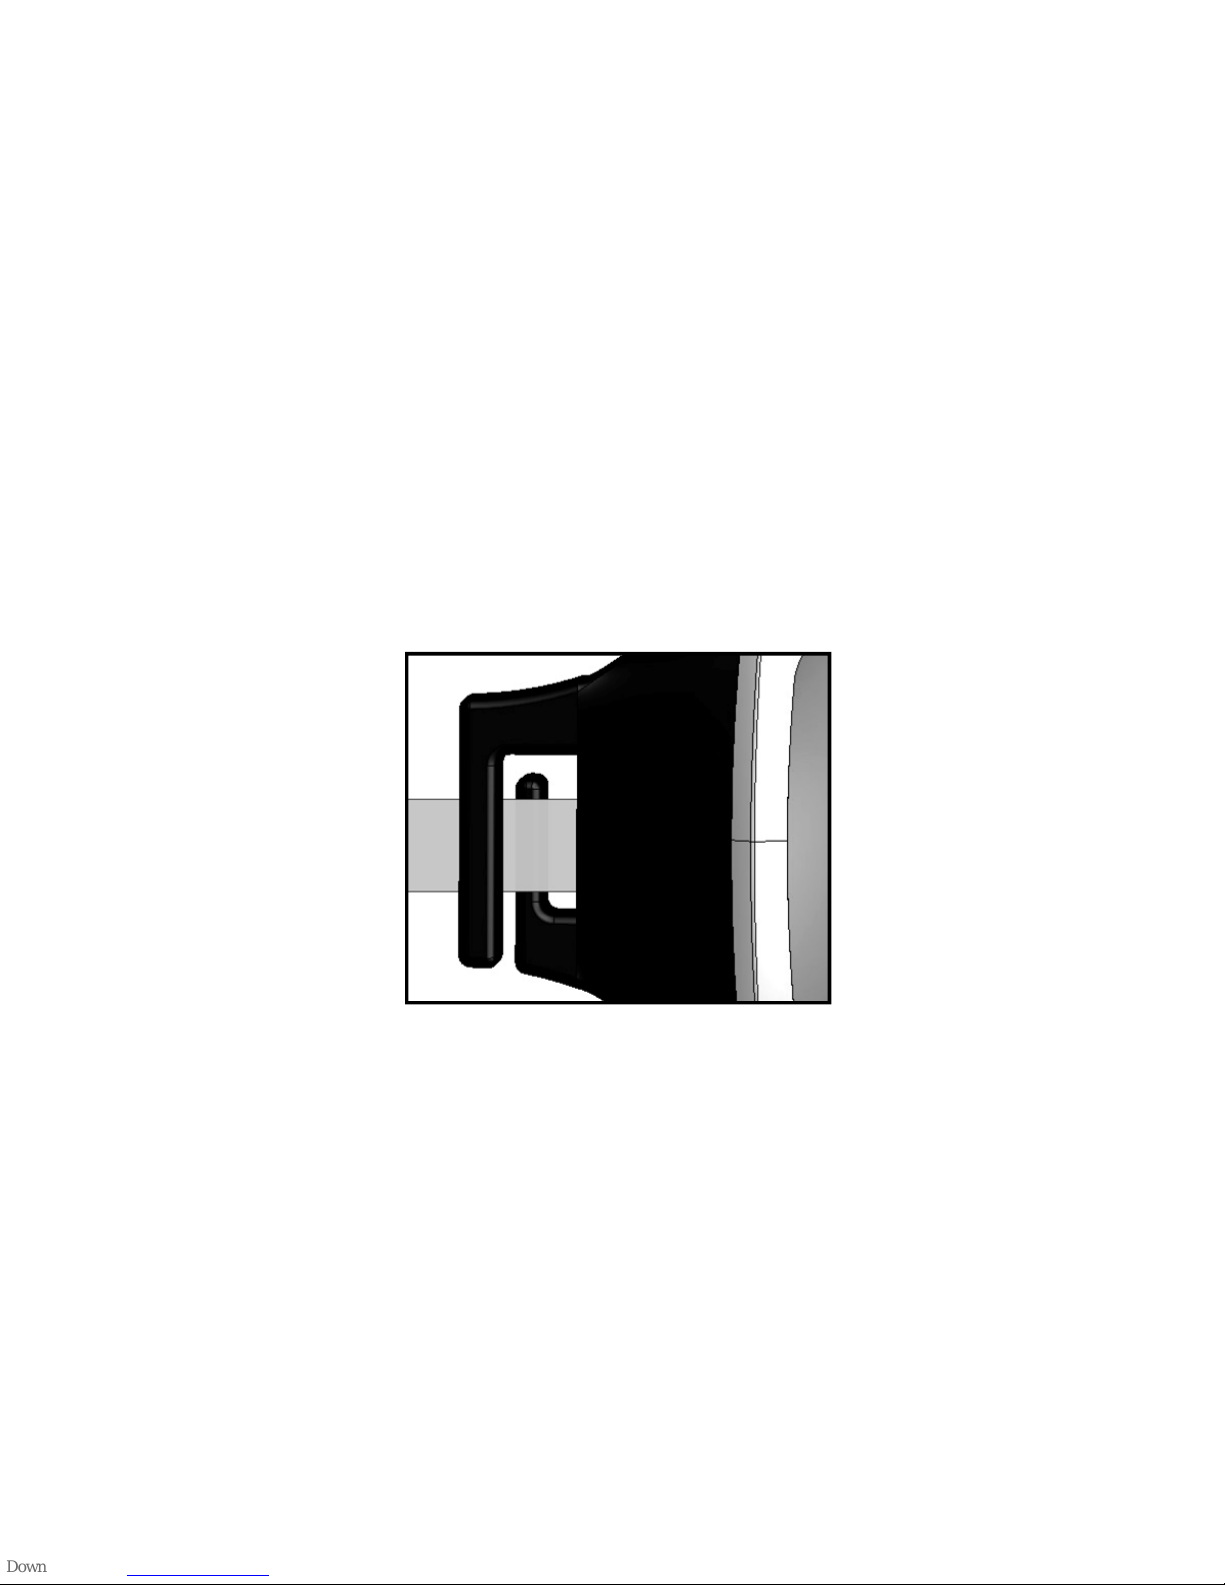
The Hydro Tracker™ has unique clips that
attach the device to the back of the head while
swimming in open water.
1) You do not need to remove the strap from
your goggles. Instead you can simply
thread the side of the goggle strap through
the opening slot of each clip.
2) Thread the goggle strap through one clip
at a time. Be sure to push the strap around
the bend so it notches securely.
3) Put on your goggles like normal and
position the Hydro Tracker™ so it rests
comfortably on the back of the head.
4) When you have achieved a green satellite
signal, press the [PAUSE/RECORD] button
and start swimming!
Note: The armband should NOT be used when
swimming. The optimal GPS signal is acquired
from the back of the head while swimming.
11
Page 12
Wearing the Device with the Armband
A comfortable neoprene armband is included.
The Hydro Tracker can be attached to the
armband for non-swimming activities such as
running, biking, kayaking, and skiing.
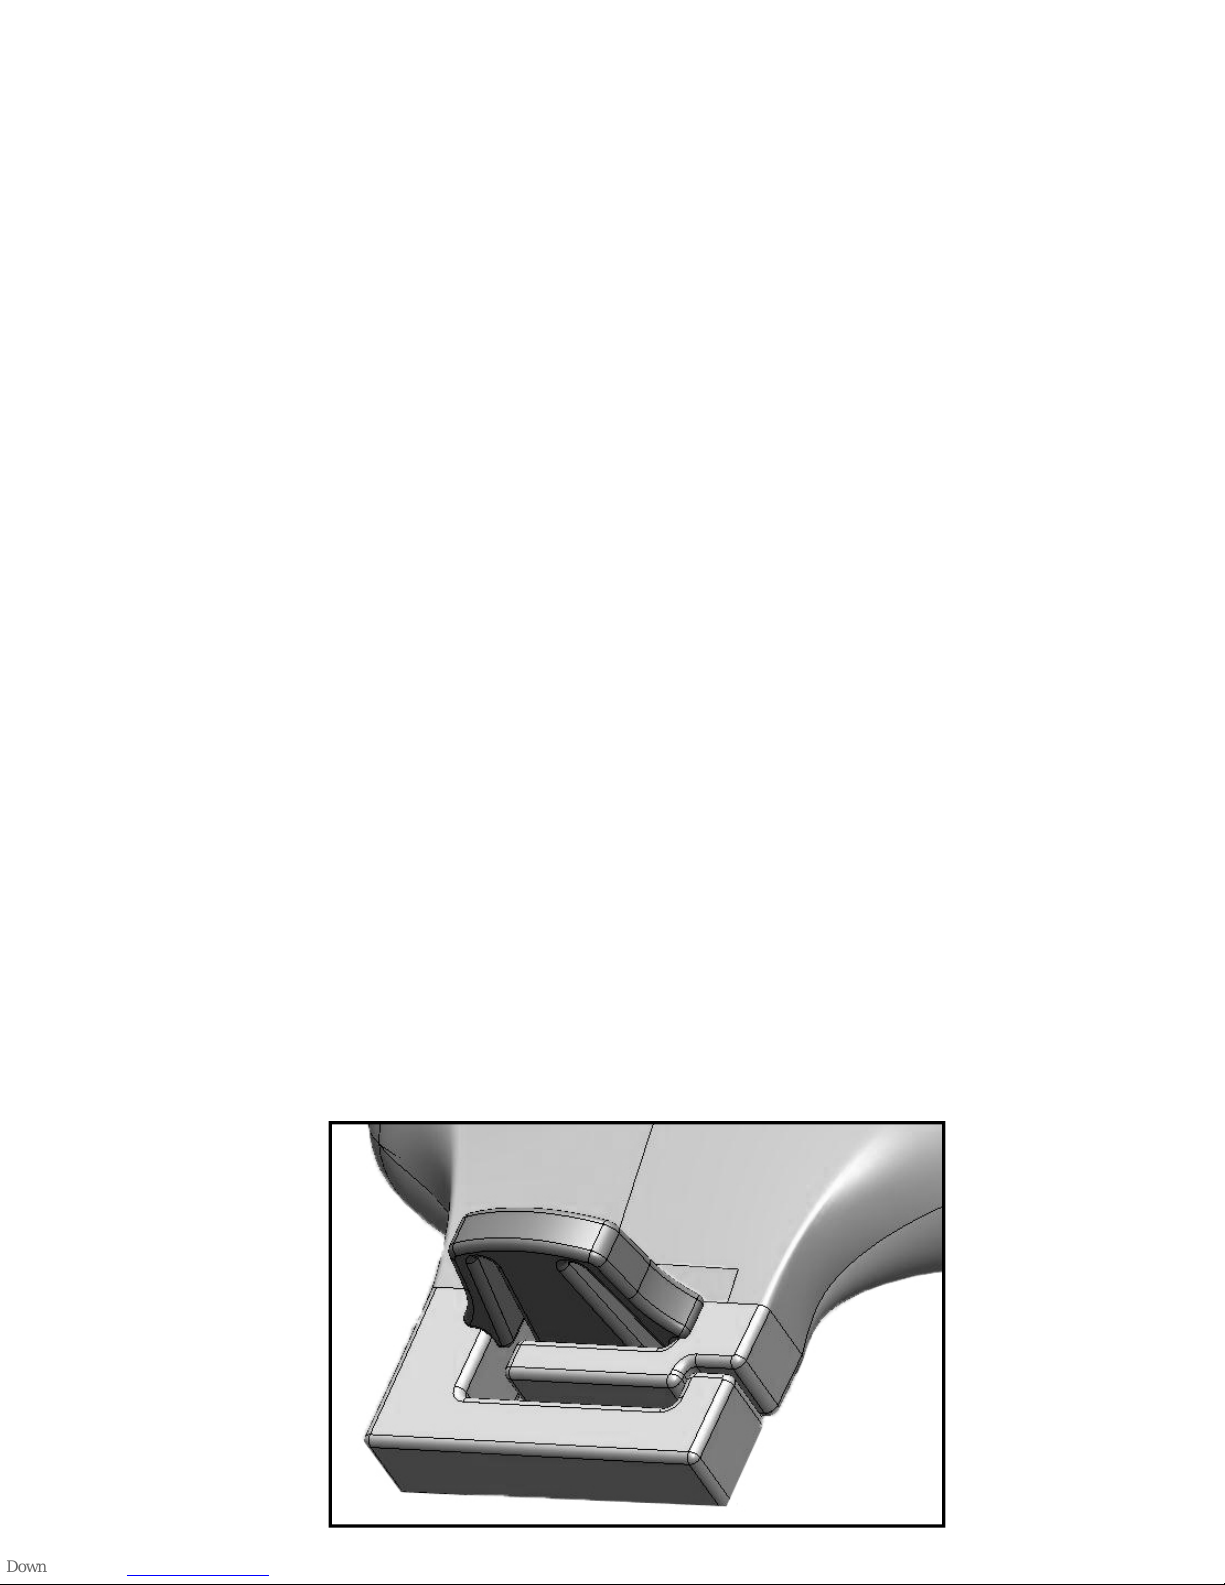
1) Locate the small plastic security clips that
protrude from the armband.
2) Slide the side clips of the Hydro Tracker™
onto these security clips. Go one clip at a
time and be sure to push the Hydro
Tracker™ down on each clip so it snaps
securely into place.
3) With the Hydro Tracker™ secured to the
armband, use the Velcro to secure the
armband on your upper arm.
4) Fasten above the elbow and make sure the
Hydro Tracker™ is facing up and out.
5) When you have achieved a green satellite
signal, press the [PAUSE/RECORD] button
for 2 seconds and then go!
6) To remove, pinch the sides of the security
clip and slide the device up and off.
12
Page 13

Uploading your Workouts
Launch the Streamline Bridge
1) After installing the Streamline Bridge
software (see pages 3 & 4 for installation
instructions), open and run the
application:
From your desktop or program list,
double-click the small swimmer icon
to launch the Bridge.
2) The Streamline Bridge window will load
and you will be prompted to enter your
user name (email) and password.
3) Make sure that you have a live internet
connection, and the Hydro Tracker™ is
correctly plugged into your computer’s
USB port.
4) Enter your user name (email) and
password you created during the FINIS
online registration and click LOGIN.
5) Once authenticated and connected, a list of
your completed workouts will appear.
These are now ready for upload.
6) Click the UPLOAD button. A notification
will appear to let you know that the
workouts were uploaded successfully.
7) To view the details of your workouts, click
the ONLINE WORKOUTS link to be taken
directly to the Streamline Training log.
13
Page 14

View Workouts on the Streamline Training Log
Once you have uploaded workouts through the
Streamline Bridge, they will automatically
appear on the online Streamline Training Log
account you created.
1) Launch your web browser and go to:
FINISinc.com/streamline
2) Click the GET STARTED button and you
will be prompted to login.
3) Once you are already logged in, you will be
taken directly to your dashboard overview.
4) From the dashboard you can view your
past 7 workouts, cumulative statistics, and
progress goals.
5) Click on a particular workout to view
further details:
See a map of your workout route on
Google Maps™
View distance, elevation, splits,
speed, and accumulated time
Export your workout as a CSV, Google
Earth™, or Garmin TCX file format
Share your workout with others via a
public link, Twitter or Facebook
Watch an animated view of your
workout
Tip: To toggle between metric and
imperial distances, click the road icon
in the top-right corner of your
dashboard view.
14
Page 15
Additional Features of the GPS Training Log
1) Click on the CALENDAR link to see your
workouts laid out on a calendar view.
2) View STATISTICS to see workout time and
distances that you have accumulated over
the past days, weeks, and months.
3) Find a particular type of workout that you
have completed with ADVANCED SEARCH
4) Set GOALS to motivate you in your training:
Number of Workouts
Distance Achieved
Time Spent
Average Pace
Updates: We are constantly improving the
Streamline Training Log and Bridge software
with enhancements. Stay up to date about new
features and products through our company
blog: FINISinc.com/blog
15
Page 16

Support
Web: Go to FINISinc.com/support for
FAQ’s, walkthroughs, videos, or to log a
support ticket
Toll Free: 888-333-4647
Safety and Care
Rinse the Hydro Tracker™ in fresh water
after use. Wipe the front and back dry and
store indoors in a dry environment.
Make sure the docking station and the
back of the Hydro Tracker™ is clean before
connecting. Remove any excess debris.
The Hydro Tracker™ is water resistant and
can be used safely in swimming pools,
lakes, oceans, or any fresh or salt water.
All users of this product assume risk
resulting from its use. Whether proximate
or remote, there may be a risk of injury.
Neither manufacturer nor seller of this
product assumes any liability.
©2012 FINIS, inc. All rights reserved
16
 Loading...