

Page 1

New Windsor, NY 12553
info@nextures.com
www.nextures.com
Installation Instructions
206 wembly Road.
Phone: 7 18.602.60 60
Fax: 7 18.963.20 82
F O R A LIFE O F S TYLE
TM
Page 2
New Windsor, NY 12553
Fireclay Farmhouse Sink
Installation Instructions
I. Welcome
Hello and welcome to the Fine Fixtures family. You have chosen one of our impeccable Fireclay sinks, and we’re
excited to get you started on installing it.
READ ALL INSTRUCTIONS BEFORE UNPACKING THE PRODUCT
206 wembly Road.
Phone: 7 18.602.60 60
Fax: 7 18.963.20 82
info@nextures.com
www.nextures.com
Before jumping in, we encourage you to take the time and read these instructions in their entirety. Please also be sure to observe all local
plumbing and building codes, and remember that you are installing your sink at your own risk. Fine Fixtures cannot assume any responsibility for
damages or personal injury that occur during installation.
II. Preparation
1. Remove packaging materials and inspect sink for shipping-related damages.
2. Check to ensure that none of the pieces required for installation are missing.
3. Do not install if damages are found. Contact Customer Service asap at 718-602-6060 or at www.finefixtures.com/contact
4. To avoid personal injury and surface damage, use assistance when lifting sink.
5. If you are not familiar with installation and plumbing, consult a professional.
Please Note!
Take pride in the knowledge that your beautiful Fireclay sink is an exquisite, handmade product. With that said, slight variances in
dimension are natural. Farmhouse sinks may also require custom cabinetry, and we recommend that you consult an experienced
cabinetmaker to achieve a perfect fit.
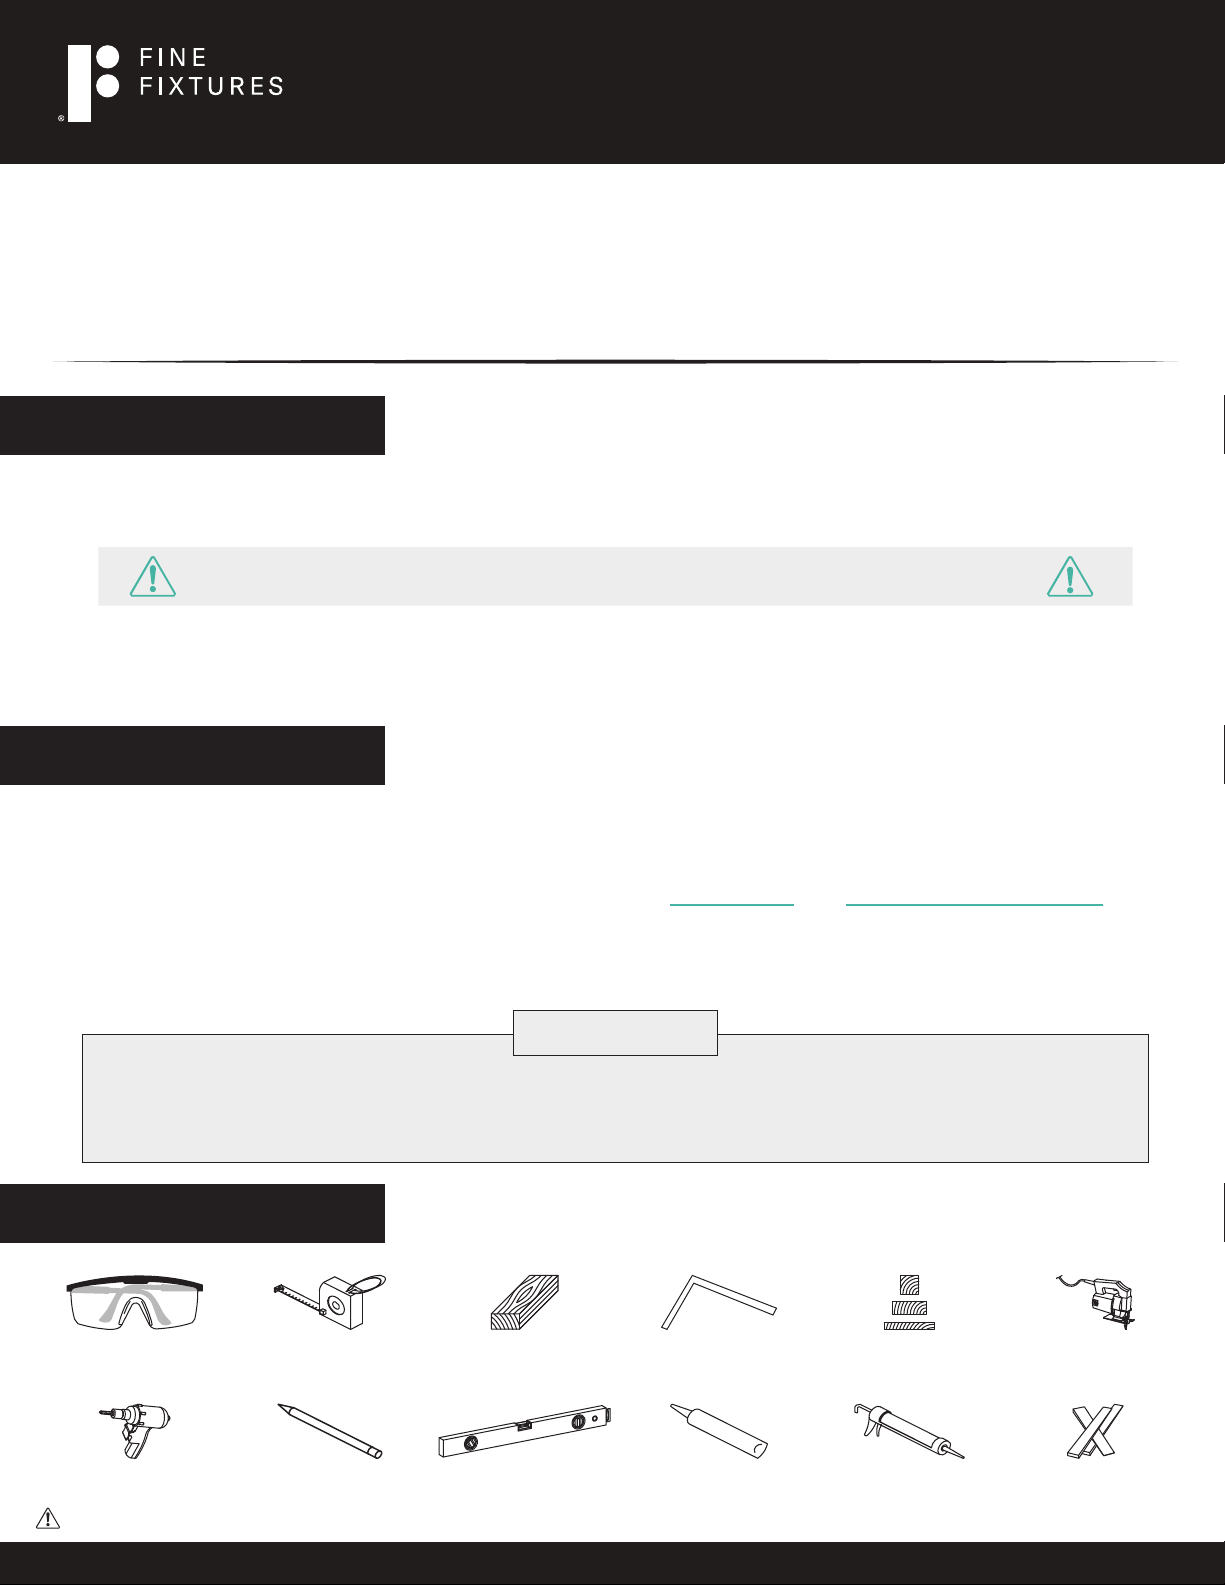
III. Things You’ll Need:
2. Tape Measure1. Safety Glasses
7. Drill 8. Pencil
Please Note! For best results, we recommend that you use a stone, marble and granite silicone caulk, or a general-purpose silicone sealant.
3. Wood Braces 4. Framing Square
9. Level
5. Support Frames 6. Hacksaw
10. Silicone 11. Silicone/Caulk Gun
F O R A LIFE O F S TYLE
12. Shims, if necessary
TM
Page 3

IV. Installation Options
Fine Fixtures recommends Under-Counter sink installation. While flush-mount or built-up installation is possible, we don’t recommend it.
With all installations, be sure to allow adequate space for faucet and backsplash installations.
Under Counter/Solid Surface Installatio: As mentioned, Farmhouse sinks may require custom cabinetry, and we recommend
that you consult an experienced cabinetmaker to achieve a perfect fit.
V. Template and Cutout
206 wembly Road.
New Windsor, NY 12553
Phone: 7 18.602.60 60
Fax: 7 18.963.20 82
info@nextures.com
www.nextures.com
1. Center sink, and trace outline of sink on ountertop
using pencil, Proceed to use this outline as guide for
cutout, and cut the cabinet to fit the kitchen sink
4. Attach the beams into place with wood glue,
allow enough time for the glue to dry then fasten
the beams with wood screws into the cabinet.
2. Build support frame or install support bars from
front to back along inner cabinet sides. Cut 2
pieces of 2 x 4 beams to fit inside the cabinet. and
a plywood board that will sit on top of the beams.
5. Cut-out the sections where your drain and faucet
lines will be, fit the board on top of the beams and
verify that it is leveled, If not leveled, adjusted with
shims
3. Position support frame so that, when installed, sink
is in line and level with top of cabinet. we recommend
that you screw the beams with wood glue and screws,
Keep in mind that frame must support weight of sink
and all its attachments.
6. Place the board on the beams, Secure the board
to the beams with screws. Verify the board is still
leveled, and place the sink over the plywood..
Ensure proper clearance for water supply lines,
drains and garbage disposal, if applicable.
F O R A LIFE O F S TYLE
TM
Page 4

VI. Final Sink Placement
1. Test fit sink in newly created opening.
2. Check that entire sink weight is supported by support frame.
3. Verify that sink is in line and level with top of cabinet.
4. If necessary, use shims to level sink.
5. Set sink. Using sealant, fill gaps below sink front and between sink and countertop.
6. Hold sink in place to secure and position countertop on sink.
7. Remove excess sealant from all surfaces.
206 wembly Road.
New Windsor, NY 12553
Phone: 7 18.602.60 60
Fax: 7 18.963.20 82
info@nextures.com
www.nextures.com
VI. About Fireclay and Care
Fireclay sinks are made of clay fired at over 1,400°F, which causes clay to become stonelike. This produces a strong and durable material resistant to scratching, staining, fading and discoloration.
To clean, use a soft, non-abrasive sponge or a cleaning cloth. Add mild soap and warm water or a gentle all-purpose cleaner. Wipe
surface dry with a clean, soft cloth after each use. For tough stains, use non-abrasive liquid or cream bathroom cleaner.
Refrain from soaking dishes for long periods of time, and do not leave coee grounds or teabags in sink. These may otherwise cause
potential stains or damage to finish.
We reserves the right to change, update, modify, alter, redesign this manual/product or its policies without prior notice!
It is your responsibility to visit website to download or contact customer service for the most updated version of the installation instructions.
We shall not be liable for any injuries or property damages in connection with this product during installation or use of this product!
F O R A LIFE O F S TYLE
TM
 Loading...