

Page 1
APRON BATHTUB
INSTALLATION INSTRUCTIONS
206 wembly Road.
New Windsor, NY 12553
Phone: 7 18.602.60 60
Fax: 7 18.963.20 82
info@nextures.com
www.nextures.com
Important Information
The bath must only be supported by the feet or base. Do not support the
bath by the rim.
Before installing a rim-mount bath faucet, refer to the online product
specification sheet. Ensure clearance under the rim before drilling faucet
holes in the rim.
Provide adequate floor support. Refer to the specification sheet for specific
floor-loading requirements.
Make sure the subfloor is level. Provide drain access from below. Provide
access to all plumbing connections. Observe all local building and plumbing
codes.
Refer to the specication sheet.
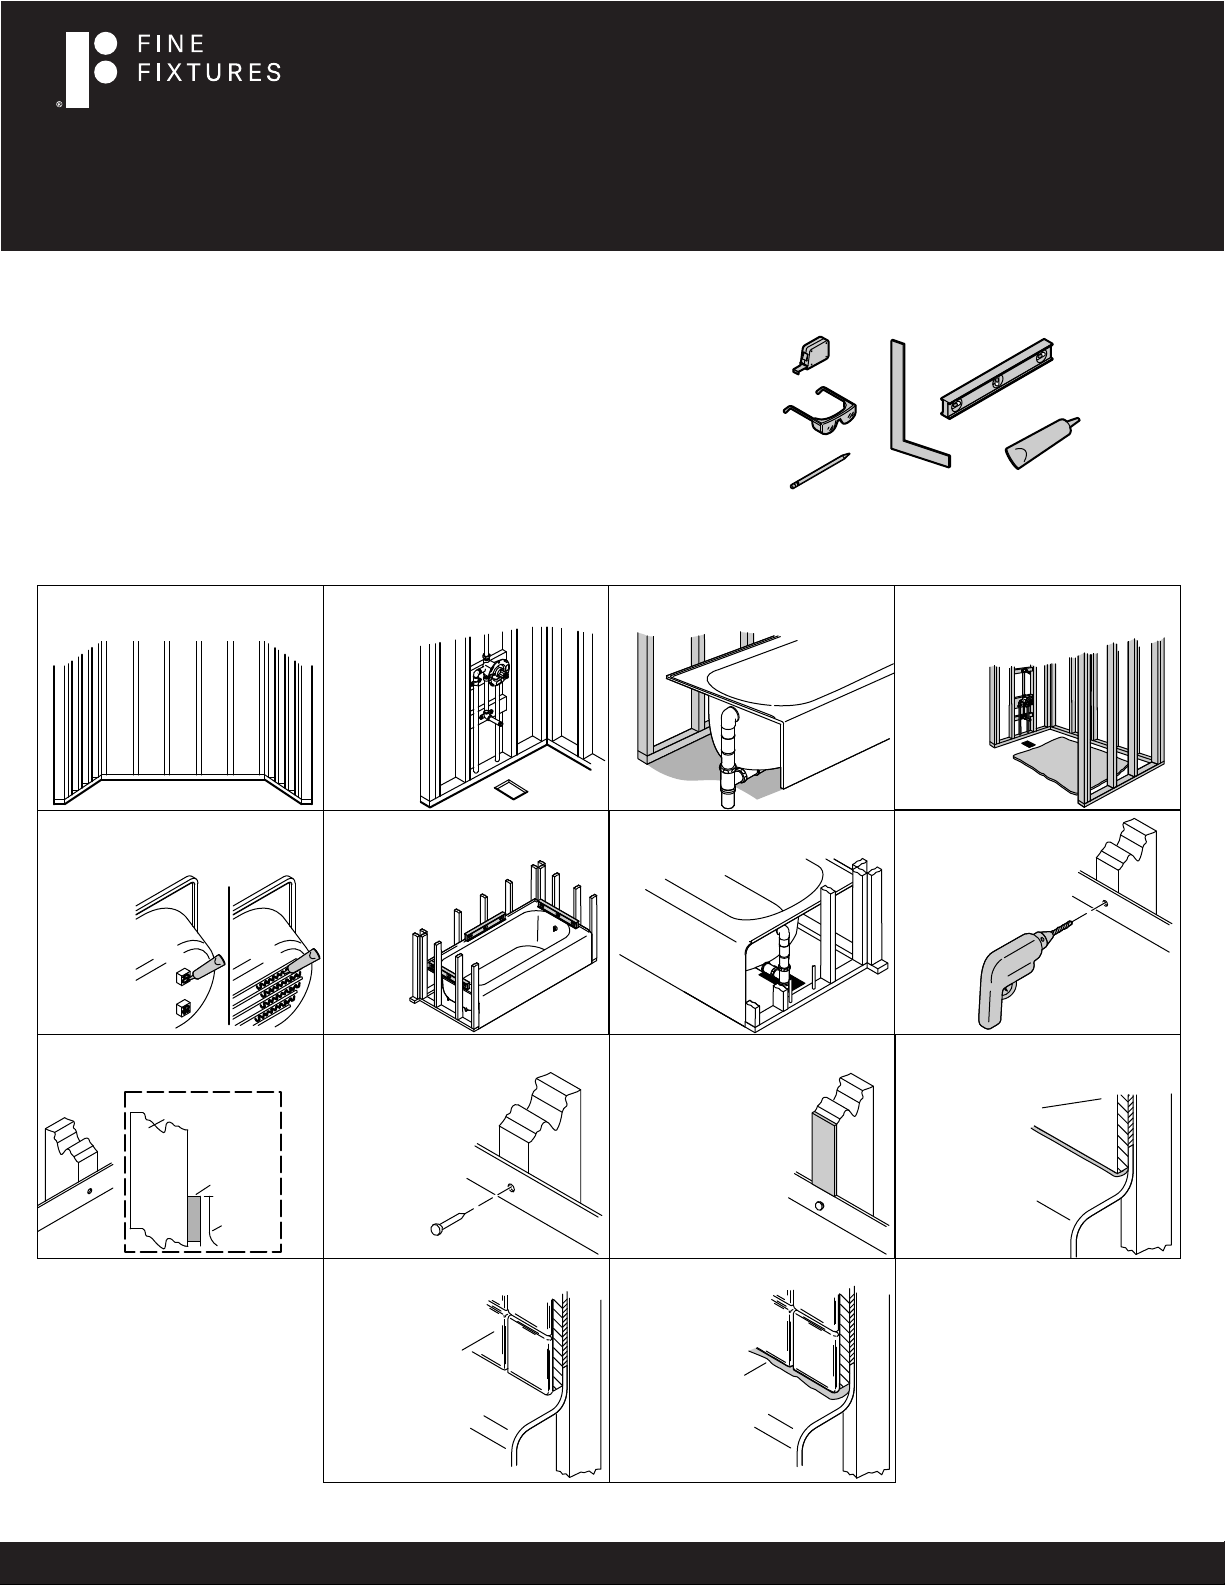
5. For adhesive installation, apply a
generous amount of construction
adhesive to the bath feet or base.
6. With help, lift the bath into position.
Verify level. Ensure the feet or base
are fully supported.
Conventional woodworking tools
and materials for better installation
*Drop cloth
*Construction Adhesive
3. Install the drain to the bath.2. Install the rough plumbing.1. Construct a plumb stud pocket.
7. Connect the bath drain to the drain
pipe. Position a protective liner in
the bath basin.
100% Silicone
Sealant
4. For mortar bed installation, set the
basin area in 1" (25 mm) to 2" (51 mm)
of mortar cement.
8. Drill small pilot holes
through the ange
at the studs.
9. If there are gaps, ll them with a shim.
Side View
Stud
Shim
Flange
10. Secure the ange to the stud with
galvanized nails or screws.
13. Install the nished
wall and deck to
within 1/16" (2 mm)
of the bath rim.
Finished
Material
11. Secure 1/4" (6 mm) furring strips
to the studs to be ush with the
bath ange.
14. Apply 100% silicone
sealant around the
bath along the
nished walls
and deck.
Silicone
Sealant
12. Install water-resistant wallboard
over the framing. Apply 100% silicone
sealant along the seam.
Water-Resistant
Wallboard
F O R A LIFE OF ST YLE
TM
 Loading...