

Fine Digital 400 User Manual

User’s Guide
2005

003
F400
002
C O N T E N T S
1. INTRODUCTION
2. HOME SCREEN MENU
3. TECHNICAL SUPPORT
4. APPENDIX

005
F400
004
driver and passenger seats. Make sure the windshield is
clean and dry to ensure a tight grip.
(1) When the suction on the vehicle mount is placed into
position, (2) press and hold the center button while you
firmly flip the latch down. This will lock the holder in
place.
2. Connect the GPS Receiver
Locate the input/output area on the backside of the
navigation unit, then insert the GPS Receiver, “GPS” letter
side up.
3. Plug the Cigarette Lighter Adapter
1. Introduction
1.1. What is in the Box?
The Navigation System box includes the following items:
Finedrive 400 Navigation Unit
SD Card w/NAVTEQ Mapping Software
GPS Receiver
DC12V In-car Cigarette Lighter Adapter
Vehicle Suction Mount
Stylus Pen
User Guide
1.2. Installation Precaution
Choose a mounting location in your vehicle where this unit will
not distract or otherwise interfere with the driver’s ability to
control the vehicle.
Do not install components in areas which are susceptible to rain,
moisture, direct sunlight, extreme heat or cold, excessive dust,
dirt or humidity.
Use only installation parts and hardware provided with the unit
to ensure proper installation. Using other parts can cause
malfunction and possible damage to your navigation system.
1.3. Hardware Installation
1. Mount the Finedrive 400 in your vehicle
Although the Finedrive 400 can be installed on any glass
surface in your vehicle, we recommend that you install
the unit below the-center of the windshield, between the

007
F400
006
the message and proceed by tapping the "OK"
button.
Finedrive 400 will power itself on and off each time
your car is turned on and off. If the power plug in
your car is always on, like in some recent SUV
models, we recommend turning the navigation
device off manually so that it doesn°Øt discharge
your car battery.
Each time the Finedrive 400 is turned off, it
remembers the information from the last routing
session. If the device is turned off while you were
using GPS modules, it will display the GPS module
again once the unit is turned back on.
Plug in the connector on the cigarette lighter power adapter
into the power input jack.
4. Slide the navigation unit into the holder
5. Turning the navigation unit on and off
Press OK, then wait for a couple of seconds and a CAUTION
screen will appear as follows:
When the CAUTION sign has appeared, please read

009
F400
008
Navigation: Activates mapping applications and
routing functions.
MP3 Player: Activates the MP3 player and FM
Transmitter functions.
Setup: Configure the system settings of the device
(brightness, volume, etc.)
Shut Down: Turn device off manually.
Note : If your Finedrive 400 is turned off while in use, the
device will automatically remember the last status. Once you
turn on the device again, and after clicking OK button in the
Caution window, the unit displays the last status of the previous
function (either navigation or MP3 player)
.
2.1.1. How to use Home screen
Press the Home button ( ) to go to the Home screen from
other features.
2.1.2. How to use Navigation, MP3 Player
Each time you turn on the device, the following screen appears.
2.1. Using the Home Screen Menu
The Caution window appears each time the power is turned on.
Clicking OK on the Caution Screen will take you to the
following Home Screen Menu. The Home Screen menu will
also appear whenever you press the Home button.
Home Screen displays the four main features of the Finedrive
400. It will help you to access any available feature with a single
click.
Home
2. Home Screen Menu
011
F400
010
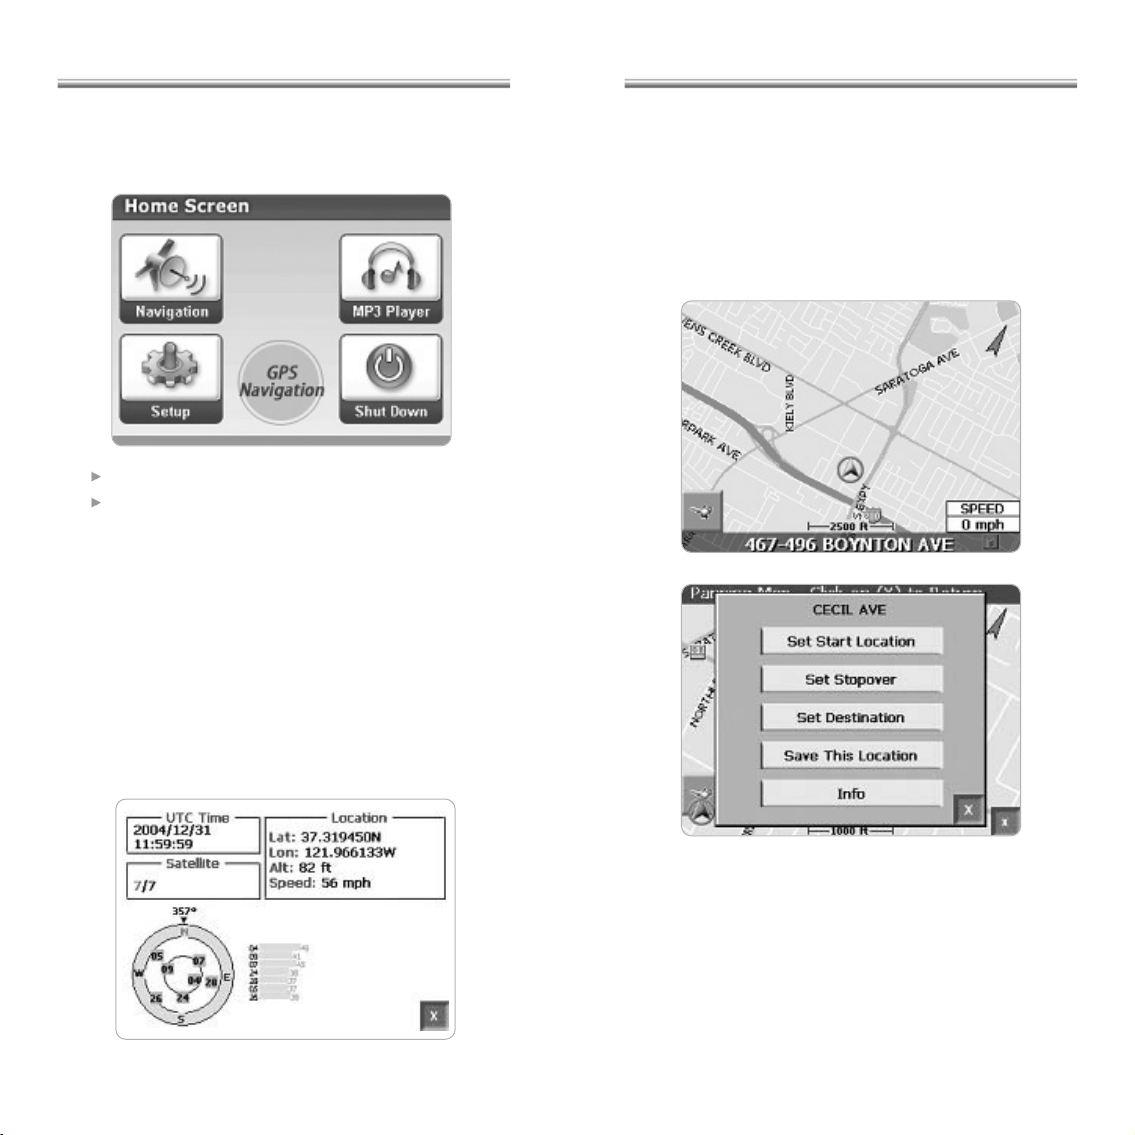
2.2.2. Operating Navigation
When you start the navigation system, a map will be displayed
as shown below. If your GPS device receives a satellite signal,
it will provide an expanded view of your current location.
If you are not receiving a signal, the default map is shown. The
varying colors of the vehicle icon indicate the number of
satellite signals available. In this case, the vehicle icon is shown
at the bottom of the map.
To see the detailed vehicle location:
You can choose any function by tapping the icon.
Refer to 2.2. Navigation for details on Navigation.
Refer to the 2.3. MP3 Player for details on MP3
Player.
2.2. Navigation
2.2.1. Checking GPS
Allow five to fifteen minutes for your GPS navigation to receive
a satellite signal for the first time. Thereafter, it will take 90
seconds or less to receive the signals.

013
F400
012
2.2.4. The Main Menu
2.2.5. The Main Menu
1. To display a map in the Map View, tap the Menu
button > Return to Map icon. The Map View
Tap on the locator bar at the bottom of the map.
Tap on the map location and select Info from the
Pop Up menu.
2.2.3. Moving Around the Map
Tap the pointer on the map and drag it in the direction you want
it to move: up, down, right, or left. Once you remove the stylus
pointer from the screen, the map re-centers on the selected
location.
Options
Destination
Route Options
Simulation
Display Options
Return to Map
GPS Info
Description
Sets the destination by address, intersection,
points of interest, favorite locations, or
recent locations.
Manages your route preferences.
Starts/stops the current routing simulation.
Sets the map orientation, screen color,
automatic or manual guidance, and display
of POI (Point of Interest) icons.
Displays an expanded view of the map area
around the vehicle location.
Displays GPS status information.

015
F400
014
2.2.7. Route Options
Also accessible from the Main Menu, the Route Option enables
you to use the navigation system in a number of different ways
for determining your optimal route.
“Method” allows you to choose how your route is determined:
Quickest Route calculates a route with minimum
travel time
Shortest Route calculates a route with minimum
travel distance
Major determines the route that includes major
roads, such as highways
Local determines the best route that excludes major
roads, such as highways
The other route preferences allow you to include or exclude
Ferries, Toll Roads or Carpool lanes in the route the
navigation system selects for you.
screen displays:
2. The orientation of a map is set in the Display
Options screen:
Heading Up to rotate the map automatically in
accordance with the direction of the vehicle
North Up to maintain the map in North/South position.
2.2.6. Map View Modes
To select your Map View preference, from the Main Menu
select Display Options and make your choice.
 Loading...