

Fimco LG-14-SM, LG-14-PM Assembly And Operation Instructions Manual
5301144
MODEL NO. LG-14-PM
15 Gallon Lawn & Garden Spot Sprayers
Assembly / Operation Instructions / Parts
BEFORE RETURNING THIS PRODUCT
FOR ANY REASON, PLEASE CALL
5301145
MODEL NO. LG-14-SM
Your authorized dealer is the best source of replacement
parts and service. To obtain prompt, efficient service, always
remember to give the following information:
1-800-831-0027
IF YOU SHOULD HAVE A QUESTION OR
EXPERIENCE A PROBLEM WITH YOUR
FIMCO INDUSTRIES PRODUCT:
1-800-831-0027
BEFORE YOU CALL, PLEASE HAVE THE
FOLLOWING INFORMATION AVAILABLE:
SALES RECEIPT & MODEL NUMBER. IN MOST
CASES, A FIMCO INDUSTRIES EMPLOYEE CAN
RESOLVE THE PROBLEM OVER THE PHONE.
GENERAL INFORMATION
The purpose of this manual is to assist you in operating and
maintaining your lawn and garden sprayer. Please read it
carefully as it furnishes information which will help you achieve
years of dependable trouble free operation.
WARNING
DO NOT USE PUMP IN AN EXPLOSIVE
ENVIRONMENT. DO NOT USE TO PUMP
FLAMMABLE FLUIDS, GASOLINE,
KEROSENE FUEL, OIL, ETC.
1. Correct part description and part number.
2. Model Number of your sprayer.
3. Serial Number of your sprayer.
Part description and part numbers can be obtained from the
illustrated parts list section of this manual.
Whenever you need parts or repair service, contact your
distributor / dealer first. For warranty work always take your
original sales slip, or other evidence of purchase date, to your
distributor / dealer.
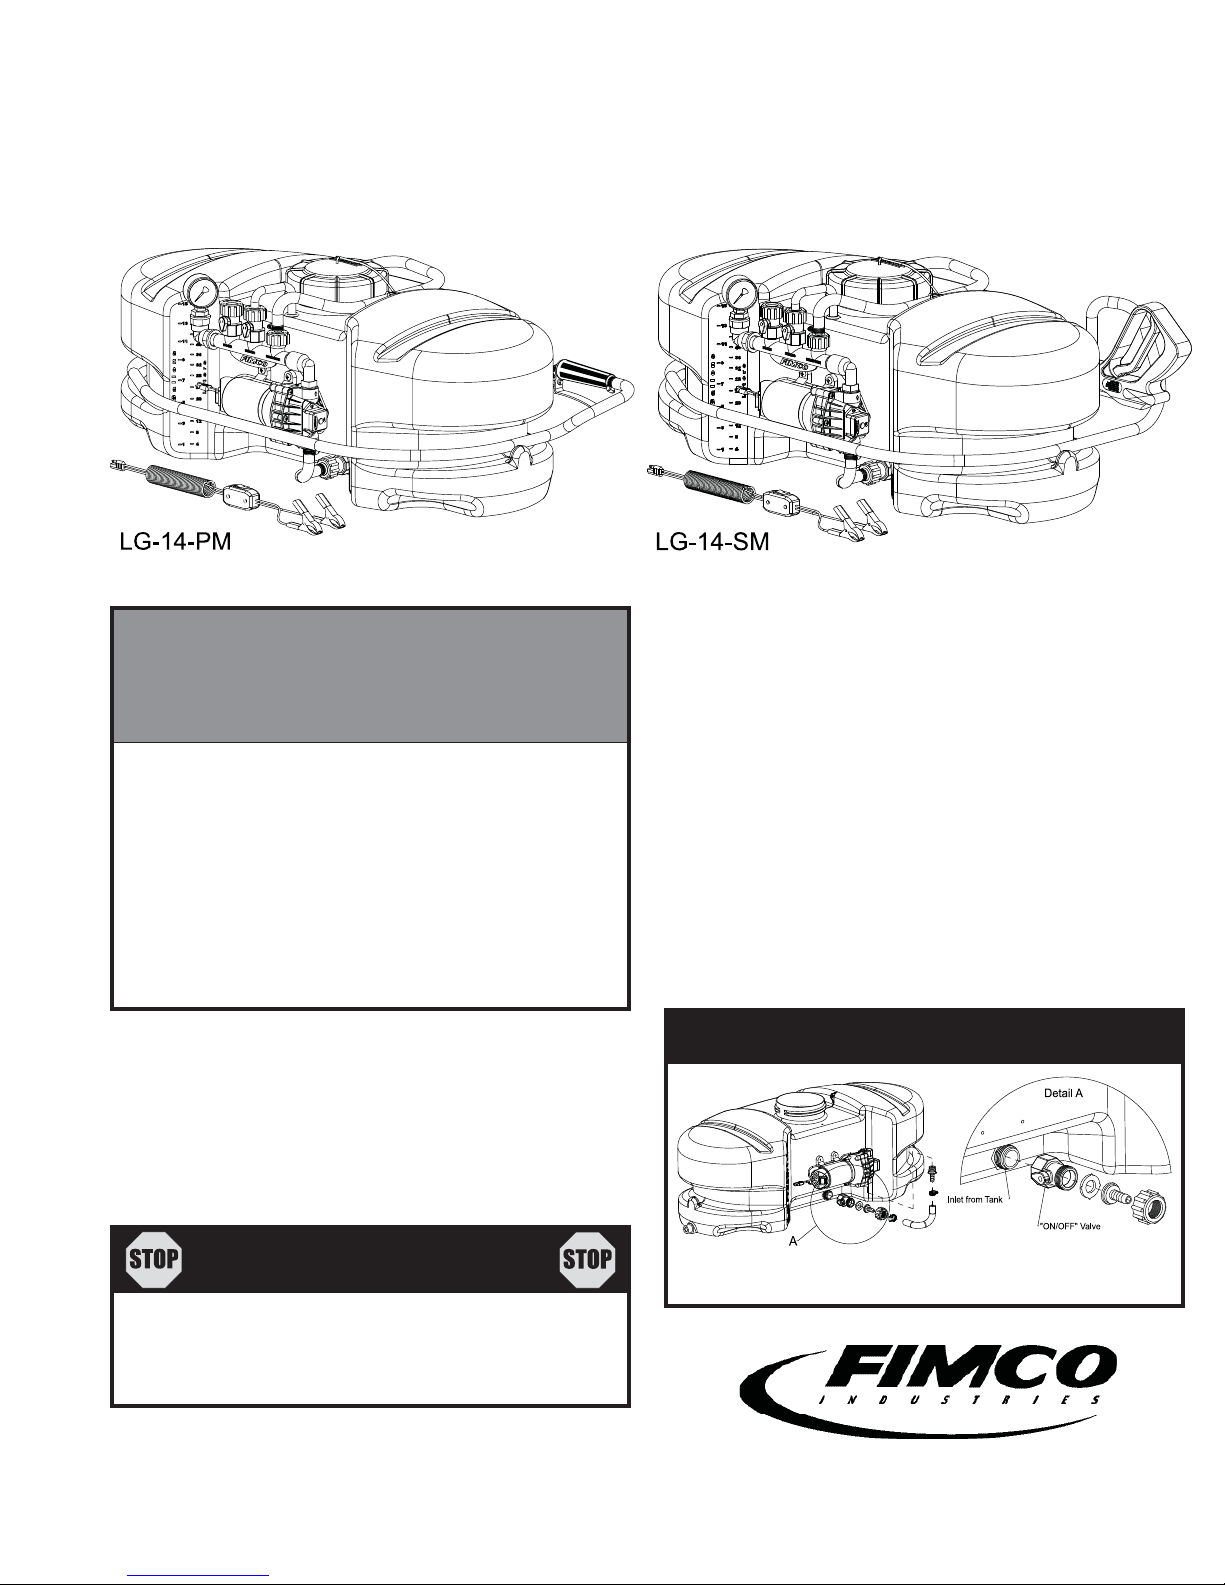
IMPORTANT REMINDER
This unit comes with an On/Off valve located near the inlet of the tank, towards the underside.
(See Detail A). You must make sure the valve is in the "open" position before using your unit.
WARRANTY / PARTS / SERVICE
Products are warranted for one year from date of purchase
against manufacturer or workmanship defects.
WWW.FIMCOINDUSTRIES.COM
1000 FIMCO LANE • P.O. BOX 1700 • NO. SIOUX CITY, SD 57049
TOLL FREE: 800-831-0027 • TOLL FREE FAX: 800-494-0440
Form No. 1310 (5004804 4/07) Printed In U.S.A.
Page 1

TECHNICAL SPECIFICATIONS
• Corrosion Resistant Polyethylene Tank.
• 12 Volt Diaphragm Pump.
• Pressure Gauge-Adjustable Pressure Range.
• 15 Foot Handgun Hose.
CAUTION
PRESSURE SWITCH OPERATION
Pressure switch is pre-set at the factory. Improper
adjustment of the pressure switch, may cause severe overload or
premature failure. If the pump is subjected to rapid cycling during
normal operation, or infrequent periods, damage may occur.
CAUTION: Always check the vehicle load rating before
using this sprayer. The loaded weight of the sprayer and
boom assembly is about 170 lbs. when the tank is full for a
15 gallon unit and 250 lbs. for a 25 gallon unit.
It is important to test the sprayer with plain water before
actual spraying is attempted. This will enable you to check
the sprayer for leaks in the plumbing system.
ASSEMBLY
1. Thread the gauge into the reducing bushing at the end of
the manifold assembly. Use a good grade of thread sealant
here to insure no leaks.
2. Connect the wiring harness to the wires coming out of the
pump. Connect the wiring from the wiring assembly to the 12
Volt power source of the vehicle. The red wire of the 2-wire
set must be connected to the positive (+) post on the battery
or the “hot” connection on a switch or to the ammeter. The
brown wire may be grounded or connected to the negative
(-) post on the battery.
3. Remove the drain plug assembly from the parts bag and
thread it onto the drain bung located at the lower rear end
of the tank.
AFTER SPRAYING
After use fill the sprayer part way with water, start the sprayer
and allow clear water to be pumped through the plumbing
system and out through the handgun. Use the handgun on
the sprayer to thoroughly wash all internal parts of the tank
and tank cover.
Refill the tank about half full with plain water and use a chemical neutralizer such as Nutra-Sol or equivalent and repeat
cleaning instructions above. Flush the entire sprayer with
the neutralizing agent. Follow the chemical manufacturers
disposal instructions of all wash or rinsing water.
WINTER STORAGE
Drain all water out of sprayer paying special attention to pump,
valves, and handgun. These items are especially prone to
damage from chemicals and freezing weather.
The sprayer should be winterized before storage by pumping a
solution of R.V. anti-freeze through the entire plumbing. Proper
care and maintenance will prolong the life of the sprayer.
4. Remove the handgun clips/screws from the parts bag,
if applicable, and attach them to the side of the tank, for
handgun storage.
OPERATION
The pump on the sprayer is equipped with a pressure switch
that is factory set at a maximum of 60 PSI. Pressure may
be decreased by opening the regulating valve. The more it
is opened, the lower the pressure will be.
The handgun has an adjustable nozzle which allows the spray
to be adjusted from a cone shaped fine mist to a straight
stream. It is normal for the pump to cycle when spraying
with a fine mist spray.
WARNING: Some chemicals will damage the pump valves if
allowed to soak untreated for a length of time. Always flush
the pump with water after use. Do not allow chemicals to sit
in pump for extended times of idleness. Follow the chemical manufactures instructions on disposal of all waste water
from the sprayer.
Page 2
 Loading...