

Page 1
P360S
User Guide
Safety Instructions
• DO NOT look into the light source. Be cautious of the high-intensity beam.
• DO NOT disassemble P360S. This will void the warranty.
• DO NOT install P360S in damp or wet locations.
• DO NOT obstruct the fixture’s air vents.
• Use safety cable (not included) when rigging P360S overhead.
• Only use Fiilex approved power supply and accessories. Failure to do so may damage the fixture.
Mode Selection
Intensity
CCT
HUE (Magenta/Green)
DMX Control
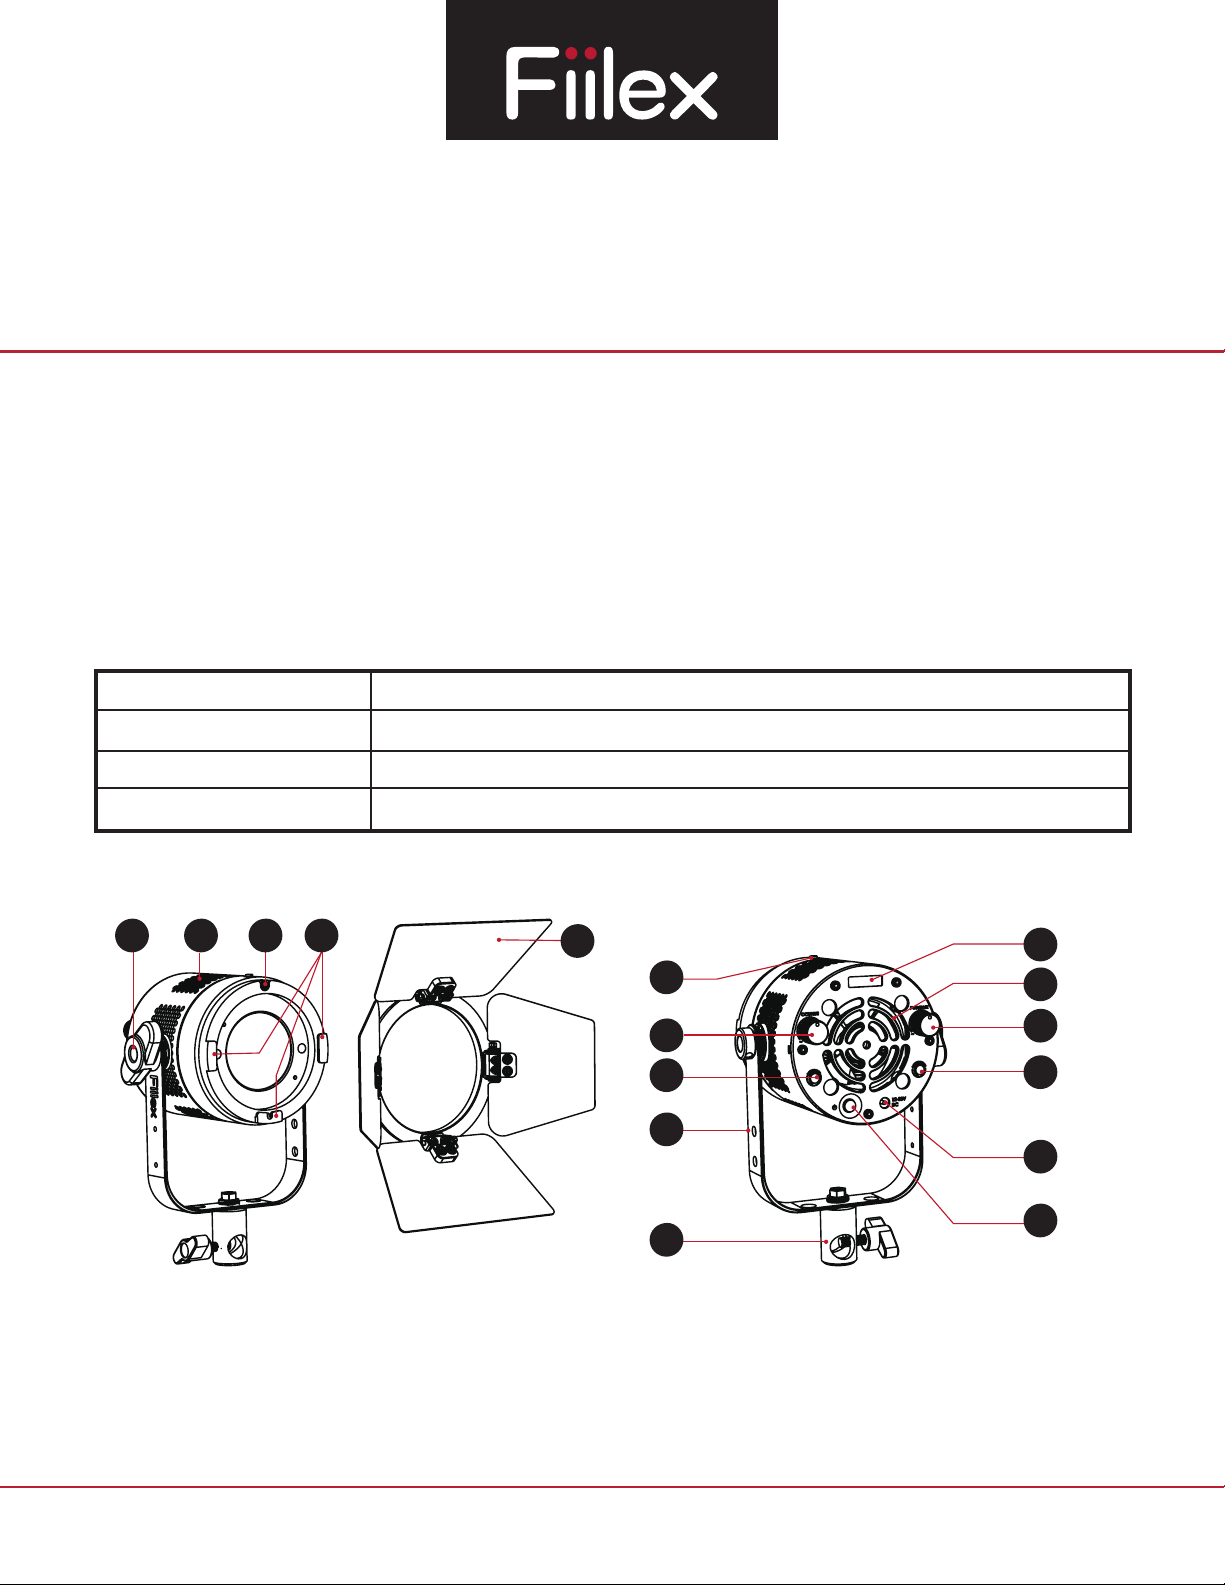
Parts Diagram
5
4
3
Turn the Intensity Knob (13) to adjust brightness.
Turn the CCT Knob (7) to adjust color temperature.
Double click the HUE Knob (7) to adjust HUE value.
Double click the DMX Knob (13) to set DMX address (Range: 1 - 510).
2
1
6
7
8
9
10
11
12
13
14
15
16
1. 4-leaf Barndoor
2. Barndoor Slot
3. Accressory Lock
4. Side Vents
1689 Regatta Blvd. Richmond, CA 94804 | (510) 620-5155 | fiilex@fiilex.com
5. Yoke Knobs
6. Accessory Lock Release
7. CCT/HUE Knob
8. Light Control Input Jack
9. Yoke
10. Light Stand Adapter
11. OLED Display
12. Rear Vents
13. Intensity / DMX Knob
14. Light Control Output Jack
15. DC Power Input Jack
16. ON/OFF Button
210202A
www.fiilex.com
 Loading...