

Page 1

P180E
Portable LED Light
User Manual
Page 2

Table of Contents
What’s In The Box
Getting To Know The Light
Set Up And Basic Operation
Optional Accessories
Specifications
For Your Safety
1
2
4
7
8
9
Page 3
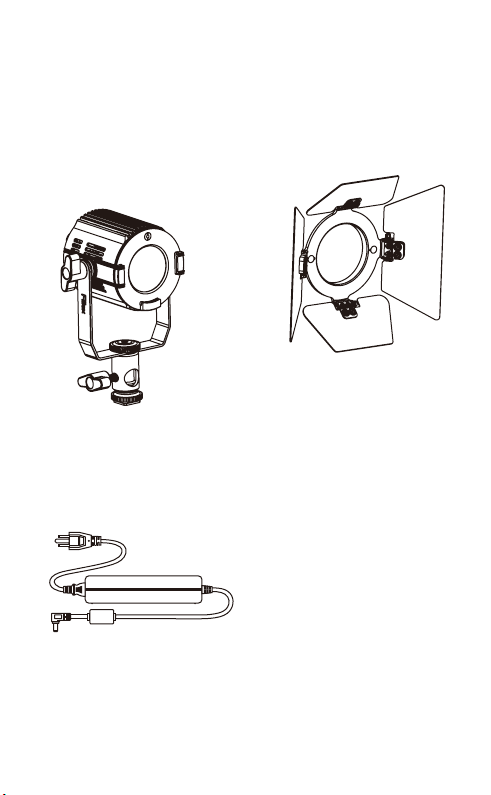
What’s In The Box
• 4 Leaf Barndoor• P180E Light with
Cold Shoe Mount w/ Stud
• Power Supply
1
Page 4
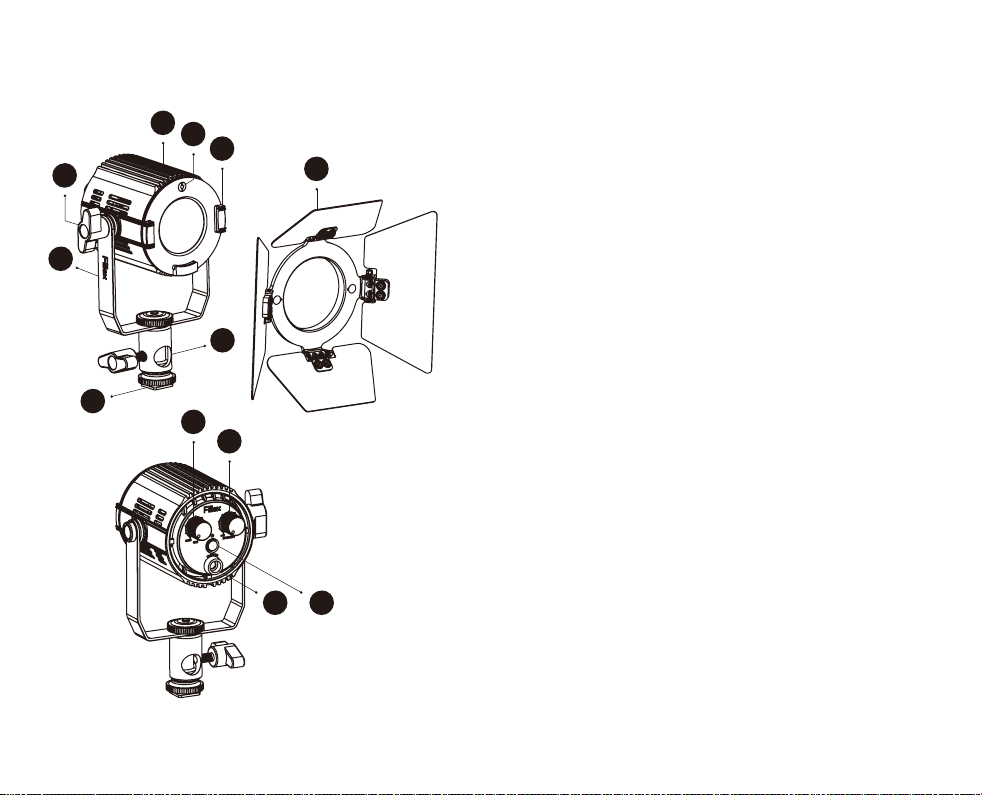
Getting To Know The Light
D
C
B
E
F
G
H
J
I
A
KL
4 Leaf Barndoor
A
Barndoor Slot
B
Barndoor Fix Ball
C
Air Vents
D
Yoke Knob
E
Yoke
F
Light Stand Adapter
G
Cold Shoe Mount w/ Stud
H
Light Intensity Knob
I
CCT Tuning Knob
J
On/ Off Button
K
DC Power Input Jack
L
2 3
Page 5
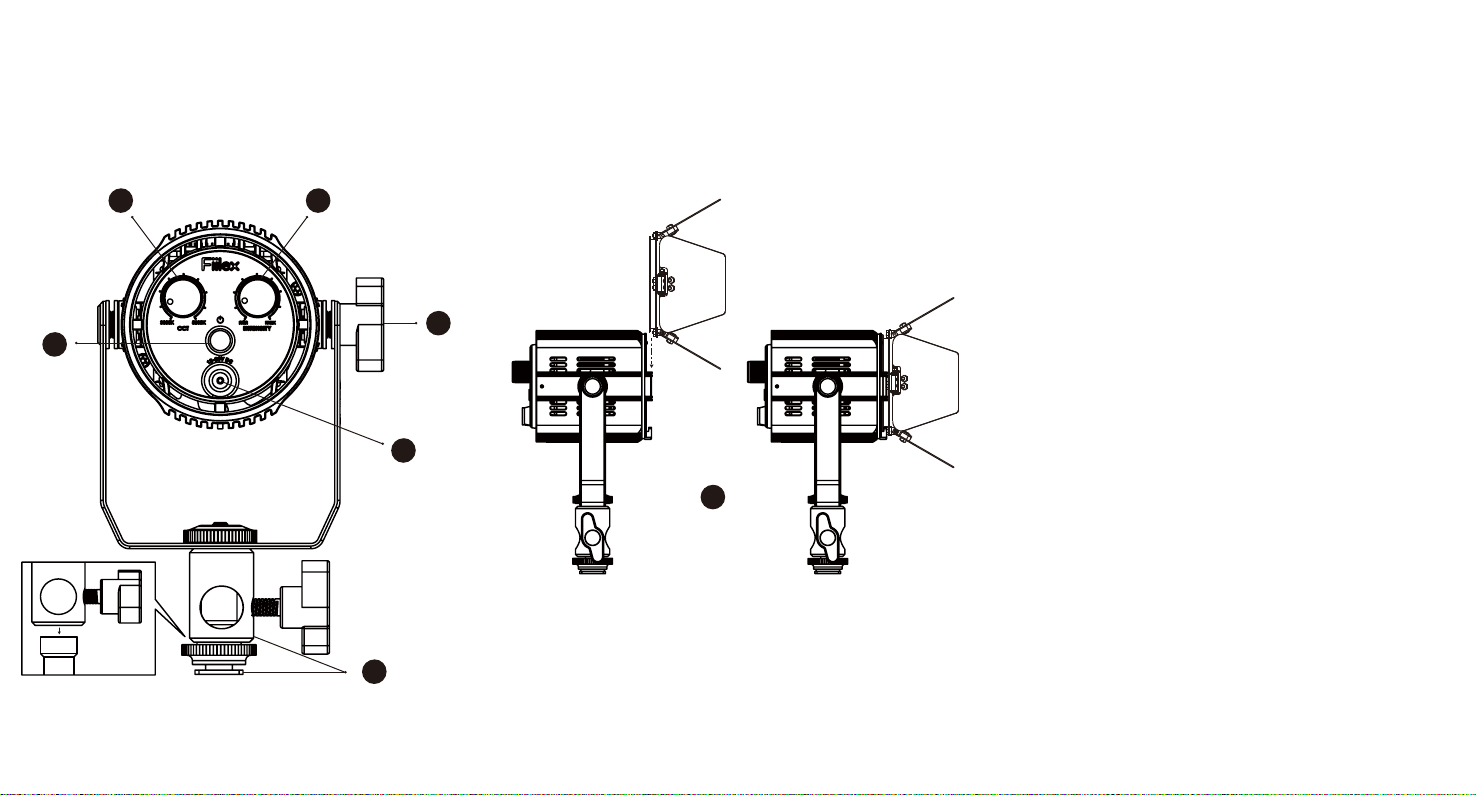
Set Up And
Basic Operation
54
3
1
Mount Light Stand Adapter (G) to 5/8 Stud on Light
stand or use Cold Shoe Mount (H) to attach to camera.
2
Insert the AC/DC Power Adapter into the Power
6
2
7
Input Jack (L).
3
Press the On/Off Button (K) to power on the P180E.
4
Adjust the color temperature with the CCT Tuning
Knob (J).
5
Adjust the brightness with the Light Intensity Knob (I).
6
Loosen the Yoke Knob (E) to install optional Rain
Guard or Umbrella Holder.
7
Slide the Barndoor (A) into the Barndoor Slot (B)
until it clicks into place.
1
4
65
Page 6
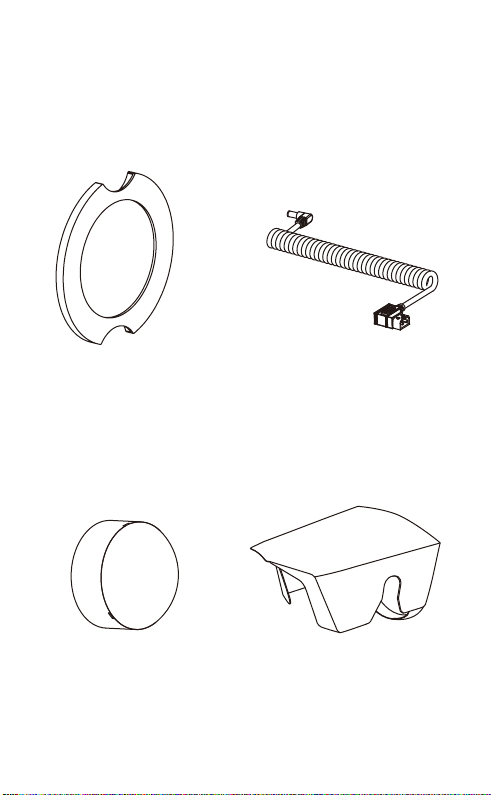
Optional Accessories
Fresnel Lens
D-tap Cable
Dome Diffuser Rain Guard
See website for additional accessories. www.fiilex.com
7
Page 7

Specifications
Size (without Barndoor)
2.9” x 2.9” x 3.8” / 74.2 x 74.2 x 98mm
Weight (Includes Yoke)
1.2 lb/527g
LED
Dense Matrix LED
Thermal Design
Advanced Vapor Cooling System
CCT Range
3000-5600K Continuous Tuning
CRI
≥92
Power Consumption
40W Max / Comparable in output to 200W Tungsten
Power Input
12 to 24V DC
AC Adapter
100-240V AC, 50-60Hz (In) / 19V DC, 65W Max (Out)
Operating Temperature
- 30 to 40 °C
Weather Resistance
IP-24 Rating
8
Page 8

For Your Safety
•Do not attempt to disassemble the body of the P180E.
•Do not directly cover the side and/or back air vents.
Allow for proper air flow.
•Use only included power supply or optional D-Tap Cable.
Failure to do so may cause damage to the LED light.
•Use only a soft, dry towel to gently clean the exterior of
light when needed.
•Before powering up for the first time, please remove any
or all protective membranes from the light.
Fiilex.com
1689 Regatta Blvd. Richmond, CA 94804
(510)620-5155 . [email protected]
Information and Specifications in this document are subject to change without notice. DiCon
Lighting, Inc. assumes no responsibility or liability for any error or inaccuracies that may
appear in this manual. Unlawful reproduction or distribution in any manner without the
written permission of DiCon Lighting, is strictly prohibited.
© DiCon Lighting 1996-2014 All Rights Reserved
9
 Loading...