

Page 1

P360 Gen II Series
FLXP360C FLXP360P FLXP360PP
User Manual
180814A
Page 2

General Notes:
• Please read the following operating instructions very carefully before using this fixture for the
first time. They contain important information on the operation of Fiilex lighting equipment.
• For your own safety, please follow all safety instructions and warnings.
• Please also follow the operating instructions of the light and power adapter manufacturers.
• Keep these operating instructions for you and subsequent users for reference in the future.
• For further information, please ask your retailer or enquire at your local authorities. Only use
Fiilex spare parts and accessories (www.fillex.com).
Basic Operation (refer to Parts Diagram on following page)
• Mounting the P360 Gen II Series
The Light Stand Adapter (14) on the P360 Gen II Series can be mounted to a baby / junior stand
with combo pin. Secure the fixture to the stand by turning the tightening knob.
• Powering on the P360 Gen II Series
The P360 Gen II Series comes with a power adapter. To supply a P360 Gen II Series with power,
insert the connector into the DC Power Input Jack (9), then connect the DC plug into an active
wall socket. The fixture’s OLED Display (15) will turn on once it is receiving power. The On/Off
Button (10) can toggle the fixture’s output on and off. Settings can still be adjusted while the
switch is set to off.
• Adjusting the P360 Gen II Series
Use the Yoke Knobs (5) to lock the fixture’s tilt position. Tighten the handle to secure.
• DMX (Pro / Pro Plus only)
Insert phone jack (TRRS) connector into Light Control Input / Output Jack (8/12). Double click
Intensity / DMX Address Knob (7) to enter DMX address edit mode, the turn knob to select
address. To return to intensity adjustment mode, click knob (7) again or wait 3 seconds.
Mode
Intensity PWR
DMX
Screen
Indicator
DMX
Description
To adjust the brightness of the fixture, simply turn the Light
Intensity / DMX Address Knob (7).
Control via DMX. Manual control knobs disabled. Mode
activates automatically when DMX signal detected.
Color
Temperature
Hue
CCT
HUE
To adjust the color temperature of the fixture, simply turn the
CCT / Hue Tuning Knob (11).
To adjust the hue of the fixture, double click the CCT / Hue
Tuning Knob (11) and turn the knob.
1
Page 3

4
5
3
1
2
Parts Diagram
1. 4 Leaf Barndoor
2. Barndoor Brackets
3. Accessory Lock
4. Side Vents
5. Yoke Knobs
6. Rear Vents
7. Light Intensity / DMX Address Knob
(DMX: P360 Pro / P360 Pro Plus Only)
8. Light Control Output Jack
(P360 Pro / P360 Pro Plus Only)
16
15
6
9. DC Power Input Jack
10. On / Off Button
11. CCT / Hue Tuning Knob
(Hue: P360 Pro Plus Only)
12. Light Control Input Jack
(P360 Pro / P360 Pro Plus Only)
13. Yoke
14. Light Stand Adapter
15. OLED Display
(P360 Pro / P360 Pro Plus Only)
16. Accessory Lock Release
11
7
8
12
9
13
10
Attach Light Stand
Adapter (14) to a
baby / junior stand
with combo pin.
Secure the light by
tightening the
locking knob.
14
Installing Barndoor
Slide Barndoors
into Barndoor
Brackets (2) until
Accessory Lock (3)
clicks.
Compatible Accessories
Releasing Barndoor
To release Barndoors,
slide back Accessory
Lock Release (16) and
slide Barndoors out of
Barndoor Brackets (2).
Pluging in the PowerMounting the Light Turning the Light On
Insert the DC
connector into the DC
power jack.
Press the On/Off
button to turn on the
light. The button will
turn green to indicate
that the light is on.
Dome Diffuser
Medium
Softbox Kit
Power Adapter
Holder Gen II
DMX
Contoller
RJ45 Unit
Link Cable
Adapter with
Coupler(F/F)
XLR5 (F)
Unit Link
Cable Adapter
D-Tap Cable Fresnel Lens
2
Page 4
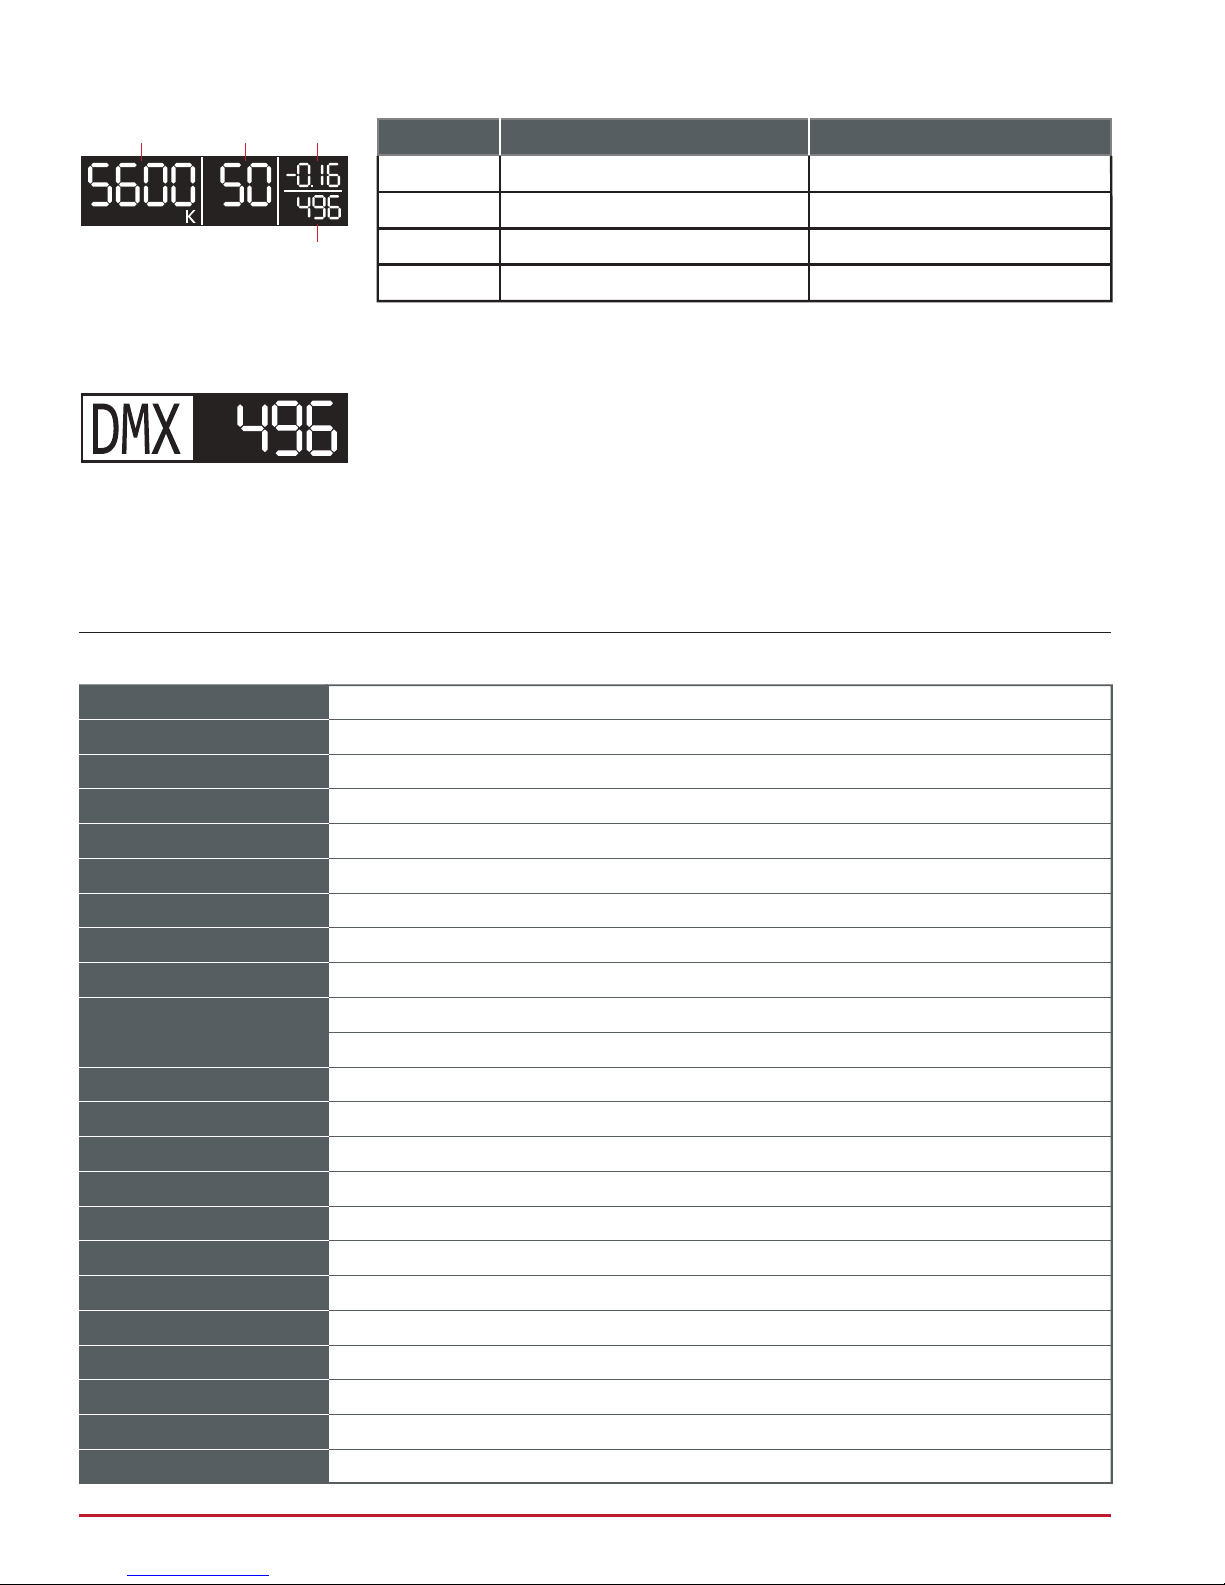
Rear Panel Interface Operation
CCT
Assigning DMX Address:
DMX Address Setting Screen
PWR HUE
D
%
DMX
Dial
CCT
PWR
HUE
DMX
Function
Set color temperature
Set intensity
Set HUE value
Set DMX address
± .25 Magenta / Green
Range
2800K - 6500K
100% - 0.1%
1 - 510
1. Double click the Light Intensity / DMX Address Knob (7) to unlock
DMX address setting screen on the OLED Display (15).
2. Rotate the knob to select desired base address (1-510).
3. Lock in setting by clicking knob once. Alternatively, the address will
automatically lock in after 1 second of inactivity.
4. The Matrix II Tunable white occupies three consecutive DMX channels for operation. With a
base DMX address 50, the controls for intensity, CCT, and hue will correspond to DMX channels
50, 51, and 52 respectively.
For adjusting fixture’s DMX address via RDM, consult operating instructions for DMX/RDM control system.
•
Specifications
Weight: Fixture
1.6 lbs / 0.74 kg
Weight: Power Adapter
Light Source
Thermal Design
CCT Range
Dimming
CRI
Power Consumption
Power Connection
Input Voltage
Operating Temperature
Beam Angle
Mounting
Tilt Angle
DMX Type
DMX Ports
USB Power
5.6 lbs / 2.6 kg
DiCon Dense Matrix LED
Advanced Vapor Cooling System (Classic), Active Cooling (Pro and Pro Plus )
2800-6500K Continuous Tuning
0-100% (0.1% increments at low power range)
93-95
90W Max
90W AC/DC Power Adapter
AC Power: 100-240VAC. 50-60Hz
DC Power: 19VDC, 90W max.
32-104°F / 0-40°C
65° (31° w/ P360 Gen II Series Fresnel accessory)
Baby / junior stand with combo pin.
±90°
DMX 512/RDM
XLR5 or RJ45
N/A
Mini USB Interface
Housing Color
IP Rating
LED Lifetime
Certifications
N/A
Black
IP-24
42,000 hours
CE, UL, FCC
3
Page 5

Safety
• Do not attempt to disassemble the body of the P360 Gen II Series, doing so will immediately
void the factory warranty.
• Do not install the P360 Gen II Series in a damp or wet area.
• Do not submerge P360 Gen II Series in water.
• Do not cover the side or back air vents.
• Only use the included power adapter, failure to do so may cause damage to the LED light.
• Only use a soft, dry towel to gently clean the exterior of the light.
• Before using the light for the first time, remove the protective membranes.
• The light stand must be installed on an even and flat surface. The center post should be less
than 9.5" from the ground when the three legs are down
Warranty
Unless otherwise stated, your product is covered by a one year parts and labor limited warranty.
Fiilex guarantees, to the original buyer, that this product is to be free of defects in both workmanship and material for a period of one year from the date of shipment. This warranty extends to all
products which have proved defective through normal use but excludes products that have been
disassembled, modified or misused by the buyer or any other person. This warranty is in lieu of all
other warranties, and disclaims all warranties expressed or implied, including any warranty of merchantability, fitness for a particular purpose, or arising from the course of dealing between the
parties or usage of trade.
Returning an Item Under Warranty for Repair
It is necessary to obtain a Return Authorization Number (RA#) from your dealer/ point of purchase
BEFORE any units are returned for repair. Fiilex will make the final determination as to whether or
not the unit is covered by warranty. Fiilex will replace or repair to proper working condition any
products that are returned under warranty. Products repaired or replaced under warranty are
under warranty only for the remaining unexpired period of time of the original warranty.
Any Product unit or part returned to Fiilex must be packaged in a suitable manner to ensure the
protection of such Product unit or parts. The package must be clearly and prominently marked to
indicate that the package contains returned product units or parts with a Return Authorization
(RA#) number. All returned product units or parts must be accompanied by a written explanation of
the alleged problem or malfunction.
www.fiilex.com
1689 Regatta Blvd. Richmond, CA 94804
| (510) 620-5155 | [email protected]
4
 Loading...