

Page 1

Page 2
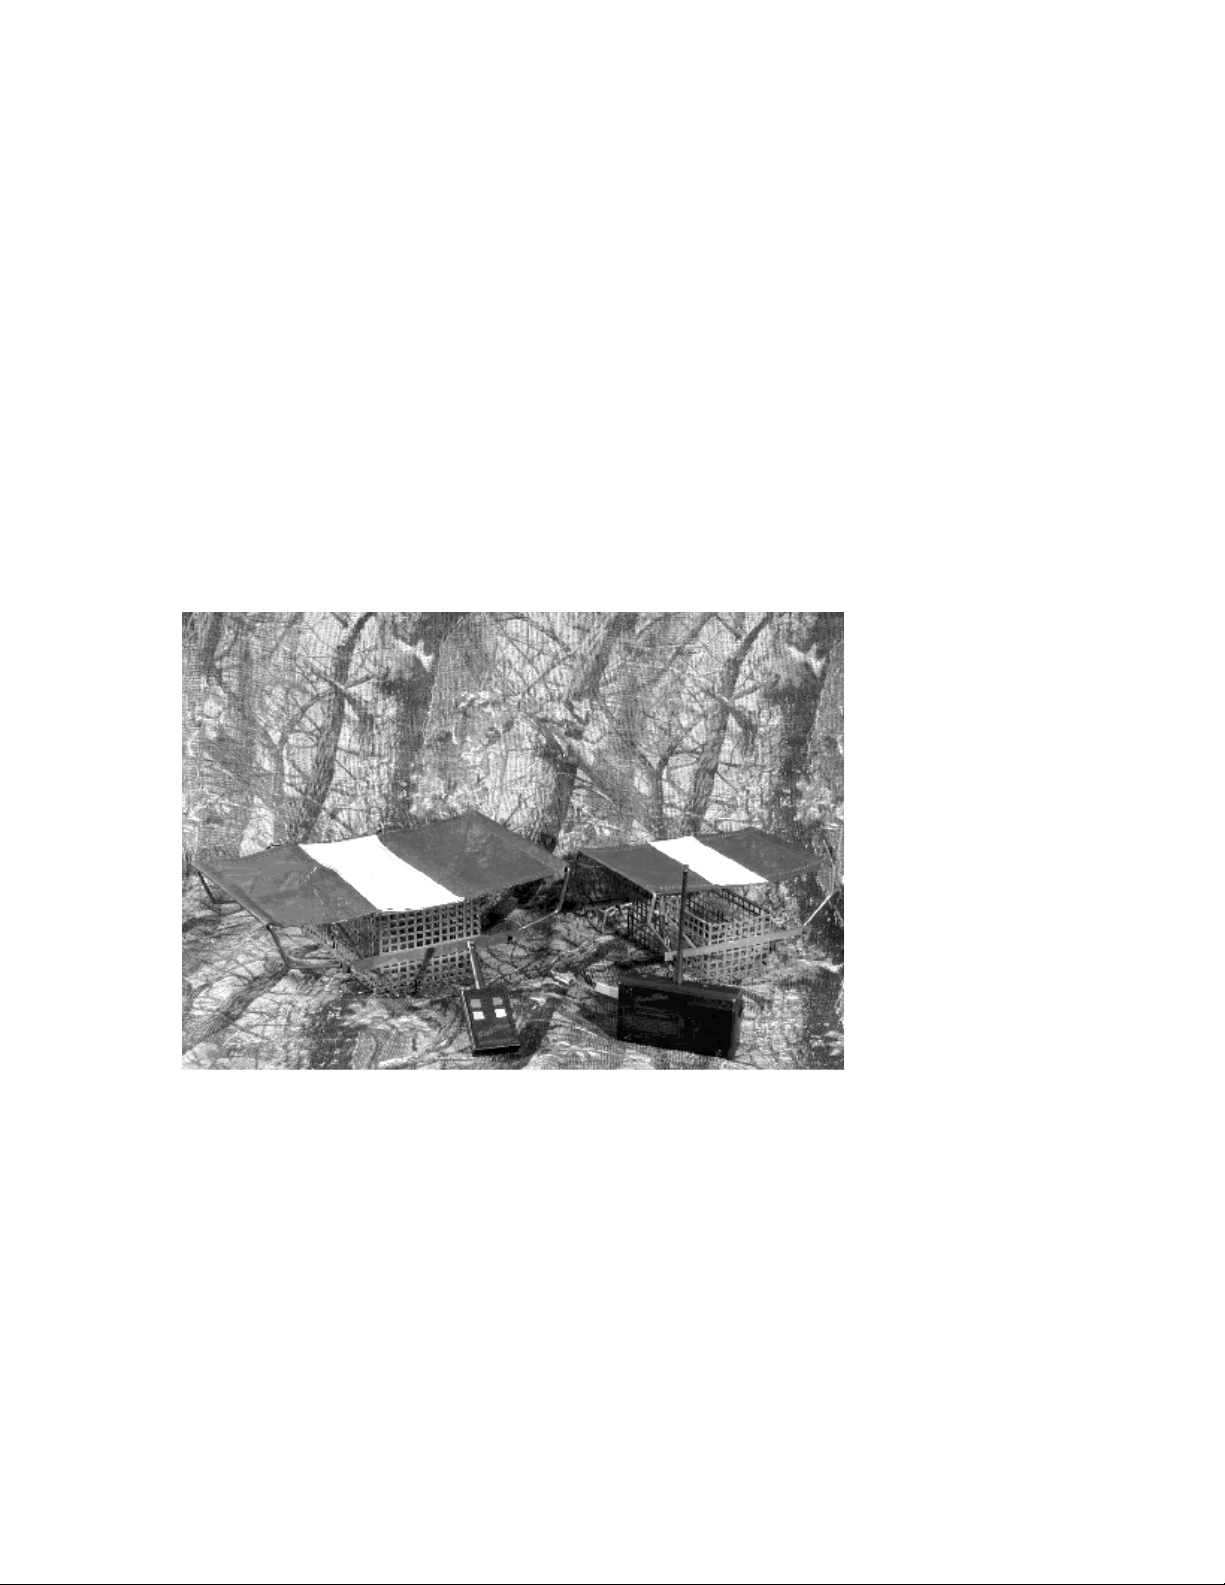
Thank y ou for p urch asing
FieldPro equipm ent !
Your ne w equipm e nt uses
st ate of the art el ect ronics so
that we can offer you a quality
product at an af for dable price.
Page 3

TABLE OF CONTENTS
TRANSMITTER ( ProTX)
Getting started……………………….. 1
Controls……………………………….. 1
RECEIVER ( ProRX)
Getting started……………………….. 2
Setting the ProRX color code switch.. 3
Mounting to the E-Z bird launcher… 4
Adjusting the launcher………………. 5
Ready to go…………………………… 5
STORAGE AND RATING S………… … 6
WARRANTY AND SERVICE…………. 7
FieldPro, ProTX, and ProRX are Trademarks of FieldPro, LLC
First Print ing Apr il 1999
Page 4

GETTING STARTED WITH
TH E ProTX
1. Replac ing the battery (in clu de d ): The ProTX is
designed to oper ate from one 9-volt alkal ine batte ry .
Open the batte ry co m partm ent on th e back of th e ProTX
by sliding th e door any fro m th e ProTX a nte nna. In sta ll
th e battery and re -install the b a ttery door.
C ON TROLS
1. Testing the co n trol buttons: The ProTX was designed
to operate up to fou r ProRX’s. Each button on th e top of
th e ProTX will operate one ProRX. Press each button and
make su re th e red LED tu rn s on when you press each
button and turns o ff when you release the butto n .
2. O peration: The unit will operate up to 100 ya rd s
consist ent ly. It will op er at e th e be st under line of si ght
conditions. The unit will not operate ove r hills but dow n
in a valley is fine. Pressing th e bu tto n for under one
secon d will op er at e the ProR X if th e above conditions are
follow ed. The unit is not water pr oof but it is w ate r
resi stant. Humidity and dam pness will not affect the
unit adversely
3. Color coding: All th e ProTX buttons are color coded to
match th e ProRX so that you c an tell which button on th e
ProTX will operate which ProRX. Refer to the section
titled “Set ting the ProRX co lor code sw i tc h” to lear n
more about that sub j ec t.
Hold the
Note:
ProTX aw ay from
your bo dy for
opt i mal ran ge.
Page 1
Page 5
GETTING STA RTED WITH
TH E ProRX-1
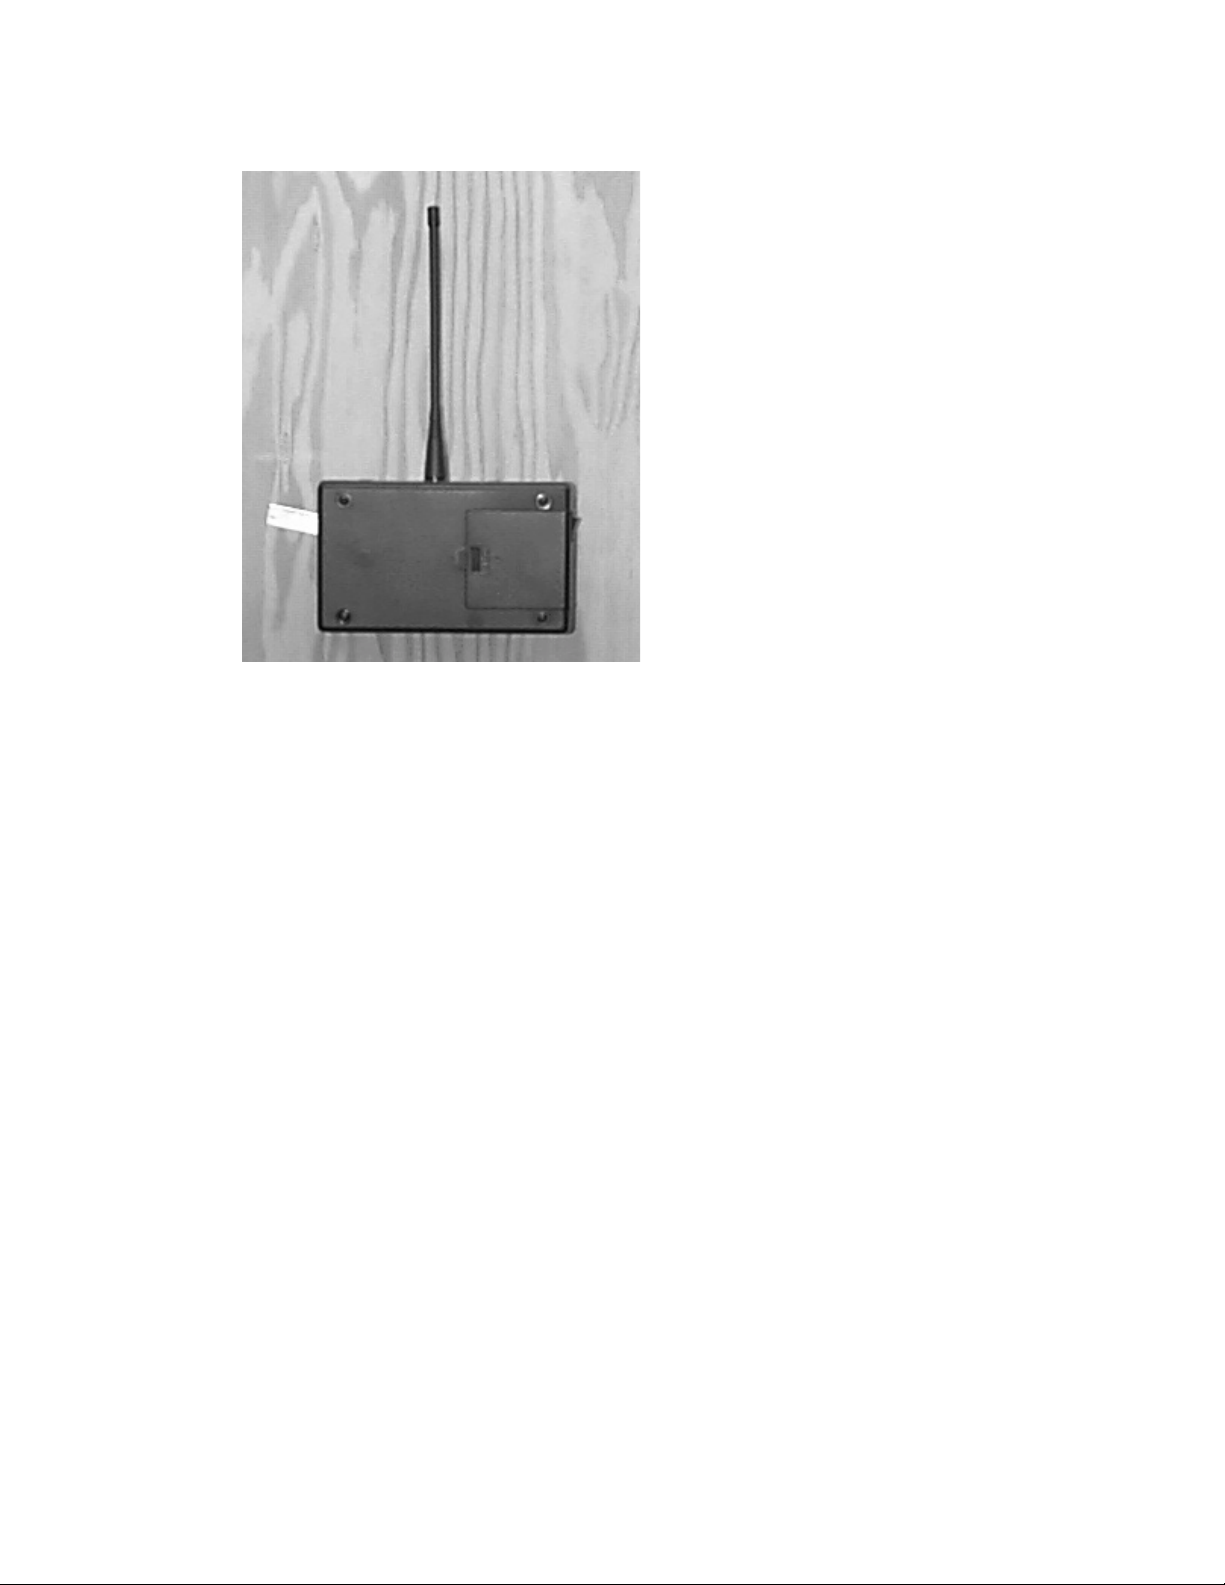
1. Replac ing the batter ies (included): The ProRX is
designed to oper ate from four AA alkaline b a tteries.
M ake su re th e pow er sw i tch on the right si de of the unit
is set to OFF. Open th e battery co m p a rtm en t on th e fr ont
of th e ProRX by sliding th e door to the right. In sta ll th e
b a tteries and re-ins tall the b attery door. Turn the unit
ON to position th e arm of the ProR X corr ect ly th en turn
th e unit back OFF.
Page 2
Page 6
SETTIN G TH E ProRX CO LO R CODE
SW I TC H
1. Opening the u n it: Lay th e unit on a flat su rf ace with
th e batter y door facing up. Rem ove th e screw s from eac h
corner of the unit. Rem ove th e top and place it to th e
ri ght of th e unit.
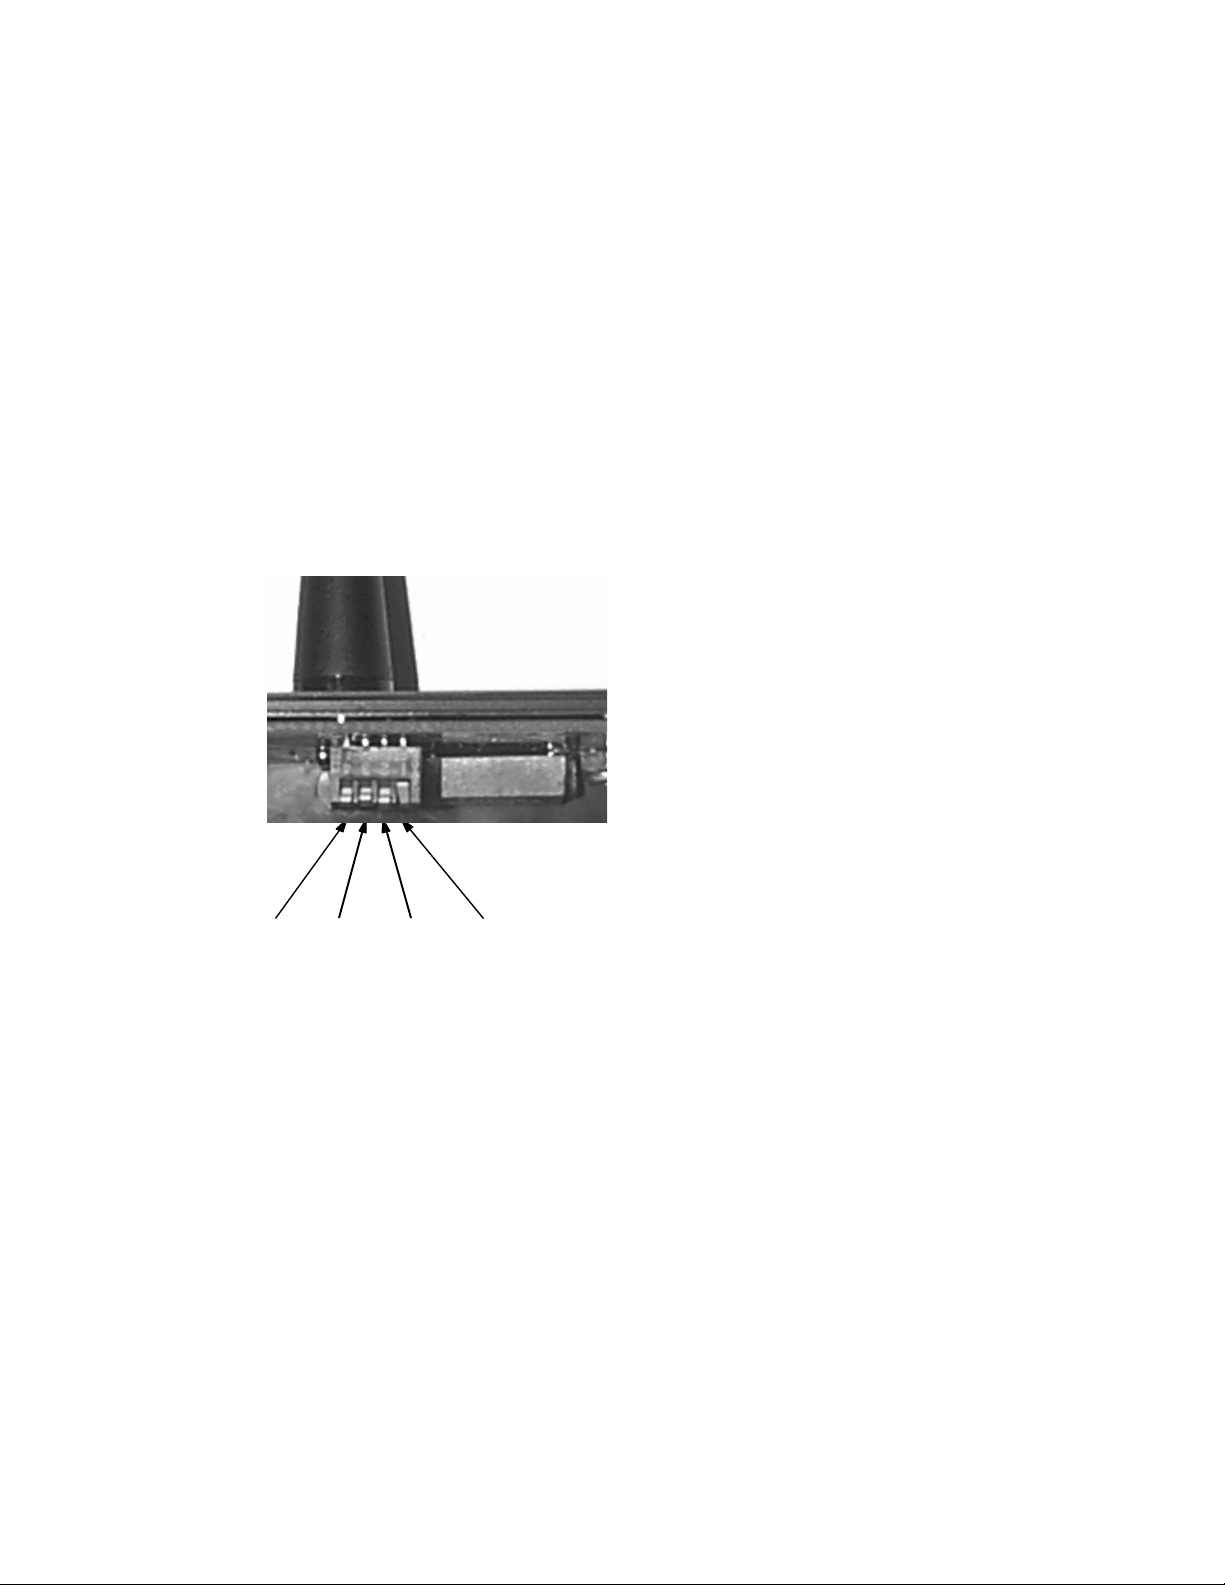
2. S etting th e color code sw i t ch : The col or code sw itch
is located at the to p -cen ter, below th e a nte nna. The
picture below sh o w s th e default col or code sw itch
setting, which is RED. To set the unit to anot her col or,
si mply flip th e RED sw itch dow n to match the others,
th e n flip th e desired col or code sw itch up.
Blue White Yello w Red
3. Closing the unit: Place the top back on th e unit and
install the four screw s. Do not overtighten !
4. Color cod i ng the receiver: O nce th e color code sw itch
has been set, you might w ant to mark th e outside of th e
unit with th at color . U se the appropr iat e sm all col or
st icker provided to do that. Use the large col or sti cker to
wrap around th e a nte nna if you would like to see it from
a distance.
Page 3
Page 7
M OUNTING TO TH E
E-Z BIRD LAUNCHER
1. Rem oving th e hardw are: U n screw the tw o bolts fro m
th e back of th e unit. Keep them together with th e
lockw ashers fo r lat er .
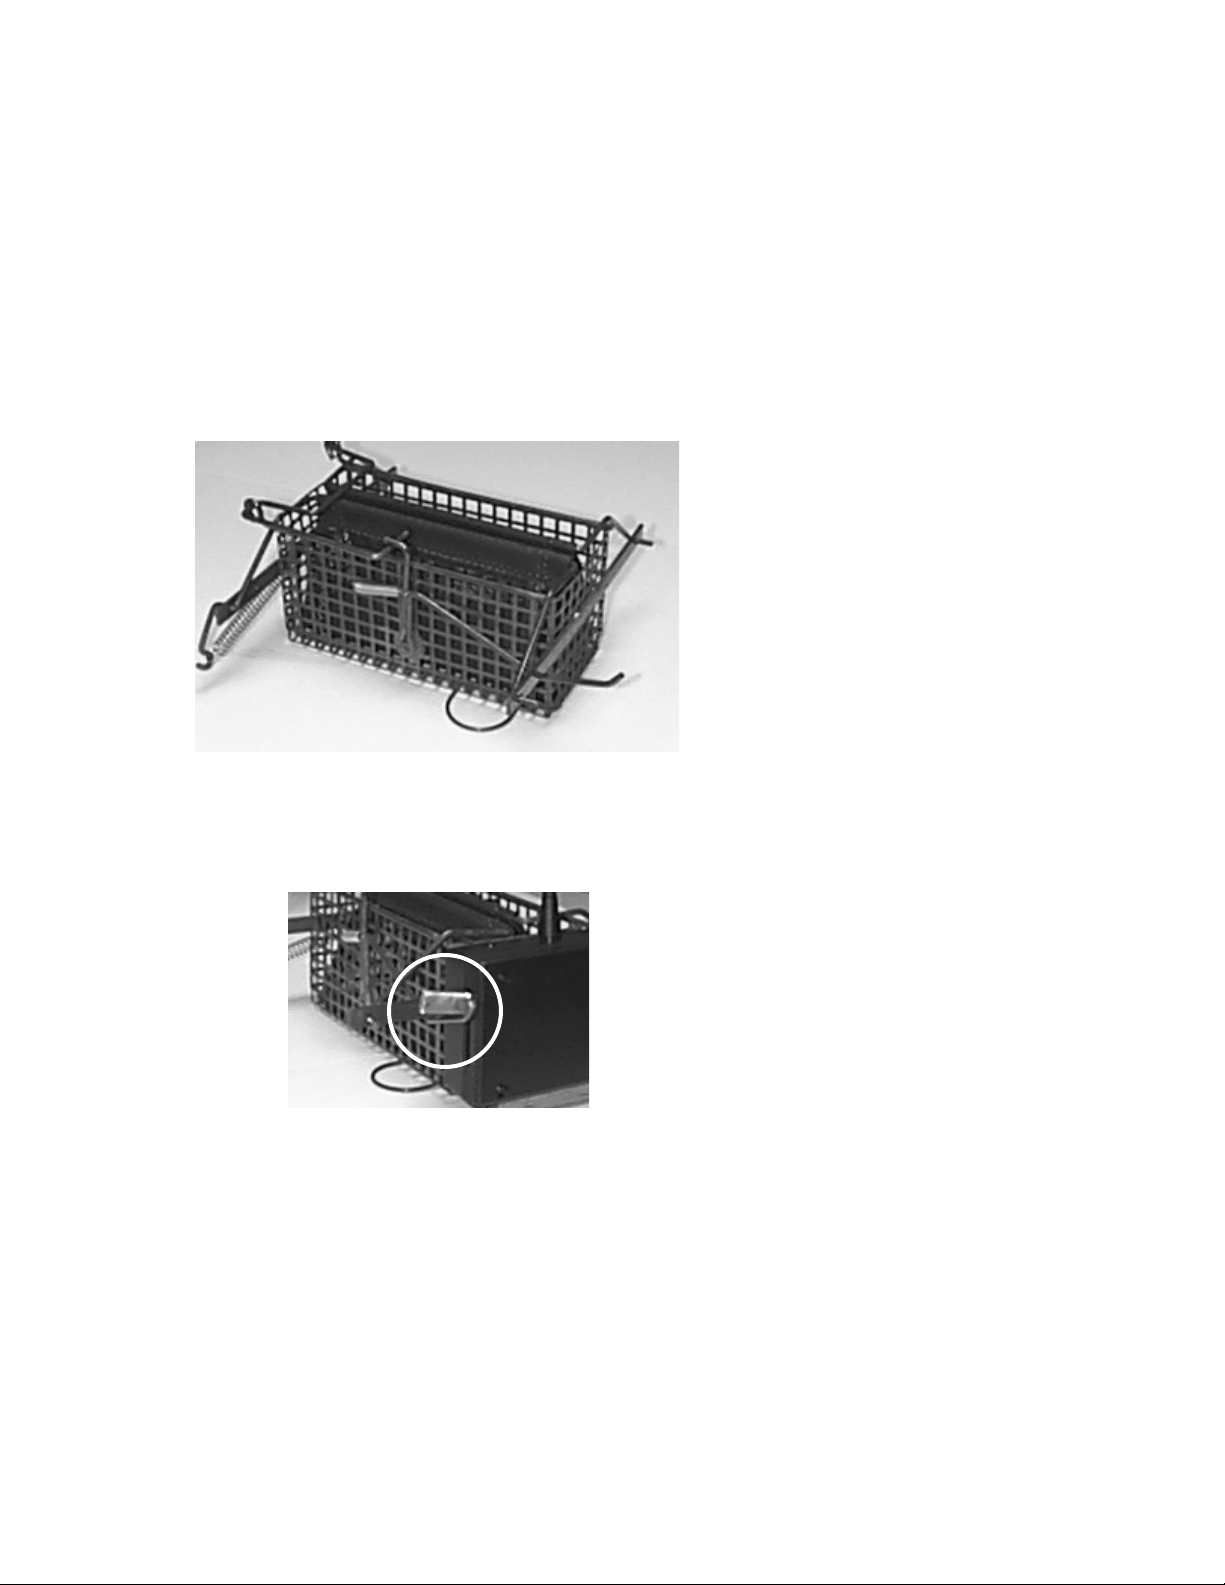
2. G etting ready fo r m ou n tin g : Se t the E-Z bird
lau ncher , as show n below . Tie th e launcher arm s
tog eth er so that it will not launch accidentally while
installing th e ProRX.
3. Finding the right plac e m ent: Place th e ProRX against
th e E-Z bird launcher so th e metal ar m of th e unit just
tou ch e s or is a little bit above th e arm of the E-Z bird
lau ncher as sh ow n below .
Page 4
Page 8
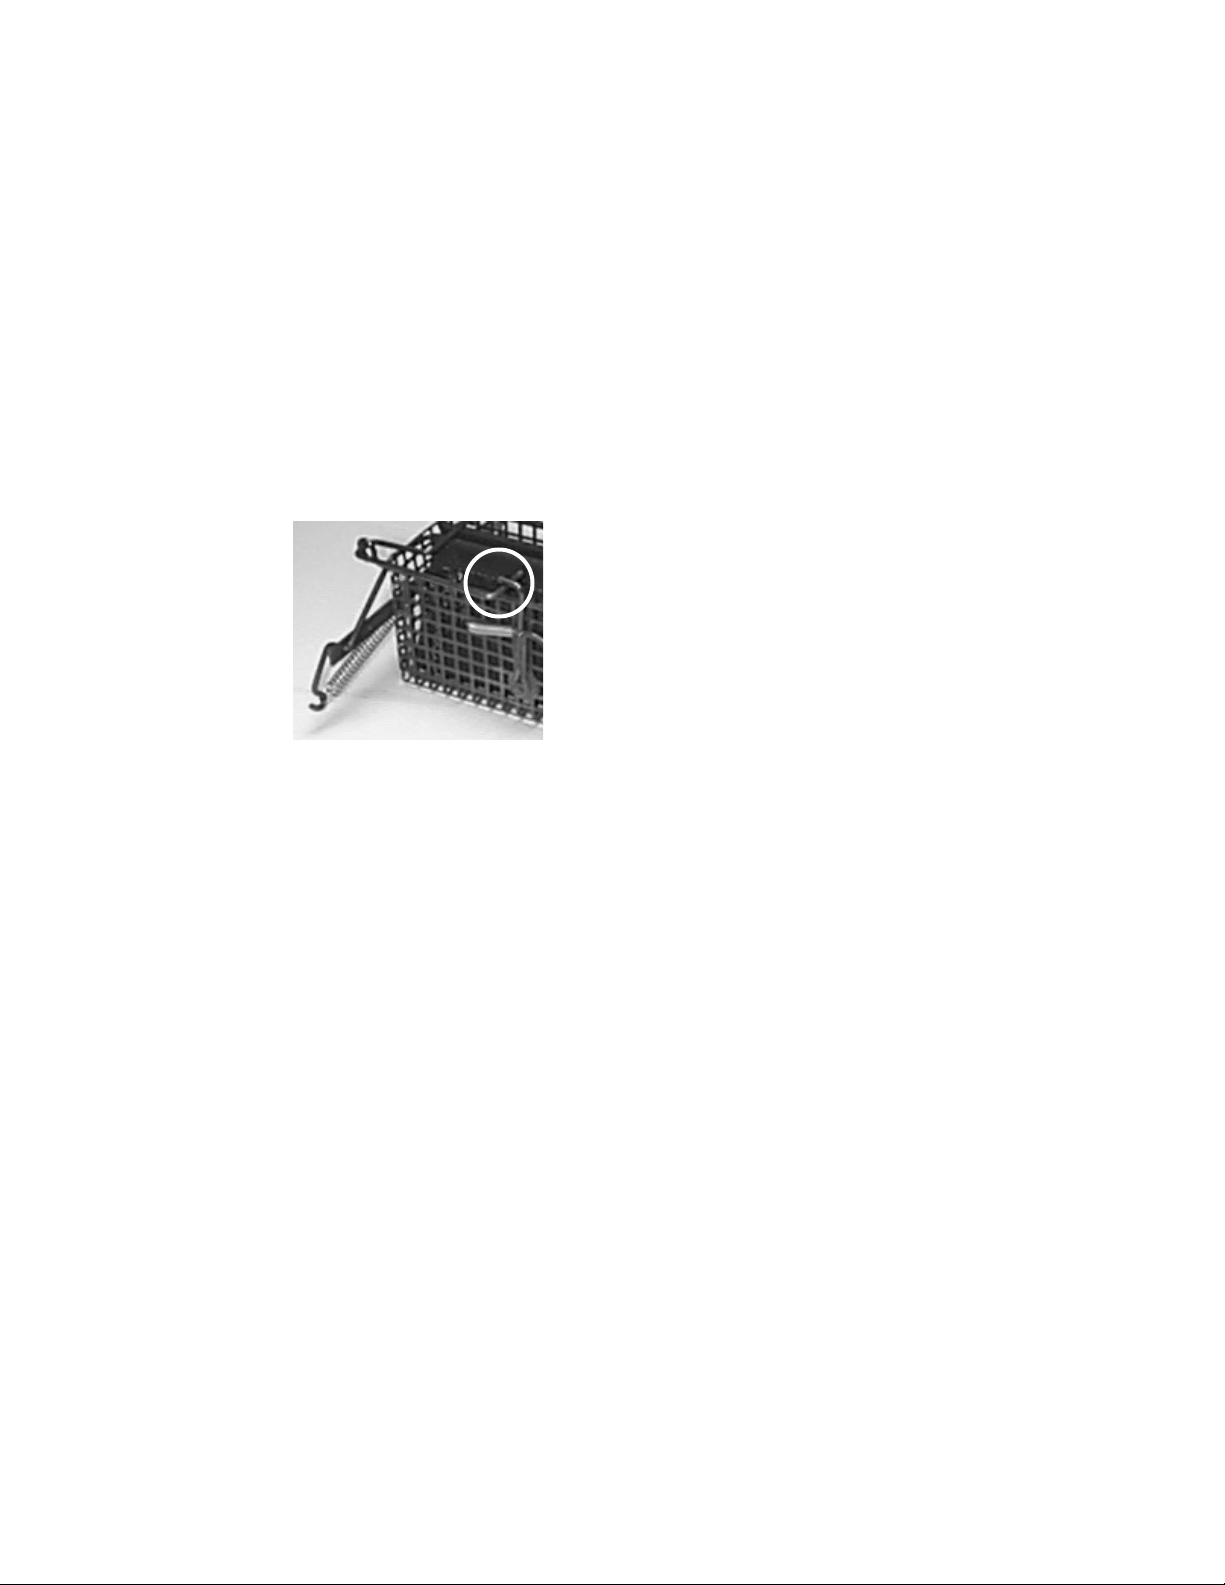
4. In sta lling th e hardw are: Take th e bolts and
lockw ashers from st ep 1 and screw th em into th e ProRX
fro m th e inside of th e E-Z bird lau ncher .
ADJUSTING TH E LAUNCHER
1. Adjusting fo r a fast launch: It is im portant on th e
medium and large E-Z bird launchers that you set th em
so that th ey ar e “hair trigger ”. The pict u re below
d e m o n stra tes this. You might al so want to bent th e arm
of th e E-Z bird launcher up to tou ch the arm of the
ProRX fo r a very quick re lease.
READY TO GO
1. O peration: Go ahead and tu rn the pow er sw itch on
th e right side of th e unit to the ON position. Press the
correspond i ng col or coded button on th e PROtx to te st
th e ProRX. Turn the unit to the OFF position when you
are done testing and when not in u se. The unit is not
w a terp ro o f but it is water resist ant. Humidity an d
dam pness will not affect th e unit ad versel y.
Severe
Note:
weather Condition s
like rain an d high
winds can limit th e
operating range.
Page 5
Page 9

STORAGE AND RATINGS
Storage Tem perat ure:
-45 degrees C to +85 degrees C
Operating Temperature:
-20 degrees C to +70 degrees C
Operating Range:
100 yards
ProTX Speci ficat ions:
Size - 2.375”(L) x 1”(W) x 3.75”(H)
Weight - 2.9 ounces (without battery)
Battery Req uirem ents - (1) 9 volt alka line
ProRX Speci ficat ions:
Size - 6.25”(L) x 1.75”(W) x 3.625”(H)
Weight - 10.9 ounces (without batteries)
Battery Req uirem ents - (4) AA alkali ne
WARRANTY AND SERVICE
Page 6
Page 10

Factory War ranty
Both the ProTX and the ProRX are covered by a one year
warranty on parts and labor fro m date of pu rchas e. The
warranty does not cover misuse, abuse, or any unauthorized
alterations or modifications.
Service
If you have a problem with your equipment and need to get
it repaired or have questions regarding your equipment,
please call 330-658-7705 or email us at
Page 11
W ARRA N TY RE GISTRATION
(Please fill out and return for our records)
Name _________________________________
Address _______________________________ Apt. No. _______
City __ __ _______________ St ate __ ____________ Zip __ ______
Telephone No. _________________________
Em ail Address _________________________
Date of Purchase _______________________
Location P urch ased ____________________________________
Model No. ProTX-1 Se rial No. _________
ProRX-1 Serial No. _________
ProRX-1 Ser ial No. _________
ProRX-1 Ser ial No. _________
ProRX-1 Ser ial No. _________
*T h e Serial No. is located on the front of the
Pr oRX an d on the bac k of the ProTX.
Comments and Suggestions:
______________________________________________________
______________________________________________________
______________________________________________________
______________________________________________________
______________________________________________________
______________________________________________________
______________________________________________________
______________________________________________________
______________________________________________________
SEND TO:
14120 Galehou se Rd.
Doy lest ow n, OH 44230
FieldP r o
Page 7
Page 12

 Loading...