

Page 1

FZR 5110-B
Page 2
2
English .................................................................................................................................................................................................. 5 - 20
Čeština................................................................................................................................................................................................21 - 36
Slovenština ........................................................................................................................................................................................37 - 52
Magyarul ............................................................................................................................................................................................53 - 68
Polski .................................................................................................................................................................................................69 - 84
1
7
10
1
3
4
2
12
5
6
7
8
9
11
FZR 5110-B
Page 3
3
23
12
45
123
Discharge chute/
Odhozový tunel/
Vyhadzovací tunel/
Kidobójárat/
Tunel wyrzutowy
Mulching plug/
Mulčovací záslepka/
Mulčovacia záslepka/
Mulcsozó dugó/
Zaślepka mulczująca
Central hook/
Středová pojistka/
Stredová poistka/
Középső biztosíték/
Centralny bezpiecznik
Upper limit/Horní limit/Horný limit/
Felső határérték/Górny limit
Lower limit/Dolní limit/Dolný limit/
Alsó határérték/Dolny limit
67
Fuel tank cap/Víčko palivové nádrže/
Viečko palivovej nádrže/Üzemanyagtartály
kupakja/Korek wlewu paliwa
PETROL LAWNMOWER USER'S MANUAL
Page 4
4
89
Oil drain plug/
Zátka vypouštění oleje/
Zátka vypúšťania oleja/
Olajkieresztő dugó/
Korek spustowy oleju
FZR 5110-B
Page 5

Table of Contents
5
Petrol Lawnmower
USER'S MANUAL
Thank you for purchasing this rotary petrol lawnmower. Before you start using it, please,
carefully read this user's manual and save it for possible future use.
TABLE OF CONTENTS
ILLUSTRATED ATTACHMENT ......................................................................................................................................1
1. GENERAL SAFETY INSTRUCTIONS ......................................................................................................................... 6
Important safety information ................................................................................................................................6
Packaging ......................................................................................................................................................................6
User's Manual ................................................................................................................................................................ 6
2. EXPLANATION OF INSTRUCTION LABELS ON THE MACHINE ..................................................................7
3. DESCRIPTION OF THE MACHINE ..........................................................................................................................9
4. ASSEMBLY/PREPARATION.........................................................................................................................................9
Taking the lawnmower out of the cardboard packaging ................................................................... 9
5. ASSEMBLING THE LAWNMOWER .........................................................................................................................9
Assembling the handle ...........................................................................................................................................9
Installing the small items tray ...............................................................................................................................9
Instructions for assembling the grass catcher ...........................................................................................10
Adding motor oil before starting the lawnmower .................................................................................10
Adding fuel ...................................................................................................................................................................10
6. OPERATION ..................................................................................................................................................................11
Starting the lawnmower ........................................................................................................................................ 11
Controlling travel .......................................................................................................................................................11
Application range for the lawnmower .........................................................................................................11
Mulching ........................................................................................................................................................................ 11
Setting the mowing height ...................................................................................................................................12
Replacing the mowing blades .........................................................................................................................12
Changing the motor oil .........................................................................................................................................12
Spark plug .....................................................................................................................................................................12
7. SAFETY INSTRUCTIONS .............................................................................................................................................13
General safety instructions ..................................................................................................................................13
Instructions for use ....................................................................................................................................................13
8. MAINTENANCE ............................................................................................................................................................15
Lawn care .....................................................................................................................................................................15
Maintenance ..............................................................................................................................................................15
Servicing ........................................................................................................................................................................16
Warranty does not cover ......................................................................................................................................16
Storage ...........................................................................................................................................................................16
9. TECHNICAL INFORMATION ..................................................................................................................................17
10. DECLARATION OF CONFORMITY ......................................................................................................................18
11. DISPOSAL .......................................................................................................................................................................19
EN
PETROL LAWNMOWER USER'S MANUAL
Page 6

EN 6
General safety instructions
1. GENERAL SAFETY INSTRUCTIONS
IMPORTANT SAFETY NOTICE
Carefully unpack the product and take care not to throw away any part of the packaging before you fi nd all the
parts of the product.
Store the machine in a dry place out of reach of children.
Read all warnings and instructions. Not following warnings or instructions may lead to injury by electrical
shock, a fi re and/or serious injuries.
PACKAGING
The product is packed in a package that prevents damage during transport. This package is a resource and so
can be handed over for recycling.
USER'S MANUAL
Before you start working with the machine, read the following safety and usage instructions.
Acquaint yourself with the operating elements and the correct use of the machine. Keep the user's manual in
a safe place where it can be easily retrieved for future use. Save the original packaging, including the internal
packing material, warranty card and proof of purchase receipt at least for the duration of the warranty.
If you need to ship this machine, pack it in the original cardboard box to ensure maximum protection during
shipping or transport (e.g. when moving or when you need to send this product for repair).
Note: If you hand over the machine to somebody else, do so together with the user's manual. Following
the instructions in the included user's manual is a prerequisite for the proper use of the machine. The
user's manual also contains operating, maintenance and repair instructions.
The manufacturer takes no responsibility for accidents or damages resulting from not
following the instructions in this manual.
FZR 5110-B
Page 7
Explanation of instruction labels on the machine
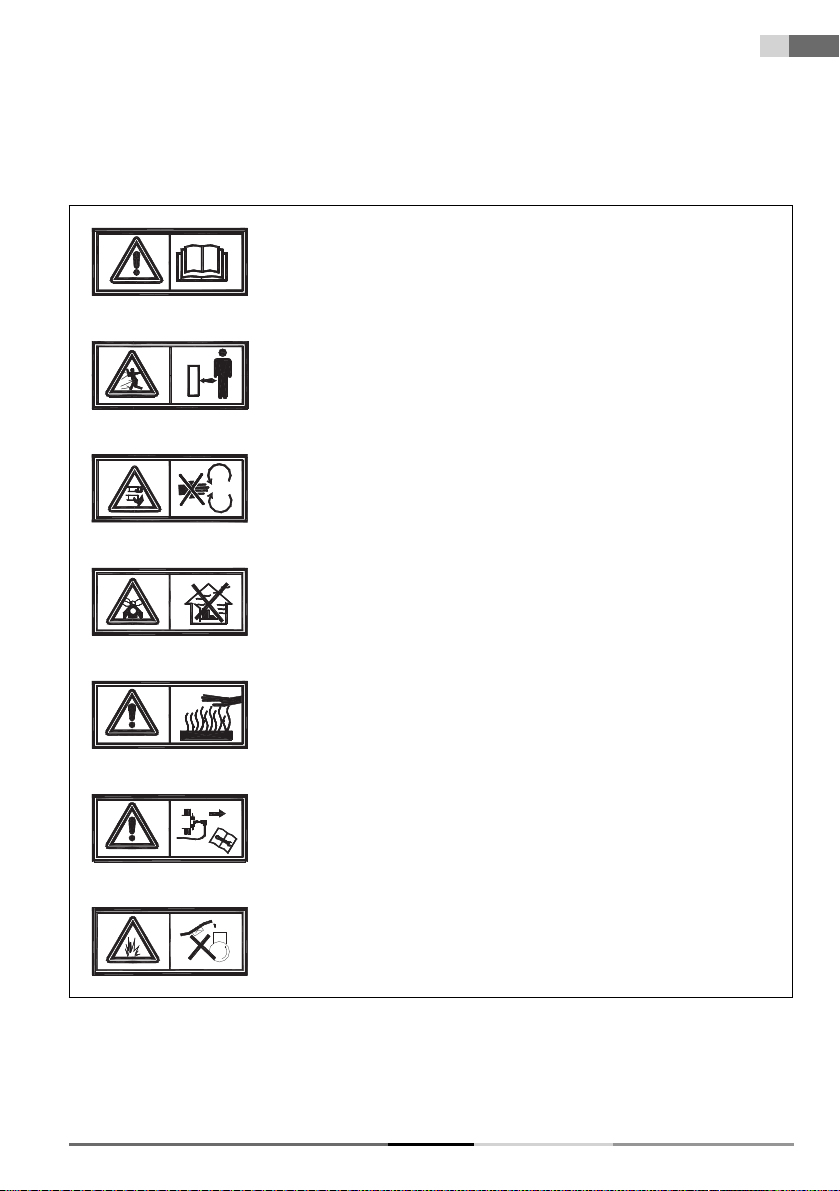
2. EXPLANATION OF INSTRUCTION LABELS
ON THE MACHINE
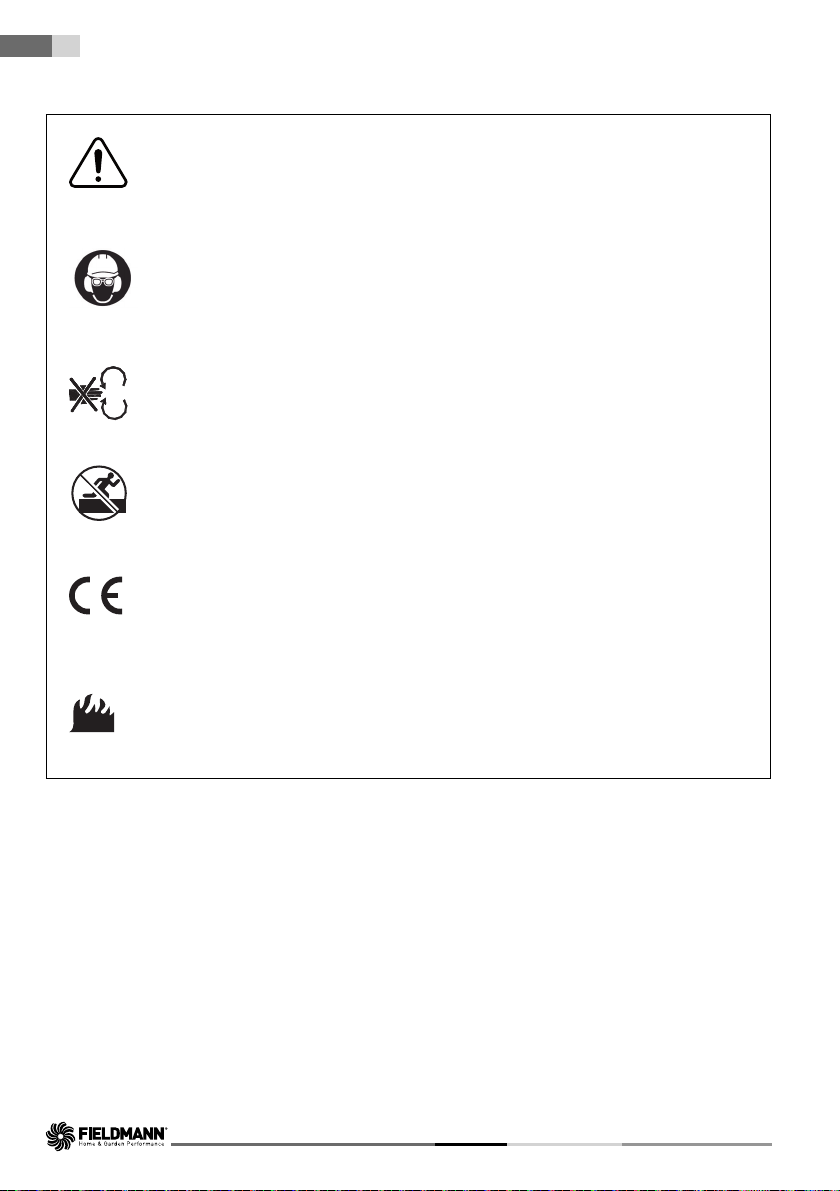
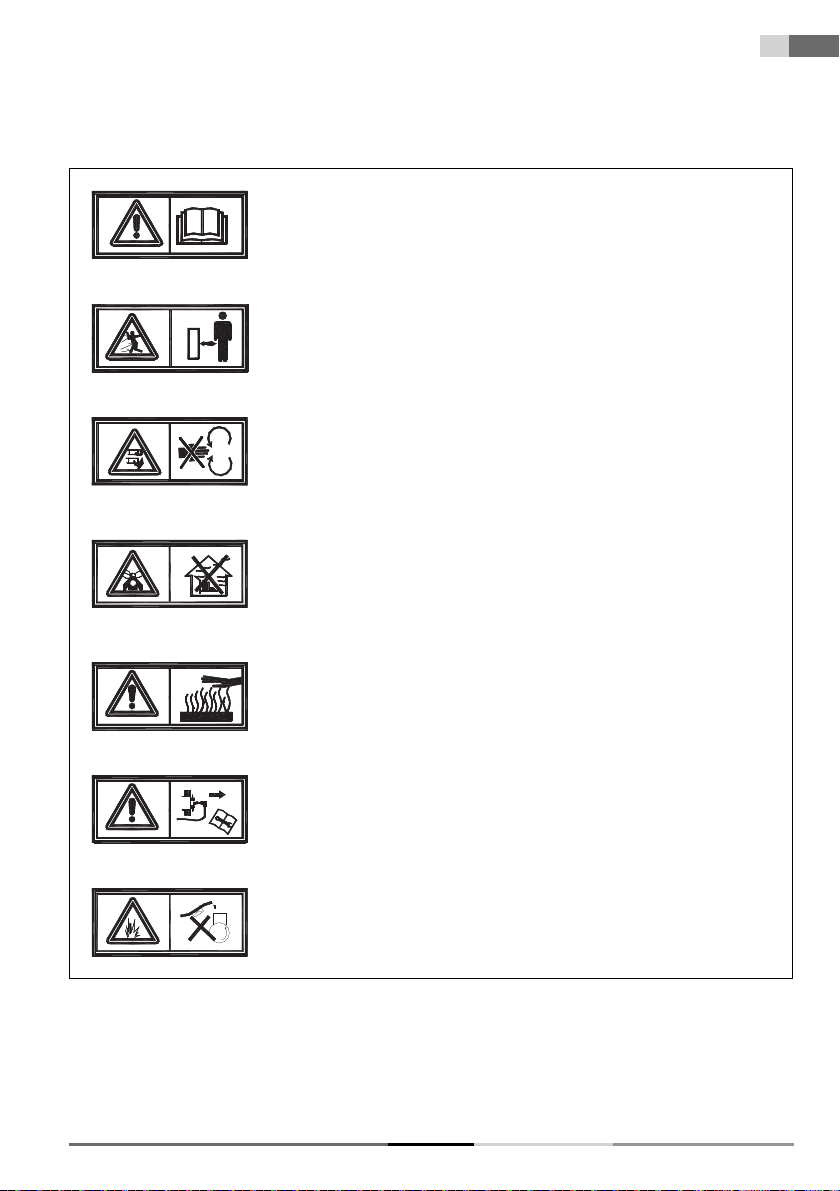
Before putting into operation, please carefully
read the user's manual.
Keep other persons away from the work area.
Attention, rotating blades! Protect yourself against
the danger of injury to limbs.
Emission of toxic gasses. Do not use the petrol
lawnmower in enclosed or unventilated areas.
EN
7
Hot surfaces, risk of burns!
Before carrying out maintenance, turn off the
engine and disconnect the spark plug.
Never add fuel while the engine is running.
PETROL LAWNMOWER USER'S MANUAL
Page 8
EN 8
Explanation of instruction labels on the machine
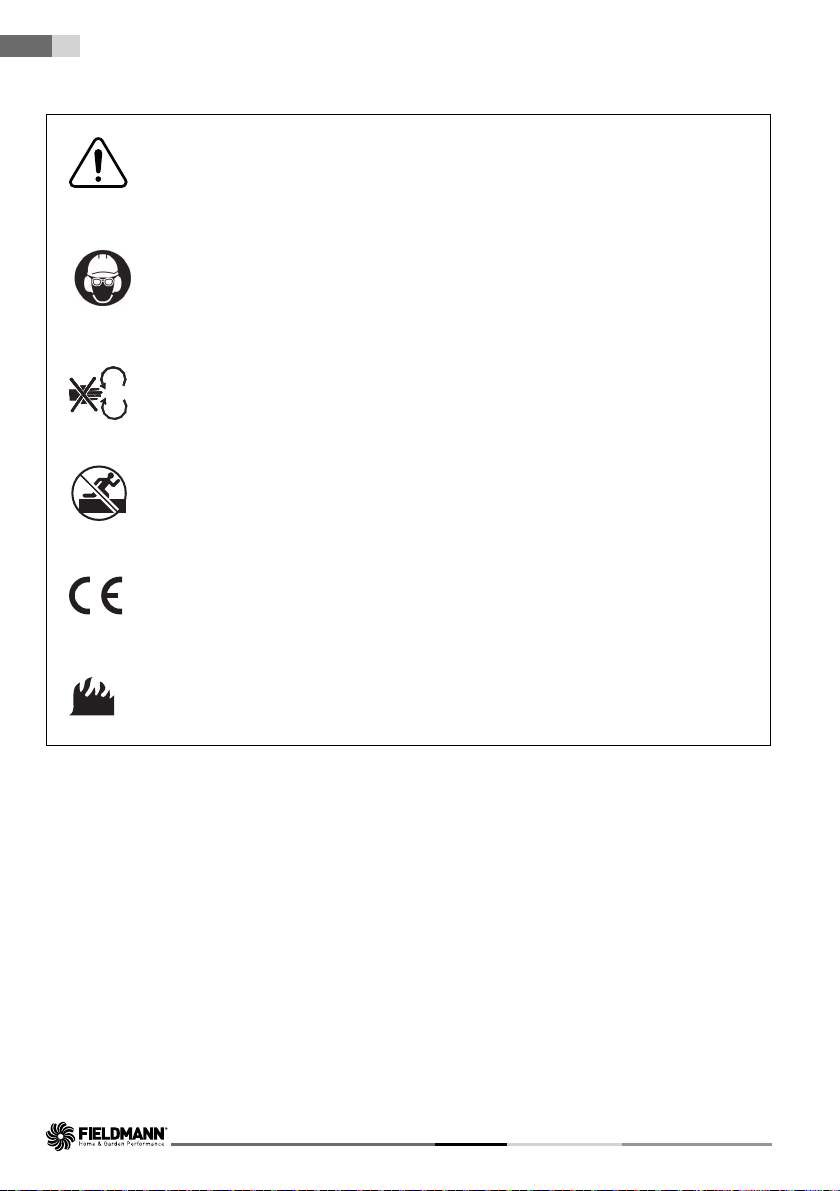
Indicates that there is a risk of injury to persons, death
or damage to the machine if instructions are not followed
Use hearing protection.
Use eye protection.
Use breathing organ protection.
Always maintain a distance from moving parts.
Travel along the slope on contours, not up and down.
Conforms to all relevant European directives.
Petrol is extremely fl ammable and therefore allow the
engine to cool down for 2 minutes before adding more
fuel.
FZR 5110-B
Page 9

Description of the machine | Assembly/Preparation | Assembling the lawnmower
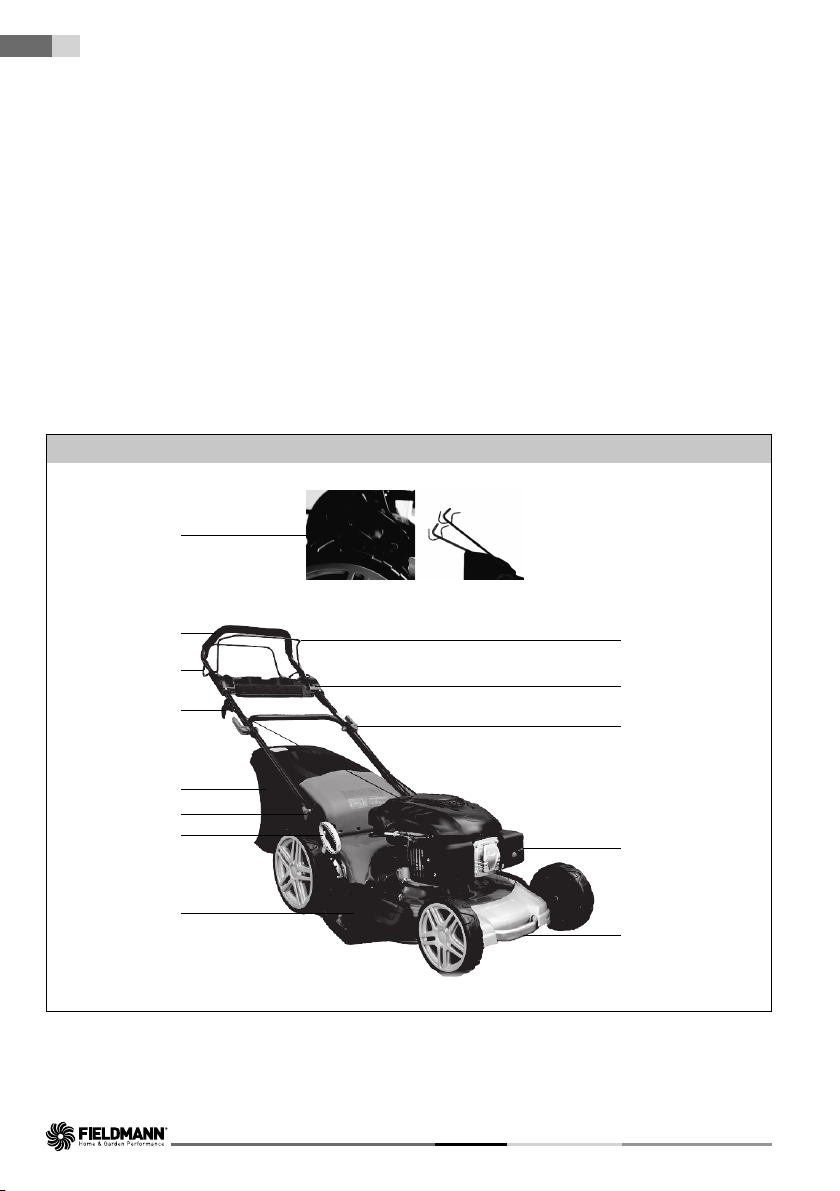
3. DESCRIPTION OF THE MACHINE (fi gure 1)
1. Top part of the handle
2. Start/brake lever
3. Travel lever
4. Pull cord
5. Quick coupling screw
6. Grass catcher
7. Bottom part of the handle
8. Mowing height adjustment lever
9. Fuel primer bulb
10. Side discharge fl ap
11. Front handle
12. Small items tray
4. ASSEMBLY/PREPARATION
Before assembling and starting the petrol lawnmower, fi rst carefully read the entire user's manual and the
instructions contained in it.
IMPORTANT INFORMATION: The lawnmower is supplied WITHOUT FUEL AND OIL in the engine.
Your new lawnmower was assembled and tested at the factory.
EN
9
TAKING THE LAWNMOWER OUT OF THE CARDBOARD PACKAGING
Take the lawnmower out of the cardboard packaging and check that no loose parts are left in the packaging.
5. ASSEMBLING THE LAWNMOWER
IMPORTANT INFORMATION: Carefully unfold the lawnmower handle careful not to pinch your fi nger or
damage the lawnmower's control cables.
ASSEMBLING THE HANDLE
1. Insert the bottom part of the handle (fi gure 1 - point 7) into the respective hole on the lawnmower and after
setting it at an appropriate handle height (2 positions), secure in place with screws.
2. Remove the protective padding and fi t the top part of the handle (fi gure 1 - point 1) into the hole in the bottom
part of the handle and tighten both fastening screws (fi gure 1 - point 5).
INSTALLING THE SMALL ITEMS TRAY (fi gure 1 - point 12)
Fasten the small items tray to the handle using the included screws.
PETROL LAWNMOWER USER'S MANUAL
Page 10

EN 10
Assembling the lawnmower
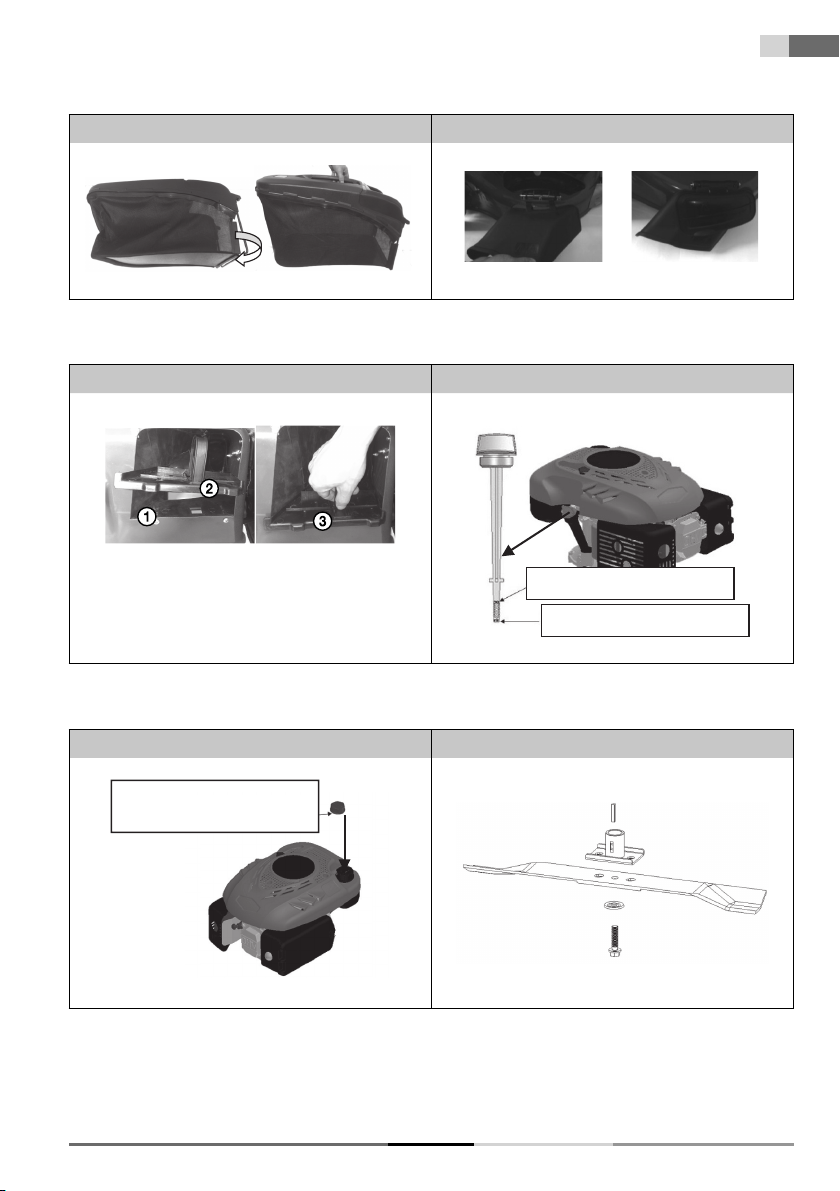
INSTRUCTIONS FOR ASSEMBLING THE GRASS CATCHER
Assemble the grass catcher according to fi gure 2 – attach the plastic end piece from underneath and along the
sides of the catcher to the steel frame.
ADDING MOTOR OIL BEFORE STARTING THE LAWNMOWER
The lawnmower is supplied without motor oil. Before fi rst start up, add motor oil SAE30 15W-40 (approx 500 ml)
according to the following instructions.
Caution! DO NOT OVERFILL the oil tank, otherwise a large amount of smoke will come out of the exhaust
when the lawnmower is started up.
1. When adding oil, place the lawnmower on a level surface.
2. Pull the oil dipstick out of the oil refi ll hole.
3. After adding oil, put the dipstick back into the hole (fi gure 5) and tighten it fi rmly.
4. The oil level must be between the upper and lower limit (see fi gure 5).
IMPORTANT INFORMATION: Check the oil level before every use of the lawnmower.
Add oil if necessary. Add oil up to the MAX level mark on the oil dipstick.
Replace the oil after the fi rst 5 hours of operation and subsequently after every 25 hours of operation.
ADDING FUEL
After unscrewing the fuel tank cap (fi gure 6), add fuel. Add fuel up to the collar of the fuel tank. Do not overfi ll
the fuel tank. Always add fresh, clean and approved lead-free petrol. Do not mix oil with fuel in an amount that
you will not be needing in the following 30 days; this will ensure the required freshness of the fuel.
Caution! Fuels mixed with alcohol (e.g. gasohol) or fuels with ethanol or methane additives
may bind moisture to themselves, which may result in separation during storage and the formation of acids.
Subsequently during storage the acid vapours may damage the fuel system of the lawnmower engine. If
you will not be using the lawnmower for more than 30 days, drain the fuel system of the lawnmower, this
will prevent future engine problems. Drain the fuel tank, start the engine and let it run until the fuel lines
and the carburettor are empty. At the start of the next season, add fresh fuel into the fuel tank. For more
information, see chapter Storage instructions. Never clean the engine or the carburettor with cleaning
agents, there is a risk of irreversible damage.
FZR 5110-B
Page 11

Operation
6. OPERATION
Start/brake lever (fi gure 1 point 2) – If you wish to start the lawnmower, you need to pull this lever
towards the handle. When the lever is released, the engine will stop.
Starting pull cord (fi gure 1 point 4) - Serves to start the lawnmower.
Travel lever (fi gure 1 – point 3) - Serves to start the travel of the lawnmower while mowing.
STARTING THE LAWNMOWER
1. If the engine is not warm, press the fuel primer bulb 2-3 times (fi gure 1 – point 9) (it is not necessary to use
the fuel primer bulb if the engine is warm)
2. Pull the start/brake lever to the handle and pull on the pull cord
3. The engine is turned off by releasing the start/brake lever
Note: A small amount of smoke may be emitted when the engine is started up for the fi rst time as the
protective layers in the engine are burnt off. This is completely normal and does not constitute a problem.
Pull the start/brake lever towards the handle and quickly pull on the pull cord. Do not allow the pull cord to
wind back.
Caution! Immediately wipe away any drops of fuel or oil. Do not store or add fuel or handle it in any way
in the vicinity of an open fi re.
CONTROLLING TRAVEL
The travel is controlled using the travel lever (fi gure 1 – point 3). When the lever is pulled to the handle, the
lawnmower will start moving. To stop, release the lever. The lawnmower has one constant speed.
11
EN
APPLICATION RANGE FOR THE LAWNMOWER
Mowing with loose placement of grass clippings on the lawn - mulching
Mowing with collection of grass clippings in a grass catcher
Mowing with rear discharge of grass clippings
Mowing with side discharge of grass clippings
MULCHING
1. Attach and remove accessories only with the engine turned off.
2. After attaching the mulching accessory, check its stability.
3. Use only original mulching accessories when mulching.
4. Try not to mow tall grass all at once, this will prevent overloading the lawnmower mechanism and the engine.
Assembly (fi gure 4)
Slide the mulching plug (1) into the discharge chute (2). Secure the seated plug in position using the selfclamping hook.
PETROL LAWNMOWER USER'S MANUAL
Page 12

EN 12
Operation
Disassembly
Firmly press your thumb on the central point of the plug (3), when it lifts up, pull it out of the discharge chute.
Mowing with side discharge of grass clippings (fi gure 3)
To attach the side discharge fl ap, lift up the side chassis cover on the lawnmower (fi gure 3 - point 1). Secure
the fl ap in place using hooks which fall under the spindle of the cover. Then release the cover (fi gure 3 - point 2).
When mowing with side discharge, it is necessary to place the mulching plug into the discharge chute.
SETTING THE MOWING HEIGHT
The mowing height is set centrally using the central mowing height adjustment lever (fi gure 1 – point 8).
There are 6 positions ranging from 25 - 75 mm. The middle mowing height is the most suitable for the majority of
lawns. Lawn damage may result when the lowest height is set.
REPLACING THE MOWING BLADES
If you wish to replace the mowing blade, remove the bolt (fi gure 7). Prior to removing the blade, drain the oil from
the oil tank.
Perform the installation according to the provided picture. Tighten the screw. The tightening torque is 40 Nm.
When replacing the the blade, replace the fastening bolt also.
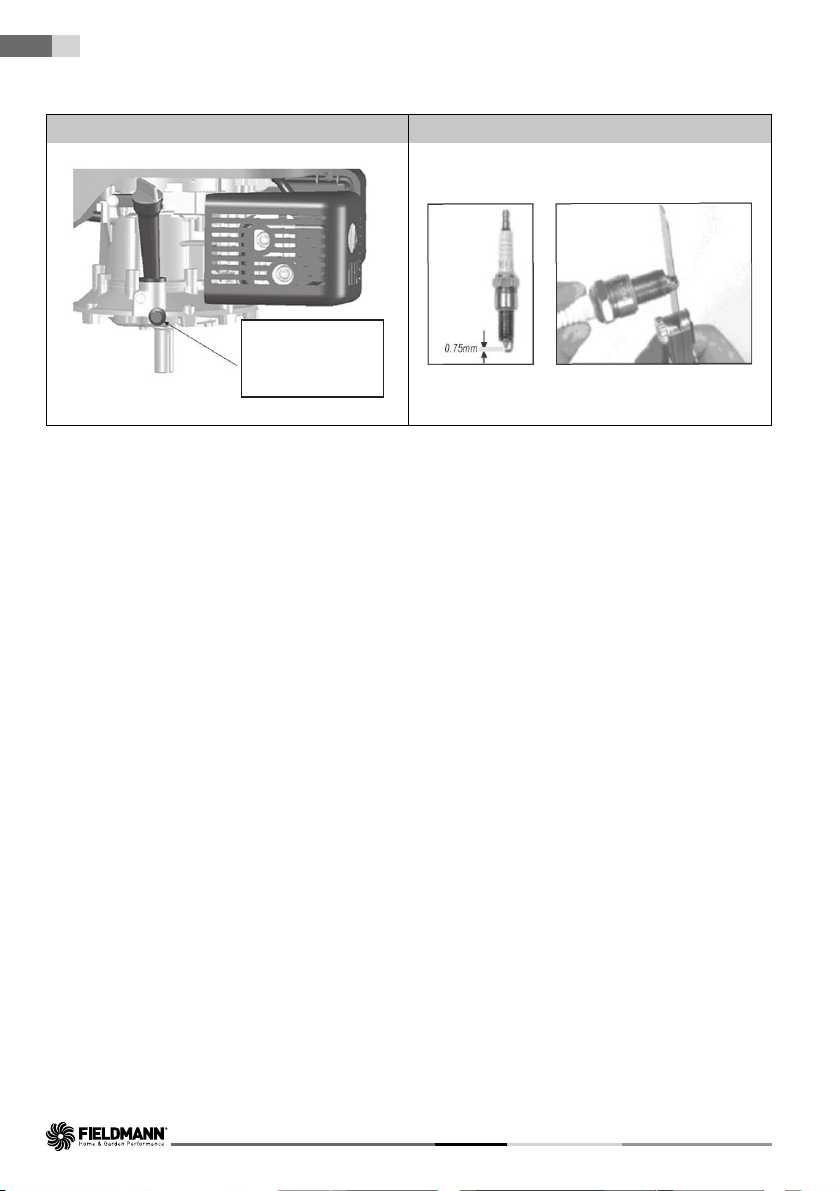
CHANGING THE MOTOR OIL
The drain plug is located under the engine (fi gure 8). Place a suitable container for catching the used oil under
the engine and remove the plug. Tilt the lawnmower so that all the oil can drain from the oil tank.
After draining the oil, put the plug back into the hole, making sure that the plug is securely in its place and wipe
away any drops of spilled oil.
Add type SAE30 oil into the oil tank.
When the oil dipstick is inserted into the hole (not after being screwed in), the oil level should be between the Min
and Max marks (fi gure 5). Do not overfi ll the oil tank.
Start the engine and allow it to run for a short time. Stop the engine, wait 1 minute and check the oil level in the oil
tank. Add oil to the required level if necessary.
SPARK PLUG
As soon as the engine cools down, screw out the spark plug using a socket wrench and clean it with a wire
brush. Using a feeler gauge, set the spark gap to 0.75 mm (fi gure 9). Screw the spark plug back into position. Do
not overtighten the spark plug.
FZR 5110-B
Page 13

Safety Instructions
7. SAFETY INSTRUCTIONS
GENERAL SAFETY INSTRUCTIONS
This product is used exclusively for mowing grass. Do not use it for any other purposes than those intended.
Otherwise there is a risk of damaging it or an injury.
Never allow children or persons who are not acquainted with the contents of this user's manual to work with
the machine.
The person operating the lawnmower is responsible for the safety of persons in the work area.
Never operate the lawnmower in the near vicinity of other people, children or freely roaming animals.
Before starting mowing, check the terrain where the lawnmower will be used and remove stones, wires,
sticks, splinters, bones and other foreign objects, which could become caught in it or defl ected or cause
injuries.
INSTRUCTIONS FOR USE
All nuts, pins and bolts must be properly tightened so that the machine is in a safe and operational condition.
Never use the lawnmower without the grass catcher or protective cover.
Never use the lawnmower with loose mowing blades. Always check in advance that all respective bolts are
securely tightened. Blunt blades must be sharpened evenly.
Damaged blades must be replaced.
When working with the lawnmower, wear long pants and solid footwear.
Never start the lawnmower in enclosed or poorly ventilated areas where fumes could accumulate. Emissions
from the engine contain carbon monoxide, which is life threatening.
Work only during suffi cient light conditions (in daylight or suffi cient artifi cial lighting).
Do not use the lawnmower when it is raining or if the grass is wet.
Proceed especially carefully when mowing in elevated terrain (on a slope). Always mow perpendicular to the
slope, parallel to the contour, and not directly up/down.
Under no condition leave the lawnmower running without supervision; if you leave the lawnmower, turn off
the engine.
Never lift the rear part of the lawnmower when starting it and always keep your limbs away from the cutting
deck or the rear grass ejection chute while the engine is running.
Never modify the engine's speed setting.
On lawnmowers with travel, release the travel lever before starting the engine.
Never transport the lawnmower while its engine is running.
Stop the engine and disconnect the spark plug in the following cases:
- when performing any task whatsoever under the mowing deck or in the rear grass ejection chute.
- when performing maintenance, repairs or inspecting the machine.
- before carrying, lifting or transporting the lawnmower.
- when you leave the lawnmower without supervision or you are getting ready to adjust the mowing height.
- before removing and emptying the grass catcher.
- when an impact with a foreign object occurs, stop the engine and carefully inspect to ensure that there is
no damage. In the event of damage, take the lawnmower to a specialised service centre for repairs.
13
EN
ATTENTION: The mowing blade continues to rotate for several seconds after the engine is turned off.
PETROL LAWNMOWER USER'S MANUAL
Page 14

EN 14
Safety Instructions
- if the lawnmower is vibrating abnormally (immediately identify and remedy the cause of the vibration).
- For the purpose of ensuring safe operation, regularly check that the pins, bolts and nuts on the
lawnmower are securely tightened.
ATTENTION: FUEL IS A VERY FLAMMABLE LIQUID.
Store fuel in a suitable container.
Only add fuel in an open and well ventilated location. When handling fuel, do not smoke or use a mobile
phone.
Only add fuel when the engine is turned off. Never open the fuel tank or add fuel if the engine is hot or if it is
running.
If fuel is spilled, do not start the engine. Take the lawnmower away from the location where the fuel was
spilled and take care to avoid possible ignition. Continue with work only after the spilled fuel has evaporated
and the fuel fumes have dissipated;
After adding fuel, securely tighten the fuel tank cap and the cap on the fuel canister.
ATTENTION: Before carrying out maintenance or repairs, stop the engine and disconnect the spark plug.
FZR 5110-B
Page 15

Maintenance
8. MAINTENANCE
LAWN CARE
Various forms of care are required depending on the type of grass area.
Therefore, always read the instructions included on seed packages with respect to the mowing height for the
growing conditions in the given locality.
It is necessary to always keep in mind that the larger part of grass consists of a stem and one or more leaves.
When the leaves are cut off completely, the lawn is damaged and the renewal of growth will be much more
diffi cult.
The following instructions generally apply:
– excessively low mowing causes disruption to the roots and subsequently "spotty" appearance;
– in summer, mowing must be higher to prevent the soil from drying out;
– mowing wet grass may result in a lower effi ciency of the blade due to grass catching on the blade and
grass being ripped out of the ground;
– in the event of exceptionally tall grass it is appropriate to perform the fi rst mow at the maximum permitted
mowing height of the machine and then mow again only after two or three days.
The lawn will have a better appearance when it is mowed regularly over its entire area at the same height with
alternating mowing directions.
MAINTENANCE
All nuts, pins and bolts must be properly tightened so that the machine is in a safe and operational
condition. Regular maintenance is the basic prerequisite for ensuring safety of the user, maintain the
lawnmower's operating condition and high performance.
Never store a machine with petrol in the fuel tank inside a building where the fumes could come within range
of an open fi re, sparks or sources of high temperature
Before storing in any enclosed area, allow the engine to cool down.
To reduce the risk of a fi re, ensure that the lawnmower and in particular the engine, exhaust muffl er, battery
and also the location of spare fuel storage are free of grass, leaves or excessive amounts of lubricant.
Regularly inspect the condition of the defl ector and the grass catcher; replace if damaged.
Drain the fuel in a well ventilated area when the engine has cooled down.
When removing or installing the mowing blade, use thick work gloves.
It is necessary to check the balance of the mowing blade every time that it is sharpened.
15
EN
ATTENTION: Before carrying out maintenance or repairs, stop the engine and disconnect the spark plug.
Before using the four-stroke engine, please carefully read the user's manual of the engine. Regularly check the
oil level and if necessary add oil or change it.
Regularly inspect the lawnmower and ensure that all grass deposits are removed from the underside of the
chassis.
Regularly lubricate the axle of the chassis and the bearings using a suitable lubricant.
Regularly inspect the condition of the blades because they have a signifi cant effect on the performance of the
lawnmower. Blades should always be sharp and balanced.
In regular intervals, check that all nuts and bolts are tightened. Nuts and bolts that are worn out or incorrectly
tightened may cause serious damage to the engine or the frame.
PETROL LAWNMOWER USER'S MANUAL
Page 16

EN 16
Maintenance
If the blade strongly impacts an obstacle, stop the lawnmower and take it to an authorised service centre.
BLADE: the blade is made from pressed steel. To achieve the best possible mowing results, regularly sharpen
the blades, approximately after every 25 hours of operation. Check that the blade is always correctly
balanced. To do this, insert a steel axle (with a diameter of 2-3 mm) into the middle hole. If it is correctly
levelled, the axis will remain in the horizontal position.
If the blade does not remain in the horizontal position, replace it.
When removing the blade, screw out the bolt, check the load bearing part of the blade. If the parts are worn
out or damaged, replace them.
ATTENTION: Always use only original spare parts. Poor quality spare parts may cause serious damage to
the lawnmower and create a safety hazard.
SERVICE
In the event that after purchasing the product you fi nd any kind of defect, contact the service department.
When using the product, follow the instructions contained in the included user's manual.
A complaint will not be accepted if you modifi ed the product or if you did not follow the instructions in the
user's manual.
WARRANTY DOES NOT COVER
Normal wear and tear of operating parts of the machine as a result of its use
Servicing tasks related to standard maintenance of the machine (e.g. cleaning, lubrication, tuning, etc.).
Defects caused by external effects (e.g. climatic conditions, dustiness, inappropriate use, etc.)
Mechanical damage resulting from the machine being dropped, impact, etc.
Damages resulting from unprofessional handling, overloading, use of incorrect parts, inappropriate tools, etc.
On returned products that were not properly protected against mechanical damage during transport, the risk
of potential damage is borne exclusively by the owner.
STORAGE
If you will not be using the machine for an extended period of time, store it according to the following
instructions. This will extend the lifetime of the machine.
Fully drain fuel from the fuel tank and the carburettor.
Screw out the spark plug and pour a small amount of motor oil into the socket. Gently pull the pull cord 2 to 3
times.
Use a clean cloth to clean the exterior surfaces. Store the machine in a clean dry location.
FZR 5110-B
Page 17

Technical specifi cations
9. TECHNICAL SPECIFICATIONS
Engine type OHV, air cooled, 4-stroke
Rated power 2.70 kW
Engine rpm 2900 rpm
Displacement 140 cm
Starting Pull cord
Fuel tank capacity (lead-free 95 or higher) 0.8 litres
Adjustable mowing height 25-75 mm with 6 positions
Height adjustment Central height adjustment
Mowing width 510 mm
Wheel span 200 mm (front wheel)
Capacity of grass catcher: 75 l
Chassis steel
Declared noise level 98 dB (A)
Weight 34 kg
Amendments to text and technical parameters are reserved.
Changes in the text, design and technical specifi cations may be made without prior notice and we reserve the
right to make these changes.
3
280 mm (rear wheel)
17
EN
PETROL LAWNMOWER USER'S MANUAL
Page 18

EN 18
Declaration of Conformity
10. DECLARATION OF CONFORMITY
ES DECLARATION OF CONFORMITY
We Fast ČR, a.s., Černokostelecká 251 01 Říčany u Prahy, tel.:323204111, hereby declare,
that the Fieldmann FZR 5110 B Petrol Lawnmower (year of manufacture is indicated on the rating label and is
followed by the serial number of the machine, meets the directives COUNCIL DIRECTIVE:
2006/42/EC – 2004/108/EC – 2000/14/EC – 97/68/EC – 2002/88/EC
and was tested in compliance with the norms below:
EN 55012
EN 836 – EN 836/A4
EN ISO 5395 –1:2013
EN ISO 5395 – 2:2013
EN ISO 14982:2009
EN ISO 3744:2010
ISO 11094:1991
FAST ČR, a.s. is authorised to act on behalf of the manufacturer.
CE label: 14
In Říčany, on 18. 9. 2014
Petr Uher
Quality Manager
FZR 5110-B
Page 19
Disposal
11. DISPOSAL
INSTRUCTIONS AND INFORMATION REGARDING THE DISPOSAL
OF USED PACKAGING MATERIALS
Dispose of used packaging material at a site designated for waste in your municipality.
The machine and its accessories are manufactured from various materials, e.g. metal and
plastic.
Take damaged parts to a recycling centre. Inquire at the relevant government department.
This product meets all the basic requirements of EU directives that apply to it.
Changes in the text, design and technical specifi cations may be made without prior notice and we reserve
the right to make these changes.
User s manual in the original language.
19
EN
PETROL LAWNMOWER USER'S MANUAL
Page 20

EN 20
Notes
FZR 5110-B
Page 21

Obsah
21
Benzínová sekačka na trávu
NÁVOD K OBSLUZE
Děkujeme vám, že jste si zakoupili tuto zahradní benzínovou rotační sekačku. Než ji
začnete používat přečtěte si, prosím, pozorně tento návod k obsluze a uschovejte jej pro
případ dalšího použití.
OBSAH
OBRAZOVÁ PŘÍLOHA ................................................................................................................................................1
1. VŠEOBECNÉ BEZPEČNOSTNÍ PŘEDPISY .......................................................................................................... 22
Důležitá bezpečnostní upozornění ................................................................................................................ 22
Obal ................................................................................................................................................................................ 22
Návod k použití ......................................................................................................................................................... 22
2. VYSVĚTLENÍ ŠTÍTKŮ S POKYNY NA STROJI ..................................................................................................... 23
3. POPIS STROJE .............................................................................................................................................................. 25
4. SESTAVENÍ/PŘÍPRAVA ............................................................................................................................................. 25
Vyjměte sekačku z kartonového obalu ....................................................................................................... 25
5. SESTAVTE SEKAČKU .................................................................................................................................................. 25
Sestavení madla ....................................................................................................................................................... 25
Montáž přihrádky na drobnosti ........................................................................................................................ 25
Pokyny pro sestavení travního koše ............................................................................................................... 26
Před spuštěním sekačky dolijte motorový olej ....................................................................................... 26
Doplnění paliva ........................................................................................................................................................ 26
6. PROVOZ ......................................................................................................................................................................... 27
Start sekačky .............................................................................................................................................................27
Ovládání pojezdu .................................................................................................................................................... 27
Rozsah použití benzínové sekačky ................................................................................................................. 27
Mulčování .................................................................................................................................................................... 27
Nastavení výšky sečení ........................................................................................................................................ 28
Výměna žacích nožů ............................................................................................................................................. 28
Výměna motorového oleje ................................................................................................................................ 28
Zapalovací svíčka ................................................................................................................................................... 28
7. BEZPEČNOSTNÍ POKYNY .......................................................................................................................................29
Všeobecné bezpečnostní pokyny ................................................................................................................. 29
Pokyny k používání .................................................................................................................................................. 29
8. ÚDRŽBA .......................................................................................................................................................................... 31
Péče o trávník ............................................................................................................................................................ 31
Údržba ............................................................................................................................................................................ 31
Servis................................................................................................................................................................................ 32
Záruka se nevztahuje ............................................................................................................................................32
Uskladnění ................................................................................................................................................................... 32
9. TECHNICKÉ ÚDAJE ................................................................................................................................................... 33
10. PROHLÁŠENÍ O SHODĚ .......................................................................................................................................... 34
11. LIKVIDACE ..................................................................................................................................................................... 35
CZ
BENZ ÍNOVÁ SEK AČKA N A TRÁVU NÁVO D K OBSLUZE
Page 22

CZ 22
Všeobecné bezpečnostní předpisy
1. VŠEOBECNÉ BEZPEČNOSTNÍ PŘEDPISY
DŮLEŽITÁ BEZPEČNOSTNÍ UPOZORNĚNÍ
Výrobek pečlivě vybalte a dejte pozor, abyste nevyhodili žádnou část obalového materiálu dříve, než najdete
všechny součásti výrobku.
Stroj uchovávejte na suchém místě mimo dosah dětí.
Čtěte všechna upozornění a pokyny. Zanedbání při dodržování varovných upozornění a pokynů mohou mít
za následek úraz elektrickým proudem, požár a/nebo těžká poranění.
OBAL
Výrobek je umístěn v obalu bránícím poškozením při transportu. Tento obal je surovinou a lze jej proto odevzdat
k recyklaci.
NÁVOD K POUŽITÍ
Než začnete se strojem pracovat, přečtěte si následující bezpečnostní předpisy a pokyny k používání.
Seznamte se s obslužnými prvky a správným používáním zařízení. Návod pečlivě uschovejte pro případ pozdější
potřeby. Minimálně po dobu záruky doporučujeme uschovat originální obal včetně vnitřního balicího materiálu,
pokladní doklad a záruční list.
V případě přepravy zabalte stroj zpět do originální krabice od výrobce, zajistíte si tak maximální ochranu výrobku
při případném transportu (např. stěhování nebo odeslání do servisního střediska).
Poznámka: Předáváte-li stroj dalším osobám, předejte jej společně s návodem. Dodržování přiloženého
návodu k obsluze je předpokladem řádného používání stroje. Návod k obsluze obsahuje rovněž pokyny pro
obsluhu, údržbu a opravy.
Výrobce nepřebírá odpovědnost za nehody nebo škody vzniklé následkem nedodržování
tohoto návodu.
FZR 5110-B
Page 23
Vysvětlení štítků spokyny na stroji
2. VYSVĚTLENÍ ŠTÍTKŮ S POKYNY NA STROJI
Před uvedením do provozu si prosím pozorně
přečtěte návod k obsluze.
Udržujte ostatní osoby mimo pracovní oblast.
Pozor, rotující nože! Chraňte se před nebezpečím
poranění končetin.
Emise toxických plynů. Benzínovou sekačku
nepoužívejte v uzavřených či neventilovaných
prostorách.
23
CZ
Horké povrchy, hrozí nebezpečí popálenin!
Před prováděním údržby vypněte motor a odpojte
zapalovací svíčku.
Nikdy nedoplňujte palivo, pokud je motor
spuštěný.
BENZ ÍNOVÁ SEK AČKA N A TRÁVU NÁVO D K OBSLUZE
Page 24
CZ 24
Vysvětlení štítků spokyny na stroji
Upozorňuje, že v případě nedodržení pokynů hrozí
nebezpečí zranění osob, smrti nebo poškození nástroje.
Používejte ochranu sluchu.
Používejte ochranu zraku.
Používejte ochranu dýchacích orgánů.
Neustále udržujte odstup od pohybujících se dílů.
Pohybujte se svahem po vrstevnici, ne nahoru a dolů.
Vyhovuje všem příslušným evropským směrnicím.
Benzín je extrémně hořlavý a proto před doplňováním
paliva nechte motor 2 minuty vychladnout.
FZR 5110-B
Page 25

Popis stroje | Sestavení/Příprava | Sestavte sekačku
3. POPIS STROJE (obrázek 1)
1. Horní díl madla
2. Spínací/brzdová páka
3. Páka pojezdu
4. Startovací lanko
5. Rychloupínací šroub
6. Koš
7. Spodní díl madla
8. Páka nastavení výšky sečení
9. Pumpička nástřiku paliva
10. Defl ektor bočního odhozu
11. Přední madlo
12. Přihrádka na drobnosti
4. SESTAVENÍ/PŘÍPRAVA
Před sestavením a spuštěním benzínové sekačky si pečlivě přečtěte celý návod k obsluze a v něm uvedené
pokyny.
DŮLEŽITÁ INFORMACE: Sekačka se dodává BEZ PALIVA A OLEJE v motoru.
Vaše nová travní sekačka byla sestavena a vyzkoušena ve výrobním závodě.
25
CZ
VYJMĚTE SEKAČKU Z KARTONOVÉHO OBALU
Vyjměte sekačku z kartonového obalu a zkontrolujte, zda v obalu nezůstaly volné díly.
5. SESTAVTE SEKAČKU
DŮLEŽITÁ INFORMACE: Opatrně rozložte rukojeť sekačky a neskřípněte či nepoškoďte ovládací lanka
sekačky.
SESTAVENÍ MADLA
1. Zasuňte spodní část madla (obrázek 1 - bod 7) do příslušných otvorů na sekačce a po zvolení vyhovující
výšky madla (2 pozice) zajistěte šrouby.
2. Odstraňte ochranné vycpávky a připevněte horní část madla (obrázek 1 - bod 1) do otvoru ve spodní části
rukojeti a utáhněte oba upínací šrouby (obrázek 1 - bod 5).
MONTÁŽ PŘIHRÁDKY NA DROBNOSTI ( obrázek 1 - bod 12)
Přihrádku na drobnosti připevníte k madlu pomocí přiložených šroubů.
BENZ ÍNOVÁ SEK AČKA N A TRÁVU NÁVO D K OBSLUZE
Page 26

CZ 26
Sestavte sekačku
POKYNY PRO SESTAVENÍ TRAVNÍHO KOŠE
Sestavte travní koš dle obrázku 2 – připevněte plastové zakončení ve spodu a po stranách koše k ocelovému
rámu.
PŘED SPUŠTĚNÍM SEKAČKY DOLIJTE MOTOROVÝ OLEJ
Sekačka se dodává bez motorového oleje. Před prvním startem nalijte motorový olej SAE30 15W-40 (cca 500 ml)
dle následujících pokynů.
Upozornění! NEPŘEPLŇTE zásobník oleje, jinak z výfuku po nastartování sekačky vyjde velké množství
kouře.
1. Při dolévání oleje postavte sekačku na rovnou plochu.
2. Vyjměte měrku oleje z otvoru pro dolévání oleje.
3. Po doplnění oleje měrku umístěte zpět do otvoru (obrázek 5) a pevně ji dotáhněte.
4. Hladina oleje se musí pohybovat mezi horní a dolní mezí (viz obrázek 5).
DŮLEŽITÁ INFORMACE: Hladinu oleje kontrolujte před každým použitím sekačky. V případě potřeby olej
doplňte. Olej doplňte po rysku MAX na měrce oleje.
Olej vyměňte po prvních 5 hodinách provozu a následně po každých 25 provozních hodinách
DOPLNĚNÍ PALIVA
Po odšroubování víčka palivové nádrže (obrázek 6) doplňte palivo. Doplňte palivo po hrdlo palivové nádrže.
Nepřeplňte nádrž. Vždy doplňujte čerstvý, čistý a schválený bezolovnatý benzín.
Upozornění! Paliva smíchaná s alkoholem (např. gasohol) či paliva s příměsí etanolu či metanu
na sebe mohou vázat vlhkost, což může během skladování vést k separaci a tvorbě kyselin. Během
skladování pak mohou výpary kyselin poškodit palivový systém motoru sekačky. Pokud nebudete sekačku
používat déle než 30 dní, vypusťte palivovou soustavu sekačky; zabráníte tím budoucím potížím s motorem.
Vypusťte palivovou nádrž, nastartujte motor a nechejte jej běžet, dokud nedojde k vyprázdnění palivového
potrubí a karburátoru. Před příští sezónou do nádrže dolijte čerstvé palivo. Více podrobností naleznete
v kapitole Pokyny pro skladování. Nikdy motor ani karburátor nečistěte čisticími prostředky, hrozí riziko
nevratného poškození.
FZR 5110-B
Page 27

Provoz
27
6. PROVOZ
Páka ovládání startu/brzdy (obrázek 1 bod 2) – Pokud chcete sekačku spustit, musíte tuto
páku přitáhnout k rukojeti. Při uvolnění páky se motor sekačky zastaví.
Startovací lanko (obrázek 1 bod 4) - Slouží ke startu sekačky.
Páka ovládání pojezdu (obrázek 1 – bod 3) - Slouží ke spuštění pojezdu sekačky při sečení.
START SEKAČKY
1. Není-li motor zahřátý 2-3 stiskněte pumpičku nástřiku paliva (obrázek 1 – bod 9) (je – li motor zahřátý již není
třeba používat pumpičky nástřiku)
2. Přitáhněte spínací/brzdovou páku k madlu a zatáhněte za startovací lanko
3. Motor vypnete uvolněním spínací/brzdové páky
Poznámka: Po prvním nastartování motoru může dojít k mírnému výskytu kouře z důvodu vypálení
ochranných vrstev v motoru. Jedná se o zcela běžnou situaci, která nepředstavuje žádný problém.
Upozornění! Případné kapky paliva či oleje ihned utřete. Neskladujte, nedoplňujte palivo ani s ním
nemanipulujte v blízkosti otevřeného ohně.
OVLÁDÁNÍ POJEZDU
Pojezd se ovládá pomocí páky pojezdu (obrázek 1 – bod 3) Po přitáhnutí páky k madlu se sekačka rozjede. Pro
zastavení páku opět uvolněte. Sekačka má jednu konstantní rychlost.
CZ
ROZSAH POUŽITÍ BENZÍNOVÉ SEKAČKY
Sečení s volným ukládáním posečené trávy na trávník - mulčování
Sečení se sběrem posečené trávy do travního koše
Sečení se zadním výhozem posečené trávy
Sečení s bočním výhozem posečené trávy
MULČOVÁNÍ
1. Příslušenství připevňujte a odnímejte výhradně při vypnutém motoru.
2. Po připevnění mulčovacího příslušenství si ověřte jeho stabilitu.
3. Při mulčování používejte výhradně originální mulčovací příslušenství.
4. Snažte se nesekat přerostlou trávu najednou, zabráníte tím přetížení mechanismu sekačky a motoru.
Sestavení (obrázek 4)
Zasuňte mulčovací záslepku (1) do odhozového tunelu (2). Nasazenou záslepku zajistěte v pozici samoupínacím háčkem .
Demontáž
Zatlačte palcem pevně na středový bod záslepky (3), po nadzvednutí ji vytáhněte z odhozového tunelu.
BENZ ÍNOVÁ SEK AČKA N A TRÁVU NÁVO D K OBSLUZE
Page 28

CZ 28
Provoz
Sečení s bočním výhozem (obrázek 3)
Pro nasazení defl ektoru bočního výhozu nadzvedněte kryt na boku šasi sekačky (obrázek 3 - bod 1). Defl ektor
zajistěte pomocí háčků, které zapadnou pod osičku krytu. Poté kryt uvolněte (obrázek 3 - bod 2). Při sečení
s bočním výhozem je nutné do odhozového tunelu umístit mulčovací záslepku.
NASTAVENÍ VÝŠKY SEČENÍ
Výšku sečení nastavíte centrálně pomocí páky centrálního nastavení výšky sečení (obrázek 1 – bod 8).
Volit můžete ze 6 pozic v rozsahu 25 - 75 mm.Pro sečení většiny trávníků je nejvhodnější střední výška sečení. Při
nastavení nejnižší výšky může dojít k poškození trávníku.
VÝMĚNA ŽACÍCH NOŽŮ
Chcete-li vyměnit žací nůž, demontujte šroub (obrázek 7). Před odstraněním nože vypusťte olej ze zásobníku oleje.
Proveďte montáž podle uvedeného obrázku. Dotáhněte šroub. Utahovací moment činí 40 Nm. Při výměně nože
současně vyměňte upínací šroub nože.
VÝMĚNA MOTOROVÉHO OLEJE
Vypouštěcí zátka se nachází pod motorem (obrázek 8). Umístěte pod motor vhodnou nádobu na zachycení
použitého oleje a sejměte zátku. Nakloňte sekačku tak, aby mohl vytéci všechen olej ze zásobníku.
Po vypuštění oleje umístěte zátku zpět do otvoru, ujistěte se, že je zátka umístěna řádně na svém místě, a otřete
případné kapky rozlitého oleje.
Doplňte do zásobníku olej typu SAE30.
Po vložení měrky oleje do otvoru (nikoli po zašroubování) by měla být hladina oleje mezi ryskami Min a Max
(obrázek 5). Nepřeplňte zásobník oleje.
Spusťte motor a nechte jej krátce běžet. Zastavte motor, počkejte 1 minutu a změřte hladinu oleje v zásobníku.
V případě potřeby doplňte olej na požadovanou úroveň.
ZAPALOVACÍ SVÍČKA
Jakmile dojde k vychladnutí motoru, vyšroubujte zapalovací svíčku přiloženým nástrčným klíčem a očistěte ji
drátěným kartáčem. Pomocí spároměru nastavte odtrh svíčky na hodnotu 0,75 mm (obrázek 9). Našroubujte
zapalovací svíčku zpět do pozice. Svíčku nepřetáhněte.
FZR 5110-B
Page 29

Bezpečnostní pokyny
7. BEZPEČNOSTNÍ POKYNY
VŠEOBECNÉ BEZPEČNOSTNÍ POKYNY
Tento výrobek slouží výlučně k sečení trávy. Nepoužívejte jej k jiným účelům, než pro který je určen.
V opačném případě hrozí jeho poškození či úraz.
Nikdy nedovolte dětem ani osobám neznalým tohoto návodu k použití se zařízením pracovat.
Osoba, která obsluhuje sekačku, zodpovídá za bezpečnost osob v pracovním prostoru.
Sekačku nikdy nepoužívejte v těsné blízkosti ostatních osob, dětí nebo volně pobíhajícího zvířectva.
Před zahájením sečení zkontrolujte terén, na němž má být sekačka použita, a odstraňte z ní kameny, dráty,
klacky, střepy, kosti a ostatní cizí tělesa, která by mohla být zachycena nebo vymrštěna a způsobit zranění.
POKYNY K POUŽÍVÁNÍ
Všechny matky, svorníky a šrouby musí být řádně dotaženy tak, aby zařízení bylo v bezpečném
a provozuschopném stavu.
Sekačku nikdy nepoužívejte bez sběrného koše nebo ochranného krytu.
Sekačku nikdy nepoužívejte s uvolněnými čepelemi nože. Vždy se předem ujistěte, že jsou příslušné šrouby
dobře utažené. Ztupené čepele musejí být nabroušeny, a to rovnoměrně.
Nože spoškozenými čepelemi je potřeba vyměnit.
Při práci se sekačkou používejte kalhoty s dlouhými nohavicemi a pevnou obuv.
Sekačku nikdy nestartujte v uzavřených anebo špatně větraných prostorách, kde se mohou hromadit výpary.
Emise vycházející z motoru obsahují oxid uhelnatý, který je životu nebezpečný.
Pracujte pouze při dostatečném osvětlení (za denního světla nebo při dostatečném umělém osvětlení).
Sekačku nepoužívejte za deště nebo je-li tráva mokrá.
Zvláště opatrně postupujte při sekání ve zvýšeném terénu (svah). Vždy sekejte napříč svahem, paralelně
k vrstevnici, a nikoliv shora/zdola kolmo na ni.
Sekačku zásadně nenechávejte běžet bez obsluhy, pokud sekačku opustíte, vypněte motor.
Při startování nikdy nenadzdvihujte zadní část sekačky a nikdy nepřibližujte končetiny k podvozku či do otvoru
pro zadní výhoz trávy, pokud je motor zapnutý.
Nikdy neměňte nastavení rychlosti motoru.
U sekaček s pojezdem, uvolněte pojezd před spuštěním motoru.
Sekačku nikdy nepřemisťujte se spuštěným motorem.
Zastavte motor a odpojte zapalovací svíčku v následujících případech:
- před prováděním jakékoliv činnosti pod krytem sečení či otvorem pro zadní výhoz trávy.
- před prováděním údržby, opravy či kontroly stroje.
- před přenášením, zvedáním či přemisťováním sekačky.
- ponecháváte-li sekačku bez dozoru anebo se chystáte upravit nastavení výšky sečení.
- před demontáží a vyprazdňováním sběrného vaku.
- dojde-li ke kolizi s cizím předmětem, zastavte motor a sekačku pečlivě prohlédněte, abyste vyloučili
možnost poškození. V případě poškození, dopravte sekačku do specializovaného servisu za účelem
opravy.
29
CZ
POZOR: Po vypnutí motoru se žací nůž několik sekund i nadále točí.
BENZ ÍNOVÁ SEK AČKA N A TRÁVU NÁVO D K OBSLUZE
Page 30

CZ 30
Bezpečnostní pokyny
- v případě abnormálních vibrací sekačky (okamžitě zjistěte a zajistěte odstranění příčiny vibrace).
- Za účelem zajistění bezpečného provozu pravidelně kontrolujte řádné utažení čepů, šroubů a matic na
sekačce.
POZOR: PALIVO JE VYSOCE HOŘLAVÁ KAPALINA.
Palivo uchovávejte v nádobě k tomu určené.
Palivo doplňujte pouze na otevřeném či dobře větraném prostranství. Při manipulaci s palivem nekuřte, ani
nepoužívejte mobilní telefon.
Palivo doplňujte pouze za předpokladu, že je motor vypnutý. Nikdy neotvírejte palivovou nádrž a palivo
nedoplňujte, je-li motor horký anebo v chodu.
Pokud dojde k rozlití benzínu, motor nestartujte. Odstraňte sekačku z místa, kde bylo palivo rozlito, a vyvarujte
se možného vznícení. V práci pokračujte až po odpaření rozlitého paliva a rozptýlení palivových výparů;
Po doplnění paliva dobře utáhněte kryt palivové nádrže i víko kanystru s palivem.
POZOR: Před prováděním údržby nebo opravy zastavte motor a odpojte zapalovací svíčku.
FZR 5110-B
Page 31

Údržba
8. ÚDRŽBA
PÉČE O TRÁVNÍK
Dle druhu trávnaté plochy je zapotřebí použít různé způsoby péče;
Proto po každé si přečtěte pokyny uvedené v baleních osiv, týkající se výšky sečení vzhledem k podmínkám
růstu v dané oblasti.
Je třeba mít stále na paměti, že větší část trávy je složena ze stébla a jednoho nebo více listů.
Při úplném odseknutí listů dojde k poškození trávníku a obnovení růstu bude mnohem obtížnější.
Všeobecně platí následující pokyny:
– příliš nízké sečení způsobuje narušení kořenů a následně „skvrnitým“ vzhledem;
– v létě musí být sečení vyšší, aby se zabránilo vysychání půdy;
– sečení mokré trávy může způsobit snížení účinnosti nože následkem zachytávání trávy na noži
a vytrhávání travnatého porostu;
– v případě mimořádně vysoké trávy je vhodné provést první sečení s maximální dovolenou výškou stroje
a poté provést druhé sečení až po dvou nebo třech dnech.
Trávník bude mít lepší vzhled pravidelným a celoplošným posekem stejné výšky a dodržováním střídání dvou
směrů.
ÚDRŽBA
Všechny matky, svorníky a šrouby musí být řádně dotaženy tak, aby zařízení bylo v bezpečném
a provozuschopném stavu. Pravidelná údržba je základním předpokladem pro zajištění bezpečnosti
uživatele, zachování provozuschopnosti a vysokého výkonu sekačky.
Zařízení s benzínem v nádrži nikdy neuskladňujte uvnitř budovy, kde by se výpary mohly dostat do dosahu
otevřeného ohně, jiskry nebo zdroje vysoké teploty
Před uskladněním v jakémkoliv uzavřeném prostoru nechte motor vychladnout.
Z důvodu snížení rizika požáru zajistěte, aby sekačka a obzvláště motor, tlumič výfuku, baterie a také místo
uložení náhradního benzínu byly zbaveny zbytků trávy, listí anebo nadměrného množství maziva.
Kontrolujte pravidelně stav defl ektoru a sběrného koše; v případě poškození je vyměňte.
Vypouštění paliva provádějte v dobře větraném prostoru při vychladlém motoru.
Při snímání či instalaci žacího nože používejte silné pracovní rukavice.
Po každém nabroušení čepele žacího nože je nutné překontrolovat jeho vyvážení.
31
CZ
POZOR: Před prováděním údržby nebo opravy zastavte motor a odpojte zapalovací svíčku.
Před používáním čtyřtaktního motoru si prosím pečlivě přečtěte návod k obsluze motoru. Pravidelně
kontrolujte hladinu oleje, v případě potřeby jej doplňte anebo vyměňte.
Pravidelně sekačku kontrolujte a zajistěte, aby byly všechny nánosy trávy ve spodní části podvozku
odstraňovány.
Pravidelně mazejte osu podvozku a ložiska vhodným mazivem.
Kontrolujte pravidelně stav nožů, protože mají podstatný vliv na výkon sekačky. Nože by měly být vždy ostré
a vyvážené.
V pravidelných intervalech kontrolujte dotažení všech šroubů a matic. Opotřebované nebo špatně dotažené
matice a šrouby mohou způsobit vážná poškození motoru nebo rámu.
Pokud nůž prudce zasáhne překážku, sekačku zastavte a odvezte ji do autorizovaného servisu.
BENZ ÍNOVÁ SEK AČKA N A TRÁVU NÁVO D K OBSLUZE
Page 32

CZ 32
Údržba
NŮŽ: nůž je vyroben z lisované oceli. Abyste docílili co nejlepšího sečení, pravidelně nůž bruste,přibližně
po každých 25 hodinách provozu. Ujistěte se, že je nůž vždy správně vyvážený. Za tímtoúčelem vložte do
středového otvoru nože železnou osičku (o průměru 2-3 mm). Je-li nůž správně vyvážen, osa se udrží
v horizontální poloze.
Pokud se nůž neudrží v horizontální poloze, vyměňte jej.
Při demontáži nože odšroubujte šroub, zkontrolujte nosnou část nože. Pokud jsou části opotřebené nebo
poškozené, vyměňte je.
POZOR: Používejte pouze originální náhradní díly. Nekvalitní náhradní díly mohou způsobit vážná
poškození sekačky a ohrozit vaši bezpečnost.
SERVIS
V případě, že po zakoupení výrobku zjistíte jakoukoli závadu, kontaktujte servisní oddělení. Při použití výrobku
se řiďte pokyny uvedenými v přiloženém návodu k použití.
Na reklamaci nebude brán zřetel, pokud jste výrobek pozměnili či jste se neřídili pokyny uvedenými v návodu
k použití.
ZÁRUKA SE NEVZTAHUJE
Na přirozené opotřebení funkční částí stroje v důsledku jeho používání
Na servisní zásahy související se standardní údržbou stroje (např. čištění, mazání, seřízení apod.) Na závady
způsobené vnějšími vlivy (např. klimatickými podmínkami, prašností, nevhodným použitím apod.)
Na mechanická poškození v důsledku pádu stroje, nárazu, úderu do něj apod.
Na škody vzniklé neodborným zacházením, přetížením, použitím nesprávných dílů, nevhodných nástrojů
apod.
U reklamovaných výrobků, které nebyly řádně zabezpečeny proti mechanickému poškození při přepravě nese
riziko případné škody výhradně majitel.
USKLADNĚNÍ
Pokud stroj delší dobu nepoužíváte, přístroj uskladněte dle následujících pokynů. Prodloužíte tak životnost
stroje.
Kompletně vylijte palivo z palivové nádrže a karburátoru.
Vyšroubujte zapalovací svíčku a nalijte do otvoru malé množství motorového oleje. Jemně potáhněte
2 až 3krát startér.
Čistým hadrem vyčistěte vnější plochy. Stroj uskladněte na čistém a suchém místě.
FZR 5110-B
Page 33

Technické údaje
33
9. TECHNICKÉ ÚDAJE
Typ motoru OHV, vzduchem chlazený, 4 taktní
Nominální výkon 2,70 kW
Otáčky motoru 2900 ot./min
Zdvihový objem 140 cm
Startování Tahem
Objem palivové nádrže (bezolovnatý 95 nebo více) 0,8 litru
Nastavitelná výška pokosu 25-75 mm s 6 pozicemi
Nastavení výšky Centrální nastavení výšky
Šířka pokosu 510 mm
Rozteč kol 200 mm (přední kolo)
Kapacita sběrného vaku 75 l
Šasi ocelová
Deklarovaná úroveň hluku 98 dB(A)
Hmotnost 34 kg
Změna textu a technických parametrů vyhrazena.
Změny v textu, designu a technických specifi kací se mohou měnit bez předchozího upozornění a vyhrazujeme si
právo na jejich změnu.
3
280 mm (zadní kolo)
CZ
BENZ ÍNOVÁ SEK AČKA N A TRÁVU NÁVO D K OBSLUZE
Page 34

CZ 34
Prohlášení oshodě
10. PROHLÁŠENÍ O SHODĚ
ES PROHLÁŠENÍ O SHODĚ
My Fast ČR, a.s., Černokostelecká 251 01 Říčany u Prahy, tel.:323204111, závazně prohlašujeme,
že benzínová sekačka Fieldmann FZR 5110 B (rok výroby je vyznačen na typovém štítku
a je následován výrobním číslem stroje, splňuje předpisy SMĚRNICE RADY:
2006/42/EC – 2004/108/EC – 2000/14/EC – 97/68/EC – 2002/88/EC
a byl testován ve shodě s níže uvedenými normami:
EN 55012
EN 836 – EN 836/A4
EN ISO 5395 –1:2013
EN ISO 5395 – 2:2013
EN ISO 14982:2009
EN ISO 3744:2010
ISO 11094:1991
Firma FAST ČR, a.s. je oprávněna jednat jménem výrobce.
CE label: 14
V Říčanech dne 18. 9. 2014
Petr Uher
manažer kvality
FZR 5110-B
Page 35

11. LIKVIDACE
POKYNY A INFORMACE O NAKLÁDÁNÍ S POUŽITÝM OBALEM
Použitý obalový materiál odložte na místo určené obcí k ukládání odpadu.
Stroj a jeho příslušenství jsou vyrobeny z různých materiálů, např. z kovu a plastů.
Poškozené součástky odevzdejte do tříděného sběru. Informujte se u příslušného úřadu.
Tento výrobek splňuje veškeré základní požadavky směrnic EU, které se na něj vztahují.
Změny v textu, designu a technických specifi kací se mohou měnit bez předchozího upozornění
a vyhrazujeme si právo na jejich změnu.
Návod k použití v originálním jazyce.
Likvidace
35
CZ
BENZ ÍNOVÁ SEK AČKA N A TRÁVU NÁVO D K OBSLUZE
Page 36

CZ 36
Poznámky
FZR 5110-B
Page 37

Obsah
37
Benzínová kosačka na trávu
NÁVOD NA OBSLUHU
Ďakujeme vám, že ste si kúpili túto záhradnú benzínovú rotačnú kosačku. Skôr ako ju
začnete používať, prečítajte si, prosím, pozorne tento návod na obsluhu a uschovajte ho
pre prípad ďalšieho použitia.
OBSAH
OBRAZOVÁ PRÍLOHA ................................................................................................................................................. 1
1. VŠEOBECNÉ BEZPEČNOSTNÉ PREDPISY ......................................................................................................... 38
Dôležité bezpečnostné upozornenia ........................................................................................................... 38
Obal ................................................................................................................................................................................ 38
Návod na použitie ................................................................................................................................................... 38
2. VYSVETLENIE ŠTÍTKOV S POKYNMI NA STROJI ............................................................................................. 39
3. POPIS STROJA ..............................................................................................................................................................41
4. ZOSTAVENIE/PRÍPRAVA............................................................................................................................................41
Vyberte kosačku z kartónového obalu .........................................................................................................41
5. ZOSTAVTE KOSAČKU .................................................................................................................................................41
Zostavenie držadla ..................................................................................................................................................41
Montáž priehradky na drobnosti ......................................................................................................................41
Pokyny na zostavenie trávového koša .........................................................................................................42
Pred spustením kosačky dolejte motorový olej ...................................................................................... 42
Doplnenie paliva ..................................................................................................................................................... 42
6. PREVÁDZKA ................................................................................................................................................................. 43
Štart kosačky .............................................................................................................................................................. 43
Ovládanie pojazdu ................................................................................................................................................ 43
Rozsah použitia benzínovej kosačky ............................................................................................................. 43
Mulčovanie ................................................................................................................................................................. 43
Nastavenie výšky kosenia .................................................................................................................................. 44
Výmena žacích nožov .......................................................................................................................................... 44
Výmena motorového oleja ................................................................................................................................44
Zapaľovacia sviečka ............................................................................................................................................. 44
7. BEZPEČNOSTNÉ POKYNY ...................................................................................................................................... 45
Všeobecné bezpečnostné pokyny ............................................................................................................... 45
Pokyny na používanie ........................................................................................................................................... 45
8. ÚDRŽBA ...........................................................................................................................................................................47
Starostlivosť o trávnik ...............................................................................................................................................47
Údržba .............................................................................................................................................................................47
Servis ............................................................................................................................................................................... 48
Záruka sa nevzťahuje ............................................................................................................................................48
Uskladnenie................................................................................................................................................................. 48
9. TECHNICKÉ ÚDAJE ................................................................................................................................................... 49
10. VYHLÁSENIE O ZHODE ..........................................................................................................................................50
11. LIKVIDÁCIA ....................................................................................................................................................................51
SK
BENZÍNOVÁ KOSAČKA NA TRÁVU NÁVOD NA OBSLUHU
Page 38

SK 38
Všeobecné bezpečnostné predpisy
1. VŠEOBECNÉ BEZPEČNOSTNÉ PREDPISY
DÔLEŽITÉ BEZPEČNOSTNÉ UPOZORNENIA
Výrobok starostlivo vybaľte a dajte pozor, aby ste nevyhodili žiadnu časť obalového materiálu, skôr ako
nájdete všetky súčasti výrobku.
Stroj uchovávajte na suchom mieste mimo dosahu detí.
Čítajte všetky upozornenia a pokyny. Zanedbanie pri dodržiavaní varovných upozornení a pokynov môže mať
za následok úraz elektrickým prúdom, požiar a/alebo ťažké poranenia.
OBAL
Výrobok je umiestnený v obale brániacom poškodeniu pri transporte. Tento obal je surovinou a je preto možné ho
odovzdať na recykláciu.
NÁVOD NA POUŽITIE
Skôr ako začnete so strojom pracovať, prečítajte si nasledujúce bezpečnostné predpisy a pokyny na používanie.
Oboznámte sa s obslužnými prvkami a správnym používaním zariadenia. Návod dôkladne uschovajte pre prípad
neskoršej potreby. Minimálne počas záruky odporúčame uschovať originálny obal vrátane vnútorného baliaceho
materiálu, pokladničný doklad a záručný list.
V prípade prepravy zabaľte stroj späť do originálnej škatule od výrobcu, zaistíte si tak maximálnu ochranu
výrobku pri prípadnom transporte (napr. sťahovanie alebo odoslanie do servisného strediska).
Poznámka: Ak odovzdávate stroj ďalším osobám, odovzdajte ho spoločne s návodom. Dodržiavanie
priloženého návodu na obsluhu je predpokladom riadneho používania stroja. Návod na obsluhu obsahuje
tiež pokyny na obsluhu, údržbu a opravy.
Výrobca nepreberá zodpovednosť za nehody alebo škody vzniknuté následkom
nedodržiavania tohto návodu.
FZR 5110-B
Page 39

Vysvetlenie štítkov spokynmi na stroji
39
2. VYSVETLENIE ŠTÍTKOV S POKYNMI NA STROJI
Pred uvedením do prevádzky si, prosím, pozorne
prečítajte návod na obsluhu.
Udržujte ostatné osoby mimo pracovnej oblasti.
Pozor, rotujúce nože! Chráňte sa pred
nebezpečenstvom poranenia končatín.
Emisia toxických plynov. Benzínovú kosačku
nepoužívajte v uzatvorených či neventilovaných
priestoroch.
SK
Horúce povrchy, hrozí nebezpečenstvo
popálenín!
Pred vykonávaním údržby vypnite motor
a odpojte zapaľovaciu sviečku.
Nikdy nedoplňujte palivo, ak je motor spustený.
BENZÍNOVÁ KOSAČKA NA TRÁVU NÁVOD NA OBSLUHU
Page 40
SK 40
Vysvetlenie štítkov spokynmi na stroji
Upozorňujeme, že v prípade nedodržania pokynov hrozí
nebezpečenstvo zranenia osôb, smrti alebo poškodenia
nástroja.
Používajte ochranu sluchu.
Používajte ochranu zraku.
Používajte ochranu dýchacích orgánov.
Neustále udržujte odstup od pohybujúcich sa dielov.
Pohybujte sa svahom po vrstevnici, nie nahor a dole.
Vyhovuje všetkým príslušným európskym smerniciam.
Benzín je extrémne horľavý a preto pred doplňovaním
paliva nechajte motor 2 minúty vychladnúť.
FZR 5110-B
Page 41

Popis stroja | Zostavenie/Príprava | Zostavte kosačku
41
3. POPIS STROJA (obrázok 1)
1. Horný diel držadla
2. Spínacia/brzdová páka
3. Páka pojazdu
4. Štartovacie lanko
5. Rýchloupínacia skrutka
6. Kôš
7. Spodný diel držadla
8. Páka nastavenia výšky kosenia
9. Pumpička nástreku paliva
10. Defl ektor bočného vyhadzovania
11. Predné držadlo
12. Priehradka na drobnosti
4. ZOSTAVENIE/PRÍPRAVA
Pred zostavením a spustením benzínovej kosačky si pozorne prečítajte celý návod na obsluhu a v ňom uvedené
pokyny.
DÔLEŽITÁ INFORMÁCIA: Kosačka sa dodáva BEZ PALIVA A OLEJA v motore.
Vaša nová kosačka na trávu bola zostavená a vyskúšaná vo výrobnom závode.
SK
VYBERTE KOSAČKU Z KARTÓNOVÉHO OBALU
Vyberte kosačku z kartónového obalu a skontrolujte, či v obale nezostali voľné diely.
5. ZOSTAVTE KOSAČKU
DÔLEŽITÁ INFORMÁCIA: Opatrne rozložte rukoväť kosačky a nepricviknite či nepoškoďte ovládacie
lanká kosačky.
ZOSTAVENIE DRŽADLA
1. Zasuňte spodnú časť držadla (obrázok 1 – bod 7) do príslušných otvorov na kosačke a po zvolení
vyhovujúcej výšky držadla (2 pozície) zaistite skrutkami.
2. Odstráňte ochranné vypchávky a pripevnite hornú časť držadla (obrázok 1 – bod 1) do otvoru v spodnej časti
rukoväti a utiahnite obe upínacie skrutky (obrázok 1 – bod 5).
MONTÁŽ PRIEHRADKY NA DROBNOSTI (obrázok 1 – bod 12)
Priehradku na drobnosti pripevníte k držadlu pomocou priložených skrutiek.
BENZÍNOVÁ KOSAČKA NA TRÁVU NÁVOD NA OBSLUHU
Page 42

SK 42
Zostavte kosačku
POKYNY NA ZOSTAVENIE TRÁVOVÉHO KOŠA
Zostavte trávový kôš podľa obrázka 2 – pripevnite plastové zakončenie naspodku a po stranách koša
k oceľovému rámu.
PRED SPUSTENÍM KOSAČKY DOLEJTE MOTOROVÝ OLEJ
Kosačka sa dodáva bez motorového oleja. Pred prvým štartom nalejte motorový olej SAE30 15W-40 (cca 500
ml) podľa nasledujúcich pokynov.
Upozornenie! NEPREPLŇTE zásobník oleja, inak z výfuku po naštartovaní kosačky vyjde veľké množstvo
dymu.
1. Pri dolievaní oleja postavte kosačku na rovnú plochu.
2. Vyberte mierku oleja z otvoru na dolievanie oleja.
3. Po doplnení oleja mierku umiestnite späť do otvoru (obrázok 5) a pevne ju dotiahnite.
4. Hladina oleja sa musí pohybovať medzi hornou a dolnou medzou (pozrite obrázok 5).
DÔLEŽITÁ INFORMÁCIA: Hladinu oleja kontrolujte pred každým použitím kosačky. V prípade potreby
olej doplňte. Olej doplňte po rysku MAX. na mierke oleja.
Olej vymeňte po prvých 5 hodinách prevádzky a následne po každých 25 prevádzkových hodinách
DOPLNENIE PALIVA
Po odskrutkovaní viečka palivovej nádrže (obrázok 6) doplňte palivo. Doplňte palivo po hrdlo palivovej
nádrže. Nepreplňte nádrž. Vždy doplňujte čerstvý, čistý a schválený bezolovnatý benzín.
Upozornenie! Palivá zmiešané s alkoholom (napr. gasohol) či palivá s prímesou etanolu či metánu
na seba môžu viazať vlhkosť, čo môže počas skladovania viesť k separácii a tvorbe kyselín. Počas
skladovania môžu výpary kyselín poškodiť palivový systém motora kosačky. Ak nebudete kosačku používať
dlhšie ako 30 dní, vypustite palivovú sústavu kosačky; zabránite tým budúcim problémom s motorom.
Vypustite palivovú nádrž, naštartujte motor a nechajte ho bežať, kým nedôjde k vyprázdneniu palivového
potrubia a karburátora. Pred ďalšou sezónou do nádrže dolejte čerstvé palivo. Viac podrobností nájdete
v kapitole Pokyny na skladovanie. Nikdy motor ani karburátor nečistite čistiacimi prostriedkami, hrozí riziko
nezvratného poškodenia.
FZR 5110-B
Page 43

Prevádzka
6. PREVÁDZKA
Páka ovládania štartu/brzdy (obrázok 1 – bod 2) – Ak chcete kosačku spustiť, musíte túto páku
pritiahnuť k rukoväti. Pri uvoľnení páky sa motor kosačky zastaví.
Štartovacie lanko (obrázok 1 – bod 4) – Slúži na štart kosačky.
Páka ovládania pojazdu (obrázok 1 – bod 3) – Slúži na spustenie pojazdu kosačky pri kosení.
ŠTART KOSAČKY
1. Ak nie je motor zahriaty, 2- až 3-krát stlačte pumpičku nástreku paliva (obrázok 1 – bod 9) (ak je motor
zahriaty, nie je už potrebné používať pumpičku nástreku)
2. Pritiahnite spínaciu/brzdovú páku k držadlu a zatiahnite za štartovacie lanko
3. Motor vypnete uvoľnením spínacej/brzdovej páky
Poznámka: Po prvom naštartovaní motora môže dôjsť k miernemu výskytu dymu z dôvodu vypálenia
ochranných vrstiev v motore. Ide o celkom bežnú situáciu, ktorá nepredstavuje žiadny problém.
Upozornenie! Prípadné kvapky paliva či oleja ihneď utrite. Neskladujte, nedoplňujte palivo ani s ním
nemanipulujte v blízkosti otvoreného ohňa.
OVLÁDANIE POJAZDU
Pojazd sa ovláda pomocou páky pojazdu (obrázok 1 – bod 3). Po pritiahnutí páky k držadlu sa kosačka
rozbehne. Na zastavenie páku opäť uvoľnite. Kosačka má jednu konštantnú rýchlosť.
43
SK
ROZSAH POUŽITIA BENZÍNOVEJ KOSAČKY
Kosenie s voľným ukladaním pokosenej trávy na trávnik – mulčovanie
Kosenie so zberom pokosenej trávy do trávového koša
Kosenie so zadným vyhadzovaním pokosenej trávy
Kosenie s bočným vyhadzovaním pokosenej trávy
MULČOVANIE
1. Príslušenstvo pripevňujte a odoberajte výhradne pri vypnutom motore.
2. Po pripevnení mulčovacieho príslušenstva si overte jeho stabilitu.
3. Pri mulčovaní používajte výhradne originálne mulčovacie príslušenstvo.
4. Snažte sa nekosiť prerastenú trávu naraz, zabránite tým preťaženiu mechanizmu kosačky a motora.
Zostavenie (obrázok 4)
Zasuňte mulčovaciu záslepku (1) do vyhadzovacieho tunela (2). Nasadenú záslepku zaistite v pozícii
samoupínacím háčikom.
Demontáž
Zatlačte palcom pevne na stredový bod záslepky (3), po nadvihnutí ju vytiahnite z vyhadzovacieho tunela.
BENZÍNOVÁ KOSAČKA NA TRÁVU NÁVOD NA OBSLUHU
Page 44

SK 44
Prevádzka
Kosenie s bočným vyhadzovaním (obrázok 3)
Na nasadenie defl ektora bočného vyhadzovania nadvihnite kryt na boku šasi kosačky (obrázok 3 – bod 1).
Defl ektor zaistite pomocou háčikov, ktoré zapadnú pod osičku krytu. Potom kryt uvoľnite (obrázok 3 – bod 2).
Pri kosení
s bočným vyhadzovaním je nutné do vyhadzovacieho tunela umiestniť mulčovaciu záslepku.
NASTAVENIE VÝŠKY KOSENIA
Výšku kosenia nastavíte centrálne pomocou páky centrálneho nastavenia výšky kosenia (obrázok 1 – bod 8).
Voliť môžete zo 6 pozícií v rozsahu 25 – 75 mm. Na kosenie väčšiny trávnikov je najvhodnejšia stredná výška
kosenia. Pri nastavení najnižšej výšky môže dôjsť k poškodeniu trávnika.
VÝMENA ŽACÍCH NOŽOV
Ak chcete vymeniť žací nôž, demontujte skrutku (obrázok 7). Pred odstránením noža vypustite olej zo zásobníka
oleja.
Vykonajte montáž podľa uvedeného obrázka. Dotiahnite skrutku. Uťahovací moment je 40 Nm. Pri výmene noža
súčasne vymeňte upínaciu skrutku noža.
VÝMENA MOTOROVÉHO OLEJA
Vypúšťacia zátka sa nachádza pod motorom (obrázok 8). Umiestnite pod motor vhodnú nádobu na zachytenie
použitého oleja a odoberte zátku. Nakloňte kosačku tak, aby mohol vytiecť všetok olej zo zásobníka.
Po vypustení oleja umiestnite zátku späť do otvoru, uistite sa, či je zátka umiestnená riadne na svojom mieste,
a utrite prípadné kvapky rozliateho oleja.
Doplňte do zásobníka olej typu SAE30.
Po vložení mierky oleja do otvoru (nie po zaskrutkovaní) by mala byť hladina oleja medzi ryskami Min. a Max.
(obrázok 5). Nepreplňte zásobník oleja.
Spustite motor a nechajte ho krátko bežať. Zastavte motor, počkajte 1 minútu a zmerajte hladinu oleja
v zásobníku. V prípade potreby doplňte olej na požadovanú úroveň.
ZAPAĽOVACIA SVIEČKA
Hneď ako dôjde k vychladnutiu motora, vyskrutkujte zapaľovaciu sviečku priloženým nástrčným kľúčom a očistite
ju drôtenou kefou. Pomocou škáromera nastavte odtrh sviečky na hodnotu 0,75 mm (obrázok 9). Naskrutkujte
zapaľovaciu sviečku späť do pozície. Sviečku nepretiahnite.
FZR 5110-B
Page 45

Bezpečnostné pokyny
7. BEZPEČNOSTNÉ POKYNY
VŠEOBECNÉ BEZPEČNOSTNÉ POKYNY
Tento výrobok slúži výlučne na kosenie trávy. Nepoužívajte ho na iné účely, než na aké je určený. V opačnom
prípade hrozí jeho poškodenie či úraz.
Nikdy nedovoľte deťom ani osobám bez znalosti tohto návodu na použitie so zariadením pracovať.
Osoba, ktorá obsluhuje kosačku, zodpovedá za bezpečnosť osôb v pracovnom priestore.
Kosačku nikdy nepoužívajte v tesnej blízkosti ostatných osôb, detí alebo voľne pobiehajúceho zvieratstva.
Pred začatím kosenia skontrolujte terén, na ktorom sa má kosačka použiť, a odstráňte z neho kamene, drôty,
konáriky, črepy, kosti a ostatné cudzie telesá, ktoré by sa mohli zachytiť alebo vymrštiť a spôsobiť zranenie.
POKYNY NA POUŽÍVANIE
Všetky matice, svorníky a skrutky musia byť riadne dotiahnuté tak, aby zariadenie bolo v bezpečnom
a prevádzkyschopnom stave.
Kosačku nikdy nepoužívajte bez zberného koša alebo ochranného krytu.
Kosačku nikdy nepoužívajte s uvoľnenými čepeľami noža. Vždy sa vopred uistite, či sú príslušné skrutky
dobre utiahnuté. Otupené čepele sa musia nabrúsiť, a to rovnomerne.
Nože s poškodenými čepeľami je potrebné vymeniť.
Pri práci s kosačkou používajte nohavice s dlhými nohavicami a pevnú obuv.
Kosačku nikdy neštartujte v uzatvorených alebo zle vetraných priestoroch, kde sa môžu hromadiť výpary.
Emisie vychádzajúce z motora obsahujú oxid uhoľnatý, ktorý je životu nebezpečný.
Pracujte iba pri dostatočnom osvetlení (za denného svetla alebo pri dostatočnom umelom osvetlení).
Kosačku nepoužívajte za dažďa alebo ak je tráva mokrá.
Obzvlášť opatrne postupujte pri kosení vo zvýšenom teréne (svah). Vždy koste naprieč svahom, paralelne
k vrstevnici, a nie zhora/zdola kolmo na ňu.
Kosačku zásadne nenechávajte bežať bez obsluhy, ak kosačku opustíte, vypnite motor.
Pri štartovaní nikdy nenadvihujte zadnú časť kosačky a nikdy nepribližujte končatiny k podvozku či do otvoru
na zadné vyhadzovanie trávy, ak je motor zapnutý.
Nikdy nemeňte nastavenie rýchlosti motora.
Pri kosačkách s pojazdom uvoľnite pojazd pred spustením motora.
Kosačku nikdy nepremiestňujte so spusteným motorom.
Zastavte motor a odpojte zapaľovaciu sviečku v nasledujúcich prípadoch:
- pred vykonávaním akejkoľvek činnosti pod krytom kosenia či otvorom na zadné vyhadzovanie trávy.
- pred vykonávaním údržby, opravy či kontroly stroja.
- pred prenášaním, zdvíhaním či premiestňovaním kosačky.
- ak ponechávate kosačku bez dozoru alebo sa chystáte upraviť nastavenie výšky kosenia.
- pred demontážou a vyprázdňovaním zberného vaku.
- Ak dôjde ku kolízii s cudzím predmetom, zastavte motor a kosačku starostlivo prezrite, aby ste vylúčili
možnosť poškodenia. V prípade poškodenia, dopravte kosačku do špecializovaného servisu na opravu.
45
SK
POZOR: Po vypnutí motora sa žací nôž niekoľko sekúnd aj naďalej točí.
- v prípade abnormálnych vibrácií kosačky (okamžite zistite a zaistite odstránenie príčiny vibrácie).
- Na zaistenie bezpečnej prevádzky pravidelne kontrolujte riadne utiahnutie čapov, skrutiek a matíc na
kosačke.
BENZÍNOVÁ KOSAČKA NA TRÁVU NÁVOD NA OBSLUHU
Page 46

SK 46
Bezpečnostné pokyny
POZOR: PALIVO JE VYSOKO HORĽAVÁ KVAPALINA.
Palivo uchovávajte v nádobe na to určenej.
Palivo doplňujte iba na otvorenom či dobre vetranom priestranstve. Pri manipulácii s palivom nefajčite, ani
nepoužívajte mobilný telefón.
Palivo doplňujte iba za predpokladu, že je motor vypnutý. Nikdy neotvárajte palivovú nádrž a palivo
nedoplňujte, ak je motor horúci alebo v chode.
Ak dôjde k rozliatiu benzínu, motor neštartujte. Odstráňte kosačku z miesta, kde bolo palivo rozliate,
a vyvarujte sa možného vznietenia. V práci pokračujte až po odparení rozliateho paliva a rozptýlení palivových
výparov;
Po doplnení paliva dobre utiahnite kryt palivovej nádrže aj veko kanistra s palivom.
POZOR: Pred vykonávaním údržby alebo opravy zastavte motor a odpojte zapaľovaciu sviečku.
FZR 5110-B
Page 47

Údržba
8. ÚDRŽBA
STAROSTLIVOSŤ O TRÁVNIK
Podľa druhu trávnatej plochy je potrebné použiť rôzne spôsoby starostlivosti;
Preto zakaždým si prečítajte pokyny uvedené v baleniach osív, týkajúce sa výšky kosenia vzhľadom
na podmienky rastu v danej oblasti.
Je potrebné mať stále na pamäti, že väčšia časť trávy je zložená zo stebla a jedného alebo viacerých listov.
Pri úplnom odseknutí listov dôjde k poškodeniu trávnika a obnovenie rastu bude omnoho ťažšie.
Všeobecne platia nasledujúce pokyny:
– príliš nízke kosenie spôsobuje narušenie koreňov a následne „škvrnitý“ vzhľad;
– v lete sa musí kosiť vyššie, aby sa zabránilo vysychaniu pôdy;
– kosenie mokrej trávy môže spôsobiť zníženie účinnosti noža následkom zachytávania trávy na noži
a vytrhávania trávnatého porastu;
– v prípade mimoriadne vysokej trávy je vhodné vykonať prvé kosenie s maximálnou dovolenou výškou
stroja a potom vykonať druhé kosenie až po dvoch alebo troch dňoch.
Trávnik bude mať lepší vzhľad pravidelným a celoplošným kosením rovnakej výšky a dodržiavaním striedania
dvoch smerov.
ÚDRŽBA
Všetky matice, svorníky a skrutky musia byť riadne dotiahnuté tak, aby zariadenie bolo v bezpečnom
a prevádzkyschopnom stave. Pravidelná údržba je základným predpokladom na zaistenie bezpečnosti
používateľa, zachovanie prevádzkyschopnosti a vysokého výkonu kosačky.
Zariadenie s benzínom v nádrži nikdy neuskladňujte vnútri budovy, kde by sa výpary mohli dostať do dosahu
otvoreného ohňa, iskry alebo zdroja vysokej teploty.
Pred uskladnením v akomkoľvek uzatvorenom priestore nechajte motor vychladnúť.
Z dôvodu zníženia rizika požiaru zaistite, aby kosačka a obzvlášť motor, tlmič výfuku, batéria a tiež miesto
uloženia náhradného benzínu boli zbavené zvyškov trávy, lístia alebo nadmerného množstva maziva.
Kontrolujte pravidelne stav defl ektora a zberného koša; v prípade poškodenia ich vymeňte.
Palivo vypúšťajte v dobre vetranom priestore pri vychladnutom motore.
Pri odoberaní či inštalácii žacieho noža používajte hrubé pracovné rukavice.
Po každom nabrúsení čepele žacieho noža je nutné prekontrolovať jeho vyváženie.
47
SK
POZOR: Pred vykonávaním údržby alebo opravy zastavte motor a odpojte zapaľovaciu sviečku.
Pred používaním štvortaktného motora si, prosím, pozorne prečítajte návod na obsluhu motora. Pravidelne
kontrolujte hladinu oleja, v prípade potreby ho doplňte alebo vymeňte.
Pravidelne kosačku kontrolujte a zaistite, aby sa všetky nánosy trávy v spodnej časti podvozka odstraňovali.
Pravidelne mažte os podvozka a ložiská vhodným mazivom.
Kontrolujte pravidelne stav nožov, pretože majú podstatný vplyv na výkon kosačky. Nože by mali byť vždy
ostré a vyvážené.
V pravidelných intervaloch kontrolujte dotiahnutie všetkých skrutiek a matíc. Opotrebované alebo zle
dotiahnuté matice a skrutky môžu spôsobiť vážne poškodenia motora alebo rámu.
Ak nôž prudko zasiahne prekážku, kosačku zastavte a odvezte ju do autorizovaného servisu.
BENZÍNOVÁ KOSAČKA NA TRÁVU NÁVOD NA OBSLUHU
Page 48

SK 48
Údržba
NÔŽ: nôž je vyrobený z lisovanej ocele. Aby ste docielili čo najlepšie kosenie, pravidelne nôž brúste, približne
po každých 25 hodinách prevádzky. Uistite sa, či je nôž vždy správne vyvážený. Na tento účel vložte do
stredového otvoru noža železnú osičku (s priemerom 2 – 3 mm). Ak je nôž správne vyvážený, os sa udrží
v horizontálnej polohe.
Ak sa nôž neudrží v horizontálnej polohe, vymeňte ho.
Pri demontáži noža odskrutkujte skrutku, skontrolujte nosnú časť noža. Ak sú časti opotrebené alebo
poškodené, vymeňte ich.
POZOR: Používajte iba originálne náhradné diely. Nekvalitné náhradné diely môžu spôsobiť vážne
poškodenia kosačky a ohroziť vašu bezpečnosť.
SERVIS
V prípade, že po kúpe výrobku zistíte akúkoľvek poruchu, kontaktujte servisné oddelenie. Pri použití výrobku
sa riaďte pokynmi uvedenými v priloženom návode na použitie.
Na reklamáciu sa nebude brať zreteľ, ak ste výrobok pozmenili či ste sa neriadili pokynmi uvedenými
v návode na použitie.
ZÁRUKA SA NEVZŤAHUJE
Na prirodzené opotrebenie funkčnej časti stroja v dôsledku jeho používania.
Na servisné zásahy súvisiace so štandardnou údržbou stroja (napr. čistenie, mazanie, nastavenie a pod.),
na poruchy spôsobené vonkajšími vplyvmi (napr. klimatickými podmienkami, prašnosťou, nevhodným
použitím a pod.).
Na mechanické poškodenia v dôsledku pádu stroja, nárazu, úderu doň a pod.
Na škody vzniknuté neodborným zaobchádzaním, preťažením, použitím nesprávnych dielov, nevhodných
nástrojov a pod.
Pri reklamovaných výrobkoch, ktoré neboli riadne zabezpečené proti mechanickému poškodeniu pri preprave
nesie riziko prípadnej škody výhradne majiteľ.
USKLADNENIE
Ak stroj dlhší čas nepoužívate, prístroj uskladnite podľa nasledujúcich pokynov. Predĺžite tak životnosť stroja.
Kompletne vylejte palivo z palivovej nádrže a karburátora.
Vyskrutkujte zapaľovaciu sviečku a nalejte do otvoru malé množstvo motorového oleja. Jemne potiahnite
2- až 3-krát štartér.
Čistou handrou vyčistite vonkajšie plochy. Stroj uskladnite na čistom a suchom mieste.
FZR 5110-B
Page 49

Technické údaje
9. TECHNICKÉ ÚDAJE
Typ motora OHV, vzduchom chladený, 4-taktný
Nominálny výkon 2,70 kW
Otáčky motora 2 900 rpm/min
Zdvihový objem 140 cm
Štartovanie Ťahom
Objem palivovej nádrže (bezolovnatý 95 alebo viac) 0,8 litra
Nastaviteľná výška pokosu 25 – 75 mm s 6 pozíciami
Nastavenie výšky Centrálne nastavenie výšky
Šírka pokosu 510 mm
Rozstup kolies 200 mm (predné koleso)
Kapacita zberného vaku 75 l
Šasi oceľové
Deklarovaná úroveň hluku 98 dB(A)
Hmotnosť 34 kg
Zmena textu a technických parametrov vyhradená.
Zmeny v texte, dizajne a technických špecifi káciách sa môžu meniť bez predchádzajúceho upozornenia
a vyhradzujeme si právo na ich zmenu.
3
280 mm (zadné koleso)
49
SK
BENZÍNOVÁ KOSAČKA NA TRÁVU NÁVOD NA OBSLUHU
Page 50

SK 50
Vyhlásenie ozhode
10. VYHLÁSENIE O ZHODE
ES VYHLÁSENIE O ZHODE
My, Fast ČR, a. s., Černokostelecká 251 01 Říčany u Prahy, tel.: 323204111, záväzne vyhlasujeme,
že benzínová kosačka Fieldmann FZR 5110 B (rok výroby je vyznačený na typovom štítku
a je nasledovaný výrobným číslom stroja) spĺňa predpisy SMERNICE RADY:
2006/42/EC – 2004/108/EC – 2000/14/EC – 97/68/EC – 2002/88/EC
a bol testovaný v zhode s nižšie uvedenými normami:
EN 55012
EN 836 – EN 836/A4
EN ISO 5395 –1:2013
EN ISO 5395 – 2:2013
EN ISO 14982:2009
EN ISO 3744:2010
ISO 11094:1991
Firma FAST ČR, a. s., je oprávnená konať v mene výrobcu.
CE label: 14
V Říčanech, dňa 18. 9. 2014
Petr Uher
manažér kvality
FZR 5110-B
Page 51

Likvidácia
11. LIKVIDÁCIA
POKYNY A INFORMÁCIE O ZAOBCHÁDZANÍ S POUŽITÝM OBALOM
Použitý obalový materiál odložte na miesto určené obcou na ukladanie odpadu.
Stroj a jeho príslušenstvo sú vyrobené z rôznych materiálov, napr. z kovu a plastov.
Poškodené súčiastky odovzdajte do triedeného zberu. Informujte sa na príslušnom úrade.
Tento výrobok spĺňa všetky základné požiadavky smerníc EÚ, ktoré sa naň vzťahujú.
Zmeny v texte, dizajne a technických špecifi káciách sa môžu meniť bez predchádzajúceho upozornenia
a vyhradzujeme si právo na ich zmenu.
Návod na použitie v originálnom jazyku.
51
SK
BENZÍNOVÁ KOSAČKA NA TRÁVU NÁVOD NA OBSLUHU
Page 52

SK 52
Poznámky
FZR 5110-B
Page 53

Tartalom
53
Benzines fűnyíró
HASZNÁLATI ÚTMUTATÓ
Köszönjük, hogy megvásárolta ezt a kerti benzines rotációs fűnyírót. Mielőtt használni
kezdi, fi gyelmesen olvassa el ezt a használati útmutatót és őrizze meg a későbbiekre.
TARTALOM
KÉPMELLÉKLET ................................................................................................................................................................1
1. ÁLTALÁNOS BIZTONSÁGI ELŐÍRÁSOK ............................................................................................................. 54
Fontos biztonsági fi gyelmeztetések ................................................................................................................ 54
Csomagolás ............................................................................................................................................................... 54
Használati útmutató ................................................................................................................................................ 54
2. A GÉPEN TALÁLHATÓ, UTASÍTÁSOKAT TARTALMAZÓ CÍMKÉK MAGYARÁZATA .......................... 55
3. A GÉP LEÍRÁSA ............................................................................................................................................................57
4. ÖSSZEÁLLÍTÁS/ELŐKÉSZÍTÉS ...................................................................................................................................57
Vegye ki a fűnyírót a kartondobozból ...........................................................................................................57
5. ÁLLÍTSA ÖSSZE A FŰNYÍRÓT ...................................................................................................................................57
A fogantyú összeállítása .......................................................................................................................................57
A tárolótálca felszerelése .....................................................................................................................................57
Útmutató a fűgyűjtő kosár összeállításához ............................................................................................... 58
A fűnyírót bekapcsolása előtt töltse fel motorolajjal ............................................................................ 58
Üzemanyag feltöltése ............................................................................................................................................ 58
6. ÜZEMELTETÉS ............................................................................................................................................................... 59
A fűnyíró beindítása .............................................................................................................................................. 59
A kerékmeghajtás kezelése ............................................................................................................................... 59
A benzines fűnyíró használatának módjai ................................................................................................ 59
Mulcsozás ..................................................................................................................................................................... 59
A vágási magasság beállítása ....................................................................................................................... 60
A vágókések cseréje .............................................................................................................................................. 60
Olajcsere....................................................................................................................................................................... 60
Gyújtógyertya ............................................................................................................................................................ 60
7. BIZTONSÁGI UTASÍTÁSOK ........................................................................................................................................61
Általános biztonsági előírások............................................................................................................................61
Használati utasítások ...............................................................................................................................................61
8. KARBANTARTÁS .......................................................................................................................................................... 63
A gyep gondozása ................................................................................................................................................. 63
Karbantartás ............................................................................................................................................................... 63
Szerviz ............................................................................................................................................................................. 64
A jótállás nem vonatkozik .................................................................................................................................... 64
Tárolás ............................................................................................................................................................................ 64
9. MŰSZAKI ADATOK .................................................................................................................................................... 65
10. MEGFELELŐSÉGI NYILATKOZAT ........................................................................................................................ 66
11. MEGSEMMISÍTÉS ........................................................................................................................................................67
HU
BENZINES FŰNYÍRÓ HASZNÁLATI ÚTMUTATÓ
Page 54

HU 54
Általános biztonsági előírások
1. ÁLTALÁNOS BIZTONSÁGI ELŐÍRÁSOK
FONTOS BIZTONSÁGI FIGYELMEZTETÉSEK
A terméket gondosan csomagolja ki és ügyeljen arra, hogy ne dobjon ki semmit, mielőtt minden alkatrészt
meg nem talál.
A gépet tartsa száraz helyen és gyermekektől távol.
Olvassa el az összes fi gyelmeztetést és utasítást. A fi gyelmeztetések és utasítások fi gyelmen kívül
hagyásának áramütés, tűz és/vagy komoly sérülés lehet a következménye.
CSOMAGOLÁS
A termék védőcsomagolásban van, hogy az átszállítás közbeni sérüléstől védve legyen. Ez a csomagolás
újrahasznosítható anyagból készült.
HASZNÁLATI ÚTMUTATÓ
Mielőtt használni kezdi a gépet, olvassa el a következő biztonsági előírásokat és a használati utasításokat.
Ismerkedjen meg a kezelőelemekkel és a készülék helyes használatával. Az útmutatót gondosan őrizze meg
későbbi szükség esetére. Javasoljuk, hogy legalább a jótállás idejére őrizze meg a termék eredeti dobozát,
csomagolását, pénztárbizonylatát és jótállási jegyét.
Szállítás esetén csomagolja vissza az eredeti gyári csomagolásba, így maximális védelmet biztosít számára
(pl. költözés vagy szervizbe küldés esetén).
Megjegyzés: Ha a gépet újabb személynek adja el, az útmutatóval adja át. A használati útmutató
utasításainak betartása a gép helyes használatának alapja. A használati útmutató szintúgy tartalmaz
utasításokat a kezelésre, karbantartásra és javításra vonatkozóan.
A gyártó nem felel az útmutató utasításainak be nem tartásából adódó balesetekért
vagy károkért.
FZR 5110-B
Page 55

Agépen található, utasításokat tartalmazó címkék magyarázata
2. A GÉPEN TALÁLHATÓ, UTASÍTÁSOKAT
TARTALMAZÓ CÍMKÉK MAGYARÁZATA
Üzembe helyezés előtt fi gyelmesen olvassa el
a használati útmutatót.
Másokat tartson távol a munkaterülettől.
Vigyázat, forgó kések! Védekezzen a végtagok
sérülésének veszélye ellen.
Mérgező gázok kibocsátása. A benzines fűnyírót
ne használja zárt, vagy nem szellőző helyen.
55
HU
Forró felületek, égési sérülés veszélye!
Karbantartás előtt kapcsolja ki a motort és
csavarja ki a gyújtógyertyát.
Soha ne töltsön bele üzemanyagot, ha jár
a motor.
BENZINES FŰNYÍRÓ HASZNÁLATI ÚTMUTATÓ
Page 56

HU 56
Agépen található, utasításokat tartalmazó címkék magyarázata
Arra fi gyelmeztet, hogy az utasítások be nem tartása
esetén személyi sérülés, halál, vagy a gép sérülésének
veszélye fenyeget.
Használjon fülvédőt.
Védje a látását.
Gondoskodjon a légutak védelméről.
Állandóan tartson biztonságos távolságot a mozgó
alkatrészektől.
Lejtőn a szintvonalak mentén, ne felfelé és lefelé haladjon.
Megfelel minden vonatkozó európai irányelvnek.
A benzin rendkívül gyúlékony, ezért üzemanyag betöltése
előtt hagyja a motort 2 percig hűlni.
FZR 5110-B
Page 57

Agép leírása | Összeállítás/Előkészítés | Állítsa össze afűnyírót
3. A GÉP LEÍRÁSA (1. kép)
1. Felső fogantyúrész
2. Kapcsoló- / fékkar
3. A futómű karja
4. Indítózsinór
5. Gyorsrögzítő csavar
6. Kosár
7. Alsó fogantyúrész
8. A vágási magasság beállítására szolgáló kar
9. Üzemanyag-befecskendező pumpa
10. Oldalkidobó terelőlap
11. Elülső fogantyú
12. Tárolótálca
4. ÖSSZEÁLLÍTÁS/ELŐKÉSZÍTÉS
A benzines fűnyíró összeállítása és beindítása előtt fi gyelmesen olvassa el a teljes használati útmutatót és
a benne szereplő utasításokat.
FONTOS INFORMÁCIÓK: A fűnyírót ÜZEMANYAG ÉS OLAJ NÉLKÜL szállítjuk.
Az Ön új fűnyíróját a gyártóüzemben összeállították és kipróbálták.
57
HU
VEGYE KI A FŰNYÍRÓT A KARTONDOBOZBÓL
Vegye ki a fűnyírót a kartondobozból és ellenőrizze, nem maradtak-e a dobozban alkatrészek.
5. ÁLLÍTSA ÖSSZE A FŰNYÍRÓT
FONTOS INFORMÁCIÓK: Óvatosan nyissa szét a fűnyíró fogantyúját, ne csípje be és ne sértse meg
a fűnyíró kezelőzsinórját.
A FOGANTYÚ ÖSSZEÁLLÍTÁSA
1. Csúsztassa a fogantyú alsó részét (1. kép - 7. pont) a megfelelő nyílásokba a fűnyírón, és a megfelelő
fogantyúmagasság (2 állás) megválasztása után rögzítse csavarokkal.
2. Távolítsa el a védő párnázatot és rögzítse a fogantyú felső részét (1. kép - 1. pont) a fogantyú alsó részében
levő nyílásba, majd húzza meg a két feszítőcsavart (1. kép - 5. pont).
A TÁROLÓTÁLCA FELSZERELÉSE (1. kép - 12. pont)
A tárolótálcát a mellékelt csavarok segítségével rögzítse a fogantyúhoz.
BENZINES FŰNYÍRÓ HASZNÁLATI ÚTMUTATÓ
Page 58

HU 58
Állítsa össze afűnyírót
ÚTMUTATÓ A FŰGYŰJTŐ KOSÁR ÖSSZEÁLLÍTÁSÁHOZ
A 2. kép alapján állítsa össze a fűgyűjtó kosarat – a kosár alján és oldalain található műanyag végződéseket
rögzítse az acélvázhoz.
A FŰNYÍRÓT BEKAPCSOLÁSA ELŐTT TÖLTSE FEL MOTOROLAJJAL
A fűnyírót motorolaj nélkül szállítjuk. Az első beindítás előtt töltsön bele SAE30 15W-40 motorolajat (kb. 500 ml-t)
az alábbiak szerint.
Figyelem! NE TÖLTSE TÚL az olajtartályt, különben a beindítás után a kipufogóból nagy mennyiségű füst
távozik.
1. Az olaj beöntésekor állítsa a fűnyírót egyenes felületre.
2. Vegye ki a nívópálcát az olajtöltő nyílásból.
3. Az olaj beöntése után tegye vissza a nívópálcát a nyílásba (5. kép), és erősen csavarja be.
4. Az olajszintnek az alsó és a felső határérték között kell lennie (ld. 5. kép).
FONTOS INFORMÁCIÓK: Az olajszintet a fűnyíró minden használata előtt ellenőrizze. Szükség esetén
töltse fel az olajat. Az olajat a nívópálca MAX jelzéséig töltse.
A motorolajat az első 5 óra üzemelés után, majd minden 25 üzemóra után cserélje ki
ÜZEMANYAG FELTÖLTÉSE
Az üzemanyagtartály kupakjának (6. kép) lecsavarása után töltse be az üzemanyagot. Az üzemanyagot
a tartály nyakáig töltse. Ne töltse túl a tartályt. Mindig friss, tiszta és engedélyezett ólommentes benzint
használjon.
Figyelem! Az alkohollal kevert (pl. gasohol), vagy etanol vagy metán adalékot tartalmazó üzemanyagok
megköthetik a nedvességet, ami a tárolás során szeparálódhat és savképződést okozhat. Tárolás közben
így a savak kipárolgásai károsíthatják a fűnyíró motorjának üzemanyagrendszerét. Ha a fűnyírót 30
napnál hosszabb ideig nem használja, ürítse ki az üzemanyagrendszerét, így megelőzheti a későbbi
motorproblémákat. Ürítse ki az üzemanyagtartályt, indítsa be a motort és működtesse, amíg ki nem ürül az
üzemanyagvezeték és a karburátor. A következő szezon előtt töltsön friss üzemanyagot a tartályba. További
részleteket a Tárolás c. fejezetben talál. Soha ne tisztítsa a motort vagy a karburátort tisztítószerekkel - ezek
visszafordíthatatlan károkat okozhatnak.
FZR 5110-B
Page 59

Üzemeltetés
59
6. ÜZEMELTETÉS
Start/fékkezelő kar (1. kép 2. pont) – Ha be akarja indítani a fűnyírót, ezt a kart húzza a fogantyú felé.
A kar elengedésével a fűnyíró motorja megáll.
Indítózsinór (1. kép 4. pont) - A fűnyíró beindítására szolgál.
A futómű karja (1. kép – 3 pont) - A fűnyíró kerékmeghajtására szolgál vágás közben.
A FŰNYÍRÓ BEINDÍTÁSA
1. Ha a motor hideg, 2-3-szor nyomja meg az üzemanyag-befecskendező pumpát (1. kép – 9. pont) (ha a motor
bemelegedett, már nincs szükség a befecskendező pumpa használatára)
2. Húzza a kapcsoló- / fékkart a fogantyúhoz és húzza meg az indítózsinórt
3. A motort a kapcsoló- / fékkar elengedésével kapcsolhatja ki
Megjegyzés: A motor első beindítása után kis mennyiségű füst távozhat, mivel a motor védőrétege leég.
Ez megszokott jelenség, nem jelent hibát.
Figyelem! Ha üzemanyag- vagy olajcseppet lát, azonnal törölje le. Az üzemanyagot ne tárolja, ne töltse és
ne használja nyílt láng közelében.
A KERÉKMEGHAJTÁS KEZELÉSE
A kerékmeghajtás a futómű karjának (1. kép – 3. pont) segítségével vezérelhető Ha a kart a fogantyú felé húzza,
a fűnyíró elindul. A megállításhoz engedje el a kart. A fűnyíró egy, állandó sebességfokozattal rendelkezik.
HU
A BENZINES FŰNYÍRÓ HASZNÁLATÁNAK MÓDJAI
Vágás és a levágott fű szabad elhelyezése a gyepen - mulcsozás
Vágás és a levágott fű összegyűjtése a fűgyűjtő kosárba
Vágás és a levágott fű hátsó kidobása
Vágás és a levágott fű oldalsó kidobása
MULCSOZÁS
1. A tartozékok fel- és leszerelését kizárólag kikapcsolt motor mellett végezze.
2. A mulcsozó betét rögzítése után ellenőrizze a stabilitását.
3. Mulcsozáshoz kizárólag eredeti mulcsozó betétet használjon.
4. Lehetőleg ne egyszerre vágja le a túl nagyra nőtt füvet, így elkerülheti a fűnyíró mechanizmusának és
motorjának túlterhelését.
Összeállítás (4. kép)
Dugja a mulcsozó dugót (1) a kidobójáratba (2). A felhelyezett dugót rögzítse az önfeszítő horoggal.
Szétszerelés
Hüvelykujjával nyomja meg erősen a dugó középső pontját (3), emelje fel, majd húzza ki a kidobójáratból.
BENZINES FŰNYÍRÓ HASZNÁLATI ÚTMUTATÓ
Page 60

HU 60
Üzemeltetés
Vágás oldalsó kidobással (3. kép)
Az oldalkidobó terelőlap felhelyezéséhez emelje fel a fűnyíró házának oldalán levő burkolatot (3. kép - 1. pont).
A terelőlapot rögzítse a horgok segítségével, amelyek a burkolat tengelye alá esnek. Ezután engedje vissza
a burkolatot (3. kép - 2. pont). Oldalsó kidobással történő vágás esetén a kidobójáratba be kell helyezni
a mulcsozó dugót.
A VÁGÁSI MAGASSÁG BEÁLLÍTÁSA
A vágási magasságot központilag állíthatja be a vágási magasság központi beállítására szolgáló kar
segítségével (1. kép – 8. pont).
6 állás közül választhat, 25 és 75 mm között.A gyepek nagy részének vágásához a legmegfelelőbb a közepső
vágási magasság. A legalacsonyabb állás választása esetén sérülhet a gyep.
A VÁGÓKÉSEK CSERÉJE
Ha ki szeretné cserélni a vágókést, szerelje le a csavart (7. kép). A kés eltávolítása előtt engedje ki az olajat az
olajtartályból.
Az ábra szerint végezze el a szerelést. Húzza meg a csavart. A meghúzási nyomaték 40 Nm. A kés cseréjekor
egyúttal cserélje ki a kés rögzítőcsavarját is.
OLAJCSERE
A kiengedő dugó a motor alatt található (8. kép). Helyezzen a motor alá egy megfelelő edényt a használt olaj
felfogásához, és húzza ki a dugót. Billentse meg a fűnyírót, hogy az összes olaj kifolyhasson a tartályból.
Az olaj kieresztése után helyezze vissza a dugót a nyílásba ellenőrizze, hogy a dugót a helyén van-e, és törölje le
az esetleges olajcseppeket.
Töltsön a tartályba SAE30 típusú olajat.
A nívópálca behelyezése után (nem a becsavarás után) az olajszintnek a Min. és a Max. jelzés között kell lennie
(5. kép). Ne töltse túl az olajtartályt.
Indítsa be a motort és rövid ideig működtesse. Állítsa le a motort, várjon 1 percig, majd mérje meg az olajszintet
a tartályban. Szükség esetén töltse fel az olajat a szükséges szintre.
GYÚJTÓGYERTYA
Amikor a motor kihűlt, a mellékelt dugókulccsal csavarja ki a gyújtógyertyát és tisztítsa meg drótkefével.
Hézagmérő segítségével állítsa be a gyertya hézagját 0,75 mm-re (9. kép). Csavarja vissza a gyújtógyertyát
a helyére. Ne húzza túl a menetet.
FZR 5110-B
Page 61

Biztonsági utasítások
7. BIZTONSÁGI UTASÍTÁSOK
ÁLTALÁNOS BIZTONSÁGI ELŐÍRÁSOK
Ez a termék kizárólag fű nyírására szolgál. Ne használja a készüléket a rendeltetésszerű használattól eltérő
módon. Ellenkező esetben a készülék károsodása vagy sérülés veszélye fenyeget.
Soha ne engedje, hogy gyermekek vagy az útmutatót nem ismerő személyek használják a gépet.
A fűnyírót használó személy felelős a munkaterületen található személyek biztonságáért.
A fűnyírót soha ne használja más személyek, gyerekek vagy szabadon szaladgáló állatok közvetlen
közelében.
A fűnyírás megkezdése előtt ellenőrizze a terepet, ahol a fűnyírót használja, és távolítsa el a köveket, drótokat,
cserepeket, csontokat és más idegen tárgyakat, amelyek beakadhatnának vagy kivágódhatnának és sérülést
okozhatnának.
HASZNÁLATI UTASÍTÁSOK
Minden anyát, szegecset és csavart alaposan rögzíteni kell, úgy, hogy a készülék biztonságos és üzemkész
állapotban legyen.
A fűnyírót soha ne használja a gyűjtőkosár vagy a védőfedél nélkül.
A fűnyírót soha ne használja, ha a kés pengéi lazák. Mindig előre ellenőrizze, hogy a megfelelő csavarok jól
meg vannak-e húzva. A tompa pengéket ki kell élesíteni, mégpedig egyenletesen.
A sérült pengékkel rendelkező kést ki kell cserélni.
Ha a fűnyíróval dolgozik, használjon hosszú szárú nadrágot és stabil cipőt.
A fűnyírót soha ne indítsa be zárt vagy rosszul szellőző helyen, ahol a kipufogógáz felgyűlhet. A motorból
távozó gáz szénmonoxidot tartalmaz, ami életveszélyes.
Csak megfelelő fényviszonyok mellett dolgozzon (nappali fénynél, vagy elégséges mesterséges világítás
mellett).
Ne használja a fűnyírót esőben, vagy ha a fű nedves.
Különös óvatossággal végezze a fűnyírást, ha a talaj lejt vagy emelkedik. Mindig ferdén nyírjon,
a szintvonalakkal párhuzamosan, soha ne merőlegesen rájuk, azaz fel/le.
A fűnyírót soha ne hagyja felügyelet nélkül menni, ha nincs mellette, kapcsolja ki a motort.
Indításkor soha ne emelje meg a fűnyíró hátsó részét és soha ne közelítsen a végtagjaival az alvázhoz vagy
a hátsó kidobónyíláshoz, ha a motor jár.
Soha ne módosítsa a motor sebességének beállítását.
Kerékmeghajtású fűnyíró esetén engedje ki a kerékmeghajtást, mielőtt bekapcsolja a motort.
A fűnyírót soha ne helyezze át működő motorral.
Állítsa le a motort, és csavarja ki a gyújtógyertyát az alábbi esetekben:
- mielőtt bármilyen tevékenységet folytat a vágófedél vagy a hátsó fűkidobó nyílás alatt.
- a gép karbantartása, javítása vagy ellenőrzése előtt.
- a fűnyíró felemelése vagy áthelyezése előtt.
- ha a fűnyírót felügyelet nélkül hagyja, vagy ha módosítani akarja a vágási magasság beállítását.
- a gyűjtőzsák leszerelése és kiürítése előtt.
- ha idegen tárgynak ütközik, állítsa meg a motort, és a fűnyírót gondosan nézze át, hogy kizárja
a meghibásodás lehetőségét. Meghibásodás esetén vigye a fűnyírót szakszervizbe javítás céljából.
61
HU
VIGYÁZAT: A motor kikapcsolása után a vágókés még néhány másodpercig forog.
BENZINES FŰNYÍRÓ HASZNÁLATI ÚTMUTATÓ
Page 62

HU 62
Biztonsági utasítások
- ha a fűnyíró abnormálisan rázkódik (azonnal keresse meg és távolítsa el a rázkódás okát).
- a biztonságos működés érdekében rendszeresen ellenőrizze, hogy a szelepek, csavarok és anyák meg
vannak húzva a fűnyíróban.
VIGYÁZAT: AZ ÜZEMANYAG ERŐSEN GYÚLÉKONY FOLYADÉK.
Az üzemanyagot erre szolgáló edényben tartsa.
Az üzemanyagot csak nyílt vagy jól szellőző helyen töltse. Az üzemanyaggal való tevékenység alatt ne
dohányozzon és ne használjon mobiltelefont.
Üzemanyagot csak akkor töltsön, ha a motor ki van kapcsolva. Soha ne nyissa ki az üzemanyag-tartályt és ne
töltsön bele üzemanyagot, ha a motor forró vagy jár.
Ha kifolyik a benzin, ne indítsa el a motort. Távolítsa el a fűnyírót onnan, ahol az üzemanyag kifolyt, és
vigyázzon, nehogy valami meggyulladjon. A munkát csak azután folytassa, hogy a kifolyt üzemanyag
elpárolgott, és az üzemanyag gőze eloszlott;
Üzemanyagtöltés után jól csavarja be az üzemanyagtartály tetejét és az üzemanyagkanna kupakját.
VIGYÁZAT: Karbantartás vagy javítás előtt állítsa le a motort és csavarja ki a gyújtógyertyát.
FZR 5110-B
Page 63

Karbantartás
8. KARBANTARTÁS
A GYEP GONDOZÁSA
A füves terület típusától függően különböző gondozási módokra van szükség;
Ezért mindig olvassa el a vetőmag csomagolásán található utasításokat, melyek az adott területen való
növekedés körülményei között adnak tanácsot a vágási magasságra.
Ne feledje, hogy a fűfélék nagy része szárból és egy vagy több levélből áll.
A levelek teljes levágása esetén károsodik a gyep, és sokkal nehezebben fog újra nőni.
Általánosságban a következő utasítások érvényesek:
– a túl alacsony vágás megsérti a gyökereket, aminek a következménye "foltos" megjelenés;
– nyáron magasabb vágás szükséges, hogy védje a talajt a kiszáradástól;
– nedves fű vágása csökkentheti a kés hatékonyságát, mivel ráragadhat a fű és kiszakíthatja a füves
növényzet;
– nagyon magas fű esetén ajánlott először a legmagasabb vágási magasságon vágni, majd két-három
nap múlva megismételni a vágást.
A gyep szebb lesz, ha azonos magasságban, rendszeresen és az egész felületen vágják, felváltva a két
irányban.
KARBANTARTÁS
Minden anyát, szegecset és csavart alaposan rögzíteni kell, úgy, hogy a készülék biztonságos és üzemkész
állapotban legyen. A rendszeres karbantartás alapvető feltétele a felhasználó biztonságának, a fűnyíró
működőképessége és magas teljesítménye megőrzésének.
A gépet benzinnel a tartályában soha ne tárolja olyan épületben, ahol a kipárolgás kapcsolatba kerülhet nyílt
lánggal, szikrával vagy magas hőmérséklet forrásával
Bármilyen zárt helyen való tárolás előtt hagyja a motort kihűlni.
Tűzveszély csökkentése érdekében gondoskodjon róla, hogy a fűnyírón, különösen a motoron, a kipufogó
hangtompítóján, az akkumulátoron, valamint a tartalék benzin tárolási helyén ne maradjon fű, falevelek vagy
túl sok kenőanyag.
Rendszeresen ellenőrizze a terelőlap és a gyűjtőkosár állapotát; sérülés esetén cserélje ki őket.
Az üzemanyag kiengedését jól szellőző helyen, hideg motor mellett végezze.
A vágókés levétele vagy felszerelése esetén használjon vastag védőkesztyűt.
A vágókés pengéjének minden élesítése után ellenőrizni kell a kiegyensúlyozását.
63
HU
VIGYÁZAT: Karbantartás vagy javítás előtt állítsa le a motort és csavarja ki a gyújtógyertyát.
A négyütemű motor használata előtt kérjük, gondosan olvassa el a motor használati útmutatóját.
Rendszeresen ellenőrizze az olajszintet, szükség esetén töltse fel vagy cserélje.
Rendszeresen ellenőrizze a fűnyírót és gondoskodjon az alváz alsó részében levő fű eltávolításáról.
Rendszeresen kenje megfelelő kenőanyaggal az alváz tengelyét és a csapágyakat.
Rendszeresen ellenőrizze a kések állapotát, mivel alapvetően befolyásolják a fűnyíró teljesítményét. A kések
mindig legyenek élesek és kiegyensúlyozottak.
Rendszeres időközönként ellenőrizze, hogy valamennyi csavar és anya megfelelően meg van-e húzva.
Az elhasznált vagy rosszul meghúzott anyák és csavarok a motor vagy a váz komoly sérülését okozhatják.
Ha a kés hirtelen akadályba ütközik, a fűnyírót állítsa le és vigye szakszervizbe.
BENZINES FŰNYÍRÓ HASZNÁLATI ÚTMUTATÓ
Page 64

HU 64
Karbantartás
KÉS: préselt acélból készült. A legjobb vágás érdekében rendszeresen, körülbelül 25 óra működés után
élesítse a kést. Győződjön meg róla, hogy a kés mindig megfelelően ki van-e egyensúlyozva. Ebből a célból
tegyen a kés középső nyílásába egy (kb. 2-3 mm átmérőjű) kis vas tengelyt. Ha a kés megfelelően ki van
egyensúlyozva, a tengely vízszintes helyzetben marad.
Ha a kés nem marad vízszintes helyzetben, cserélje ki.
A kés leszerelésekor csavarja ki a csavart, ellenőrizze a kés hordozó részét. Ha az alkatrészek elhasználódtak
vagy sérültek, cserélje ki őket.
VIGYÁZAT: Csak eredeti pótalkatrészeket használjon. A gyenge minőségű pótalkatrészek a fűnyíró
komoly meghibásodását okozhatják és fenyegethetik az Ön biztonságát.
SZERVIZ
Amennyiben a termék megvásárlása után bármilyen hibát tapasztal, vegye fel a kapcsolatot
a szervizrészleggel. A termék használata során tartsa be a mellékelt használati útmutató utasításait.
A reklamáció elutasításra kerül, ha a terméket módosította, vagy nem tartotta be a használati útmutató
utasításait.
A JÓTÁLLÁS NEM VONATKOZIK
A gép funkcionális részeinek használat közbeni természetes elhasználódására
A gép rendes karbantartásával összefüggő szerviz-beavatkozásokra (pl. tisztítás, kenés, beállítás, stb.)
A külső hatások (pl. éghajlati viszonyok, por, nem megfelelő használat, stb.) által okozott hibákra
A gép leesése, ütközése és hasonlók miatti mechanikus sérülésekre
A nem szakszerű bánásmód, túlterhelés, nem megfelelő alkatrészek, nem alkalmas szerszámok használata
és hasonlók által okozott károkra
Az olyan reklamált termékek esetén, amelyek nem voltak megfelelően biztosítva a szállítás során
a mechanikus sérülések ellen, az esetleges károkért kizárólag a tulajdonos felelős.
TÁROLÁS
Ha a gépet hosszabb ideig nem használja, az alábbi utasítások alapján tárolja. Ezzel meghosszabbítja a gép
élettartamát.
Teljesen engedje ki az üzemanyagot a tartályból és a karburátorból.
Csavarja ki a gyújtógyertyát és a nyílásba öntsön egy kevés motorolajat. Finoman húzza meg az indítókart
2-3-szor.
Egy tiszta ronggyal tisztítsa meg a külső felületeket. A gépet tiszta és száraz helyen tárolja.
FZR 5110-B
Page 65

Műszaki adatok
65
9. MŰSZAKI ADATOK
Motortípus OHV, léghűtéses, 4-ütemű
Névleges teljesítmény 2,70 kW
A motor fordulatszáma 2900 ford/perc
Hengerűrtartalom 140 cm
Indítás Húzással
Az üzemanyagtartály térfogata (ólommentes 95 vagy
magasabb)
Beállítható vágási magasság 25-75 mm 6 állásban
A magasság beállítása Központi magasság-beállítás
Vágási szélesség 510 mm
Keréktávolság 200 mm (első kerék)
A gyűjtőzsák térfogata 75 l
Készülékház acél
Deklarált zajszint 98 dB(A)
Súly 34 kg
A szöveg és műszaki paraméterek változtatásának joga fenntartva.
Változtatások a szövegben, a kivitelben és a műszaki jellemzőkben előzetes fi gyelmeztetés nélkül történhetnek,
a módosításra vonatkozó jog fenntartva.
3
0,8 liter
280 mm (hátsó kerék)
HU
BENZINES FŰNYÍRÓ HASZNÁLATI ÚTMUTATÓ
Page 66

HU 66
Megfelelőségi nyilatkozat
10. MEGFELELŐSÉGI NYILATKOZAT
EK MEGFELELŐSÉGI NYILATKOZAT
A Fast ČR, a.s., Černokostelecká 251 01 Říčany u Prahy, tel.:323204111, kötelezően nyilatkozik,
hogy a Fieldmann FZR 5110 B benzines fűnyíró (a gyártási év a típuscímkén található, és a gép gyártási száma
követi, megfelel a TANÁCS következő IRÁNYELVEINEK:
2006/42/EC – 2004/108/EC – 2000/14/EC – 97/68/EC – 2002/88/EC
és az alábbi szabványokkal összhangban került vizsgálatra:
EN 55012
EN 836 – EN 836/A4
EN ISO 5395 –1:2013
EN ISO 5395 – 2:2013
EN ISO 14982:2009
EN ISO 3744:2010
ISO 11094:1991
A FAST ČR Rt jogosult a gyártó nevében eljárni.
CE label: 14
Kelt: Říčany, 2014. 9. 18.
Petr Uher
minőségügyi menedzser
FZR 5110-B
Page 67

Megsemmisítés
11. MEGSEMMISÍTÉS
A HASZNÁLT CSOMAGOLÓANYAGOKRA VONATKOZÓ UTASÍTÁSOK ÉS TÁJÉKOZTATÓ
A használt csomagolóanyagot az önkormányzat által kijelölt hulladékgyűjtő helyen adja le.
A gép és tartozékai különböző anyagokból, pl. fémből és műanyagból készültek.
A sérült alkatrészeket adja le szelektív gyűjtőhelyen. Tájékozódjon a vonatkozó hivatalnál.
Ez a termék teljesíti az összes rá vonatkozó EU irányelv követelményeit.
Változtatások a szövegben, a kivitelben és a műszaki jellemzőkben előzetes fi gyelmeztetés nélkül
történhetnek, a módosításra vonatkozó jog fenntartva.
Használati útmutató az eredeti nyelven.
67
HU
BENZINES FŰNYÍRÓ HASZNÁLATI ÚTMUTATÓ
Page 68

HU 68
Megjegyzések
FZR 5110-B
Page 69

Spis treści
69
Spalinowa kosiarka do trawy
INSTRUKCJA OBSŁUGI
Dziękujemy za zakupienie tej ogrodowej spalinowej kosiarki rotacyjnej. Zanim zaczniesz
z niej korzystać, przeczytaj uważnie niniejszą instrukcję obsługi i zachowaj ją do wglądu.
SPIS TREŚCI
ZAŁĄCZNIK Z RYSUNKAMI ........................................................................................................................................ 1
1. OGÓLNE ZASADY BEZPIECZEŃSTWA .............................................................................................................. 70
Ważne instrukcje dotyczące bezpieczeństwa ........................................................................................ 70
Opakowanie ............................................................................................................................................................... 70
Instrukcja obsługi ...................................................................................................................................................... 70
2. WYJAŚNIENIE TABLICZEK ZE WSKAZÓWKAMI ZNAJDUJĄCYCH SIĘ NA MASZYNIE ...................71
3. OPIS MASZYNY ........................................................................................................................................................... 73
4. MONTAŻ/PRZYGOTOWANIE ................................................................................................................................ 73
Wyjmij kosiarkę z kartonowego opakowania ........................................................................................... 73
5. ZMONTUJ KOSIARKĘ ................................................................................................................................................ 73
Montaż uchwytu ....................................................................................................................................................... 73
Montaż pojemnika na drobiazgi ..................................................................................................................... 73
Zalecenia dotyczące montażu kosza na trawę ......................................................................................74
Przed uruchomieniem kosiarki dolej olej silnikowy ................................................................................74
Uzupełnianie paliwa ...............................................................................................................................................74
6. OBSŁUGA ...................................................................................................................................................................... 75
Uruchamianie kosiarki .......................................................................................................................................... 75
Obsługa napędu ..................................................................................................................................................... 75
Zakres użycia kosiarki spalinowej .................................................................................................................... 75
Mulczowanie .............................................................................................................................................................. 75
Ustawienia wysokości koszenia ........................................................................................................................76
Wymiana noży tnących ........................................................................................................................................76
Wymiana oleju silnikowego.................................................................................................................................76
Świeca zapłonowa ..................................................................................................................................................76
7. WSKAZÓWKI BEZPIECZEŃSTWA ...........................................................................................................................77
Ogólne wskazówki bezpieczeństwa ..............................................................................................................77
Instrukcja użycia ........................................................................................................................................................77
8. KONSERWACJA.......................................................................................................................................................... 79
Pielęgnacja trawnika ............................................................................................................................................. 79
Konserwacja ............................................................................................................................................................... 79
Serwis .............................................................................................................................................................................. 80
Gwarancja nie dotyczy ........................................................................................................................................ 80
Przechowywanie ...................................................................................................................................................... 80
9. DANE TECHNICZNE ..................................................................................................................................................81
10. DEKLARACJA ZGODNOŚCI ................................................................................................................................82
11. LIKWIDACJA ................................................................................................................................................................. 83
PL
SPALINOWA KOSIARKA DO TRAWY INSTRUKCJA OBSŁUGI
Page 70

PL 70
Ogólne zasady bezpieczeństwa
1. OGÓLNE ZASADY BEZPIECZEŃSTWA
WAŻNE INSTRUKCJE DOTYCZĄCE BEZPIECZEŃSTWA
Rozpakuj uważnie wyrób, zwracając przy tym uwagę, abyś nie wyrzucił żadnej części materiału
opakowaniowego, zanim nie znajdziesz wszystkich części wyrobu.
Przechowuj urządzenie w suchym miejscu z dala od dzieci.
Przeczytaj wszystkie uwagi i wskazówki. Nieprzestrzeganie ostrzeżeń i wskazówek może spowodować
porażenie prądem elektrycznym, pożar lub ciężkie obrażenia.
OPAKOWANIE
Wyrób został umieszczony w opakowaniu chroniącym je przed uszkodzeniem podczas transportu. Opakowanie
to jest surowcem i dlatego podlega recyklingowi.
INSTRUKCJA OBSŁUGI
Zanim rozpoczniesz pracę z urządzeniem, przeczytaj następujące zasady bezpieczeństwa i wskazówki
dotyczące użytkowania.
Zapoznaj się z elementami sterowania i prawidłowym użyciem urządzenia. Instrukcję należy starannie
zachować do wglądu. Co najmniej w okresie gwarancyjnym zalecamy zachowanie oryginalnego opakowania
łącznie z wewnętrznym materiałem opakowaniowym, dokument kasowy i kartę gwarancyjną.
W razie transportu zapakuj maszynę z powrotem do oryginalnego pudełka dostarczonego przez producenta,
zapewniając w ten sposób maksymalną ochronę produktu podczas ewentualnego transportu (np.
przeprowadzki lub wysyłki do serwisu).
Uwaga: Jeśli przekazujesz maszynę innym osobom, przekaż ją razem z instrukcją. Przestrzeganie
załączonej instrukcji obsługi stanowi założenie prawidłowego użycia urządzenia. Instrukcja obsługi
zawiera również wskazówki dotyczące obsługi, konserwacji i naprawy.
Producent nie ponosi odpowiedzialności za wypadki lub szkody powstałe na skutek
nieprzestrzegania niniejszej instrukcji.
FZR 5110-B
Page 71

Wyjaśnienie tabliczek ze wskazówkami znajdujących się na urządzeniu
71
2. WYJAŚNIENIE TABLICZEK ZE WSKAZÓWKAMI
ZNAJDUJĄCYCH SIĘ NA MASZYNIE
Przed uruchomieniem urządzenia prosimy
o uważne zapoznanie się z instrukcją obsługi.
Pozostałe osoby powinny znajdować się poza
obszarem pracy.
Uwaga, noże rotujące! Unikać ryzyka urazu
kończyn.
Emisja gazów toksycznych. Nie korzystaj
z kosiarki spalinowej w pomieszczeniach
zamkniętych lub nie wentylowanych.
PL
Powierzchni gorące, ryzyko oparzeń!
Przed rozpoczęciem konserwacji wyłącz silnik
i odłącz świecę zapłonową.
Nigdy nie dolewaj paliwa przy włączonym silniku.
SPALINOWA KOSIARKA DO TRAWY INSTRUKCJA OBSŁUGI
Page 72

PL 72
Wyjaśnienie tabliczek ze wskazówkami znajdujących się na urządzeniu
Uwaga, w przypadku nieprzestrzegania zaleceń zagraża
ryzyko obrażeń osób, śmierci lub uszkodzenia urządzenia.
Używaj ochronników słuchu.
Używaj środków ochrony wzroku.
Używaj środków ochrony dróg oddechowych.
Zachowaj stale odstęp od poruszających się części.
Poruszaj się po zboczu wzdłuż poziomic, nie zaś w górę
i w dół.
Produkt spełnia wszystkie odpowiednie dyrektywy
europejskie.
Benzyna jest substancją skrajnie łatwopalną, dlatego
przed dolaniem paliwa pozostaw silnik na 2 minuty do
wystygnięcia.
FZR 5110-B
Page 73

Opis maszyny | Montaż/Przygotowanie | Zmontuj kosiarkę
3. OPIS MASZYNY (rysunek 1)
1. Górna część uchwytu
2. Dźwignia zapłonu/hamulca
3. Dźwignia napędu
4. Linka rozrusznika
5. Śruba szybkozaciskowa
6. Kosz
7. Dolna część uchwytu
8. Dźwignia regulacji wysokości koszenia
9. Pompka wtrysku paliwa
10. Defl ektor wyrzutu bocznego
11. Uchwyt przedni
12. Pojemnik na drobiazgi
4. MONTAŻ/PRZYGOTOWANIE
Przed zmontowaniem i uruchomieniem kosiarki spalinowej dokładnie przeczytaj całą instrukcję obsługi
i zawarte w niej polecenia.
WAŻNA INFORMACJA: Kosiarka została dostarczona BEZ PALIWA I OLEJU w silniku.
Twoja nowa kosiarka do trawy została zmontowana i wypróbowana w zakładzie produkcyjnym.
73
PL
WYJMIJ KOSIARKĘ Z KARTONOWEGO OPAKOWANIA
Wyjmij kosiarkę z kartonowego opakowania i sprawdź, czy w opakowaniu nie pozostały wolne części.
5. ZMONTUJ KOSIARKĘ
WAŻNA INFORMACJA: Ostrożnie rozłóż rękojeść kosiarki tak, aby nie przytrzasnąć ani nie uszkodzić
linki.
MONTAŻ UCHWYTU
1. Wsuń spodnią część uchwytu (rysunek 1 - punkt 7) do odpowiednich otworów w kosiarce, a po wybraniu
odpowiedniej wysokości uchwytu (2 pozycje), zabezpiecz go śrubami.
2. Usuń wypełnienia ochronne. Przymocuj górną część uchwytu (rysunek 1 - punkt 1) do otworu w spodniej
części rękojeści i dokręć obie śruby mocujące (rysunek 1 - punkt 5).
MONTAŻ POJEMNIKA NA DROBIAZGI (rysunek 1 - punkt 12)
Przymocuj pojemnik na drobiazgi do uchwytu za pomocą dołączonych śrub.
SPALINOWA KOSIARKA DO TRAWY INSTRUKCJA OBSŁUGI
Page 74

PL 74
Zmontuj kosiarkę
ZALECENIA DOTYCZĄCE MONTAŻU KOSZA NA TRAWĘ
Zmontuj kosz na trawę zgodnie z rysunkiem 2 – przymocuj plastikowe zakończenie pod spodem i po bokach
kosza do stalowej ramy.
PRZED URUCHOMIENIEM KOSIARKI DOLEJ OLEJ SILNIKOWY
Kosiarka została dostarczona bez oleju silnikowego. Przed pierwszym uruchomieniem wlej olej silnikowy SAE30
15W-40 (ok. 500 ml) przestrzegając poniższych wskazówek.
Uwaga! NIE PRZEPEŁNIAJ pojemnika z olejem, w przeciwnym wypadku po uruchomieniu kosiarki z rury
wydechowej zacznie się wydobywać duża ilość dymu.
1. Przed rozpoczęciem dolewania oleju postaw kosiarkę na równej powierzchni.
2. Wyjmij miarkę oleju z otworu służącego do jego dolewania.
3. Po dolaniu oleju umieść miarkę z powrotem w otworze (rysunek 5) i dokładnie ją dokręć.
4. Poziom oleju musi się wahać pomiędzy górną i dolną granicą (por. rysunek 5).
WAŻNA INFORMACJA: Sprawdź poziom oleju przed każdym użyciem kosiarki. W razie potrzeby dolej
olej. Dolewaj olej do kreski MAX znajdującej się na miarce oleju.
Wymień olej po pierwszych 5 godzinach pracy, a następnie po każdych 25 godzinach pracy.
UZUPEŁNIANIE PALIWA
Odkręć korek wlewu paliwa (rysunek 6) i dolej paliwo. Dolej paliwo aż po szyjkę wlewu zbiornika paliwa. Nie
przepełniaj zbiornika. Dolewaj zawsze świeżej, czystej i certyfi kowanej benzyny bezołowiowej.
Uwaga! Paliwo zmieszane z alkoholem (np. gazohol) czy paliwo z domieszką etanolu czy metanu
może wiązać wilgoć, co może prowadzić podczas magazynowania do separacji i powstawania kwasów.
Podczas przechowywania opary kwasów mogą uszkodzić system paliwowy silnika kosiarki. Jeśli nie
będziesz korzystać z kosiarki przez okres dłuższy niż 30 dni, wypuść paliwo z układu paliwowego kosiarki.
Zapobiegniesz w ten sposób problemom z silnikiem. Wypuść paliwo ze zbiornika paliwa, uruchom silnik
i pozwól mu działać, dopóki nie dojdzie do opróżnienia układu paliwowego i gaźnika. Przed kolejnym
sezonem dolej do zbiornika świeże paliwo. Więcej szczegółów znajdziesz w rozdziale Przechowywanie.
Nigdy nie czyść silnika ani gaźnika środkami czyszczącymi, zagraża ryzyko nieodwracalnego uszkodzenia.
FZR 5110-B
Page 75

Obsługa
75
6. OBSŁUGA
Dźwignia zapłonu/hamulca (rysunek 1 punkt 2) – Aby uruchomić kosiarkę, przyciągnij dźwignię do
rękojeści. Po zwolnieniu dźwigni dojdzie do zatrzymania pracy silnika.
Linka rozrusznika (rysunek 1 punkt 4) – Służy do uruchomienia kosiarki.
Dźwignia napędu (rysunek 1 punkt 3) – Służy do uruchomienia napędu kosiarki podczas koszenia.
URUCHAMIANIE KOSIARKI
1. Jeśli silnik nie jest rozgrzany, wciśnij 2-3 razy pompkę wtrysku paliwa (rysunek 1 – punkt 9). (Jeśli silnik jest
rozgrzany, nie trzeba korzystać z pompki wtrysku paliwa.)
2. Przyciągnij dźwignię zapłonu/hamulca do uchwytu i pociągnij za linkę rozrusznika.
3. Aby wyłączyć silnik, zwolnij dźwignię zapłonu/hamulca.
Uwaga: Po pierwszym uruchomieniu silnika może pojawić się niewielka ilość dymu z powodu opalenia
warstw ochronnych silnika. Jest to standardowa sytuacja, która nie sygnalizuje żadnego problemu.
Uwaga! Natychmiast zetrzyj ewentualne krople paliwa czy oleju. Nie przechowuj, nie dolewaj paliwa ani
nie manipuluj nim w pobliżu otwartego ognia.
OBSŁUGA NAPĘDU
Do obsługi napędu służy dźwignia napędu (rysunek 1 – punkt 3). Po przyciągnięciu dźwigni do uchwytu
kosiarka zacznie jechać. Aby ją zatrzymać, zwolnij ponownie dźwignię. Kosiarka dysponuje jedną stałą
prędkością.
PL
ZAKRES UŻYCIA KOSIARKI SPALINOWEJ
Koszenie z wolnym układaniem trawy na trawniku - mulczowanie
Koszenie z gromadzeniem skoszonej trawy w koszu
Koszenie z tylnym wyrzutem skoszonej trawy
Koszenie z bocznym wyrzutem skoszonej trawy
MULCZOWANIE
1. Wyposażenie należy przymocowywać i zdejmować wyłącznie przy wyłączonym silniku.
2. Po przymocowaniu wyposażenia do mulczowania sprawdź jego stabilność.
3. Podczas mulczowania korzystaj wyłącznie z oryginalnego wyposażenia do mulczowania.
4. Staraj się nie kosić naraz wysokiej trawy. Unikniesz w ten sposób przeciążenia mechanizmu kosiarki i silnika.
Montaż (rysunek 4)
Wsuń zaślepkę mulczującą (1) do tunelu wyrzutowego (2). Zabezpiecz osadzoną zaślepkę w jej pozycji za
pomocą haka samoblokującego .
Demontaż
Wciśnij mocno kciukiem środkowy punkt zaślepki (3). Po uniesieniu wyciągnij ją z tunelu wyrzutowego.
SPALINOWA KOSIARKA DO TRAWY INSTRUKCJA OBSŁUGI
Page 76

PL 76
Obsługa
Koszenie z bocznym wyrzutem (rysunek 3)
Aby osadzić defl ektor bocznego wyrzutu podnieś pokrywę z boku obudowy kosiarki (rysunek 3 - punkt 1).
Zabezpiecz defl ektor za pomocą haczyków, które wpasują się pod oś pokrywy. Następnie zwolnij pokrywę
(rysunek 3 - punkt 2). Podczas koszenia z wyrzutem bocznym należy umieścić w tunelu wyrzutowym zaślepkę
mulczującą.
USTAWIENIA WYSOKOŚCI KOSZENIA
Ustaw wysokość koszenia centralnie za pomocą dźwigni centralnej regulacji wysokości koszenia (rysunek 1
– punkt 8).
Możesz dokonać wyboru spośród 6 pozycji w zakresie 25 - 75 mm. Do koszenia większości trawników
najbardziej odpowiednia jest średnia wysokość koszenia. Przy ustawieniu najniższej wysokości może dojść do
uszkodzenia trawnika.
WYMIANA NOŻY TNĄCYCH
Aby wymienić nóż tnący, odkręć śrubę (rysunek 7). Przed usunięciem noża wysuń olej ze zbiornika oleju.
Dokonaj montażu zgodnie z pokazanym rysunkiem. Dokręć śrubę. Moment dokręcania wynosi 40 Nm.
Równocześnie z wymianą noża wymień śrubę dokręcającą nóż.
WYMIANA OLEJU SILNIKOWEGO
Korek spustowy znajduje się pod silnikiem (rysunek 8). Umieść pod silnikiem odpowiedni zbiornik na zużyty olej
i zdejmij korek. Pochyl kosiarkę tak, aby cały olej mógł wypłynąć ze zbiornika.
Po wypuszczeniu oleju umieść korek z powrotem w otworze, upewnij się, że korek jest umieszczona prawidłowo
na swoim miejscu i ewentualnie wytrzyj krople rozlanego oleju.
Dolej do zbiornika olej typu SAE30.
Po włożeniu miarki oleju do otworu (bez zaśrubowania) poziom oleju powinien znajdować się pomiędzy
kreskami Min. i Maks. (rysunek 5). Nie przepełniaj zasobnika na olej.
Uruchom silnik i pozostaw go na chwilę włączony. Zatrzymaj silnik, odczekaj 1 minutę i zmierz poziom oleju
w zbiorniku. W razie potrzeby dolej olej do odpowiedniego poziomu.
ŚWIECA ZAPŁONOWA
Po ostygnięciu silnika odkręć świecę zapłonową za pomocą dostarczonego klucza i oczyść ją drucianą
szczotką. Ustaw za pomocą szczelinomierza odstęp świecy na wartość 0,75 mm (rysunek 9). Wkręć świecę
zapłonową z powrotem na jej pozycję. Nie dokręcaj nadmiernie świecy.
FZR 5110-B
Page 77

Zalecenia dotyczące bezpieczeństwa
7. WSKAZÓWKI BEZPIECZEŃSTWA
OGÓLNE WSKAZÓWKI BEZPIECZEŃSTWA
Ten produkt służy wyłącznie do koszenia trawy. Nie używaj do innych celów niż te, do których jest
przeznaczony. W innym wypadku grozi jego uszkodzenie lub wypadek.
Nigdy nie należy pozwolić pracować z tym urządzeniem dzieciom ani osobom niezapoznanym z niniejszą
instrukcją obsługi.
Osoba obsługująca kosiarkę odpowiada za bezpieczeństwo osób znajdujących się w obszarze jej pracy.
Nigdy nie używaj kosiarki bezpośrednio w pobliżu innych osób, dzieci lub wolno biegających zwierząt.
Przed rozpoczęciem koszenia sprawdź teren, na którym kosiarka ma być używana, i usuń z niego kamienie,
druty, patyki, odłamki szkła, kości i inne przedmioty obce, które mogłyby się zaklinować lub zostać
wyrzucone i spowodować zranienia.
INSTRUKCJA UŻYCIA
Wszystkie nakrętki, sworznie i śruby należy dokręcić tak, aby urządzenie znajdowało się w bezpiecznym
stanie i było zdolne do pracy.
Nigdy nie korzystaj z kosiarki bez kosza lub pokrywy ochronnej.
Nigdy nie korzystaj z kosiarki z poluzowanymi ostrzami noża. Zawsze upewnij się najpierw, czy odpowiednie
śruby są dobrze dokręcone. Stępione ostrza należy równomiernie naostrzyć.
Noże z uszkodzonymi ostrzami należy wymienić.
Podczas pracy z kosiarką należy nosić spodnie z długimi nogawkami i solidne buty.
Nigdy nie uruchamiaj kosiarki w zamkniętych lub słabo wentylowanych pomieszczeniach, gdzie mogą się
gromadzić opary. Emisje pochodzące z silnika zawierają tlenek węgla, który jest substancją zagrażającą
życiu.
Pracuj wyłącznie przy dostatecznym oświetleniu (przy świetle dziennym lub przy dostatecznym sztucznym
oświetleniu).
Nie korzystaj z kosiarki podczas deszczu lub kiedy trawa jest mokra.
Zachowaj szczególną ostrożność podczas koszenia w terenie z różnicami poziomów (na zboczach). Koś
zawsze w poprzek zbocza, równolegle do poziomicy, nie zaś z góry na dół, prostopadle do niej.
Nigdy nie pozostawiaj włączonej kosiarki bez obsługi. Jeśli zamierzasz odejść od kosiarki, wyłącz silnik.
Podczas uruchamiania kosiarki nigdy nie podnoś jej tylnej części i nigdy nie zbliżaj kończyn do podwozia lub
do otworu tylnego wyrzutu trawy przy włączonym silniku.
Nigdy nie zmieniaj ustawień prędkości silnika.
W przypadku kosiarek z napędem zwolnij napęd przed uruchomieniem silnika.
Nigdy nie przemieszczaj kosiarki z włączonym silnikiem.
W następujących wypadkach należy zatrzymać silnik i odłączyć świecę zapłonową:
- przed rozpoczęciem jakiejkolwiek czynności pod pokrywą lub otworem tylnego wyrzutu trawy.
- przed rozpoczęciem konserwacji, naprawy lub kontroli urządzenia.
- przed przenoszeniem, podnoszeniem lub przemieszczaniem kosiarki.
- jeśli pozostawiasz kosiarkę bez nadzoru lub jeśli zamierzasz zmienić ustawienia wysokości koszenia.
- przed demontażem i opróżnianiem worka zbiorczego.
- jeśli dojdzie do kolizji z przedmiotem obcym, zatrzymaj silnik i dokładnie przejrzyj kosiarkę, aby
wykluczyć możliwość jej uszkodzenia. W razie uszkodzenia, przewieź kosiarkę do wyspecjalizowanego
serwisu w celu dokonania jej naprawy.
77
PL
SPALINOWA KOSIARKA DO TRAWY INSTRUKCJA OBSŁUGI
Page 78

PL 78
Zalecenia dotyczące bezpieczeństwa
UWAGA: Po wyłączeniu silnika nóż obraca się jeszcze przez kilka sekund.
- W razie niestandardowych wibracji kosiarki (sprawdź natychmiast i usuń przyczynę wibracji).
- W celu zapewnienia bezpiecznej pracy kontroluj regularnie dokręcenie czopów, śrub i nakrętek na
kosiarce.
UWAGA: PALIWO JEST CIECZĄ WYSOCE ŁATWOPALNĄ.
Przechowuj paliwo w przeznaczonym do tego zbiorniku.
Uzupełniaj paliwo wyłącznie w przestrzeni otwartej lub dobrze wentylowanej. Podczas kontaktu z paliwem
nie pal papierosów ani nie używaj telefonu komórkowego.
Paliwo należy uzupełniać wyłącznie przy wyłączonym silniku. Nigdy nie otwieraj zbiornika na paliwo i nie
dolewaj go, jeśli silnik jest gorący lub pracuje.
Jeśli dojdzie do rozlania benzyny, nie uruchamiaj silnika. Usuń kosiarkę z miejsca, gdzie doszło do rozlania
paliwa unikając w ten sposób jego ewentualnego zapalenia. Kontynuuj pracę dopiero po wyparowaniu
rozlanego paliwa i rozproszeniu oparów paliwa.
Po uzupełnieniu paliwa dobrze dokręć zakrętkę zbiornika paliwa i zakrętkę kanistra z paliwem.
UWAGA: Przed rozpoczęciem konserwacji lub naprawy wyłącz silnik i odłącz świecę zapłonową.
FZR 5110-B
Page 79

Konserwacja
8. KONSERWACJA
PIELĘGNACJA TRAWNIKA
W zależności od rodzaju trawnika należy stosować różne sposoby pielęgnacji.
Dlatego za każdym razem należy zapoznać się ze wskazówkami podanymi na opakowaniach nasion,
dotyczącymi wysokości koszenia, uwzględniającymi warunki wzrostu trawy na danym obszarze.
Należy pamiętać, że większość trawy składa się ze źdźbła i jednego lub większej ilości liści.
W przypadku całkowitego ścięcia liści dojdzie do uszkodzenia trawnika i odnowienie jego wzrostu będzie
o wiele trudniejsze.
Ogólnie obowiązują następujące wskazówki:
– koszenie na zbyt niskim poziomie powoduje naruszenie korzeni i pojawienie się „plam“;
– w lecie należy kosić na wyższym poziomie, aby uniknąć wysychania gleby;
– koszenie mokrej trawy może spowodować obniżenie efektywności noża, co może doprowadzić do
zaczepiania się trawy na nożu i jej wyrywania;
– w przypadku wyjątkowo wysokiej trawy należy dokonać pierwszego koszenia na maksymalną
wysokość, jaką umożliwia maszyna, a następnie wykonać drugie koszenie dopiero po dwu lub trzech
dniach.
Trawnik będzie mieć lepszy wygląd przy regularnym koszeniu całej jego powierzchni na tej samej wysokości
oraz przy przestrzeganiu zmiany dwu kierunków.
KONSERWACJA
Wszystkie nakrętki, sworznie i śruby należy dokręcić tak, aby urządzenie znajdowało się w bezpiecznym
stanie i było zdolne do pracy. Regularna konserwacja jest podstawą zapewnienia bezpieczeństwa
użytkownika, zachowania zdolności urządzenia do pracy i jego wysokiej efektywności.
Jeśli zbiornik paliwowy kosiarki jest napełniony benzyną, nigdy nie należy przechowywać jej wewnątrz
budynku, gdzie opary mogłyby być w kontakcie z otwartym ogniem, iskrami lub źródłami wysokich
temperatur.
Przed odstawieniem kosiarki do przechowania w jakimkolwiek pomieszczeniu zamkniętym pozostaw silnik
do wystygnięcia.
W celu obniżenia ryzyka pożaru zadbaj o to, aby na kosiarce, a w szczególności jej silniku, tłumiku,
akumulatorze oraz w miejscu przechowywania zapasowej benzyny nie znajdowały się resztki trawy, liści lub
nadmierna ilość smaru.
Regularnie sprawdzaj stan defl ektora i kosza; w razie ich uszkodzenia wymień je.
Wylewaj paliwo w dobrze wentylowanym pomieszczeniu przy chłodnym silniku.
Podczas zdejmowania lub instalacji noża korzystaj z grubych rękawic ochronnych.
Po każdym naostrzeniu ostrza noża należy sprawdzić jego wyważenie.
79
PL
UWAGA: Przed rozpoczęciem konserwacji lub naprawy wyłącz silnik i odłącz świecę zapłonową.
Przed rozpoczęciem używania silnika czterosuwowego zapoznaj się dokładnie z jego instrukcją obsługi.
Regularnie sprawdzaj poziom oleju, w razie potrzeby uzupełnij go lub wymień.
Regularnie sprawdzaj kosiarkę i zadbaj o usuwanie wszystkich osadów trawy ze spodniej części podwozia.
Regularnie smaruj oś podwozia oraz łożyska odpowiednim smarem.
Regularnie sprawdzaj stan noży, ponieważ ma to znaczący wpływ na efektywność kosiarki. Noże powinny
być zawsze ostre i wyważone.
SPALINOWA KOSIARKA DO TRAWY INSTRUKCJA OBSŁUGI
Page 80

PL 80
Konserwacja
W regularnych odstępach czasu sprawdzaj dokręcenie wszystkich śrub i nakrętek. Zużyte lub źle dokręcone
nakrętki i śruby mogą spowodować poważne uszkodzenie silnika lub jego ramy.
Jeśli nóż gwałtownie zderzy się z przeszkodą, zatrzymaj kosiarkę i odwieź ją do autoryzowanego serwisu.
NÓŻ: nóż jest wyprodukowany z wytłaczanej stali. Aby uzyskać jak najlepszy efekt koszenia, regularnie
ostrz nóż, po mniej więcej 25 godzinach pracy. Upewnij się, czy nóż jest prawidłowo wyważony. W tym celu
włóż do środkowego otworu noża żelazną oś (o średnicy 2-3 mm). Jeśli nóż jest prawidłowo wyważony, oś
utrzyma się w pozycji horyzontalnej.
Jeśli nóż nie utrzyma się w pozycji horyzontalnej, wymień go.
Przy demontażu noża odkręć śrubę i sprawdź nośną część noża. Jeśli części są zużyte lub uszkodzone,
wymień je.
UWAGA: Używaj wyłącznie oryginalnych części zamiennych. Części zamienne złej jakości mogą
spowodować poważne uszkodzenia kosiarki i zagrażać Twojemu bezpieczeństwu.
SERWIS
Jeśli po nabyciu produktu odkryjesz w nim jakąkolwiek wadę, skontaktuj się z wydziałem serwisu. Podczas
korzystania z produktu postępuj zgodnie z zaleceniami podanymi w dołączonej instrukcji użycia.
Reklamacja nie dotyczy sytuacji, gdy użytkownik dokonał przeróbki produktu lub nie postępował zgodnie
z zaleceniami podanymi w instrukcji użycia.
GWARANCJA NIE DOTYCZY
Naturalnego zużycia funkcjonalnych części maszyny wynikających z jej eksploatacji.
Czynności serwisowych związanych ze standardową konserwacją maszyny (np. czyszczenia, smarowania,
kalibracji itp.) Wad spowodowanych na skutek oddziaływania czynników zewnętrznych (np. warunków
klimatycznych, zapylenia, niewłaściwego użycia itp.)
Uszkodzeń mechanicznych będących następstwem upadku maszyny, zderzenia, uderzenia itp.
Szkód powstałych na skutek niefachowej obsługi, przeciążenia, użycia niewłaściwych części lub
nieodpowiednich narzędzi itp.
W przypadku reklamowanych produktów, które nie zostały należycie zabezpieczone przed mechanicznym
uszkodzeniem podczas transportu, ryzyko ewentualnej szkody ponosi wyłącznie ich właściciel.
PRZECHOWYWANIE
Jeśli nie zamierzasz używać maszyny przez dłuższy czas, przechowuj ją zgodnie z zaleceniami podanymi
poniżej. Dzięki temu przedłużysz żywotność urządzenia.
Wylej całość paliwa ze zbiornika paliwa i karburatora.
Odkręć świecę zapłonową i nalej do otworu niewielką ilość oleju silnikowego. Delikatnie pociągnij
2 do 3 razy za rozrusznik.
Wytrzyj zewnętrzne powierzchnie czystą ścierką. Przechowuj maszynę w czystym i suchym miejscu.
FZR 5110-B
Page 81

Dane techniczne
9. DANE TECHNICZNE
Typ silnika OHV, chłodzony powietrzem, 4-suwowy
Moc nominalna 2,70 kW
Obroty silnika 2900 obr./min.
Pojemność skokowa 140 cm
Rozruch Przez pociągnięcie
Pojemność zbiornika na paliwo (bezołowiowe 95 lub
więcej)
Ustawienia wysokości koszenia 25-75 mm z 6 pozycjami
Ustawienia wysokości Centralna regulacja wysokości
Szerokość koszenia 510 mm
Rozstaw kół 200 mm (przednie koło)
Pojemność worka zbiorczego 75 l
Obudowa stalowa
Deklarowany poziom hałasu 98 dB(A)
Ciężar 34 kg
Zastrzega się możliwość zmiany tekstu i parametrów.
Zmiany tekstu, designu i danych technicznych mogą być dokonywane bez uprzedniego ostrzeżenia.
Zastrzegamy sobie prawo do ich zmiany.
3
0,8 litra
280 mm (tylne koło)
81
PL
SPALINOWA KOSIARKA DO TRAWY INSTRUKCJA OBSŁUGI
Page 82

PL 82
Deklaracja zgodności
10. DEKLARACJA ZGODNOŚCI
ES DEKLARACJA ZGODNOŚCI
My, Fast ČR, a.s., Černokostelecká 251 01 Říčany u Prahy, tel.:323204111, oświadczamy w sposób wiążący,
że kosiarka benzynowa Fieldmann FZR 5110 B (na tabliczce znamionowej został podany rok produkcji, a za nim
numer seryjny maszyny) spełnia przepisy DYREKTYWY RADY:
2006/42/WE – 2004/108/WE – 2000/14/WE – 97/68/WE – 2002/88/WE
i została przetestowana zgodnie z poniższymi normami:
EN 55012
EN 836 – EN 836/A4
EN ISO 5395 –1:2013
EN ISO 5395 – 2:2013
EN ISO 14982:2009
EN ISO 3744:2010
ISO 11094:1991
Firma FAST ČR, a.s. ma prawo działać w imieniu producenta.
CE label: 14
W Říčanach, dnia 18. 9. 2014
Petr Uher
Menedżer Jakości
FZR 5110-B
Page 83

Likwidacja
11. LIKWIDACJA
WSKAZÓWKI I INFORMACJE DOTYCZĄCE GOSPODARKI ZUŻYTYM OPAKOWANIEM
Zużyty materiał z opakowania należy przekazać na gminne wysypisko odpadów.
Maszyna i jej wyposażenie są wyprodukowane z różnych materiałów, np. z metalu i plastiku.
Uszkodzone części należy oddać do punktu selektywnej zbiórki. Szczegółowych informacji
udziela odpowiedni urząd.
Ten produkt spełnia wszelkie podstawowe wymogi dyrektyw UE, które go dotyczą.
Zastrzegamy sobie możliwość dokonywania zmian tekstu, designu i danych technicznych wyrobu bez
uprzedzenia.
Instrukcja użycia w języku oryginalnym.
83
PL
SPALINOWA KOSIARKA DO TRAWY INSTRUKCJA OBSŁUGI
Page 84

PL 84
Uwagi
FZR 5110-B
Page 85

Záruční list I Záručný list I Warranty Certificate I
Jótállási jegy I Garantijos taisyklės I Karta Gwarancyjna I
Vyplní prodejce. I Vyplní predajca. I To be fil led in by the sel ler.
I
Wypełnia sprzedawca. I A keresk edő tölti ki.
Název: I Názov: I Name: I Nazwa: I Megnevezés: Datum oznámení nároku na záruku: I Dátu m oznámen ia nároku n a záruku: I Date of notification
Typ:
I Type: I Típus:
Výrobní číslo:
I Výro bné číslo: I S erial numb er: I Numer seryjny: I Gyártási szám: Důvod poruchy: I Dôvod poruchy: I Cause of de fect: I Prz yczy na awarii: I Hib a oka:
A termék a zonosítá sra alkal mas részei nek meghat ározása (a mennyibe n alkalmaz ható): Způso b oprav y:
Číslo prodejního dokumentu:
dokumentu sprzedaży:
Datum nákupu (uvedení do provozu):
chase (p utting in to operati on):
be helye zés) időpo ntja:
Den: I Deň: I
Day: I Dzień: I Nap:
Razítko prodejce:
bélyegzője:
I Číslo pre dajného do kumentu: I Sales document no.: I Numer
I Vásárlást igazoló bizonylat száma:
I Dátum náku pu (uvedeni e do prevádzk y): I Date of pur-
I Data z akupu ( prze kaza nia do ek splo atacj i): I A vásá rlás (üze m-
Měsíc:
I Mesiac: I
Month: I Miesiąc: I Hó:
I Pečiat ka predajc u: I Seller´s stamp: I Pieczęć sprzedawcy: I Kereskedő
Rok:
Year: I Év:
I
20
V případě o pravy v yplní serv is.
in case of repair.
of the entitlement to warranty:
bejelentésének időpontja:
Den: I Deň: I
Day: I Dzień: I Nap:
Datum př evzetí do o pravy:
accepting for repair:
Den: I Deň: I
Day: I Dzień: I Nap:
Datum vr ácení v ýrobku zpě t zákazní kovi:
of retur ning the pro duct back to t he custome r:
fogyasztó részére való visszaadásának időpontja:
Den: I Deň: I
Day: I Dzień: I Nap:
Nová zá ruční lhů ta – prodlo užená o délku o pravy :
opravy:
I New war ranty pe riod – exte nded by the du ration of th e repair: I Nowy termin gwa-
ranc yjny – prze dłużony o c zas napra wy:
tott – új ha tárideje:
Den: I Deň: I
Day: I Dzień: I Nap:
Razítko servisu: I Pečiatk a servi su I Stamp of the r epair shop: I Piec zęć serwisu: I Szerviz
pecsétje:
I V prípade o pravy vy plní serv is. I To be filled in b y a repair shop
I W przyp adku napraw y wypeł nia serwi s. I Javítás e setén a szer viz tölti ki .
I Data zgłoszenia roszczeń gwarancyjnych: I A j ótállás i igény
Měsíc:
I Mesiac: I
Month: I Miesiąc: I Hó:
I Dátum pr evzatia d o oprav y: I Data prz yjęcia d o napraw y: I Date of
I Javít ásra átv étel időpon tja:
Měsíc:
I Mesiac: I
Month: I Miesiąc: I Hó:
I Spôsob opravy: I Mode of r epair: I Sposób naprawy: I Javítás módja:
I Dátum vr átenia v ýrobku spä ť zákazní kovi: I Date
I Data zwrotu wyrobu klientowi: I A termék
Měsíc:
I Mesiac: I
Month: I Miesiąc: I Hó:
I Nová zá ručná leh ota – predl žená o dĺžk u
I A jótáll ás – kijaví tás időtar tamáva l meghoss zabbí-
Měsíc:
I Mesiac: I
Month: I Miesiąc: I Hó:
Rok:
Year: I Év:
Rok:
Year: I Év:
Rok:
Year: I Év:
Rok:
Year: I Év:
I
I
I
I
20
20
20
20
Autorizovaná servisní střediska I Autorizované servisné strediská I Authorized service centres
FAST ČR, a. s.
Černokostelecká 1621
CZ 251 01 Říčany
Česká republika
Tel.: +420/ 323 204 120
Fax: +420/ 323 204 121
servis.praha@fastcr.cz
www.fastcr.cz
FAST ČR, a. s.
Cejl 31
CZ 602 00 Brno
Česká republika
Tel.: +420/ 531 010 295
Fax: +420/ 531 010 296
servis.brno@fastcr.cz
www.fastcr.cz
Fast Plus, spol. s r. o.
Na Pántoch 18
SK 831 06 Bratislava
Slovenská republika
Tel.: +421/2 /49 105 854
Fax: +421/2 /49 105 859
servis@fastplus.sk
www.fastplus.sk
További információkért I Aby uzyskać więcej informacji I További információkért
Fast Hungary Kft.
Dulácska u. 1/a.
H-2045 Törökbálint
Magyarország
Tel.: + 36/ 23 330 905
Fax: + 36/ 23 330 827
info@fasthungary.hu
www.fasthungary.hu
Arconet sp. z o.o.
W celu znalezienia
najbliższego serwisu
prosimy zadzwonić:
0801 44 33 22
Lub odwiedzić stronę
internetową:
www.arconet.pl
Uab „Senuku Prekybos
Centras“ Garantinis Servisas
Jonavos G. 62, Lt-44192,
Kaunas, Lithuania
Tel.: +370 37 212 146
Tex.: +370 37 212 165
garrem@senukai.lt
www.senukai.lt
revision 02/2011
Page 86

Záruční podmínky
Prodávající poskytuje kupujícímu na výrobek záruku vtrvání 24 měsíců od převzetí výrobku kupujícím. Záruka se poskytuje za dále uvedených podmínek. Záruka se vztahuje pouze na nové zboží prodané
spotřebiteli za účelem použití uvedeném v příslušném návodu k obslu ze. Práva zodpovědno sti za vady
(reklamaci) může k upující uplatnit buď uprodávajícího, u kterého byl výro bek zakoupen nebo vn íže
uvedeném autorizovaném servisu. Kupující je povinen reklamac i uplatnit bez zby tečného odkl adu, aby
nedocházelo ke zhoršení vady, nejpozději však do
konce záručn í doby. Kupující je povinen posk ytnout
při reklamaci součinnost nutnou pro ověření existence reklam ované vady. Do reklamační ho řízení se
přijímá pou ze kompletní az důvodů d održení hygienických předpisů čist ý výrobek. Vpř ípadě oprávněné reklama ce se záruční doba prodlužuje o dobu
od okamžiku u platnění reklamace do okamžiku
převzetí opraveného výrobku kupujícím nebo okamžiku, kdy je kupující po skončení opravy povinen
výrobek převzít. Kupující je povinen prokázat svá
práva reklamo vat (doklad ozakoupen í výrobku, záruční list, d oklad ouvedení v ýrobku do provozu…).
Záruka se n evztahuje z ejména na:
vady, na které by la poskytnuta slev a opotřebení
apoš kození vzniklé běžným už íváním výrobku
po-
škození výrobku vd ůsledku neodborné či nesprávné
instalace, p oužití výrobku v rozporu snávo dem k obsluze, platnými právními předpisy aobecně známými ao bvyklými zp ůsoby používání, vdů sledku použití výro bku kjinému účelu, n ež ke kterému je určen
poškození výrobku vdůsledku zanedbané nebo nesprávné údr žby
znečištěním, nehodou azásahem vyšší moci (živelná
událost, požár, vniknutí vody…)
výrobku z působené nevhodnou kvalitou signálu, rušivým elektromagnetickým polem apod.
ké poškození vý robku (např.ulomení kn oíku, pád…)
náplní, spot řebního mater iálu (baterie) nebo n evhodnými provozními podmínkami (např. vysoké okolní
teploty, vysoká vlhkost prostředí, otřesy…)
zení, úpravu ne bo jiný zásah do v ýrobku prove dený
neoprávněnou nebo neautorizovanou osobou (servisem)
oprávněnos t svých práv (kdy a kde reklamovaný vý robek zakoupil)
dokladech l iší od údajů uve dených na vý robku
dy, kdy reklamova ný výrobek nelze z totožnit svýr obkem uvedeným vdokladech, kterými kupující prokazuje svá práva r eklamovat (např. poškození v ýrobního
čísla nebo zá ruční plomb a přístroj e, přepisovan é údaje
vdokladech…)
poškození v ýrobku způsobené j eho
vady funkčnosti
mechanic-
poškození způsobené použitím nevhodných médií,
poško-
případy, kdy kup ující při reklamaci ne prokáže
případy, kdy se úd aje vpředložených
přípa-
Záručné podmienky
Predávajúci poskytuje kupujúcemu na výrobok
24 mesiacov záruku od jeho prevzatia kupujúcim. Záruka sa posk ytuje ďalej za niž šie uvedených podmie nok. Záruk a sa vzťahuje i ba na spotrebný to var predaný spotrebiteľovi na bežné domáce použitie. Práva
zo zodpovednosti za chyby (rek lamácie) môže kupujúci uplatni ť buď upredávajúce ho, uktorého bol v ýrobok zakú pený alebo vnižš ie uvedenom autoriz ovanom servis e. Kupujúci je povinný rek lamáciu uplatniť
bez zbyto čného odkladu, aby nedo chádzalo ku zhoršeniu chyby, najne skôr však do konca záručnej d oby.
Kupujúci je pov inný pri reklamác ii spolupracovať pri
overení existencie reklamovanej chyby. Do reklamačného procesu sa prijíma iba kom pletný a z dôvodu
dodržania hygienických predpisov neznečistený výrobok. V prípade oprávnen ej reklamácie sa záručná
doba predlž uje odobu od okam žiku uplatnenia re klamácie do okamžiku prevzatia opraveného výrobku kupujúcim, kedy je kupujúci po skončení opravy povinný
výrobok p revziať. Kupujúci je po vinný preukázať svo je práva reklam ovať (doklad ozakúp ení výrobku, záručný list, d oklad ouvedení v ýrobku do pr evádzky…).
Záruka s a nevzťahuje n a:
chyby, na ktoré boli poskytnuté zľavy opotrebe-
nia a p oškodenia vzniknuté bežným u žívaním vý-
poškodenie výrobku vdôsledku neodbornej
robku
či nesprávn ej inštalácie, p oužitie výr obku v rozpore
snávodo m na použitie splat nými právnymi predpismi avšeob ecne známymi aobv yklými spôso bmi používania, vd ôsledku použitia v ýrobku za iným účel om,
než na ktor ý je určený
ku zanedbanej alebo nesprávnej údržby
výrobku s pôsobené jeho znečis tením, nehodou a zásahom vyš šej moci (živelná udal osť, požiar, vniknuti e
vody…)
vhodnou kvalitou signálu, rušivým elektromagnetickým poľom a pod.
(napr. zlomenie gombíka, pád…)
sobené použitím nevhodných médií, náplní, spotrebného materiálu (batérie) alebo nevhodnými prevádzkovými po dmienkami ( napr. vysoké te ploty vokolí,
vysoká vlhkosť prostredia, otrasy…)
úpravu alebo i ný zásah do výrobku spôsobe ný neoprávnenou alebo neautorizovanou osobou (servisom) prípady, keď kupujúci pri reklamácii nepreukáže oprávneno sť svojich práv ( kedy a kde reklamovaný
výrobok z akúpil)
ných doklado ch líšia od údajov u vedených na výr obku
prípady, keď rek lamovaný výrobok sa n estotožňuje
svýrob kom uvedeným vdok ladoch, ktorý mi kupujúci
preukazuje s voje práva reklamova ť (napr. poškodenie
výrobné ho čísla alebo záruč nej plomby prístr oja, prepisované údaje vdokladoch…)
poškodenie v ýrobku vdôsl ed-
poškodenie
chyby funkčnosti výrobku spôsobené ne-
mechanické poškodenie výrobku
poškodenie spô-
poškodenie,
prípady, keď sa úd aje vpredlože-
Conditions of guarantee
This produc t is warranted for the period of 24
months fro m the date of purchase to the e nd-
-user. Warrant y is limited to the f ollowing conditions. Warranty is referred only to the customer goods using for common domestic use. The
claim for ser vice can be applied eit her at dealer’s shop wher e the product was b ought, or at
below mentio ned author ized servi ce shops. The
end-user is obligated to set u p aclaim immediately when t he defects ap peared but only til l
the end of war ranty perio d. The end-us er is obligated to coo perate to certif y the claiming de fects. O nly completed and clean (according to
hygienic standards) product will be accepted.
In case of eligible warranty claim the warranty period will be prolonged by the period from
the date of clai m application till t he date of taking over the pr oduct by end-user, or th e date
the end-us er is obligated to take it o ver. To obtain the ser vice under this warran ty, end-user
is obligated t o certify his cla im with duly completed following documents: receipt, certicate of warranty, certicate of installation…
This warranty is void especially if apply
Defect s which were put on sale.
as follows:
Wear-out or damage caused by common use.
The produc t was damaged by unprofes sional
or wrong installation, used in contrary to the
applicable instruction manual, used in contrary
to legal enac tment and common proce ss of use
or used for an other purpose whi ch has been designed for.
cared-for or insucient maintenance.
product w as damaged by dirt, acci dent of force
majeure (natur al disaster, re, ood, …).
fects on f unctionality caused by lo w duality of
signal, electromagnetic eld interference etc.
The produc t was mechanically dama ged (e.g.
broken but ton, fall…).
of unsuitable media, llings, expendable supplies (batteries) or by unsuitable working conditions (e.g. high temperatures, high humidity,
quakes,…).
lure action to the product by unauthorized person.
to claim (time and p lace of purchase).
presented d ocuments diers f rom data on products.
not be indent ied accord ing to the pres ented documents (e.g. the s erial number or the war ranty
seal has been damaged).
Garantijos taisyklės
Šiam gaminiui suteikiama 24 mėnesių nuo įsigijimo datos garantija. Garantija apsiriboja žemiau
pateikiamomis sąlygomis. Garantija skirta tik gaminiams, skirtiems buitiniam naudojimui. Dėl garantinio remonto pirkėjas gali kreiptis įpardavėjo
parduotuvę, kurioje gaminį p irko, arba į nurodytus įgaliotus techninės priežiūros centrus. Galutinis naudotojas įsipareigoja pateikti pretenziją
nedelsiant po defekto atsiradimo, tačiau tik iki
garantijos galiojimo periodo pabaigos. Galutinis
naudotojas įsipareigoja bendradarbiauti patvirtinant gaminio defektus, dėl kurių pateikia pretenziją. Priimtas bus tik pilnai s ukomplektuotas
ir švarus (pagal higienos standartus) gaminys. Jei
pretenzija dėl garantinio remonto bus pagrįsta,
gaminio garantijos galiojimo periodas bus prailgintas atitinkamai periodu nuo pretenzijos pateikimo datos iki galutinis naudotojas pasiims
sutaisytą gaminį arba iki datos, kada galutinis naudotojas turėtų pasiimti sutaisytą gaminį. Norėdamas gauti garantinio remonto paslaugas, galutinis naudotojas turi patvirtinti pretenziją pilnai
užpildytais sekančiais dokumentais: pirkimo kvitu, garantiniu talonu, instaliavimo sertifikatu…
Garantija netaikoma:
toms) prekėms.
Nukainotoms (brokuo-
Įprastinai susidėvinčioms gaminio
Jótállási feltételek
A FAST Hungary Kft. a termék re a fogyasztó
részére tör ténő átadástól (vásárlástó l), illetve
ha az üzembe helyezést a forgalmazó vagy annak megbízot tja végzi, az üzembe hel yezéstől
The produc t was damaged by un-
Damage caused by use
Repair, modic ation or other fai-
End-user d id not prove enough his right
Cases when t he claiming product can
Gedimams, atsiradusiems neprofesionaliai
dalims
ar neteisingai gaminį instaliavus, nesilaikant gaminio naudojimo instrukcijų, naudojant gaminį ne pagal įstatymų numatytus standartus ar įprastinius
tokio tipo gaminių naudojimo procesus, naudojant
gaminį kitai paskirčiai nei n umatyta.
atsiradusiems dėl netinkamos ar nepakankamos
gaminio priežiūros.
purvo, nenugalimos jėgos aplinkybių (stichinių nelaimių, gaisro, potvynio,…).
dusiems dėl prastos kokybės signalo, elektromagnetinio lauko t rikdžių ir kt.
pažeidimų (pvz. sulaužy ti mygtukai, kr itimo požymiai…).
gaminį su netinkamomis laikmenomis, jungiant
prie netinkamų tinklų, dedant įgaminį netinkamus
maitinimo š altinius (baterijas) ar dėl b et kokių kitų
netinkamų naudojimo sąlygų (pvz. aukštos temperatūros, didelės drėgmės, žemės drebėjimų…).
Nustačius, kad gaminys taisytas, modikuotas ar ardytas neįgaliotų tai daryti asmenų.
naudotojas neturi visų reikalingų dokumentų, įrodančių jo teisę įgarantinį remontą (pvz. dokumento,
kur būtų nurodytas gaminio įsigijimo laikas ir vieta).
Jei data pateiktuose dokumentuose skiriasi nuo
datos ant gaminio.
Gedimams, at siradusiems dėl
Gedimams, atsiradusiems naudojant
számított 24 hónapig tartó időtartamra vállal
jótállást. A jótállási igény a jótállási jeggyel,
The
a vásárlástól (üzembe helyezéstől) számított
1 évig a terméket értékesítő for galmazónál,
De-
illetve a jót állási jegyen feltünte tett hivatalos
szerviz nél közvetlenül is, míg a 13. hónap tól a
24. hónapig kizá rólag a hivatalos s zerviznél érvényesíthető.
Jótállási jegy hiányában a fogyasztói szerződés megkötés ét bizonyítot tnak kell tekinteni,
ha a fogyasz tó bemutatja a termék ell enértékének megzetését hitelt érdemlően igazoló
bizonylatot. Mindezek érdekében kérjük tisztelt Vásárlói nkat, hogy őri zzék meg a zetési
Data on
bizonylatot is. A jótállási időn belüli meghibásodás esetén a fogyasztó (i) elsősorban - vá lasztás a szerint - a hibás termé k díjmentes kijavítását vagy kicser élését követelheti, kivéve,
ha a választo tt igény teljes ítése lehetet len,
vagy ha az a jótállásra kötelezet tnek a másik
igény teljesítésével összehasonlítva aránytalan többle tköltséget eredményezne, (ii) ha
Gedimams,
Gedimams, atsira-
Radus mechaninių
Jei galutinis
sem kijavításra, sem kicse rélésre nincs joga,
vagy ha a köteleze tt a kijavítást, ille tve kicserélést nem vál lalata, vagy e kötelezettségének megfelelő határidőn belül, a fogyasztónak
okozott jelentős kényelmetlenség nélkül nem
tud eleget te nni, a fogyasztó – v álasztása sze rint – megfe lelő árleszállít ást igényelhet vagy
elállhat a szerződéstől. Jelentéktelen hiba miatt elállásn ak nincs helye.
A 151/2003. (IX.22.) Kormány rendeletben meghatározott tartós fogyasztási cikk meghibásodása miatt a v ásárlástól (üzembe helye zéstől)
számítot t három munkanap on belül érvén yesített cse reigény ese tén a forgalmaz ó nem hivatkozhat aránytalan többletköltségre, hanem a
forgalmazó köteles a tartós fogyasztási cikket
kicseré lni, feltéve, hogy a me ghibásodás a re ndeltetésszerű használatot akadályozza. Kijavítás esetén a f ogyaszt ási cikkbe c sak új alkatré sz
kerülhet beép ítésre. A jótállásra kötelezett
törekszi k arra, hogy a kijavítá s vagy kicserélés
15 napon belül meg történjen. A r ögzített b ekötésű, illet ve a 10kg-nál súlyos abb, vagy töme gközlekedési eszközön kézi csomagként nem
szállítható fogyaszt ási cikket az üze meltetés
helyén kell megjavítani. Ha a javítás az üzemel-
Warunki gwarancji
Produkt objęty jest 24 – miesięczną gwarancją, począwsz y od daty zakupu przez kli enta. Gwarancja jest
ogranicz ona tylko do pr zedstawi onych dalej war unków.
Gwarancja obejmuje tylko produkty zakupione wPolsce ijest waż na tylko na tery torium Rzec zpospolitej Pol skiej. Gwarancja obejmuje tylko produkty funkcjonujące wwarunkach gospodarstwa domowego (nie dotyczy
produktów oznaczonych jako „Professional“). Zgłoszenia gwarancyjnego można dokonać wautoryzowanej
sieci ser wisowej lub w sklepie, gdzie produkt został
nabyty. Uży tkownik jest zob owiązany zgłos ić usterkę
niezwło cznie po jej wykr yciu, anajpóźn iej wostatnim
dniu obowiązywania okresu gwarancyjnego. Użytkownik jest zobo wiązany do prz edstawienia i udokumentowania usterk i. Tylko kompletne ic zyste pro dukty (zgo dnie ze standardami higienicznymi) będą przyjmowane
do naprawy. Usterki będą usuwane przez autoryzowany punkt serwisowy wmożliwie krótkim terminie, nieprzekraczającym 14 dni roboczych. Okres gwarancji
przedłu ża się oczas p obytu sprzętu w serwisie. Klient
może ubiegać si ę owymianę spr zętu na wolny od wad,
jeżeli punkt serwisowy stwierdzi na piśmie, że usunięcie
wady jest ni emożliwe. Aby produkt mó gł być przyjęty
przez ser wis, użytkownik je st zobowiązany dosta rczyć
oryginały: dowodu zakupu (paragon lub faktura), podbitej iwypełnionej karty gwaranc yjnej, certykatu instalacji (niektóre produkty).
tetés helyén n em végezhető el, a le- és f elszerelésről, va lamint az el – és vissza szállításról a
jótállás kötelezettje gondoskodik. Nem számít
bele a jótállá si időbe a kijav ítási időne k az a része, amely alat t a fogyasz tó a terméket n em tudja rendeltetésszerűen használni. A jótállási idő
a terméknek vagy jelentősebb részének kicserélése (kij avítása) esetén a ki cserélt (kijaví tott)
termékre (termékrészre), valamint a kijavítá s
következményeként jelentkező hiba tekintetében újból kezd ődik.
Nem érvénye síthető a jót állási igény, ha
jótállásra köt elezett bizo nyítja, hogy a hib a oka
a termék fogy asztó részér e való átadását köve tően keletkeze tt, így például ha a hib át
rendeltetésszerű használat, használati útmutató gyelmen kí vül hagyása, helyte len szállítás
vagy tárolás , leejtés, rongálás, elemi kár, készüléken kívü lálló ok (pl. hálóz ati feszült ség megengedettnél nagyobb ingadozása)
telen átalakí tás, beavatkozás, nem a hiva talos
szerviz á ltal végzett j avítás
tát képező karbantartási munkák elmulasztása
okozta. A jót állás a fogyasz tó törvényből e redő
jogait nem ér inti.
Gwarancja zostaje unieważniona, jeśli:
usterka by ła widoczna wc hwili zakupu, usterka
wynika ze zwykłego użytkowania i zużycia,
dukt został uszkodzony zpowodu złej instalacji, niezastosowania się do instrukcji obsługi lub użytkowania niezgodn ego zprzeznac zeniem,
uszkodzony z powodu złej konser wacji lub jej braku,
produkt został uszkodzony zpowodu zanieczyszczenia, wypadk u lub okolicznośc i ocharakter ze sił wyższych (powódź, pożar, wojny, zamieszki itp.)
wykazuj e złe działani e zpowodu słabe go sygnału, z akłóceń elektromagnetycznych itp.,
uszkodzony mechanicznie (np. wyłamany przycisk,
produkt zo stał uszkodzony z powodu
upadek, itp.),
użycia niewłaściw ych materiałów eksploatacyjnych,
nośników, akcesoriów, baterii, akumulatorków itp.
lub zpowo du użytkowania w złych warunkach (te mperatura, wilgotność, wstrząsy itp.),
prawiany lub mod ykowany prze z nieautoryzowany
użytkow nik nie jest wstan ie udowodnić
personel,
zakupu (niec zytelny paragon lu b faktura),
przedst awionych dokumentac h są inne niż na urząd-
produkt ni e może być zidenty kowany ze wz-
zeniu,
ględu na uszkodzenie numeru seryjnego lub plomby
gwarancyjnej.
nem
illeték-
fogyasztó felada-
pro-
produkt został
produkt
produkt został
produkt by ł na-
dane na
Page 87

Garantieschein I Hoja de garantía I Fiche de garantie I
Jamstveni list I Certificato di garanzia I Garantiebewijs I
Im Falle ein er Reparatu r vom Servic e auszufüll en.
reparación.
Vom Verkäufer aus zufüllen. I Par a ser llenado e l vendedor. I À rem plir par le ven deur.
I
Popuni prodavatelj. I Da compil are dal vendit ore. I Door de verkoper in te vullen.
Name: I Denominación: I Dénomination: I Naziv: I Nome: I Naam: Datum der Bek anntmachun g des Anspr uchs auf Gar antie: I Fecha de notificación de derecho
Typ:
I Modelo: I Type: I Tip: I Tipo:
Produktionsnummer:
fabbr icazione b roj szám:
A termék a zonosítá sra alkal mas részei nek meghat ározása (a mennyibe n alkalmaz ható): Art de r Reparatu r:
Nummer des Verkaufsbeleges:
I Broj kupoprodajnog dokumenta: I N. docum ento di vendi ta: I Nummer van aankoopbewijs:
Datum des Einkaufs [Inbetriebnahme]:
[Mise en service]:
Aankoopdatum [ingebruikname]:
Tag: I Día: I Jour: I
Dan: I Giorno: I Dag:
Stempel d es Verkäuf ers:
Timbr o del vendito re: I Stempel v an verkope r:
I No. de ser ie: I Numéro de référence: I Numer seryjny: I Numero di
I Serienummer:
I No. de docu mento de vent a: I Numéro de document de vente:
I Datum kupn je [puštan ja u pogon]: I Data di acquisto (messa in funzione): I
I Fecha de compra [puesta en servicio]: I Date d´achat
Monat:
I Mes: I Mois: I
Mjesec: I Mese: I Maand:
I Sello de l vendedor: I Ta mpon du ve ndeu r: I Pečat p rodavate lja: I
Jahr:
I Año I Année: I
Godina: I Anno: I Jaar:
20
I À remplir p ar le servi ce de réparat ion en cas de rép aration. I U sl učaju popr avke
popuni servis.
I Nel caso di u n riparo va com pilato dal C entro di Assi stenza. I Door servicecentrum
a garantía:
I Date de notification de l´application de la garantie: I Datum obavijesti jamstvenog
I Dat a della notific a del diritto al la garanzia: I Datum waarop beroep op garantie is
zahtjeva:
gedaan:
Tag: I Día: I Jour: I
Dan: I Giorno: I Dag:
Datum de r Übernahm e zur Repara tur:
remise au service de réparation:
per rip arazione :
Tag: I Día: I Jour: I
Dan: I Giorno: I Dag:
Grund d er Störung:
I Reden va n defect
guasto:
di riparazione:
Datum der Rückgabe des Produktes dem Kunden:
cliente:
I Date de la r emise du pro duit au clie nt: I Datum pov ratka pr oizvoda n atrag kupc u:
I Data del r itiro del pr odotto da p arte del cl iente: I Datum w aarop klan t product w eer in
ontvangst heeft genomen:
Tag: I Día: I Jour: I
Dan: I Giorno: I Dag:
Neue Gar antiefr ist - verlä ngert um di e Dauer der Rep aratur:
prorr ogado por e l tiempo de rep aración :
de la rép aration:
garan zia, rinno vato a segui to di ripar azione:
duur van r eparati e
Tag: I Día: I Jour: I
Dan: I Giorno: I Dag:
Stempel d er Serv icestelle :
servisa:
I Timbr o del Centro di A ssisten za Tecnica: I Stempel van serv icecentrum:
Monat:
Mjesec: I Mese: I Maand:
I Datum wa arop repa ratie is aan genomen:
I Wijze van repareren:
I Datum pr ijema za pop ravak: I D ata della pr esa in car ico
Monat:
Mjesec: I Mese: I Maand:
I Motivo d e la avería : I Cause du déf aut: I Prz yczyn a awarii: I Motivo del
I Forma d e reparac ión: I Type de rép aration: I N ačin popr avke: I Tipologia
Monat:
Mjesec: I Mese: I Maand:
I Novi ja mstveni r ok – produž en o trajanje p opravke : I Nuovo term ine di
Monat:
Mjesec: I Mese: I Maand:
I Sello de l servic io I Tampon du ser vice de ré paratio n: I Pečat
I Para ser ll enado por el se rvicio, en c aso de
in te vulle n bij repara tie.
I Mes: I Mois: I
I Fecha de aceptación para reparación: I Date de la
I Mes: I Mois: I
I Mes: I Mois: I
I Nouve au délai de ga rantie – pro longé de la du rée
I Mes: I Mois: I
Jahr:
I Año I Année: I
Godina: I Anno: I Jaar:
Jahr:
I Año I Année: I
Godina: I Anno: I Jaar:
I Fecha de devolución del producto al
Jahr:
I Año I Année: I
Godina: I Anno: I Jaar:
I Nuevo pl azo de gara ntía –
I Dieuw e garantiet ermijn - ver lenging me t de
Jahr:
I Año I Année: I
Godina: I Anno: I Jaar:
20
20
20
20
Autorisierte Servicestellen I Centros de servicio autorizados I Centres autorisés de réparation
FAST ČR, a. s.
Černokostelecká 1621
CZ 251 01 Říčany
Česká republika
Tel.: +420/ 323 204 120
Fax: +420/ 323 204 121
servis.praha@fastcr.cz
www.fastcr.cz
FAST ČR, a. s.
Cejl 31
CZ 602 00 Brno
Česká republika
Tel.: +420/ 531 010 295
Fax: +420/ 531 010 296
servis.brno@fastcr.cz
www.fastcr.cz
Fast Plus, spol. s r. o.
Na Pántoch 18
SK 831 06 Bratislava
Slovenská republika
Tel.: +421/2 /49 105 854
Fax: +421/2 /49 105 859
servis@fastplus.sk
www.fastplus.sk
Autorizirana servisna centra I Centri di Assistenza autorizzati I Geautoriseerde servicecentra
Fast Hungary Kft.
Dulácska u. 1/a.
H-2045 Törökbálint
Magyarország
Tel.: + 36/ 23 330 905
Fax: + 36/ 23 330 827
info@fasthungary.hu
www.fasthungary.hu
Arconet sp. z o.o.
W celu znalezienia
najbliższego serwisu
prosimy zadzwonić:
0801 44 33 22
Lub odwiedzić stronę
internetową:
www.arconet.pl
Uab „Senuku Prekybos
Centras“ Garantinis Servisas
Jonavos G. 62, Lt-44192,
Kaunas, Lithuania
Tel.: +370 37 212 146
Tex.: +370 37 212 165
garrem@senukai.lt
www.senukai.lt
revision 02/2011
Page 88

I Garantiebedingungen
Der Verkäuf er gewährt dem K unden eine Gara ntie auf
das Produk t in der Länge von 24 Mo naten nach der
Übernahme d es Produkte s durch den Käuf er. Die Garantie wird zu de n unten genann ten Bedingu ngen gewähr t.
Die Garanti e bezieht sich nu r auf die Artik el, die dem
Verbraucher zur in der entsprechenden Betriebsanleitung genann ten Nutzung ver kauft worde n sind. Die Rechte aus der Mängelhaftung (Beanstandung) kann der
Käufer dir ekt beim Verkäufe r geltend machen, be i dem
das Produk t gekauft wurde, o der in der unten genann ten autorisi erten Servic estelle. Der Käufe r ist verpichtet, die Beanstandung ohne unnötigen Verzug geltend
zu machen, so d ass sich der Mang el nicht versc hlechtert, spätestens bis Ende der Garantiefrist. Der Käufer
ist verpi chtet, bei der B eanstandung H ilfe beim Prüfen des Bes tehens des beansta ndeten Mangels zu leisten. Zur Beans tandung können nur komp lette und aus
hygienischen Gründen auch saubere Produkte angenommen werden. Wenn die Beanstandung gerechtfertigt ist, verlängert sich die Garantiezeit um die Zeit von
der Geltendmachung der Beanstandung bis zum Moment der Über nahme des reparier ten Produktes durch
den Käufer o der bis zum Mom ent, wenn der Kä ufer nach
Beendigung der Reparatur verpichtet ist, das Produkt
zu übernehmen. Der Käufer ist verpichtet, sein Recht
auf Beanstandung nachzuweisen (Kaufbeleg, Garantieschein, Beweis über die Inbetriebnahme des Produktes…).
Die Garantie bezieht sich vor allem nicht auf:
Mängel, auf di e Rabatt gewäh rt worden ist Verschle-
iß und Beschädigung durch die übliche Benützung des
Beschädi gung des Produktes in folge unsa-
Produktes
chgemäßer oder falscher Installation, Benützung des
Produktes im Widerspruch zur Betriebsanleitung, zu
den gültigen Rechtsvorschriften und den allgemein bekannten und ü blichen Nutz ungsmethod en, infolge der
Nutzung de s Produktes zu ein em anderen Zweck, als f ür
welchen das P rodukt bes timmt ist
Produktes infolge vernachlässigter oder falscher Wartung
Beschädigung des Produktes durch Verschmutzung, Unfall oder durch höhere Gewalt (Naturkatastrophe, Brand, Eindringen von Wasser...)
des Produktes durch ungeeignete Qualität des Signals,
ein störendes elektromagnetisches Feld usw.
chanische B eschädigung des Pro duktes (z. B. Br uch des
Knopfes, Sturz…)
Medien, Füllungen, Verbrauchsmaterial (Batterie) oder
ungeeignete Betriebsbedingungen (z. B. hohe Umgebungstemperatur, hohe Feuchtigkeit des Umfelds, Erschütterungen...)
anderen Ein gri in das Prod ukt durch eine n icht berecht igte oder nicht autorisierte Person (Service)
der Käufer bei der Beanstandung die Berechtigung seiner
Rechte nich t nachweist (wann und wo d as beanstandete
Produkt g ekauft wu rde)
den vorgele gten Belegen von de n am Produkt ange führten Angaben u nterscheiden
dete Produk t mit dem in den B elegen, mit d enen der Käufer sein Recht auf Beanstandung nachweist, angeführten
Produkt n icht identizier t werden kann (z. B. Besch ädigung der Produktionsnummer oder Garantieplombe des
Gerätes, überschriebene Angaben in den Belegen...)
Beschädigung des
Funktionsfehler
me-
Beschädigung durch ungeeignete
Beschädigung, Anpassung oder einen
Fälle, wenn
Fälle, wenn sich d ie Angaben in
Fälle, wenn das beanstan-
Condiciones de garantía
El vendedor proporcionará una garantía de 24 meses al
comprador a p artir de la re cepción del pr oducto por pa rte
de éste. La gar antía se otorga b ajo las siguiente s condiciones. La gar antía se aplica s olamente a los pro ductos nuevos que se ven den a los consum idores para e l uso indicado en las instrucciones de manejo correspondientes. Los
derechos de responsabilidad de defectos (reclamación) el
comprado r los puede apl icar, ya sea en el ven dedor dond e
compró el producto o en el centro de servicio autorizado
abajo indic ado.
El comprado r está obligado a hacer u na reclamación sin
demora injusticada para evitar el deterioro del defecto, pero a más tar dar a nales del período d e garantía.
El comprado r está obligado a e stablecer las si nergias necesarias ante una reclamación para vericar la existencia
del defecto reclamado. En el procedimiento de reclamación sólo se acept a el producto í ntegro y limpio p or razones
de cumplimiento de normas de higiene. En caso de reclamaciones justicadas, el período de garantía se extiende
por el período comprendido entre el momento de hecha
la reclamac ión y el momento en qu e el comprador r ecoge
el produc to reparado, o a partir d el momento en que el
comprador e stá obligado a recog er el producto despu és
de reparad o. El comprador est á obligado a probar su d erecho a rec lamar (comproban te de compra, hoja de garantía, doc umento de pues ta en servici o del producto . ..).
La garantía no se aplica a:
defect os que fueron objet o de rebaja desgaste y d años causad os por el uso normal d el producto
el producto debido a una instalación inadecuada o inco-
daños en
rrecta, e l uso del produc to en contradicción con l as instrucciones de manejo, las normas jurídicas vigentes y
los patrones de uso conocidos y convencionales . Daños
en el produc to, debido a un uso dife rente de aquel para
el que fue concebido
gencia o mantenimiento inadecuado
ducto cau sados por su cont aminación, ac cidente y por
fuerza mayor (desastres naturales, incendios, penetración de agua ...)
ducto causados por mala calidad de la señal, interferencia del camp o electromagné tico, etc.
en el produc to (p.ej., rotura del b otón, caída ...) daños
causados por el uso de medios inadecuados, accesorios,
materiales consumibles (baterías) o condiciones de trabajo inadecuadas (tales como temperaturas ambiente elevadas, alta humedad, estremecimientos ...)
dicación o cualquier otra intervención en el producto por
personas n o cualicadas o no auto rizadas (por el centr o
de servicios) los casos en que el c omprador no pr ueba la
legitimi dad de sus der echos a rec lamar (fech a y lugar donde compró el producto reclamado)
datos en los do cumentos di eren de la in formació n contenida en el producto
mado no puede s er identicad o con el producto me ncionado en los doc umentos, co n los que el compr ador prueb e
su derecho a r eclamar (p.ej., daño s en el número de ser ie
o el sello de gar antía del disposi tivo, datos trans critos en
los documentos...)
daños en el producto por negli-
daños en el pro-
defectos en el funcionamiento del pro-
daños mecánicos
daños, mo-
los casos en q ue los
los casos en q ue el producto re cla-
Conditions de garantie
Le vendeur ac corde à l‘acheteur u ne garantie de prod uit s´étalant sur
24 mois à part ir de la reprise d u produit par l´acheteur. La ga rantie
s´applique selon les conditions suivantes. La garantie concerne unique
ment la nouvelle marchandise vendue au consommateur pour une utilisation conforme au mode d´emploi relatif. L´acheteur peut faire valoir
ses droit s à la garantie de s défauts (l a réclamatio n) auprès du ven
deur qui lui a v endu le produit ou aup rès d´un des services a utorisés
indiqués c i-dessous. L a réclamation do it être faite par l´ache teur sans
tarder a n d´éviter la détér ioration du déf aut, avant la n de la pé ri
ode de garantie au plus tard. Lors de la réclamation, la coopération de
l´acheteur est nécessaire pour vérier l´existence du défaut réclamé. Se
ulement un p roduit compl et et, pour des r aisons d´hygiè ne, propre es t
accepté pou r la procédure d e réclamation. E n cas de réclama tion justi
ée, la période de garantie est prolongée de la période allant du moment de l´applica tion de la réclamati on jusqu´à la reprise d u produit
réparé par l´acheteur ou jusqu´au moment où l´acheteur doit reprendre
le produit a près la réalisatio n de sa réparation. L´acheteur d oit prou
ver ses droi ts à la réclamat ion (la produc tion du justi catif d´achat, de
la che de garantie, du certicat de la mise en service du produit... ).
La garant ie ne s´applique p as notamm ent :
aux défau ts donnan t lieu à une pro motion à l´usure et l´endommag ement provoqués par l´utilisation courante du produit
ment du produit provoqué par une installation défectueuse où incorrecte,
à l´utilisatio n du produit n on confor me au mode d´emploi , aux prescr ipti
ons juridiques en vigueur, et aux utilisations généralement connues et ha-
à l´endommage-
Condizioni di garanzia
Il Venditore ga rantisce il pro dotto per il pe riodo di
24 mesi dalla pre sa in consegna del pr odotto da parte dell‘Acquir ente. La garanzia è conces sa alle condizioni citat e in seguito. La gara nzia si riferisc e solo alla
merce nuova, venduta all‘utente ai fini di utilizzo indicati nel re lativo manuale d‘us o. L‘Acquir ente può far
valere i dir itti per la res ponsabilit à per difett i (il reclamo) o presso il Vend itore, presso i l quale il prodot to
è stato comp rato, o in un Centro di Assi stenza autorizzato indi cato sotto. L‘Acquirente è te nuto a far valere
il reclamo s enza indugi, aff inché non si avveri un p eggioramen to del difetto, e comun que entro e non oltre la scade nza del termine di garan zia. Presentando
il reclamo, l ‘Acquirente è tenuto a c ollaborare in mo do
necessario ai fini della verifica dell‘esistenza del difetto reclam ato. Nella procedura d el reclamo viene am messo solo u n prodotto completo e p ulito a garanzia
delle norme sull‘igiene. Nel caso di un reclamo giustificato, il t ermine di garanzia v iene prolungato d el periodo che è tr ascorso da l momento della p resentaz ione
del reclamo a l momento della p resa in conseg na, da
parte dell‘Acquirente, del prodotto riparato o al momento in cui l ‘Acquir ente è tenuto a ritirar e il prodotto alla fine della riparazione. L‘Acquirente è tenuto a
dimostra re il proprio diri tto a presentar e il reclamo (il
documento d i acquisto del p rodotto, il cer tificat o di
garanzia, un documento attestante la messa del prodotto in funzione...).
Non sono coperti dalla garanzia soprattutto:
i dife ti per i qua li è già stato conce sso uno sconto il
logoramen to e il danneggiame nto del prodotto, p rovocati dal suo uso abituale
il danneggiamento del prodo-
bituelles, à l´endommagement du produit provoqué par l´usage impropre
auquel celu i-ci n´est pas dest iné.
-
voqué par la négligence de l´entretien ou l´entretien incorrect.
dommagement du produit provoqué par l´encrassement, l´accident ou la
force majeur (le sinistre, l´incendie, l´inltration d´eau...)
-
fonctio nnement provoq ués par la mauvai se qualité de signa l, le champs
magnétiques interférant, etc.
duit (p. ex. le bouton cassé, la chute...)
-
provoqué par les médias inconvenables, la charge, le matériel de conso
mmation (les piles) ou par les conditions de fonctionnement inconvenables (p.ex. la température environnementale trop élevée, l´humidité de
l´environnement importante, les secousses...)
-
modica tion ou une autre int ervention ee ctuée sur le pro duit pat une
personn e (un service) inc ompétent ou no n autorisé.
teur ne prouve pas, lors de la réclamation, le bien fondé de ses droits (le
lieu et le jour de son achat du produit)
-
dans les documents présentés dièrent de celles du produit.
il n´est pas possib le d´ide ntier l e produi t faisan t l´objet de réc lamatio n au
produit g urant dans l es documen ts présen tés par l´acheteu r an de faire
valoir s es dro its à la r éclam ation ( p.ex. l e numér o de réf érenc e ou le pl omb
de garantie de l´appareil endommagés, les informations gurant dans les
document s recti ées... )
-
tto in segu ito ad un‘ins tallazione s corrett a o non profe ssionale, all‘u so del prodot to contrario al ma nuale d‘uso,
alle norme giuridiche valide e generalmente conosciute
e ai modi abit uali d‘uso, in se guito all‘uti lizzo del pro dotto per ni di versi da quel li previst i
del prodot to in seguito a una manutenzione trascurata
o scorret ta
dal suo imbra ttamento, da un i ncidente, o dovut o a forza maggiore (una calamità naturale, un incendio, un‘inltrazione d’acqua...)
dotto, provocati dalla qualità inadatta del segnale, da
un campo elettromagnetico di disturbo, ecc.
ggiamento m eccanico del prodot to (p.e. lo staccamen to di un pulsan te, la caduta del prod otto a terra...)
danneggiamento provocato dall‘utilizzo di supporti,
rell e mater iale di consumo (batt erie) inadatti, oppu re dalle condizioni di esercizio inadatte ( p.e. un‘elevata
temperatura circostante, un‘elevata umidità dell‘ambiente, eventua li urti...)
o un altro inte rvento eettuato d a una persona (centro assisten za) non autorizz ata o non abilitat a
cui l‘Acquirente, presentando il reclamo, non dimostra
la fondatez za dei propri dirit ti (quando e dove egli ha
acquisito il p rodotto reclam ato)
documenti esibiti dieriscono da quelli indicati sul pro-
i casi in cui il pr odotto rec lamato non può e ssere
dotto
identicato con il prodotto indicato nei documenti con i
quali l‘Acquir ente dimostr a il suo diritt o al reclamo (p.e.
il danneggiamento del numero di fabbricazione oppure del sigill o di garanzia dell‘ap parecchio, dati t rascritti
nei documenti...)
à l´endommagement du produit pro-
à l´endommagement mécanique du pro-
à l´endommagement du produit
à l´endommagement, la
aux cas où l´ache-
aux cas où le s données gur ant
il danneggiamento
il danneggiamento del prodotto provocato
difetti alla funzionalità del pro-
il danneggiamento, la modica
i casi in cui i dat i nei
aux vices de
aux cas où
il danne-
i casi in
Jamstveni
Prodavatel j daje kupcu jams tvo na proiz vod u trajanju od 24
mjeseca o d dana primitka proiz voda kupcem. Jamst vo se daje
à l´en-
pod sljede ćim uvjetima. Jams tvo se odnosi sam o na novu robu
koja je prodana potrošaču u svrhu korištenja koje je navedeno
u odgovaraj ućoj uputi za op služivanje. Pr ava koja proizla ze iz
odgovornosti za nedostatke (reklamacija) može kupac primije
niti kod prod avatelja kod kojeg je k upio proizvod ili u d olje navedenom aut oriziranom serv isu. Kupac je obvezan r eklamaciju
-
primijeniti bez suvišnog odlaganja, kako bi se izbjeglo pogor
šanje nedostatka, ali najkasnije do kraja jamstvenog roka. Kupac je dužan p ružiti potrebnu s uradnju kod reklama cije koja je
neophodna za provjeru postojanja reklamiranog nedostatka.
U reklamaci jski postupak pr ima se samo kompletn i i iz razloga
održavan ja higijensk ih propisa č isti proi zvod. U sluč aju opravda
ne reklamac ije se jamstveni rok p rodužava o razdoblj e od trenutka primljene reklamacije do trenutka primitka popravljenog
proizvod a kupcem ili trenutk a, kada je kupac nakon oko nčanja
popravke ob vezan proiz vod preuzeti. Ku pac je dužan dok aza
ti svoja prav a za reklamaciju (ku poprodajni dokum ent o kupnji proizvo da, jamstveni list, do kument o puštanju proi zvoda u
pogon...).
Jamstvo s e ne odnosi nai me na:
nedostat ke na koje je bio pru ženi popust habanje ili oš tećenje koje je nas talo normaln im korištenj em proizvo da
ja proizvoda koje je uzrokom nestručne ili neispravne instalacije,
Garantievoorwaarden
De verkoper g eeft de eind gebruiker een g arantie van 24
maanden op he t product vana f de dag van de aankoo p.
Deze garantie is geldig onder de volgende voorwaarden.
Garantie is alleen van toepassing op nieuwe goederen die
aan de consume nt zijn verkocht met a ls doel deze te gebruiken in overeenstemming met de gebruiksaanwijzing en
het doel waar voor ze gemaakt zij n. De eindgebruiker k an
een beroe p doen op de gar antie bij de ve rkoper waa r hij het
product h eeft gekoch t of bij een hierond er vermeld, geau toriseerd servicecentrum. De eindgebruiker is verplicht om
het produc t zo snel mogeli jk, maximaal vo or het einde van
de garantie periode, terug te st uren om te voorkomen dat
het defec t verder verslech tert. De eindgebr uiker moet in-
il
geval van reparatie binnen de garantieperiode meewerken aan het doc umenteren van het geconstateerde defec t.
Alleen comp lete artikel en die volgens de hy giënische vo orschriften zijn gereinigd, kunnen ter reparatie worden aangenomen. Indien het product voor reparatie in aanmerking
komt, wordt de garantieperiode verlengd met de periode
vanaf het mom ent dat de reparat ie is aangevraagd t ot het
moment dat de eindgebruiker het gerepareerde product
weer in ontvangst neemt of wanneer de eindgebruiker het
na afrondi ng van de reparati e verplicht in ont vangst dient
te nemen. De eind gebruiker is ver plicht om zijn re cht op reparatie te bewijzen (aankoopbon, garantiebewijs, bewijs
van ingebruikname van product...).
De garantie vervalt indien er sprake is van:
defecte producten waarop korting is gegeven slij tage
of defec ten als gevolg va n normaal geb ruik defec ten als
gevolg van oneigenlijk of verkeerd gebruik, van gebruik
korištenj a proizvoda u suprut nosti sa uputom za op služivanje,
važećim pr avnim propisima i opć e poznatim i uobičajen im na
činom koriš tenja, iz razloga ko rištenja proiz voda u druge svrhe
nego kojima je namijenjen
zanemaran og ili neispravnog odr žavanja
-
da prouzrokovano njegovim uprljanjem, nezgodom i utjecajem više sile (el ementarna nepogod a, požar, prodor vode...)
nedostatke u fukcijonalnosti proizvoda koje su prouzrokovane
nepovoljnim kvalitetom signala, smetnjom elektromagnetnih
polja i sl.
mba, pad…)
nih medija, punjenja, potrošačkog materijala (baterije) ili nepogodnim radn im uvijetima (np r. visoke tempera ture u okolišu,
visoka vlažnost okoliša, potresi...)
drugu intervenciju izvršenu na proizvodu neovlaštenom ili ne
autorizir anom osobom (ser visom)
likom reklam acije neće dok azati opravda nost njegovi h prava
(kada i gdje je k upio reklamiran i proizvod)
podaci u pre dočenim isprava ma različite od p odatka navedeni h
na proizvodu
rati sa proizvodom koji je naveden u dokumentima, kojima kupac dokazu je svoja prava za reklam aciju (npr. oštećenje proi zvodnog broja ili jamstvena plomba uredjaja, prepisivani podaci
u dokumenti ma...)
oštećen-
dat niet in overeenstemming met de gebruiksaanwijzing,
geldende wettelijke voorschriften en algemeen bekende
en normale ma nieren van gebruik i s of van gebruik voor
andere doeleinden dan voor het product zi jn voorges chre-
schade aan he t product als gevo lg van verwaarlo-
ven
osd of onjuist onderhoud schade aan het pro duct als ge volg van het ge brek aan reinigen, o ngevallen en ext erne
oorzaken (rampen, brand, overstroming...)
de funct ies van het product a ls gevolg van onjuist e netspanning, s toring van een e lektromagn etisch veld, e tc.
mechanis che defecten aan h et product (bijv. af breken
van de knoppen, val...)
ruik van onge schikte media , vullingen, voedi ng (batterijen) of ongeschikte operationele omstandigheden (bijv.
hoge omgevingstemperatuur, zeer vochtige omgeving,
aardbevingen...)
die door niet-bevoegd of niet-geautoriseerde personen
(of serviceorganisaties) aan het product zijn gedaan ge vallen waar in de eindgebruike r bij een verzoek tot re paratie binnen de garantieperiode niet bewijst dat hij daar
recht op hee ft (wanneer en waar h ij het teruggestu urde
product gekocht heeft)
op de overlegde documenten verschillen van de gegevens die op het p roduct verme ld worden. gevallen waarin het teruggestuurde product niet geïdenticeerd kan
worden aan de ha nd van het produc t dat vermeld wordt
in de docume nten waarmee de eindge bruiker zijn recht
op reparatie binnen de garantieperiode uitoefent (bijv.
beschadigde serienummers of garantiezegel, veranderde
gegevens in de documenten...)
oštećenje proizvoda iz razloga
mehaničko oštećenje proizvoda (npr.slomljenje gu-
oštećenje prouzrokovano korištenjem neisprav-
slučajeve kada proizvod nije moguće identici-
schade als ge volg van het geb-
schad e of re para tie of a nder e ingr epen
gevallen waarin de gegevens
oštećenje proizvo-
oštećenja, prilagodbu ili
slučajieve kada kupac pri-
slučajeve k ada su
defecten in
-
-
Page 89

Заполняется продавцом. В с лучае ре монта зап олняетс я сервисн ой органи зацией.
Название: Дата обращения в сервисный центр:
Гарантийный талон I
Число: Месяц: Год:
Тип:
Серийный номер изделия Причина неисправност и:
A termék a zonosítá sra alkal mas részei nek meghat ározása (a mennyibe n alkalmaz ható): Спос об ремон та:
Номер д окум ента, п одтв ержд ающего п родаж у: Дат а возвра та изд елия об ратно з аказч ику:
Дата покупки (ввода в эксплуатацию): Новый гарантийный срок – продлен на срок проведения ремонта:
Число: Месяц: Год:
Печать продавца: Печать сервисной организации:
20
Дата принятия в ремонт:
Число: Месяц: Год:
Число: Месяц: Год:
Число: Месяц: Год:
20
20
20
20
Авторизованные сервисные центры
АО «FAST ČR»
Чернокостелецка 1621
251 01 Ржичаны
Чешская Республика
Тел.: +420/323 204 120
Факс: +420/323 204 121
servis.praha@fastcr.cz
www.fastcr.cz
Авторизованные сервисные центры
Fast Hungary Kft.
Dulácska u. 1/a.
H-2045 Törökbálint
Magyarország
Tel.: + 36/ 23 330 905
Fax: + 36/ 23 330 827
info@fasthungary.hu
www.fasthungary.hu
АО «FAST ČR»
Цейл 31
602 00 Брно
Чешская Республика
Тел.: +420/531 010 295
Факс: +420/531 010 296
servis.brno@fastcr.cz
www.fastcr.cz
Arconet sp. z o.o.
W celu znalezienia
najbliższego serwisu
prosimy zadzwonić:
0801 44 33 22
Lub odwiedzić stronę
internetową:
www.arconet.pl
ООО «FAST Plus»
На Пантох 18
831 06 Братислава
Словацкая Республика
Тел.: +421/2/49 105 854
Факс: +421/2/49 105 859
servis@fastplus.sk
www.fastplus.sk
Uab „Senuku Prekybos
Centras“ Garantinis Servisas
Jonavos G. 62, Lt-44192,
Kaunas, Lithuania
Tel.: +370 37 212 146
Tex.: +370 37 212 165
garrem@senukai.lt
www.senukai.lt
revision 02/2011
Page 90

Условия гарантии
Продавец предоставляет покупате лю гарантию на товар в течение 24 месяцев с момента пол учения
товара покупателем. Гарантия предоставляется при соблюдении следующих условий. Гарантия
распрос траняется только на новый това р, проданный потр ебителю дл я целей использ ования,
указанных в соответствующей инстру кции по эксплуа тации. Покупатель имеет прав о обратитьс я с
претензией, связанной с ответственно стью за некачественный то вар (реклама цией), непосредс твенно
к продавцу, у котор ого был приобре тен товар, либо в авторизованный сервисный центр, указанный
ниже. Покупатель обязан пр едъявить рек ламацию без не обоснованной задержки, чтобы избежать
ухудшения неисправности, но не позднее, чем до конца истечения гар антийного сро ка. Покупател ь
обязан при решении рекламации оказывать содействие, необходимое для проверки наличия
заявленного дефекта. В рамках процедуры рассмотрения жалоб принимается только комплектный и, в
целях соблюдения гигиенических правил, чистый товар. В случае если претензия является обоснованной,
гарантийный срок продлевается на период с момента принятия товара для проведения гарантийного
ремонта изделия по момент получения отремонтированного товара покупателем, либо по момент,
когда покупатель обязан получить товар после проведения гарантийного ремонта. Покупатель
обязан предъявить документы, подтверждающие его право на проведение гарантийного ремонта
(докумен т, подтверждающ ий покупку, гарантийный талон, д окумент о вводе в эксплуатацию ...).
Гарантийные обязательства на товар, главным образом, не распространяются на:
недос татки, на котор ые была предос тавлена скидка износ и повреждения, вызванные обычным
использованием изделия
установки и монтажа, использования изделия в противоречии с Инструкцией по эксплуатации,
действующим законодательством и общеизвестными и обычными способами использования, в с вязи
с использов анием товара д ля других целей, чем те, для которых он предназнач ен
изделия, связанные с пренебрежением или неправильным т ехническим обслужив анием
изделия, вы званные его загрязнением, аварией и форс-мажорными обстоятельствами (стихийными
бедствиями, пожаром, попаданием воды ...)
качеством сигнала, помехами электромагнитного поля и т.д.
(например, отломанная кнопка, падение ...)
носителе й, расходных матер иалов (батарей) или в ре зультате ненадле жащих условий экс плуатации (напр.,
высокой темпер атуры окру жающей среды, высокой влажнос ти, ударов ...)
или другое вмешательство в результате самостоятельного ремонта из делия или ремон та, проведенно го
неуполномоченным или неавторизированным лицом (сервисным центром)
не подтвердит правомерность своих прав на гарантийный ремонт (когда и где был приобретен товар, на
который распространяется гарантия)
от информации, содержащейся на изделии
является тождественным с изделием, указанным в документах, которыми покупатель подтверждает
свое право на проведение гарантийного ремонта (напр., повреждение серийного номера или гарантийной
пломбы уст ройства, ис правление дан ных в документа х ...)
повреж дения изделия в ре зультате неспециали зированной или непр авильной
повреж дения
повреждения
неисправности изделия, вызванные неадекватным
повреж дения, вызванные использованием неподходящих
сл учаи, когда данные в предос тавленных документах отличаются
слу чаи, когда изделие, на котор ое заявлена реклам ация, не
механические повреждения изделия
повреждения, изменения
случаи, когда покупател ь
Page 91

Page 92

 Loading...