

FIAS GEN52, Genesis Series Installation Manual
FIAS LIGHTING PTY LTD
Model: GEN52
Genesis Series
52 inch ceiling Fan
Installation Manual
Page 1

FIAS LIGHTING PTY LTD
Thank you for purchasing FIAS Genesis Ceiling fan. Please read all information before
use and construction of ceiling fan.
Important
Warranty is VOID if a non licensed Electrician installs the ceiling fan and performs
electrical work.
Please retain this Manual for Future reference
Do not use this ceiling fan if it appears to be tampered or damaged in any manner
The fan must be installed so that the blades are more than 2.1 metre above the floor.
Accessories
Only use remote controls and wall controller Approved by Fias Lighting Pty Ltd
Use of generic accessories will VOID the warranty
Electricians
All ceiling fans should be attached to a solid structure because it creates movement
when working. To avoid hazards, the bracket should be mounted firmly on the solid
structure. You may attach the bracket on a steel structure, concrete ceiling or timber
frame.
Page 2
FIAS LIGHTING PTY LTD
Assembly instructions
Image 1:
1. Mount the Bracket that is supplied with the Ceiling fan to a solid structure as
mentioned before. Use the two long screws that are provided in the packaging
to secure the bracket onto the ceiling. (Image 1). A licensed electrician should
complete the wiring.
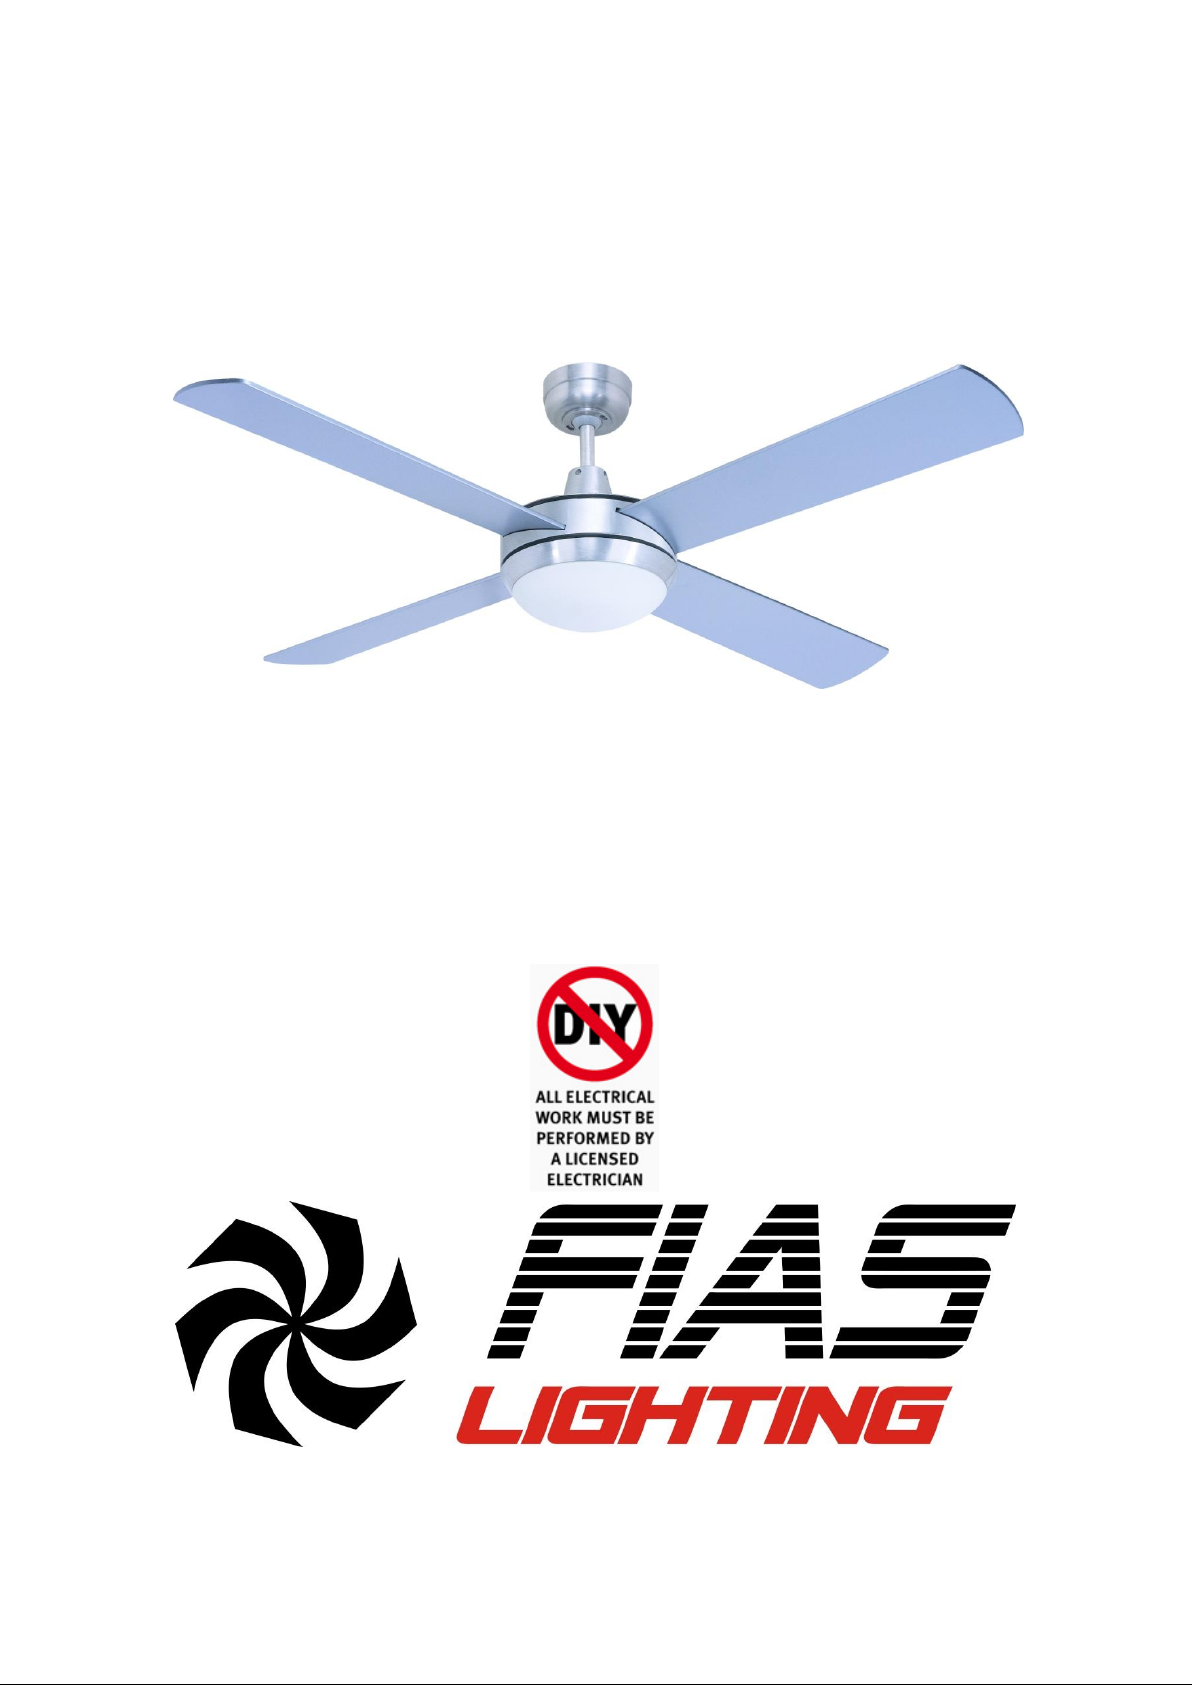
Image 2
2. Once the Mounting Bracket has been installed,
you may start the assembly of the ceiling fan.
Remove the two screws that are on the cover
plate which is located on the top of the ceiling
fan. As shown in the diagram. This will give you
access to mount the blades on the ceiling fan.
(Image 2)
Please do not throw the screws or the cover plate.
as you will require them later on.
Page 3
FIAS LIGHTING PTY LTD
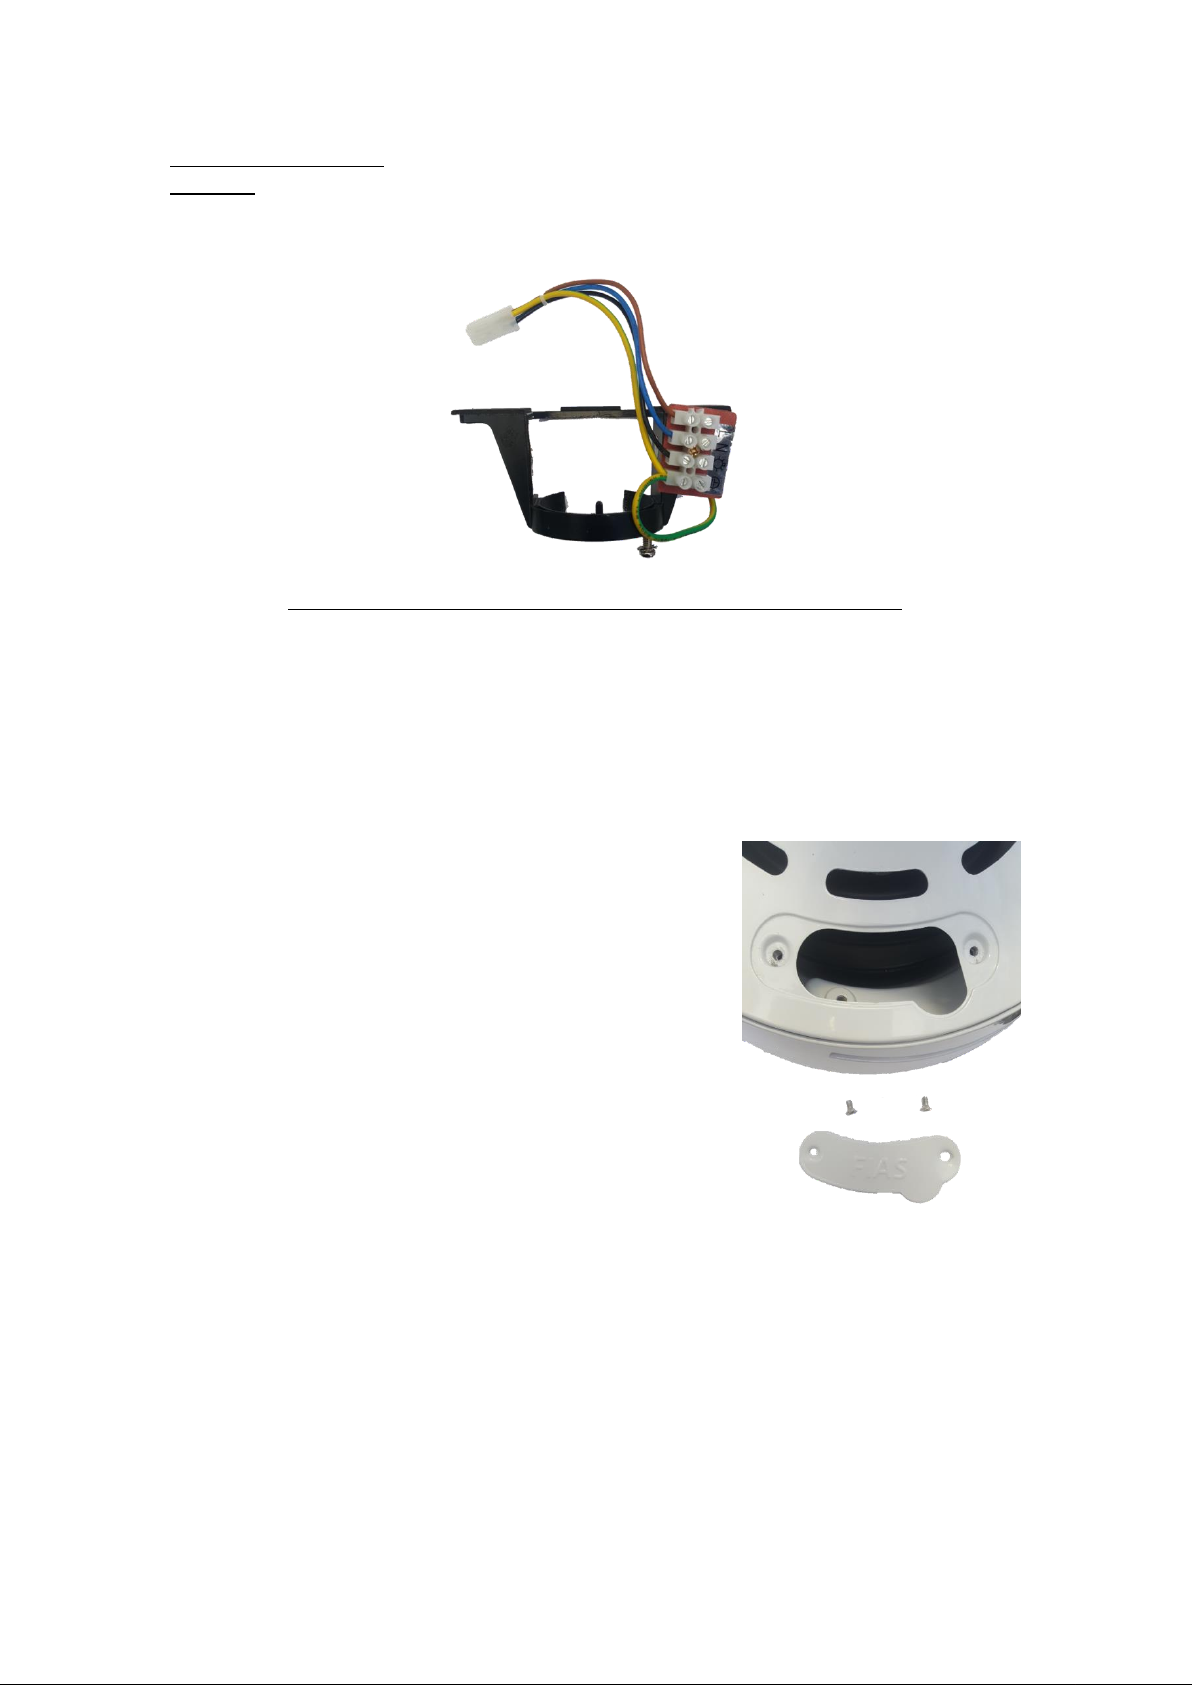
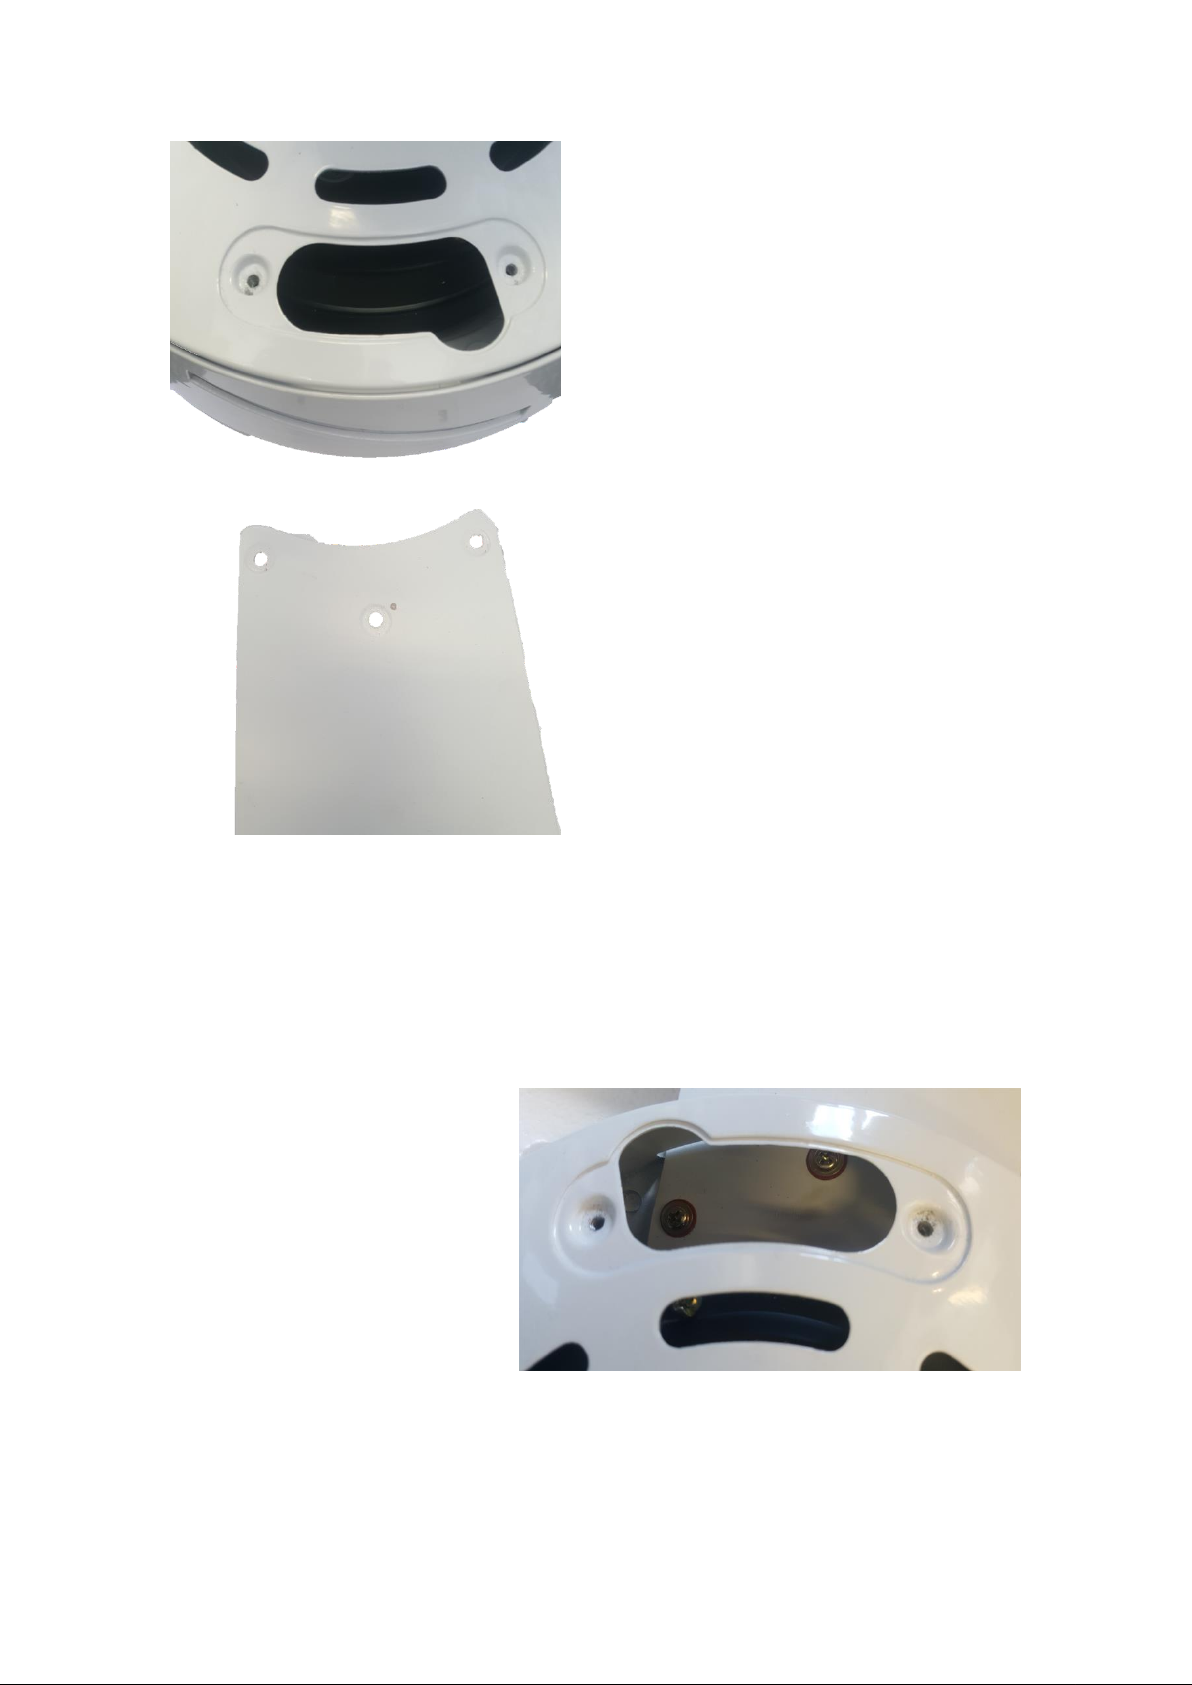
Image 3
3. Insert the Blades in the slot of the ceiling fan. There are a total of 4 slots and 4
blades. It is easier to mount the blades one at a time rather than slotting all 4
blades into position
4. Once the blades have been
inserted, use the washers
provided in the box and
tighten the blade screws.
There are a total of 3 blade
screws for each blade.
Image 4
Page 4
 Loading...