

Page 1
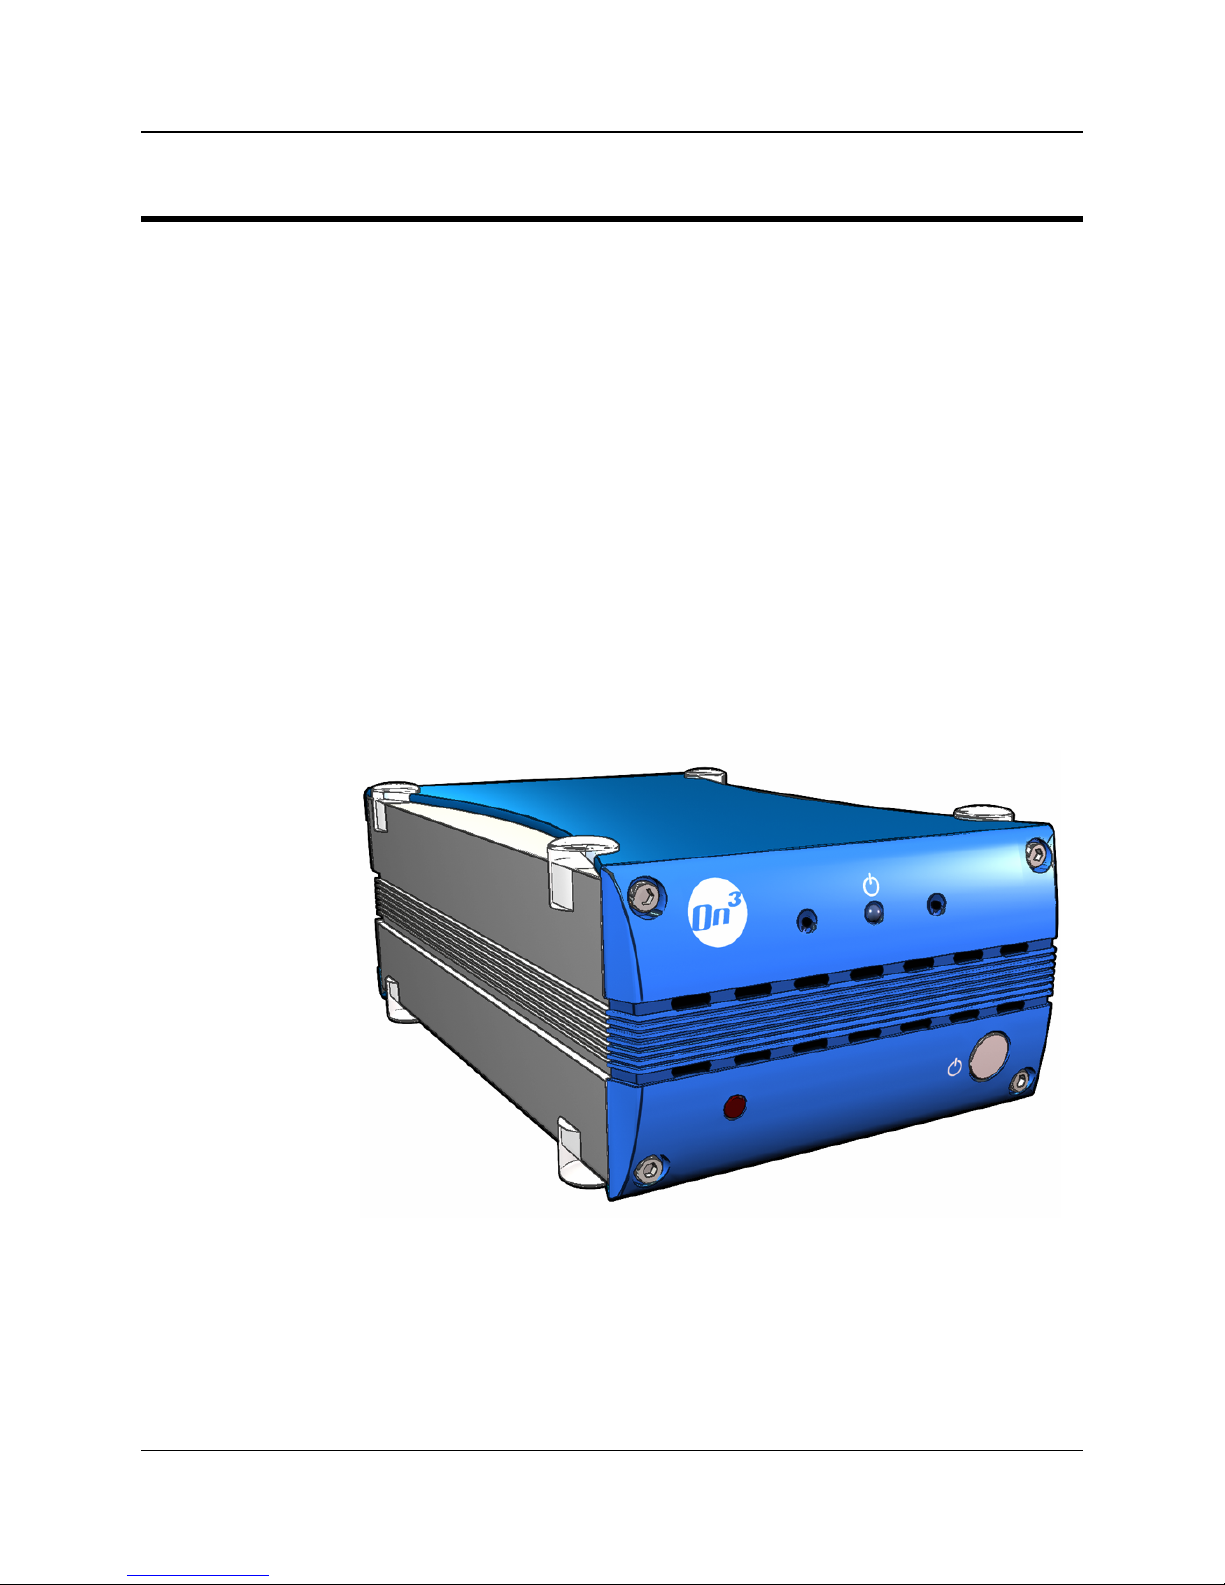
INTRODUCING ON3
Chapter 1: Introducing On3
Congratulations! You're moments away from sharing and storing your
library of digital media, including videos, music pictures using the FIA
On3 Digital Media Player and Library.
Introduction
The On3 unit contains advanced video and audio processing technology as
well as an internal 80- or 120-GB hard drive. The unit is simple to setup,
and once your digital data has been installed, it can be easily viewed at
any time since the unit is always on and ready.
No PC is required to view or listen to your entertainment media. With the
FIA On3, the entire family can enjoy high-quality digital entertainment
throughout the entire home.
FIA On3 and On3-xr User’s Guide
1
Page 2

INTRODUCING ON3
2
On3 System Features
• View videos and photos on the TV with home theater, high quality
viewing
• Listen to music on the stereo with crystal clear audio sound
• Portable compact design can be used alone or networked through
wireless or Ethernet LAN
• Media is always available - the unit is always on, always ready
• A PC is not required to view and listen to your digital media
• Installs in less than 5 minutes and with only 2 mouse clicks
• Packs loads of digital medial content onto a standard 80 or 120-GB
library
• Supports Microsoft and Apple operating systems
• Supports analog and digital 5:1 audio connections
• Enjoy your media in every room in the house (in up to 4 rooms
with optional On3-xr units).
FIA On3 and On3-xr User’s Guide
Page 3
INTRODUCING ON3
On3 System
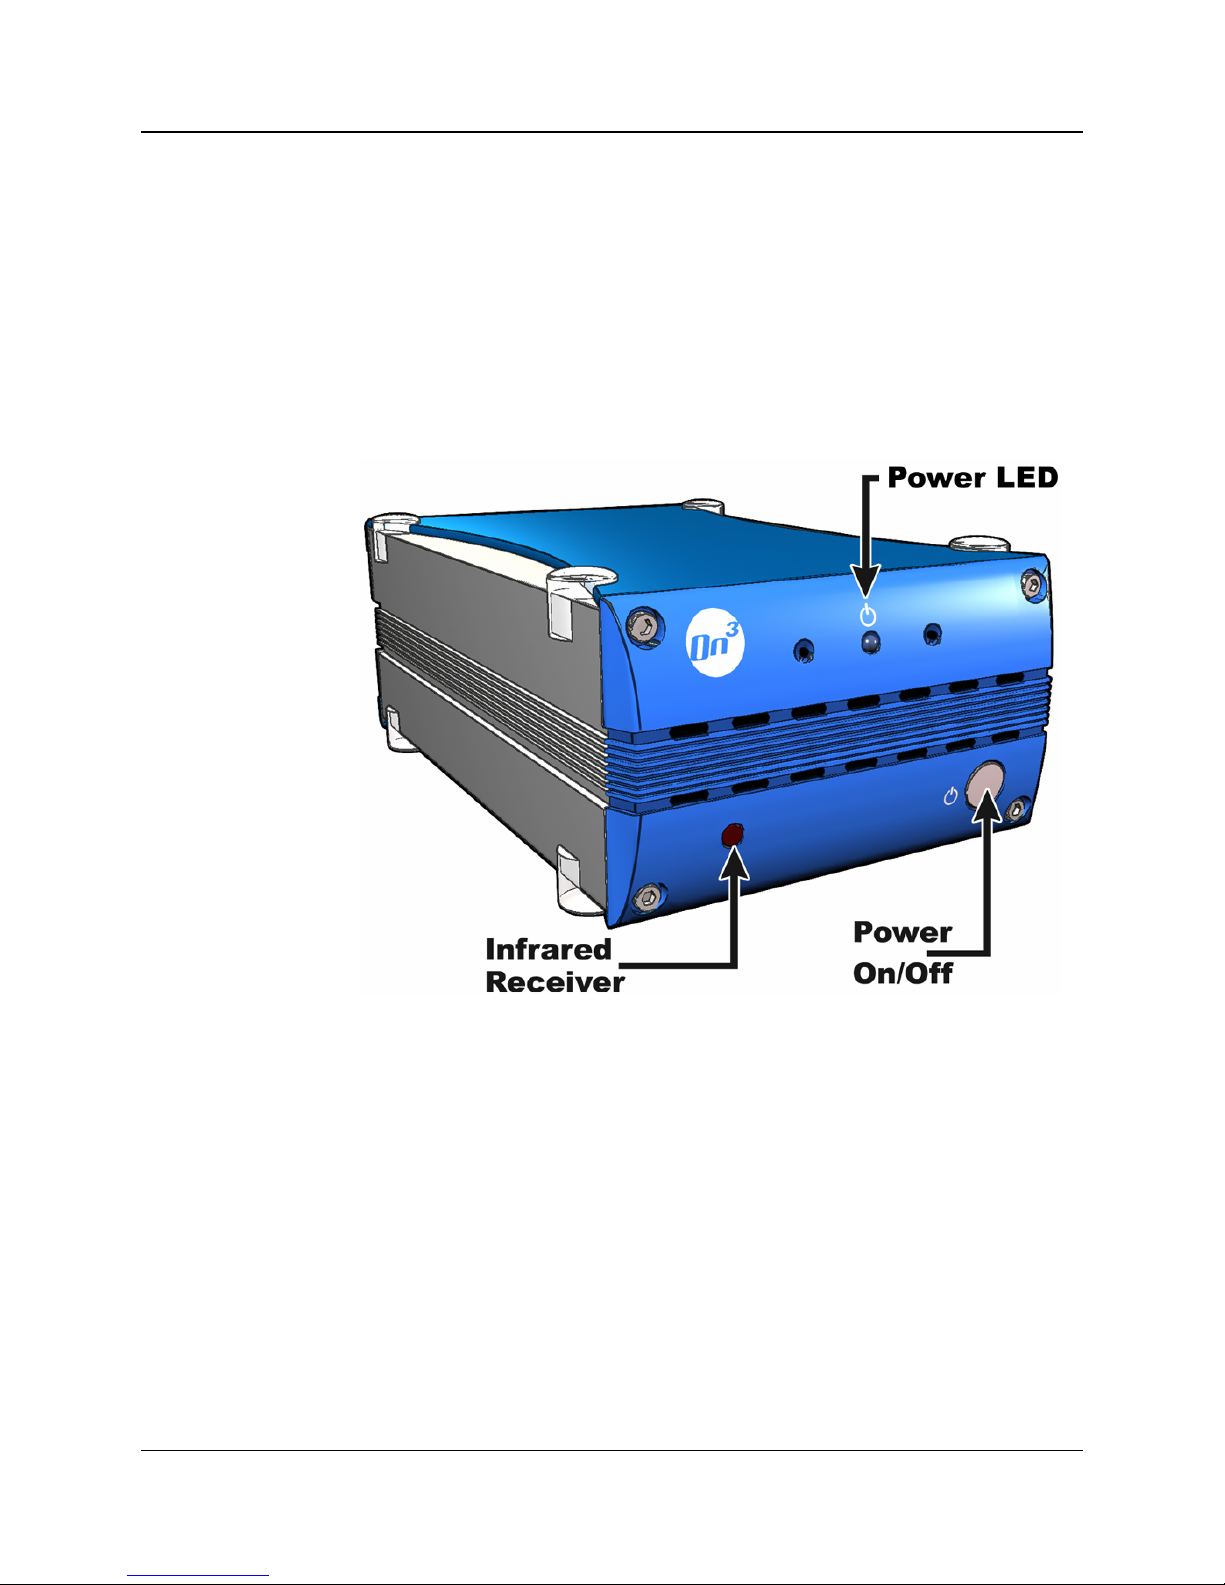
Front Panel
The illustrations below show the basic components you should be familiar
with. A description of these components follows:
On the front of the On3 Media Server are the following components:
Power Button – Manually powers up the On3 unit or shuts it down.
Power Indicator – This light is illuminated whenever power is applied to
the On3 unit. This LED flashes whenever the On3 is initially powered up.
Once it’s on steady, the On3 is ready to use.
IR Receiver – Receives signals from the On3 Remote Control. Make sure
this opening is never obstructed or else the Remote Control may not
function properly.
FIA On3 and On3-xr User’s Guide
3
Page 4

INTRODUCING ON3
Rear Panel
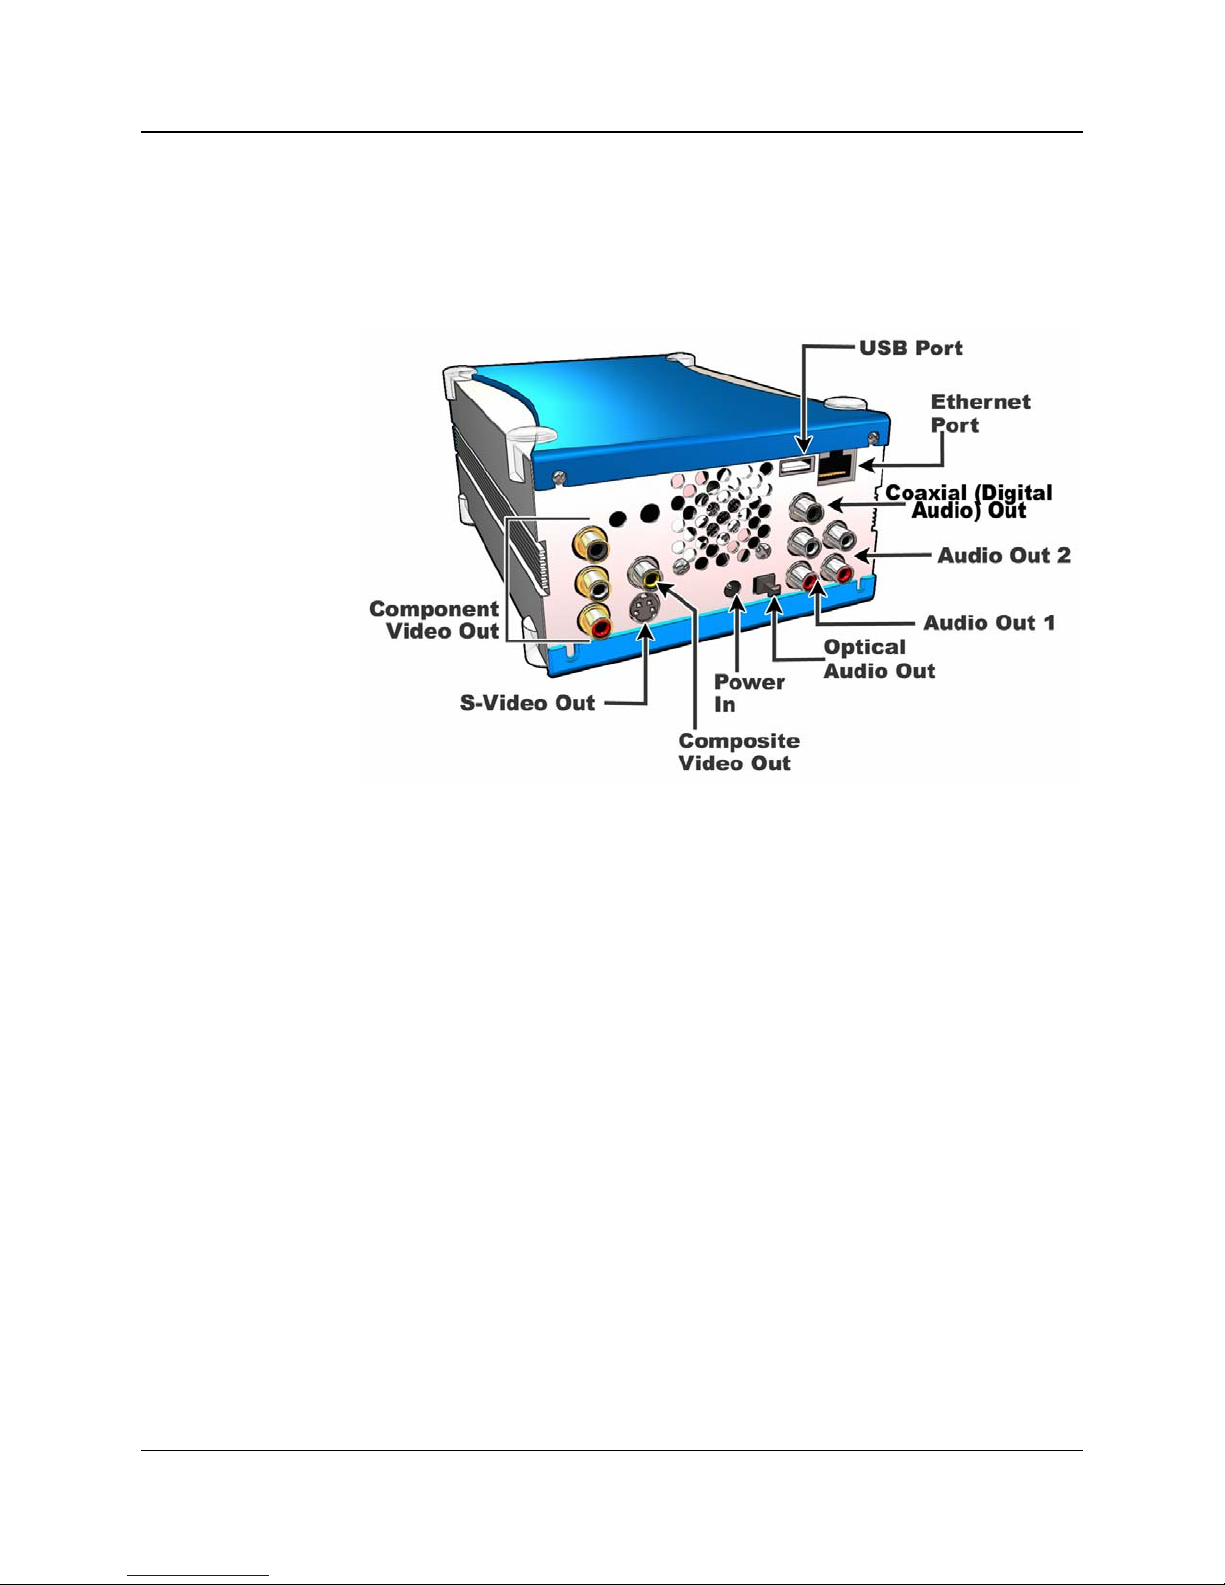
On the rear or the On3 device are the following components:
Power Connector – Supplies power to the On3 unit.
Ethernet Port – Standard 10/100 Ethernet network port for connecting the
On3 unit to a home network or directly to a PC. If a wireless connection is
not available, this is how digital media is transferred onto the unit.
USB Port – Industry standard USB port that supports an external hard
drive for additional storage. If attaching an external drive, be sure it has its
own power supply.
Video Outputs
Video (Component) Out – For optimum video performance, use this video
output if available.
S-video Out – This high-performance video output is superior to
composite video, and should be used if available.
Video (Composite) Out – Oldest and most common video format. For
display devices lacking either Component or S-video, this is the option to
use.
FIA On3 and On3-xr User’s Guide
4
Page 5

INTRODUCING ON3
5
Audio Outputs
Optical Digital Audio – Utilizes a fiber optic cable to reduce interference
and signal degradation common when using traditional cables. This option
provides the best audio quality.
Coaxial (Digital Audio) Out – High-quality video output for digital audio
devices. Use this option if Optical Digital is unavailable.
Audio (Analog) Out (Primary) – Stereo output for older audio devices
incapable of utilizing either Optical Digital or Coaxial.
Audio (Analog) Out (Auxiliary) – Secondary set of stereo outputs for
another audio device.
FIA On3 and On3-xr User’s Guide
Page 6
INTRODUCING ON3
6
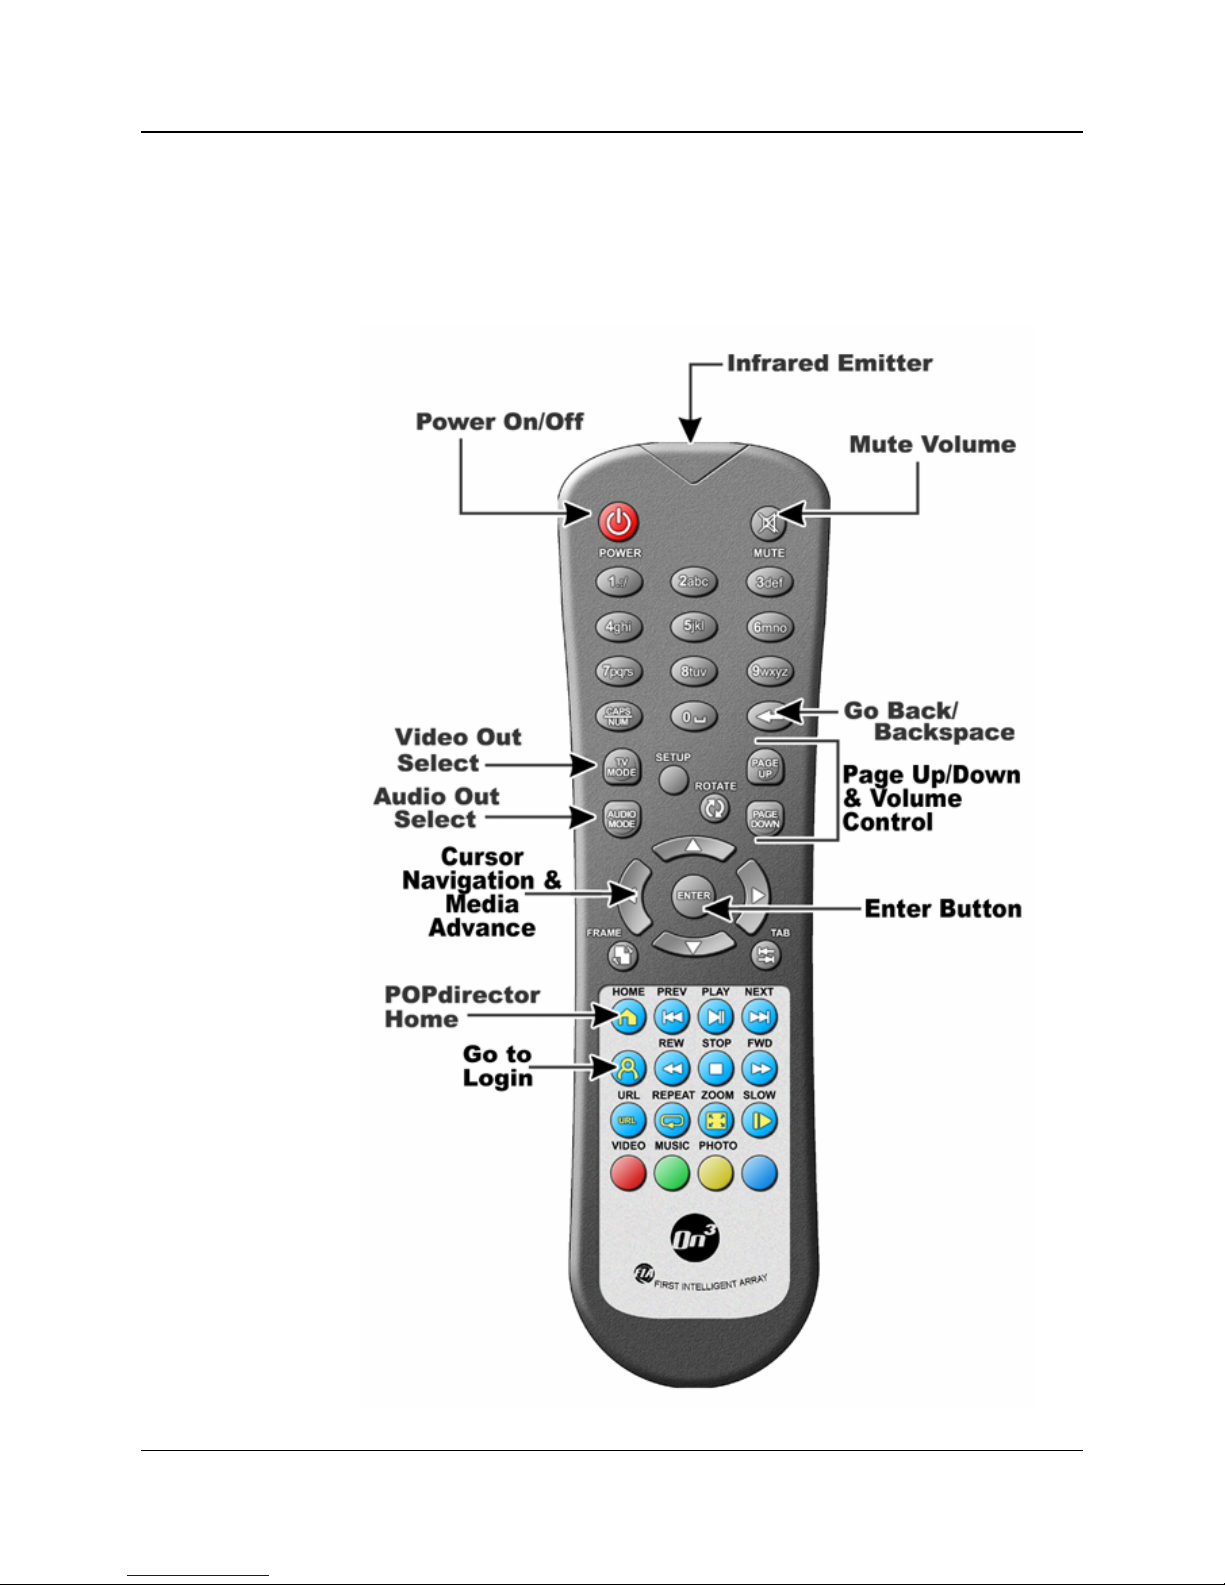
Remote Control
The On3’s Remote Control should be intuitive and familiar to most
people. Some of the Remote Control’s buttons serve multiple functions
(and others are disabled), depending what mode you’re in.
FIA On3 and On3-xr User’s Guide
Page 7
INTRODUCING ON3
7
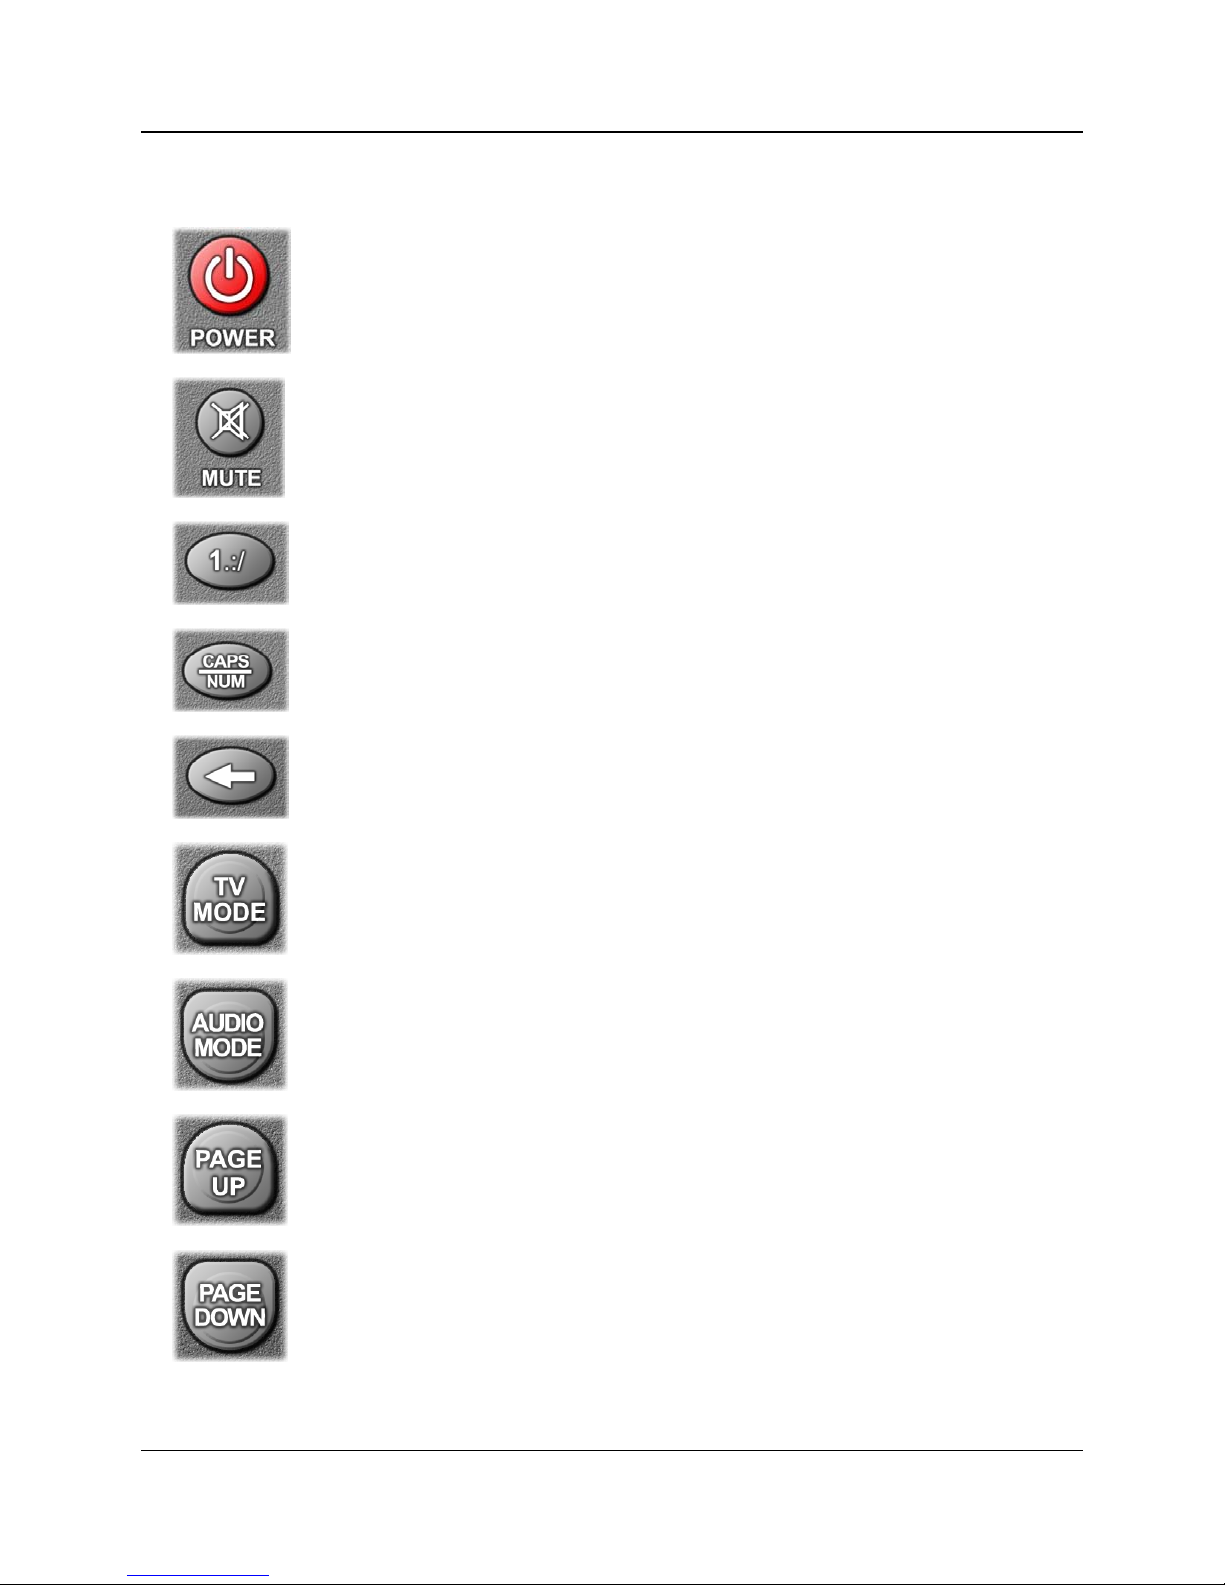
On3 Control Buttons
Power
Mute
Number/Text
keypad
CAPS/NUM
Go Back
TV Mode
Applies or removes power to the On3 video processor.
Toggles the volume on or off.
Allows for menu selection and/or data entry. Any special
characters not displayed on the remote can probably be
found by repeatedly pressing the “1” key.
Toggles between all, numbers only, upper and lower case
letters on the number/text keypad.
Return to Previous screen or delete entered data.
Switches to alternate video output modes. Default setting
is NTSC.
Audio Mode
Scrolls through the audio output options: Mono Left,
Mono Right and Stereo (default).
Page Up
On multipage menu screens, moves to the previous page.
When media is playing, increases volume.
Page Down
On multipage menu screens, moves to the next page.
When media is playing, decreases volume.
FIA On3 and On3-xr User’s Guide
Page 8
INTRODUCING ON3
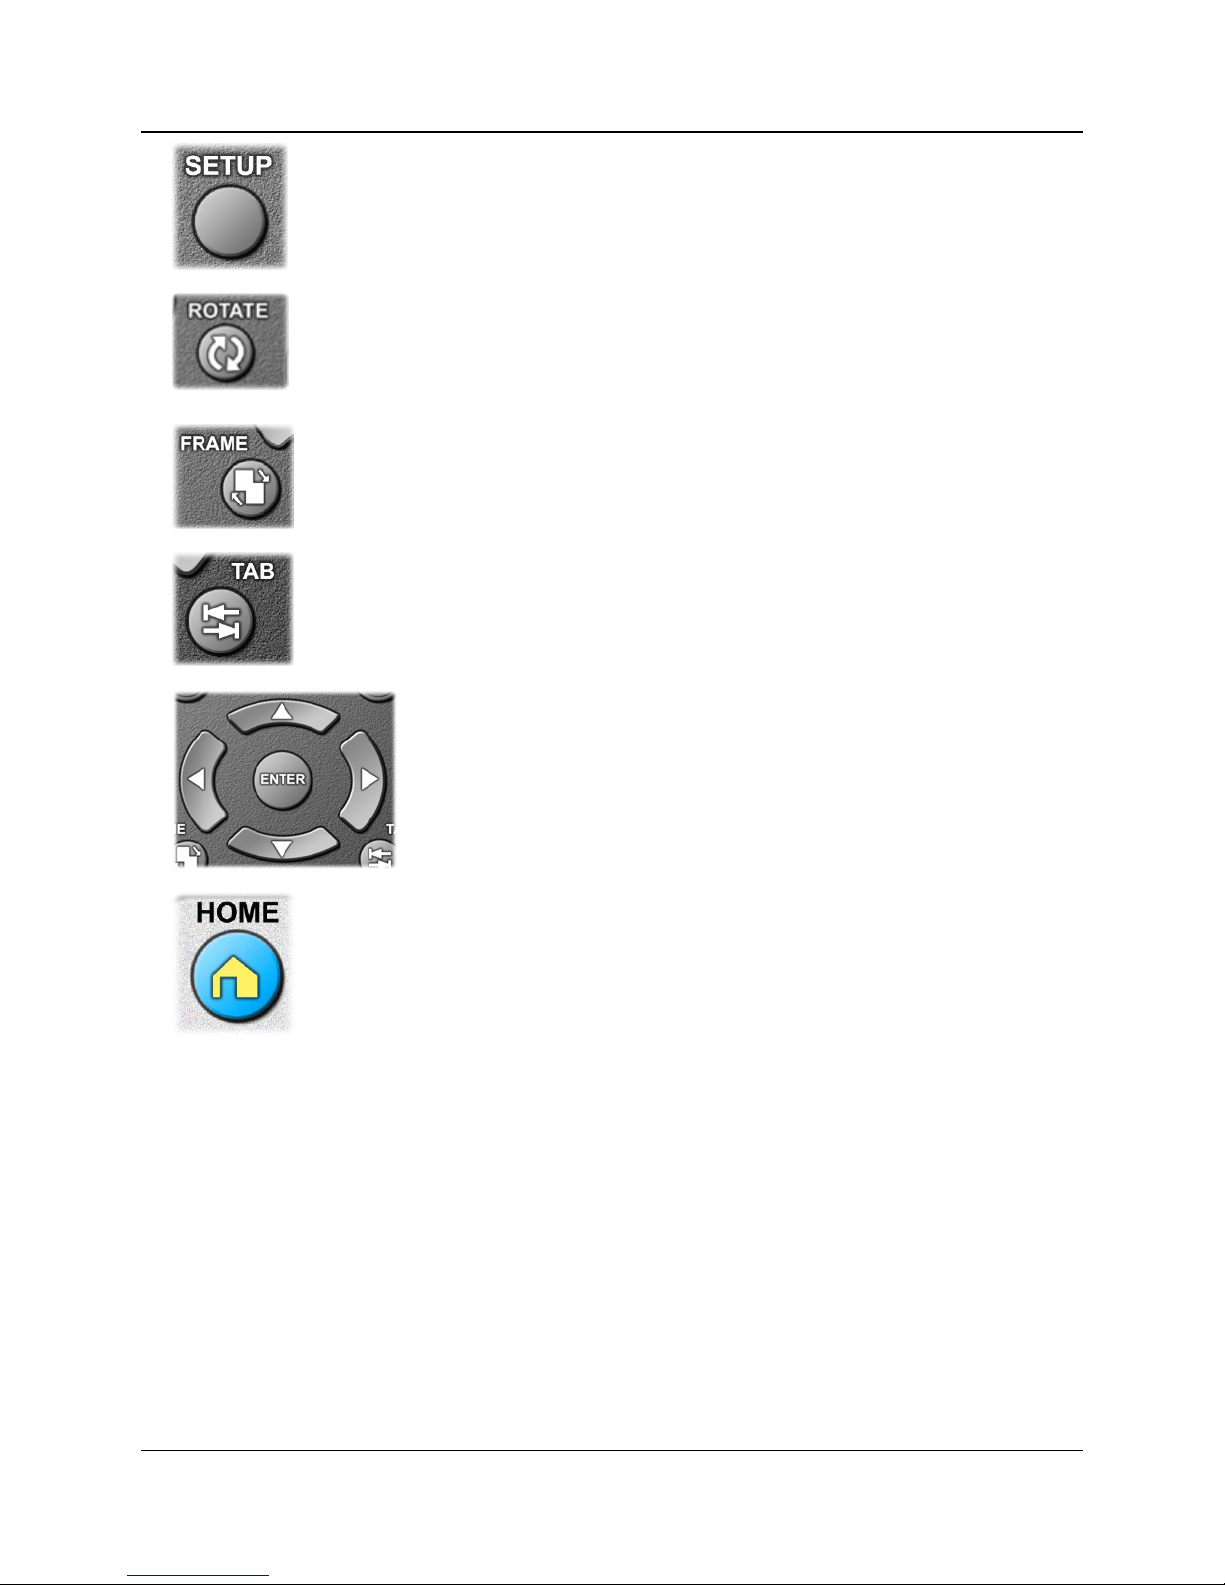
Setup
Rotate
Frame
Tab
Reveals the setup/configuration tab for the On3 hardware
setup.
Rotates the picture 90 degrees each time this button is
pressed.
For Internet browsing which has frame on the web page,
THIS FEATURE IS NOT CURRENTLY SUPPORTED.
Scrolls the screen cursor through the selections on the
page.
NavigationArrows
Moves the cursor around the screen in the
direction of the arrows. Pressing Enter chooses
the highlighted selection.
Home
Immediately returns the user to the home page. When
media is playing, you must first press the Stop button
before this will function.
FIA On3 and On3-xr User’s Guide
8
Page 9
INTRODUCING ON3
Media Control Buttons
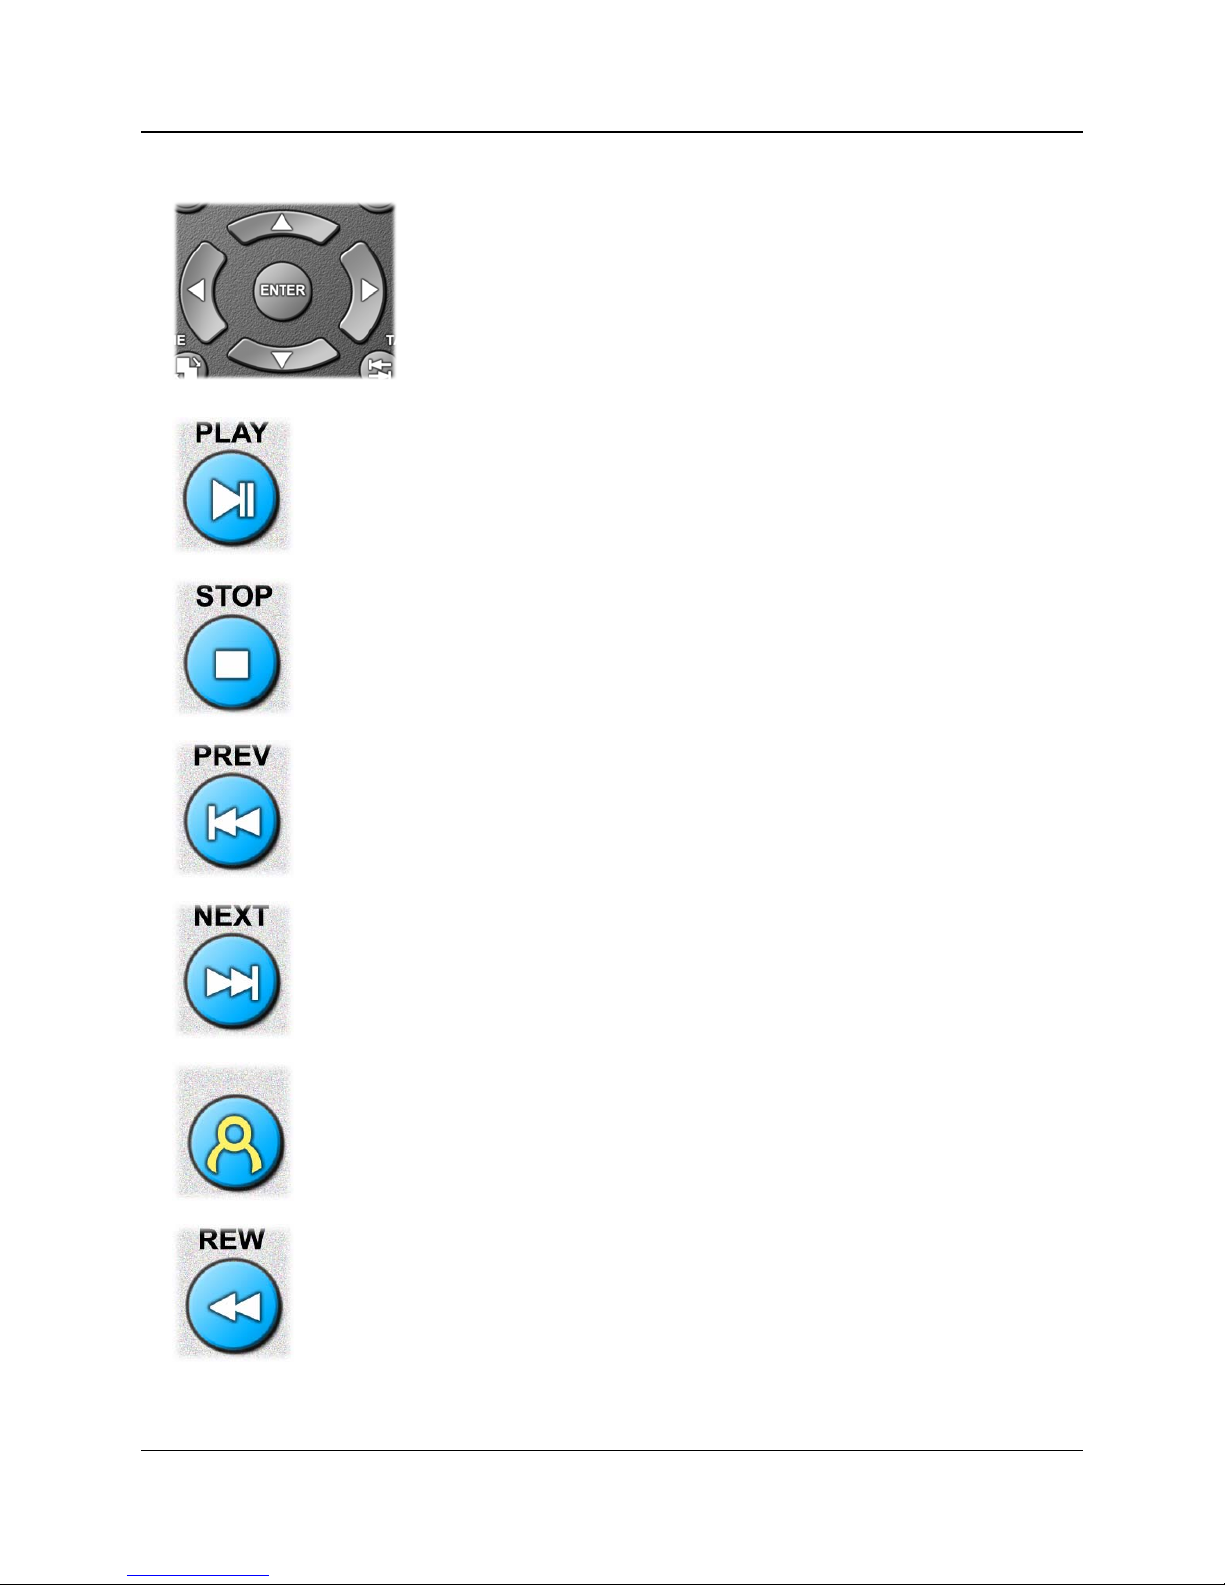
Play/Pause
Stop
NavigationArrows
Plays the currently-selected media file or returns video to
normal speed. If media is already playing at normal
speed, pressing this button will pause it. This button also
pauses photo slideshows during play.
Stops the currently-playing media file or slideshow and
displays the applicable menu screen.
When music or videos are playing, pressing
the Left or Right arrows displays a percentage
representing a location within the media file.
Releasing the Arrow button takes the user
directly to that point. Up and Down Arrows
can be used to go forward or back during
photo slideshows.
Previous
Next
Login
Rewind
When playing all (music and videos), skips to the
previous media file.
When playing all (music and video), skips ahead to the
next media file.
Return to Login screen. This button is disabled while
media is playing.
When a video is playing, this button will reverse the
video. Pressing again will increase backward speed to
2x, 3x and 4x. To return video to normal play, press the
Play button once.
FIA On3 and On3-xr User’s Guide
9
Page 10
INTRODUCING ON3
0
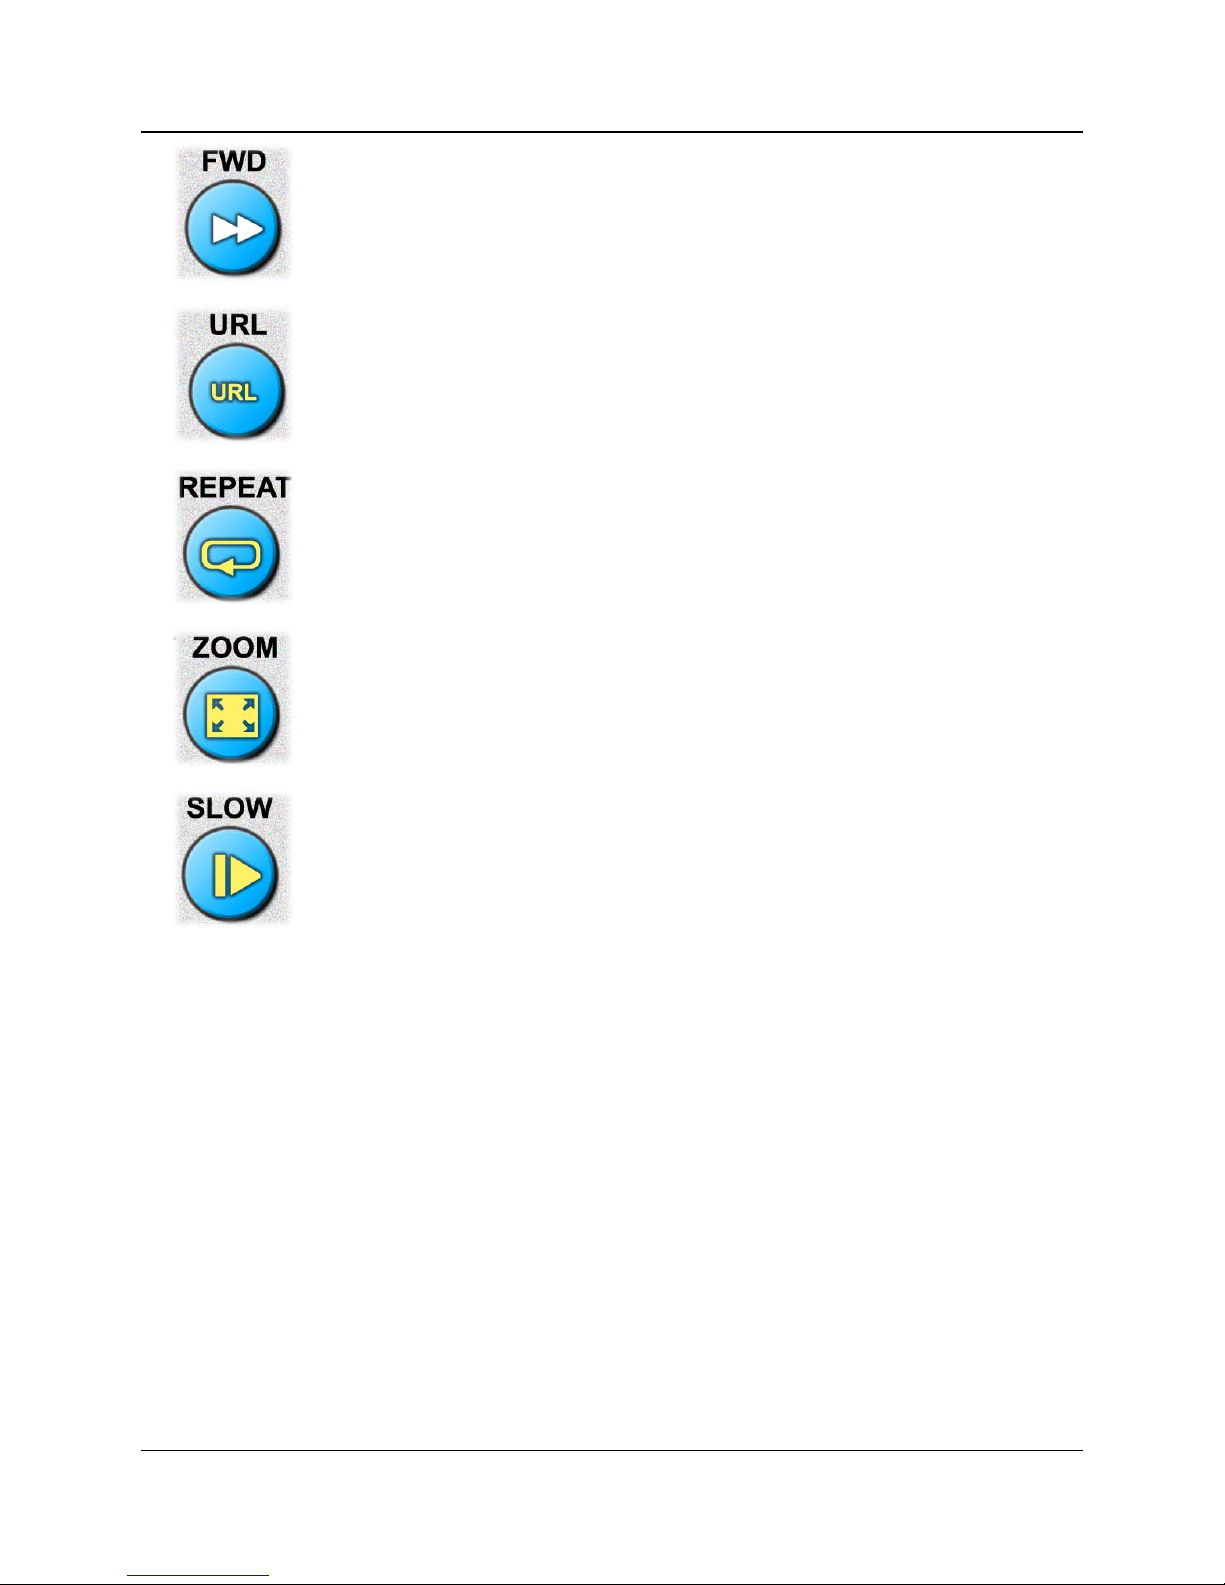
Forward
URL
Repeat
Zoom Video
When a video is playing, this button will accelerate the
video speed. Pressing again will further increase the
speed to 2x, 3x and 4x. To return video to normal play,
press the Play button once.
Allows the user to enter an Internet URL through the
remote keypad. THIS FEATURE IS NOT
CURRENTLY SUPPORTED.
Once pressed, will automatically repeat the currentlyplaying video or music file.
When a video is playing, toggles display between Actual
Size, Full Screen and Fit to Screen (maintaining aspect
ratio).
Slow
When a video is playing, pressing this button slows the
playback to 2x, 4x, 8x, 16x or 32x. Pressing Play once
again returns video to normal speed.
FIA On3 and On3-xr User’s Guide
1
Page 11
INTRODUCING ON3
Media Shortcut Buttons
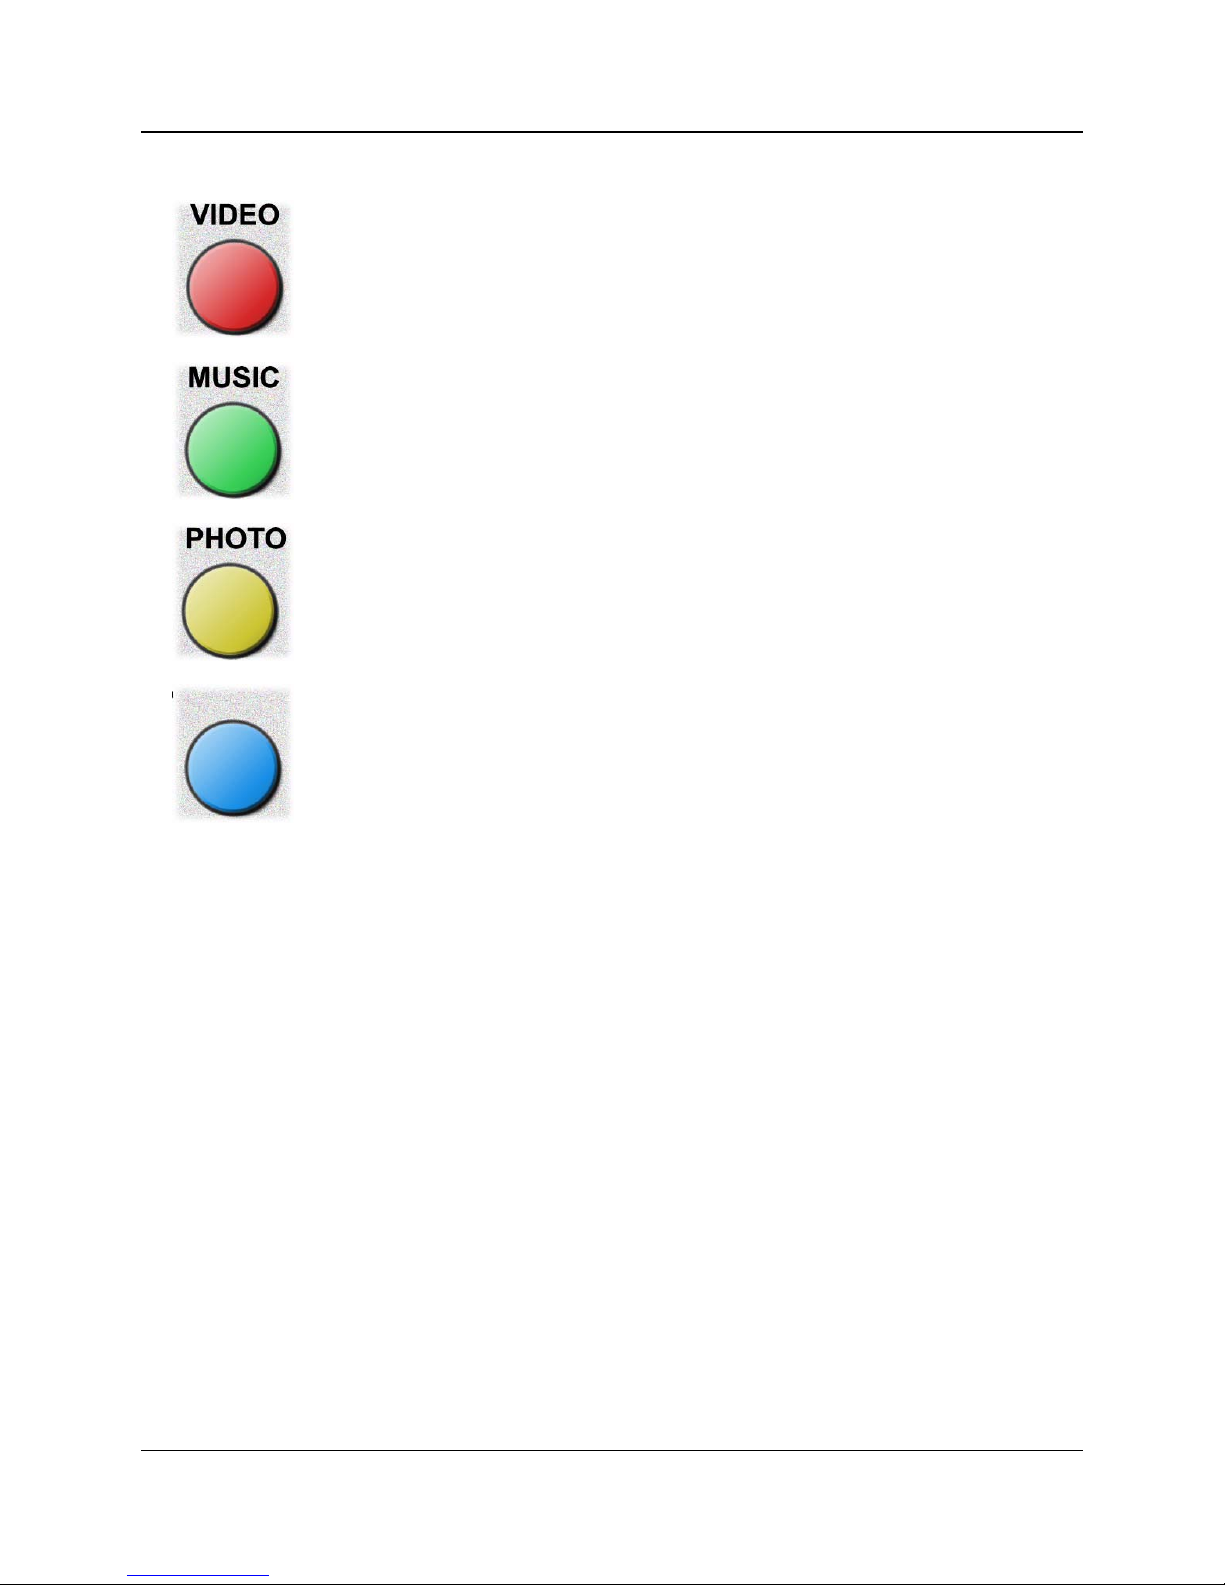
Video
Music
Photo
Auxiliary
Goes directly to the main Video screen. If media is
currently playing, you must press Stop before this button
will work.
Goes directly to the main Music screen. If media is
currently playing, you must press Stop before this button.
Goes directly to the main Photo screen. If media is
currently playing, you must press Stop before this button.
Currently not used.
FIA On3 and On3-xr User’s Guide
11
Page 12

INTRODUCING ON3
2
Documentation and Software
Your On3 and On3-xr unit includes the following important
documentation and software:
Quick Setup Guide
For most people, this sheet contains all the information necessary to setup,
troubleshoot and use the On3 Digital Media Player and Library.
Setup CD
Contains software, utilities and an electronic version of the On3 User
Guide.
User Guide
This electronic document contains complete and comprehensive
information regarding all aspects of the On3 Digital Media Player and
Library.
FIA On3 and On3-xr User’s Guide
1
Page 13

ON3 SETUP
Chapter 2: On3 Setup
Setting up and configuring the On3 Media Server is no more difficult than
adding a piece of equipment to your home entertainment center.
Everything you need to know is included in this chapter. Advanced users
may wish to refer to the On3 Quick Setup Guide for more concise
instructions.
Before you Begin
Before you begin, make sure you have the following minimum
requirements:
• Quality video and/or audio output device such as a
television, monitor or home stereo system.
Hardware Setup
Follow the instructions below to set up the On3 hardware:
Placement
When deciding where to place your new On3 system, consider the
following guidelines:
• PC system or home network with a functioning Ethernet
port or a wireless network (if purchased wireless On3
option).
• Digital media in AVI, MPEG, MP3 and JPEG formats.
• The On3 unit should be placed on a flat, sturdy surface.
• Sufficient space should be provided behind the unit to
accommodate cabling and cooling.
• The IR receiver on the front bezel should not be obstructed.
FIA On3 and On3-xr User’s Guide
13
Page 14
ON3 SETUP
Cabling
The On3 was designed to seamlessly integrate with virtually any
entertainment configuration. Refer to the illustration below while
determining the cabling options that best suit your needs.
Video Connections
Component Video Out - This connection produces the highest-quality
video display, and should normally be the first choice.
OR
S-Video - Produces good results. If Component video isn’t available, this
is a good second choice.
OR
Composite Video Out - Intended solely for older video devices that don’t
have S-Video or Component Video inputs. This option is also the most
common and is compatible with virtually every video device.
FIA On3 and On3-xr User’s Guide
14
Page 15

ON3 SETUP
5
Audio Connections
Optical Audio Out - Offers the highest-quality audio with none of the
distortion or noise associated with traditional cables. Use this option when
connecting the On3 to high-end audio equipment.
OR
Coaxial (Digital Audio) Out - High-quality digital audio with AC-3
support. If Optical Audio isn’t available, this is the second choice.
OR
Stereo Audio Out - Redundant pairs of Stereo Audio Out suitable for most
audio equipment. This is by far the most common audio configuration and
should be used whenever Optical or Coaxial aren’t available.
FIA On3 and On3-xr User’s Guide
1
Page 16
ON3 SETUP
6
Network Connection
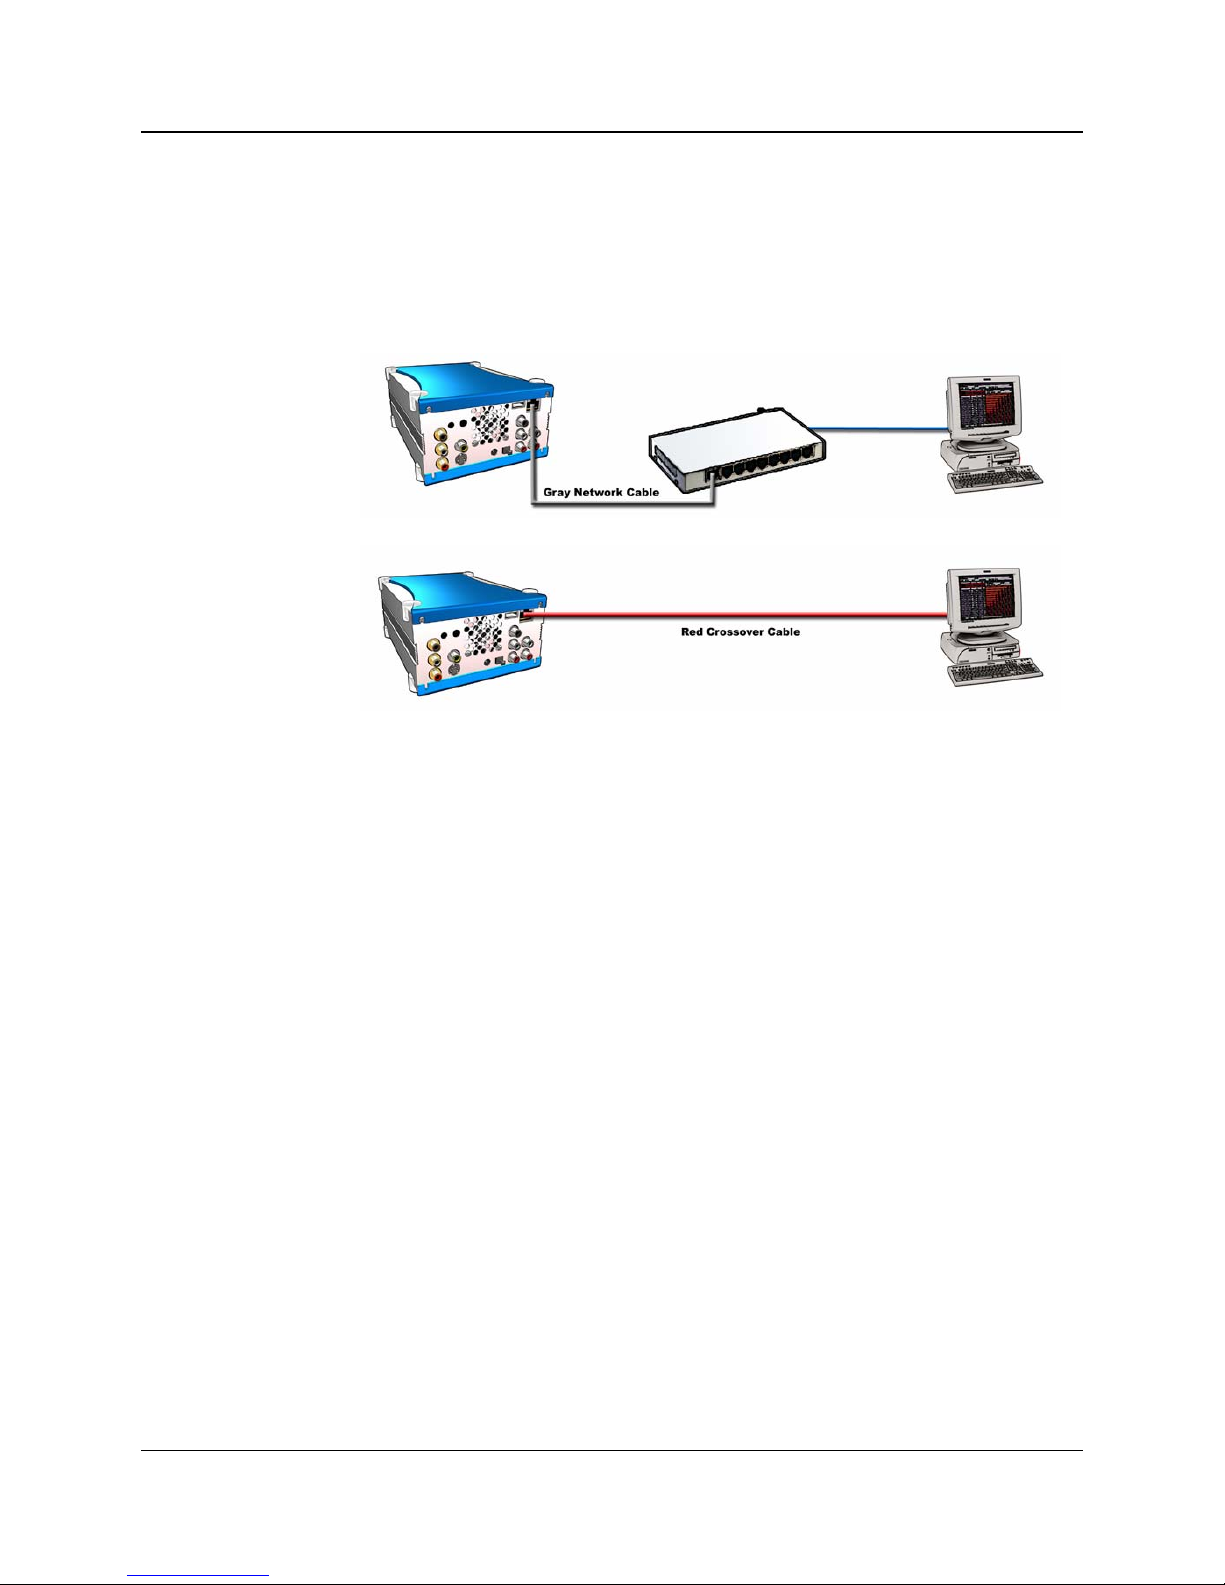
In order to configure, manage and transfer digital data to the On3, it must
be connected to a network through a hub (with a gray network cable),
directly to a PC (with a red crossover cable), or if equipped with the
optional wireless feature, over a wireless network.
Standard network connection.
Peer-to-peer connection.
Depending on your particular network configuration, plug the appropriate
cable into the Ethernet port on the back of the unit.
Connecting Power
Last but not least, be sure to connect the included power cord and
transformer between the On3 unit and a grounded, three-pronged outlet.
FIA On3 and On3-xr User’s Guide
1
Page 17
ON3 SETUP
7
Powering the On3
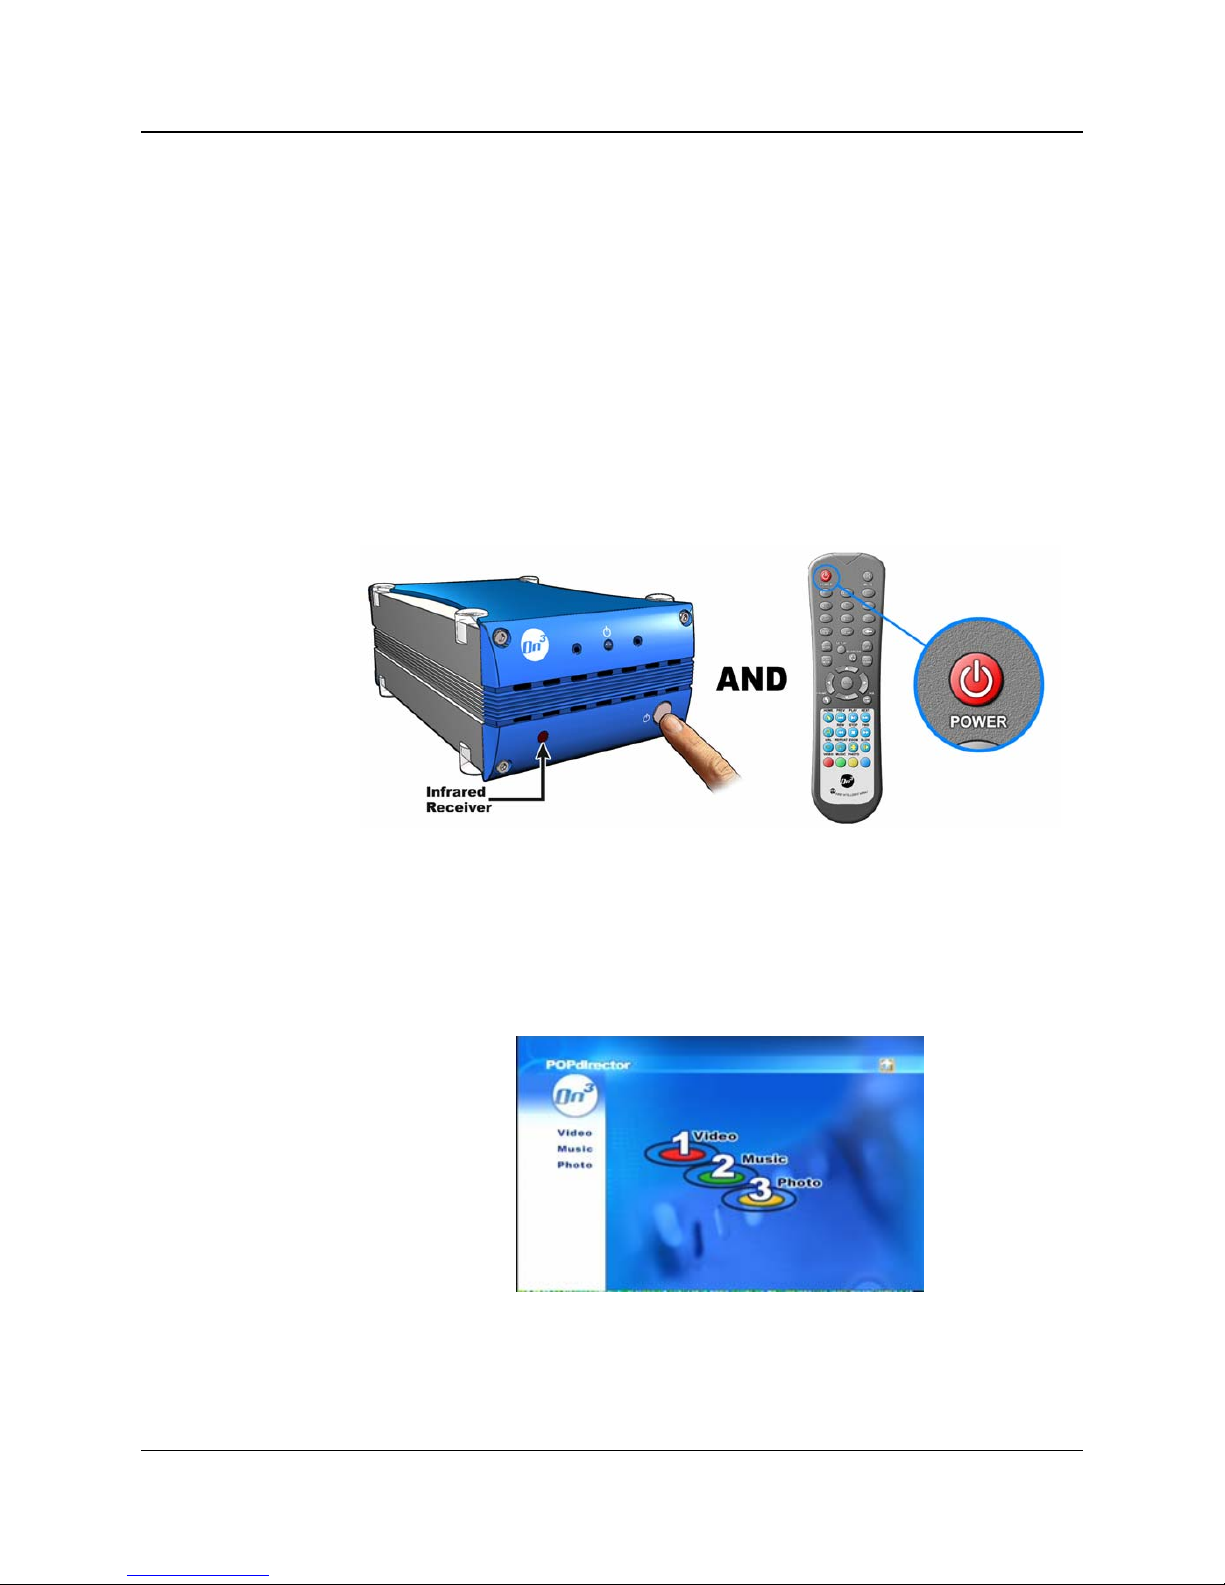
To turn on the On3 Digital Media Player and Library, you must first press
the large power button located on the front of the unit. This applies power
to the internal hard drive initializes the data on the On3. This power button
can remain on at all times.
Using the On3 Remote Control, press the red power button to activate the
internal video processor.
While the On3 unit is powering up, the blue LED will flash. Once the
LED is on steady, the unit is ready to use.
Depending on how you connected the On3 to your video display device, it
may be necessary to switch the video input setting on your display.
Usually, this is a button on either the television’s remote control or front
display labeled “video.”
At this point, your television should display the following menu screen:
FIA On3 and On3-xr User’s Guide
1
Page 18
ON3 SETUP
Configuration
Once the On3 Digital Media Player and Library has been placed, all the
cables attached and powered up, it must be configured to allow digital
media files to be transferred to it.
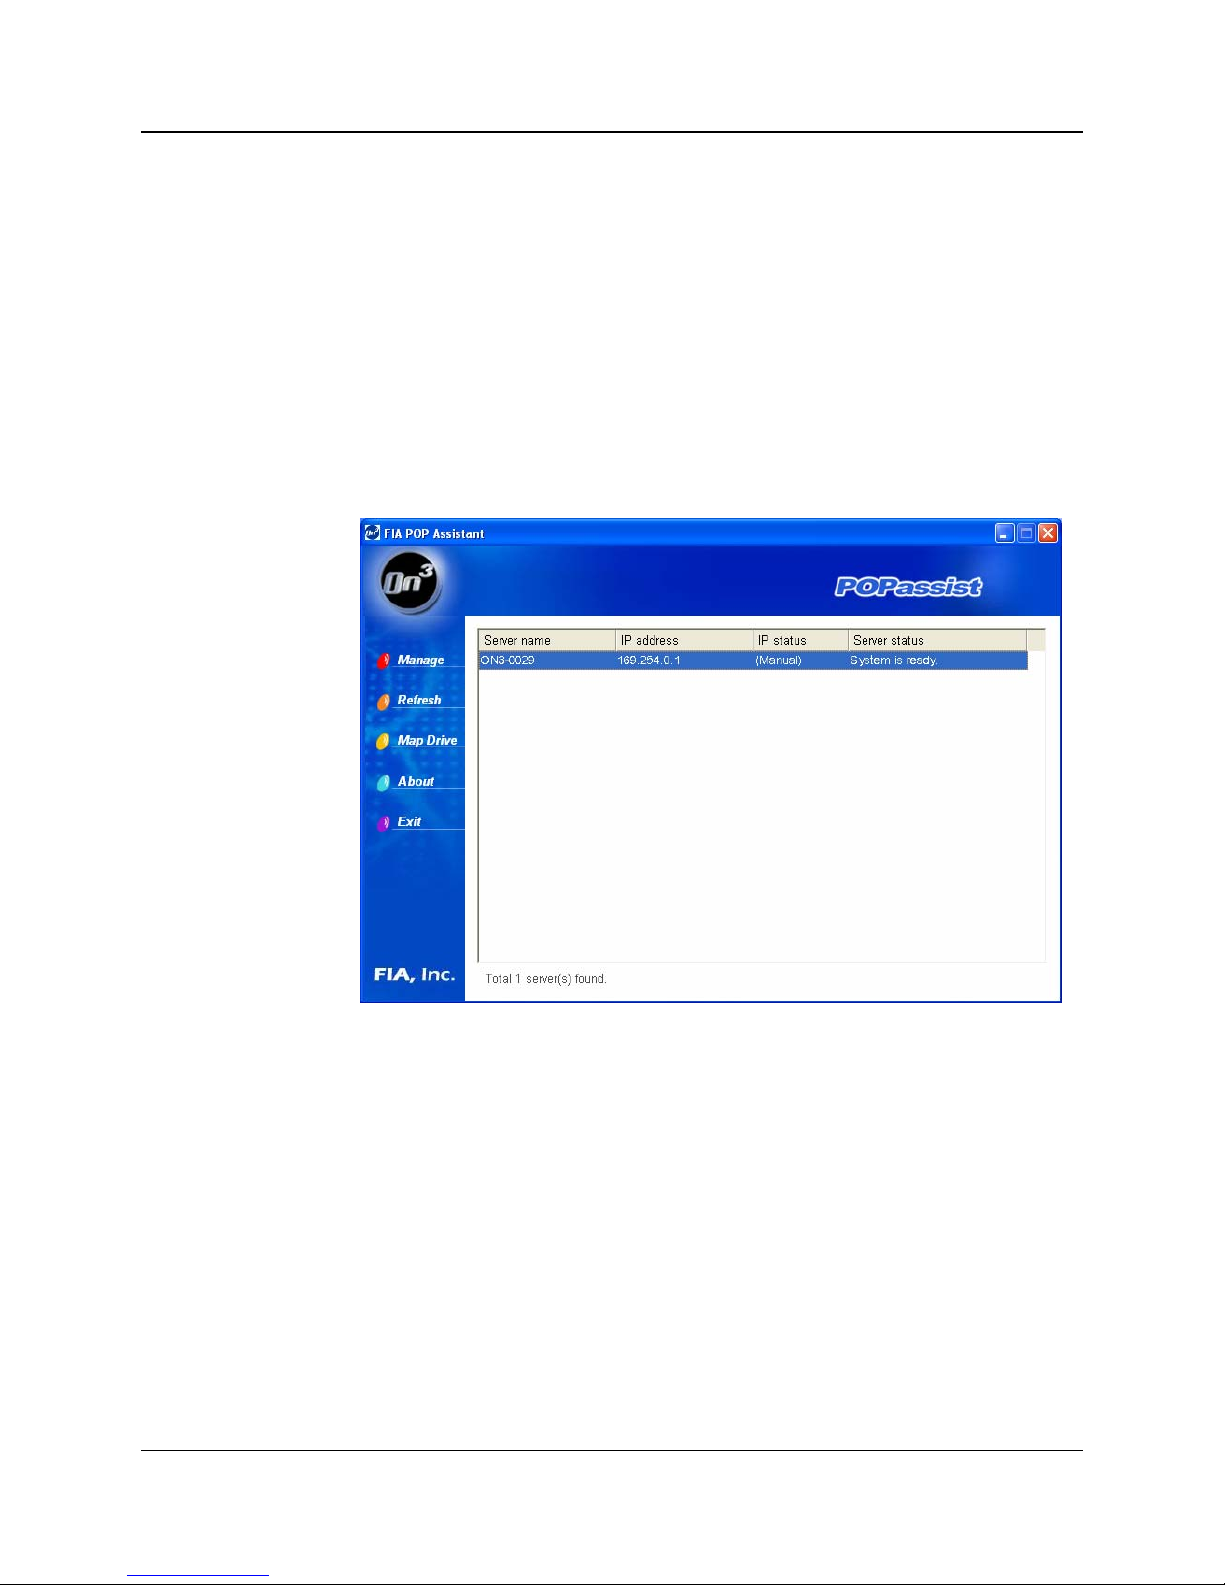
1. Insert the Setup CD into a PC that’s connected directly to the On3
unit or through a home network.
2. The POPassist utility should automatically run and search for the
device.
3. Once the On3 unit has been found, click on the Map Drive button
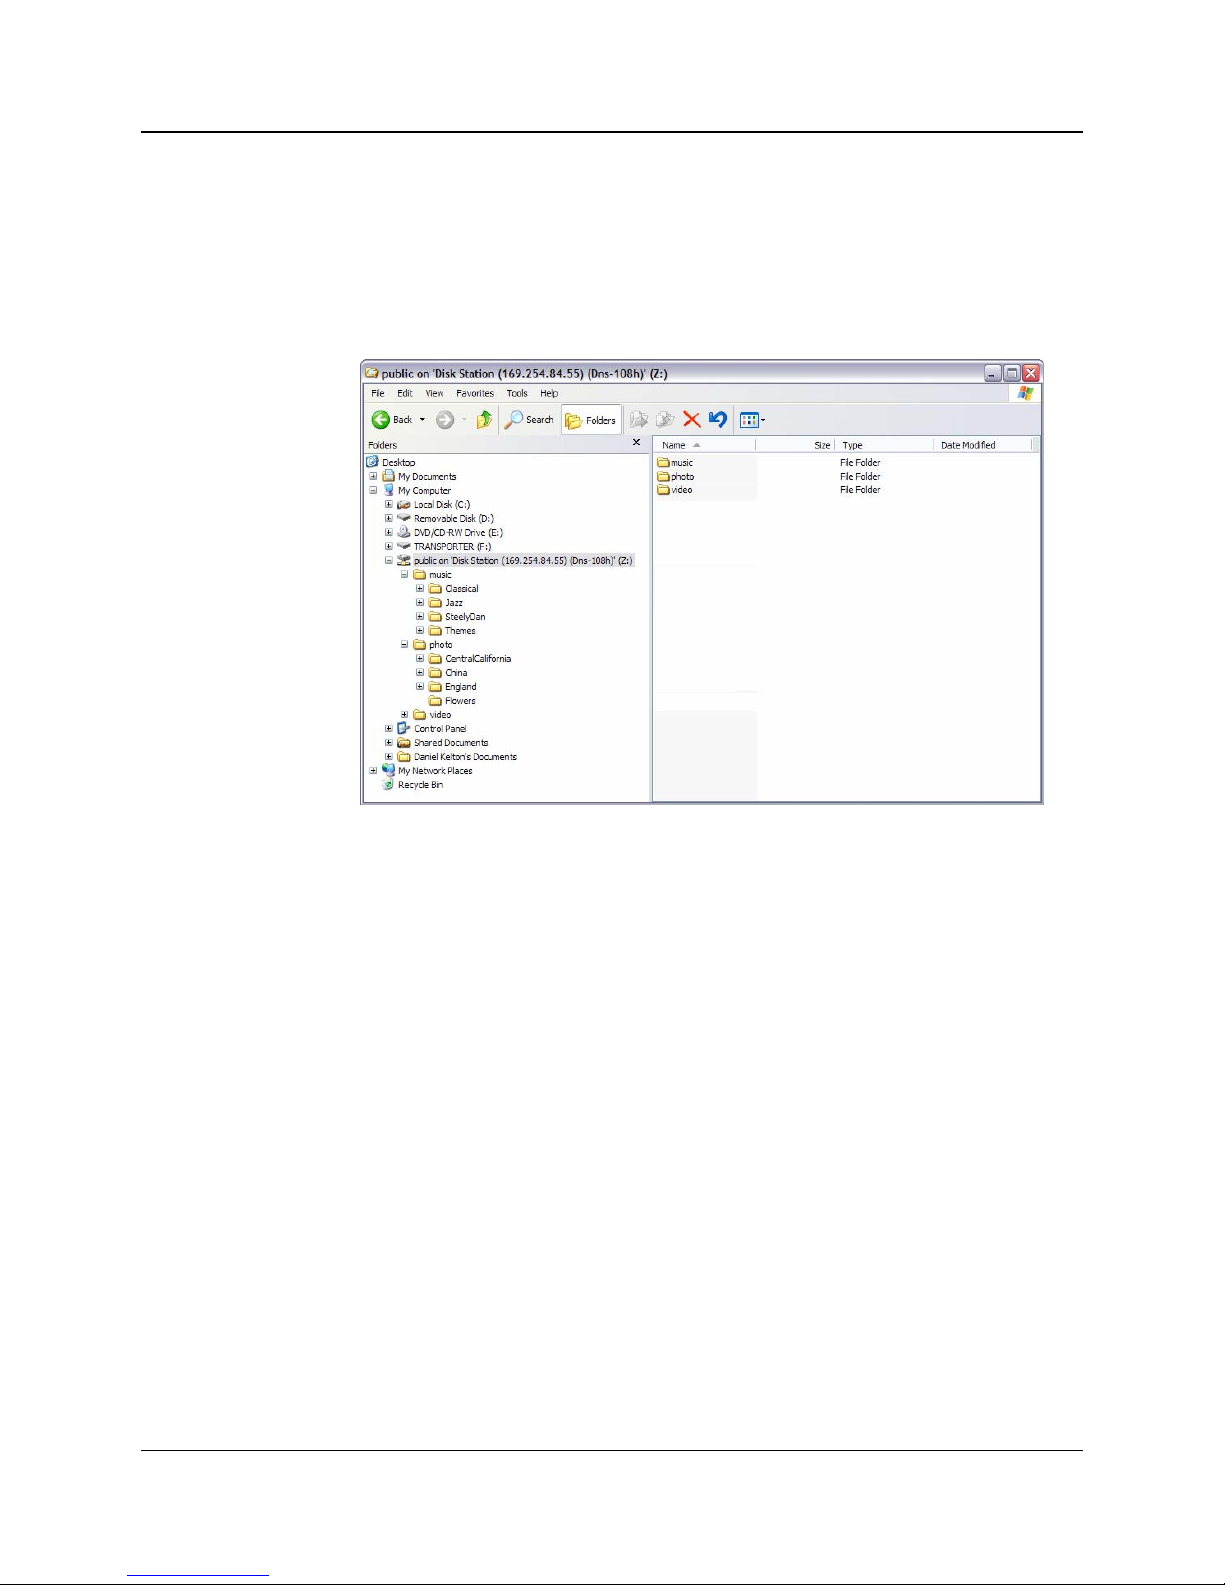
After the On3 Media Server has been assigned a drive letter, it can be
accessed just like any other drive on a network. Digital media can be
copied to it, renamed and arranged as needed.
FIA On3 and On3-xr User’s Guide
POPassist helps your home computer identify the On3 Digital
Media Player and Library and automatically configures it for you.
to assign it a network drive letter.
18
Page 19
ON3 SETUP
Transferring Media to On3
Once the On3 Digital Media Player and Library has been configured and
mapped, media files can be dragged and dropped onto it like any other
device on the network.
Place video files (AVI, MPEG) into the Video folder, music files (MP3,
WMA and WAV) into the Music folder and photos (JPEG, PNG, GIF)
into the Photos folder.
Additional folders can be added under the default folders to further
organize and categorize your media files.
FIA On3 and On3-xr User’s Guide
19
 Loading...