

Page 1
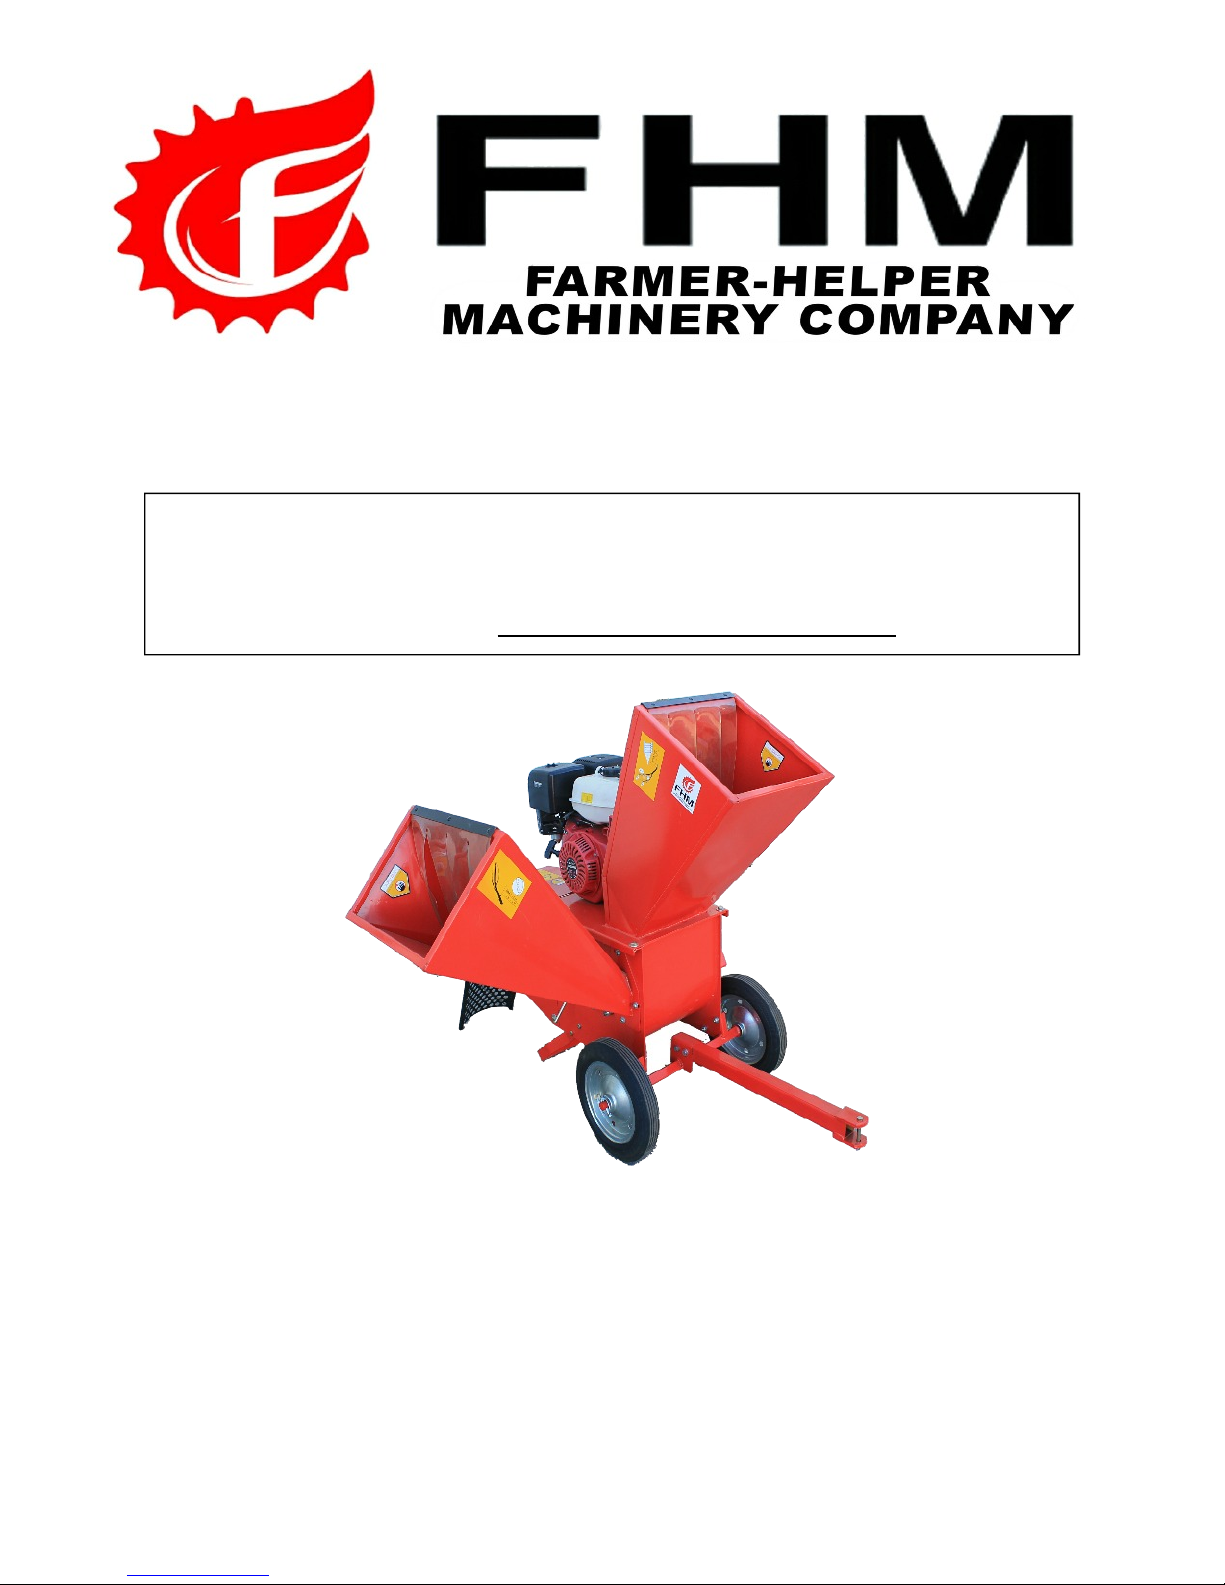
Chipper/Shredder with 2-Way Feed
Owner’s Manual
Chipper/Shredder models: ECO-13
READ SAFETY WARNINGS AND OPERATING INSTRUCTIONS
CAREFULLY SAVE THESE INSTRUCTIONS.
For product questions or service,
or go to www.betstproducts.com
When you call the help-line you will need to have the following
information:
Date of Purchase: _______________________
Location of Purchase: _______________________
Serial #: _______________________
CALL 1-541-895-3083
Page 2
Rugged, Labor and Time Saving Products
PowRkraft ECO-13 Cripper / Shredder 2 Revision 9-19-14
The information and specifications included in this publication were in effect at the time of approval for printing.
This manual contains important safety instructions for Chipper/Shredders
READ SAFETY WARNINGS AND OPERATING INSTRUCTIONS CAREFULLY
SAVE THESE INSTRUCTIONS.
This owner’s manual is considered a permanent part of the chipper/shredder and
should remain with the chipper/shredder if resold.
Page 3

Rugged, Labor and Time Saving Products
PowRkraft ECO-13 Cripper / Shredder 3 Revision 9-19-14
Contents
Warnings ............................................................................ 1
Product Specifications........................................................ 2
Component Identification ................................................... 3
Missing Parts Order Form…………………………………….4
Safety Information .............................................................. 5
Operating Guidelines ......................................................... 6
Assembly............................................................................ 7
Important Engine Information............................................. 8
Operating Instructions ........................................................ 9
Maintenance & Storage.................................................... 10
Troubleshooting ............................................................... 12
Limited Warranty & Service.............................................. 13
Page 4
Rugged, Labor and Time Saving Products
PowRkraft ECO-13 Cripper / Shredder 4 Revision 9-19-14
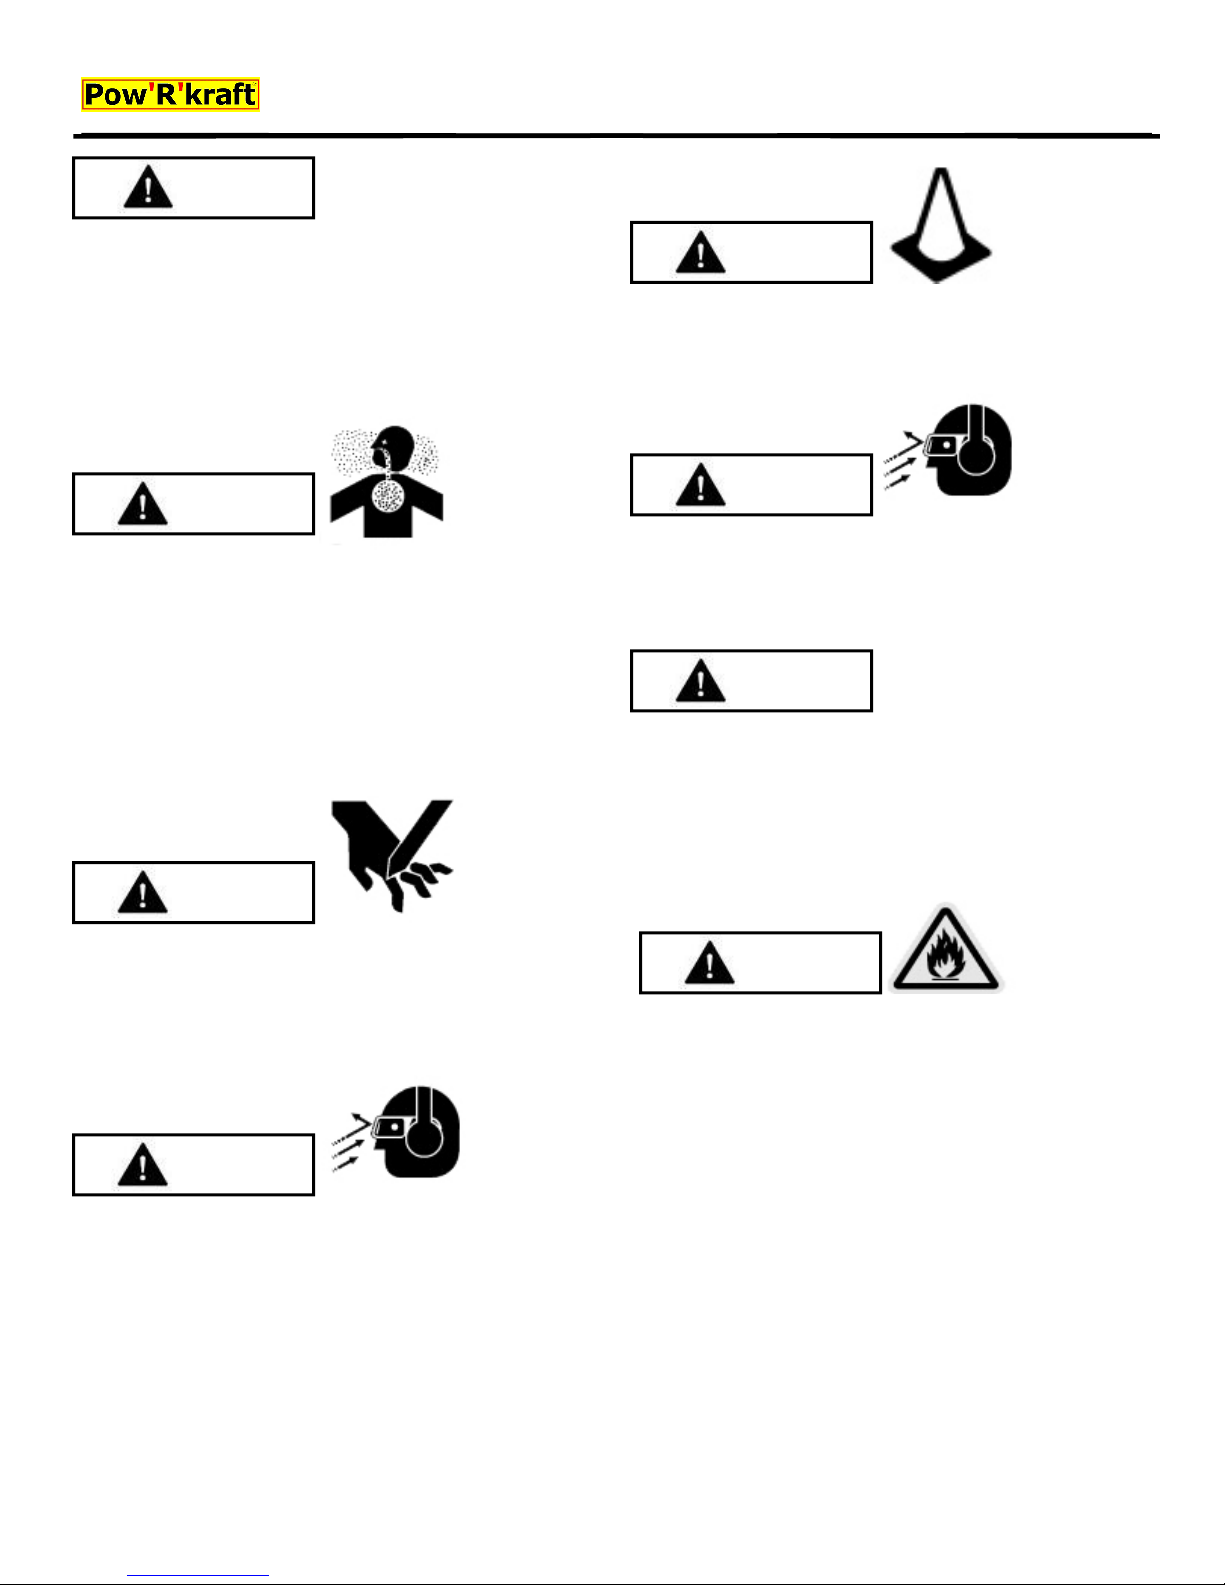
WARNING
Warnings
This symbol indicates important safety instructions
which, if not followed, could endanger personal safety
and/or property. Read and follow all instructions in this
manual before attempting to operate this machine.
Failure to comply with these instructions may result in
personal injury. When you see this symbol—heed its
warning.
WARNING
CARBON MONOXIDE GAS
Exhaust contains poisonous carbon monoxide, a colorless
and odorless gas. Breathing exhaust can cause loss of
consciousness and may lead to death.
The Engine Exhaust from this product contains chemicals
known to the State of California to cause cancer, birth
defects or other reproductive harm.
WARNING
Keep bystanders, helpers, pets, and children at least 75
feet from the machine while it is in operation. Stop
machine if anyone enters the area.
WARNING
Wear hearing and eye protection while operating this
machine or if you are within 75 feet of this machine.
Thrown objects which ricochet can cause serious injury to
the eyes.
WARNING
Never wear loose clothes or long jewelry and keep your
long hair under a headgear when operating machine.
Never operate this machine in bare feet or sandals.
Never use machine on a slope or hard smooth floor.
WARNING
This machine has a rotating cutting blade capable of
amputating hands and feet and throwing objects. Keep
hands and feet out of openings while machine is running.
Failure to observe these safety instructions could result in
serious injury or death.
WARNING
WARNING: Do not operate this machine unless the chute
deflector has been installed properly.
WARNING
Gasoline is extremely flammable and the vapors are
explosive. Serious personal injury can occur when
gasoline is spilled on you or your clothing, which can
ignite. In the event of a gasoline spill, wash your skin and
change clothes immediately.
WARNING: Do not deposit branches larger than 3” x 4”
inches in diameter (depending on Model #, see Model
Specifications table pg 2) in the side chute. Do not
deposit branches larger than 1/4 inches into the funnel.
DO NOT force the branches into this machine, allow the
machine to automatically feed through.
Page 5
PowRkraft ECO-13 Cripper / Shredder 5 Revision 9-19-14
Training
Rugged, Labor and Time Saving Products
Warnings
1. Read, understand, and follow all instructions on the
machine and in the manual) before attempting to
assemble and operate. Keep this manual in a safe
place for future and regular reference and for
ordering replacement parts.
2. Be familiar with all controls and their proper
operation. Know how to stop the machine and
disengage them quickly.
3. Never allow children under 18 years old to operate
this machine. Children 18 years old and over should
read and understand the operation instructions and
safety rules in this manual and should be trained and
supervised by a parent.
4. Never allow adults to operate this machine without
proper instruction.
5. Keep bystanders, helpers, pets, and children at least
75 feet from the machine while it is in operation. Stop
machine if anyone enters the area.
6. Never run an engine indoors or in a poorly ventilated
area. Engine exhaust contains carbon monoxide, an
odorless and deadly gas.
7. Do not put hands or feet near rotating parts or in the
feeding chambers and discharge opening. Contact
with the rotating impeller can amputate fingers,
hands, and feet.
8. Never attempt to unclog either the feed intake or
discharge opening, remove or empty bag, or inspect
and repair the machine while the engine is running.
Shut the engine off and wait until all moving parts
have come to a complete stop. Disconnect the spark
plug wire and ground it against the engine.
NOTE:
The operator or
user is
responsible for
accidents or
hazards
occurring to other
people, their
property, and
themselves.
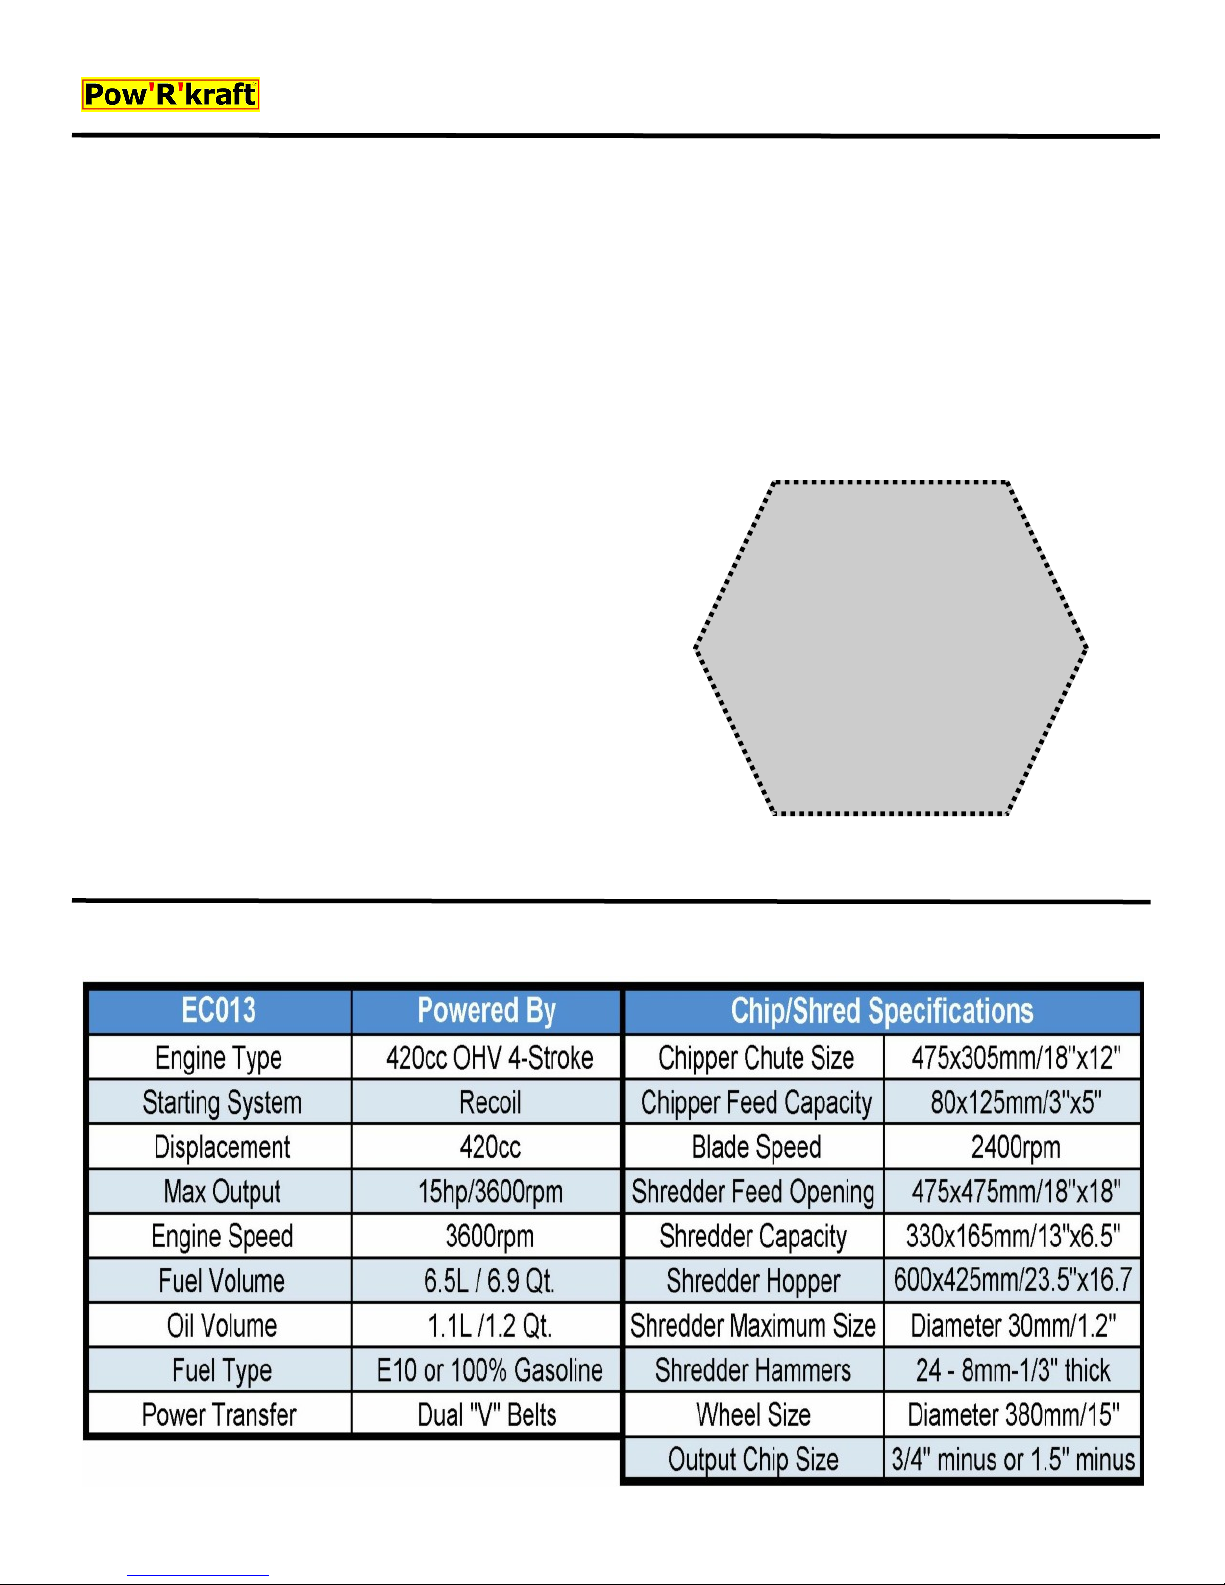
Product Specifications
Chipper/Shredder Model # Specifications
Page 6
PowRkraft ECO-13 Cripper / Shredder 6 Revision 9-19-14
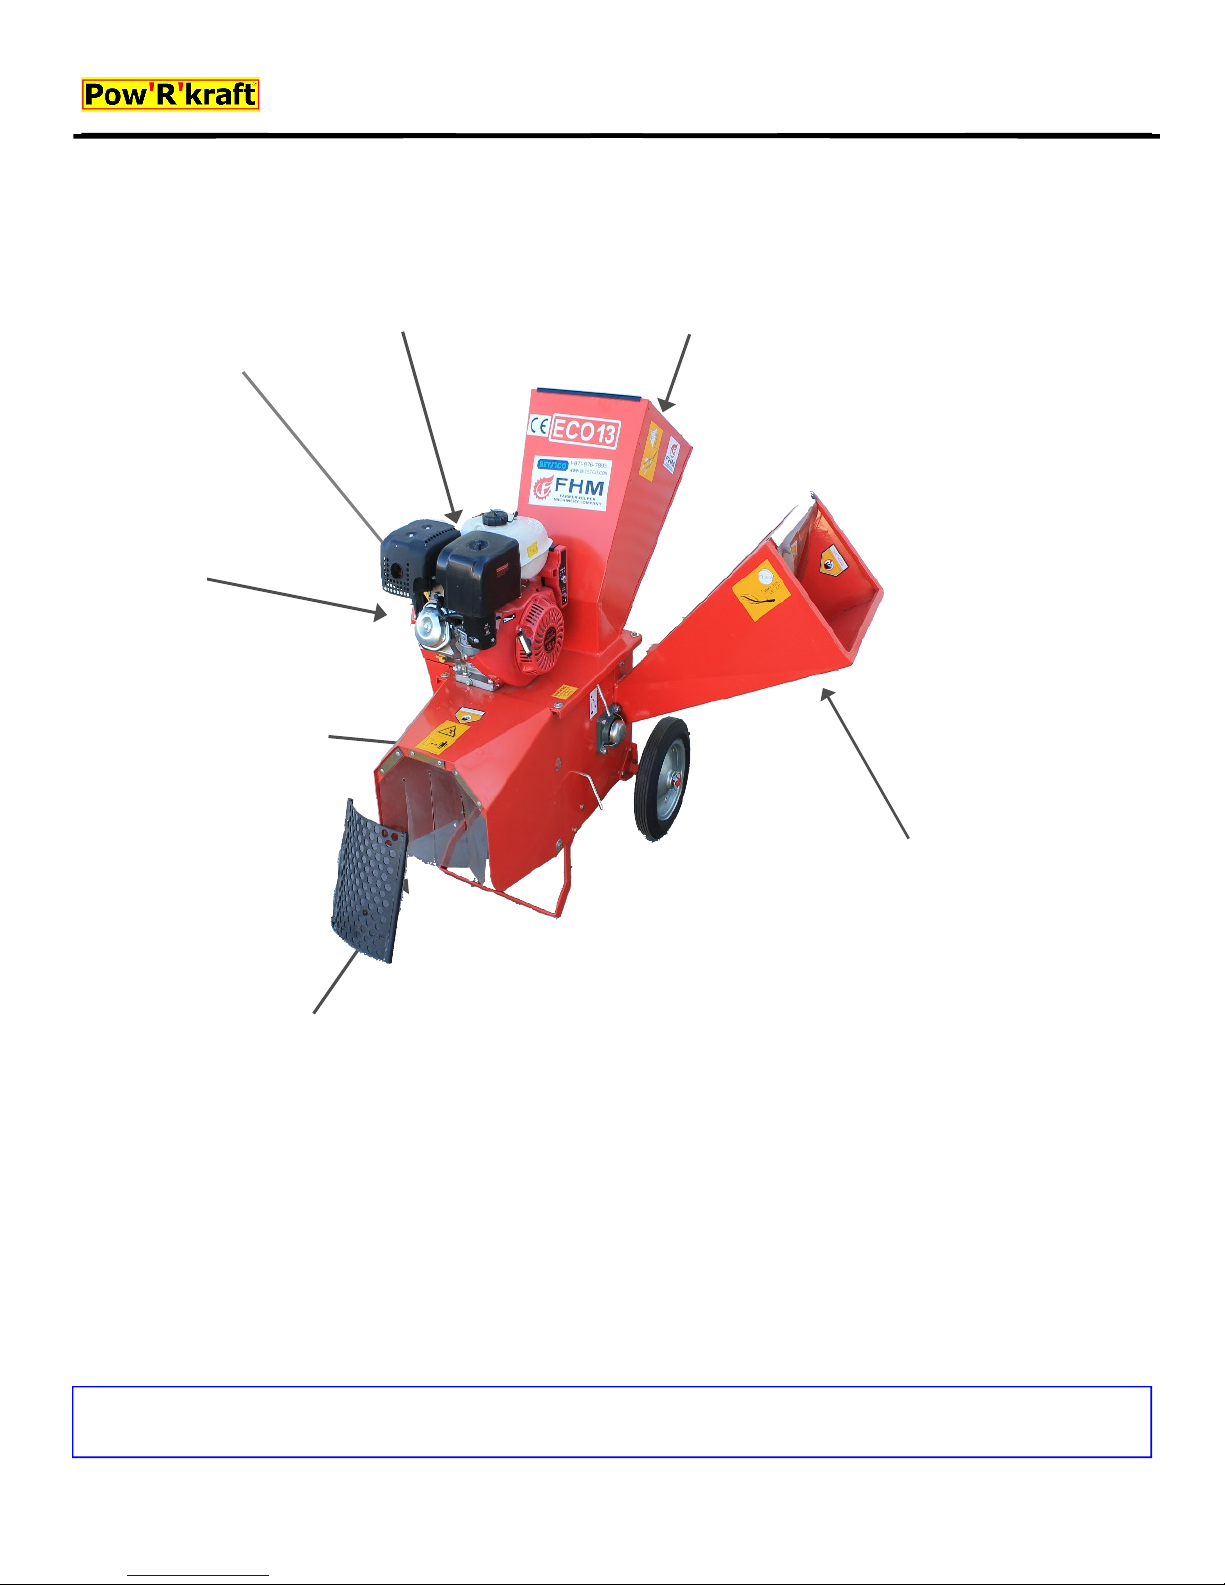
Choke Lever
Move the choke
lever to the CHOKE
position to prepare a
cold engine for
starting.
Fuel Valve
Use the fuel valve
to turn fuel on and
off to engine.
Rugged, Labor and Time Saving Products
Component Identification
Fuel Tank
Use regular unleaded fuel. Always
leave about 1” of air gap at the top
of the tank for fuel expansion to
prevent seepage or spills.
Shredder Funnel
Use the chipper funnel to
feed leaves or twigs up
to 1” diameter
Blade Access Hatch
Remove the blade access
hatch to clean, remove, or
sharpen the chipper/
shredder blade.
Discharge Chute
Chipped materials are
discharged through this
opening. It may be left
open or the chipper
collection bag can be
attached to the chute.
Chipper Chute
Use the chipper chute to
feed longer and/or thicker
pieces of yard waste into the
impeller for chipping.
Depending on the model #,
the chipper/shredder can cut
up to a 3” x 4” in diameter
piece of wood.
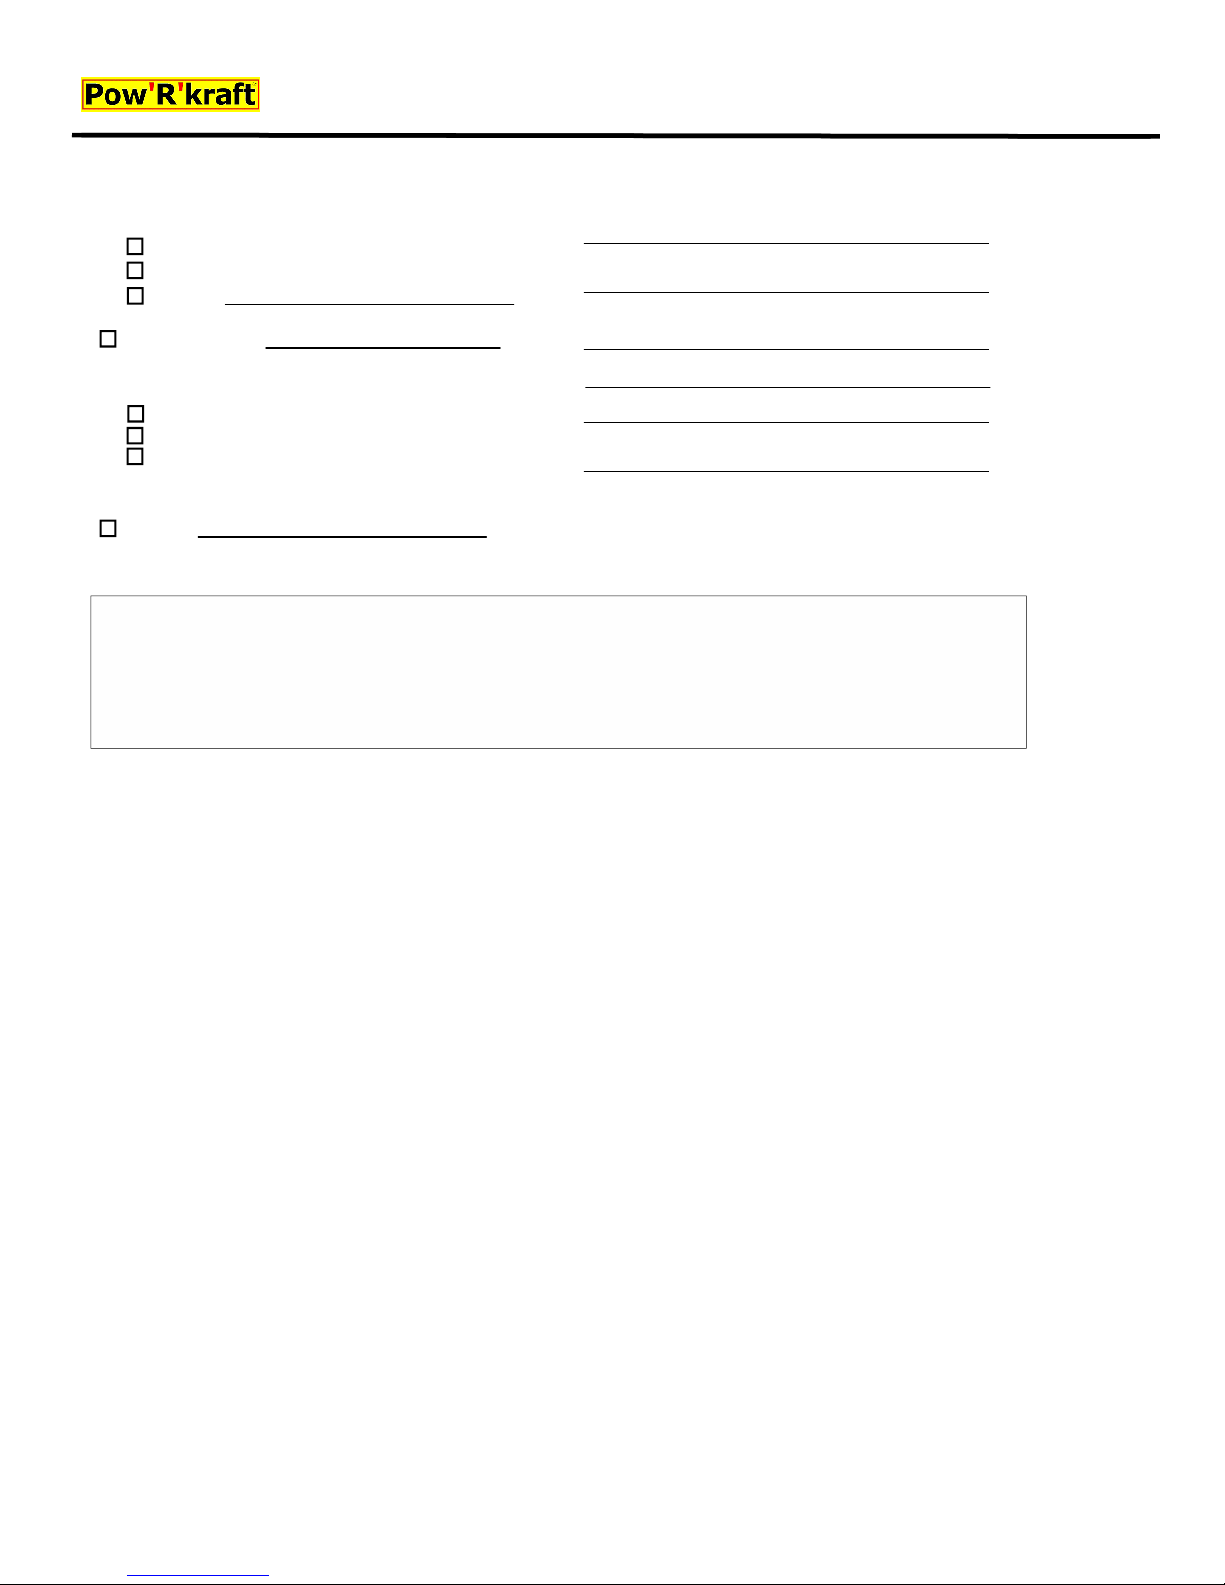
If you are missing any parts, please complete the form on the next page and fax it back to us at:541-895-2756
Page 7
Rugged, Labor and Time Saving Products
PowRkraft ECO-13 Cripper / Shredder 7 Revision 9-19-14
Please indicate the part that you are missing:
Missing Parts Request Form
Hardware bag
Wheel Kit
Other
Date of purchase
Model #:
ECO-13
Serial #:
Comments:
Name
Address
Phone
Email
IMPORTANT: Please include your receipt. Without a receipt, your
order will be delayed. You may also email us at:
[email protected]. If emailing, please scan in
your proof of purchase.
Page 8

Rugged, Labor and Time Saving Products
PowRkraft ECO-13 Cripper / Shredder 8 Revision 9-19-14
Safety Information
Your Responsibility
Restrict the use of this chipper/shredder to persons who read, understand and follow the warnings
and instructions in this manual and on the machine.
Note: Not all safety labels shown may apply to your chipper/shredder.
Preparation
1. Thoroughly inspect the area where the chipper/
shredder is to be used. Remove all rocks, bottles,
cans, or other foreign objects which could be picked up
or thrown and cause personal injury or damage to the
machine.
2. Avoid discharging chipped material out of the
discharge chute against a wall or on asphalt, concrete,
or other hard surfaces as material being ejected could
ricochet, causing injury to you or bystanders.
3. Always wear safety glasses or safety goggles to
protect eyes during operation or while performing an
adjustment or repair.
4. Wear sturdy, rough-soled work shoes and close fitting
pants and shirts. Loose fitting clothing or jewelry can
be caught in movable parts. Wear leather work gloves
when feeding material in the chipper chute.
5. Before starting the engine, check bolts and screws for
proper tightness to be sure the machine is in safe
working condition. Also, visually inspect the chipper
shredder at frequent intervals for any damage.
6. Maintain or replace safety and instructions labels, as
necessary.
7. To avoid personal injury or property damage use
extreme care in handling gasoline.
a. Use only an approved gasoline container.
b. Extinguish all cigarettes, cigars, pipes, and other
sources of ignition.
c. Never fuel machine indoors.
d. Never remove gas cap or add fuel while the engine
is hot or running.
e. Allow engine to cool at least two minutes before
refueling.
f. Never over fill fuel tank. Leave at least 1/2 inch
open below bottom of filler neck to provide space
for fuel expansion.
g. Tighten gasoline cap securely.
h. If gasoline is spilled, wipe it off the engine and
equipment. Move machine to another area and
wait 5 minutes before starting the engine.
i. Never store machine or fuel container inside near
an open flame, spark, or pilot light (e.g., furnace,
water heater, space heater, clothes dryer, etc.).
j. To reduce the fire hazard, keep machine free of
grass, leaves, or other debris build-up. Clean up
oil or fuel spills and remove any fuel soaked
debris.
k. Allow machine to cool at least 5 minutes before
storing.
8. Never attempt to make any adjustments while the
engine (motor) is running (except where specifically
recommended by the manufacturer).
Safety Label Locations
These labels warn you of potential hazards that can
cause serious injury. Read them carefully. If a label
comes off or becomes hard to read, contact your
PowRkraft for a replacement.
Safety Information
PowRkraft Outdoor Power products are designed to give
safe and dependable service if operated according to
instructions. Read and understand this owner’s manual
before operating your power equipment.
Operator Responsibility
Know how to stop your power equipment quickly in case
of emergency. Understand the use of all controls and
connections. Be sure that anyone who operates this
power equipment receives proper instruction. Do not let
children operate the power equipment without parental
supervision.
Page 9
Rugged, Labor and Time Saving Products
PowRkraft ECO-13 Cripper / Shredder 9 Revision 9-19-14
READ THESE OPERATING GUIDELINES
BEFORE YOU PROCEED ANY FURTHER
1. Do not put hands and feet near rotating parts or in the
feeding chambers and discharge opening. Contact with
the rotating impeller can amputate fingers, hands, and
feet.
2. Before starting the machine, make sure the chipper
chute, feed intake, and cutting chamber are empty and
free of all debris.
3. Thoroughly inspect all material to be shredded and
remove any metal, rocks, bottles, cans, or other foreign
objects which could cause personal injury or damage
to the machine.
4. If it becomes necessary to push material through the
shredder hopper, use a small diameter stick. Do not
use your hands or feet.
5. If the impeller strikes a foreign object or if your
machine should start making an unusual noise or
vibration, immediately shut the engine off. Allow the
impeller to come to a complete stop. Disconnect the
spark plug wire, ground it against the engine and
perform the following steps:
a. Inspect for damage.
b. Repair or replace any damaged parts.
c. Check for any loose parts and tighten to assure
continued safe operation.
Operating Guidelines
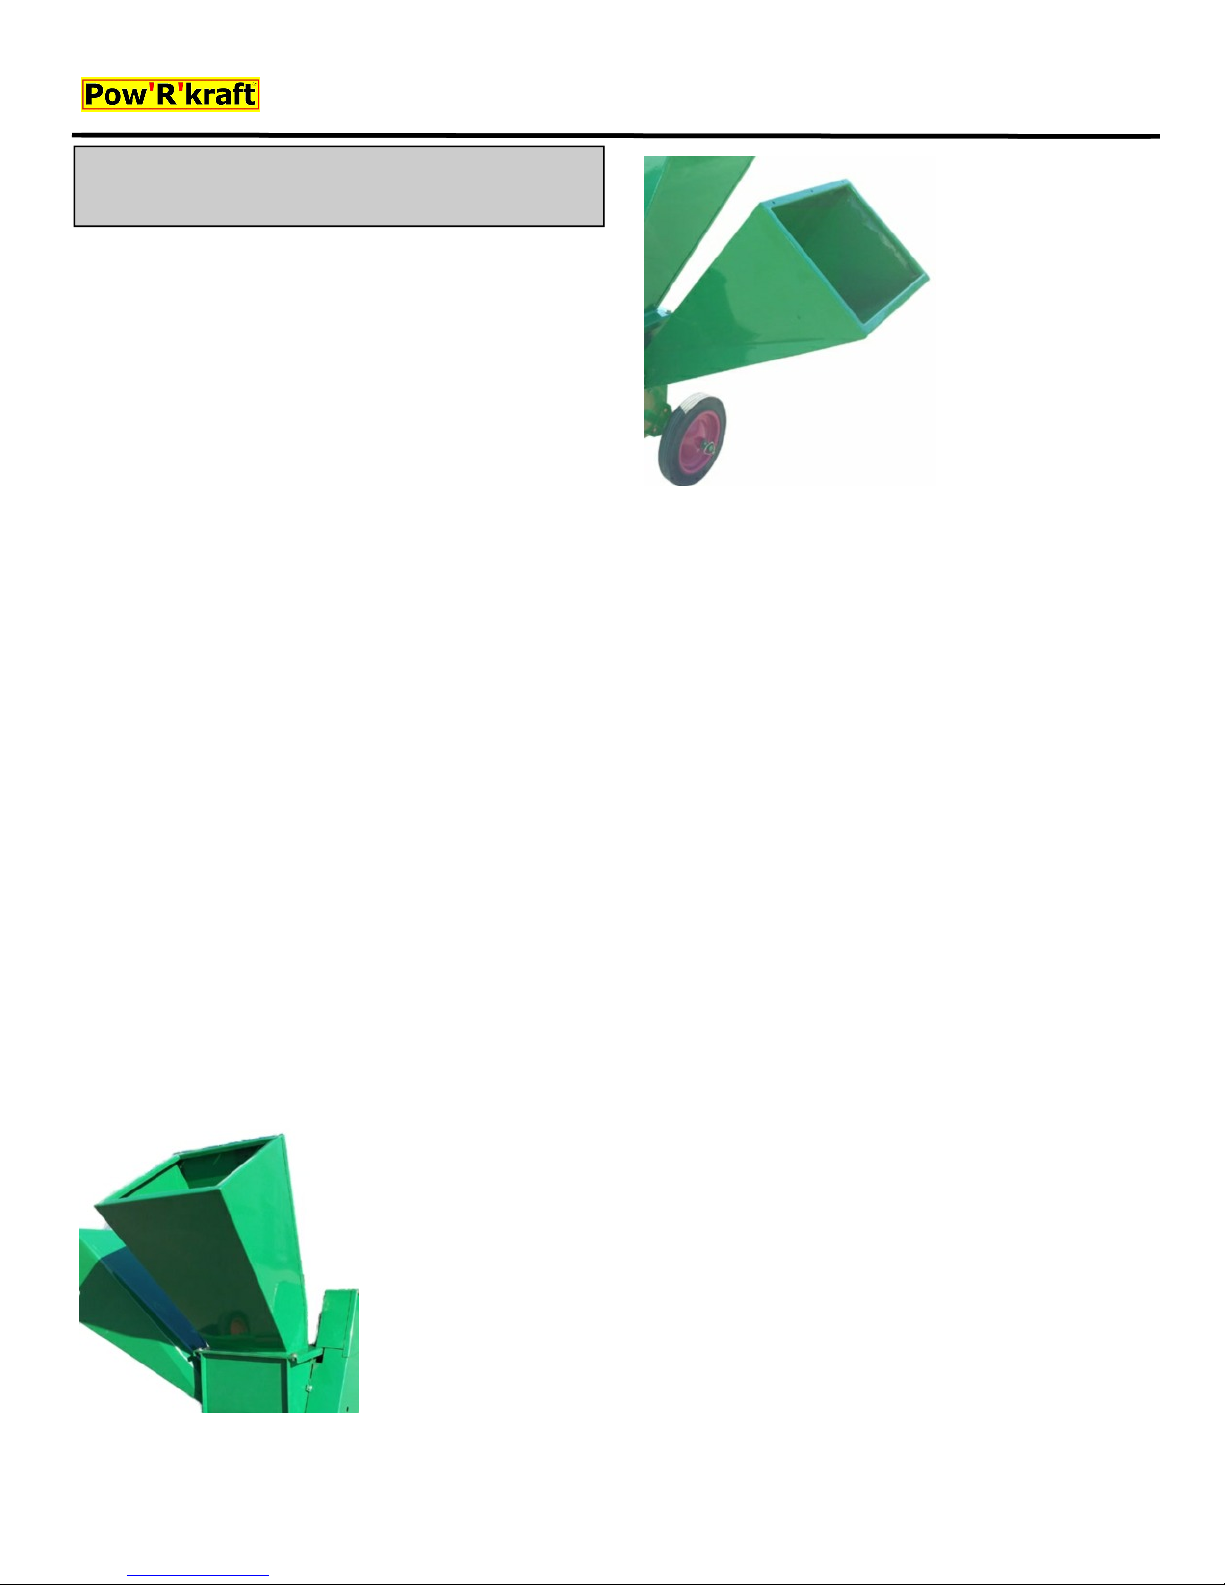
The side chute is for
longer and/or thicker
pieces of yard waste.
Depending on your
model, you may cut up
to a 3” x 5” in piece of
wood.
8. Never attempt to unclog either the feed intake or
discharge opening while the engine is running. Shut
the engine off, wait until all moving parts have
stopped, disconnect the spark plug wire and ground it
against the engine before clearing debris.
9. Never operate without the shredder funnel, chipper
chute, or discharge chute properly attached to the
machine. Never empty or change discharge bag
while the engine is running. Stop the engine when
leaving the operating position.
10. Keep all guards, deflectors and safety devices in
place and operating properly.
11. Keep your face and body back and to the side of the
chipper chute while feeding material into the machine
to avoid accidental kickback injuries.
6. Do not allow an accumulation of processed material to
build up in the discharge area. This can prevent proper
discharge and result in kickback of material through
the feed opening.
7. Do not attempt to shred or chip material larger than
specified on the machine or in this manual. Personal
injury or machine damage could result.
The upper chute on the
chipper/shredder is for
Leaves and twigs only.
Do not use the funnel
for vines or long
branches such as
Weeping Willows as
they may clog the flails.
12. Never operate this machine without good visibility or
light.
13. Do not operate on a non-level surface.
14. Do not operate in a confined space.
15. Do not operate this machine while under the
influence of alcohol or drugs.
16. Muffler and engine become hot and can cause a
burn. Do not touch.
17. Never pick up or carry machine while the engine is
running.
18. Do not leave this machine running while unattended
19. Keep children, bystanders, and pets 75 feet away.
20. Use only manufacturer approved accessories/
attachments.
Page 10

Rugged, Labor and Time Saving Products
PowRkraft ECO-13 Cripper / Shredder 10 Revision 9-19-14
Required tools:
Approximate assembly time:
1. Remove the chipper from its carton.
Remove staples, break glue on top flaps, or cut tape at
carton end and peel along top flap to open carton.
2. Verify all parts are in the chipper
carton.
· Chipper Chute
· Chipper engine
and box
assembly
(pre-assembled)
· Chipper Chute
· Hardware Bag
· Trailer hitch and
funnel handles
packaged
together
Assembly Instructions
3. Disconnect the spark plug wire.
Before setting up your chipper/shredder, disconnect the
spark plug wire from the spark plug and ground against
the engine to prevent inadvertent starting. This step
should be taken as a precaution whenever you are
working on this machine.
4.
Page 11
Rugged, Labor and Time Saving Products
PowRkraft ECO-13 Cripper / Shredder 11 Revision 9-19-14
Engine Only—See Manufacturer’s manual for engine
NOTE: The chipper/shredder operates most
efficiently at the factory set engine speed of 3600
RPM. The speed is controlled by the governor,
and the throttle setting should not be adjusted.
Do not attempt to adjust the speed of the engine.
Emission Control System Information
The U.S. and California Clean Air Acts
EPA and California regulations require all manufacturers
to furnish written instructions describing the operation and
maintenance of emission control systems. The following
instructions and procedures must be followed in order to
keep the emissions from your engine within the
emission standards.
Important Engine Information
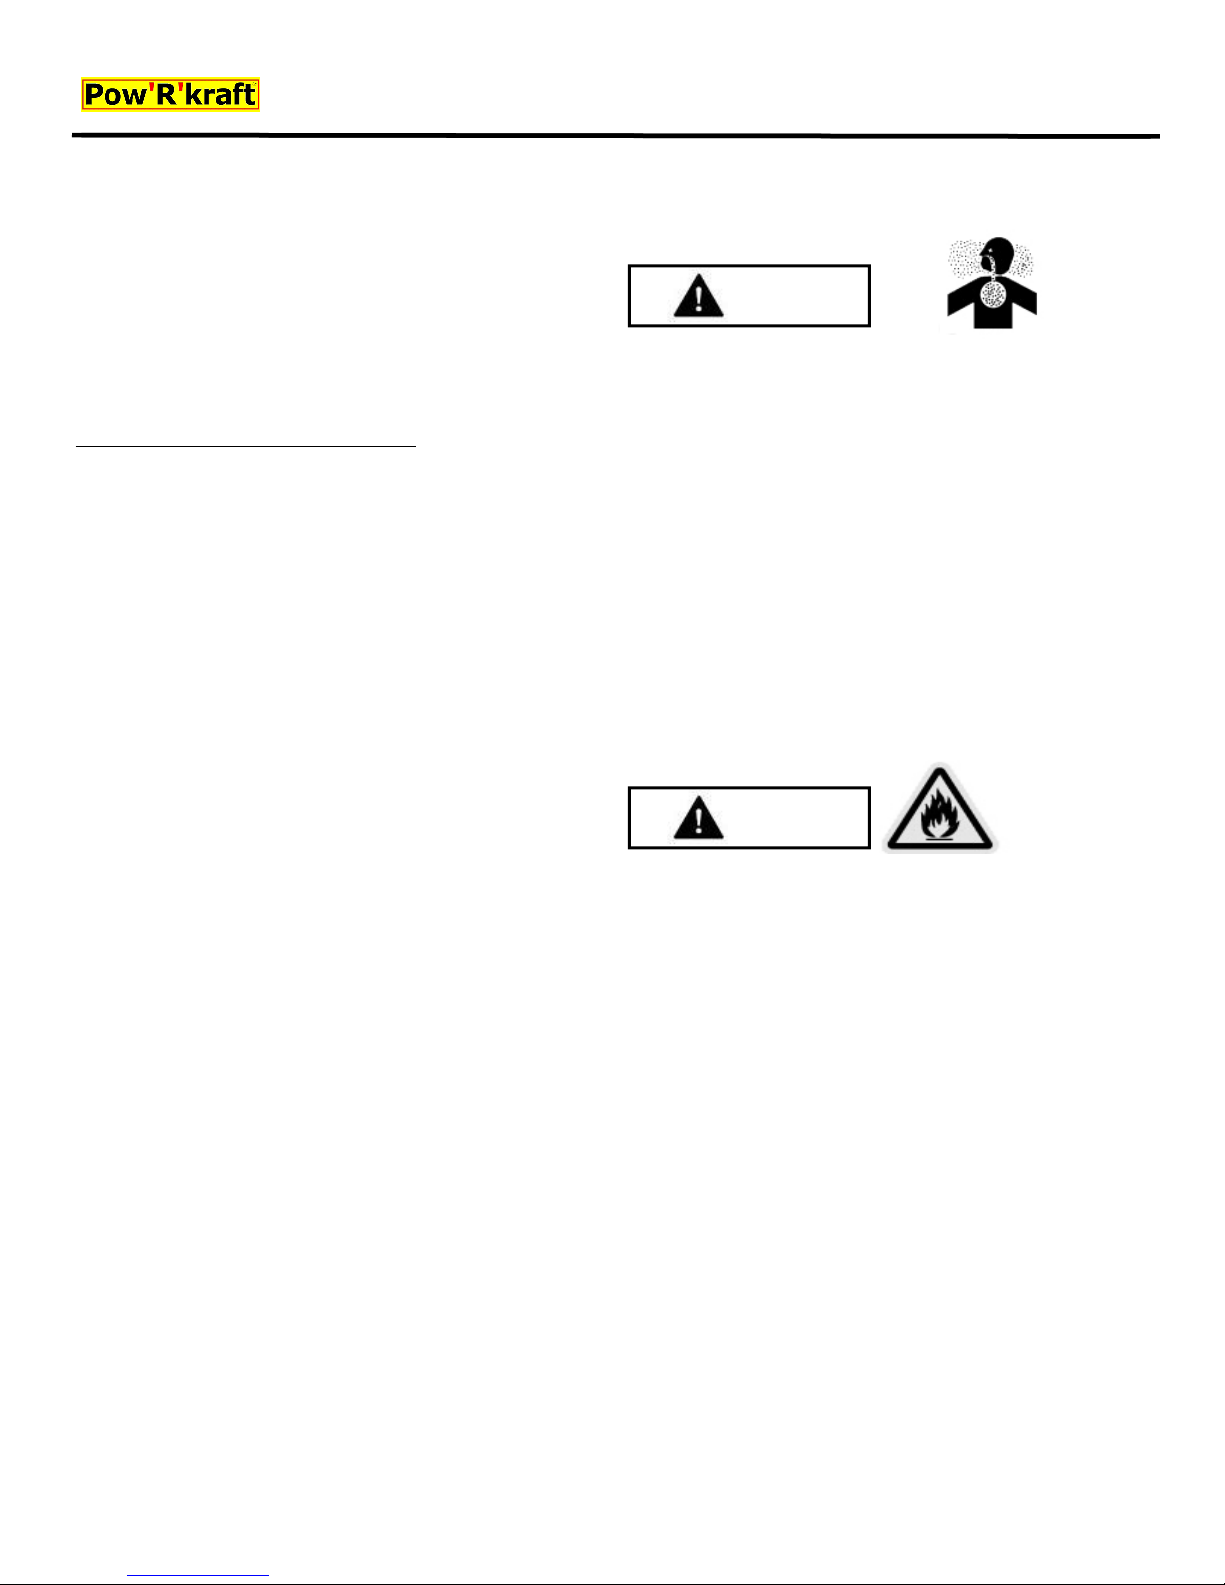
WARNING
Carbon Monoxide Gas
Exhaust contains poisonous carbon monoxide, a
colorless and odorless gas. Breathing exhaust can cause
loss of consciousness and may lead to death. To keep
exhaust gas from accumulating, DO NOT use this
product in a garage, basement, crawlspace, enclosed
shed, or any other area without adequate ventilation. DO
NOT use this equipment near ventilation ducts or open
windows that may allow exhaust gasses to enter your
home or business. ONLY operate this product outdoors.
The emission control systems on your engine were
designed, built, and certified to conform with EPA and
California emission regulations.
Maintenance, replacement, or repair of the emission
control devices and systems may be performed by any
engine repair provider, using parts that are ‘‘certified to
EPA standards.
Farmer-Helper parts whenever you have maintenance
done. These original-design replacement parts are
manufactured to the same standards as the original parts,
so you can be confident of their performance.
The use of aftermarket replacement parts, not of the
original design and quality, may impair the effectiveness of
your emission control system. A manufacturer of an
aftermarket part assumes the responsibility that the part
will not adversely affect emission control performance and
must certify that use of the part will comply with emission
regulations.
In the State of California a spark arrestor is required by
law. Other states may have similar laws. Federal laws
apply on all federal lands. If you equip the muffler with a
spark arrestor, it must be maintained in effective working
order.
We recommend the use of genuine
The engine exhaust from this product and other
components contain chemicals known to the State of
California to cause cancer, birth defects or other
reproductive harm.
WARNING
Fire and Burn Hazards
The exhaust system gets hot enough to ignite some
materials.
· Keep the power equipment at least 3 feet (1 meter)
away from buildings and other equipment during
operation.
· Do not enclose this product in any structure.
· Do not smoke when refueling.
· Keep flammable materials away.
· The muffler becomes very hot during operation and
remains hot for a while after stopping the engine. Be
careful not to touch the muffler while it is hot.
· Let the engine cool before storing.
· Refuel in a well ventilated area with the engine
stopped.
· Fuel vapors are extremely flammable and may
ignite after the engine has started. Make sure that
any spilled fuel has been wiped up before starting
the engine.
Page 12
Rugged, Labor and Time Saving Products
PowRkraft ECO-13 Cripper / Shredder 12 Revision 9-19-14
DANGER
This machine was built to be operated according to the
rules for safe operation in this manual. As with any type of
power equipment, carelessness or error on the part of the
operator can result in serious injury.
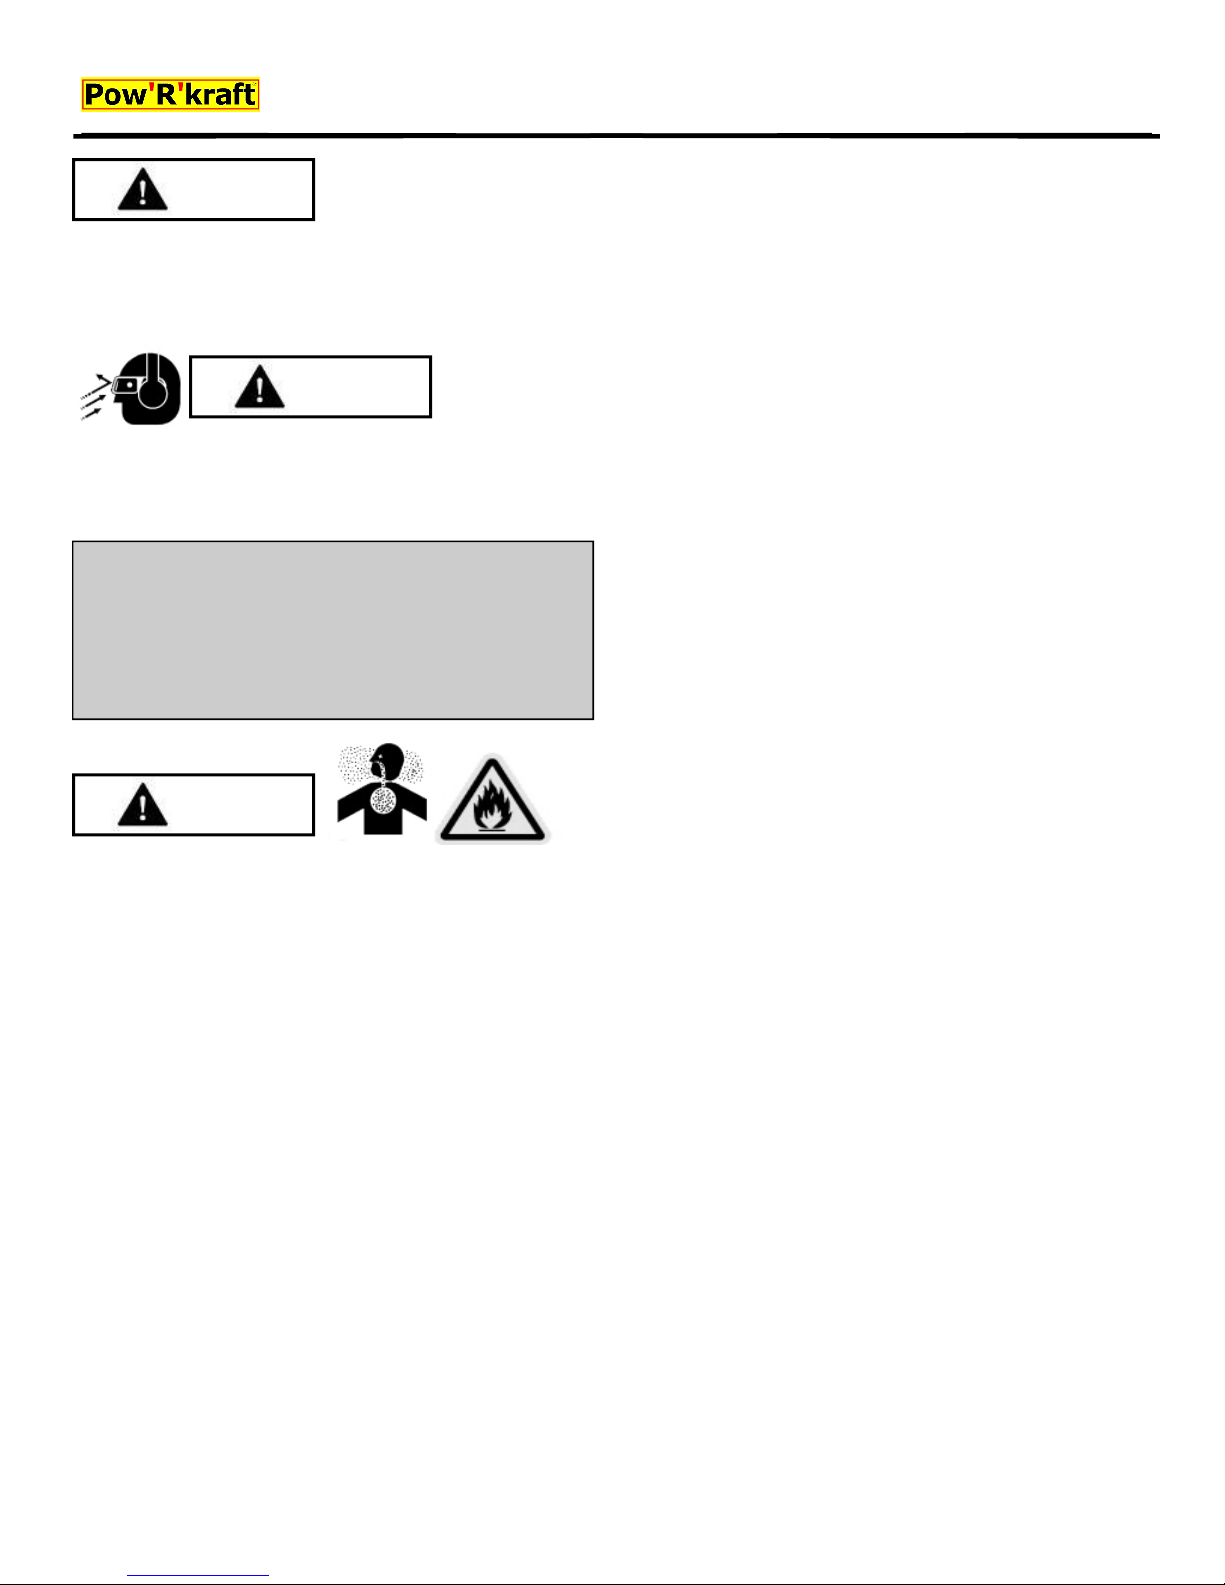
WARNING
Always wear hearing and eye protection while
operating this machine or if you are within 75 feet of
this machine.
IMPORTANT: This unit is shipped
without gasoline or oil in the engine.
Be certain to fill the engine with
gasoline and oil as instructed before
operating your machine.
WARNING
Add Gasoline and Oil
Step 1: Add gasoline
Step 2: Add approximately 1.1 quarts of 10W-30 oil until
the oil is about to overflow from the oil fill spout. A low oil
sensor will prevent the engine from running unless the oil
is COMPLETELY FULL. Ensure both oil fill plugs are
secure after filling.
Never fill fuel tank indoors with engine running or
until the engine has been allowed to cool for at least
two minutes after running.
Starting the Engine
Step 3: Attach spark plug wire to spark plug. Make certain
the metal cap on the end of the spark plug is fastened
securely over the metal tip on the spark plug.
Step 4: Move choke lever on engine to CHOKE position.
(A warm engine may not require choking).
Operating Instructions
steps until engine fires.
Rapid retraction of the recoil starter cord can pull the
starter cord back faster than you can let go. When
starting the engine, pull the cord slowly until
resistance is felt then pull rapidly to avoid kickback.
NOTE: A noise will be heard when finding the start of the
compression cycle. This noise is caused by the flails and
fingers, which are part of the shredding mechanism, and
it should be expected until the impeller reaches full
speed.
Step 7: When engine starts, move choke control
gradually to the RUN position.
Step 8: After engine is started, gradually release choke.
Using the Chipper Shredder
Yard waste such as leaves and pine needles can be
raked up and placed in the chipper funnel for shredding.
DO NOT PUT BRANCHES INTO THE CHIPPER
FUNNEL. BRANCHES SHOULD BE FED INTO THE
SIDE CHIPPER CHUTE.
When using the side chipper chute to chip branches, it is
important to let the chipper feed the branches through
automatically. DO NOT attempt to force the branches
through. If the branches do not automatically feed
through, gently push the branch and then allow the
chipper to automatically feed the branch through. Forcing
branches into the side chute may wear the belt
prematurely.
Once material is shredded by the hammers on the
impeller assembly, it is discharged through the open
discharge chute or into the chipper bag.
Do not attempt to shred or chip any material other than
normal yard vegetation found (i.e., branches, leaves,
twigs, etc.) Avoid fibrous plants such as tomato vines
until they are thoroughly dried. Twigs and small branches
can be fed into the chipper chute. (See model
specifications for maximum cutting thickness.)
IMPORTANT: The hammer screen is located inside the
housing in the discharge area. If the screen becomes
clogged, remove and clean as instructed. For best
performance, it is also important to keep the chipper
blade sharp.
Step 5: Turn the fuel valve to the ON position.
Step 6: Grasp starter handle and pull rope out slowly until
engine reaches start of compression cycle (rope will pull
slightly harder at this point). Pull rope with a rapid,
continuous, full arm stroke. Keep a firm grip on starter
handle. Let the rope rewind slowly. Repeat the previous
Page 13
Rugged, Labor and Time Saving Products
PowRkraft ECO-13 Cripper / Shredder 13 Revision 9-19-14
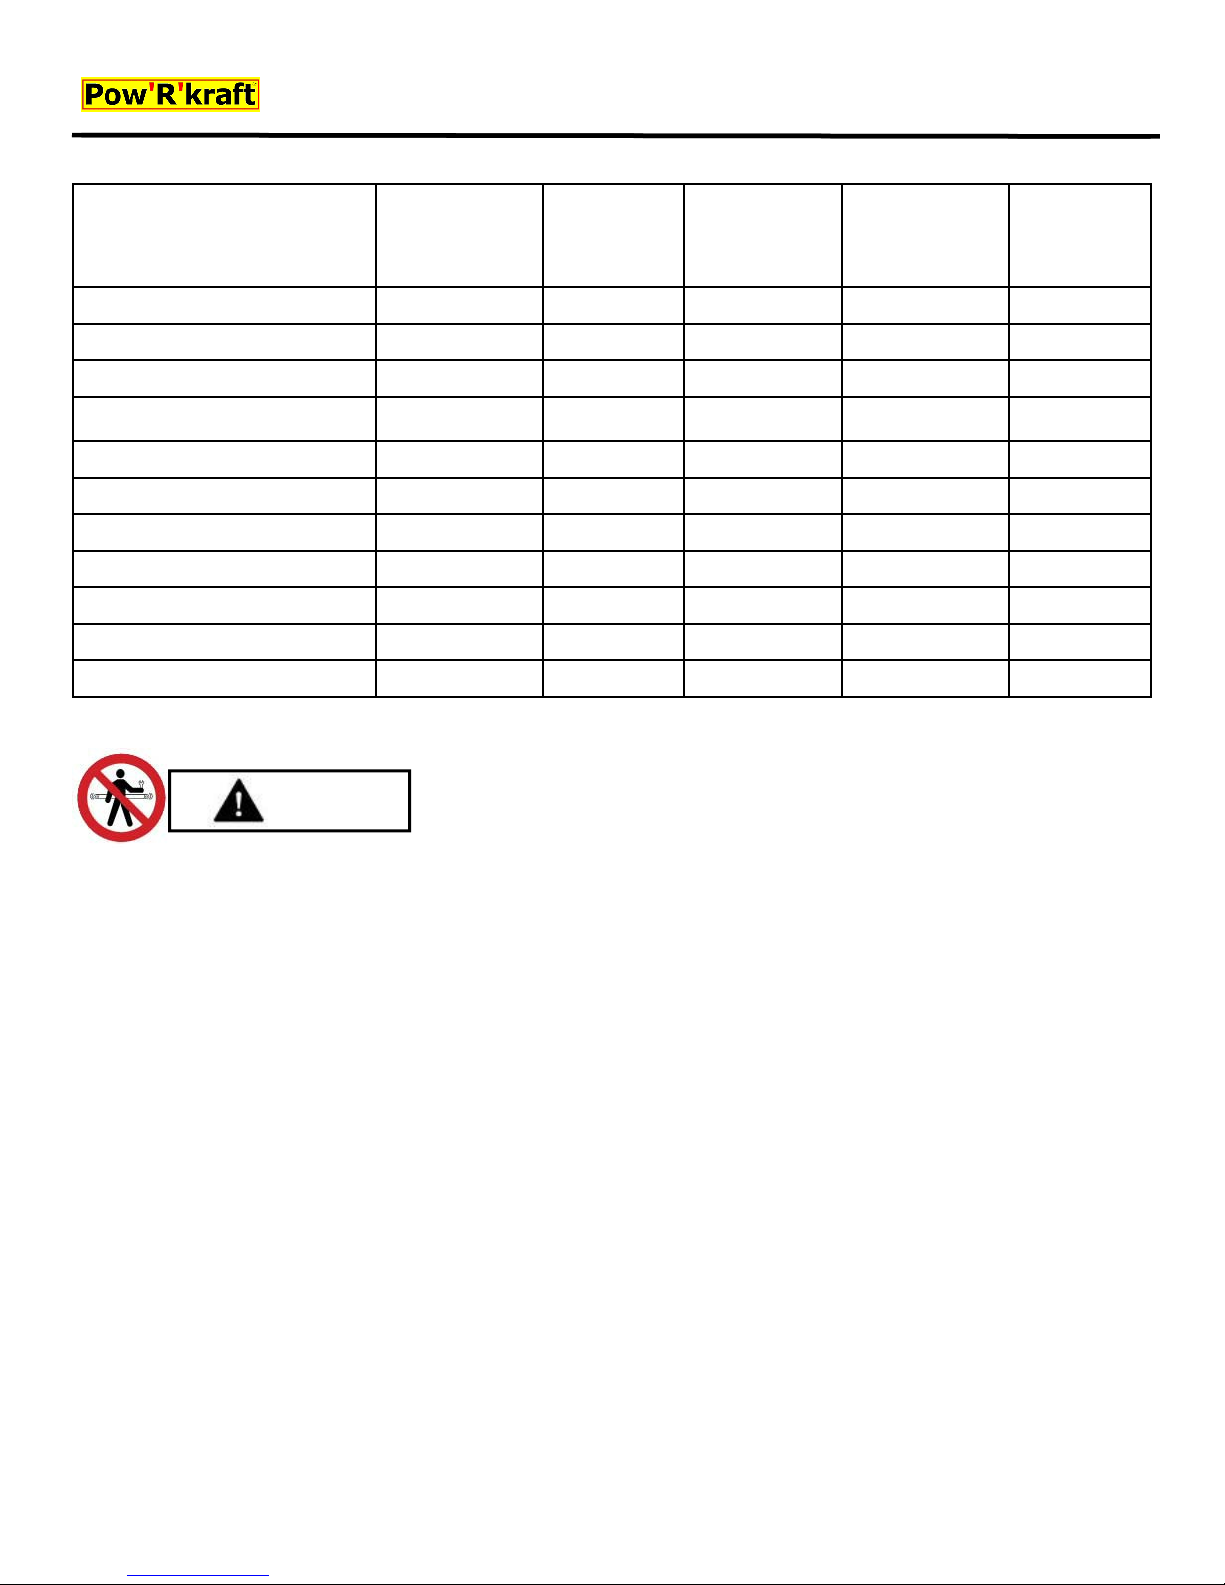
Maintenance Schedule
Maintenance and Storage
Item
Engine Oil (Check) X
Engine Oil (Change) X
Air Cleaner (Check) X
Air Cleaner Wash X
Fuel filter Cup (Clean) X
Spark Plug (Clean) X
Spark Plug (Change)
Lubricate Release Bracket X
Lubricate Hopper Assembly X
Check Chipper Blade X
Fuel Tank and Filter (Clean) X
X
Before each
use
20 hrs or
every 3
months
50 hrs or
every 3
months
6. Follow this manual for safe loading, unloading,
transporting, and storage of this machine.
100 hrs or
every 6
months
WARNING
7. Never store the machine or fuel container inside
where there is an open flame, spark or pilot light such
Always stop engine, disconnect spark plug, and
ground against engine before cleaning,
lubricating or doing any kind of maintenance on
your machine.
Maintenance and Storage
1. Never tamper with safety devices. Check their proper
operation regularly.
as a water heater, furnace, clothes dryer, etc.
8. Always refer to the operator’s manual for proper
instructions on off-season storage.
9. If the fuel tank has to be drained, do this outdoors.
10. Observe proper disposal laws and regulations for
gas, oil, etc. to protect the environment.
If the Chipper Becomes Clogged:
2. Check bolts and screws for proper tightness at
frequent intervals to keep the machine in safe working
condition. Also, visually inspect machine for any
damage and repair, if needed.
3. Before cleaning, repairing, or inspecting, stop the
engine and make certain the impeller and all moving
parts have stopped. Disconnect the spark plug wire
and ground it against the engine to prevent
unintended starting.
4. Do not change the engine governor settings or
overspeed the engine. The governor controls the
maximum safe operating speed of the engine.
5. Maintain or replace safety and instruction labels, as
necessary.
If the discharge area becomes clogged:
· Stop the engine. Disconnect spark plug wire from
spark plug and ground against the engine.
· Remove the large funnel and the clean out the
access hatch on the side of the chipper engine box
(as necessary).
· Reach in and clear the debris causing the blockage.
Reinstall the funnel and the clean out access hatch.
· Connect the spark plug wire and restart.
NOTE: If the blockage is severe, the hammer screen
within the discharge chute can be removed as well,
providing greater access. To accomplish this, remove the
pins and slide the flail screen out of the discharge chute.
300 hrs or
every 1
year
Page 14

Rugged, Labor and Time Saving Products
PowRkraft ECO-13 Cripper / Shredder 14 Revision 9-19-14
WARNING
Always stop engine, disconnect spark plug, and
ground against engine before cleaning,
lubricating or doing any kind of maintenance on
your machine.
Removing and Sharpening the Blade
Maintenance & Storage
· Scribe a mark on the base plate along the edge of
the engine.
· Remove the belt from the pulleys.
· Remove the handle, discharge chute and screen.
· Loosen the four bolts securing the engine.
· Slide the engine about 1/8” further back.
· Tighten the engine mounting bolts securely.
· Re-install the belt and verify the tension. If the belt is
still too loose, move the engine back another 1/8” by
repeating the above steps.
· Reinstall guards, chutes, and screens.
The chipper was shipped with one blade attached and
one blade in the hardware bag. You can extend the belt
life by operating the chipper with a sharp blade.
· Disconnect the spark plug wire and ground against
the engine.
· Remove the blade access hatch and rotate the
blade to align with the access hatch.
· Remove the flail screen in the discharge chute by
removing the pins that secure it at the top and
bottom of the screen.
· Remove the blade using a 3/16” Allen wrench on the
outside of the blade and an adjustable wrench on
the impeller assembly (through the discharge
chute). Use a piece of pipe or wood to block the
flails, preventing them from inadvertently turning.
· Add, replace or sharpen the blade as desired.
· When sharpening the blade, protect hands by using
gloves and following the original angle of
Grind. Torque to 250–300 in. lbs.
NOTE: Make certain the blade is reassembled with the
sharp edge facing upward.
Changing or Tightening the Belt
NOTE: The belt is designed to be the weakest link in the
mechanical linkage between the engine and the blade.
This improves the safety and durability of the chipper/
shredder.
Cleaning the Chipper/Shredder
· Make sure engine is off.
· Wipe off machine with an oiled rag to prevent rust.
· If the fuel tank has to be drained, do so outdoors.
· Observe proper disposal laws and regulations for
gas, oil, etc., to protect the environment.
Storing the Chipper/Shredder
· Clean the equipment thoroughly.
· Wipe equipment with an oiled rag to prevent rust.
· Refer to engine manual for correct engine storage
instructions.
· Store unit in a clean, dry area. Do not store next to
corrosive materials such as fertilizer.
· Never store the machine or fuel container inside
where there is an open flame, spark or pilot light
such as a water heater, furnace, clothes dryer, etc.
Occasionally, changing or tightening the belt is required.
To change the belt:
· Stop the engine and make certain the chipper/
shredder has come to a complete stop. Disconnect
the spark plug wire from spark plug and ground
against the engine.
· Remove the belt guard.
· Loosen engine mount bolts and release belt tension.
Pry the belt off the pulley using a screw driver shaft
as a wedge as you rotate the pulley. Place a new
belt on the pulleys in a similar fashion.
To tighten the tension on the pulleys, follow the above
steps plus:
Page 15
Rugged, Labor and Time Saving Products
PowRkraft ECO-13 Cripper / Shredder 15 Revision 9-19-14
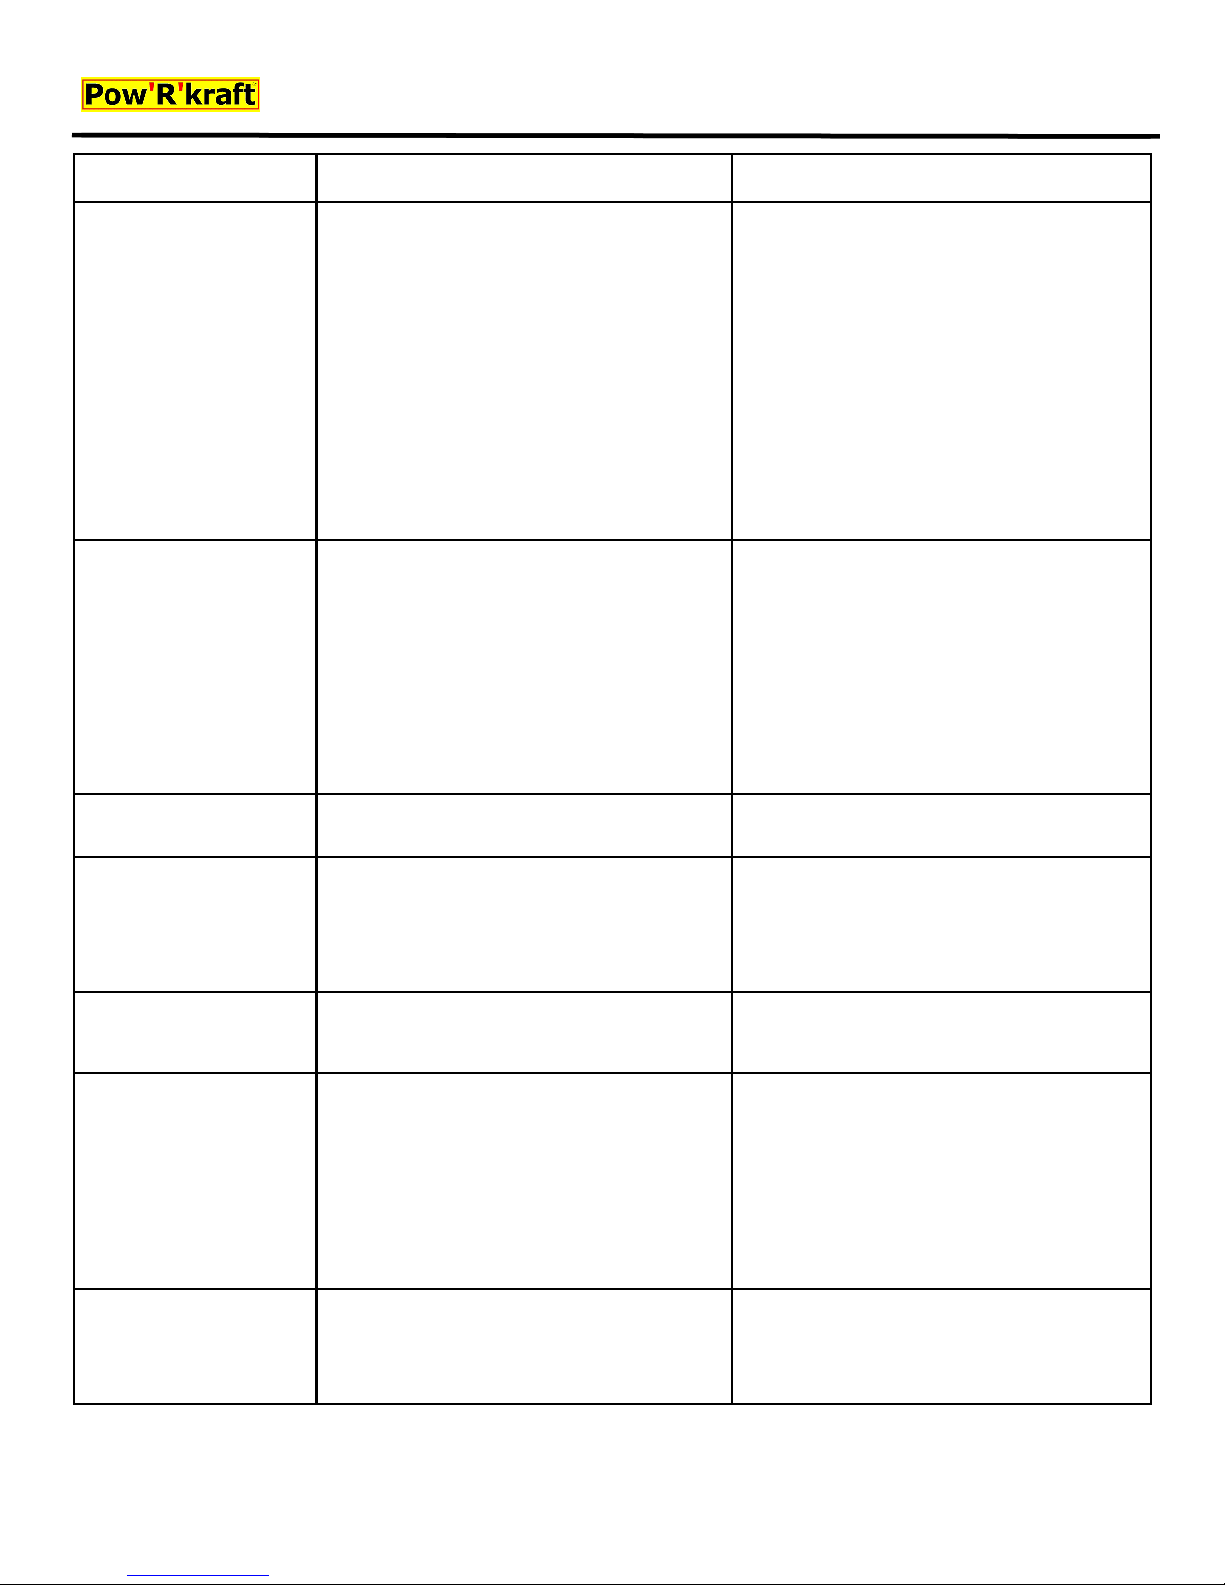
Troubleshooting
Problem Cause Remedy
Engine fails to start
Engine runs erratic
1. Spark plug wire disconnected.
2. Fuel tank empty or stale fuel.
3. Throttle control lever not in correct
starting position. (If equipped)
4. Choke not in CHOKE position. (If
equipped)
5. Engine not primed.
6. Blocked fuel line.
7. Faulty spark plug.
8. Low oil
1. Spark plug wire loose.
2. Unit running on CHOKE. (If equipped)
3. Blocked fuel line or stale fuel.
4. Water or dirt in fuel system.
5. Dirty air cleaner.
6. Carburetor out of adjustment.
1. Connect wire to spark plug.
2. Fill tank with clean, fresh gasoline.
3. Move throttle lever to FAST position.
4. Move choke to CHOKE position.
5. Prime engine.
6. Clean fuel line.
7. Clean, adjust gap, or replace.
8. Fill
1. Connect and tighten spark plug wire.
2. Move choke lever to OFF position.
3. Clean fuel line; fill tank with clean, fresh
gasoline.
4. Drain fuel tank. Refill with fresh fuel.
5. Clean or replace air cleaner.
6. See authorized service dealer
Too much vibration
Engine overheats
Occasional skip
(hesitates)
Unit does not discharge
Rate of discharge slows
1. Loose parts or damaged impeller. 1. See authorized service dealer.
1. Engine oil level low.
2. Dirty air cleaner.
3. Carburetor not adjusted properly.
1. Spark plug gap too close.
1. Discharge chute clogged.
2. Foreign object lodged in impeller.
3. Low engine RPM.
1. Fill crankcase with proper oil.
2. Clean or replace air cleaner.
3. See authorized service dealer.
1. Adjust gap to.030”.
1. Stop engine immediately and disconnect
spark plug wire. Clean flail screen and
inside of discharge opening.
2. Stop engine and disconnect spark plug
wire. Remove lodged object.
3. Always run engine at full throttle.
1. Low engine RPM.
2. Chipper blade dull.
1. Always run engine at full throttle
2. Replace chipper blade or see your
authorized service dealer.
Page 16
Rugged, Labor and Time Saving Products
PowRkraft ECO-13 Cripper / Shredder 16 Revision 9-19-14
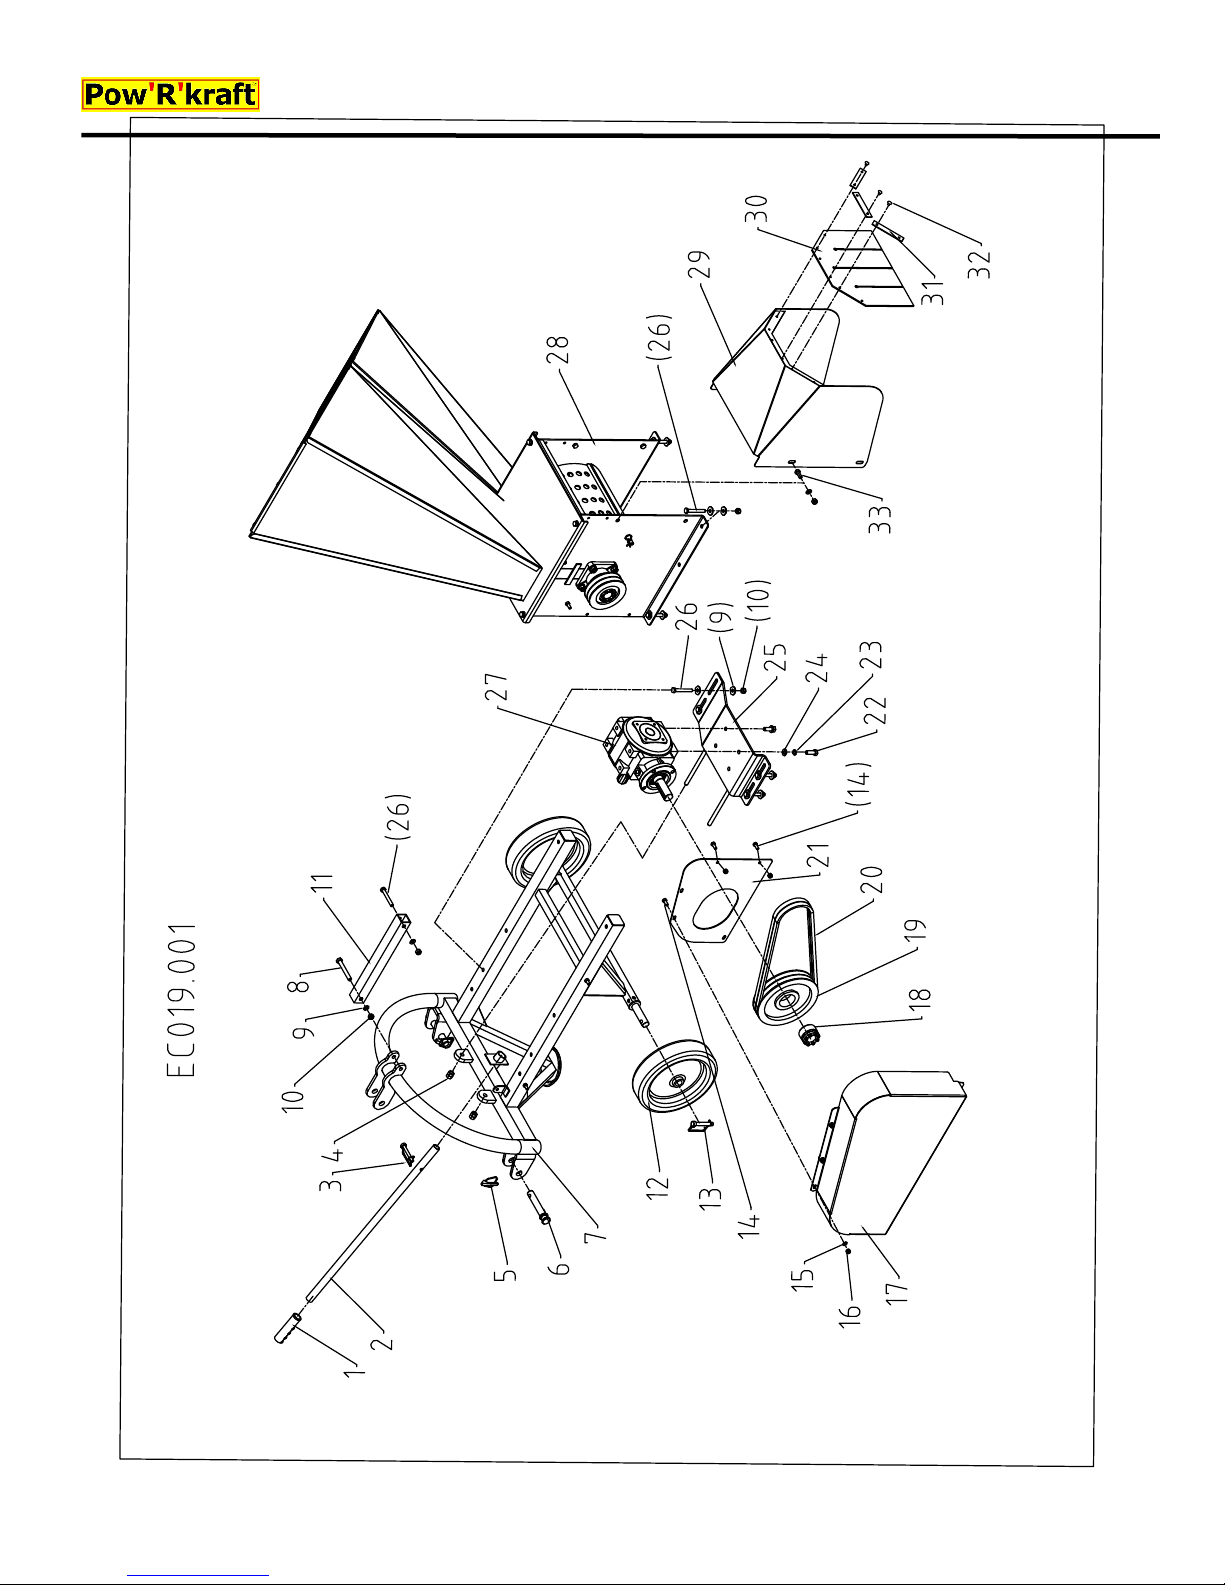
Parts Breakdown
Page 17
Rugged, Labor and Time Saving Products
PowRkraft ECO-13 Cripper / Shredder 17 Revision 9-19-14
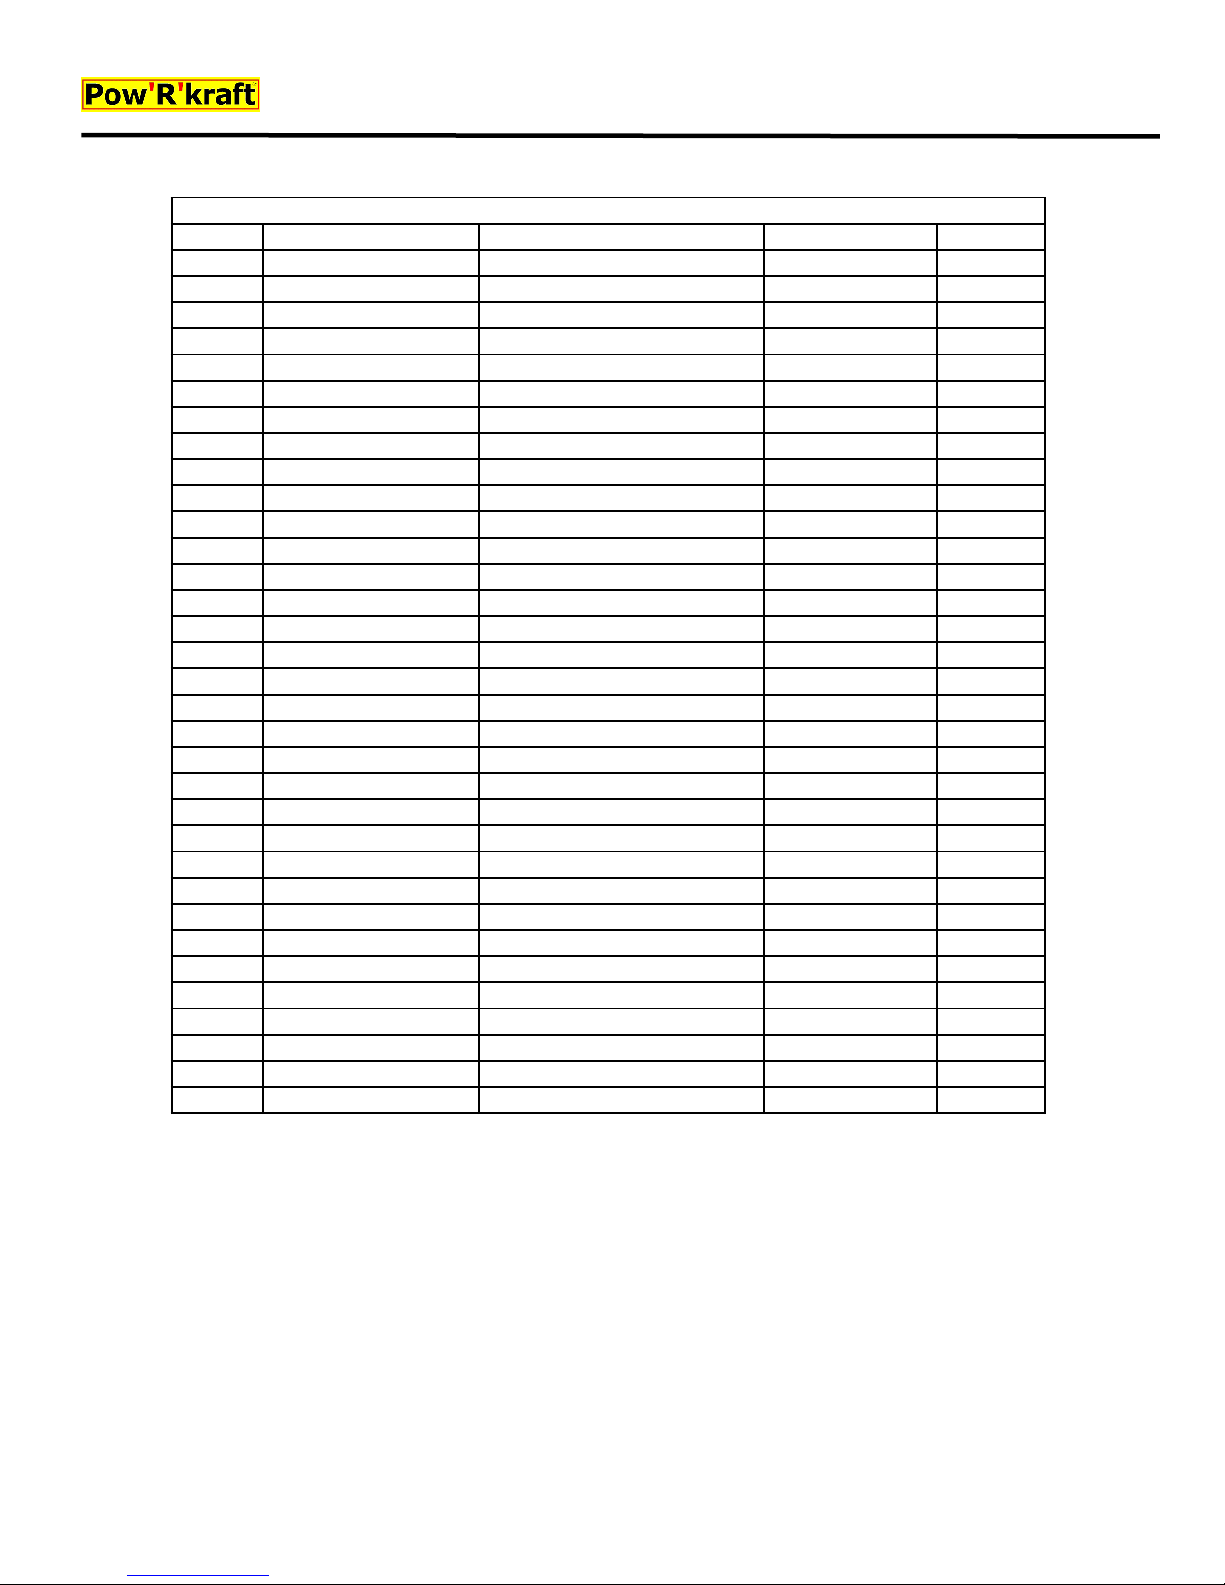
EC019.001 PARTS LIST
REF. PART NUMBER DESCRIPTION
1 LS18.101 HANDLE COVER
2 ECO19.101 DRAW BAR
3 DP8x60 LOCK PIN D8x60 D
4 GB6170-M12 NUT M12
5 LP12 LOCK PIN 12
6 T150.101 LOWER HITCH PIN
7 ECO19.011 MAIN FRAME,WDMT
8 GB5782-M10x90 BOLT M10x90
9 GB97.1-10 PLAIN WASHER 10
10 GB889.1-M10 LOCK NUT M10
11 ECO19.102 CONNECTING ROD
12 ECO19.021 WHEEL,SET
13 DP12x60 LOCK PIN D12x60 D
14 GB5783-M8x20 BOLT M8x20
15 GB97.1-8 PLAIN WASHER 8
16 GB889.1-M8 LOCK NUT M8
17 ECO19.020 SHIELD,PULLEY
18 REACH 04-3360 CLAMPING COUPLING 3360
19 EFGC125.121 PULLEY
名 称 及 规 格
扶 手 套
牵 引 杆
8x60 1
形 销
M12 4
螺 母
12 2
锁 销
下 悬 挂 销
底 座 焊 合 件
M10x90 1
螺 栓
平 垫 圈
锁 紧 螺 母
10 22
M10 14
连 接 杆
脚 轮 组 合 件
12x60 2
形 销
M8x20 4
螺 栓
平 垫 圈
锁 紧 螺 母
8 5
M8 5
带 轮 罩 焊 合 件
3360 1
胀 套
大 带 轮
20 GB11544-SPB1295 V-BELT SPB1295 V带SPB1295 2
21 ECO19.105 CONNECTING PLATE
22 GB5783-M12x35 BOLT M12x35
23 GB93-12 LOCK WASHER 12
24 GB97.1-12 PLAIN WASHER 12
25 ECO19.012 MOUNTING BASE,GEARBOX
26 GB5782-M10x75 BOLT M10x75
27 TS50.300Z.02 GEARBOX,ASSY
带 轮 挡 板
M12x35 4
螺 栓
弹 垫 圈
平 垫 圈
12 4
12 4
连 接 座 焊 合 件
M10x75 10
螺 栓
齿 轮 箱 总 成
28 ECO19.002 CHIPPER,ASSY 1
29 ECO19.016 DISCHARGE COVER
30 ECO19.106 DISCHARGE FLAP
31 ECO19.107 CLAMPING PLATE
32 JB4005-6x12 RIVET 6x12
33 GB5783-M10x25 BOLT M10x25
出 料 罩 焊 合 件
出 料 挡 板
出 料 压 板
抽 芯 铆 钉
螺 栓
6x12 6
M10x25 4
QTY.
1
1
2
1
1
2
1
1
1
1
1
1
1
3
Page 18
Rugged, Labor and Time Saving Products
PowRkraft ECO-13 Cripper / Shredder 18 Revision 9-19-14
Parts Breakdown - Continued
Page 19
Rugged, Labor and Time Saving Products
PowRkraft ECO-13 Cripper / Shredder 19 Revision 9-19-14
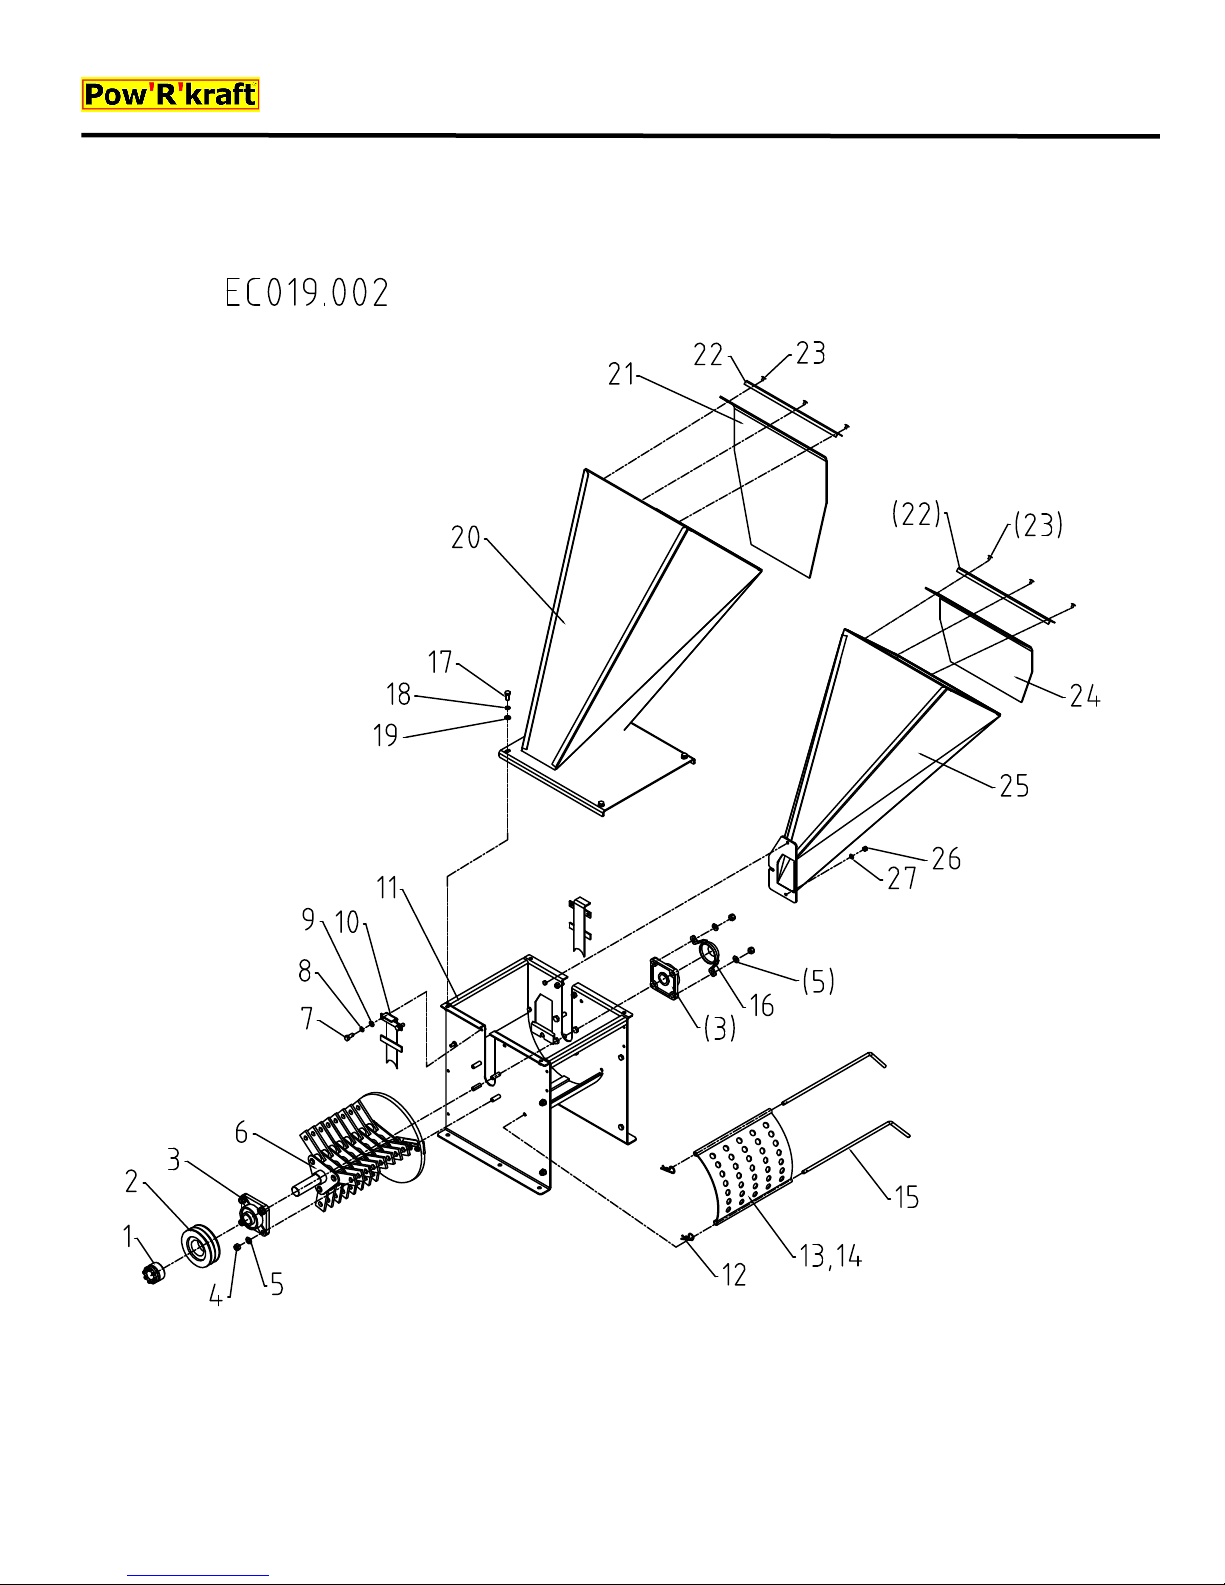
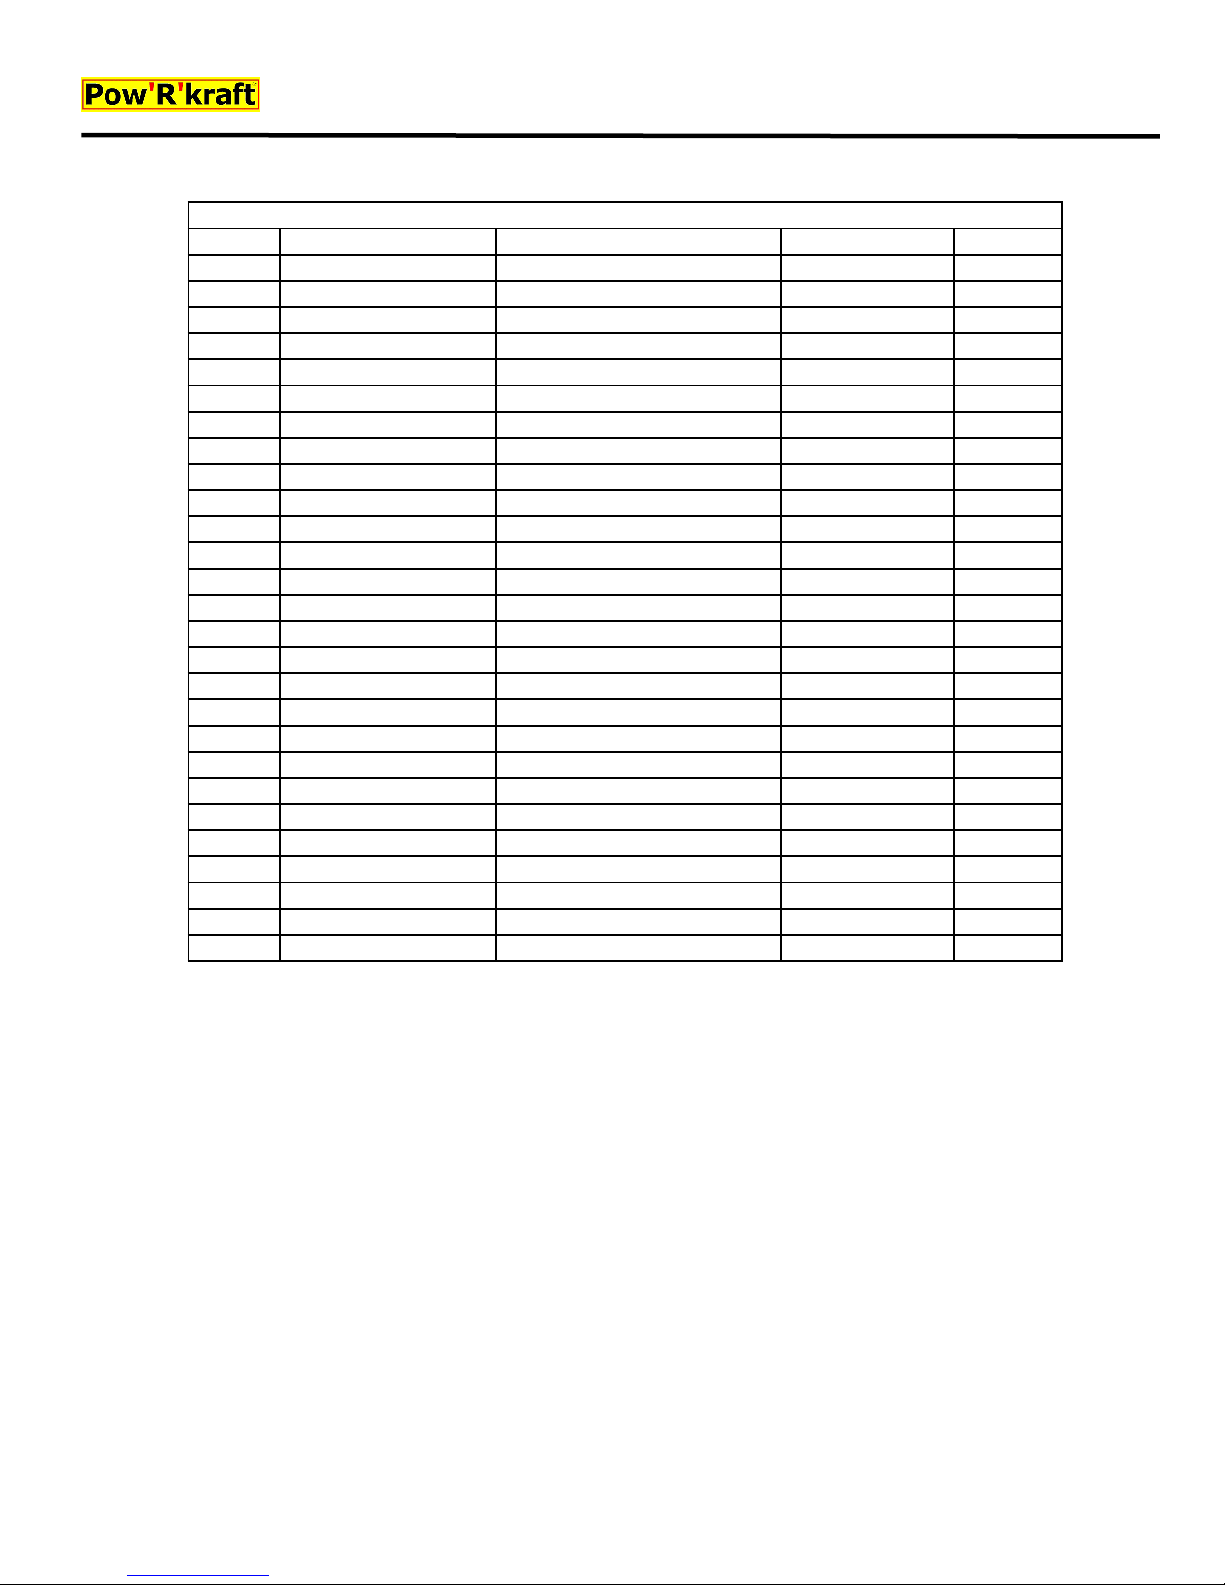
EC019.002 PARTS LIST
REF. PART NUMBER DESCRIPTION
1 REACH 04-3560 CLAMPING COUPLING 3560
2 ECO19.103 PULLEY
3 F90507 BEARING F90507,SET
4 GB889.1-M12 LOCK NUT M12
5 GB97.1-12 PLAIN WASHER 12
名 称 及 规 格
3560 1
胀 套
小 带 轮
方 座 轴 承
锁 紧 螺 母
平 垫 圈
12 8
F90507 2
M12 8
6 ECO19.003 ROTOR,ASSY 1
7 GB5783-M10x25 BOLT M10x25
8 GB93-10 LOCK WASHER 10
9 GB97.1-10 PLAIN WASHER 10
10 ECO19.019 PATCHING PLATE,WDMT
11 ECO19.013 HOUSING,WDMT
M10x25 4
螺 栓
弹 垫 圈
平 垫 圈
10 4
10 4
侧 封 板 焊 合 件
箱 体 焊 合 件
12 R PIN 3.2 R PIN 3.2 R销3.2 2
13 ECO19.017 SIFTING PLATE,WDMT
14 ECO19.018 SIFTING PLATE,WDMT
15 ECO19.109 SUPPORTING ROD
16 ECO19.022 COVER,BEARING
17 GB5783-M10x25 BOLT M10x25
18 GB93-10 LOCK WASHER 10
19 GB97.1-10 PLAIN WASHER 10
20 ECO19.015 UPPER HOPPER
21 ECO19.111 ENTRANCE FLAP,UPPER
22 ECO19.112 CLAMPING PLATE
23 JB4005-6x12 RIVET 6x12
24 ECO19.110 ENTRANCE FLAP,LOWER
25 ECO19.014 LOWER HOPPER
26 GB889.1-M8 LOCK NUT M8
27 GB97.1-8 PLAIN WASHER 8
小 孔 挡 板 焊 合 件
大 孔 挡 板 焊 合 件
出 料 口 轴
轴 承 盖 焊 合 件
M10x25 4
螺 栓
弹 垫 圈
平 垫 圈
10 4
10 4
上 斗 焊 合 件
上 料 斗 挡 板
料 斗 压 板
抽 芯 铆 钉
6x12 6
下 料 斗 挡 板
下 斗 焊 合 件
锁 紧 螺 母
平 垫 圈
M8 3
8 3
QTY.
1
2
1
1
1
2
1
1
1
2
1
1
Page 20
Rugged, Labor and Time Saving Products
PowRkraft ECO-13 Cripper / Shredder 20 Revision 9-19-14
Parts Breakdown - Continued
Page 21
Rugged, Labor and Time Saving Products
PowRkraft ECO-13 Cripper / Shredder 21 Revision 9-19-14
3
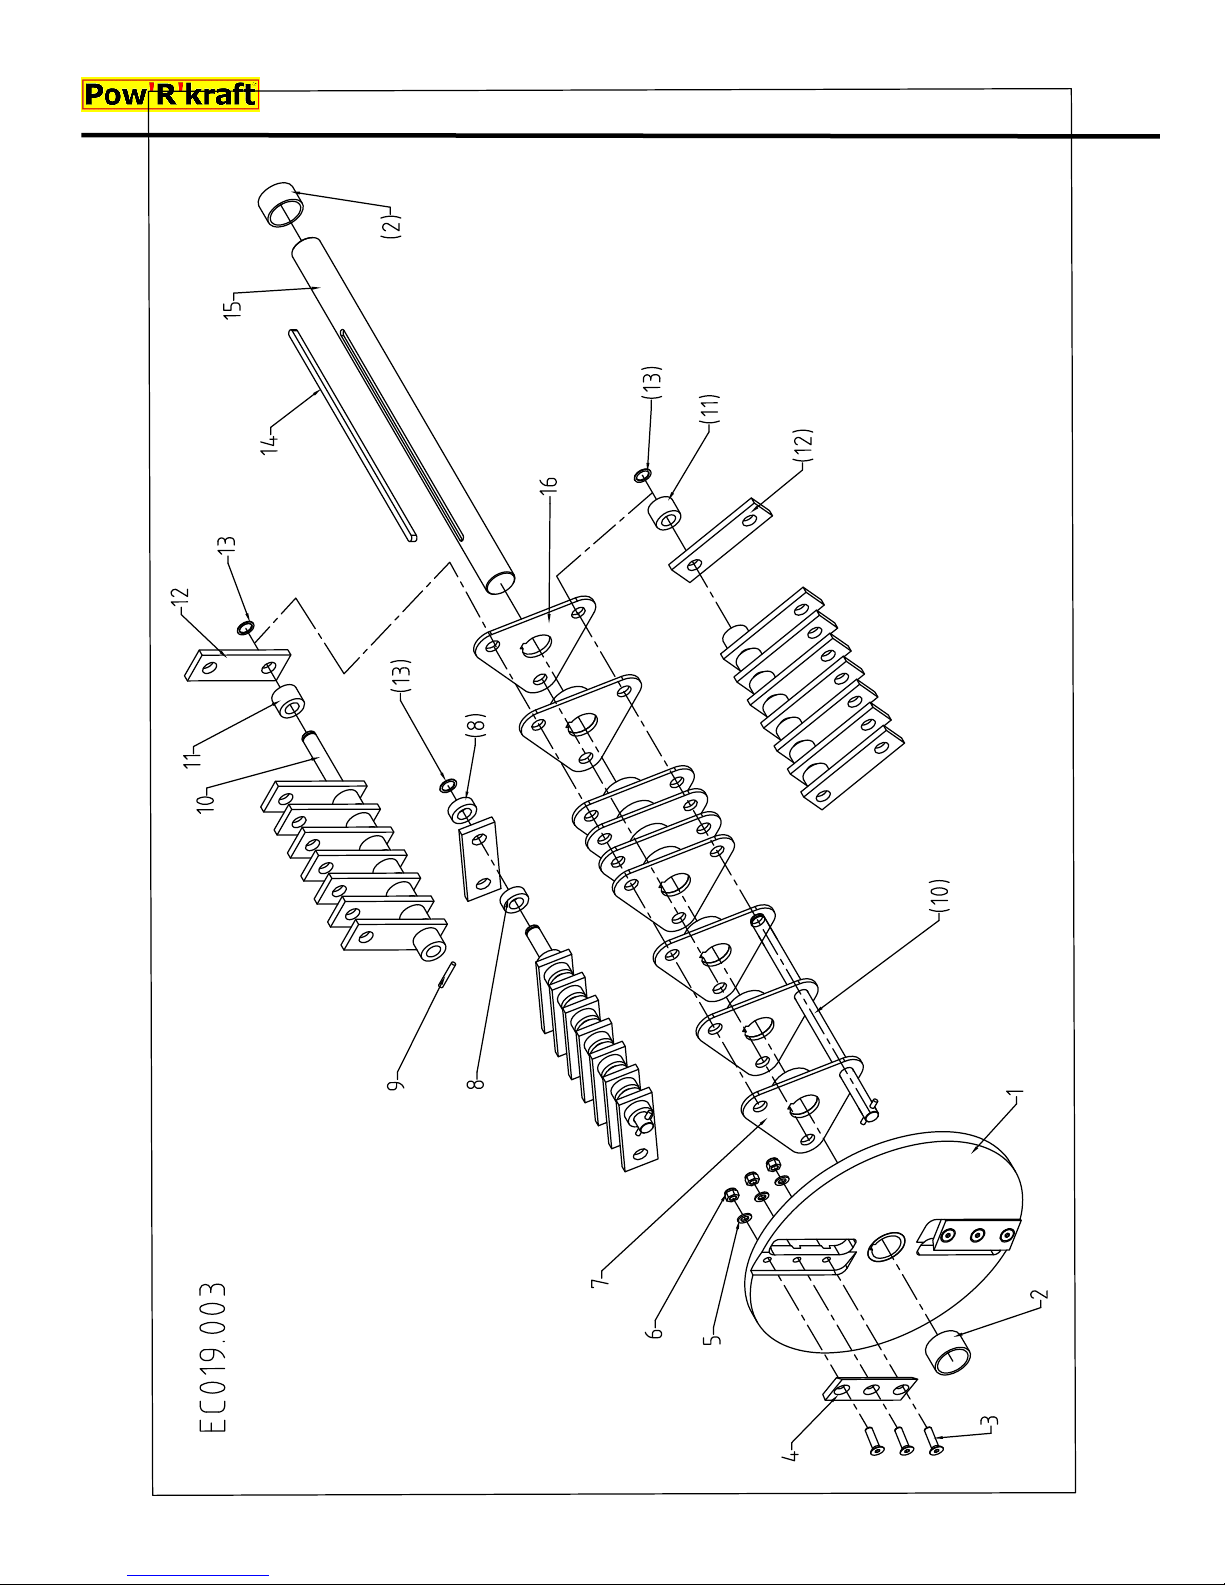
EC019.003 PARTS LIST
REF. PART NUMBER DESCRIPTION
1 ECO19.023 ROTOR,WDMT
2 ECO19.114 SPACER
3 GB2673-M8x30 COUNTERSUNK SCREW M8x
4 ECO19.115 KNIFE
5 GB97.1-8 PLAIN WASHER 8
6 GB889.1-M8 LOCK NUT M8
7 ECO19.024 SHAFT HOLDER,WDMT
8 ECO19.120 SHORT SPACER
9 GB879-5x35 SPRING PIN 5x35
10 ECO19.116 SHAFT
11 ECO19.119 LONG SPACER
12 ECO19.117 FLAIL KNIFE
13 GB893.1-16 RETAINING RING 16
14 GB1096-A8x7x328 KEY A8x7x328
15 ECO19.113 MAIN SHAFT
16 ECO19.118 PLATE
名 称 及 规 格
刀 盘 焊 合 件
隔 套
沉 头 螺 钉
M8x30 6
动 刀 片
平 垫 圈
锁 紧 螺 母
8 3
M8 3
甩 刀 座 焊 合 件
短 隔 套
弹 性 销
5x35 3
甩 刀 轴
长 隔 套
甩 刀 片
轴 挡 圈
键
16 3
A8x7x328 1
主 轴
甩 刀 固 定 板
QTY.
1
2
2
8
16
3
16
24
1
1
Page 22
Name:
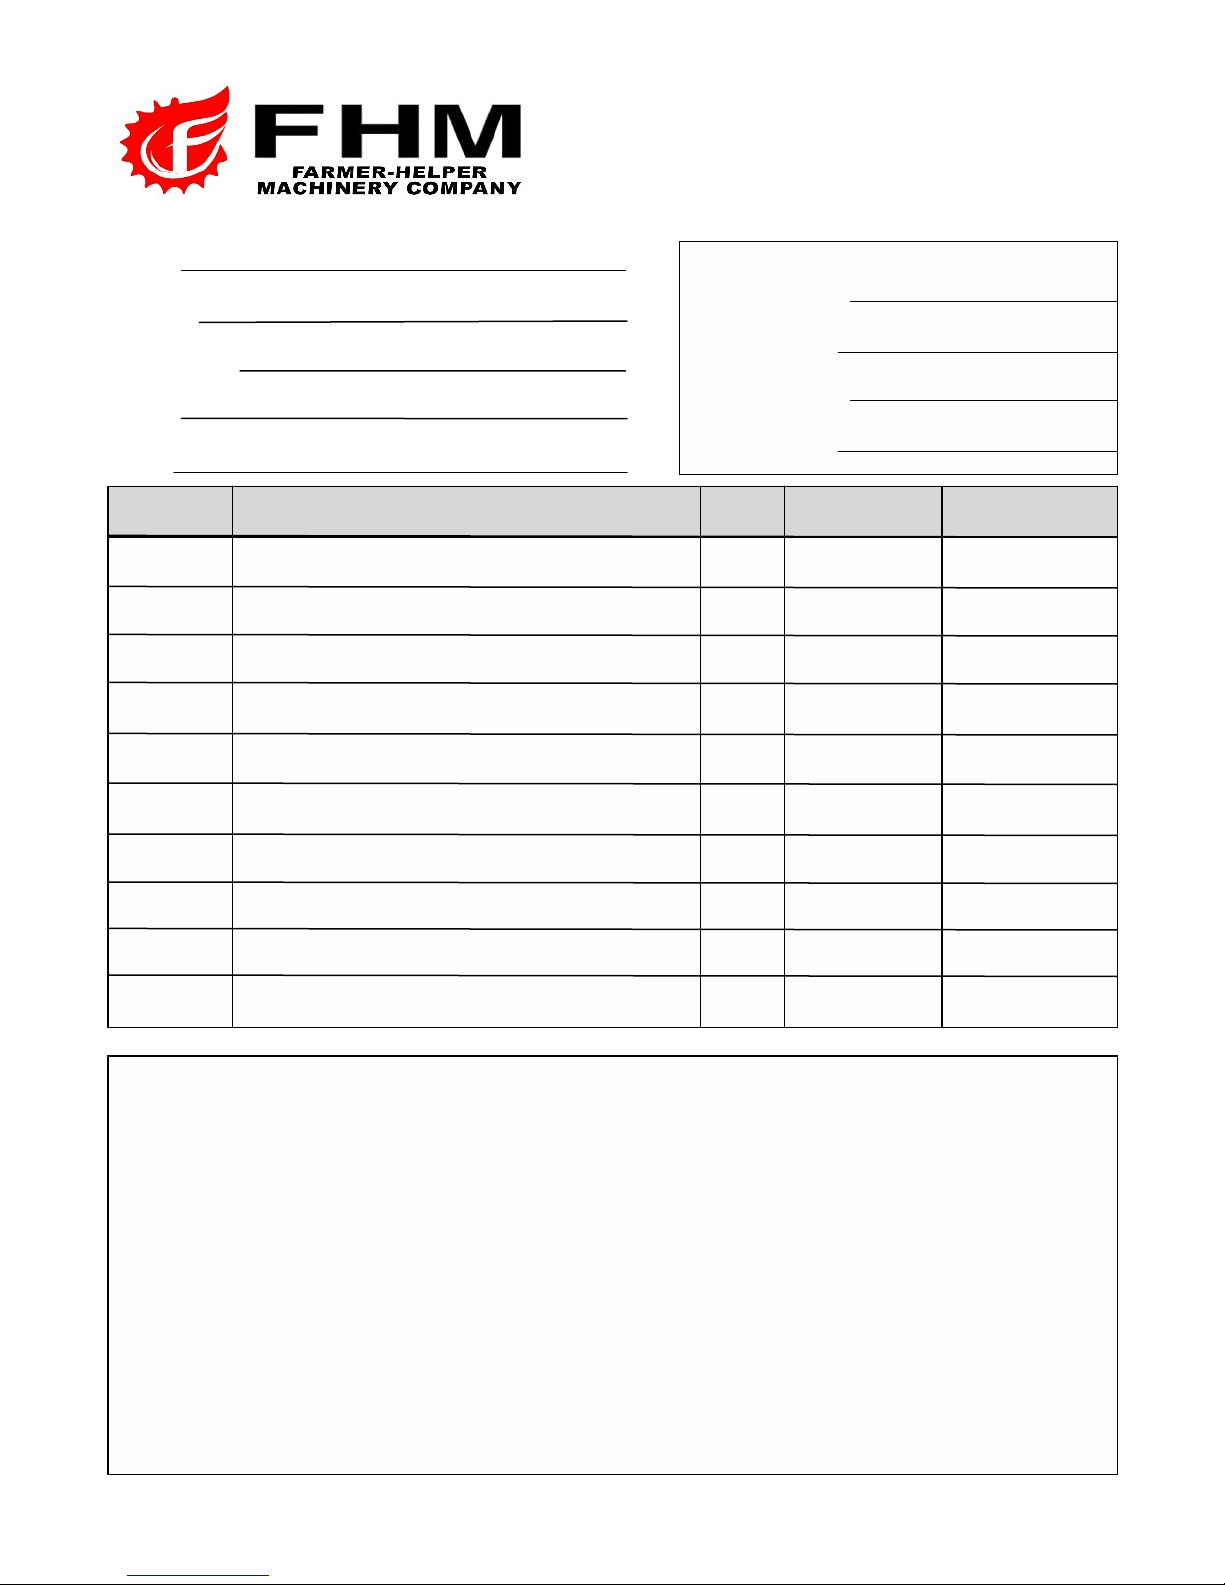
Parts Request Form
Faxto541‐895‐2756orE‐mail
Address:
City State Zip:
Phone:
E‐mail:
Item No.
Description Qty Price Amount
Model Number:
Serial Number:
Purchased From:
Purchase Date:
Comments:
Page 23

Farmer Helper Machinery Brand
LIMITED WARRANTY
FARMER HELPER MACHINERY CO. LTD. warrants to original Purchaser that FA R M E R H E L P E R
M A C H I N E R Y C O . L T D . products are free from major defects in material under normal use and
service for a period of Two (2) Years from the date the product is purchased or shipped, whichever is
later. Commercial use 180 days. Use at address that is not yours, is considered commercial use.
Consumable, Expendable, Wear Items (Examples:Rubber & plastic parts, hydraulic hoses, belts, tires,
cables, blades, tines, wedges, teeth, tips, chains, pins, brushes, filters, etc.) and cracked hydraulic pumps,
bent or broken cylinder rods are not covered under this warranty. Warranty does not cover items that
have been modified, damaged by abuse or usage not in accordance with design or maintenance.
FARMER HELPER MACHINERY CO. LTD.’s. obligation under this warranty is to repair or replace
defective product. upon determination by; Betst Products, llc., 83371 Melton Rd. N., Creswell OR
97426 that Warranty Claim is Valid. Product shall be returned upon request of Betst Products,
llc. Transportation charges to be prepaid by buyer. Gasoline or diesel engines used to powered
FARMER HELPER MACHINERY CO. LTD. products are covered by the warranty of the appropriate
engine manufacture and Purchaser must look to the engine manufacture for all issues relating
to engine operation.
Farmer-Helper Machinery nor Betst Products, llc. assumes any responsibility for labor.
PERMISSIBLE BY APPLICABLE LAW, FARMER HELPER MACHINERY CO. LTD. HEREBY
DISCLAIMS ALL WARRANTIES OF ANY KIND, EITHER EXPRESS OR IMPLIED, INCLUDING,
ANY IMPLIED WARRANTIES WITH RESPECT TO THE PRODUCT PURCHASED, WITHOUT
LIMITING THE GENERALITY OF THE FOREGOING, FARMER HELPER MACHINERY CO. LTD.
HEREBY EXPRESSLY DISCLAIMS ALL LIABILITY FOR PRODUCT DEFECT OR FAILURE,
CLAIMS THAT ARE DUE TO NORMAL WEAR, PRODUCT MISUSE, ABUSE, PRODUCT
MODIFICATION, IMPROPER PRODUCT SELECTION, NON-COMPLIANCE WITH ANY CODES,
OR MISAPPROPRIATION.• FARMER HELPER MACHINERY CO. LTD.. MAKES NO WARRANTIES
TO THOSE DEFINED AS "CONSUMERS" IN THE MAGNUSON-MOSS WARRANTY-FEDERAL
TRADE COMMISSION IMPROVEMENTS ACT . THE FOREGOING EXCLUSIONS OF IMPLIED
WARRANTIES DO NOT APPLY TO THE EXTENT PROHIBITED BY LAW. PLEASE REFER
TO YOUR LOCAL LAWS FOR ANY SUCH PROHIBITIONS
THERE SHALL BE NO LIABILITY FOR PRODUCT LIABILITY OR LIABILITY ON THE PART
OF BETST PRODUCTS, LLC. FOR ANY GENERAL, SPECIAL OR CONSEQUENTIAL DAMAGES
ARISING OUT OF THE SALE OR USE OF ANY PRODUCTS SOLD BY BETST PRODUCTS,
LLC OR AN AGENT THEREOF. BETST PRODUCTS, LLC. MAKES NO WARRANTIES, EXPRESS
OR IMPLIED, (INCLUDING, BUT NOT LIMITED TO, ANY WARRANTY OF MERCHANTABILITY
OR FITNESS OF THE PRODUCTS FOR ANY PURPOSE) WITH RESPECT TO THE PRODUCTS
COVERED BY THIS AGREEMENT EXCEPT AS IN THIS PARAGRAPH OTHERWISE EXPRESSLY
PROVIDED.
THIS IS THE SOLE AND ONLY WARRANTY OF FARMER HELPER MACHINERY CO. LTD.
PRODUCTS. NO OTHER WARRANTY IS APPLICABLE, EITHER EXPRESSED OR IMPLIED, IN
FACT OR BY LAW,
This warranty shall not be interpreted to render Betst Products, llc., or any authorized agent liable for
injury or damages of any kind or nature, direct, consequential, or contingent, to person or property.
The sole and only remedy in regard to any defective products shall be the repair or replacement thereof
as herein provided. Betst Products, llc., agent(s) of Betst Products, llc. shall not be liable for any
consequential, special, incidental or punitive damages resulting from or caused by any such defects.
Farmer-Helper Machinery reserves the right to make improvements in design or changes in
specifications at any time, without incurring any obligations to owners of units previously sold.
No one is authorized to alter, modify, or enlarge this warranty nor the exclusions, limitations, and
reservation thereof.
Revised 9-20-14
Page 24

WARRANTY VOID IF REGISTRATION IS NOT RECEIVED OR RECORDED ONLINE WITHIN 30
DAYS OF PURCHASE DATE OR SHIP DATE, WHICHEVER IS LATER.
FARMER HELPER MACHINERY REGISTRATION
Item________________________________Model # _________________ Purchase Date_____/_____/_______
Purchased From: ________________________________Gifto Inv#/Order# ____________________________
Owner Name: _______________________________________ Serial # (if Applicable)______________________
Owner Address: _______________________________________
City: ________________________ County: ___________ ST: ______ Zip Code: _____________
Phone: _______________________ Email: ________________________
Acceptance of responsibility:
I (Purchaser) have read operators manual and Limited Warranty or someone has read/and explained all
instructions to me. I understand this warranty does not cover any labor and that all disputes will be settled by
binding arbitration. Binding arbitration is conducted by the Better Business Bureau (BBB) located at 4004 SW
Kruse Way Place Ste 375 Lake Oswego OR 97035 or the current BBB location closest to Betst Products, I
acknowledge my Limited Warranty is void if any attempt to repair or replace defective parts has been made by
unauthorized personnel. I acknowledge receipt of my Operators Manual and have read the Safe Operation
Section. I acknowledge understanding maintenance and safe operation requirements, item specifications,
operation, controls, and storage requirements. I understand that I alone am responsible for proper
maintenance, care and safe operation of this Value-Leader item.
I (Purchaser) agree that persons not familiar with the operation of this item should not be allowed to use it.
Children especially should not operate or be near Power Products when in use. ANYONE OPERATING
FARMER-HELPER PRODUCTS SHOULD HAVE READ OPERATIONS MANUALS AND SAFETY MANUALS.
Owners Signature: x ____________________________________________ Date: ___/___/___
You must sign this warranty and mail or fax copy to Betst Products, 83371 Melton Rd N.#3, Creswell OR
97426. If you prefer you may complete your registration on line. This warranty is not effective unless the
Purchaser completes Registration and Warranty Form within 30 days of purchase or ship date whichever
is later.
Fax to 1-904-216-2059
NOTE: We may refuse warranty of any kind unless Betst Product, llc., receives a completed, legible and signed
warranty registration. It is the responsibility of the purchaser to assure that registration document is received by
Betst Products, llc..
Fax to 1-904-216-2059
Revised 9-20-14
Betst Products, llc. 541-895-3083 [email protected]
Page 25

2 YEAR EXTENDED WARRANTY & REGISTRATION
Fa r mer He l per Ma c h inery Branded Products
2 YEAR EXTENDED WARRANTY
2 Year Extended Warranty amends to original Recorded Manufacturers Warranty
Registration the time period of described coverage. Extended Warranty does not apply
to Consumable and Expendable Items as described in Product Warranty Registration.
This Amendment does not affect any other part of recorded Warranty Registration
or Policy. This Warranty Extension is the soul responsibility of Betst Products, llc.
No one is authorized to alter, modify, or enlarge this addition to the original
manufacturers recorded warranty registration.
EXTENDED REGISTRATION & PAYMENT MUST BE RECEIVED
WITHIN 30 DAYS OF PURCHASE DATE
EXTENDED WARRANTY REGISTRATION
Product & Model # : ________________________________________
Serial #: ______________________________
Owner Name: _______________________________________
Betst Products Invoice # ________________________________
Acceptance of responsibility:
I (Purchaser) have Read and understand the Extended Warranty or someone has read/and explained all
the above to me. I understand this extended warranty does not cover any labor. I have filed my Original
Warranty Registration and fully understand my requirements. I understand that I alone am responsible
for proper maintenance, care and safe operation of this tractor implement.
I (purchaser) also understand that persons not familiar with the operation of this equipment should not be
allowed to use it. Children especially should not operate or be near equipment. ANYONE OPERATING
EQUIPMENT SHOULD HAVE READ ALL EQUIPMENT OPERATIONS MANUALS AND SAFETY
MANUALS..
Owners Signature: x ______________________________________________________
Date: _________________
You must sign this extended warranty and email to [email protected] or Fax to 1-305-3971780 or mail copy to Betst Products, 83371 Melton Rd N.#3, Creswell OR 97426. This extended
warranty is not effective unless the Purchaser faxes or mails this Registration Form within 30
days of purchase. NOTE: The manufacturer may refuse warranty of any kind unless Betst Products
receives a completed, legible and signed extended warranty registration. It is the responsibility of the
purchaser to assure that this registration document is received by Betst Products.
To Make Payment for Extended Warranty Call: 1-877-876-7895
Revised 9-20-14
 Loading...