

Fhiaba S5991TWT6 User Manual [ru]

1
Important directions for safety and the environment
1.1
For your safety
1.2
Caring for the environment
1.3
Cleaning, sanitization and maintenance of the ice and/or water dispenser (if present)
2
Installation
2.1
Installation
2.2
Connection to the electrical power supply
2.3
Connection to the water system
3
Before starting
3.1
Know your appliance
3.2
Main components
3.3
Electronic Control
3.4
Main control panel
3.5
Fresco control panel
3.6
Electronic Control
3.7
Main control panel
3.8
Freezer control panel
4
Appliance switching on and off
4.1
Switching on and off
4.2
How to adjust the temperature for different requirements
4.3
Ice Maker activation
4.4
Information and malfunction messages on the display
USER MANUAL
Index
EN
5
Settings and Special Functions
5.1
Customization and language settings
5.2
Special functions activated through the Menu
5.3
Basic settings of the Menu
6
Internal Layout
6.1
Internal Layout (positioning, adjustment, removal)
7
Activation and use of the Ice Maker
7.1
Activation and use of the Ice Maker
7.2
Water Filter
8
Lighting
8.1
Lighting
9
Food Preservation
9.1
General directions
9.2
TriMode compartment
9.3
How to maintain good food quality
9.4
Recommendations for preserving fresh food
9.5
Recommendations for preserving frozen food
10
Recommended times for Food Preservation
11
Care and Cleaning
11.1
Care and Cleaning
11.2
Condenser cleaning
11.3
Internal cleaning
12
Troubleshooting Guide
12.1
Troubleshooting Guide
12.2
Malfunction messages appearing on the display
13
Before calling for service
13.1
Before calling for service
14
Menu Map
14.1
Functions
14.2
Setting
www.fhiaba.com ∙ info@fhiaba.com ∙ Tel +39 (0)434 420160 ∙ Fax +39 (0)434 420161
27
1
Important directions for safety and the environment
1.1
must be removed or disposed of, make sure that it does not
become a dangerous trap for children by cutting its power
supply cable and rendering it impossible to close the door.
Use the same caution at the end of the lifespan of the new
appliance.
foods and is intended for domestic use.
tions in the Installation Guide, particular care should be
taken not to obstruct the vent openings of the appliance
and of the built-in units.
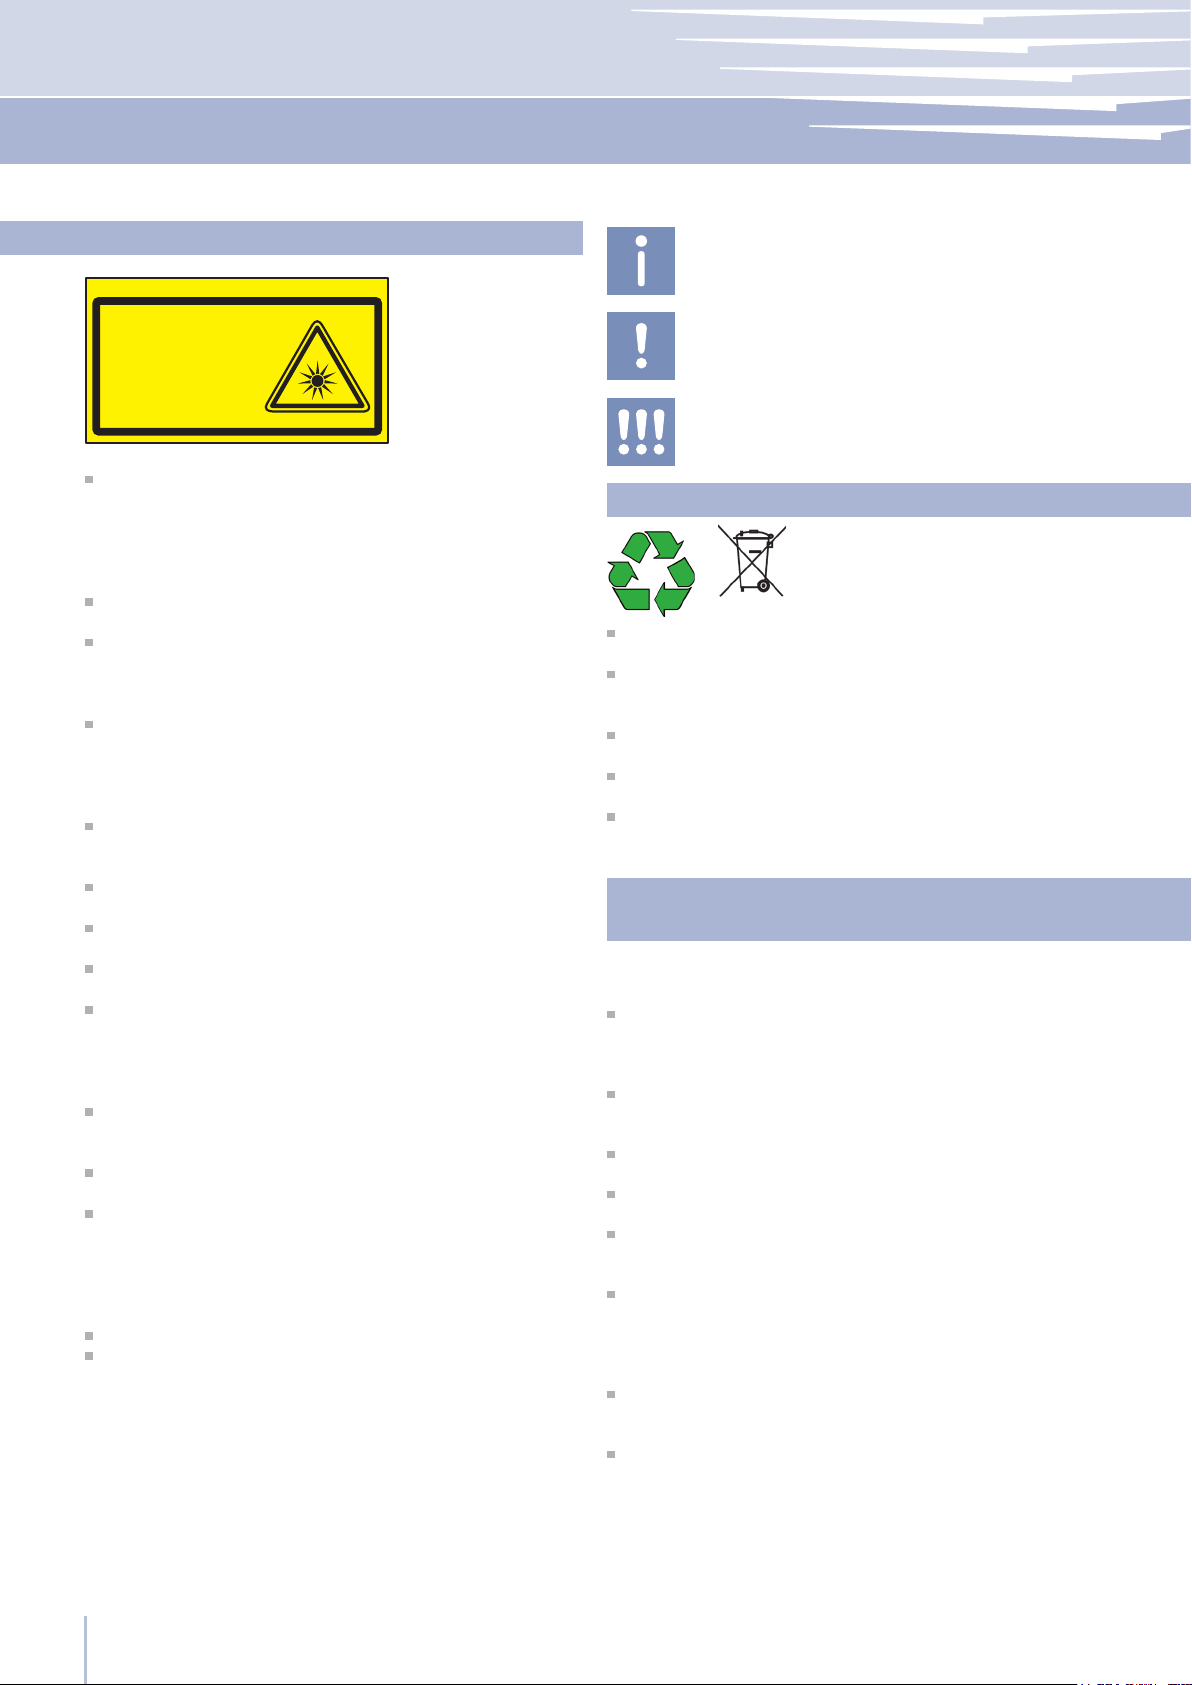
with LED lamps. Do not stare into these lamps when they
are on to avoid possible eyesight damage.
This warning is also contained on the label attached to
the inside of the refrigerator door.
surfaces in stainless steel with wet or damp hands, since
skin may stick to the very cold surfaces.
food conservation compartments.
shelf slide guides.
Do not position containers of ammable liquids near the
appliance.
Completely switch off the appliance and unplug the
power supply cable during cleaning operations. If the plug
is not easily reached, it is a good idea to turn off the breaker or remove the fuse that controls the socket that the appliance is connected to.
The packaging parts can be dangerous for children: do
not allow children to play with the plastic bags, plastic lm
or Styrofoam.
Any repairs must be performed by a qualified Smeg
Service technician.
This appliance is not intended for use by persons (including
children) with reduced physical, sensory or lack of experience
and knowledge unless they have been given supervision or
instruction concerning use of the appliance by a person responsible for their safety. Children should be supervised to ensure that they do not play with the appliance.
Do not damage the appliance refrigerant circuit pipes.
Do not store explosive substances such as aerosol cans with
a ammable propellant in this appliance.
For your safety
Risk Group 2
PRUDENZA:
NON FISSARE LA LAMPADA IN FUNZIONE.
PUÒ ESSERE DANNOSO PER GLI OCCHI.
CAUTION:
DO NOT STARE AT OPERATING LAMP.
MAY BE HARMFUL TO THE EYES.
Product tested in accordante with EN62471
If this appliance is replacing an existing appliance which
This appliance is designed to refrigerate beverages and
The appliance must be installed by following the instruc-
The appliance features a concentrated lighting system
When the freezer is functioning do not touch the inner
Do not use any type of electrical equipment inside of the
When positioning the shelves, do not place fingers in the
B09001301
Notes
Recommendations for correct use of the
appliance
Important
Directions for avoiding appliance damage
Warning
Indications for avoiding injury
to people
1.2
Caring for the environment
Pay special attention to correct disposal procedure for
all the packaging materials.
The appliance must not be disposed of with urban waste.
Contact local waste disposal centres for on how to dispose
of recyclable waste.
Prior to disposal, cut the power supply cord and make it
impossible to close the door.
During disposal, avoid damage to the refrigeration circuit.
The appliance does not contain hazardous substances for
the atmospheric ozone layer, neither in the refrigeration circuit
nor in the insulation.
Cleaning, sanitization and maintenance of
1.3
the ice and/or water dispenser (if present)
Failure to follow the instructions regarding sanitizing can
compromise the hygienic safety of the water dispensed.
When using the appliance for the rst time and every
time the lter is changed, it is recommended to let the water ow in the circuit using the “Manual Cleaning” and
discard the ice produced in the rst 24 hours.
If the water dispenser has not been used for more than
4/5 days, it is advisable to clean the circuit and run off the
rst litre of water.
Reposition the removable water dispenser (if present),
ensuring your hands are hygienically clean.
Clean the ice bucket or drawer regularly but using only
drinking water.
The lter must be changed when indicated on the control panel or when the ice/water dispenser has not been
used for more than 30 days.
With each lter replacement, sanitise the ice and/or water distribution system using a food grade disinfectant (with
sodium hypochlorite), which does not alter the characteristics of the materials. Rinse with at least 2 litres of water
before use.
Only original spare parts supplied by the manufacturer
should be used when replacing components in the ice and
water dispenser.
Any work on the appliance must be carried out by a
qualied technician or the After-sales Service.
www.fhiaba.com ∙ info@fhiaba.com ∙ Tel +39 (0)434 420160 ∙ Fax +39 (0)434 420161
2828

Installation
2-3
Installation
2.1
Make sure that installation is performed correctly, adhering
to all directions in the specic installation manual provided
with the appliance.
Connection to the electrical power supply
2.2
The appliance is equipped with a Schuko type 16A plug
and must be connected to the electrical power supply
through a corresponding Schuko socket.
Do not use extension cords and/or multiple adapters for
the power supply connection.
Do not use extension cords and/or multiple adapters for the power supply connection.
Make sure that installation is performed correctly,
according to all of the directions in the specic installation manual provided with the appliance.
Do not attempt to use a locally sourced garden
hose threaded adapter or braided supply line. It
will strip the threads on the appliance water connection solenoid.
3.1
Know your appliance
Congratulations for having purchased your new Fhiaba:
from now on you can use our innovative conservation system, which will allow you to keep all of your food in the
best way possible.
This manual will answer most of your questions about the
product’s features. Should you require further information,
please check our website
www.fhiaba.com
or write us an e-mail at
EN
If energy is supplied through an alternative energy
power source (solar, geothermal, etc..) or if home
automation systems are installed, it is necessary to
install the Alternative Energy Kit to integrate the unit
into the power grid.
Connection to the water system
2.3
The models provided with Ice Maker require a connection
to the domestic water supply system. This can be executed
through the provided water hose with 3/4” threading.
The system pressure must be between 0.05 MPa and 0.5
MPa (between 0.5 Bar and 5 Bar).
Differents pressures can cause malfunctions or leaks in the
water system. The appliance should be supplied only with
drinkable water.
care@fhiaba.com.
Before calling, write down the model type and serial
number which are available on the warranty certicate
and on the rating plate located on the bottom left-hand
corner of the appliance, behind the bottom drawer and
any messages which may have appeared on the display.
+39 0434 420 160
The appliance should be supplied only with
drinkable water.
www.fhiaba.com ∙ info@fhiaba.com ∙ Tel +39 (0)434 420160 ∙ Fax +39 (0)434 420161
29
3
Before starting
3.2
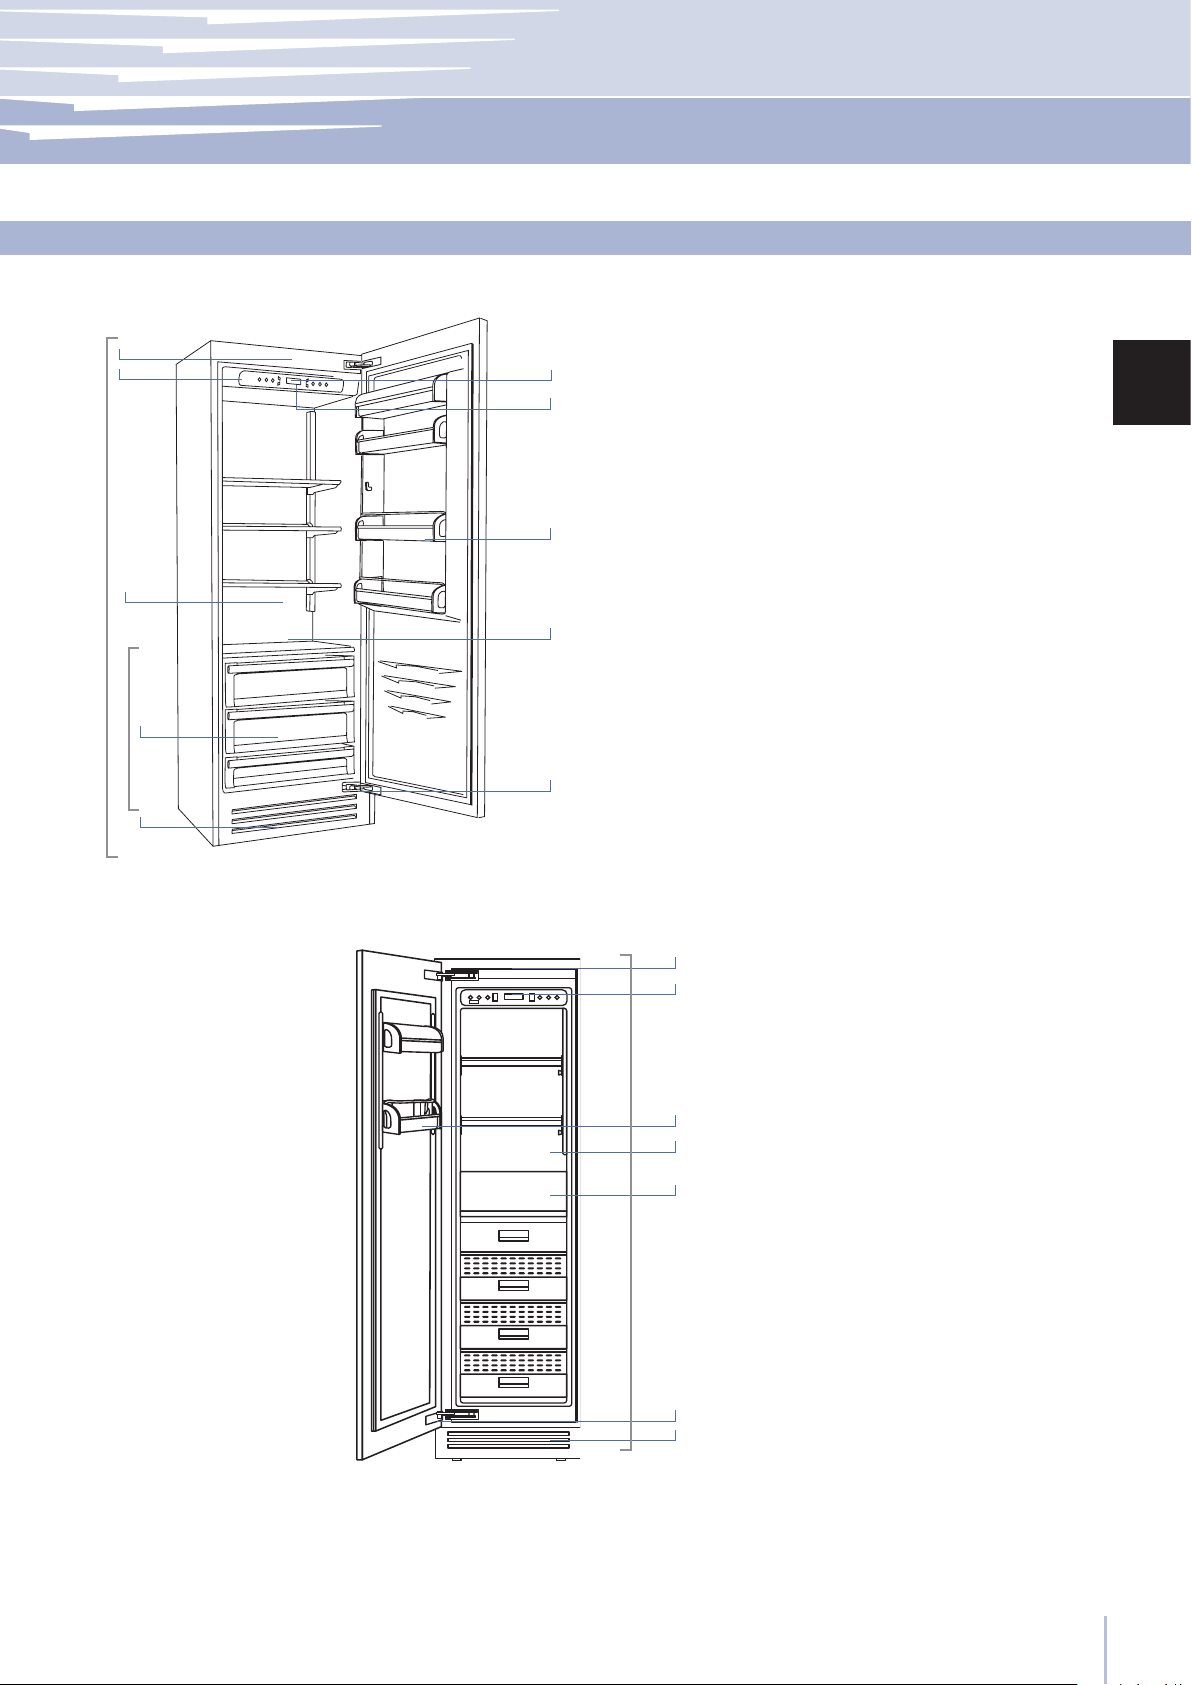
Main components
1 9
2
3
4
Fridge
5
6
Fresco
8
TriMode
10
11
12
13
14
15
16
1 Stainless steel structure with
aluminum trim
2 Control panel with Menu
3 Water Filter
4 Patented shelf positioning
system
5 Control panel, Fresco area
6 Fresco compartment with
controlled humidity
7 “Low Temp” drawer with
controlled humidity
8 Automatic icemaker
9 Double refrigeration system
10 Temperature display
11 Sound signals
Fridge
Low Temp
TriMode
12 Vacation function
1T Models
13 Spacious door shelves
14 Innovative lighting
15 Automatic door and
1
2
3
4
7
8
10
11
12
13
14
15
16
drawer closure
16 Freezer compartment
that can be transformed
into a refrigerator or Fresco
compartment
(TriMode function)
9
0T Models
www.fhiaba.com ∙ info@fhiaba.com ∙ Tel +39 (0)434 420160 ∙ Fax +39 (0)434 420161
30
Before starting
1 Stainless steel structure with
1
2
3
4
10
11
12
aluminum trim
2 Control panel with Menu
3 Water Filter
4 Patented shelf positioning
system
3
EN
Fridge
Low Temp
TriMode
13
7
14
8
15
16
9
Brilliance Models
1
2
3
7 “Low Temp” drawer with
controlled humidity
8 Automatic icemaker
9 Double refrigeration system
10 Temperature display
11 Sound signals
12 Vacation function
13 Spacious door shelves
14 Innovative lighting
15 Automatic door and
drawer closure
16 Freezer compartment
that can be transformed
into a refrigerator or Fresco
compartment
(TriMode function)
10
11
12
Fridge
Low Temp
TriMode
13
4
7
14
8
15
16
9
0H Models
www.fhiaba.com ∙ info@fhiaba.com ∙ Tel +39 (0)434 420160 ∙ Fax +39 (0)434 420161
31
3
123456798
10 11 12
Before starting
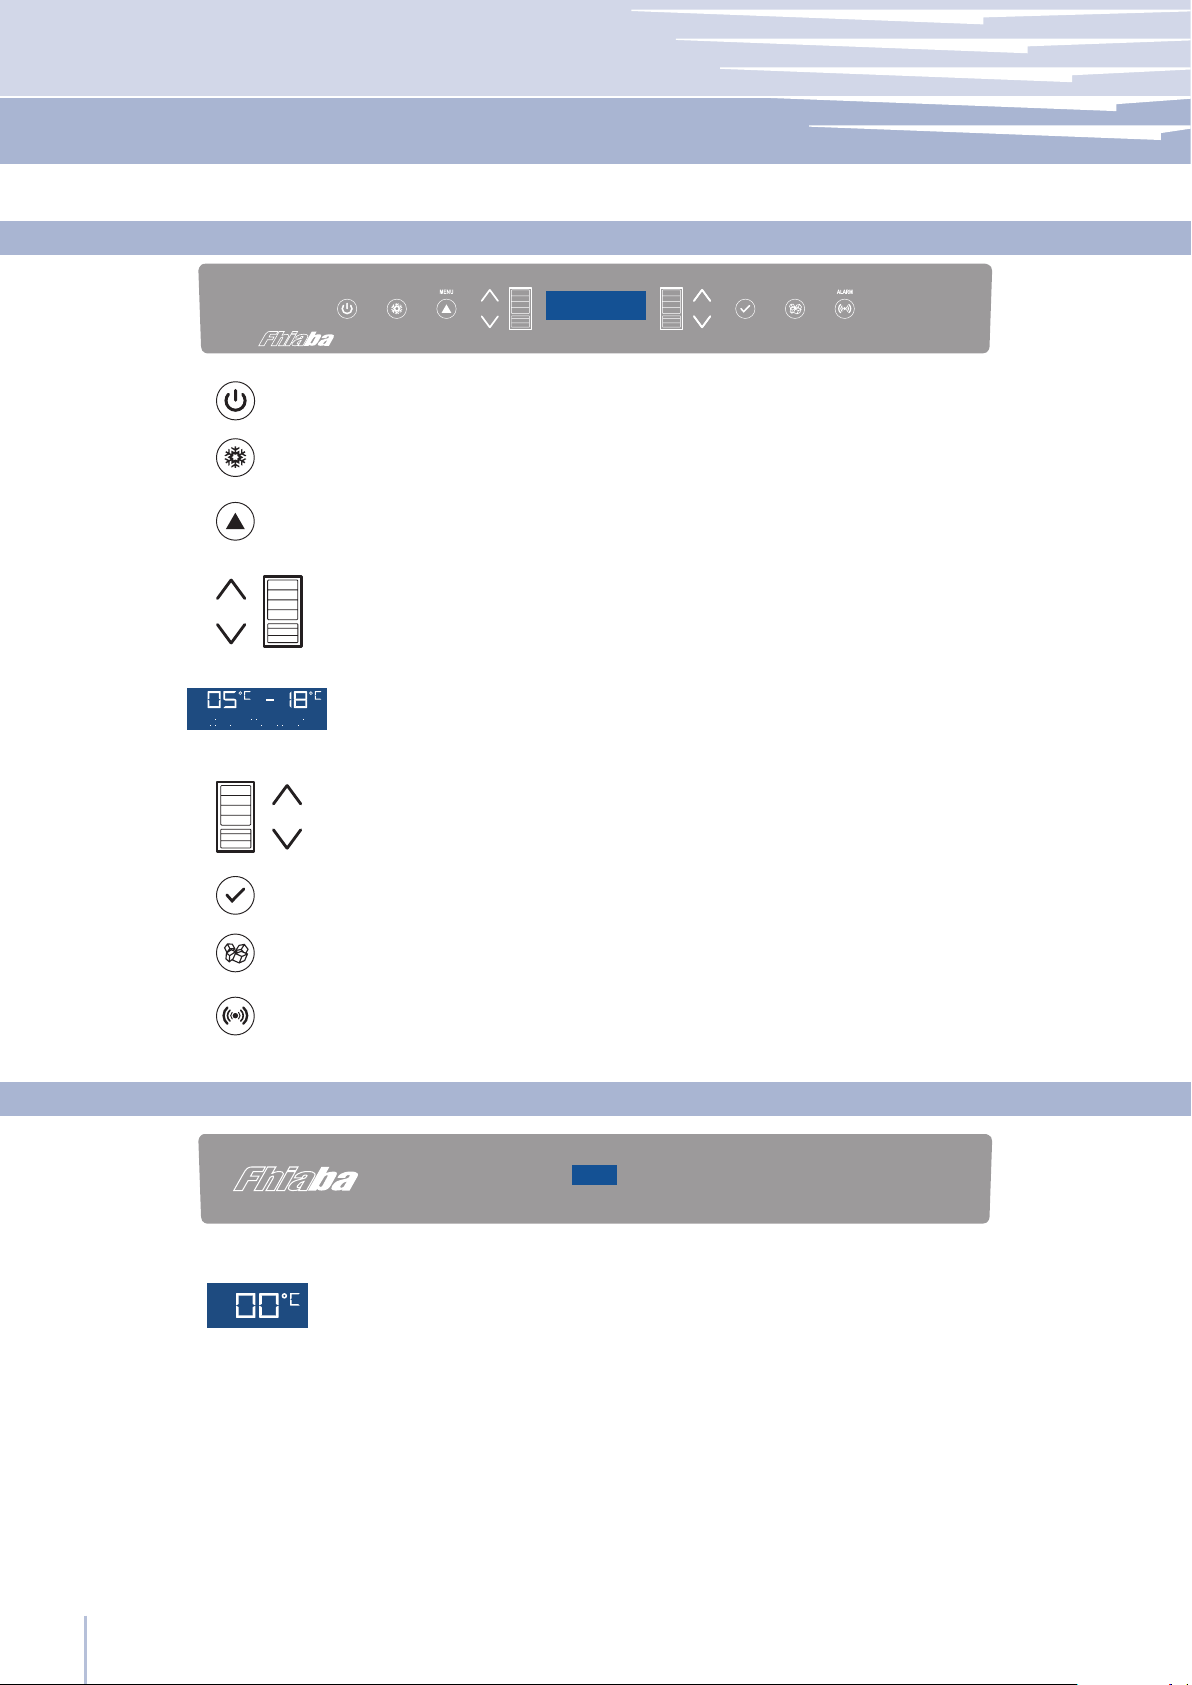
3.3
The innovative electronic control system designed by Fhiaba maintains constant temperature on the compartments and
visualizes it on the control panel display.
It also allows user interaction making it possible to personalize settings of the various functions and to receive sound and/
or visual messages should occur any malfunction in the appliance.
3.4
Main components
Main control panel
1
2
3
4
UNIT
FRIDGE
Unit
Fridge
Menu
Up/down
Fridge
ICE MAKER
ENTER
Switches the appliance (all compartments) between ON and STAND BY
(press for three seconds).
Allows switching ON and OFF of only the refrigerator compartment
(press for three seconds).
Allows access to the appliance function menu
Using the Up and Down buttons, it is possible to change the set temperature of the refrigerator and navigate through the interactive menu.
5
6
7
8
9
Fresco control panel
3.5
Display
Up/Down
Freezer
(TriMode)
Enter
Ice maker
Alarm
It shows the temperature of the refrigerator and freezer compartments,
the date and time, Menu functions and visual messages.
By selecting Up/Down the preset temperature can be changed according to the selected function mode (freezer, refrigerator, Fresco)
and navigate through the interactive menu.
Confirms activation or deactivation of the selections made in the
Menu.
Allows activating or deactivating the automatic ice production.
Blinks to signal user alerts such as door left open, also in combination with
a sound signal which can be deactivated by pressing the button.
CRISPER
11
12
13
www.fhiaba.com ∙ info@fhiaba.com ∙ Tel +39 (0)434 420160 ∙ Fax +39 (0)434 420161
32
Display
Up/Down
Crisper
Shows the temperature of the Fresco compartment.
Using the Up and Down buttons, it is possible to change the temperature set for the Fresco compartment.
Allows switching on and off of only the Fresco compartment (press
for three seconds).
Before starting
Componenti principali
Electronic Control
Single drawer Fridge
1
2
10
11
1 Stainless steel structure with
aluminum trim
2 Control panel with Menu
4 Patented shelf positioning
system
3
3.6
EN
4
7
Low Temp
9
0FR Models
13
14
15
10
5 Control panel, Fresco area
6 Fresco compartment with
controlled humidity
7 “Low Temp” drawer with
controlled humidity
8 Automatic icemaker
9 Double refrigeration system
10 Temperature display
11 Sound signals
13 Spacious door shelves
14 Innovative lighting
15 Automatic door and
1
drawer closure
16 Freezer compartment
that can be transformed
into a refrigerator or Fresco
compartment
(TriMode function)
13
4
Built-in Ice Maker
8
Freezer
15
9
0FZ Models
Must be ordered in combination with
Fridge column.
www.fhiaba.com ∙ info@fhiaba.com ∙ Tel +39 (0)434 420160 ∙ Fax +39 (0)434 420161
33
123456798
FRIDGE
FREEZER
Before starting
3
Main control panel
3.7
UNIT
FRIDGE
1
2
3
4
5
6
Unit
Fridge
Menu
Up/down
Fridge
Display
Up/Down
Freezer
FRIDGE
Switches the appliance (all compartments) between ON and STAND BY
(press for three seconds).
Allows switching ON and OFF of only the refrigerator compartment
(press for three seconds).
Allows access to the appliance function menu
Using the Up and Down buttons, it is possible to change the set temperature of the refrigerator and navigate through the interactive menu.
It shows the temperature of the refrigerator and freezer compartments,
the date and time, Menu functions and visual messages.
By selecting Up/Down the preset temperature and navigate through
the interactive menu.
FREEZER
ENTER
ICE MAKER
7
8
9
Freezer control panel
3.8
1
Enter
Ice maker
Alarm
Display
Confirms activation or deactivation of the selections made in the
Menu.
Allows activating or deactivating the automatic ice production.
Blinks to signal user alerts such as door left open, also in combination
with a sound signal which can be deactivated by pressing the button.
Shows the temperature of the Freezer compartment.
www.fhiaba.com ∙ info@fhiaba.com ∙ Tel +39 (0)434 420160 ∙ Fax +39 (0)434 420161
34
 Loading...