

FG Flight V757 User Manual
ON/OFF Switch
Charging Socket
Remote Control
Balance Bar
Upper Blade
Lower Blade
Bubble machine
Front Canopy
Main Fuselage
Bubble Container
Landing Skid
Performance
Button
Power Control
ON/OFF
Switch
INFRA-RED Channel
Selector
Direction Stick
Bubble Switch
Trimmer Switch
FG FLIGHT BUBBLE BLOWING HELICOPTER
Rear Blade
- Do not use the helicopter in direct sunlight or bright lighting, it will effect the infar-red
signal.
- Do not cover the aerial of the remote control as you will stop the signal to the helicopter.
- Do not stick any lables on to the helicopter, as it could effect the signal to the helicopter
from the remote control.
- This product is made from light weight materials and if not operated correctly, it will
damage the helicopter.
1. Only fly inside in calm air conditions. Away from air conditioners.
2. Fly in a space larger than 20ft(W) x 30ft (L) x 10ft(H)
3. Fly away from electric fans, airconditioners and other dangerous objects.
4. Don not fly near other people.
Order parts from your local retailer or Flying Gadgets - sales@flyinggadgets.com / 0208 952 0471
Please read this manual before
flying and retain for future reference
1
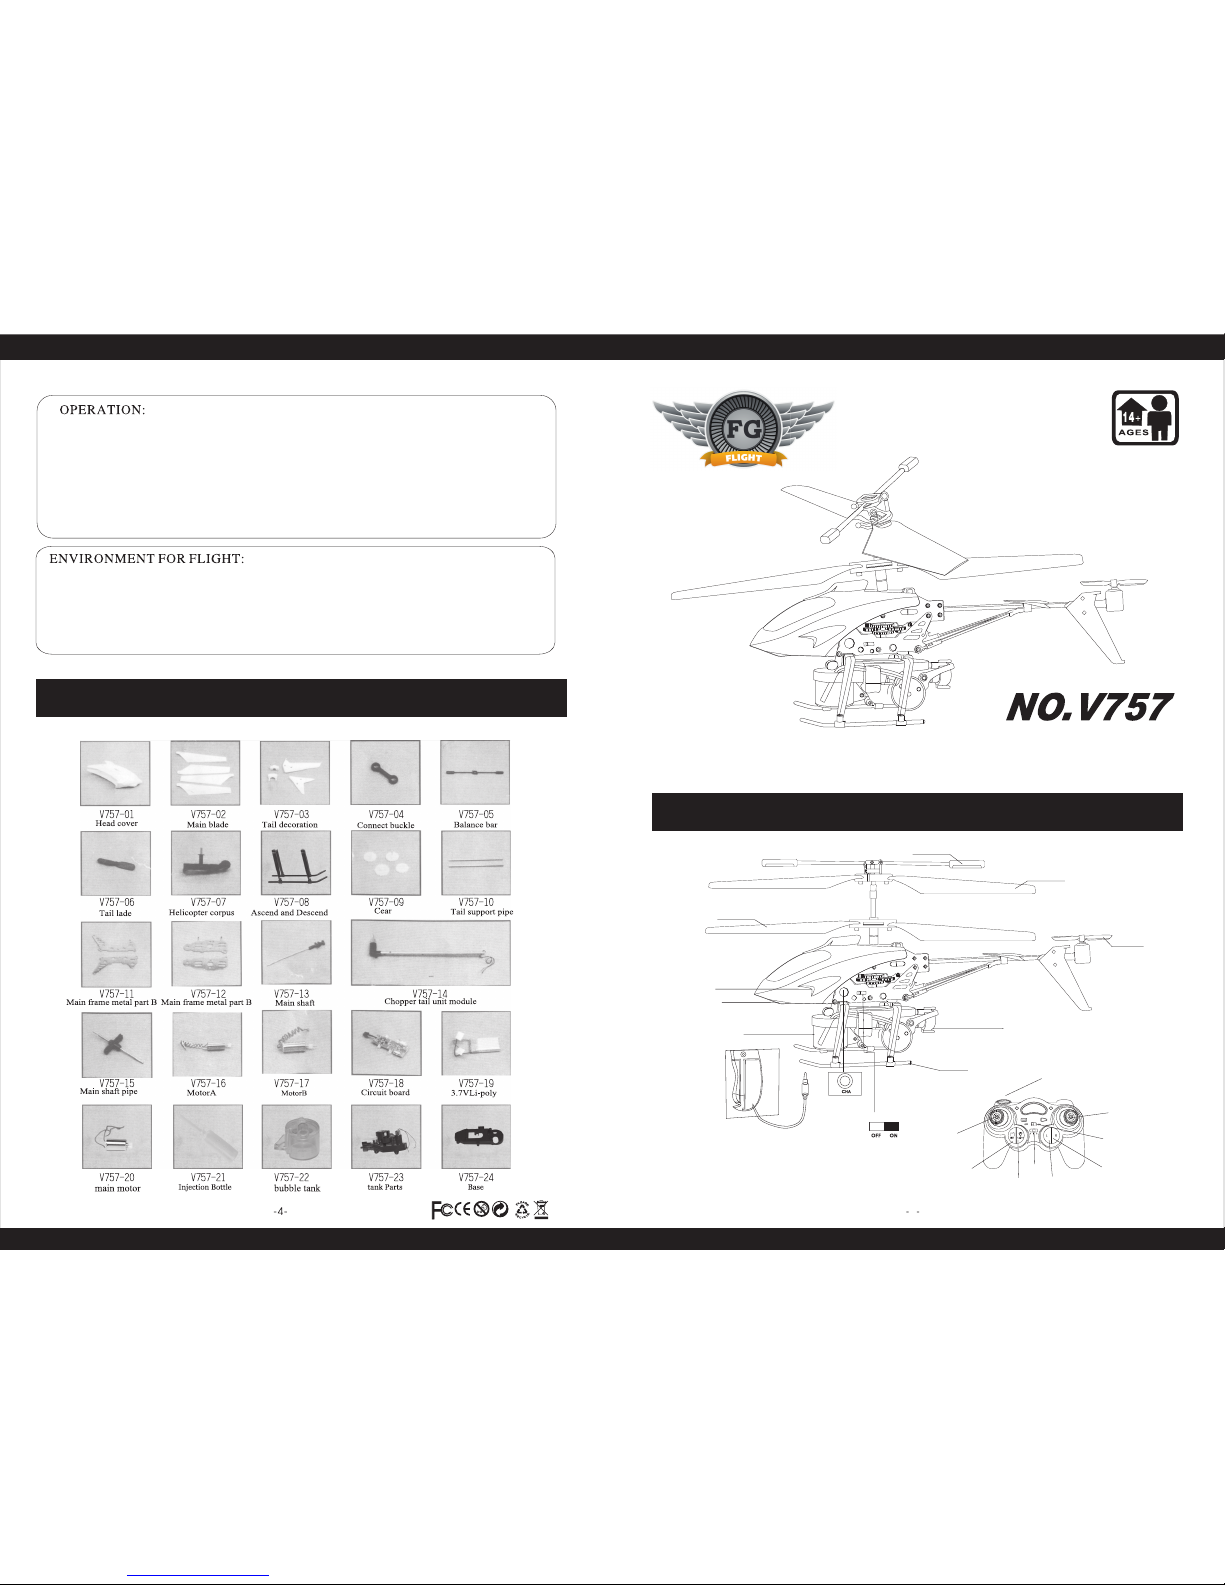
SPARE PARTS LIST
SPARE PARTS LISTSPARE PARTS LISTSPARE PARTS LIST
PARTS EXPLAINED
SPARE PARTS LISTSPARE PARTS LISTSPARE PARTS LIST
BATTERY
INSTALLATION
CHARGING THE
HELICOPTER
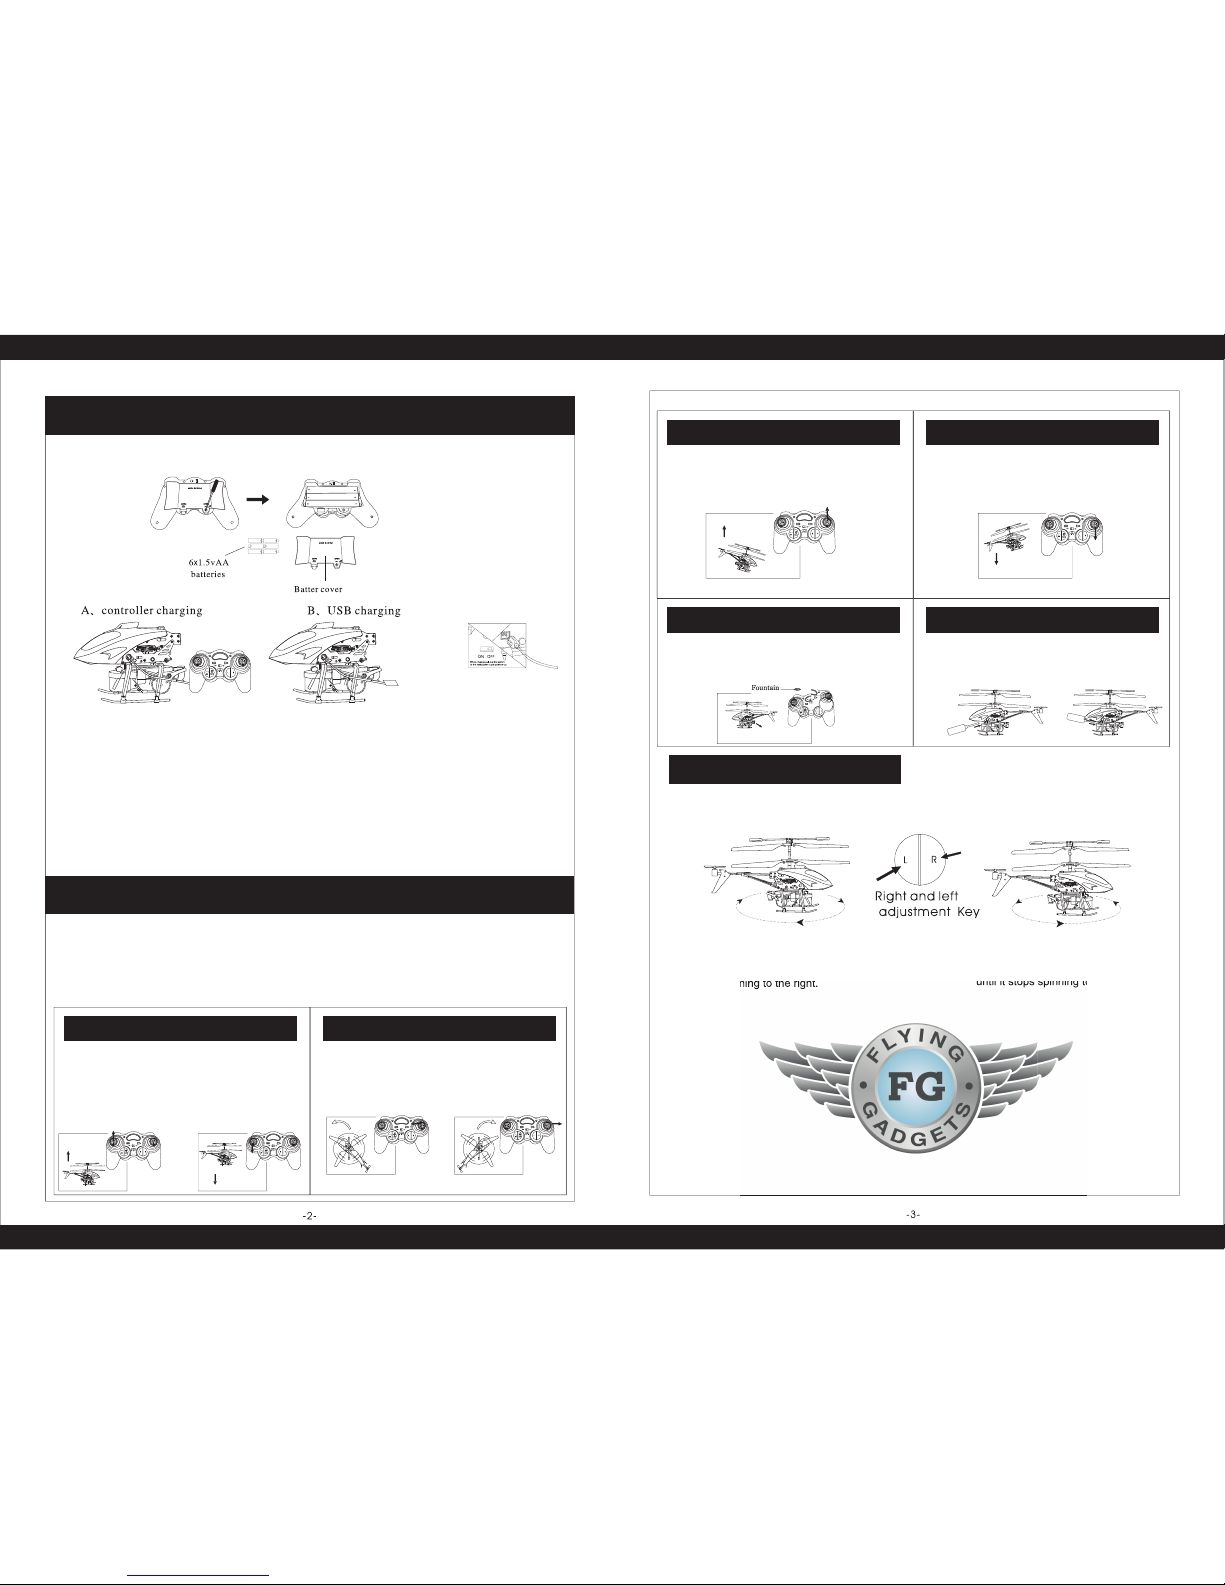
Open the battery cover and
insert 6 (AA) batteries. Make
sure they are inserted with the
correct polarity. Then replace
the battery cover.
Connect to a
USB port
Remote control charging:
1. Turn the remote control (ON), turn the helicopter power (OFF).
2. Take out the charging wire from the compartment in the remote control.
3. Connect the helicopter up to the remote control.
4. When the LED light on the front of the remote control turns from RED to GREEN charging is completed.
USB Charging:
1. Plug the USB lead in to a computer or USB input.
2. Turn the helicopter (OFF)
3. Connect the lead to the helicopter.
4. When the RED light on the USB switches OFF, charging is completed.
A FULL CHARGE TAKES UP TO 45 MINUTES AND WILL LAST FOR 6 MINUTES.
- Set the Infra-Red channel selector on the remote control to the same as the helicopter.
- Turn the remote control and then the helicopter (ON)
- Place the helicopter on a flat surface.
- Increase the power on the controller.
- The lights will start flashing on the helicopter and then you can start flying!
To make the helicopter move UP push the left
hand power stick up.
To make the helicopter move DOWN move the
left hand power stick towards you.
Use only small movements for smooth flying.
To make the helicopter spin to the LEFT, move
the right hand direction stick to the LEFT.
To make the helicopter spin to the RIGHT, move
the left hand direction stick to the LEFT.
To move FORWARDS, push the right
hand direction stick FORWARD and the
helicopter will move FORWARD..
To move the helicopter BACKWARDS, move the
left hand direction stick BACKWARDS and the
helicopter will move BACKWARDS.
To turn the bubbles ON, push the left hand
button on the top of the controller and the
helicopter will shoot bubbles out of the back of
the helicopter.
To fill the bubble tank, use the squeeze bottle
and siringe end. Fill the squeeze bottle up with
bubble fluid then squeeze in to the bubble tank
access hole.
If the helicopter is moving to the left or the right without any
control inputs. Then you will need to trim the helicopter.
HELICOPTER SPINS TO THE RIGHT HELICOPTER SPINS TO THE LEFT
Press the L side of the trim button on the
remote control. Continue pressing until it
stops spinning to the right.
Press the R side of the trim button on
the remote control. Continue pressing
until it stops spinning to the left.
until it stops spinning to the left.
BATTERY INSTALLATION & CHARGING
FLYING THE HELICOPTER
FLY UP AND DOWN
TURN LEFT/RIGHT
FORWARDS
BACKWARDS
BUBBLES
NOTE ON REFUELLING BUBBLES
TRIMMING THE HELICOPTER
 Loading...