

Page 1

Slim Progressive Scan
DVD Player
SKU 319618
User’s Guide
Important notice: Please read this manual carefully
Page 2
WARNING
- TO PREVENT FIRE OR SHOCK HAZARD. DO NOT USE THIS PLUG WITH AN EXTENSION CORD. RECEPTACLE OR OTHER OUTLET UNLESS
THE BLADES CAN BE FULLY INSERTED TO PREVENT BLADE EXPOSURE.
- TO REDUCE THE RISK OF FIRE OR ELECTRIC SHOCK, DO NOT EXPOSE THIS APPLIANCE TO RAIN OR MOISTURE.
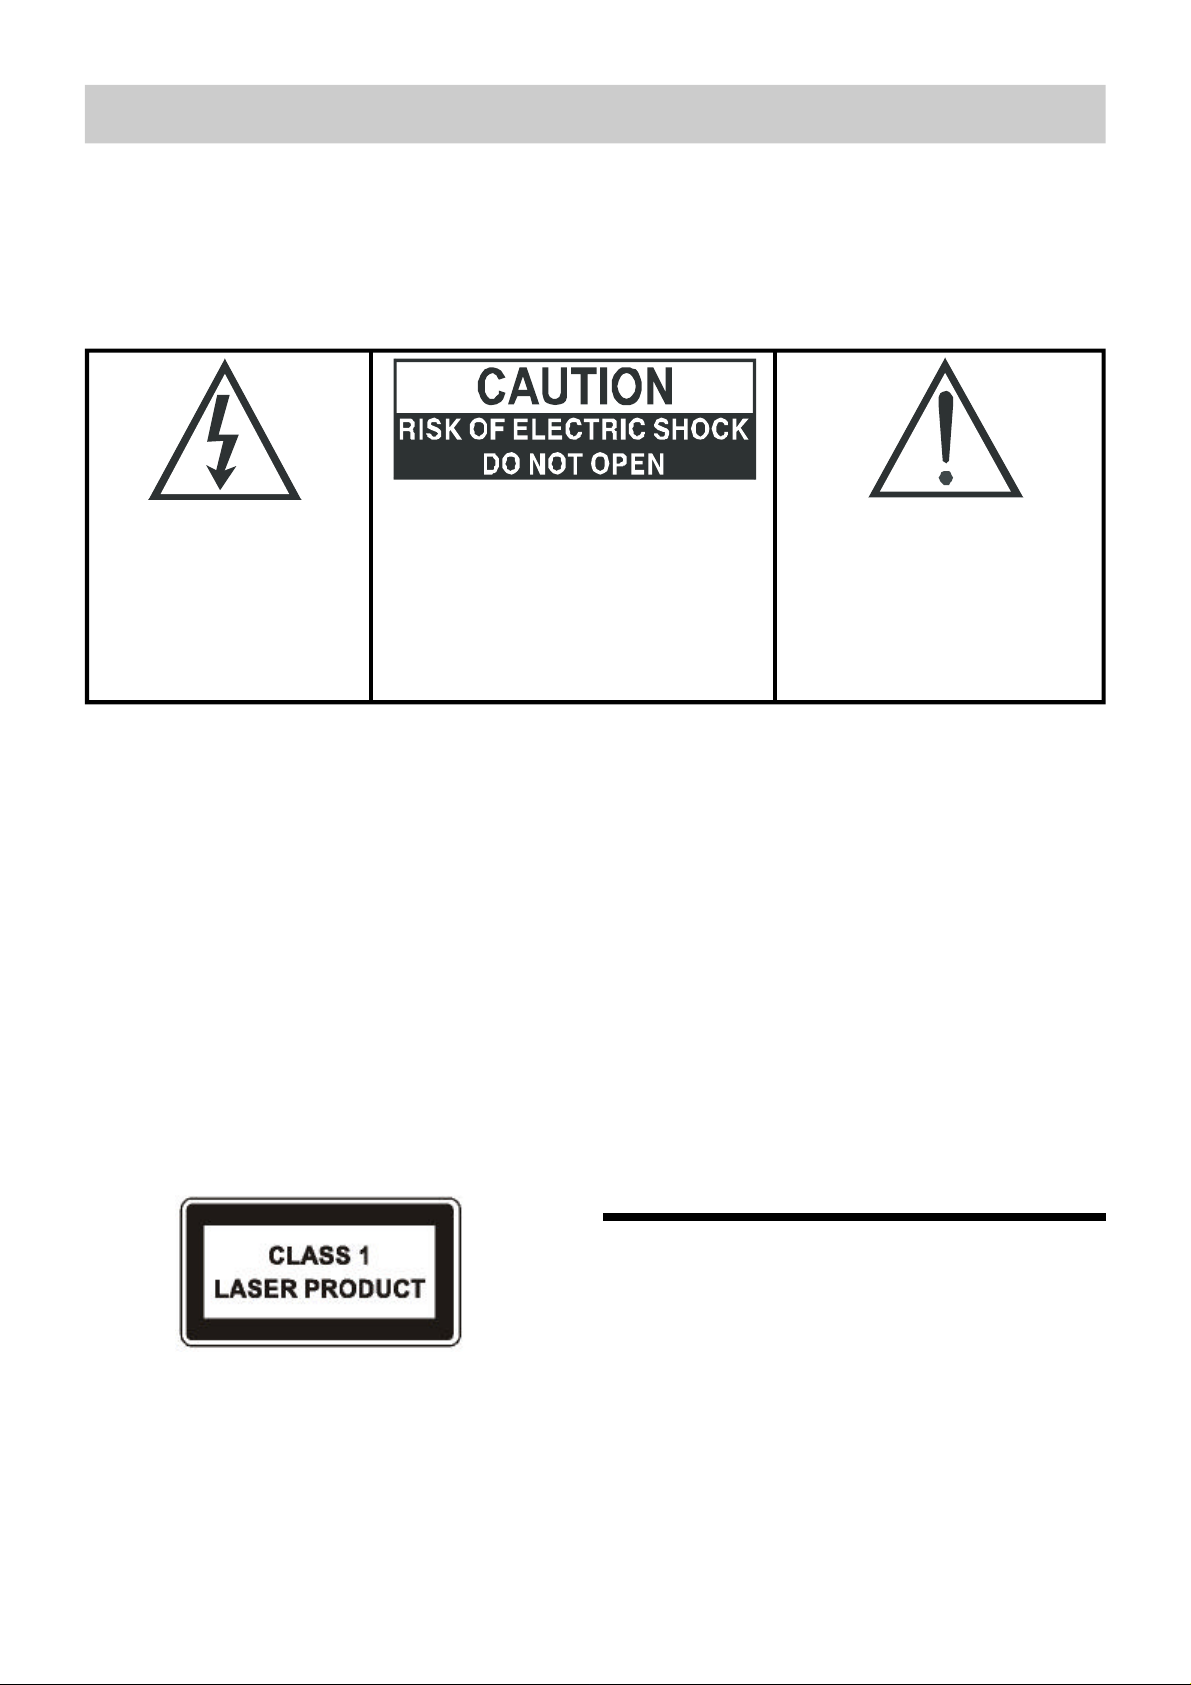
The lightning flash with arrowhead
symbol, within an equilateral triangle,
is intended to alert the user to the
presence of uninsulated “dangerous voltage” within the product’s
enclosure that may be of sufficient
magnitude to constitute a risk of
electric shock to persons.
CAUTION: TO REDUCE THE RISK OF ELECTRIC
SHOCK, DO NOT REMOVER COVER(OR BACK)
NO USER SERVICEABLE PARTS INSIDE.
REFER SERVICING TO QUALIFIED
SERVICE PERSONNEL.
The exclamation point within an equilateral
triangle is intended to alert the user to the
presence of important operating and
maintenance (servicing) instructions in the
literature acompanying the appliance.
IMPORTANT SAFETY INSTRUCTIONS
1) Read these instructions. 10) Protect the power cord from being walked on or
2) Keep these instructions. pinched particularly at plugs, convenience recep-
3) Heed all warnings. tacles, and the point where they exit from the appa-
4) Follow all instructions. ratus.
5) Do not use this apparatus near water. 11) Only use attachments/accessories specified by the
6) Clean only with dry cloth. manufacturer.
7) Do not block any ventilation openings. Install in ac- 12) Unplug this apparatus during lightning storms or when
cordance with the manufacturer’s instructions. unused for long periods of time.
8) Do not install near any heat sources such as radia- 13) Refer all servicing to qualified service personnel. Ser tors, heat registers, stoves, or other apparatus (in- vicing is required when the apparatus has been dam cluding amplifiers) that produce heat. aged in any way, such as power-supply cord or plug
9) Do not defeat the safety purpose of the polarized or is damaged, has been exposed to rain or moisture,
grounding-type plug. A polarized plug has two blades does not operate normally, or has been dropped.
with one wider than the other. A grounding type plug
has two blades and a third grounding prong.The wide
blade or the third prong are provided for your safty.If
the provided plug does not fit into your outlet, con sult an electrician for replacement of the obsolete
outlet.
Apparatus shall not be exposed to dripping or splashing and no
objects filled with liquids such as vases, shall
be placed on the apparatus.
. This appliance is classified as a CLASS 1 LASER product.
. This product contains a low power laser device. To ensu-
re continued safety, do not remove any cover or attempt
to gain access to the inside of the product. Refer all serv icing to qualified personnel only.
Care and safety information
Avoid high temperatures, moisture, water and dust. Do not expose
the system, batteries or discs to humidity, rain, sand or excessive
heat (caused by heating equipment or direct sunlight). Always
keep the disc tray closed to avoid dust on the lens.
Avoid condensation problem
The lens may cloud over when the player is suddenly moved from
cold to warm surroundings. Making it impossible to play a disc.
Leave the player in the warm environment until the moisture
evaporates.
Page 3

FCC RADIA TION NORM
FCC
This equipment has been tested and found to comply with limits for Class B digital device pursuant to Part 15 of Federal
Communications Commission (FCC) rules.
FCC Compliance Statement
These limits are designed to provide reasonable protection against frequency interference in residential
installation. This equipment generates, uses and can radiate radio frequency energy, and if not installed or used in
accordance with the instructions, may cause harmful interference to radio communication. However, there is no
guarantee that interference will not occur in television reception, which can be determined by turning the
equipment off and on. The user is encouraged to try and correct the interference by one or more of the following
measures:
n Reorient or relocate the receiving antenna
n Increase the separation between the equipment and the receiver
n Connect the equipment into an outlet on a circuit different from that to which the receiver is connected to.
CAUTION!
The Federal Communications Commission warns the user that changes or modifications to the unit
not expressly approved by the party responsible for compliance could void the user’s authority to
operate the equipment.
Page 4

Important Safeguards and Precautions
®
®
Power Cord Protection
To avoid the unit from malfunctioning, and to protect against electric shock, fire or personal injury, please observe the following:
• Hold the plug firmly when connecting or disconnecting the AC
power cord.
• Keep the AC power cord away from any heating appliances.
• Never put any heavy objects on the AC power cord.
• Do not attempt to repair or reconstruct the AC power cord in any
way.
Location and Handling
• Air vents are provided in the cabinet to prevent the tempera-
ture inside the unit from rising to dangerous levels. Do not
place this unit in closed spaces, cover it, or otherwise block
the vents.
• Do not place this unit in direct sunlight or near heat sources.
• Keep this unit away from strong magnetic objects.
• Do not insert or drop anything into this unit through the air vents
as this could cause serious damage, possibly resulting in fire.
• Do not place any object containing water or other liquids on this
unit. In the event that liquid should enter the cabinet, unplug
this unit immediately and contact the service center immediately.
• Do not remove the cabinet. Touching parts inside the cabinet
could result in electric shock and/or damage to the unit.
• Do not use the unit in a car.
If There is Noise Interference on the TV While a Broadcast is Being Received
Depending on the reception condition of the TV, interference may
appear on the TV monitor while you watch a TV broadcast if the
DVD player is left on. This is not a malfunction of the unit or the
TV. To watch a TV broadcast, turn off the DVD player.
Service
• Do not attempt to service the unit yourself.
• Please refer any service to qualified technicians.
Copyright
Audio-visual material may consist of copyrighted works which must
not be recorded without the authority of the owner of the copyright. Please refer to relevant laws in your country.
Copy protection
This DVD player supports Macrovision copy protection.
On DVD discs that include a copy protection code, if the contents
of the DVD disc are copied using a VCR, the copy protection code
prevents the videotape copy from playing normally.
Manufactured under license from Dolby Laboratories.
“Dolby” and the double-D symbol are trademarks of Dolby
Laboratories.
Nonuse Periods
• When the unit is not being used, make sure to keep the unit
turned off.
• When left unused for a long period of time, the unit should be
unplugged from the household AC outlet.
Disc Tray
• Do not put any foreign objects on or in the disc tray.
• Do not push down on or place your fingers or hand in the disc
tray.
Stacking
• Place the unit in a horizontal position and do not place anything
heavy on top of it.
Condensation
Moisture may form on the pickup lens in the following conditions:
• Immediately after a heater has been turned on near the unit.
• In a steamy or very humid room.
• When the unit is suddenly moved from a cold environment to a
warm one.
If moisture forms inside this unit, it may not operate properly. If this
happens, remove power and place the unit at a well ventilated
area and let the moisture to evaporate before using the unit again.
Recommended Measures for Optimum Picture Excellence
This unit is a precision device that is constructed using extremely
accurate technology.
Soiling or friction affecting the pickup lens or disc drive can impair
the image quality. At the worst, neither video nor audio will be
played back. To obtain optimum picture quality, the player should
be checked (cleaning and replacement of some parts) every 1,000
hours. Note that this period varies depending on the environment
(temperature, humidity, dust, etc..) in which the player is used.
Do not attempt to clean the pickup lens yourself.
CAUTION
"VENTILA TION SHOULD NOT BE IMPEDED BY COVERING THE
VENTILATION OPENINGS WITH ITEMS SUCH AS NEWSPAPER,
TABLECLOTHS, CURTAINS, ETC."
"NO OPEN FLAME SOURCES, SUCH AS LIGHTED CANDLES,
SHOULD BE PLACED ON THE APP ARATUS."
"DO NOT EXPOSE THE APPARATUS TO MOISTURE, LIQUID, OR
SPLASHING OF LIQUIDS. DO NOT PLACE OBJECTS FILLED
WITH LIQUIDS, SUCH AS V ASES, ON THE APPARATUS."
On adjusting volume
• Do not turn up the volume while listening to a portion of music
or movie with very low level inputs or no audio signals. If you
do, the speakers may become damaged when a peak level
portion is played.
4
Page 5

General Information
Table of Contents
Features....................................................................................................................................................................................... 6
DVD Region Code......................................................................................................................................................................... 6
Glossary of Disc Terms................................................................................................................................................................ 6
System Notes ............................................................................................................................................................................... 6
Notes on Using Discs ................................................................................................................................................................... 7
Accessories ................................................................................................................................................................................ 7
Installing Batteries in the Remote Control...................................................................................................................................... 7
Remote Control
Remote Control ............................................................................................................................................................................. 8
Function Overview
Front Panel ................................................................................................................................................................................... 9
Back Panel ................................................................................................................................................................................... 9
Connections
Connecting Your DVD Player to Your TV ..................................................................................................................................... 10
Basic Setup
Setup Menu .................................................................................................................................................................................. 10
System Setup............................................................................................................................................................................... 11-12
Language Setup ........................................................................................................................................................................... 12-13
Audio Setup ................................................................................................................................................................................. 13-14
Video Setup ................................................................................................................................................................................. 14-15
Playing Discs
General Operation ........................................................................................................................................................................ 15
Basic Playback ............................................................................................................................................................................. 15-16
Playing MP3/JPEG Picture Discs ................................................................................................................................................... 16
Using the Menu for DVD............................................................................................................................................................... 17
Checking the Information .............................................................................................................................................................. 17
Program Play ................................................................................................................................................................................ 18
Special Functions
Picture Zooming............................................................................................................................................................................ 19
Selecting a Subtitle Language ...................................................................................................................................................... 19
Selecting the Audio Language...................................................................................................................................................... 19
Angle Selection ............................................................................................................................................................................ 19
Troubleshooting ............................................................................................................. 20
Specifications ................................................................................................................. 21
Warranties ....................................................................................................................... 22
5
Page 6

Features
General Information
• Stereo audio out.
• Compatible with DVD, DVD+R, DVD-R, DVD+RW, DVD-RW, MP3,
CD-R, CD-RW, JPEG, Kodak.
• OSD menu display.
• Full function remote control.
Glossary of Disc Terms
• Title (DVD)
The longest sections of a picture or a music piece on a DVD; a
movie, etc., for a picture piece on a video software; or an album,
etc., for a music piece on an audio software. Each title is assigned a title number enabling you to locate the title you want.
DVD Region Code
DVD players and discs are designed with region numbers which dictate the region (printed on the rear panel). If the region number does
not match the region number in your DVD player, you will not be able
to play the disc. If you try to play the DVD, the message WRONG
REGION will appear on the OSD.
The region number for this DVD player is 1.
Discs That Can be Played
•
DVD discs
Multi-titles. Titles may be subdivided
into chapters.
Audio CDs and MP3
•
Discs are divided into tracks.
Note
• You cannot play CD-G, CD-EXTRA, CD-ROM, DVD-ROM and
USB+HUB discs.
• You cannot play illegally produced discs.
• You cannot play scratched discs.
• Discs that are dusty, soiled or marked with fingerprints will not
play properly, if at all.
• Chapter (DVD)
Sections of a picture or a music piece that are smaller than titles.
A title is composed of several chapters. Each chapter is assigned a chapter number enabling you to locate the chapter you
want. Depending on the disc, no chapters may be recorded.
System Notes
• Instructions in this manual describe the controls on the system.
You can also use the controls on the remote control if they have
the same or similar names as those on the system.
• The types of functions and operations that can be used for a par-
ticular disc vary depending on the features of that disc. In some
cases, these functions and operations may differ from the descriptions given in this Operations Manual. In this event, follow the
instructions given on the screen. This Operations Manual only
covers basic disc operations.
• For some operations, “INVALID KEY” may appear on the screen.
This indicates that the operation described in this Operations
Manual is not permitted for the current disc.
• The drawings about the TV screen and front panel display used in
this Operations Manual are purely for the purposes of explanation, the actual displays may differ slightly from what is shown
here.
6
Page 7

General Information(continued)
Notes on Using Discs
Disc handling precautions
• To keep the disc clean, handle the disc by its edge. Do not touch
the surface.
• Do not stick paper or tape on the disc.
If there is glue (or a similar substance) on the disc, remove the glue
completely before using the disc.
• Do not expose the disc to direct sunlight or heat sources such as
hot air ducts, or leave it in a car parked in direct sunlight as a
considerable rise in temperature will adversely affect the disc.
• After playing, store the disc in its case.
• Do not write on the label side with a ball-point pen or other writing
implements.
• Be careful not to drop, bend, or crack the disc.
Accessories
Check that the following items came with your DVD Player:
• Video/Audio Cable x1
• Remote Control x1
• AAA batteries x2
• User’s Manual
Installing Batteries in the Remote
Control
1. Open the battery cover on the back of the remote.
2. Insert two AAA batteries, making sure that the polarities (+ and -)
are aligned correctly.
3. Replace the battery cover.
You can control the system using the supplied remote. When using
the remote, point it at the remote sensor on the front panel of this
system.
Disc cleaning precautions
• Before playing, clean the disc with a cleaning cloth. Wipe the disc
from the center outward.
• Do not use solvents such as benzine, thinner, commercially avail-
able cleaners or antistatic spray intended for vinyl LPs.
Disc playing precautions
• Do not place more than one disc in the disc tray at a time.
• Do not place the disc wrong side up in the tray.
• Do not try to close the disc tray when the disc is not placed
properly in the tray.
If remote doesn’t operate properly:
•
Check that the batteries were installed according to the
proper polarity.
Check that the batteries are not dead. Always replace both
•
batteries at the same time with fresh, new batteries.
• Check if the remote sensor is blocked by an object.
NOTE:
• Do not leave the remote in an extremely hot or humid place.
• Do not use a new battery with an old one, always replace the
batteries at the same time using fresh, new batteries.
• Do not drop any foreign objects into the remote casing,
particularly when replacing the batteries.
• Do not expose the remote sensor to direct sunlight or lighting
apparatuses, doing so may cause the remote to malfunction.
• If you do not use the remote for an extended period of time,
remove the batteries to avoid any possible damage from battery
leakage and/or erosion.
7
Page 8

Remote Control
1
2
3
4
5
6
7
8
9
10
Remote Control
5. FAST REVERSE: Press to fast reverse through the currently
15
16
17
18
19
20
21
22
23
24
playing disc and/or track.
6. STOP: Press to stop playback.
7. TITLE/PBC: In DVD mode press to return to the menu. In VCD
mode press to switch the PBC on/off.
8. DIRECTION BUTTONS: Press to select the item you want.
9. SETUP: Press to enter into the SETUP menu.
10. PROGRAM: Press to program the tracks.
11. NUMBER KEYS: Press to select the items or settings directly.
12. ANGLE: Press to access various camera angles on the DVD.
13. AUDIO: Press to change the audio channels of a DVD or select
stereo, left, or right audio channel of a VCD disc.
14. REPEAT: Press to select variations of continuous play.
15. MUTE: Press to disable or enable sound output.
11
12
13
14
27
26
25
16. OPEN/CLOSE: Press to open or close the disc tray.
17. NEXT SKIP: Press to skip to the next chapter or track.
18. STEP: Press to view playback frame by frame.
19. FAST FORWARD: Press to fast forward through the currently
playing disc or track.
20. MENU/RETURN: In DVD mode, press to select the menu play. In
VCD mode, press to return to the PBC.
21. ENTER: Press to enter a command or confirm a selection.
22. DISPLAY: Press to show the information about the currently
playing disc.
23. CLEAR: Press to clear what you have selected or input.
24. ZOOM: Press to enlarge the picture.
25. GOTO: Press to go to the desired starting title, chapter, track or
time.
26. SUBTITLE: Press to access the various subtitle languages.
27. A-B: Specifies a section and plays it repeatedly.
1. ON/STANDBY : Press to turn the unit on and off.
2. PREV SKIP: Press to skip to the previous chapter or track.
3. SLOW : Press to select the forward slow speed playback.
4. PLAY/PAUSE : Press to start or pause playback.
8
Page 9

Function Overview
6
;
Front Panel
1 2 3 4 5
1. ON/STANDBY Button : Press to switch between power on and standby mode
2. EJECT Button : Press to open or close the disc tray
3. BACK 9 Button : Press to skip to the previous track (only during playback)
4. STOP < Button : Press to stop playback
5. FWD : Button : Press to skip to the next track (only during playback)
6. PLAY/PAUSE Button : Press to start or pause disc playback
Back Panel
1 2
4
1. COMPONENT(Pr/Pb/Y) VIDEO OUT Jack : Connects to the Pr/Pb/Y input of TV
2 .AUDIO OUT( L/R) : Connects to a TV set or stereo receiver
3. VIDEO OUT Jack : Connects to the video input of a TV
4.COAXIAL OUT Jack : Connects to an optional receiver
5. S-VIDEO OUT Jack : Connects to the S-video input of a TV
3
5
9
Page 10
Connections
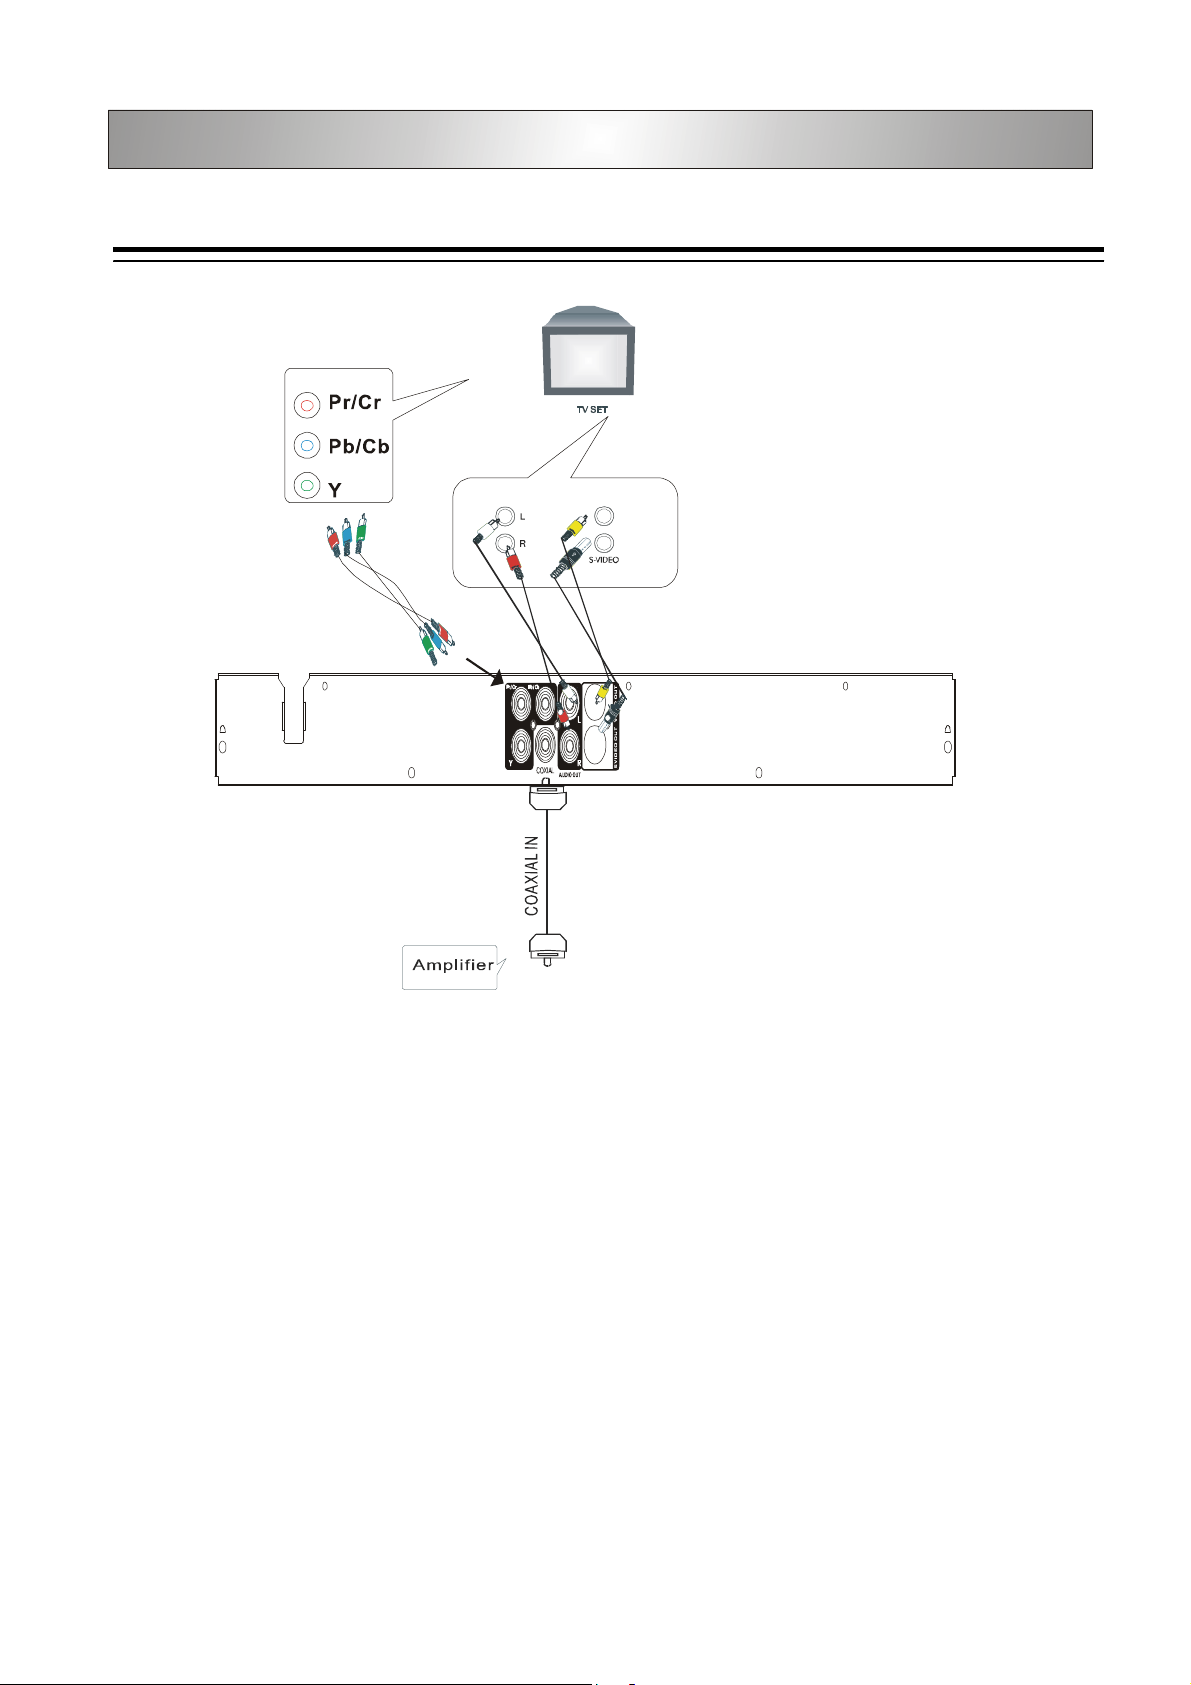
Connecting Your DVD Player to Your TV
Connections
AUDIO
IN
VIDEO
IN
* Connect the S-VIDEO OUT jack to the S-Video input jack on the TV using an S-Video cable.
* Connect the VIDEO OUT jack to the Video input jack on the TV using a video cable.
* Use the audio cables to connect the AUDIO OUT jacks to the corresponding AUDIO IN jacks on your TV, CD or TAPE recorder.
* Use the Digital cables to connect the COAXIAL jack to correspond to receive a digital signal.
10
Page 11

In the top menu select the Setup Menu to enter in order to make any
/
/
/
Basic Setup
setup changes.
In the Setup Menu, select the Setup Menu option to make changes
to the setup. For purposes of this manual the setup options are
described from top to bottom order, beginning with the SYSTEM
SETUP menu.
Some settings interact, what you choose in one menu can affect
how another selection works. If you see a selection that is grayed
out, that means that the selection interacts with one or more other
selections that are set in such a way as to render the grayed out
selection inoperable.
SETUP MENU
In the top menu, move the highlight to the Setup Menu (the SETUP
MENU should be operated in full stop mode).
SYSTEM SETUP
•
•
LANGUAGE SETUP
AUDIO SETUP
•
TV SYSTEM
You can setup the color system of this unit to match your
connected TV set. If the color system of this unit is different from
that of the TV set, the images will not be displayed normally on the
screen.
VIDEO SETUP
•
SYSTEM SETUP
The system setup is carried out via the TV, enabling you to
customize the DVD system to suit your particular requirements. If
the options selected are not available on a disc, then the
disc’s default settings will be used.
1. Press SETUP on remote control in stop mode.
2. Use to select the item you want.
3. Press ENTER to confirm the selection.
4. To exit the setup, press SETUP again.
This section includes:
TV SYSTEM
•
TV TYPE
•
SCREEN SAVER
•
PASSWORD
•
RATING
•
DEFAULT
•
TV TYPE
4:3 PS
If you have a conventional TV set and your DVD is not
formatted for widescreen viewing, use this setting. A wide
picture is displayed on the whole TV screen with a portion
automatically cut off.
4:3 LB
If you have a conventional TV set and your DVD is formatted for
widescreen viewing, use this setting. Wide bands will be
displayed on the upper and lower portions of the TV screen.
11
Page 12

/
/
/
Basic Setup(continued)
DRM REG CODE
16:9
If you have a widescreen TV set, use this setting (you must
also set your widescreen TV to Full size).
SCREEN SAVER
The default setting for the SCREEN SAVER is ON.
the screen saver image appears when you leave the system
in stop mode for about 5 minutes.
PASSWORD
The password is used to change the parental control settings.
When you use this unit for the first time, enter the default
password “3308”.
DEFAULT
If you select this function, all of the functions will restore to the
original settings, except the rating.
LANGUAGE SETUP
1. Press SETUP on the remote control.
2. Use to select item you want.
3. Press ENTER to confirm the selection.
4. To exit the setup, press SETUP again.
This section includes:
• OSD LANGUAGE
• AUDIO LANG
• SUBTITLE LANG
• MENU LANG
• DRM REG CODE
RATING
After you enter the password, you can choose the RATING.
The default setting is 8.
•
12
Page 13

Basic Setup(continued)
OSD LANGUAGE
ENGLISH
•
SPANISH
•
OSD LANGUAGE
AUDIO LANG
SUBTITLE LANG
MENU LANG
DRM REG CODE
EXIT SETUP
The default setting for the OSD LANGUAGE is ENGLISH.
AUDIO LANG, SUBTITLE LANG, MENU LANG
This function allows you to select the desired language. It
includes:
• ENGLISH
• JAPANESE
• FRENCH
• SPANISH
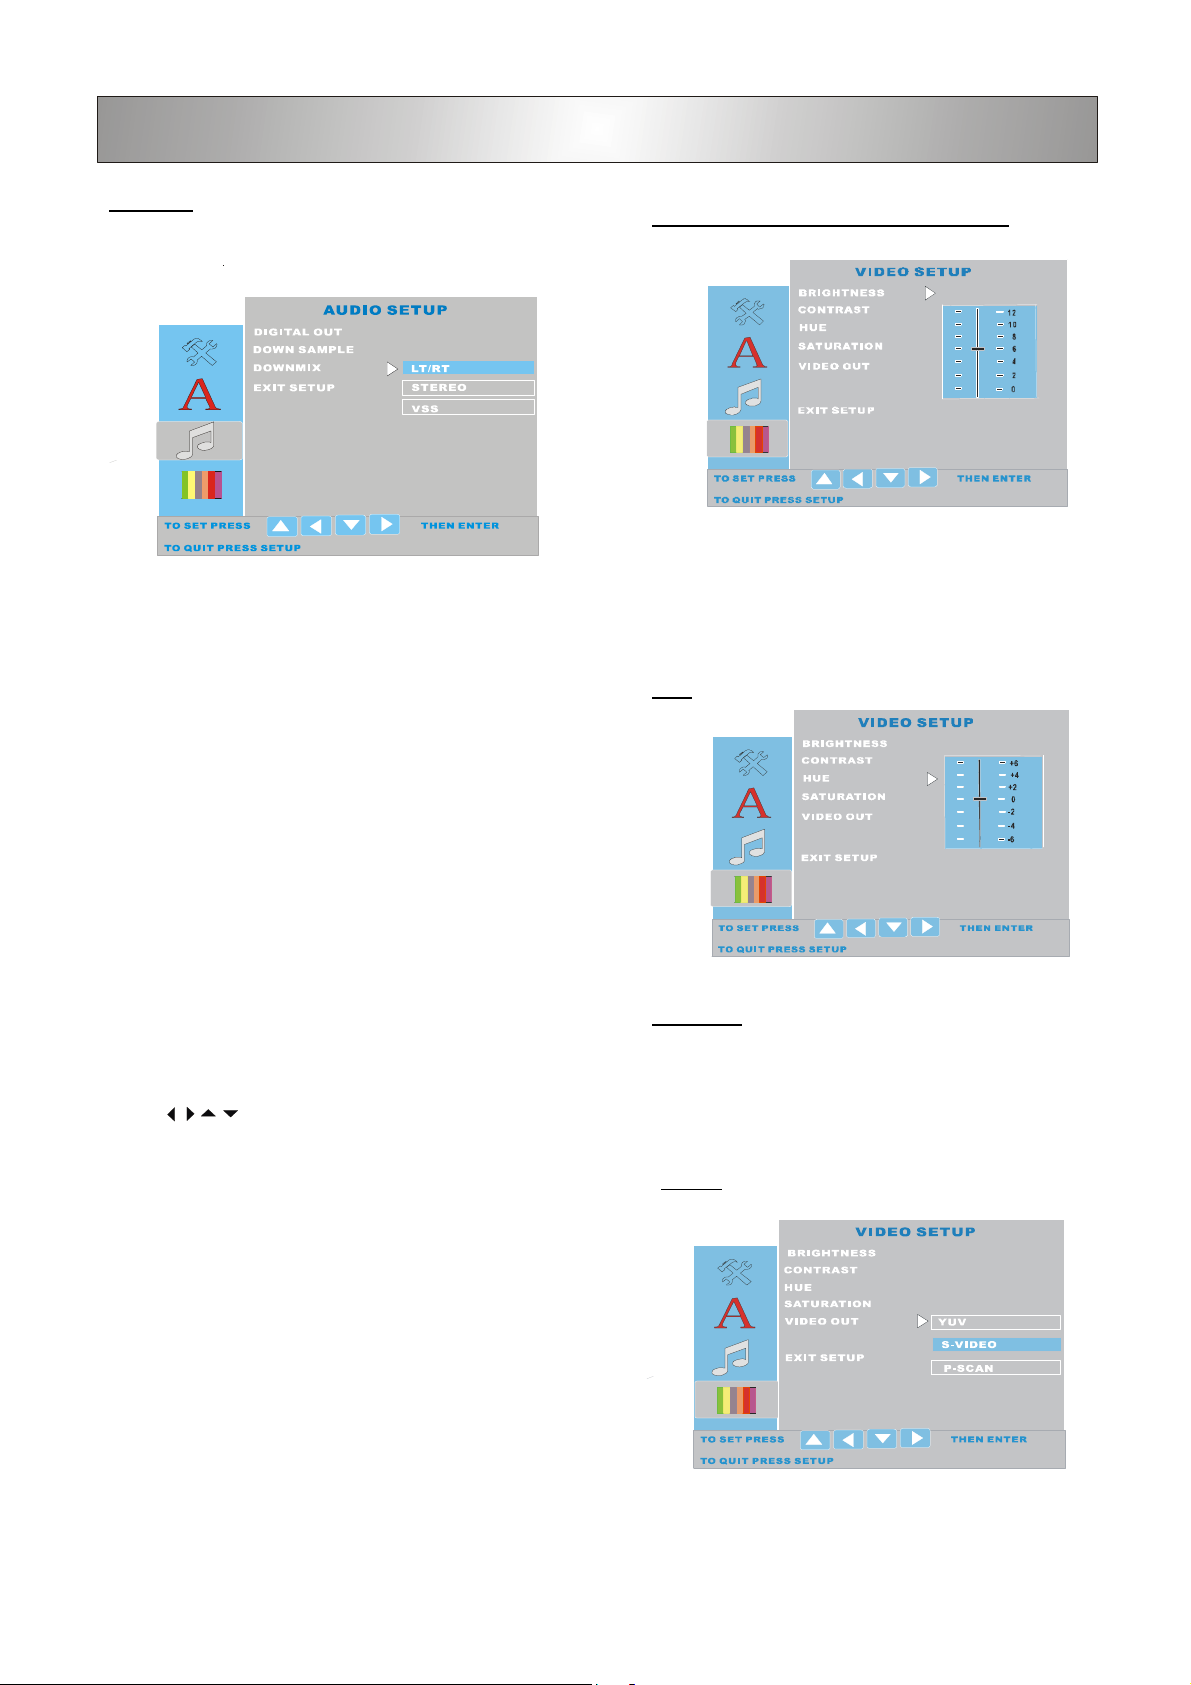
AUDIO SETUP
1. Press SETUP on the remote control.
/
/
2. Use to select the item you want.
3. Press ENTER to confirm the selection.
4. To exit the setup, press SETUP again.
This section includes:
•
DIGITAL OUT
•
DOWN SAMPLE
•
DOWNMIX
DIGITAL OUT
The default setting is RAW.
/
EXIT SETUP
DRM REG CODE
1. Select DRM REG CODE.
2. Press ENTER, a message screen wil appear as below:
DIVX VIDEO ON DEMAND
REGISTRATION CODE
YOUR REGISTRATION CODE IS A ONE TIME
CODE USED TO SETUP YOUR VIDEO ON
DEMAND ACCOUNT. THIS WILL ALLOW YOU TO
PURCHASE AND RENT VIDEOS TO THIS PLAYERS.
WHEN ASKED FOR YOUR REGISTRATION CODE IT
IS:
MRIA-ZQZT
[ DONE]
3. Write down this VOD 8-character registration number in
order to fill in the form on the web site you rent/purchase
your DivX VOD files.
DOWN SAMPLE
48K
•
96K
•
192K
•
The default setting for the DOWN SAMPLE is 48K.
4. Select DONE to return.
13
Page 14
Basic Setup(continued)
/
/
/
DOWN MIX
To play a DVD disc recorded with surround multi-channel audio
correctly. Select the appropriate setting according to your audio
system.
LT/RT
•
When the disc you played has PRO LOGIC stereo function,
you can select this.
STEREO
•
2-channel stereo output, for stereo listening through the
analog left and right outputs.
BRIGHTNESS, CONTRAST, HUE, SATURATION
The BRIGHTNESS, CONTRAST, and SATURATION are the same
User Interface. The default setting for the BRIGHTNESS and the
CONTRAST is 6; the default setting for the HUE
and the SATURATION is 0.
HUE
VSS
•
2-channel virtual surround outputs.
Note: Depending on the disc, the actual outputs may
not match your selection.
VIDEO SETUP
1. Press SETUP on the remote control.
2. Use to select item you want.
3. Press ENTER to confirm the selection.
4. To exit the setup, press SETUP again.
This section includes:
• BRIGHTNESS
• CONTRAST
• HUE
• SATURATION
• VIDEO OUT
VIDEO OUT
• YUV
• S-VIDEO
• P-SCAN
P-SCAN
The default setting for the P-SCAN is OFF. If you set it ON
and your TV support this function then it will appear as follows.
14
Page 15

General operation
Playing Discs
1 After all the connections are properly completed, plug the AC
power cord of the player to an appropriate wall outlet.
2 Press ON/STANDBY to turn ON the main power.
3 Press OPEN/CLOSE to open the disc tray, press again to close
the disc tray.
4 Press MUTE to shut off the sound. To restore the volume, press
MUTE again.
If you select OK, it will appear as below.
Basic playback
Start playback
• Press /ll to start playback, to pause playback, press /ll again.
Note
• Some discs will start playing automatically, and others will display
the menu on the TV screen. use the / / / buttons to select
the track, or press the number keys (0 ~ 9,+10)) to go to the
desired track/chapter.
Stop playback
• Press STOP .
Skip to another track/chapter
• Press l / l repeatedly during playback to skip to the next or
previous track/chapter.
Fast search
1 Press and hold / for more than 1 second to fast reverse
or fast forward.
• For DVD/MP3/CD discs
FF (fast forward) : FF x2, FF x4, FF x8, FF x20.
FR (fast reverse) : FR x2, FR x4, FR x8, FR x20.
2 To resume normal play, press /ll.
Press SLOW to play the currently playing disc in slow motion.
• For DVD discs
Press it repeatedly to select the slow motion speed:
SF (slow forward) : SF 1/2, SF 1/3, SF 1/4, SF 1/5, SF 1/6,
SF 1/7.
15
Page 16
02 . - - - - - - 11
03 . - - - - - - 12
04 . - - - - - - 13
05 . - - - - - - 14
06 . - - - - - - 15
07 . - - - - - - 16
08 . - - - - - - 17
09 . - - - - - - 18
10 . - - - - - - 19
Playing Discs(continued)
Repeat
1. For DVD discs
Press REPEAT repeatedly to select the following:
REP : [ OFF ]
REP : [ CHAPTER ]
REP: [ TITLE ]
REP: [ REP ALL]
2. For CD discs
Press REPEAT repeatedly to select the following.
REP : [ OFF ]
REP : [ REP 1 ]
REP: [ REP ALL]
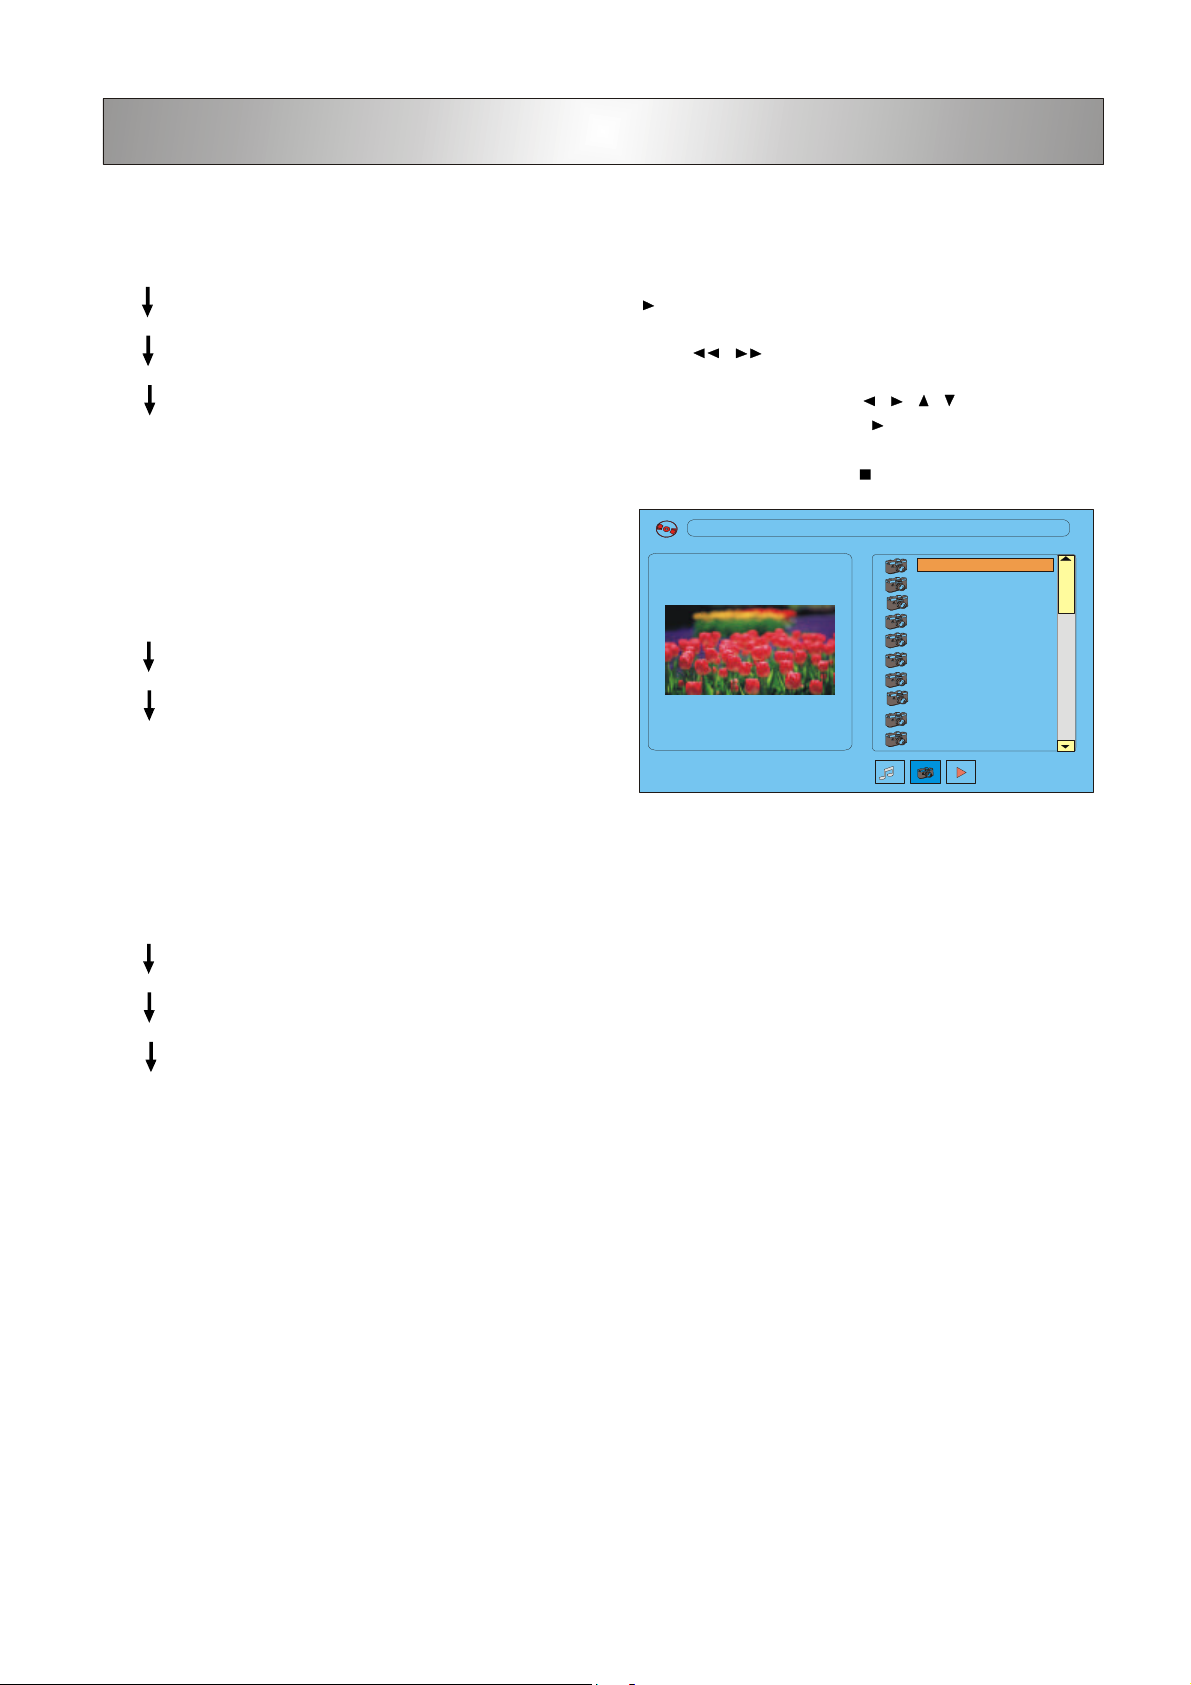
Playing MP3, DIVX, or JPEG picture discs
1. Load an MP3, DIVX, or JPEG disc.
2. Playback should start automatically, if it does not, then press the
/ll button to start playback.
3. Press l / l to select the previous or next track.
4. While in stop mode , press the / / / button to select a
desired album title , then press the /ll button to start playback.
5. To stop playback , press STOP .
[ \ ] - - - - - - 10 . JPG
01 . - - - - - - 10
2. For MP3/DIVX discs
Press REPEAT repeatedly to select the following.
REP : [ OFF ]
REP : [ REP 1 ]
REP: [REP DIR ]
REP: [ REP ALL]
16
Page 17

XXX
X
Playing Discs(continued)
X
X
Using the Menu for DVD
1 Press MENU/RETURN while playing a DVD disc.
The TITLE MENU will appear on the TV screen. The contents of
the menu vary from disc to disc.
2 Use the / / / buttons to select the title (or chapter) you
want to play.
Depending on the disc, you can use the number buttons
(0~9,+10 ) to select the title (or chapter).
3 Press ENTER to start playback.
4 To change other items, repeat Step 1 ~ 2.
Note:
• Depending on the DVD disc, you may not be able to select the
title or chapter.
• Depending on the DVD disc, a Title Menu may simply be called
a menu or root menu in the instructions supplied with the disc.
• For some DVD discs, when you press the MENU/RETURN
button, the playback will restart from the beginning of the disc.
Checking the information
You can check information about the disc, such as the total number
of the titles or chapters or tracks or time, using the Display function.
The information you want will appear on the TV screen.
When playing back a CD
1 Press DISPLAY repeatedly to show the following
(for reference only):
2 Press DISPLAY again, the information will disappear.
When playing back a DIVX disc
1 Press DISPLAY repeatedly to show the following (for reference):
When playing a DVD
1 Press DISPLAY repeatedly to show the following
(for reference only):
DVD TT 1/16 CH 1/1 00:00:35
))
1/2 ENG
DVD TT 1/16 CH 1/1 C -00:01:35
DVD TT 1/16 CH 1/1 T 00:10:35
DVD TT 1/16 CH 1/1 T -01:00:35
D 5.1CH OFF OFF
2 Press DISPLAY again, and the information will disappear.
CD
rom
CD
rom
2 Press DISPLAY again, the information will disappear.
17
Page 18

Playing Discs(continued)
Program play
You can play the contents of the disc in a specific order by programming the order of the tracks to be played.
1 While playback is stopped, select or press PROGRAM to enter
the program mode.
2 Use the number buttons (0 ~ 9,+10) to input the track numbers in
the order you want.
3 Repeat step 2 to store other tracks.
4 To start program play, press /ll.
5 To stop playback, press once.
6 To cancel the program, press again.
For VCD & CD disc
18
Page 19

Special Function
Picture Zooming
This function allows you to enlarge the picture on the TV screen and to
pan through the enlarged image.
1 Press ZOOM repeatedly to select a zoom factor as below:
ZOOM 2
Angle selection
Some DVD discs contain scenes which have been shot simultaneously
from a number of different angles. For these discs, the same scenes
can viewed from each of the different angles.
ZOOM 3
ZOOM 4
ZOOM 1/2
ZOOM OFF
2 To pan though the enlarged image, press the / / / buttons
to move the zoomed picture left, right, up or down.
Selecting a Subtitle Language
This function can only be used for DVD discs recorded with multisubtitle language.
Press SUBTITLE repeatedly to select a subtitle language.
Note
• Press Subtitle once to show the current selection. Pressing
Subtitle again will bring you through the other available subtitle
setting(s).
1 Press the ANGLE button to change the scenes from one angle to
other angle(s). For example: 1/3, 2/3, 3/3.
• During some scenes, the subtitles may not appear immediately
after you turn them on.
Selecting the Audio Language
Depending on some DVD discs, you may be able to change the audio
format (including audio recording type, number of channels recorded
and audio language).
• Press Audio during playback.
• Press / to select.
19
Page 20

If you experience any of the following difficulties while using the
Troubleshooting
system, use this troubleshooting guide to help you remedy the problem. Should any problem persist, please call tech support listed on the
warranty.
No power
• Is the power cord firmly plugged into the power outlet?
• One of the safety mechanisms may be operating. In this event,
unplug the player from the power outlet briefly and then plug it in
again.
No picture
• Check that the system’s cables are connected securely.
• The video connecting cord is damaged. Replace it with a new
one.
• Make sure you connect the system to the video input connector
on your TV.
• Make sure you turn on the TV.
• Make sure you select the video input on the TV so that you can
view the pictures from this system.
The picture quality is low
• Clean the disc.
• If video from this system has to go through your VCR to get to
your TV, the copy-protection applied to some DVD programs
could affect picture quality. If you still experience problems after
checking your connections, please try connecting your DVD
system directly to your TV’s S-Video input, if your TV is
equipped with this input.
The aspect ratio of the screen cannot be changed even though
you set TV DISPLAY in the SETUP menu when you play a wide
picture.
• The aspect ratio is fixed on your DVD disc.
• If you connect the system with the S-Video cable, connect
directly to the TV. Otherwise, you may not be able to change
the aspect ratio.
• Depending on the TV, you may not be able to change the
aspect ratio.
External noise is heard
• Check that the connecting cords are away from a transformer or
motor.
• Move your TV away from the audio components.
• The plugs and jacks may be dirty. Wipe them with a cloth
slightly dampened with alcohol.
• Clean the disc.
The sound loses stereo effect when you play CD
• Set the Audio mode to STEREO in the SETUP menu.
• Make sure you connect the system cables appropriately.
The surround effect is difficult to hear when you are playing a
Dolby Digital sound track
• Depending on the DVD disc, the output signal may not be the
entire 5.1 channel but may be monaural or stereo even if the
sound track is recorded in Dolby Digital format.
The language for the subtitles cannot be changed when you play
a DVD
• Multilingual subtitles are not recorded on the DVD.
• Changing the language for the subtitles may be prohibited on
the DVD.
The subtitles cannot be turned off when you play a DVD
• Depending on the DVD, you may not be able to turn the subtitles
off.
The angles cannot be changed when you play a DVD
• Multi-angles are not recorded on the DVD.
• Make sure to change the angles when the angle mark appears
on the TV screen.
• Changing the angles may be prohibited on the DVD.
The system does not operate properly
• Static electricity, etc., may affect the system’s operation.
Press the STANDBY button to turn the unit off, wait one minute,
then press again to turn the unit back on.
There is no sound or only a very low-level sound is heard.
• The system is in pause mode, in slow-motion play mode, or
fast forward or fast reverse is performed. Press /ll to return to
normal play mode.
• Make sure that the audio cable is connected securely.
20
Page 21

Specifications
DVD section
Laser type............................................................................. Semiconductor laser, Wavelength 650 nm
Signal system ....................................................................... PAL625/50,NTSC525/60
Video output level ................................................................. 1 Vp-p (75 ohm)
Video Y output level .............................................................. 714 Vp-p (75 ohm)
Video C output level ............................................................. 286 mVp-p (75 ohm)
Digital output ........................................................................ Coaxial
Video signal
Horizontal resolution: ........................................................... 480lines
S/N ratio: ............................................................................... 60dB
Audio signal
Audio frequency response.................................................... DVD (PCM)20 Hz - 22 kHz (+/-1.0 dB)
CD 20 Hz - 20 kHz (+/-1.0dB)
S/N ratio ............................................................................... 80dB
Dynamic range: .................................................................... DVD(PCM): 85dB
CD: 85dB
Audio L/R : ............................................................................ 2V 1K Hz 0dB
Distortion .............................................................................. 0.1%
General
Power supply ....................................................................... 120V~60Hz
Power consumption ............................................................. 15W
*Specifications subject to change without prior notice.
21
Page 22

One Year Limited Warranty
This product is warranted to be free from defects in material and workmanship for a period of one year.
Warranty obligations are limited to the replacement or repair of defective parts and components, at the option of
the manufacturer. The warranty of this product is null and void if the product is subjected to negligence, abuse,
modification, misuse, accident or if the customer uses the product for a function it was not intended for. The
warranty is only VALID FOR the original purchaser of this product and will not be honored if the product is
resold.
The manufacturer will not be liable for incidental or consequential damages caused by the use of this product.
The manufacturer will not be liable for any costs such as lost profits or revenues, cost of temporary replacements,
loss of data, loss of equipment or use of equipment or any claims by third parties.
TO OBTAIN SERVICE: please call the toll free number mentioned below to obtain service. Do not return
this product to the store. A customer representative will give you a return authorization number (RA number)
allowing you to ship your product to the service center. The purchaser must have a copy of the original receipt
for proof of purchase within one year. The purchaser of this product is responsible for any shipping costs to the
repair facility. The manufacturer service center will repair or replace the unit in question and send it back to the
purchaser within 7 working days of receipt of the unit.
In order to contact the repair faciltiy, please call toll free between the hours of 9:00 am and 5:30 pm EST 1-866611-2881
Or e-mail at IT@FerrisMarketing.com
22
Page 23

Garantía Limitada Por Un Ano
Garantizamos que este producto estará libre de defectos de material y de fabricación por un ano.
Las obligaciones de esta garantía se limitan al reemplazo o reparación de las piezas y
componentes defectuosos, a elección del fabricante. La garantía de este producto será anulada
si el producto sufre negligencia, abuso, modificación, uso incorrecto, un accidente, o si el cliente
utiliza el producto para una función para la que no fue disenado. Esta garantía es válida
solamente para el comprador original del producto y no será aplicada si el producto se revende.
El fabricante no será responsable por danos incidentales o consiguientes causados por el uso de
este producto. El fabricante tampoco será responsable por costos como la pérdida de ganancias,
costo de reemplazo temporal, pérdida de datos, pérdida del equipo o del uso del equipo, o
cualquier reclamo de terceras partes.
PARA OBTENER SERVICIO: por favor llame al número sin cargo mencionado más abajo. No
Devuelva este producto a la tienda donde lo adquirió. Un representante de servicios de atención
al cliente le dará un numero de autorización de devolución (numero RA) que le permitirá enviar su
producto al centro de servicio. El comprador deberá tener una copia del recibo original como
prueba de compra durante el ano previo. El comprador de este producto es responsable de los
gastos de envió al centro de reparación. El centro de servicio del fabricante reparará o
reemplazará la unidad en cuestión y la enviará al comprador dentro de 7 días de trabajo desde
haber recibido el producto.
Para ponerse en contacto con el centro de servicio, por favor llame sin cargo al 1-866-611-2881
entre las 9:00 am y las 5:30 pm EST
o e-mail IT@FerrisMarketing.com
23
 Loading...