

Page 1
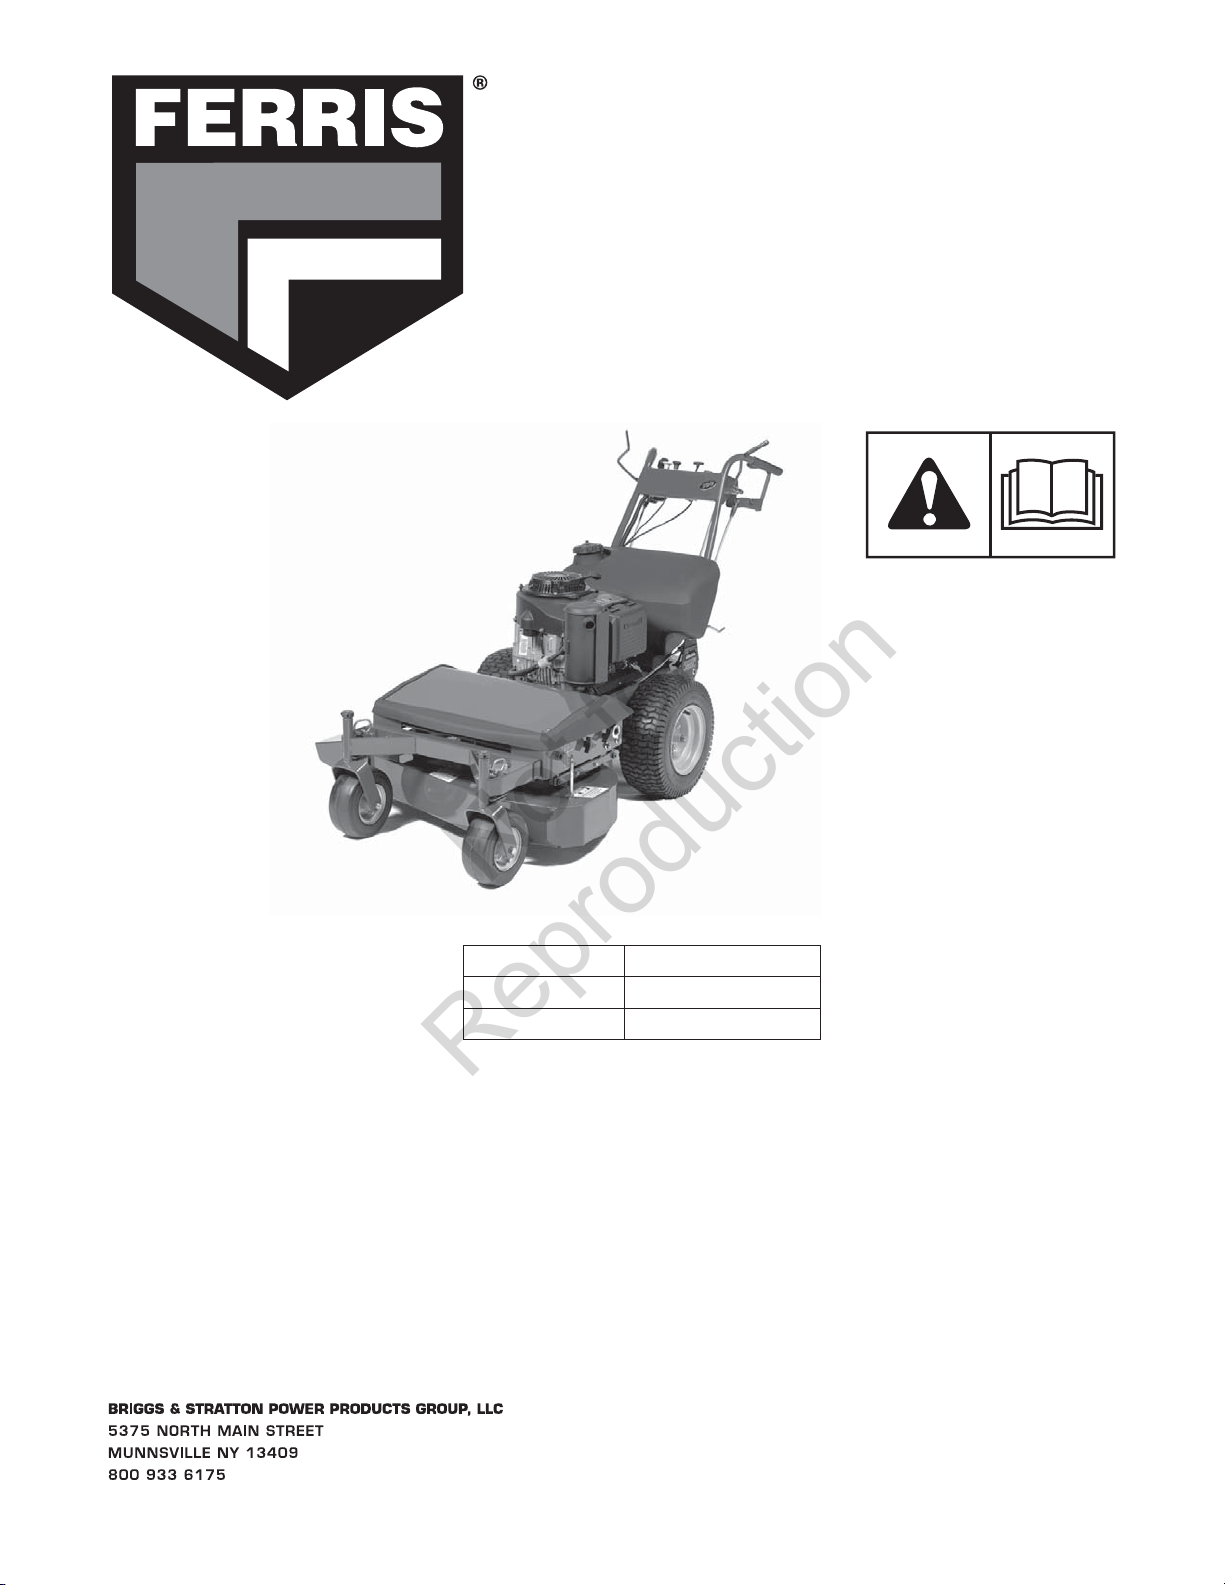
OPERATOR’S
Not for
Reproduction
MANUAL
Hydro-Cut Series
Walk Behind Mower
Model Number Description
5900543 HCKAV1532CE
5900544 HCKAV1532RDCE
5103498
Rev A
Page 2
Thank you for purchasing this quality-built Ferris
Not for
Reproduction
product. We’re pleased that you’ve placed your
confidence in the Ferris brand. When operated
and maintained according to the instructions in this
manual, your Ferris product will provide many years of
dependable service.
This manual contains safety information to make
you aware of the hazards and risks associated with
this machine and how to avoid them. This machine
is designed and intended to be used and maintained
according to the manual and operated by trained
professionals for finish cutting of established lawns and
is not intended for any other purpose. It is important
that you read and understand these instructions
thoroughly before attempting to start or operate this
equipment. Save these original instructions for
future reference.
Identification Numbers
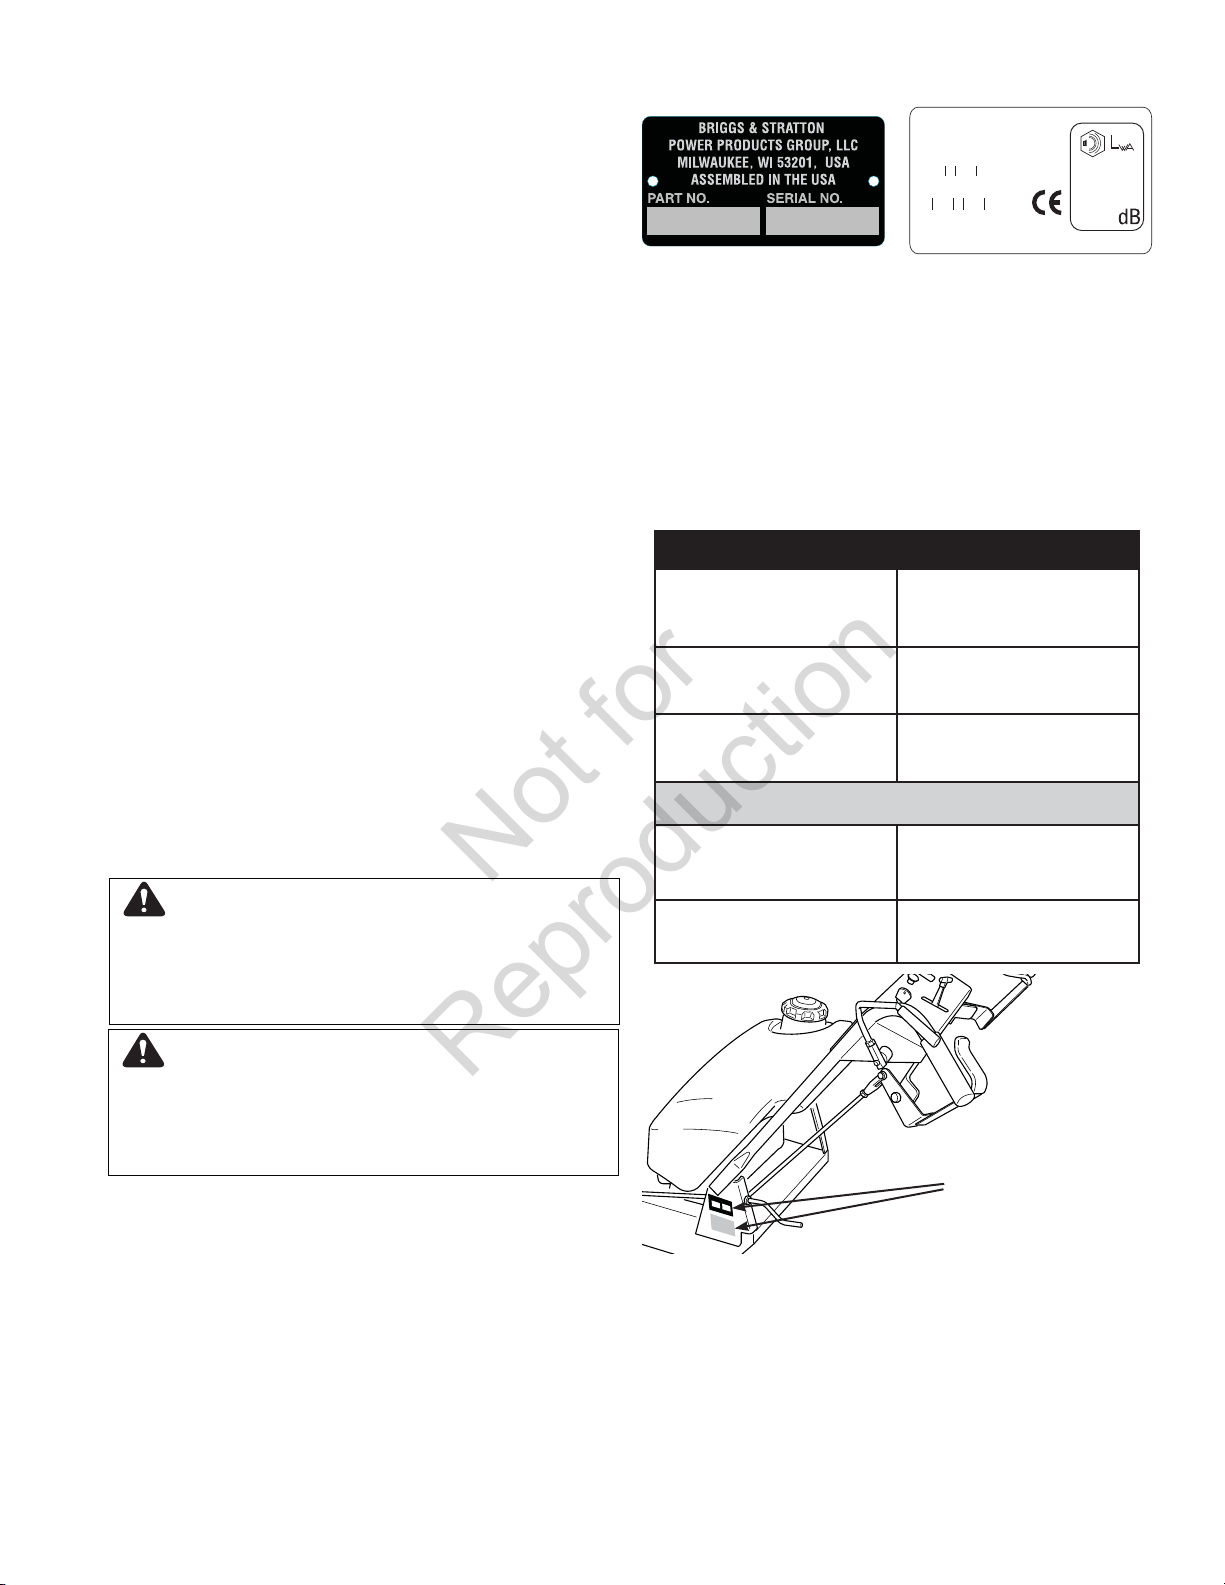
PRODUCT IDENTIFICATION
SAMPLE
When contacting your authorized dealer for
replacement parts, service, or information you
MUST have these numbers.
Record your model name/number, manufacturer’s
identification numbers, and engine serial numbers in the
space provided for easy access. These numbers can be
found in the locations shown.
NOTE: For location of engine identification numbers,
refer to the engine owner’s manual.
SAMPLE
XXXXXXXXXXXXXXX
MODEL XXXXXXX
SERIAL
XXXXXXXX
NO
0
123456 789012
Briggs & Stratton Power Product Group, LLC
XXXXXXXXXXXXXXXXXX
XXXXXXXXXXXXXXXXXX
XXXX
min
kW
XXX
kg
XXX
XXX
20xx
Assembled in U.S.A
Briggs & Stratton Power Products Group, LLC.
Copyright © 2012 Briggs & Stratton Corporation
Milwaukee, WI, USA. All rights reserved.
The Ferris logo is a trademark of Briggs & Stratton
Corporation Milwaukee, WI, USA.
Contact Information:
Briggs & Stratton Power Products Group, LLC.
5375 N. Main St.
Munnsville, NY 13409-4003
(800) 933-6175
www.ferrisindustries.com
WARNING
Engine exhaust from this product contains
chemicals known to the State of California to
cause cancer, birth defects, or other reproductive
harm.
WARNING
Battery posts, terminals, and related accessories
contain lead and lead compounds — chemicals
know to the State of California to cause cancer or
reproductive harm. Wash hands after handling.
PRODUCT REFERENCE DATA
Unit Model Number Unit SERIAL Number
Mower Deck Model Number Mower Deck SERIAL Number
Dealer Name Date Purchased
ENGINE REFERENCE DATA
Engine Make Engine Model
Engine Type/Spec Engine Code/Serial Number
ID Tag
Page 3
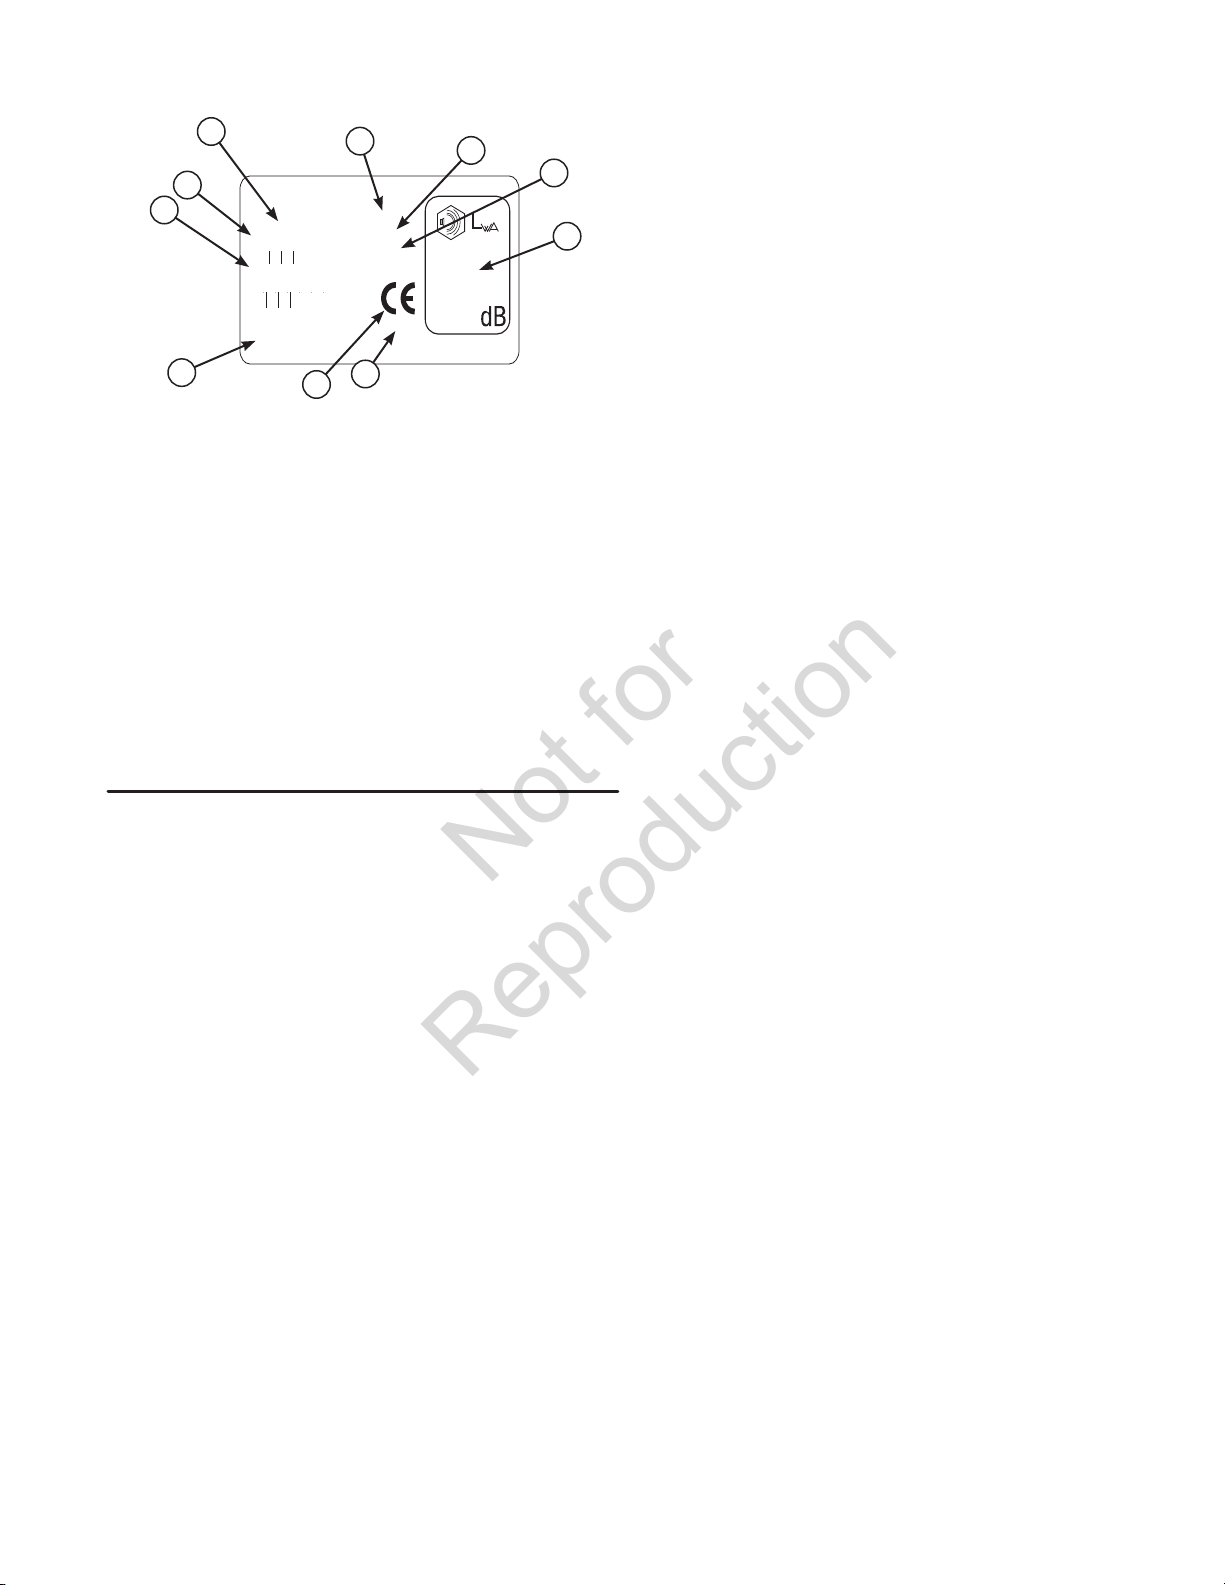
CE Identification Tag Markings
Not for
Reproduction
B
A
C
D
A. Manufacturer’s Identification Number
B. Product Description
C. Serial Number
D. Manufacturer’s Address
E. CE Compliance Logo
F. Year of Manufacture
G. Maximum Engine Speed in Rotations per Minute
H. Power Rating in Kilowatts
I. Mass of Unit in Kilograms
J. Sound Power in Decibels *
XXXXXXXXXXXXXXX
MODEL XXXXXXX
SERIAL
XXXXXXXX
NO
0
123456 789012
Briggs & Stratton Power Product Group, LLC
XXXXXXXXXXXXXXXXXX
XXXXXXXXXXXXXXXXXX
G
PRODUCT IDENTIFICATION
XXXX
min
kW
XXX
kg
XXX
XXX
20xx
Assembled in U.S.A
F
E
H
I
Table of Contents
Operator Safety .................................................. 2
Safety Decals ..........................................................8
Safety Icons ............................................................8
Safety Interlock System ..........................................9
J
Features & Controls ......................................... 10
Control Functions ..................................................10
Operation ........................................................... 11
General .................................................................11
Checks Before Starting .........................................11
Starting the Engine ...............................................11
Driving the Mower .................................................12
Operating on a Slope ............................................12
Stopping the Rider ................................................12
Mowing ..................................................................12
Pushing the Rider by Hand ...................................12
Storage .................................................................13
Starting After Long Term Storage .........................13
Cutting Height Adjustment ....................................14
Ground Speed Control Lever Adjustment .............14
Specifications ................................................... 15
Slope Identification Guide ............................... 16
This unit complies with European Harmonized Lawn Mower
Standard EN 836, European Machinery Directive 2006/42/EC,
and European EMC Directive 2004/108/EC
* Tested according to 2000/14/EC
NOTE: In this manual, “left” and “right” are referred to as
seen from the operating position.
1
Page 4
Safety Rules & Information
Not for
Reproduction
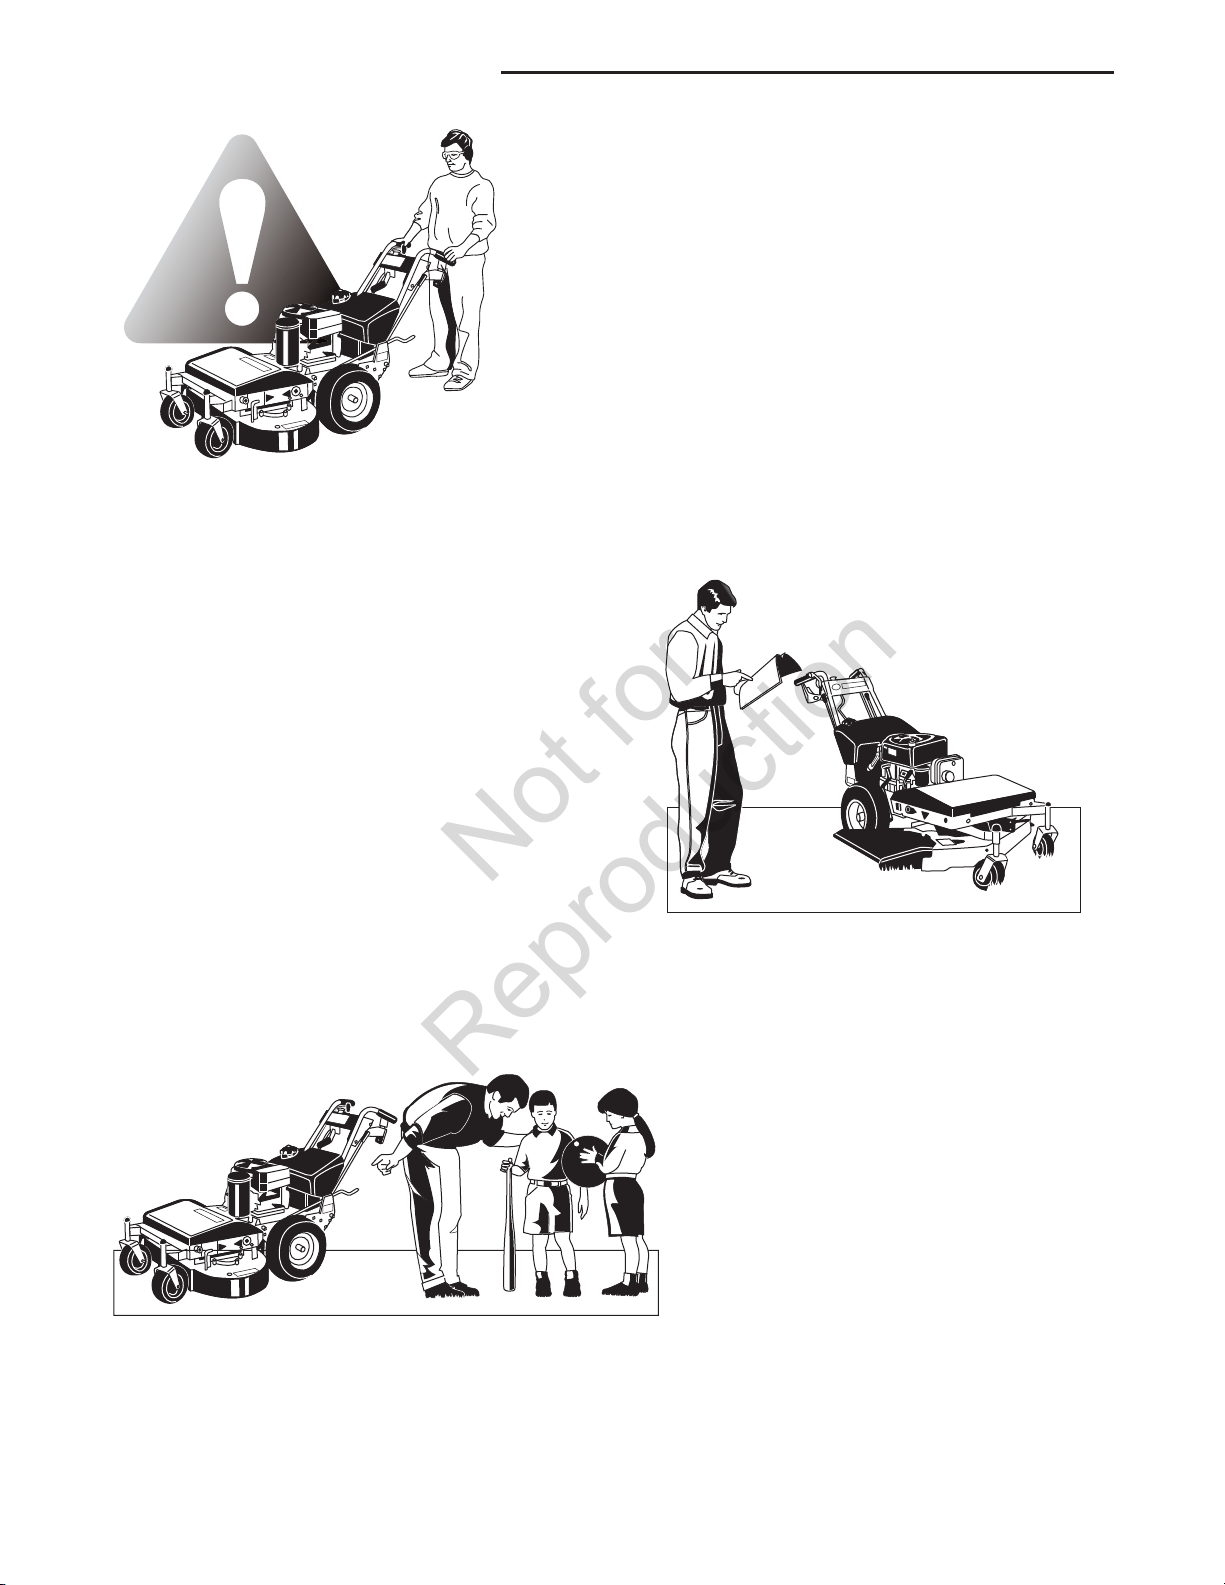
Read the Manual
Operating Safety
Congratulations on purchasing a superior-quality piece of
lawn and garden equipment. Our products are designed and
manufactured to meet or exceed all industry standards for safety.
Do not operate this machine unless you have been trained.
Reading and understanding this operator’s manual is a way to
train yourself.
Power equipment is only as safe as the operator. If it is misused,
or not properly maintained, it can be dangerous! Remember, you
are responsible for your safety and that of those around you.
Use common sense, and think through what you are doing. If
you are not sure that the task you are about to perform can be
safely done with the equipment you have chosen, ask a
professional: contact your local authorized dealer.
The operator’s manual contains important safety
information you need to be aware of BEFORE you
operate your unit as well as DURING operation.
Safe operating techniques, an explanation of the
product’s features and controls, and maintenance
information is included to help you get the most out of
your equipment investment.
Be sure to completely read the Safety Rules and
Information found on the following pages. Also
completely read the Operation section.
Children
Tragic accidents can occur with children. Do
not allow them anywhere near the area of
operation. Children are often attracted to the
unit and mowing activity. Never assume that
children will remain where you last saw them.
If there is a risk that children may enter the
area where you are mowing, have another
responsible adult watch them.
2
Page 5
Safety Rules & Information
Not for
Reproduction
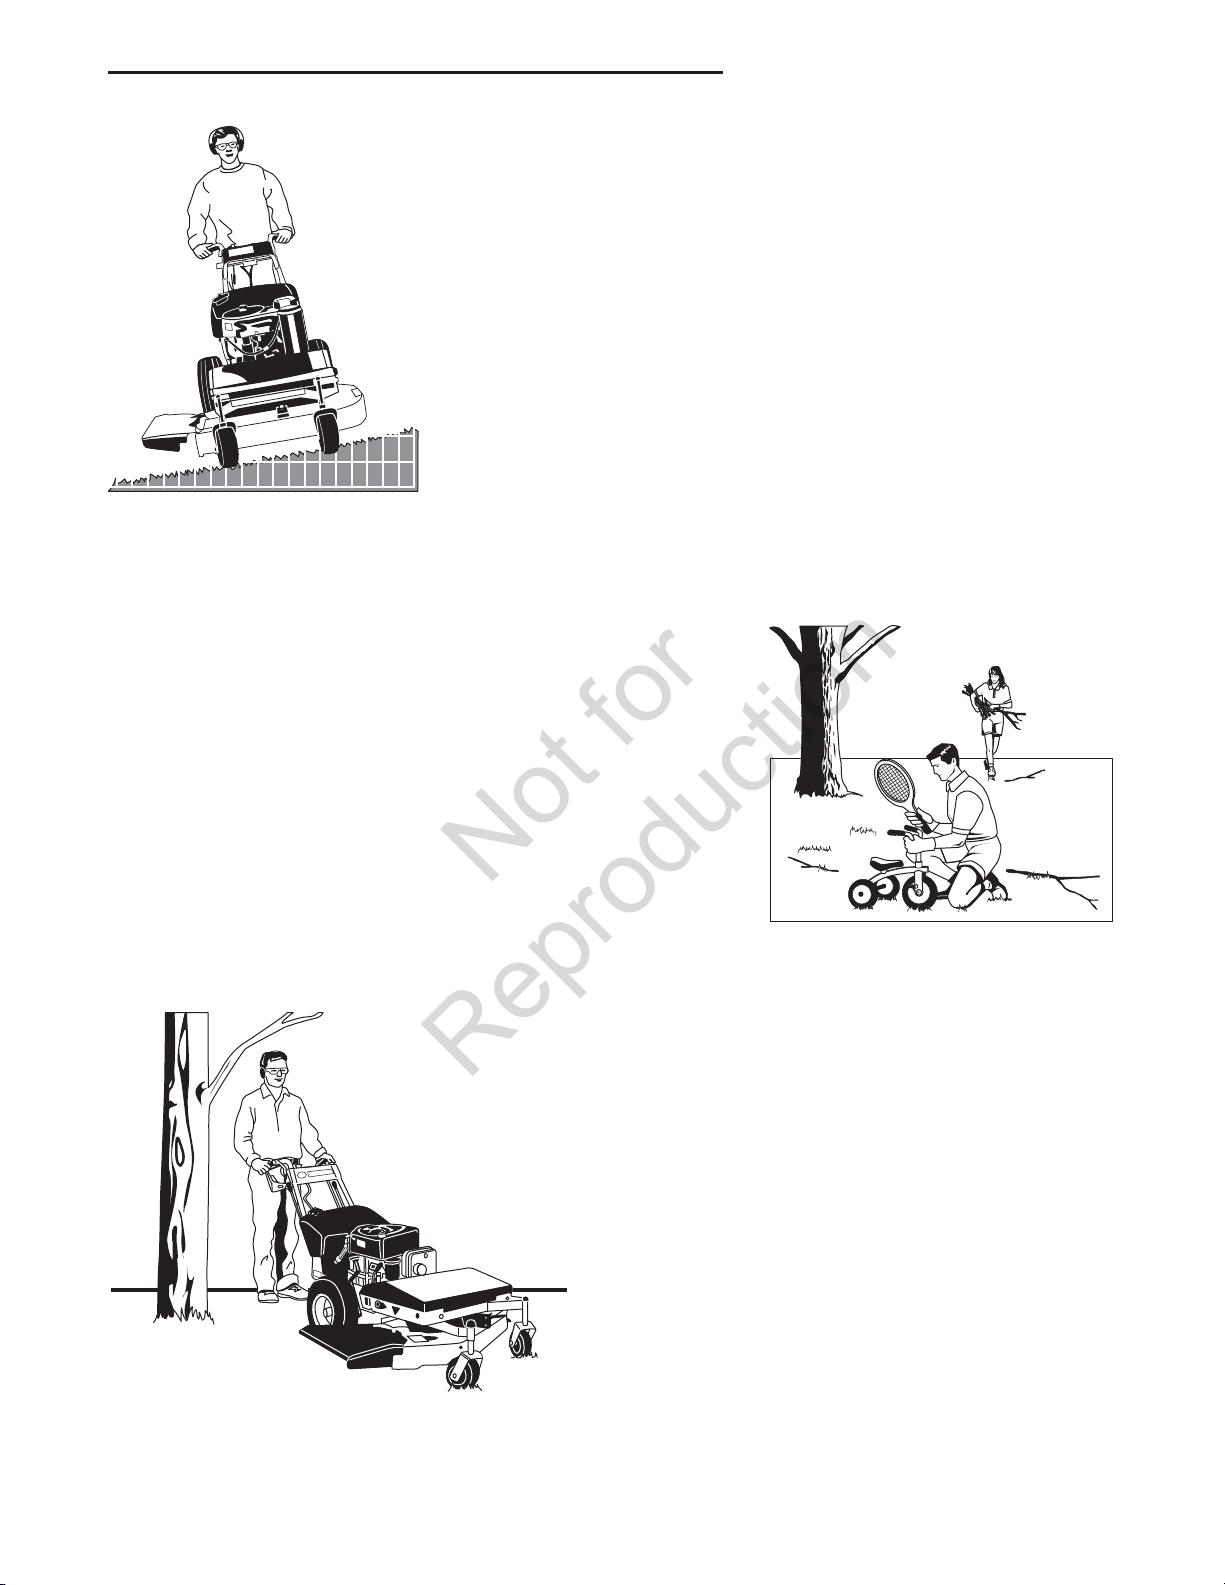
Slope Operation
You could be seriously injured if you use this unit on too steep of
a slope. Using the unit on a slope that is too steep where you do
not have adequate footing and unit traction (and control) can cause
you to lose control and possibly slip and fall or roll the unit over.
Always mow across slopes, not up and down (you could slip and
fall.)
Also, note that the surface you are on can greatly impact your
ability to safely operate this machine. Wet grass or soft soil can
seriously affect your footing and traction of the unit. Do not
operate on slopes that are slippery, wet, or have soft soil.
Thrown Objects
This unit has spinning mower blades. These blades can pick up and
throw debris that could seriously injure a bystander. Be sure to clean
up the area to be mowed and remove objects that could be thrown by
the blade BEFORE you start mowing.
Do not operate this unit without the entire grass catcher or discharge
guard (deflector) in place.
Also, do not allow anyone in the area while the unit is running! If
someone does enter the area, shut the unit off immediately until they
leave.
This equipment has many moving parts that can injure
you or someone else. However, if you stay in the
operator zone (area behind the handles and controls),
and follow the safety rules in this operator’s manual, the
unit is safe to operate.
The mower deck has spinning mower blades that can
amputate hands and feet. Do not allow anyone near the
unit while it is running! Keep safety devices (guards,
shields, and switches) in place and working.
To help you, the operator, use this equipment safely, it
is equipped with an operator-present safety system. Do
NOT attempt to alter or bypass the system. See your
dealer immediately if the system does not pass all the
safety interlock system tests found in this manual.
Moving Parts
3
Page 6
Safety Rules & Information
Not for
Reproduction
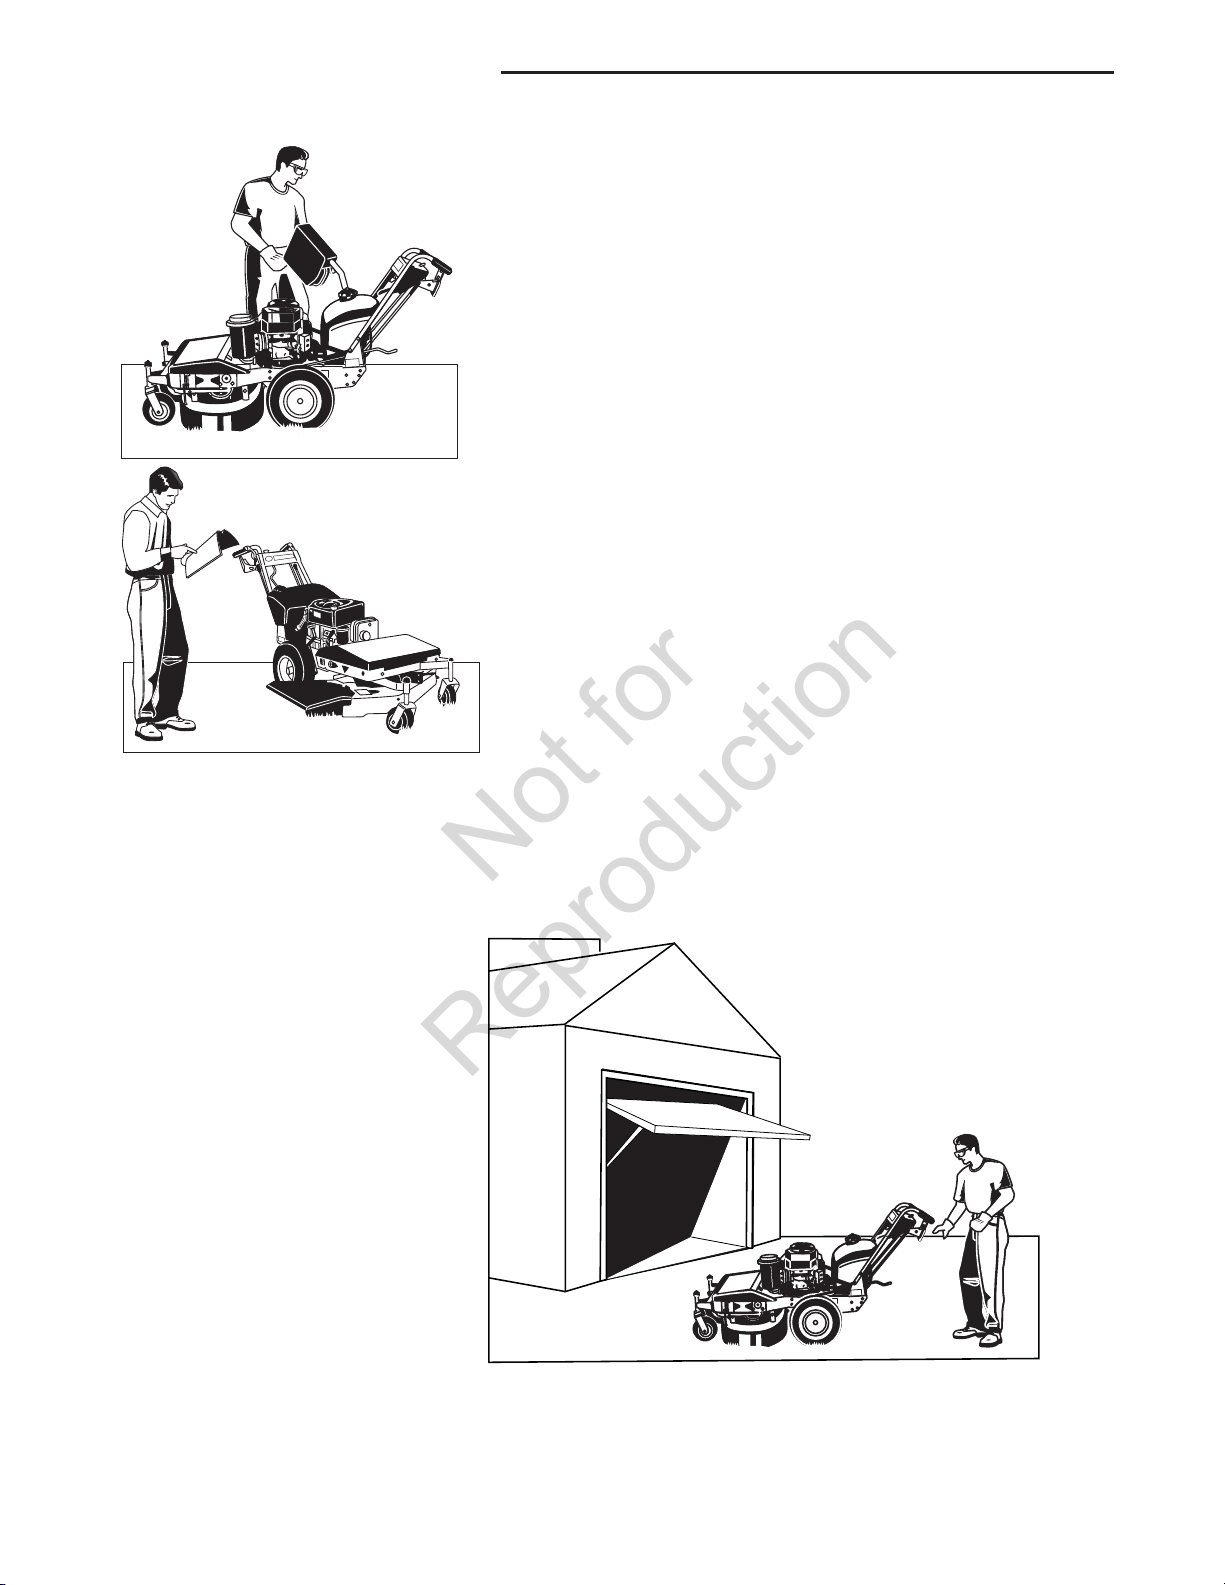
Fuel and Maintenance
Always disengage all drives, shutoff the engine and
remove the key before doing any cleaning, refueling or
servicing.
Gasoline and its vapors are extremely flammable. Do not
smoke while operating or refueling. Do not add fuel while
engine is hot or running. Allow engine to cool for at least
3 minutes prior to adding fuel.
Do not add fuel indoors, in an enclosed trailer, garage or
other enclosed area that is not well ventilated. Gasoline
spills should be cleaned up promptly and before operation
begins.
Gasoline should be stored only in sealed containers
approved for fuel.
Proper maintenance is critical to the safety and
performance of your unit. Keep the unit free of
grass, leaves and excess oil. Be sure to perform the
maintenance procedures listed in this manual, especially
periodically testing the safety system.
Enclosed Areas
Only operate this unit outdoors and
away from unventilated areas such as
inside garages or enclosed trailers.
The engine emits poisonous carbon
monoxide gas and prolonged exposure
in an enclosed area can result in
serious injury or death.
4
Page 7

Safety Rules & Information
Not for
Reproduction
Read these safety rules and follow them closely. Failure to obey these rules could result in loss
of control of unit, severe personal injury or death to you, or bystanders, or damage to property or
equipment. This mowing deck is capable of amputating hands and feet and throwing objects.
The triangle in text signifies important cautions or warnings which must be followed.
TRAINING
1. Read, understand, and follow all instructions in
the manual and on the unit before starting. If the
operator(s) or mechanic(s) can not read English
it is the owner’s responsibility to explain this
material to them.
2. Become familiar with the safe operation of the
equipment, operator controls, and safety signs.
3. All operators and mechanics should be trained.
The owner is responsible for training the users.
4. Only allow responsible adults, who are familiar
with the instructions, to operate the unit.
5. Never let children or untrained people operate
or service the equipment. Local regulations may
restrict the age of the operator.
6. The owner/user can prevent and is responsible
for accidents or injuries occurring to themselves,
other people or property.
7. Data indicates that operators, age 60 years and
above, are involved in a large percentage of riding
mower-related injuries. These operators should
evaluate their ability to operate the riding mower
safely enough to protect themselves and others
from serious injury.
PREPARATION
1. Evaluate the terrain to determine what
accessories and attachments are needed to
properly and safely perform the job. Use only
accessories and attachments approved by the
manufacturer.
2. Wear appropriate clothing including safety shoes,
safety glasses and ear protection. Long hair,
loose clothing or jewelry may get tangled in
moving parts.
3. Inspect the area where the equipment is to be
used and remove all objects such as rocks, toys
and wire, which can be thrown by the machine.
4. Use extra care when handling gasoline and
other fuels. They are flammable and vapors are
explosive.
a) Use only an approved container.
b) Never remove fuel cap or add fuel with the
engine running. Allow engine to cool before
refueling. Do not smoke.
c) Never refuel or drain the machine indoors.
5. Check that operator’s presence controls, safety
switches and shields are attached and functioning
properly. Do not operate unless they are
functioning properly.
OPERATION
1. Never run an engine in an enclosed area.
2. Mow only in the daylight or with good artificial
light, keeping away from holes and hidden
hazards.
3. Be sure all drives are in neutral and parking brake
is engaged before starting engine. Only start
engine from the operator’s position. Use seat
belts if provided.
4. Be sure of your footing while using pedestrian
controlled equipment, especially when backing up.
Walk, don’t run. Reduced footing could cause
slipping.
5. Slow down and use extra care on hillsides. Be
sure to travel in the recommended direction on
hillsides. Turf conditions can affect the machines
stability. Use caution when operating near dropoffs.
6. Do not mow in reverse unless absolutely
necessary. Always look down and behind before
and while traveling in reverse.
7. Be aware of the mower discharge direction and do
not point it at anyone. Do not operate the mower
without either the entire grass catcher or the
deflector in place.
8. Slow down and use caution when making turns
and when changing directions on slopes.
9. Never raise deck with the blades running.
10. Never leave a running unit unattended. Always
disengage the PTO, set parking brake, stop
engine, and remove keys before dismounting.
Keep hands and feet away from the cutting units.
11. Turn off the PTO switch to disengage the blades
when not mowing.
12. Never operate with guards not securely in place.
Be sure all interlocks are attached, adjusted
properly and functioning properly.
13. Never operate with the discharge deflector raised,
removed or altered, unless using a grass catcher.
14. Do not change the engine governor setting or
overspeed the engine.
15. Stop on level ground, lower implements,
disengage drives, engage parking brake, shut off
engine before leaving the operator’s position for
any reason including emptying the grass catchers
or unclogging the chute.
16. Stop equipment and inspect blades after striking
objects or abnormal vibration occurs. Make
necessary repairs before resuming operations.
17. Keep hands and feet away from the cutting units.
18. Look behind and down before backing up to be
sure of a clear path.
19. Never carry passengers and keep pets and
bystanders away.
20. Do not operate the unit while under the influence
of alcohol or drugs.
21. Slow down and use caution when making turns
and crossing roads and sidewalks. Stop blades if
not mowing.
22. Use care when loading or unloading the machine
into a trailer or truck.
5
Page 8
Safety Rules & Information
Not for
Reproduction
23. Use care when approaching blind corners, shrubs,
trees or other objects that may obscure vision.
24. To reduce fire hazard, keep unit free of grass,
leaves & excess oil. Do not stop or park over dry
leaves, grass or combustible materials.
WARNING
It is a violation of California Public Resource
Code, Section 4442, to use or operate the
engine on any forest-covered, brush-covered
or grass-covered land unless the exhaust
system is equipped with a spark arrester,
as defined in Section 4442, maintained in
effective working order. Other states or federal
jurisdictions may have similar laws. Contact
an Authorized Service Dealer to obtain a spark
arrester designed for the exhaust system
installed on this engine.
25. OSHA regulations may require the use of hearing
protection when exposed to sound levels greater
than 85 dBA for an 8 hour time period.
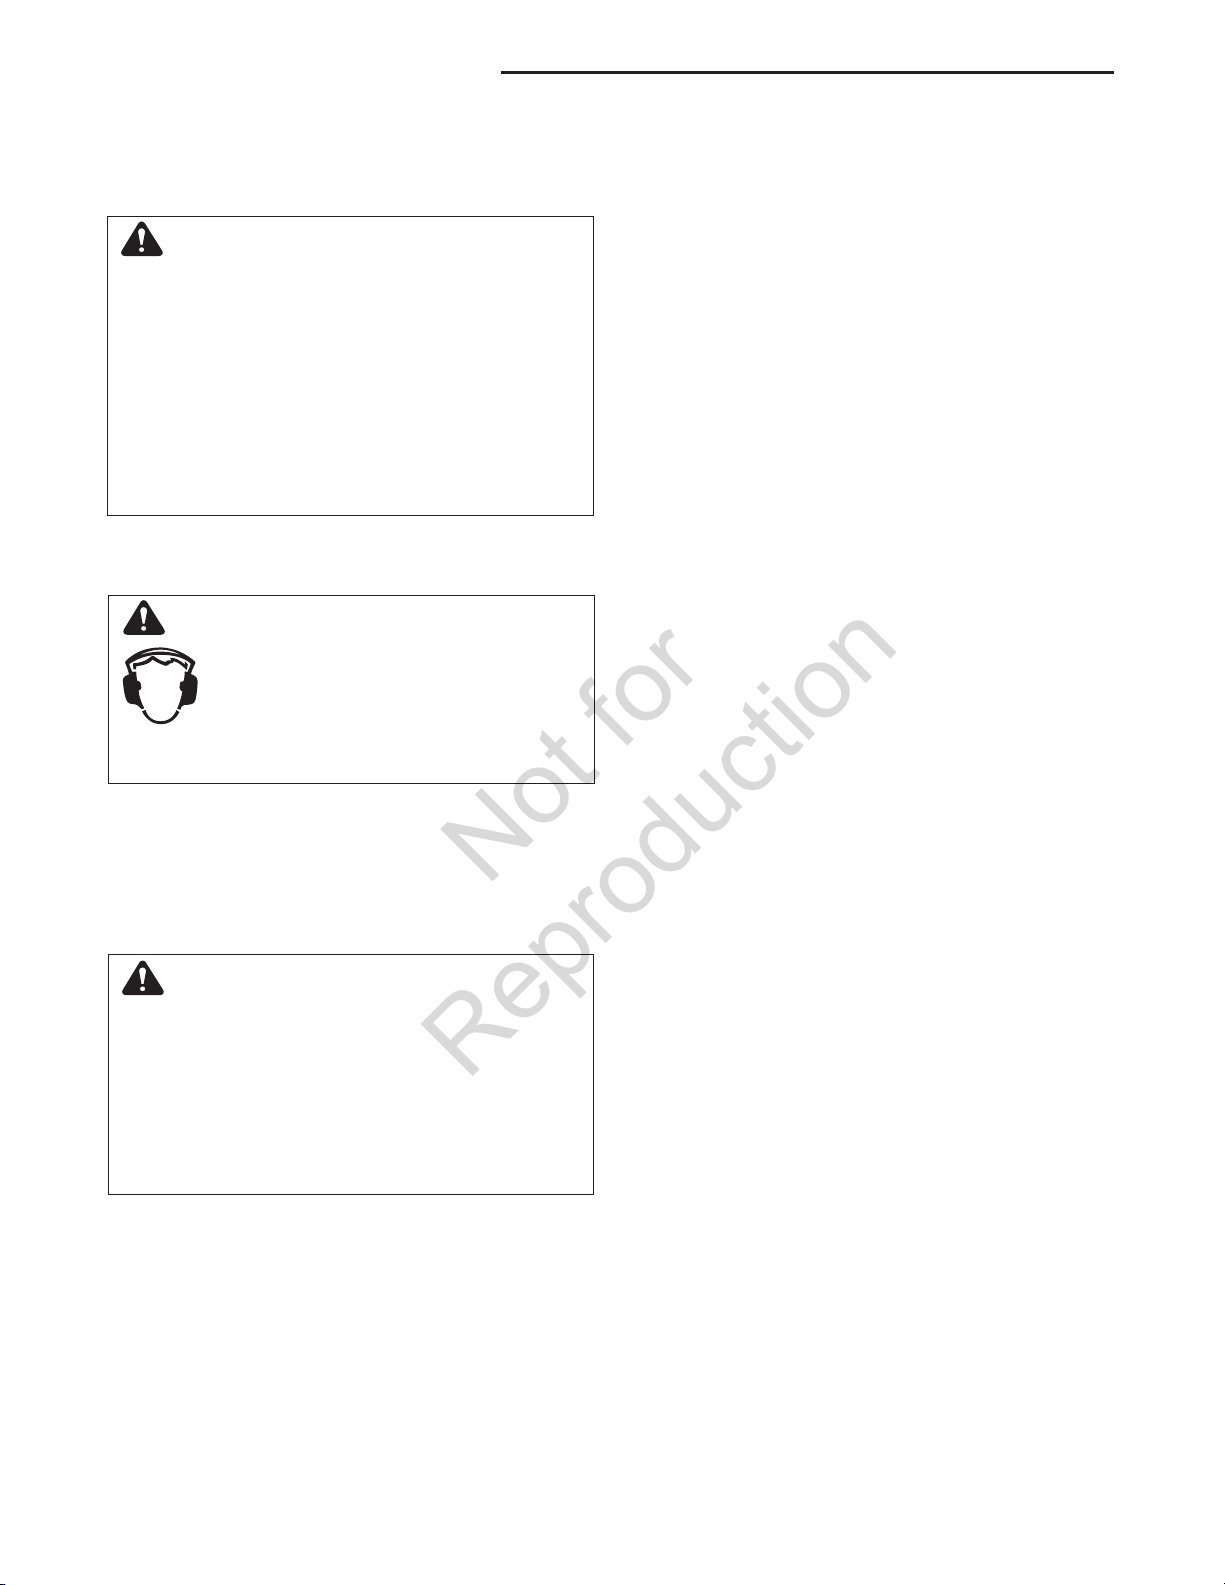
CAUTION
This machine produces sound levels
in excess of 85 dBA at the operator’s
ear and can cause hearing loss
though extended periods of exposure.
Wear hearing protection when operating this
machine.
SLOPE OPERATION
Slopes are a major factor related to loss-of-control and
tip-over accidents, which can result in severe injury or
death. All slopes require extra caution. If you cannot
back up the slope or if you feel uneasy on it, do not
drive on it.
WARNING
Operating on steep slopes can cause sliding
and loss of steering, control and rollover.
Select slow ground speed before driving onto
slope. Use extra caution when operating on
slopes with rear-mounted grass catchers.
Mow across the face of slopes, not up and
down, use caution when changing directions
and DO NOT START OR STOP ON SLOPE.
6. Keep all movement on the slopes slow and
gradual. Do not make sudden changes in speed
or direction.
7. See your authorized dealer for recommendations
of available weights to improve stability.
Do Not
1. Avoid starting, stopping, or turning on a slope.
If tires lose traction (i.e. machine stops forward
motion on a slope), disengage the blade(s) (PTO)
and drive slow off the slope.
2. Do not turn on slopes unless necessary, and then,
turn slowly.
3. Do not mow near drop-offs, ditches, or
embankments. The operator could lose footing or
balance or mower could suddenly turn over if a
wheel is over the edge of a cliff or ditch, or if an
edge caves in.
4. Do not mow on wet grass. Reduced footing or
traction could cause sliding.
5. Do not mow excessively steep slopes.
6. Do not use grass catcher on steep slopes.
CHILDREN
Tragic accidents can occur if the operator is not alert to
the presence of children. Children are often attracted
to the unit and the mowing activity. Never assume that
children will remain where you last saw them.
1. Keep children out of the mowing area and under
the watchful care of another responsible adult.
2. Be alert and turn unit off if children enter the area.
3. Before and during reverse operation, look behind
and down for small children.
4. Never allow children to operate the unit.
5. Use extra care when approaching blind corners,
shrubs, trees, or other objects that may obscure
vision.
EMISSIONS
1. Engine exhaust from this product contains
chemicals known, in certain quantities, to cause
cancer, birth defects, or other reproductive harm.
2. Look for the relevant Emissions Durability Period
and Air Index information on the engine emissions
label.
IGNITION SYSTEM (GASOLINE MODELS)
1. This spark ignition system complies with Canadian
ICES-002.
Do
1. Mow across slopes, not up and down.
2. Remove obstacles such as rocks, tree limbs, etc.
3. Watch for holes, ruts, or bumps. Uneven terrain
could overturn the unit. Tall grass can hide
obstacles.
4. Use slow speed. Choose a slow speed so that
5. Use extra care with grass catchers or other
6
you will not have to stop or change speed while
on the slope.
attachments. These can change the stability of
the unit.
Page 9

Safety Rules & Information
Not for
Reproduction
SERVICE AND MAINTENANCE
To avoid personal injury or property damage, use
extreme care in handling gasoline. Gasoline is
extremely flammable and the vapors are explosive.
Safe Handling of Gasoline
1. Extinguish all cigarettes, cigars, pipes, and other
sources of ignition.
2. Use only approved gasoline containers.
3. Never remove the gas cap or add fuel with the
engine running. Allow the engine to cool before
refueling.
4. Never fuel the machine indoors.
5. Never store the machine or fuel container where
there is an open flame, spark, or pilot light such
as near a water heater or other appliance.
6. Never fill containers inside a vehicle or on a
truck bed with a plastic bed liner. Always place
containers on the ground away from your vehicle
before filling.
7. Remove gas-powered equipment from the truck
or trailer and refuel it on the ground. If this is not
possible, then refuel such equipment on a trailer
with a portable container, rather than from a
gasoline dispenser nozzle.
8. Keep nozzle in contact with the rim of the fuel tank
or container opening at all times until fueling is
complete. Do not use a nozzle lock-open device.
9. If fuel is spilled on clothing, change clothing
immediately.
10. Never over-fill the fuel tank. Replace gas cap and
tighten securely.
11. Use extra care in handling gasoline and other
fuels. They are flammable and vapors are
explosive.
12. If fuel is spilled, do not attempt to start the engine
but move the machine away from the area of
spillage and avoid creating any source of ignition
until fuel vapors have dissipated.
13. Replace all fuel tank caps and fuel container caps
securely.
Maintenance and Storage
1. Always observe safe refueling and fuel
handling practices when refueling the unit after
transportation or storage.
2. Always follow the engine manual instructions for
storage preparations before storing the unit for
both short and long term periods.
3. Always follow the engine manual instructions for
proper start-up procedures when returning the unit
to service.
4. Never store the machine or fuel container inside
where there is an open flame, such as in a water
heater. Allow unit to cool before storing.
5. Shut off fuel while storing or transporting. Do not
store fuel near flames or drain indoors.
6. Keep all hardware, especially blade attachment
bolts, tight and keep all parts in good working
condition. Replace all worn or damaged decals.
7. Never tamper with safety devices. Check their
proper operation regularly.
8. Disengage drives, lower implement, set parking
9. Clean grass and debris from cutting units, drives,
brake, stop engine and remove key or disconnect
spark plug wire. Wait for all movement to stop
before adjusting, cleaning or repairing.
mufflers, and engine to prevent fires. Clean up oil
or fuel spillage.
10. Let engine cool before storing and do not store
near flame.
11. Stop and inspect the equipment if you strike an
object. Repair, if necessary, before restarting.
12. Park machine on level ground. Never allow
untrained personnel to service machine.
13. Use jack stands to support components when
required.
14. Carefully release pressure from components with
stored energy.
15. Disconnect battery or remove spark plug wire
before making any repairs. Disconnect the
negative terminal first and the positive last.
Reconnect positive first and negative last.
16. Use care when checking blades. Wrap the
blade(s) or wear gloves, and use caution when
servicing them. Only replace blades. Never
straighten or weld them.
17. Keep hands and feet away from moving parts.
If possible, do not make adjustments with the
engine running.
18. Charge batteries in an open well ventilated area,
away from spark and flames. Unplug charger
before connecting or disconnecting from battery.
Wear protective clothes and use insulated tools.
19. Grass catcher components are subject to wear,
damage, and deterioration, which could expose
moving parts or allow objects to be thrown.
Frequently check components and replace
with manufacturer’s recommended parts, when
necessary.
20. Check brake operation frequently. Adjust and
service as required.
21. Use only factory authorized replacement parts
when making repairs.
22. Always comply with factory specifications on all
settings and adjustments.
23. Only authorized service locations should be
utilized for major service and repair requirements.
24. Never attempt to make major repairs on this unit
unless you have been properly trained. Improper
service procedures can result in hazardous
operation, equipment damage and voiding of
manufacturer’s warranty.
25. Units with hydraulic pumps, hoses, or motors:
WARNING: Hydraulic fluid escaping under
pressure may have sufficient force to penetrate
skin and cause serious injury. If foreign fluid is
injected into the skin it must be surgically removed
within a few hours by a doctor familiar with this
form of injury or gangrene may result. Keep body
and hands away from pin holes or nozzles that
eject hydraulic fluid under high pressure. Use
paper or cardboard, and not hands, to search for
leaks. Make sure all hydraulic fluid connections
are tight and all hydraulic hoses and lines are in
good condition before applying pressure to the
system. If leaks occur, have the unit serviced
immediately by your authorized dealer.
26. WARNING: Stored energy device. Improper
release of springs can result in serious personal
injury. Springs should be removed by an
authorized technician.
7
Page 10
Operator Safety
Not for
Reproduction
Safety Decals
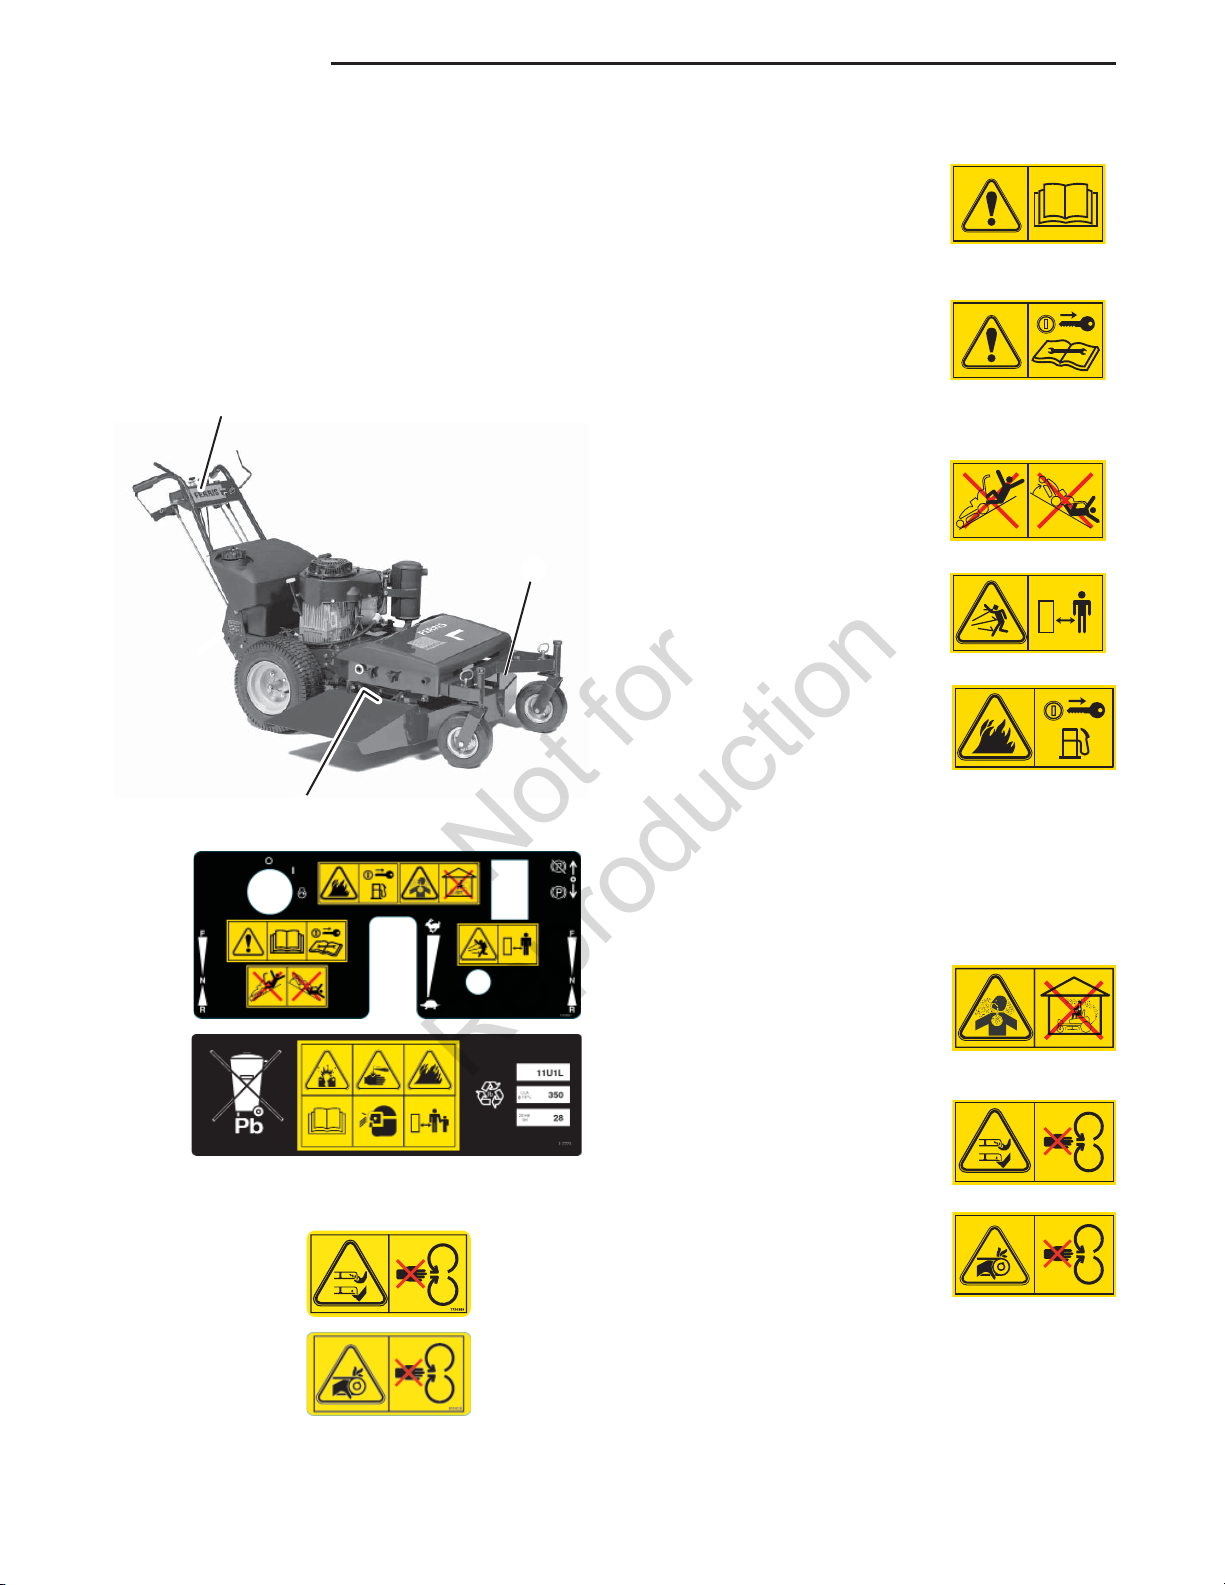
All DANGER, WARNING, CAUTION and
instructional messages on your rider and mower
should be carefully read and obeyed. Personal bodily
injury can result when these instructions are not
followed. The information is for your safety and it is
important! The safety decals below are on your rider
and mower.
If any of these decals are lost or damaged, replace
them at once. See your local dealer for replacements.
A
C & D
C & D
A
B
Safety Icons
Warning: Read Operator’s
Manual.
Read and understand the
Operator’s Manual before using
this machine.
Warning: Remove Key Before
Servicing.
Remove the key and
consult technical literature
before performing repairs or
maintenance.
Danger: Machine Rollover.
Operating on steep slopes
can cause sliding and loss of
steering, control and rollover.
Danger: Thrown Objects.
This machine is capable of
throwing objects and debris.
Keep bystanders away.
Danger: Fire Hazard.
Keep unit free of grass, leaves
and excess oil. Do not add fuel
while engine is hot or running.
Stop engine and allow to cool for
at least 3 minutes prior to adding
fuel. Do not add fuel indoors, in
an enclosed trailer, garage, or
other enclosed areas. Clean up
spilled fuel. Do not smoke while
operating this machine.
Danger: Carbon Monoxide
Poisoning.
Do not operate the engine in an
unventilated area.
Danger: Dismemberment.
This mower deck can amputate
(This decal is located on the battery for CE
models only.)
C
limbs. Keep hands and feet
away from blades.
Danger: Dismemberment.
This machine can crush and cut.
Keep hands away from belts and
pulleys.
D
8
www.ferrisindustries.com
Page 11
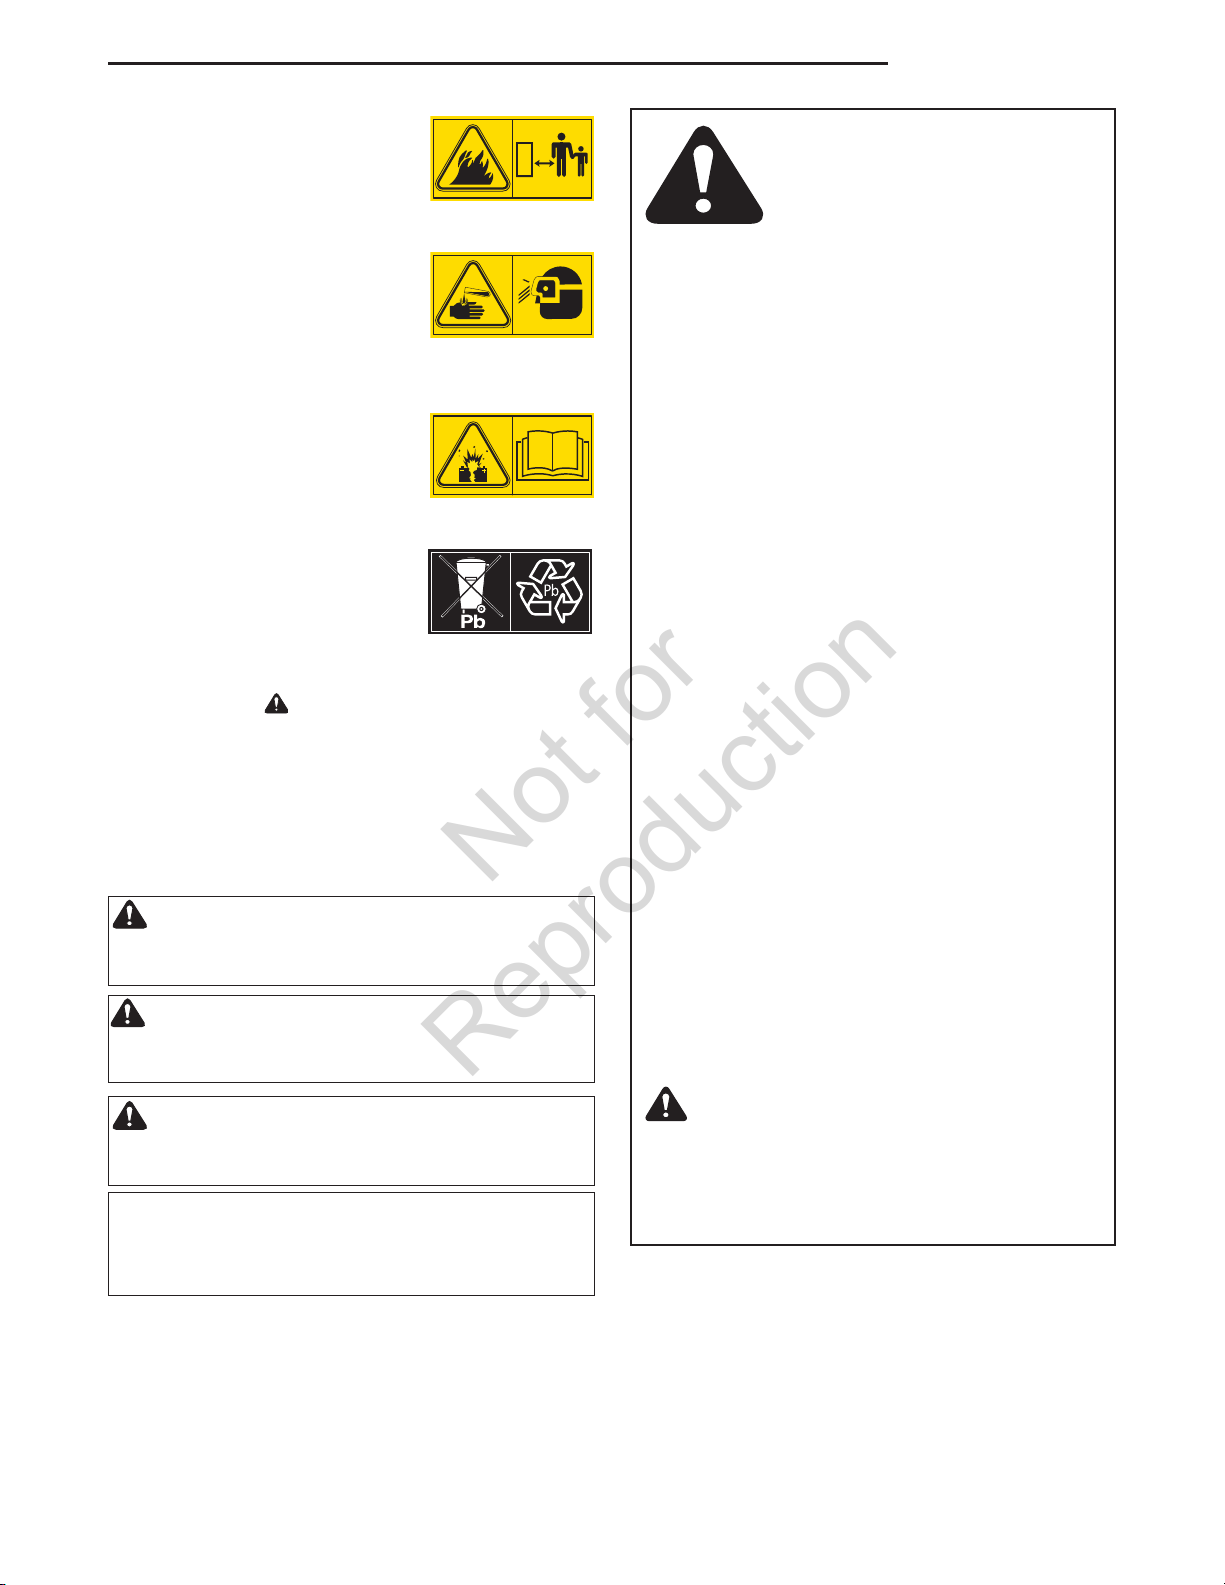
Warning : Fire hazard
Not for
Reproduction
Keep children, open flames and
sparks away from the battery,
which could ignite explosive
gases.
Warning: Sulfuric acid can
cause blindness or severe
burns
Always wear safety goggles or a
face shield when working on or
near a battery.
Warning: Batteries produce
explosive gases
Read and understand the
Operator’s Manual before using
this machine.
Important: Do not discard a
battery in the trash
Contact local authorities for
disposal and/or recycling of
batteries.
The alert symbol is used to identify safety
information about hazards that can result in personal
injury. A signal word (DANGER, WARNING, or
CAUTION) is used with the alert symbol to indicate
the likelihood and the potential severity of the injury.
In addition, a hazard icon may be used to represent
the type of hazard. An explanation of hazard levels
and icons are as follows:
DANGER
This indicates a hazard which, if not avoided, will
result in serious injury or death.
WARNING
This indicates a hazard which, if not avoided, could
result in serial injury or death.
Operator Safety
Safety
Interlock System
This unit is equipped with safety interlock switches
and other safety devices. These safety systems are
present for your safety, do not attempt to bypass
safety switches, and never tamper with safety
devices. Check their operation regularly.
Operational SAFETY Checks
Your unit is equipped with an operator presence
switch safety system. Check the operator presence
switch operation every fall and spring with the
following tests.
Test 1 — Engine WILL NOT start if:
• PTO switch is engaged.
• Parking brake is disengaged.
Test 2 — Engine WILL start if:
• PTO switch is NOT engaged.
• Parking brake is engaged.
Test 3 — Engine should SHUT OFF if:
• Operator releases the engine kill / operator
presence handles with the PTO engaged.
• Operator releases the engine kill / operator
presence handles with the parking brake
disengaged.
Test 4 — Blade Brake Check
Mower blades and mower drive belt should come
to a complete stop within seven (7) seconds after
electric PTO switch is turned off (or operator releases
operator presence handles). If mower drive belt does
not stop within seven (7) seconds, see your dealer.
NOTE: Once the engine has stopped, PTO switch
must be turned off in order to start the engine.
CAUTION
This indicates a hazard which, if not avoided, might
result in minor or moderate injury.
CAUTION or NOTICE
These messages presented without the alert symbol
indicate a situation where the unit or property could
be damaged.
If the unit does not pass a safety test, do not
operate it. See your authorized dealer. Under
no circumstance should you attempt to defeat
the purpose of the safety interlock system.
WARNING
9
Page 12
Features and Controls
Not for
Reproduction
Features and Controls
Control Functions
The information below briefly describes the function
of individual controls. Starting, stopping, driving,
and mowing require the combined use of several
controls applied in specific sequences. To learn what
combination and sequence of controls to use for
various tasks see the OPERATION section.
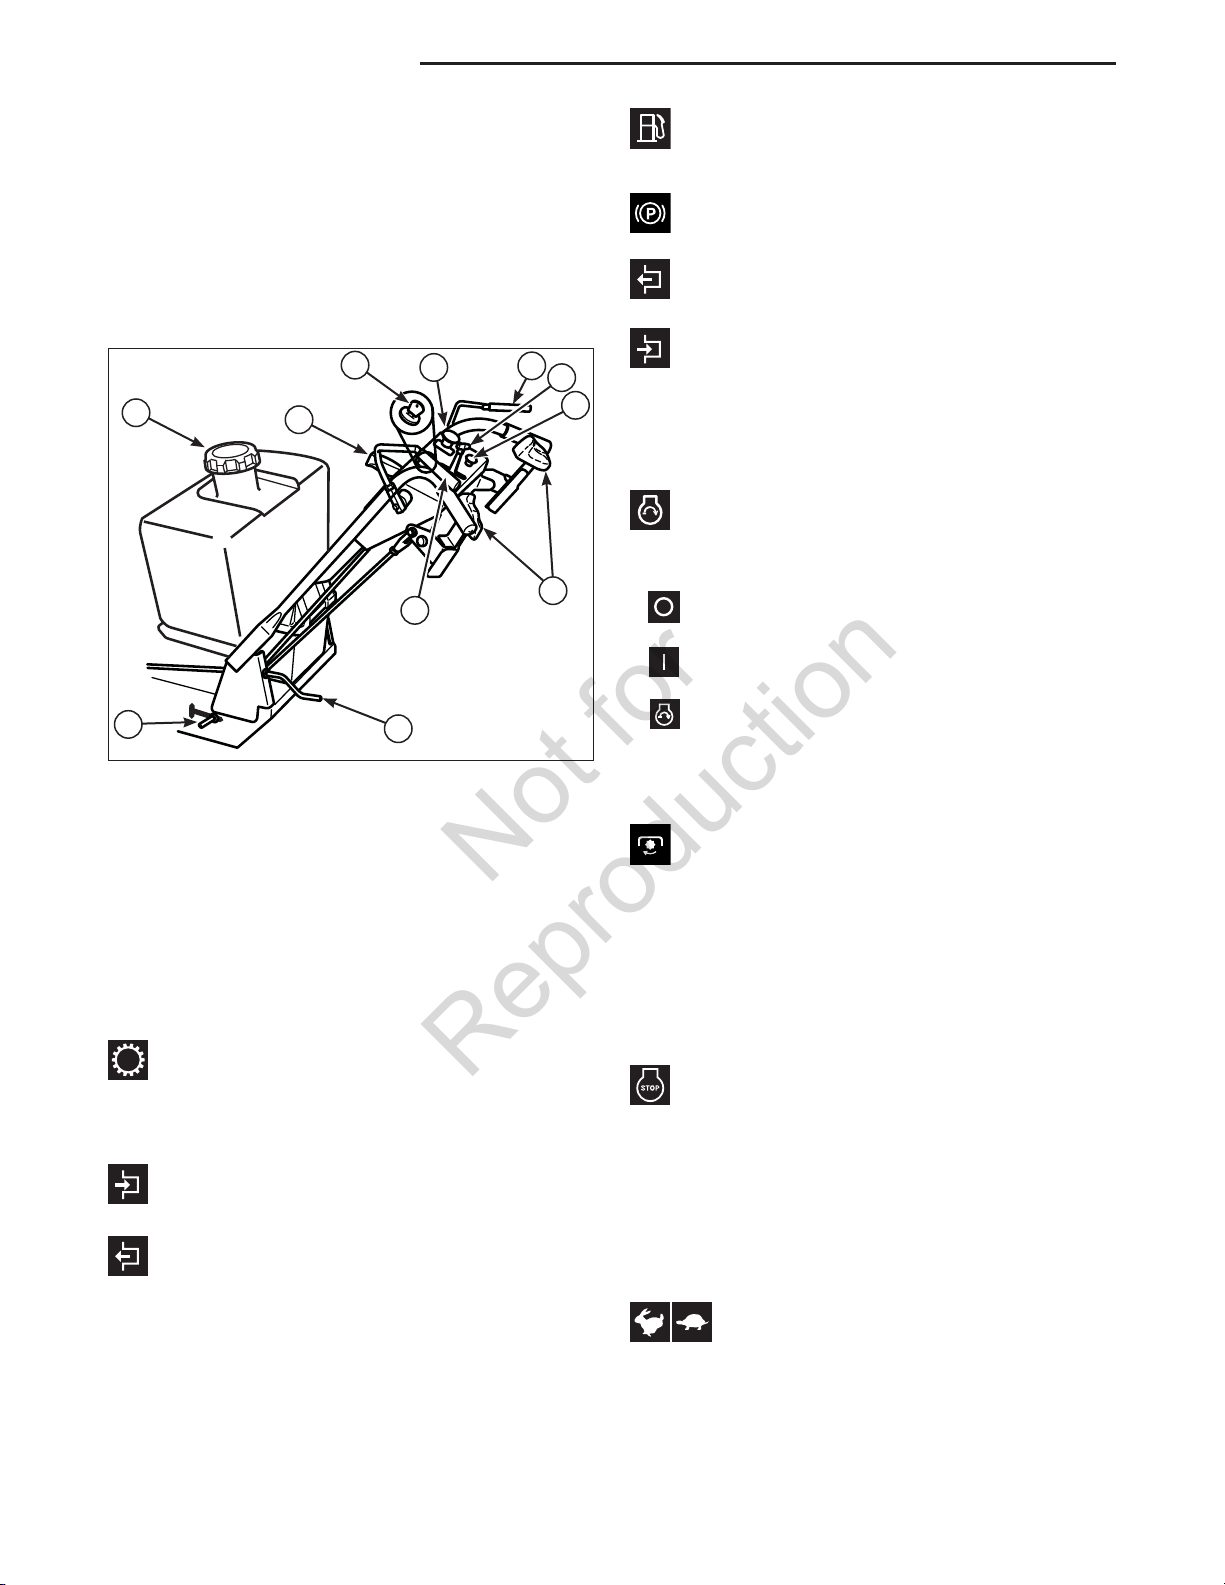
D
B
A
Figure 1. Control Locations
A. Transmission Release Valve
B. Fuel Tank Cap
C. Parking Brake
D. Ignition Switch
E. PTO (Power Take Off) Switch
F. Engine Kill / Operator Presence Handles
G. Throttle Control
H. Choke
I. Ground Speed Control Handles
J. Cutting Height Adjustment Handle
C
E
F
J
Transmission Release Valve
The transmission release valve deactivates the
transmissions so that the unit can be pushed by hand.
Engages the transmission; the mower will move
under its own power.
Disengages the transmission; the mower can
now be pushed by hand.
F
G
H
I
Fuel Tank Cap
To remove cap, turn counterclockwise.
Parking Brake
DISENGAGE Releases the parking brake.
ENGAGE Locks the parking brake.
Pull the parking brake lever back to engage the
parking brake. Move the lever fully forward to
disengage the parking brake. NOTE: To start the unit
the parking brake must be engaged.
Ignition Switch
The ignition switch starts and stops the engine, it has
three positions:
OFF Stops the engine and shuts off the
electrical system.
RUN Allows the engine to run and powers
the electrical system.
START Cranks the engine for starting.
NOTE: Never leave the ignition switch in the RUN
position with the engine stopped–this drains the
battery.
PTO (Power Take Off) Switch
The PTO Switch engages and disengages the mower
blades.
To engage the mower blades, pull up on the switch.
To disengage the mower blades, push down on the
switch.
When the PTO engagement lever or switch is in the
Engaged position, the Engine Kill system is activated.
Engine Kill / Operator Presence
Handles
These handles are a major factor in the safety
interlock system of the mower. Both handles are
tied together so depressing one handle depresses
both. The operator must depress the handles in order
to deactivate the engine kill system. Handles must
be depressed to disengage the parking brake and
engage the PTO switch.
See PUSHING THE MOWER BY HAND for
operational information.
10
The throttle controls engine speed. Move the
throttle forward to increase engine speed and back
to decrease engine speed. Always operate at FULL
throttle.
Throttle Control
www.ferrisindustries.com
Page 13
Features and Controls
Not for
Reproduction
Choke
Close the choke for cold starting. Open the choke
once the engine starts. A warm engine may not
require choking. Pull the knob UP to close the choke.
Push to knob DOWN to open the choke.
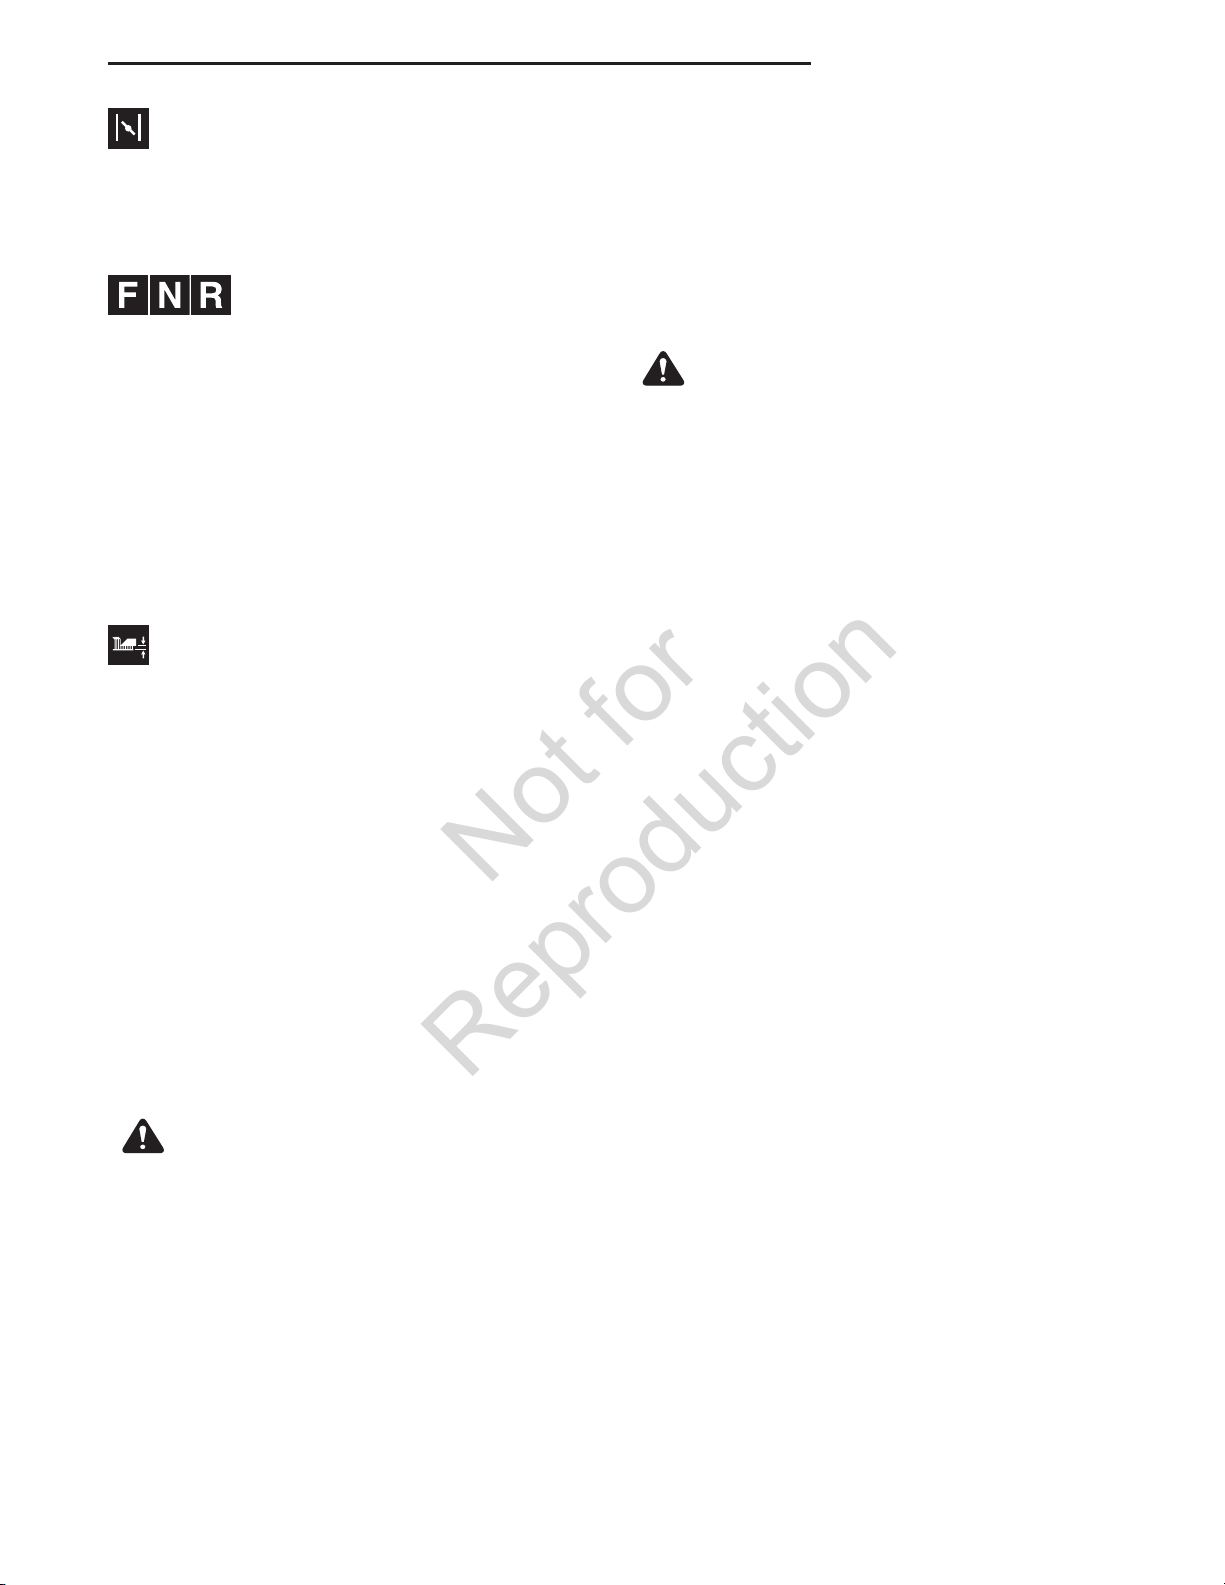
Ground Speed Control
Handles
These handles control the ground speed of the
mower. The left and right handles are tied together so
you can operate either lever to control the mower’s
ground speed.
Moving a handle forward to “F” increases the
FORWARD speed of the mower. Moving a handle
back to “R” increases the REVERSE speed. Moving
the handles to to “N” neutral position stops mower
travel.
Note: The further a handle is moved away from the
neutral position the faster the mower will travel.
Cutting Height Adjust Handle
The cutting height adjust handle controls the mower
cutting height. To adjust the mower cutting height,
turn the crank handle clockwise to raise the cutting
height. Turn the crank handle counterclockwise to
lower the cutting height. Observe the cutting height
indicator on the left side of the mower deck.
Operation
General Operating Safety:
Before first time operation:
• Be sure to read all information in the Safety and
Operation sections before attempting to operate
this tractor and mower.
• Become familiar with all of the controls and how to
stop the unit.
• Drive in an open area without mowing to become
accustomed to the unit.
WARNING
If you do not understand how a specific control
functions, or have not yet thoroughly read the
FEATURES & CONTROLS section, do so now.
Do NOT attempt to operate the tractor without
first becoming familiar with the location and
function of ALL controls.
Checks Before Starting
• Check that crankcase is filled to full mark on
dipstick. See the engine Operator’s Manual for
instructions and oil recommendations.
• Make sure all nuts, bolts, screws and pins are in
place and tight.
• Fill the fuel tank with fresh fuel. Refer to engine
manual for fuel recommendations.
• Make sure fuel shut off valve is in the ON position.
WARNING
Before leaving the operator’s position for any
reason, disengage the PTO, stop the engine
and remove the key.
To reduce fire hazard, keep the engine, tractor
and mower free of grass, leaves and excess
grease. Do not stop or park tractor over dry
leaves, grass or combustible materials.
Gasoline is highly flammable and must be
handled with care. Never fill the tank when the
engine is still hot from recent operation. Do not
allow open flame, smoking or matches in the
area. Avoid over-filling and wipe up any spills.
Starting the Engine
• Make sure the PTO switch is disengaged and the
parking brake is engaged.
• Set the engine throttle control to FAST throttle
position. Then fully close the choke by pulling the
knob OUT fully.
NOTE: A warm engine may not require choking.
• Insert the key into the ignition switch and turn it to
START.
• After the engine starts, gradually open the choke
(push knob down fully). Reduce to half throttle
speed and allow to warm up
Warm up the engine by running it for at least a minute
before engaging the PTO lever/switch or driving the
mower.
After warming the engine, ALWAYS operate the
unit at FULL THROTTLE when mowing.
In the event of an emergency the engine can be
stopped by simply turning the ignition switch to
STOP. Use this method only in emergency situations.
For normal engine shut down follow the procedure
given in STOPPING THE MOWER.
11
Page 14
Operation
Not for
Reproduction
Driving the Mower
• Make sure the PTO switch is disengaged.
• Start the engine (see STARTING THE ENGINE).
• Set the throttle control to FULL.
• Push down on both of the engine kill / operator
presence handles to deactivate the engine
kill system. Push the brake lever forward the
disengage the parking brake.
• With your thumbs, pressing the ground speed
control levers forward will move the mower
forward. Pulling them back will move the mower
backwards. The farther the levers are pushed or
pulled will result in a faster ground speed.
• To slow the mower, gently release your thumb
pressure on the ground speed control levers to
return them to the neutral position.
WARNING
Operating on steep slopes can cause sliding
and loss of steering, control and rollover.
Select slow ground speed before driving onto
a slope. Use extra caution when operating on
slopes.
Mow up and down the face of slopes, not
across, use caution when changing directions
and DO NOT START OR STOP ON SLOPE.
Operating on a Slope
While it is not recommended, traveling up and down
slopes may be required from time to time. These
guide lines are listed for your safety.
Traveling Up a Slope
Since the hill climbing ability of the machine will
probably far exceed any other machine you may have
operated, caution should be observed.
• Never make abrupt speed or direction changes on
a slope.
• Never push down on the handle bars while
going up a grade. A slight lifting pressure is
recommended to keep the front wheels on the
ground.
Traveling Down a Slope
A very slow ground speed should always be
used when traveling down a slope. This can be
accomplished by GENTLY moving the ground speed
control levers towards the reverse direction.
Stopping the Mower
• Returning the ground speed control levers to the
neutral position will stop movement.
• Disengage the PTO.
• Engage the parking brake.
• Move the throttle control to mid-throttle position
and turn the ignition key to OFF. Remove the key.
Mowing
• Make sure the PTO switch is disengaged.
• Start the engine (see STARTING THE ENGINE).
• Set the throttle control to FULL.
• Push down on both of the engine kill / operator
presence handles to deactivate the engine
kill system. Push the brake lever forward the
disengage the parking brake.
• Engage the PTO by pulling up on the PTO switch.
• Begin mowing. See Lawn Care Section in the
back of this manual for tips on mowing patterns,
lawn care, and trouble shooting information.
• When finished, disengage the PTO.
• Stop the engine (see STOPPING THE MOWER).
Pushing the Mower by Hand
DO NOT TOW MOWER
Towing the unit will cause hydraulic
transmission damage. Do not use
another vehicle to push or pull this unit.
• Disengage the PTO, turn the ignition OFF, and
remove the key.
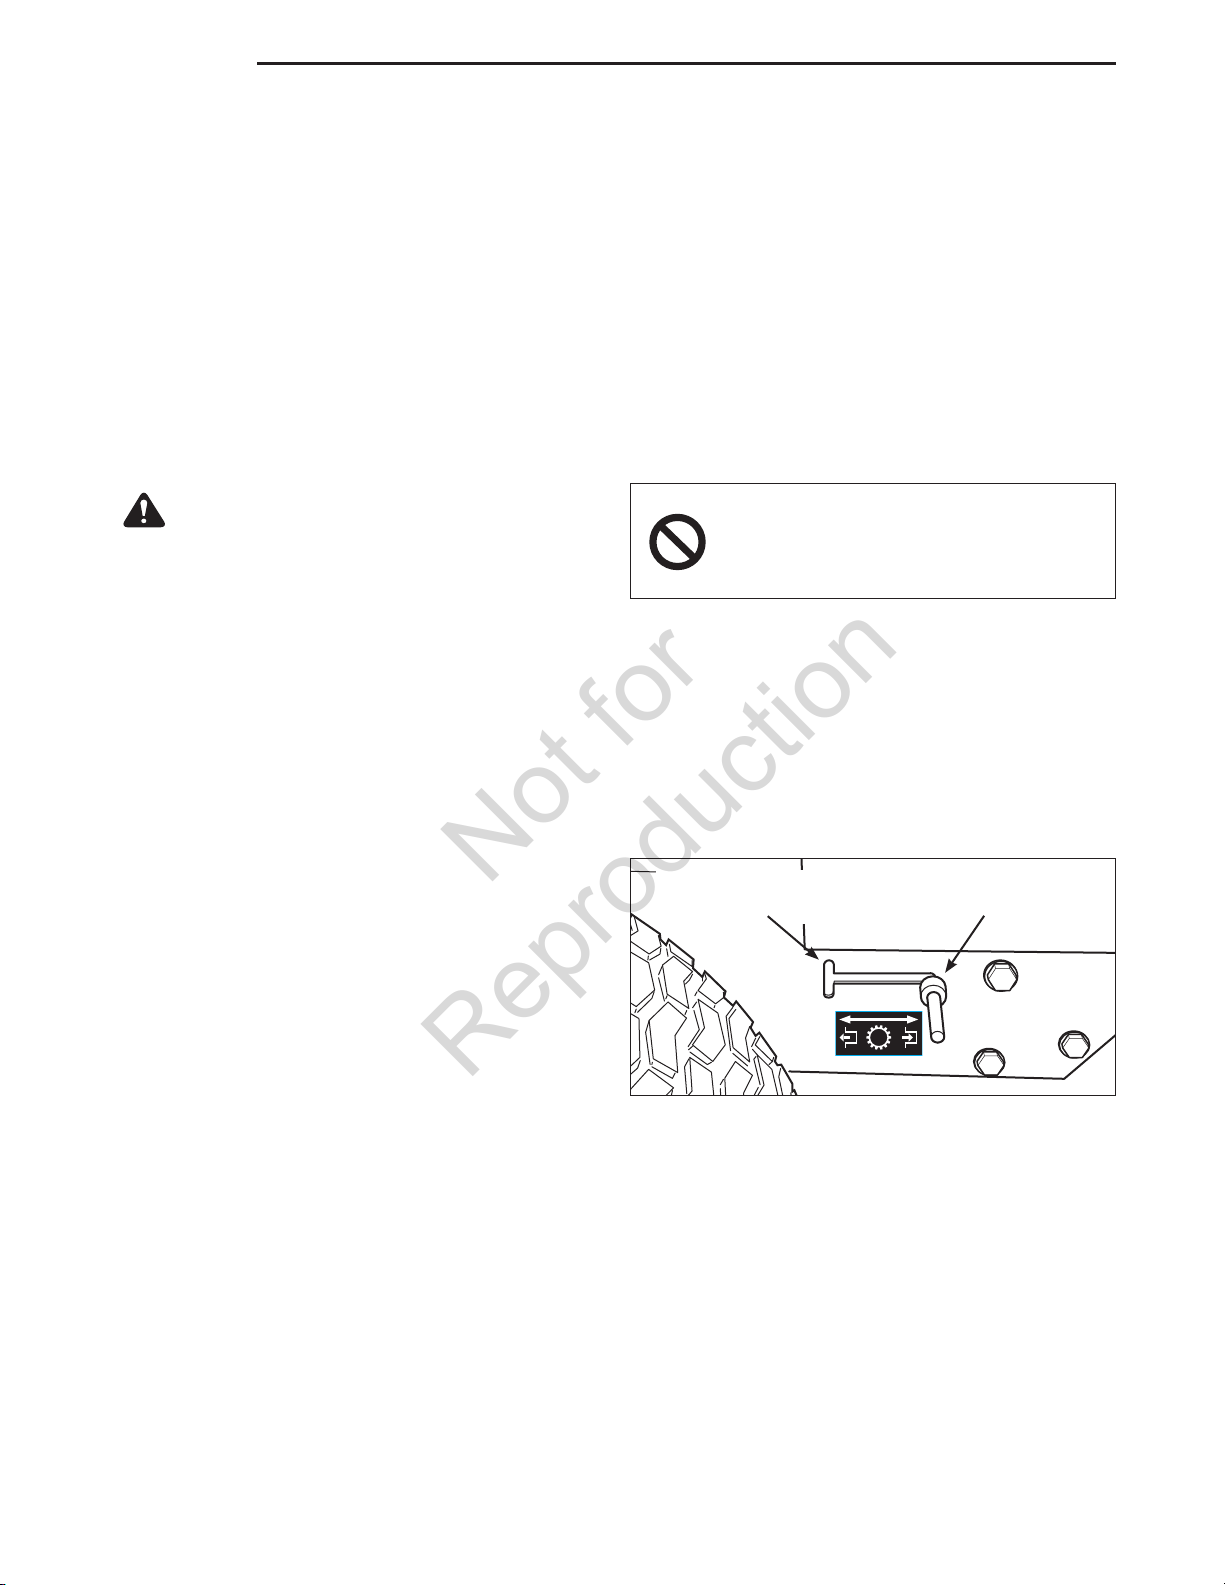
• Slide the hydraulic release rod forward and lock
into the top of the “T” slot. See Figure 2.
• Disengage the parking brake.
The mower can now be pushed by hand.
• After moving the mower, re-engage the
transmission (DRIVE position) by releasing the
rod from the “T” and sliding the release handle
towards the rear of the machine.
NEUTRAL POSITION
“DISENGAGE”
Figure 2. Hydraulic Release Rod
DRIVE POSITION
“ENGAGE”
49320
12
www.ferrisindustries.com
Page 15

Operation
Not for
Reproduction
Storage
Temporary Storage (30 Days Or Less)
Remember, the fuel tank will still contain some gasoline,
so never store the unit indoors or in any other area
where fuel vapor could travel to any ignition source.
Fuel vapor is also toxic if inhaled, so never store the unit
in any structure used for human or animal habitation.
Here is a checklist of things to do when storing your unit
temporarily or in between uses:
• Keep the unit in an area away from where children
may come into contact with it. If there’s any chance
of unauthorized use, remove the spark plug (s) and
put in a safe place. Be sure the spark plug opening
is protected from foreign objects with a suitable
cover.
• If the unit can’t be stored on a reasonable level
surface, chock the wheels.
• Clean all grass and dirt from the mower.
Long Term Storage (Longer Than 30 Days)
Before you store your unit for the off-season, read the
Maintenance and Storage instructions in the Safety
Rules section, then perform the following steps:
• Drain crankcase oil while engine is hot and refill with
a grade of oil that will be required when unit is used
again.
• Prepare the mower deck for storage as follows:
a. Clean underside of mower deck.
b. Coat all bare metal surfaces with paint or light coat
of oil to prevent rusting.
WARNING
Never store the unit, with gasoline in engine
or fuel tank, in a heated shelter or in enclosed,
poorly ventilated enclosures. Gasoline fumes
may reach an open flame, spark or pilot light
(such as a furnace, water heater, clothes dryer,
etc.) and cause an explosion.
Handle gasoline carefully. It is highly
flammable and careless use could result in
serious fire damage to your person or property.
Drain fuel into an approved container outdoors
away from open flame or sparks.
• Drain fuel system completely or add a gasoline
stabilizer to the fuel system. If you have chosen
to use a fuel stabilizer and have not drained the
fuel system, follow all safety instructions and
storage precautions in this manual to prevent
the possibility of fire from the ignition of gasoline
fumes. Remember, gasoline fumes can travel to
distant sources of ignition and ignite, causing risk of
explosion and fire.
NOTE: Gasoline, if permitted to stand unused for
extended periods (30 days or more), may develop
gummy deposits which can adversely affect the engine
carburetor and cause engine malfunction. To avoid this
condition, add a gasoline stabilizer to the fuel tank and
run the engine a few minutes, or drain all fuel from the
unit before placing it in storage.
• Clean external surfaces and engine.
• Prepare engine for storage. See engine owner’s
manual.
• Clean any dirt or grass from cylinder head cooling
fins, engine housing and air cleaner element.
• Cover air cleaner and exhaust outlet tightly with
plastic or other waterproof material to keep out
moisture, dirt and insects.
• Completely grease and oil unit as outlined in the
Normal Care section.
• Clean up unit and apply paint or rust preventative to
any areas where paint is chipped or damaged.
Starting After Long Term Storage
Before starting the unit after it has been stored for a long
period of time, perform the following steps.
• Remove any blocks from under the unit.
• Unplug the exhaust outlet and air cleaner.
• Fill the fuel tank with fresh gasoline. See engine
manual for recommendations.
• See engine owner’s manual and follow all
instructions for preparing engine after storage.
• Check crankcase oil level and add proper oil if
necessary. If any condensation has developed
during storage, drain crankcase oil and refill.
• Inflate tires to proper pressure. Check fluid levels.
• Start the engine and let it run slowly. DO NOT run at
high speed immediately after starting. Be sure to run
engine only outdoors or in well ventilated area.
13
Page 16
Operation
Not for
Reproduction
Cutting Height Adjustment
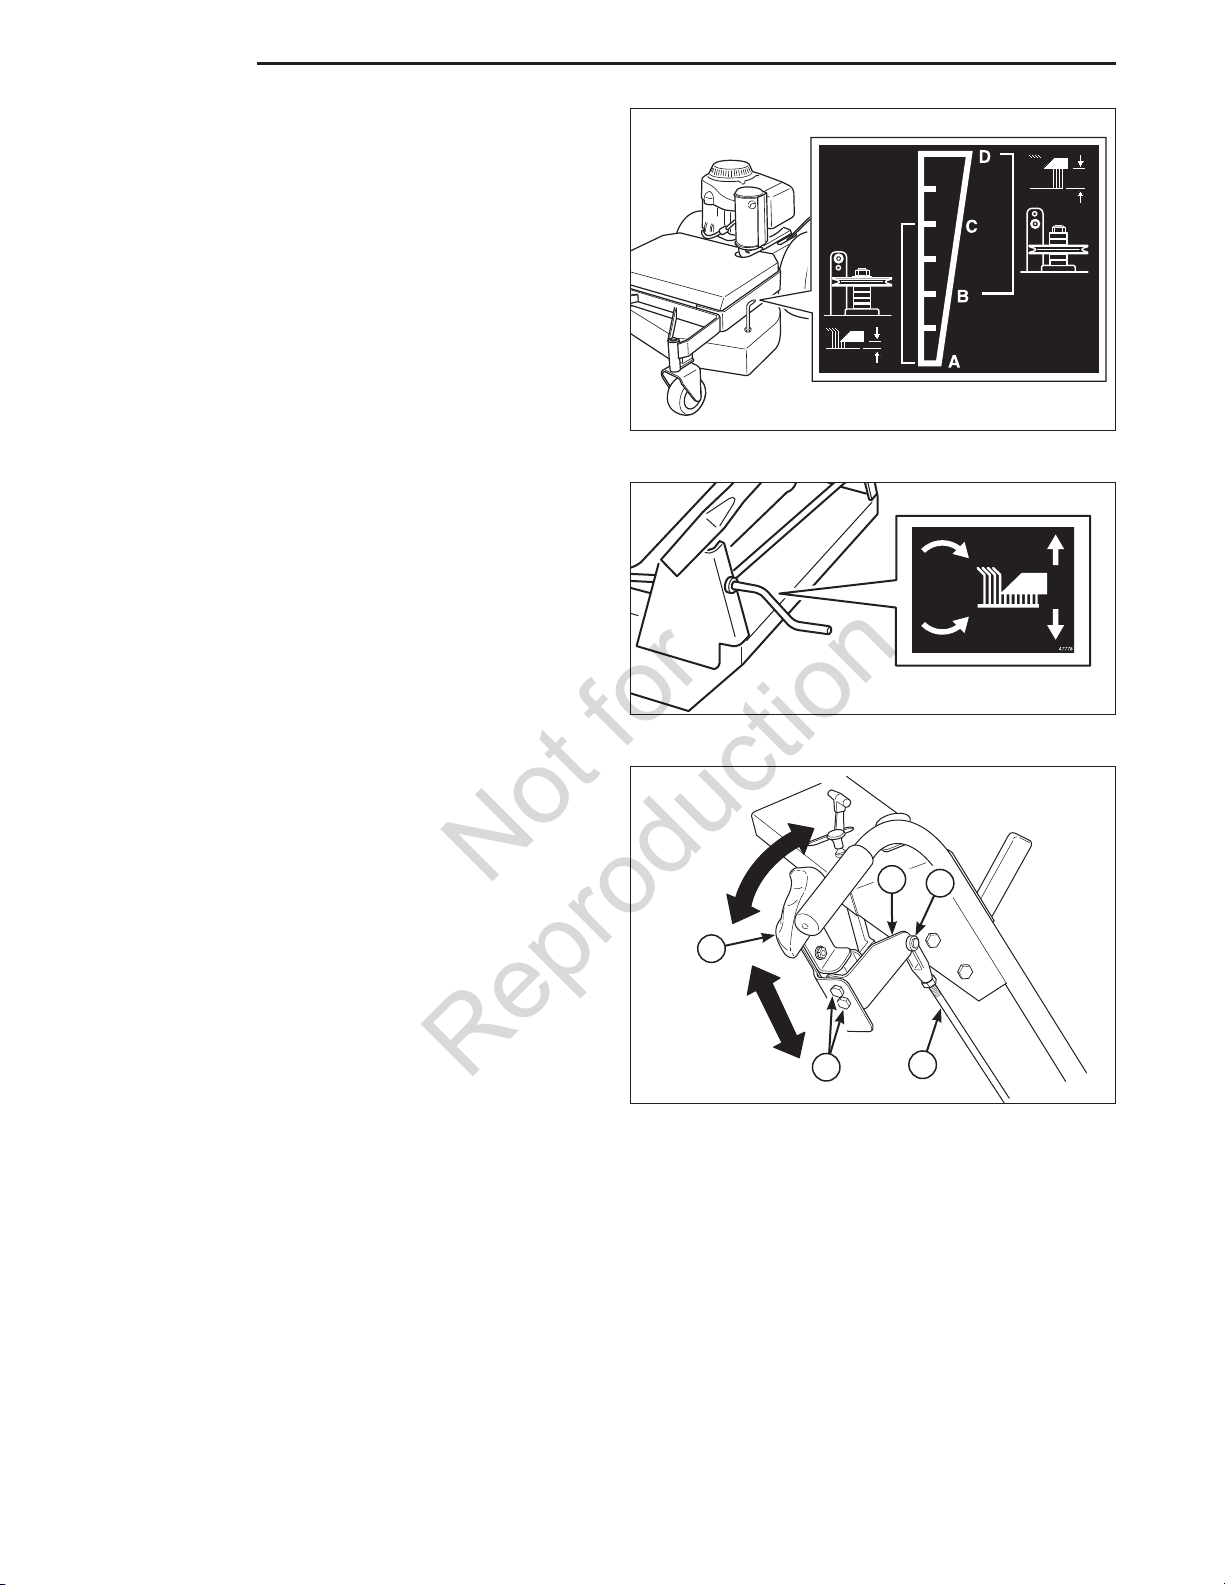
The cutting height can be adjusted within two different
ranges. The High Range covers 4-1/2” - 2-1/2” (11,4
- 6,4cm) and the Low Range covers 3-1/2” - 1-1/2”
(8,9 - 3,8cm). See Figure 3 for deck height indicator.
Before adjusting the cutting height, you must first
determine the average cutting height. Depending
on the range you plan to use, it may be necessary
to adjust the deck lift pivot locations and the pulley
spacer positions.
To Adjust the Cutting Range:
See your authorized dealer.
To Adjust the Cutting Height:
Turn the crank handle clockwise to raise the mower
deck or counterclockwise to lower the mower deck.
See Figure 4.
Ground Speed Control Lever Location
Adjustment
The control levers can be adjusted in two ways to
provide a comfortable working range when operating
the machine at the average mowing speed.
Adjust both the lever height and lever position at the
same time to obtain the most comfortable working
position
Figure 3. Deck Height Indicator
Figure 4. Cutting Height Adjustment
Adjusting the Lever Height:
1. Loosen the lever fastener (B, Figure 5) to adjust
the lever height. Make sure the levers are parallel
with the handle bars in both forward and reverse
without contacting the handle bars.
Adjusting the Lever Position:
1. Remove the hairpin and clevis pin (D) that fasten
the control rod (E) to the lever pivot (C).
2. Loosen the jam nut and adjust the position of
the clevis on the rod. By shortening the rod
(turning the clevis clockwise), it will move the lever
forward. By lengthening the rod (turning the clevis
counter-clockwise), it will move the lever rearward.
Adjust until the desired lever position is obtained
and tighten the jam nuts.
3. Reinstall the clevis on the lever pivot and secure
with the clevis pin and hairpin.
C
D
A
B
Figure 5. Ground Speed Control Lever Adjustment
A. Control Lever
B. Lever Fastener
C. Lever Pivot
D. Clevis Pin & Hairpin
E. Control Rod
E
14
www.ferrisindustries.com
Page 17

Specifications
Not for
Reproduction
NOTE: Specifications are correct at time of printing
and are subject to change without notice.
ENGINE
15 Gross HP† Kawasaki
Make
Model
Displacement
Electrical System
Oil Capacity
†Power Ratings: All power levels are stated gross horsepower per
SAE J2723 as rated by Kawasaki and tested per the SAE J1995
test standard. The gross power curves and more information can be
viewed at www.kawasaki-criticalpower.com.
Kawasaki
FS481V-DS00-S
36.8 Cu. In (603 cc)
12 volt, 15 amp charging coil;
Battery: 340 cca
1.8 US qt. (1.7 L) w/ filter
Specifications
CHASSIS
Fuel Tank
Drive Tires
Front Tires
Capacity: 4 Gallons (15.1 L)
Tire Size: 16 x 6.50 -12
Inflation Pressure: 15 psi (1,03 bar)
Tire Size: 9 x 3.5 - 6
Inflation Pressure: 25 psi (1,72 bar)
TRANSMISSIONS
HydroGear 334
Type
Hydraulic Fluid
Speeds
@ 3400 rpm
Unitized Drive Transaxle
HydroGear 20W-50 oil
Forward: 0-5.5 MPH (0-8.85 km/h)
Reverse: 0-2 MPH (0-3.22 km/h)
DIMENSIONS
Overall Length 72” (183 cm)
Overall Width 48” (122 cm)
Height 41” (104 cm)
Weight (apx.) 355 lbs. (161 kg)
15
Page 18
Operator Safety
Not for
Reproduction
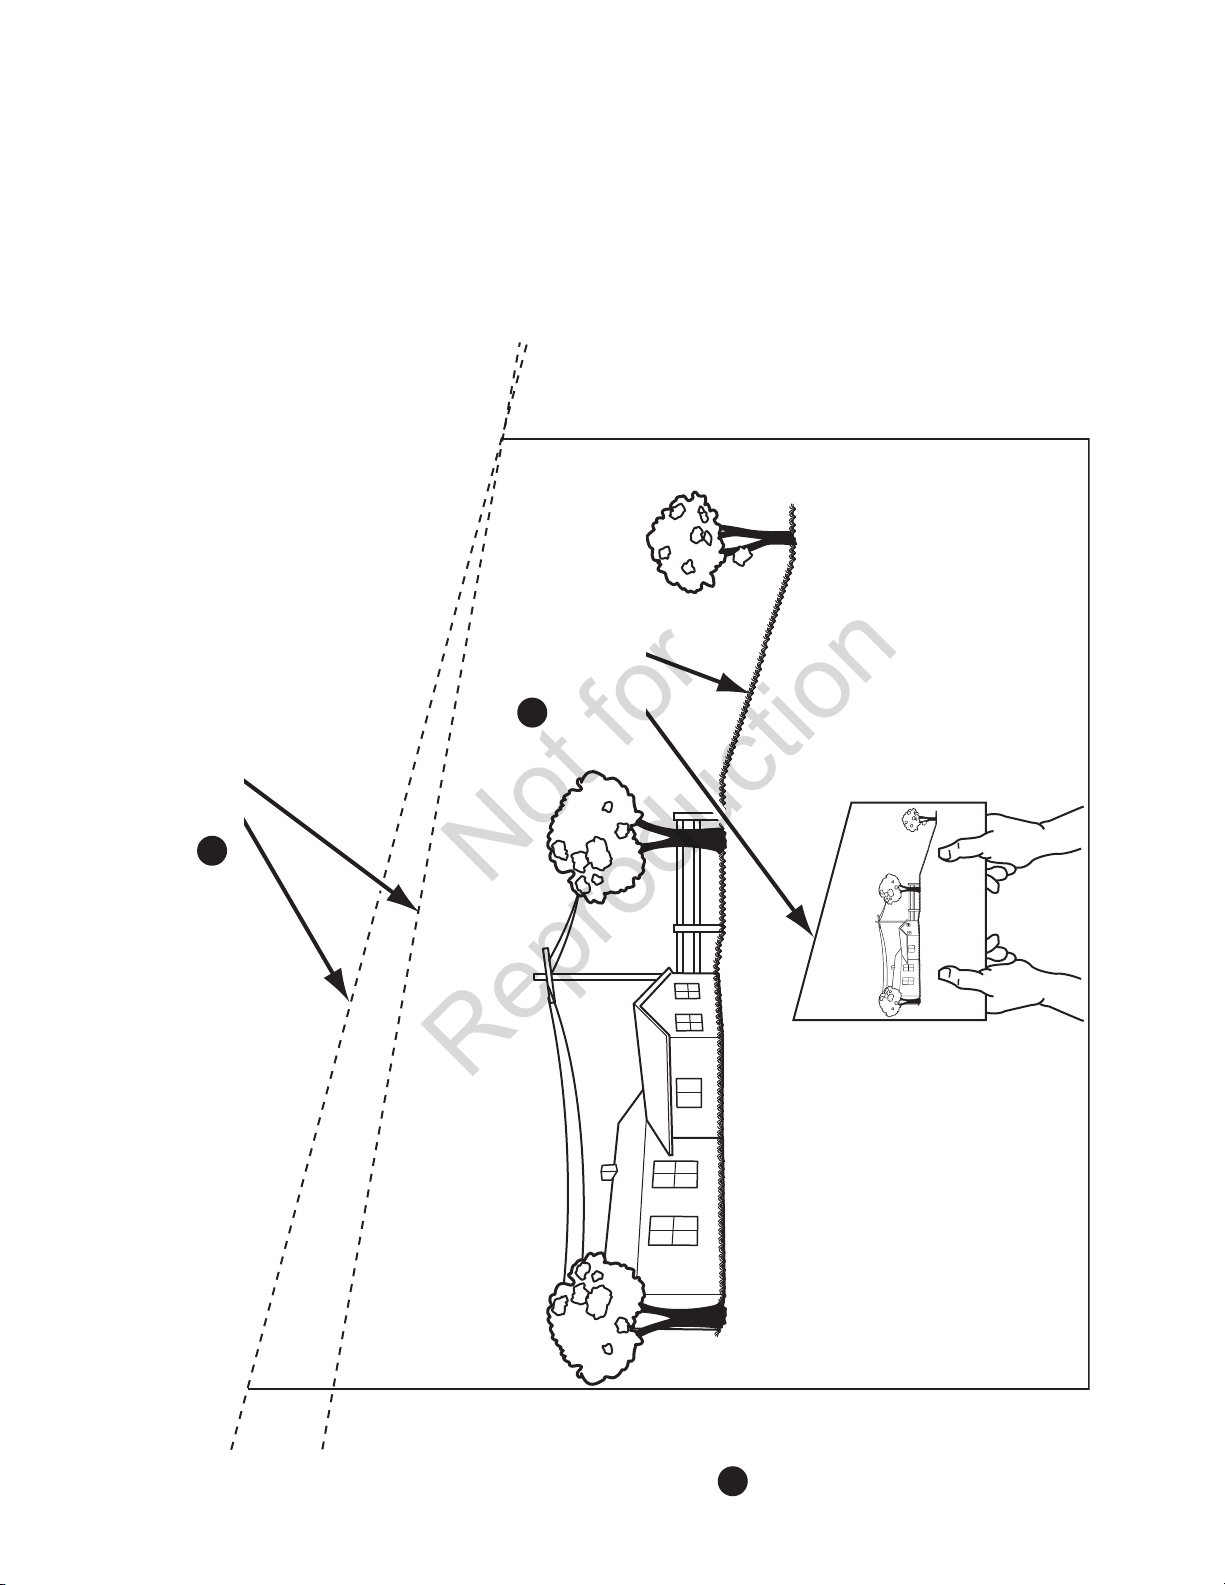
INSTRUCTIONS
1. Fold this page along
the dotted line indicated
above.
2. Align the left edge of this
guide with a vertical tree,
a power line pole, a fence
post, or any vertical
structure.
3. Compare the angle of the
fold with the angle of the
hill.
FOLD ALONG APPROPRIATE DOTTED LINE
1
3
COMPARE THE ANGLE
OF THE FOLD TO THE
ANGLE OF THE SLOPE
SLOPE INDENTIFICATION GUIDE
16
THIS IS A 15 DEGREE SLOPE
THIS IS A 10 DEGREE SLOPE
(TREE, POLE, FENCE POST, BUILDING, ETC)
ALIGN THIS EDGE WITH A VERTICAL SURFACE
2
www.ferrisindustries.com
Page 19

Notes
Not for
Reproduction
Page 20

Notes
Not for
Reproduction
Page 21

Not for
Reproduction
Page 22

BRIGGS & STRATTON PRODUCTS WARRANTY POLICY September 2012
Not for
Reproduction
LIMITED WARRANTY
Briggs & Stratton warrants that, during the warranty period specified below, it will repair or replace, free of charge, any part that is defective in material or workmanship
or both. Transportation charges on product submitted for repair or replacement under this warranty must be borne by purchaser. This warranty is effective for and
is subject to the time periods and conditions stated below. For warranty service, find the nearest Authorized Service Dealer in our dealer locator map at WWW.
FERRISINDUSTRIES.COM. The purchaser must contact the Authorized Service Dealer, and then make the product available to the Authorized Service Dealer for
inspection and testing.
There is no other express warranty. Implied warranties, including those of merchantability and fitness for a particular purpose, are limited to one
year from purchase, or to the extent permitted by law. All other implied warranties are excluded. Liability for incidental or consequential damages are
excluded to the extent exclusion is permitted by law. Some states or countries do not allow limitations on how long an implied warranty lasts, and some states or
countries do not allow the exclusion or limitation of incidental or consequential damages, so the above limitation and exclusion may not apply to you. This warranty gives
you specific legal rights and you may also have other rights which vary from state to state or country to country.**
WARRANTY PERIOD
Covered Parts Standard Warranty Period Rental Warranty Period
Riding mowers 4 years (48 months) or 500 hours, whichever occurs first.
Walk mowers
(over 30 inches of cutting width)
+Belts, Tires, Brake Pads,
Hoses, Battery, Blades
+Attachments 1 year 90 days
+Engine* See Engine Operator’s Manual See Engine Operator’s Manual
Unlimited hours during the first 2 years (24 months)
(+Except as noted below)
2 years (24 months) unlimited hours
(+Except as noted below)
90 days 90 days
90 days
90 days
* Emissions-related components are covered by the Emissions Warranty Statement.
** In Australia - Our goods come with guarantees that cannot be excluded under the Australian Consumer Law. You are entitled to a replacement or refund for a major
failure and for compensation for any other reasonably foreseeable loss or damage. You are also entitled to have the goods repaired or replaced if the goods fail to be
of acceptable quality and the failure does not amount to a major failure. For warranty service, find the nearest Authorized Service Dealer in our dealer locator map at
FERRISINDUSTRIES.COM/AU, or by calling 1300 274 447, or by emailing or writing to [email protected], Briggs & Stratton Australia Pty Ltd, 1
Moorebank Avenue, NSW, Australia, 2170.
The warranty period begins on the date of purchase by the first retail end user, and continues for the period of time or hours stated in the table above.
No warranty registration is necessary to obtain warranty on Briggs & Stratton products. Save your proof of purchase receipt. If you do not provide proof of
the initial purchase date at the time warranty service is requested, the manufacturing date of the product will be used to determine the warranty period.
ABOUT YOUR WARRANTY
We welcome warranty repair and apologize to you for being inconvenienced. Warranty service is available only through FERRIS Authorized Service Dealers. Most warranty
repairs are handled routinely, but sometimes requests for warranty service may not be appropriate. This warranty only covers defects in materials or workmanship. It does
not cover damage caused by improper use or abuse, improper maintenance or repair, normal wear and tear, or stale or unapproved fuel.
Improper Use and Abuse - The proper, intended use of this product is described in the Operator’s Manual. Using the product in a way not described in the Operator’s
Manual or using the product after it has been damaged will void your warranty. Warranty is not allowed if the serial number on the product has been removed or the product
has been altered or modified in any way, or if the product has evidence of abuse such as impact damage, or water/chemical corrosion damage.
Improper Maintenance or Repair - This product must be maintained according to the procedures and schedules provided in the Operator’s Manual, and serviced or
repaired using genuine Briggs & Stratton parts or equivalent. Damage caused by lack of maintenance or use of non-original parts is not covered by warranty.
Normal Wear - Like all mechanical devices, your unit is subject to wear even when properly maintained. This warranty does not cover repairs when normal use has
exhausted the life of a part or the equipment. Except as noted in the warranty period, maintenance and wear items such as filters, belts, cutting blades, and brake pads
(except engine brake pads) are not covered by warranty due to wear characteristics alone, unless the cause is due to defects in material or workmanship.
Stale Fuel - In order to function correctly, this product requires fresh fuel that conforms to the criteria specified in the Operator’s Manual. Damage caused by stale fuel
(carburetor leaks, clogged fuel tubes, sticking valves, etc) is not covered by warranty.
Other Exclusions - This warranty excludes damage due to accident, abuse, modifications, alterations, improper servicing, freezing or chemical deterioration. Attachments
or accessories that were not originally packaged with the product are also excluded. There is no warranty coverage on equipment used for primary power in place of utility
power or on equipment used in life support applications. This warranty also excludes failures due to acts of God and other force majeure events beyond the manufacturer’s
control.
5410603A(Rev-)
Page 23

California, U.S. EPA, and Briggs & Stratton Corporation Emissions Control Warranty Statement
Not for
Reproduction
Your Warranty Rights And Obligations
September 2012
The California Air Resources Board, U.S. EPA, and Briggs & Stratton (B&S) are pleased
to explain the emissions control system warranty on your Model Year 2012--2013
engine/equipment. In California, new small off-road engines and large spark ignited
engines less than or equal to 1.0 liter must be designed, built, and equipped to meet the
State’s stringent anti-smog standards. B&S must warrant the emissions control system
on your engine/equipment for the periods of time listed below provided there has been
no abuse, neglect, or improper maintenance of your engine or equipment.
Your emissions control system may include parts such as the carburetor or fuel injection
system, fuel tank, ignition system, and catalytic converter. Also included may be hoses,
belts, connectors, sensors, and other emissions-related assemblies.
Where a warrantable condition exists, B&S will repair your engine/equipment at no cost
to you including diagnosis, parts, and labor.
Manufacturer’s Warranty Coverage:
Small off-road engines and large spark ignited engines less than or equal to 1.0 liter, and
any related emissions components of the equipment, are warranted for two years*. If any
emissions-related part on your B&S engine/equipment is defective, the part will be
repaired or replaced by B&S.
* Two years or for the time period listed in the respective engine or product warranty
statement, whichever is greater.
Owner’s Warranty Responsibilities:
As the engine/equipment owner, you are responsible for the performance of the
required maintenance listed in your owner’s manual. B&S recommends that you
retain all receipts covering maintenance on your engine/equipment, but B&S cannot
deny warranty solely for the lack of receipts or your failure to ensure the performance
of all scheduled maintenance.
As the engine/equipment owner, you should however be aware that B&S may deny
you warranty coverage if your engine/equipment or a part has failed due to abuse,
neglect, improper maintenance, or unapproved modifications.
You are responsible for presenting your engine/equipment to a B&S distribution
center, servicing dealer, or other equivalent entity, as applicable, as soon as a
problem exists. The warranty repairs should be completed in a reasonable amount of
time, not to exceed 30 days. If you have any questions regarding your warranty
rights and responsibilities, you should contact B&S at (414) 259-5262.
Briggs & Stratton Emissions Control Warranty Provisions
The following are specific provisions relative to your Emissions Control Warranty Coverage. It is in addition to the B&S engine warranty for non-regulated engines found in the
Operator’s Manual.
1. Warranted Emissions Parts
Coverage under this warranty extends only to the parts listed below (the emissions
control systems parts) to the extent these parts were present on the B&S engine
and/or B&S supplied fuel system.
a. Fuel Metering System
Cold start enrichment system (soft choke)
Carburetor and internal parts
Fuel pump
Fuel line, fuel line fittings, clamps
Fuel tank, cap and tether
Carbon canister
b. Air Induction System
Air cleaner
Intake manifold
Purge and vent line
c. Ignition System
Spark plug(s)
Magneto ignition system
d. Catalyst System
Catalytic converter
Exhaust manifold
Air injection system or pulse valve
e. Miscellaneous Items Used in Above Systems
Vacuum, temperature, position, time sensitive valves and switches
2. Length of Coverage
Connectors and assemblies
For a period of two years from date of original purchase, B&S warrants to the original
purchaser and each subsequent purchaser that the engine is designed, built, and
equipped so as to conform with all applicable regulations adopted by the Air
Resources Board; that it is free from defects in material and workmanship that could
cause the failure of a warranted part; and that it is identical in all material respects to
the engine described in the manufacturer’s application for certification. The warranty
period begins on the date the engine is originally purchased.
The warranty on emissions-related parts is as follows:
Any warranted part that is not scheduled for replacement as required
maintenance in the owner’s manual supplied, is warranted for the warranty
period stated above. If any such part fails during the period of warranty
coverage, the part will be repaired or replaced by B&S at no charge to the
owner. Any such part repaired or replaced under the warranty will be warranted
for the remaining warranty period.
Any warranted part that is scheduled only for regular inspection in the owner’s
manual supplied, is warranted for the warranty period stated above. Any such
part repaired or replaced under warranty will be warranted for the remaining
warranty period.
Any warranted part that is scheduled for replacement as required maintenance
in the owner’s manual supplied, is warranted for the period of time prior to the
first scheduled replacement point for that part. If the part fails prior to the first
scheduled replacement, the part will be repaired or replaced by B&S at no
charge to the owner. Any such part repaired or replaced under warranty will be
warranted for the remainder of the period prior to the first scheduled
replacement point for the part.
Add on or modified parts that are not exempted by the Air Resources Board
may not be used. The use of any non exempted add on or modified parts by the
owner will be grounds for disallowing a warranty claim. The manufacturer will
not be liable to warrant failures of warranted parts caused by the use of a non
exempted add on or modified part.
3. Consequential Coverage
Coverage shall extend to the failure of any engine components caused by the
failure of any warranted emissions parts.
4. Claims and Coverage Exclusions
Warranty claims shall be filed according to the provisions of the B&S engine
warranty policy. Warranty coverage does not apply to failures of emissions parts
that are not original equipment B&S parts or to parts that fail due to abuse, neglect,
or improper maintenance as set forth in the B&S engine warranty policy. B&S is not
liable for warranty coverage of failures of emissions parts caused by the use of
add-on or modified parts.
Look For Relevant Emissions Durability Period and Air Index Information
On Your Small Off-Road Engine Emissions Label
Engines that are certified to meet the California Air Resources Board (CARB) small
off-road Emissions Standard must display information regarding the Emissions Durability
Period and the Air Index. Briggs & Stratton makes this information available to the
consumer on our emissions labels. The engine emissions label will indicate certification
information.
The Emissions Durability Period describes the number of hours of actual running time
for which the engine is certified t o be emissions compliant, assuming proper
maintenance in accordance with the Operating & Maintenance Instructions. The
following categories are used:
Moderate:
Engine is certified to be emissions compliant for 125 hours of actual engine running time.
Intermediate:
Engine is certified to be emissions compliant for 250 hours of actual engine running time.
Extended:
Engine is certified to be emissions compliant for 500 hours of actual engine running time.
For example, a typical walk-behind lawn mower is used 20 to 25 hours per year.
Therefore, the Emissions Durability Period of an engine with an intermediate rating
would equate to 10 to 12 years.
Briggs & Stratton engines are certified to meet the United States Environmental
Protection Agency (USEPA) Phase 2 or Phase 3 emissions standards. The Emissions
Compliance Period referred to on the Emissions Compliance label indicates the number
of operating hours for which the engine has been shown to meet Federal emissions
requirements.
For engines less than 225 cc displacement.
Category C = 125 hours, Category B = 250 hours, Category A = 500 hours
For engines of 225 cc or more displacement.
Category C = 250 hours, Category B = 500 hours, Category A = 1000 hours
Page 24

OPERATOR’S
Not for
Reproduction
MANUAL
Hydro-Cut Series
Walk Behind Mower
 Loading...