

Ferrari Infotainment 6111 Operating Manual
Operating manual
Guía del usuario
Mode d´emploi
Radio / Navigation System
Infotainment 6111

2
Contents
Safety Instructions 7
Advice on general traffic safety 8
Controls overview 9
General operation 10
Menu basics 10
Quick access 10
Main menu 10
Status display 11
Options menu 11
Operating in menus 11
Entry menus 12
Anti-theft device 13
Entering the device´s code number 13
Entry of incorrect code number 13
Removing/inserting the control panel 14
Remove 14
Insert 15
Inserting/detaching blanking cover 15
Inserting blanking cover 15
Removal of blanking cover 15
Switching the unit ON/OFF 16
Switch on 16
Switch off 16
Set the volume 17
Sound settings 17
Retrieving sound settings 17
Set the equalizer 18
Defining equalizer setting 18
Adjusting balance and fader 19
Setting the balance 19
Fader setting 19
Switching loudness on / off 20
Ferrari surround 20
Subwoofer 21
Crossover 21
Compression 22
Resetting the settings 22
Mute 23
Navigation Mode 24
What is navigation? 24
Navigations Daten 24
Insert memory card 25
Remove the memory card 25
Selecting Navigation 26
Calling up the navigation
main menu 27
Entering a Destination 28
Select country 28
Enter the destination 29
Select destination town or place
using ZIP or postal code 30
Enter a street for the destination 31
Enter the destination city/town center 32
Entering street number for
destination street 32
Select intersection for destination
street 33
Enter destination using
Geo co-ordinates 33
Setting route options 34
Saving/leaving route options 35
Storing destination 35
Navigation quick access 36
Navigating from the quick access 36
Protect an entry 36
Delete entry 37
Delete list 37
Saving an entry in the address book 37
Starting a new entry 38
Amend an entry 38
Selecting a destination in the
address book 39
Point of interest 40
In vicinity 41
In country 41
In destination vicinity 42
In city, town, or place 42
Information on special destinations 43
External special destinations 44
While route guidance is in
progress 46
Navigation status screen 46
Examples for navigation displays 47
Lane recommendations 48
Options menu 49
Canceling route guidance 49
Route list 50
Stopover 50
Blocking a section of the route 51
Adapt route options 52
Switch navigation
announcements on/off 52

3
Contents
Information during route
guidance 53
Display destination information 53
Display/save position 53
Display/change route options 54
Settings 54
Arrival time announcement 55
Displaying speed limits 55
ETA setting 56
Unit of Measure 57
Radio mode 58
Switch on radio mode 58
Calling up the radio main menu 58
Selecting the waveband 59
FM operation 60
Possible settings for FM stations 60
Station list 60
Scan function 61
Manual station setting 62
Filter function 62
Switching the filter function
on and off 62
Filter stations 63
Filtering stations 63
Cancel filter 63
Program type 64
Switching the program type
function on and off 64
Selecting the program types 64
Radio text 65
Voice entries 65
Reception optimization 66
Band width control 67
AM mode 67
Possible settings for AM stations 67
Search function 67
Scan function 68
Station memory 68
Call up station memory 68
Store a station 69
Other wave range adjusted 69
Station memory already tuned 70
Move station 70
Delete station 70
Name station 71
Create/delete a voice entry 71
Create 71
Delete 72
Read out voice entry 72
Media mode 73
Activating media mode 73
Media quick access 73
Media status display 74
Track change / track skip 75
Fast forward/reverse 75
Play mode 75
Calling up the play mode menu 75
Track mix (random play) 76
Track scan function 76
Repeat track 77
CD mix 77
Repeat CD 77
Directory mix 77
Repeat directory 78
Call up the media main menu 78
Switching the detailed track
display on/off 78
CD mode 79
Notes on compact discs (CD) 79
Insert/eject CDs 79
Notes for CD-R and CD-RW 80
Notes on CDs protected against
copying 80
Temperature Protection Circuit 80
MP3 mode 80
General notes on MP3 80
Create an MP3 disc 81
MP3-CD mode 82
MP3 memory card/microdrive mode 82
Insert microdrive/memory card 82
Remove microdrive/memory card 83
Playback sequence on MP3 discs 83
Play lists 84
Creating play lists 84
CD changer mode 85
Operational readiness of CD changer 85
Load/eject the CD magazine 85
External units/ AUX mode 85

4
Contents
Telephone operation 86
Call up the telephone 87
Bluetooth not yet switched on 87
Bluetooth cellular telephone
not yet connected 87
Calling up the telephone
main menu 88
Dial number 89
Selecting a number from the
address book 90
Call lists 91
Call numbers from the list 92
Retrieve information on the entry 92
Delete call list 92
Dialing emergency services 92
Settings 93
Automatic call acceptance 93
Dialog when making a call 93
Telephone calls 94
Status display 94
Accept/decline a call 94
Accept a call 94
Decline a call 95
Terminate call 95
Options menu 95
Hang up 96
DTMF 96
Private 96
Functions Telephone Quick
access 97
Call number directly 97
Protect an entry 98
Delete entries 98
Delete list 98
Save a number in the address book 99
Start a new entry 99
Amend an entry 100
Address book 101
Call up the address book 101
Call up the address book
main menu 101
Create an entry 101
New entry – navigable 103
Search for an entry 104
Adjusting search criteria 105
Modifying entries 106
Change an entry 106
Delete entry 107
Create/delete a voice entry 107
Create 107
Delete 108
Reading voice entry 108
Export address book 108
Pressing address book entry 109
Import the address book entry 109
Navigate to the address
book entry 111
Voice entries 111
Placing a call to an address
book entry 112
Functions in the quick access 112
Protect an entry 112
Delete entry 113
Delete list 113
Settings 114
Retrieve general settings 114
Bluetooth 114
Call up a device list 114
Always allow connection 115
Name device 116
Delete device from list 116
Delete all devices from list 116
Connecting and disconnecting
devices 117
Connecting devices
(Infotainment) 117
Connecting the device
(external device) 118
Disconnecting devices 120
Bluetooth, Retrieving settings 120
Bluetooth activate/deactivate 121
Searching for Bluetooth devices 121
Devices visible for others 122
Device name 122

5
Contents
User voice commands 122
Retrieving user voice command
settings 122
Set system language 123
Display language settings 124
Volume of voice messages 124
Automatic dialogues 125
Voice entries 125
Voice announcement 125
PTT extended 126
Repeat voice announcement 126
System settings 127
Retrieving system settings 128
Audio 128
GAL (speed-dependent volume) 128
Adjustment Left Hand Drive/
Right Hand Drive vehicle 128
Volume Signal sounds 129
Display volume 129
Digital level 129
Supporting parking aid 130
Display 130
Display brightness 130
Display color 130
Day/night design 131
External device 131
Reset function 132
Data backup 132
Securing data 133
Loading data 133
Direction of rotation of the
turn/push control 134
Clock 134
Software-Update 135
User voice commands 136
What is voice command
operation? 136
Symbols 136
General pointers on the voice
control system 137
Activating the voice control
system 137
Ending voice dialogue
prematurely 138
Voice entries 138
Settings 139
Examples for a voice dialogue 139
Example for an operator input
in radio mode 140
Example for entering a navigation
destination 141
Example for entering a telephone
number 143
General commands 143
Help function (Online help) 144
Aborting voice dialogues 144
Navigation in lists 144
Call up the status display 144
Commands for status displays,
quick access and main menus 145
Commands for radio mode 145
Commands for the radio status
display 146
Commands for the radio
quick access 147
Commands in the modify
station menu 148
Radio main menu commands 148
Waveband menu commands 149
Program type menu commands 150
Filter menu commands 150
Voice entries menu commands 151
Reception optimization menu
commands 151
Media mode commands 152
Commands for the media status
display 152
Commands for the media
quick access 154
Media main menu commands 155
Media playmode menu commands 155
Navigation commands 156
Correction option in case of
incorrect destination entry 156
Commands for the navigation
status display 156
Commands for the navigation
quick access 157
Modify commands in the quick
access destination menu 158

6
Contents
Navigation main menu commands 159
Commands for the address
entry menu 159
Commands for the special
destination (point of interest) menu 160
Commands for the route
options menu 161
Commands for the interim
destination (stopover) menu 161
Inquiry whether new destination
is main or interim destination 162
Telephone mode commands 162
Commands for the telephone
quick access 162
Modify commands in the quick
access telephone number menu 163
Telephone main menu commands 164
Commands in the telephone
number entry menu 164
Call list menu commands 165
Commands in the call lists 165
Settings menu commands 166
Commands for the address book 167
Commands for the address book
quick access 167
Modify commands in the quick
access entries menu 169
Modification menu commands 169
Data modification menu
commands 169
Commands in menu for selecting
a Bluetooth device during export 169
Commands during an
opened entry 170
Address book main menu
commands 170
Voice entries menu commands 171
Search criteria menu commands 171
Technical terminology 172
Keywords 175
Technical data 182
Regulatory Notice 183

7
Safety Instructions
Use of the device is only permitted if the traffic conditions are suitable and you are absolutely sure that its use presents
no risk, distraction or inconvenience to you, your passengers or other road users.
Traffic laws and regulations will apply in each and every case. Destinations may only be entered when the vehicle is
stationary.
For telephone operation the respective country-specific laws and regulations will apply.
The navigation system is merely an aid, data/information may in select cases be incorrect. The driver must decide in each
situation by him- or herself if he or she will follow the directions. No liability will be assumed for incorrect directions
provided by the navigation system. Imprecise or incorrect directions may be provided due to changing traffic patterns or
deviations in data. Therefore, you must always observe the actual road signs and traffic regulations. In particular, the
navigation system must not be used as an orientation aid at times of poor visibility.
The device must only be used for its intended purpose. The volume of the radio and the navigation system should be
adjusted so that noises external to the vehicle are still audible.
Do not activate the telephone near fueling stations, fuel depots, chemical plants and demolition work in progress using
explosives.
Turn the unit off immediately if a defect occurs (e.g. emission of smoke or odors).
For reasons of safety and security, the device must only be opened by a professional. In case of needed repair please
consult your dealer.
G

8
Advice on general traffic safety
This automobile radio device is intended and approved for installation in passenger cars, commercial vehicles and buses
(vehicle classes M, N und O) with an on-board voltage supply of 12 volts.
The installation or service must only be carried out by qualified personnel. Improper installation or maintenance may
result in faulty operation of electronic vehicle systems. The vehicle manufacturer´s safety instructions must be observed.
Any tampering with the vehicle electronic systems (e.g. speedometer signal connection) must be carried out by an
authorized dealer workshop. No liability will be assumed in case of adverse effects on the vehicle´s electronic systems.
This device is only intended for the vehicle manufacturer´s prescribed installation location.
Mounting of the device must be selected in such a manner that correct mounting will be ensured in case of possible vehicle
collision.
The voltage supply must be properly secured.
Interference may result if mobile phones without external antenna are used near the radio device.
Familiarize yourself with the device and its operation before the beginning of your journey. Only operate the device while
driving if traffic conditions allow this. The automobile radio device volume must be adjusted so that external sounds
(e.g. police siren) remain clearly audible.

Controls overview
9
2
4
6 7
5
1
15
10
12
3
13
14
11
8 9
Controls overview
1 Information button
2 ON / OFF switch
3 Radio mode select
4 Mode select CD/CDC/Memory card
5 Navigation mode select
6 Cellular phone mode select
7 Address book mode select
8 CD eject button
9 Status button
10 Right hand side turn/push control
Push = Confirm
Turn = Browse in lists and menus
11 Undo button (Back)
12 Slide lock for detachable control panel
13 Display
14 Arrow buttons and
Changing of radio stations and audio tracks
15 Left hand side turn/push control
Push = activates voice dialogue
Turn = Volume adjustment
10
General operation
General operation
Menu basics
Quick access
The quick access enables quick access to
the most important function of the
various operating modes. In most cases
you then have the option of selecting
from lists (radio stations, navigation
destinations etc.). You can switch to the
respective main menu of the operating
mode by selecting the first entry in
the list.
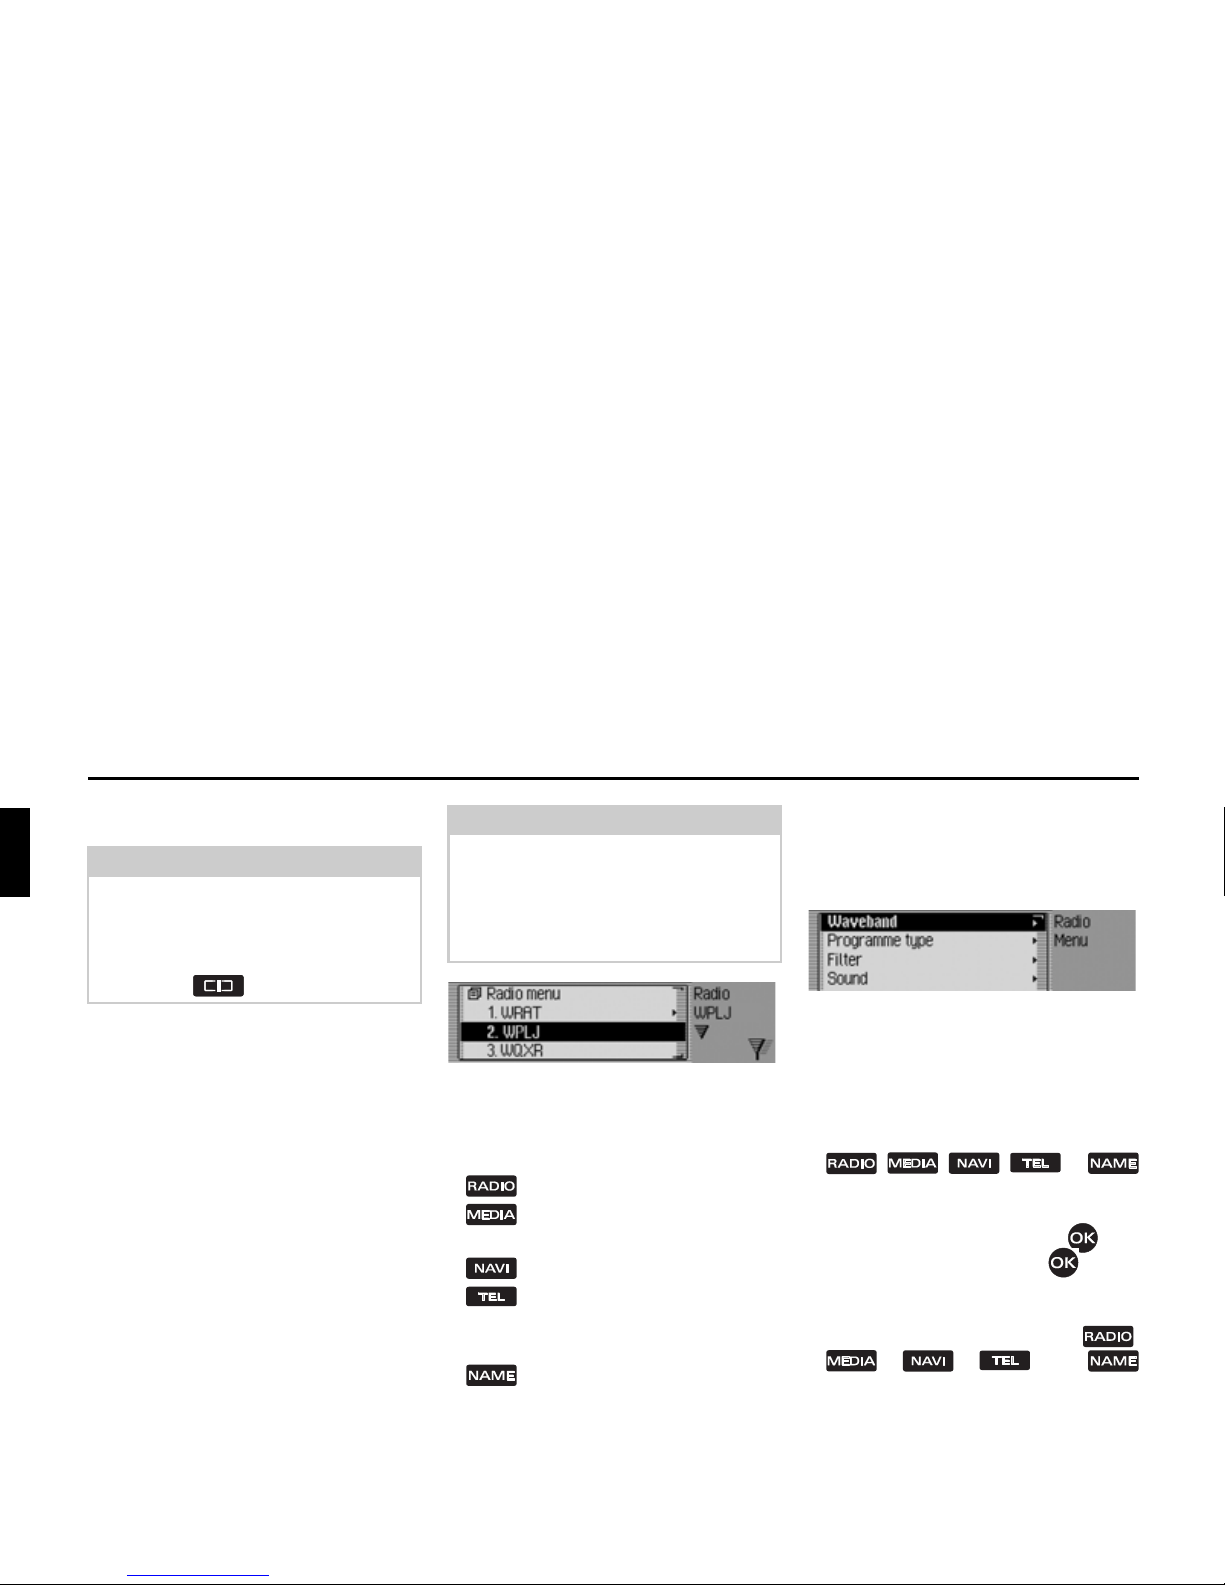
You can see the radio quick access in
this example.
By pressing the respective control
elements you obtain:
• the radio quick access.
• the media quick access (CD,
CD changer and memory card).
• the navigation quick access.
• the cellular phone quick access
(if Bluetooth is switched on and
a cellular phone is connected).
• the address book quick access.
Main menu
In the main menu of an operating mode
you have access to the various functions
and settings in that operating mode.
You see the radio main menu here as an
example.
The main menu may be called up for
various operating modes using two
different ways:
• Activate the quick access (Push
, , , or
button).
X Select the first quick access entry by
turning the turn/push control .
X Push the turn/push control .
or
X Push the button of the quick access
you have called up again ( ,
, , or
button).
Note:
If an entry in a list is abbreviated due to
excessive length (three dots at the end
of the text) then the entire text of the
entry may be displayed by momentarily
pushing the button.
Note:
After a short period without control
input in the displayed quick access the
display will change automatically to the
active operating mode´s status
indication.
1001
1002
11
General operation
Status display
In the status screen you obtain all
required information regarding the
currently selected operating mode.
If the navigation is active in addition to
the current radio or media operating
mode, then you can obtain a combined
display.
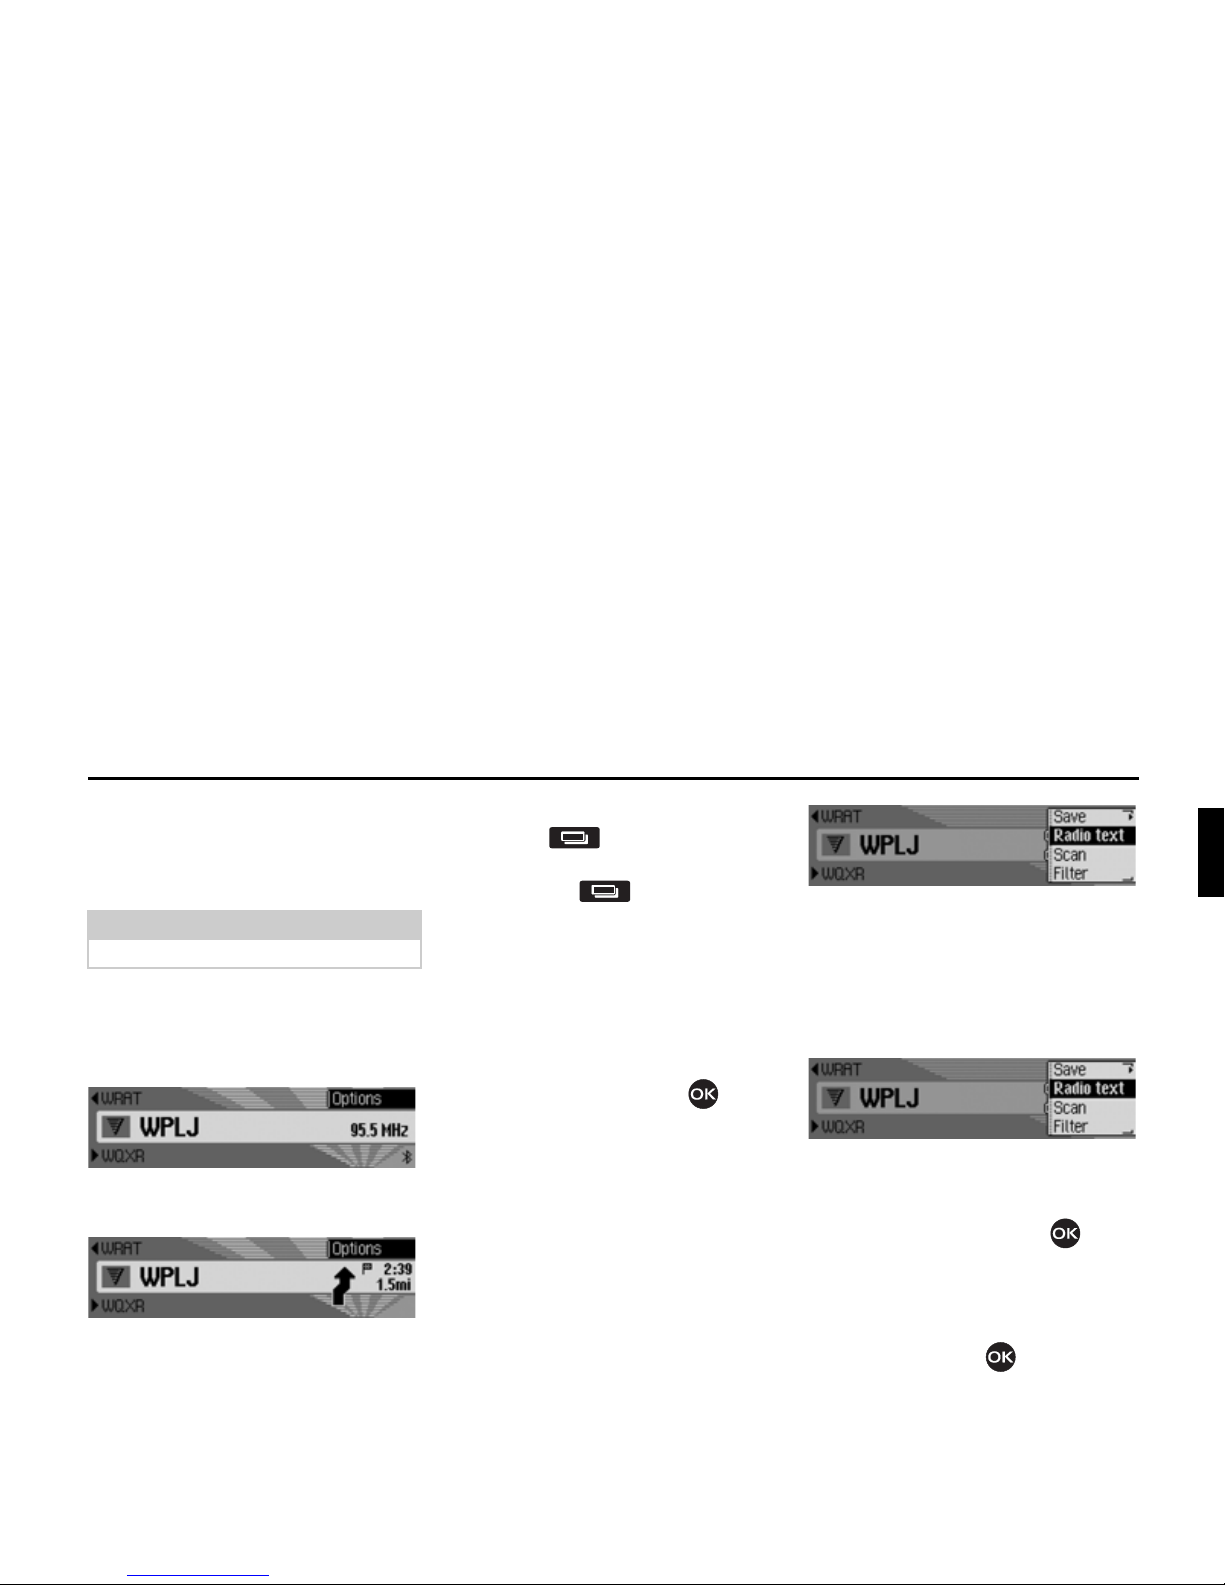
You can see the radio status display in
this example.
You see the radio status display here
with an active route guidance in the
navigation system as an example.
You always obtain the status display by
pushing the button.
In an active route guidance repeated
pushing of the button facilitates
changing between the combined display
and the navigation system status display.
Options menu
You can call up the options menu in the
status display.
X Push the turn/push control .
The options menu is displayed.
You have direct access to important
functions of the active operating mode in
the options menu. Some of the possible
settings and functions in the options
menu may also be set or activated using
the main menu.
You see the options menu of the radio
function as an example here.
Operating in menus
Operating the menus is always the same
for the different menus.
You see the options menu of the radio
function as an example here.
You can browse through the menus by
turning the turn/push control .
A menu entry will either lead to another
menu or a function may be switched on
or off by selecting the entry (Pressing
the turn/push control ).
Note:
The address book has no status display.
1003
1004
1005
1005
12
General operation
If another menu is hidden by the menu
entry then this will be indicated by
a small triangle at the end of the menu
entry.
If a function may be turned on or off,
then this will be displayed by the menu
entry using or . The symbol
represents OFF, the symbol
represents ON.
Entry menus
In some cases data may be entered, this
takes place in special entry menus.
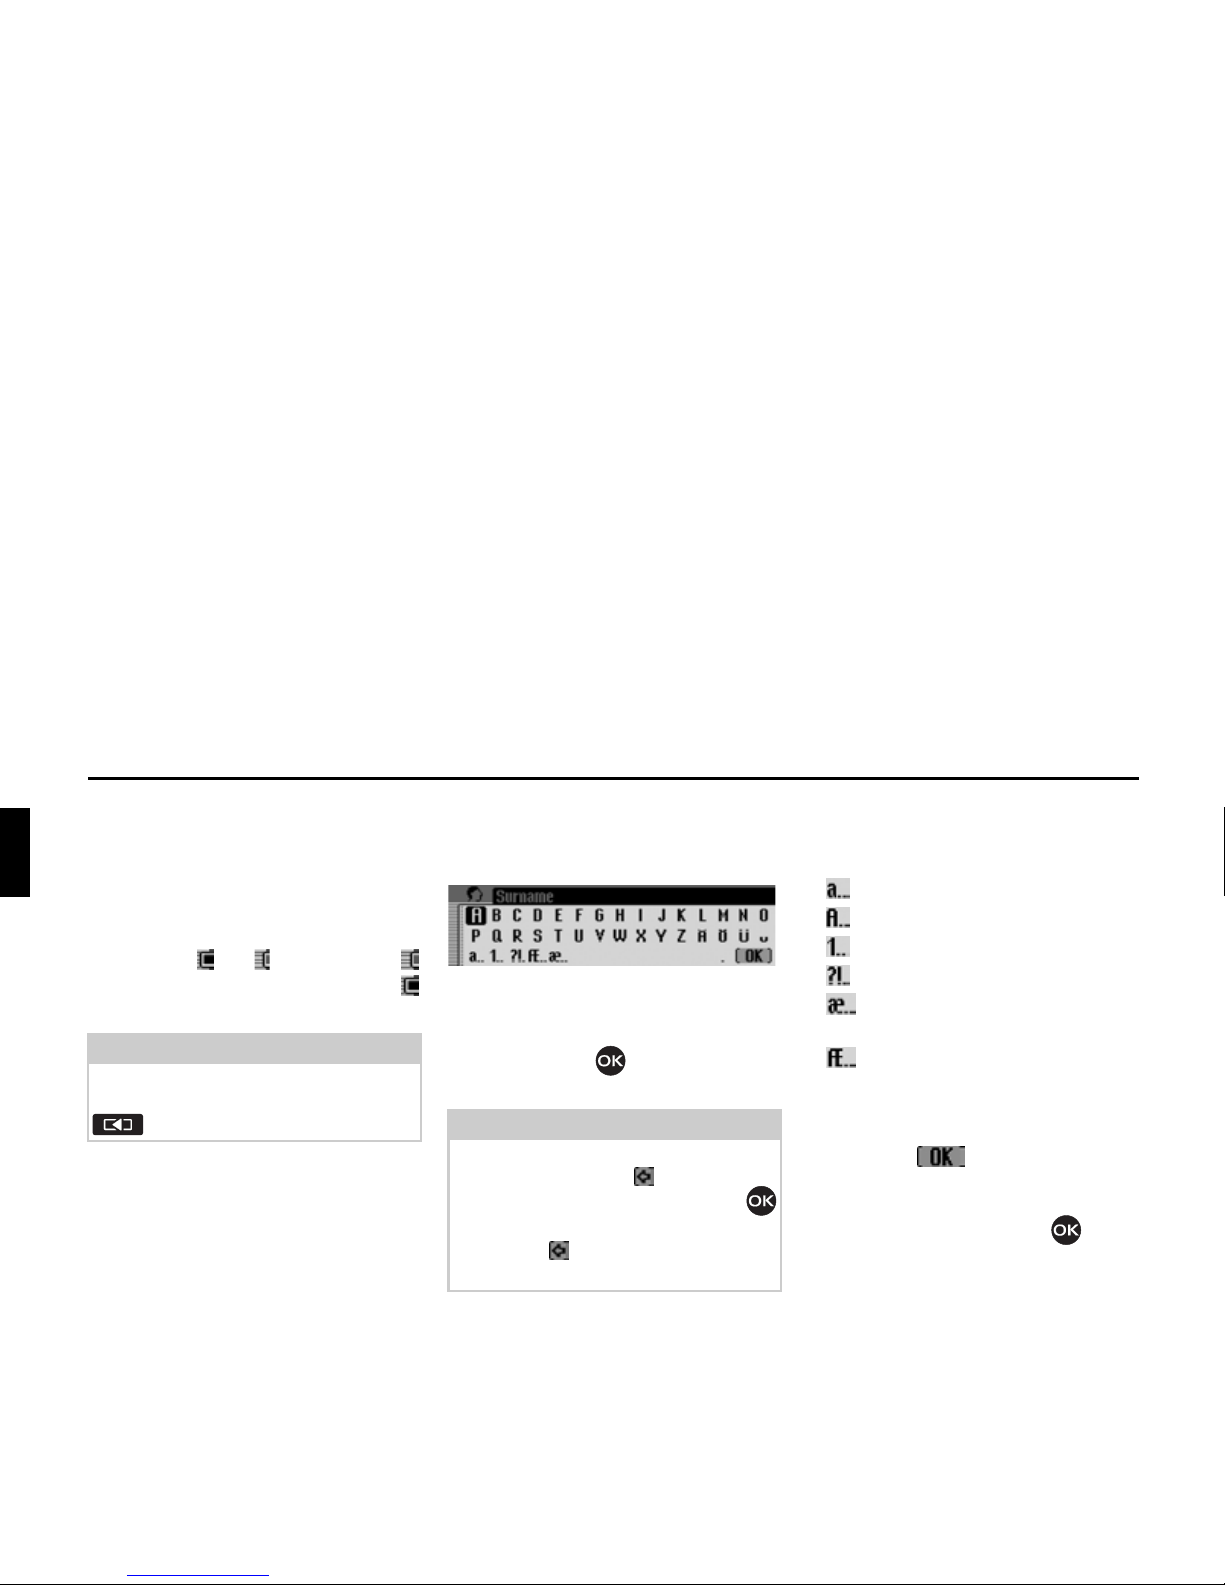
You see the entry menu for a last name
in an address book entry in the example.
X Select the letters by turning the turn/
push control and subsequent
pushing of the turn/push control.
You can change the character set of the
selectable characters by selecting
different symbols.
• Switching to lower case letters.
• Switching to upper case letters.
• Switching to numerals.
• Switching to special symbols.
• Switching to international lower
case letters.
• Switching to international upper
case letters.
Accept entry:
X Select the symbol in the entry
menu.
or
X Press the turn/push control longer
than 2 seconds.
Note:
You can always jump back one step at a
time in the menu tree by pushing the
button.
Note:
You can delete the last character of the
entry by selecting the symbol.
If you push the turn/push control
longer than two seconds while selecting
the symbol then the entire entry will
be deleted.
6003
13
General operation
Anti-theft device
Your Infotainment has dual anti-theft
protection:
• Secured by a five-digit device code
number
• Secured by a detachable control panel
Entering the device´s code
number
The Infotainment is protected against
unauthorized use once reconnected to
the power supply after having been
disconnected.
You need the five-digit Code number
printed on the CODE CARD in order to
put your Infotainment back into service.
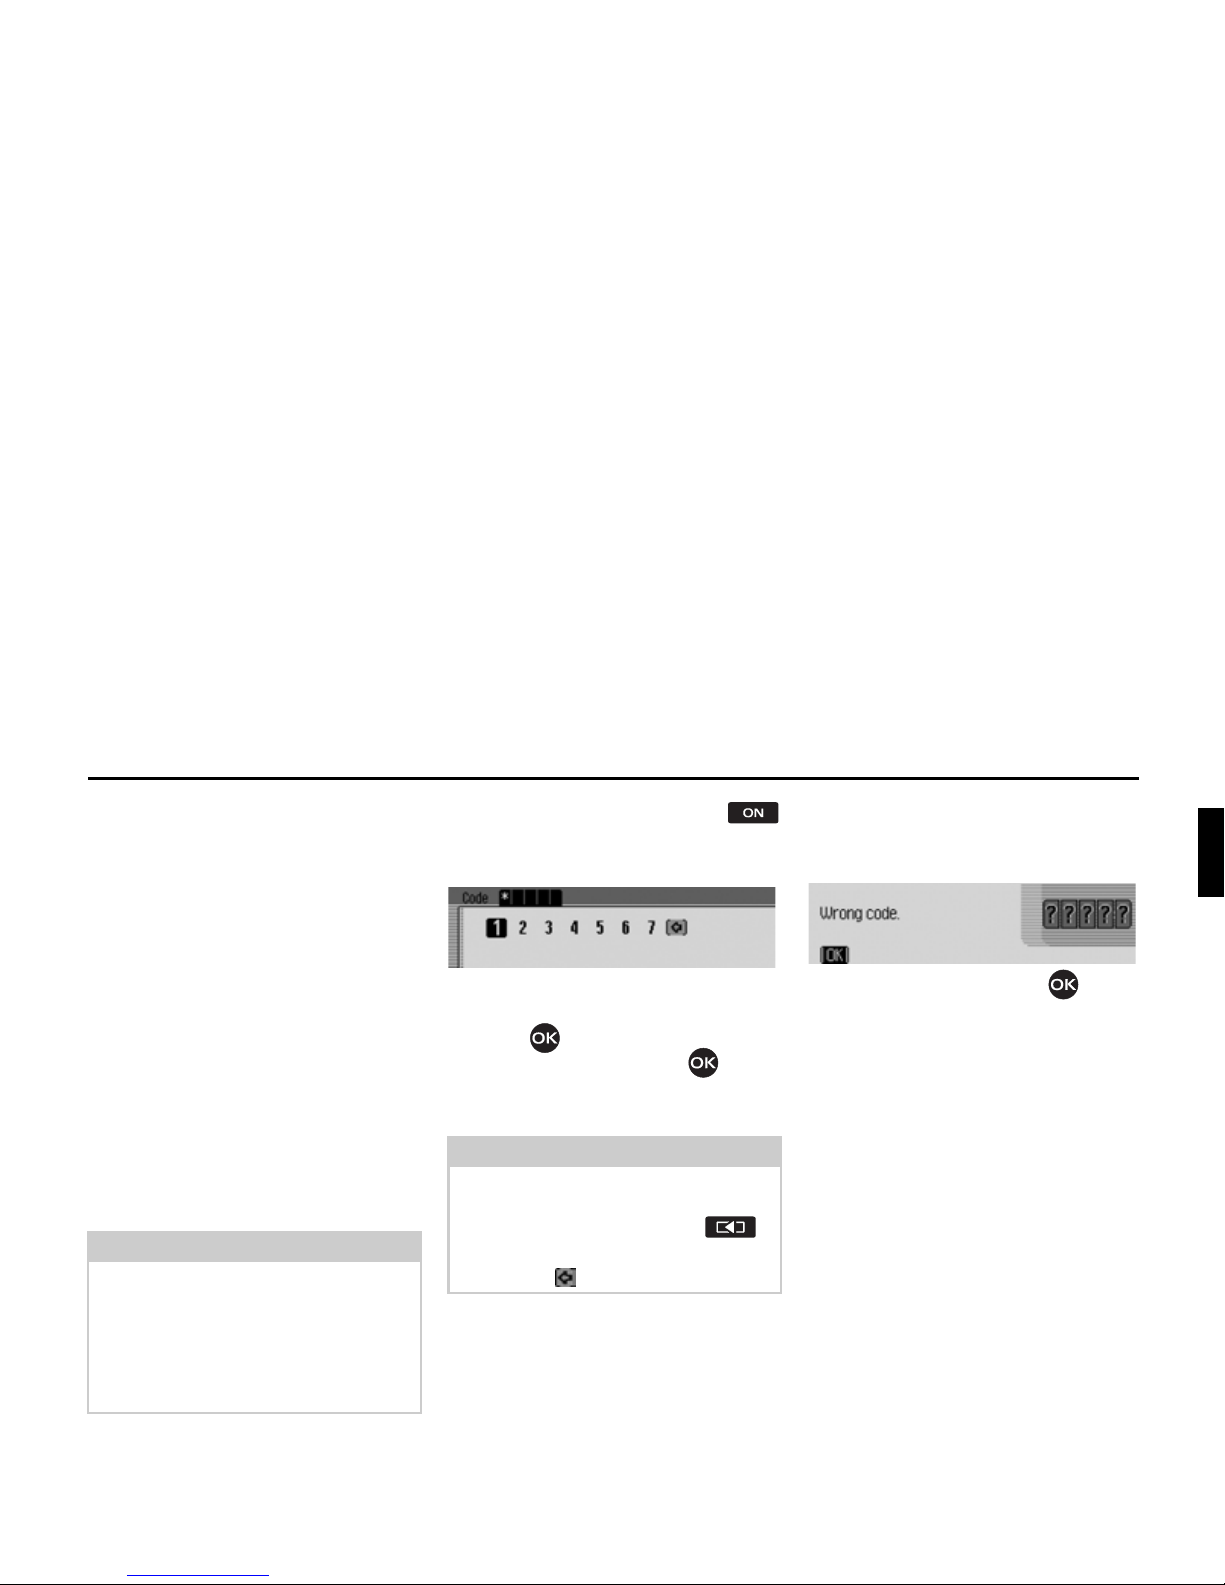
After powering up using the
button the code number entry menu will
be displayed after a short period of time.
X Select the first digit of the code
number by turning the turn/push
control .
X Push the turn/push control .
X Continue in the same manner with the
remaining digits of the code number.
Once you have entered all 5 digits of the
code number correctly, the Infotainment
turns on automatically and you can
operate all functions.
Entry of incorrect code number
The following display will appear in
case of an incorrect code number entry.
X Push the turn/push control .
The code number entry menu will be
displayed once more.
X Enter the correct code number
according to the procedure previously
described.
Note:
It is essential that the CODE CARD be
kept in a safe place outside the vehicle.
This will prevent unauthorized use. The
provided stickers can be attached to the
inside of the vehicle windscreen/
windows.
Note:
In case of an incorrect entry:
X The last digit entered will be deleted
by pushing the Undo button .
or
X Select the symbol.
1006
1007
14
General operation
Removing/inserting the control
panel
Part of the front control panel can be
removed as an additional, effective antitheft protection measure.
The Infotainment may not be switched
on without this removable control panel.
Remove
X Slide the control panel slide lock (A)
to the right.
The control panel will be unlatched.
X Remove the control panel from its
mounting.
If the Infotainment is still switched on
while the control panel is being removed
it will be muted and can no longer be
operated.
If the control panel is reinserted within
45 seconds then the Infotainment is
switched on again.
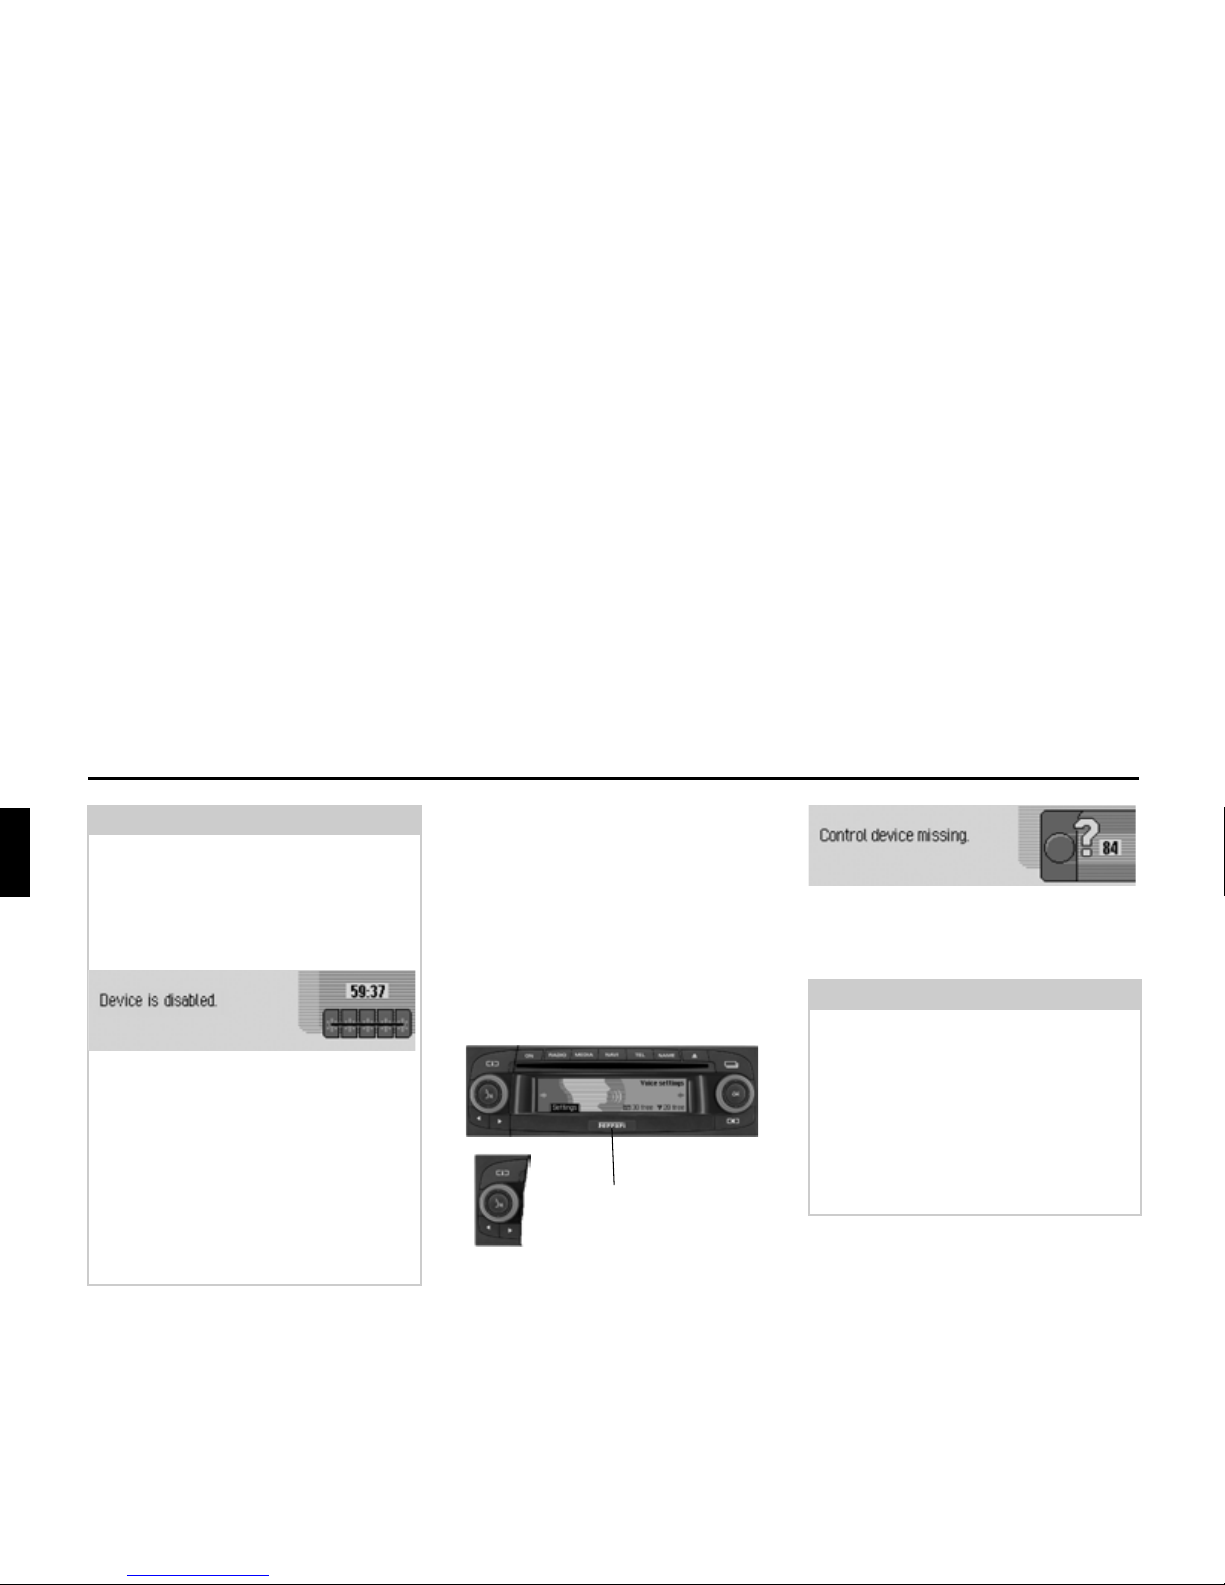
Note:
If the code number has been entered
incorrectly in three consecutive
instances then the device will locked as
inoperable for a duration of approx.
1hour.
The remaining waiting period until the
next possible code entry will be
indicated.
X Leave the ignition on.
If the ignition is switched off the
waiting period of one hour will start all
over again.
The entry menu will be displayed again
after the waiting period has elapsed.
1008
A
Note:
• Do not touch the metal contacts on
the control panel or on the
Infotainment.
• If you move your vehicle with the
control panel detached it will take
some time for the navigation system
to determine your position once the
control panel has been reinserted.
1009

15
General operation
Insert
X Position the control panel in place on
the left hand side.
X Firmly push the control panel.
The Infotainment is now ready for
operation and can be switched on or will
turn itself on automatically.
Inserting/detaching blanking
cover
A red plastic cover is included with the
Infotainment. This plastic cover may be
engaged in the aperture created by
detachment of the control panel.
The plastic cover serves primarily as a
visual protection for a possibly inserted
CF card/microdrive, on the other hand
the red color clearly indicates the
detached control panel.
Inserting blanking cover
X Remove the control panel as described
under “Removing/inserting the
control panel” on page 14.
X Position the plastic cover with the hole
towards the top and the smooth side
towards the outside into the upper
aperture.
X Push the plastic cover rearwards on
the bottom until it engages.
The blanking cover is now inserted.
X Reinsert the control panel as described
under “Removing/inserting the control
panel” on page 14.
Removal of blanking cover
X Remove the control panel as described
under “Removing/inserting the control
panel” on page 14.
X Reach with your finger into the plastic
cover aperture.
X Press the plastic cover downwards
lightly.
X Pull the plastic cover forward.
The blanking cover is now removed.
X Reinsert the control panel as described
under “Removing/inserting the control
panel” on page 14.
Note:
If a new control panel or the control
panel of another Infotainment is
inserted, the Infotainment code number
must be entered as described under
“Entering the device´s code number”
on page 13.
16
General operation
Switching the unit ON/OFF
Switch on
X Press the button.
or
X If the Infotainment has been switched
off previously using the ignition, the
Infotainment will switch on again
after turning on the ignition.
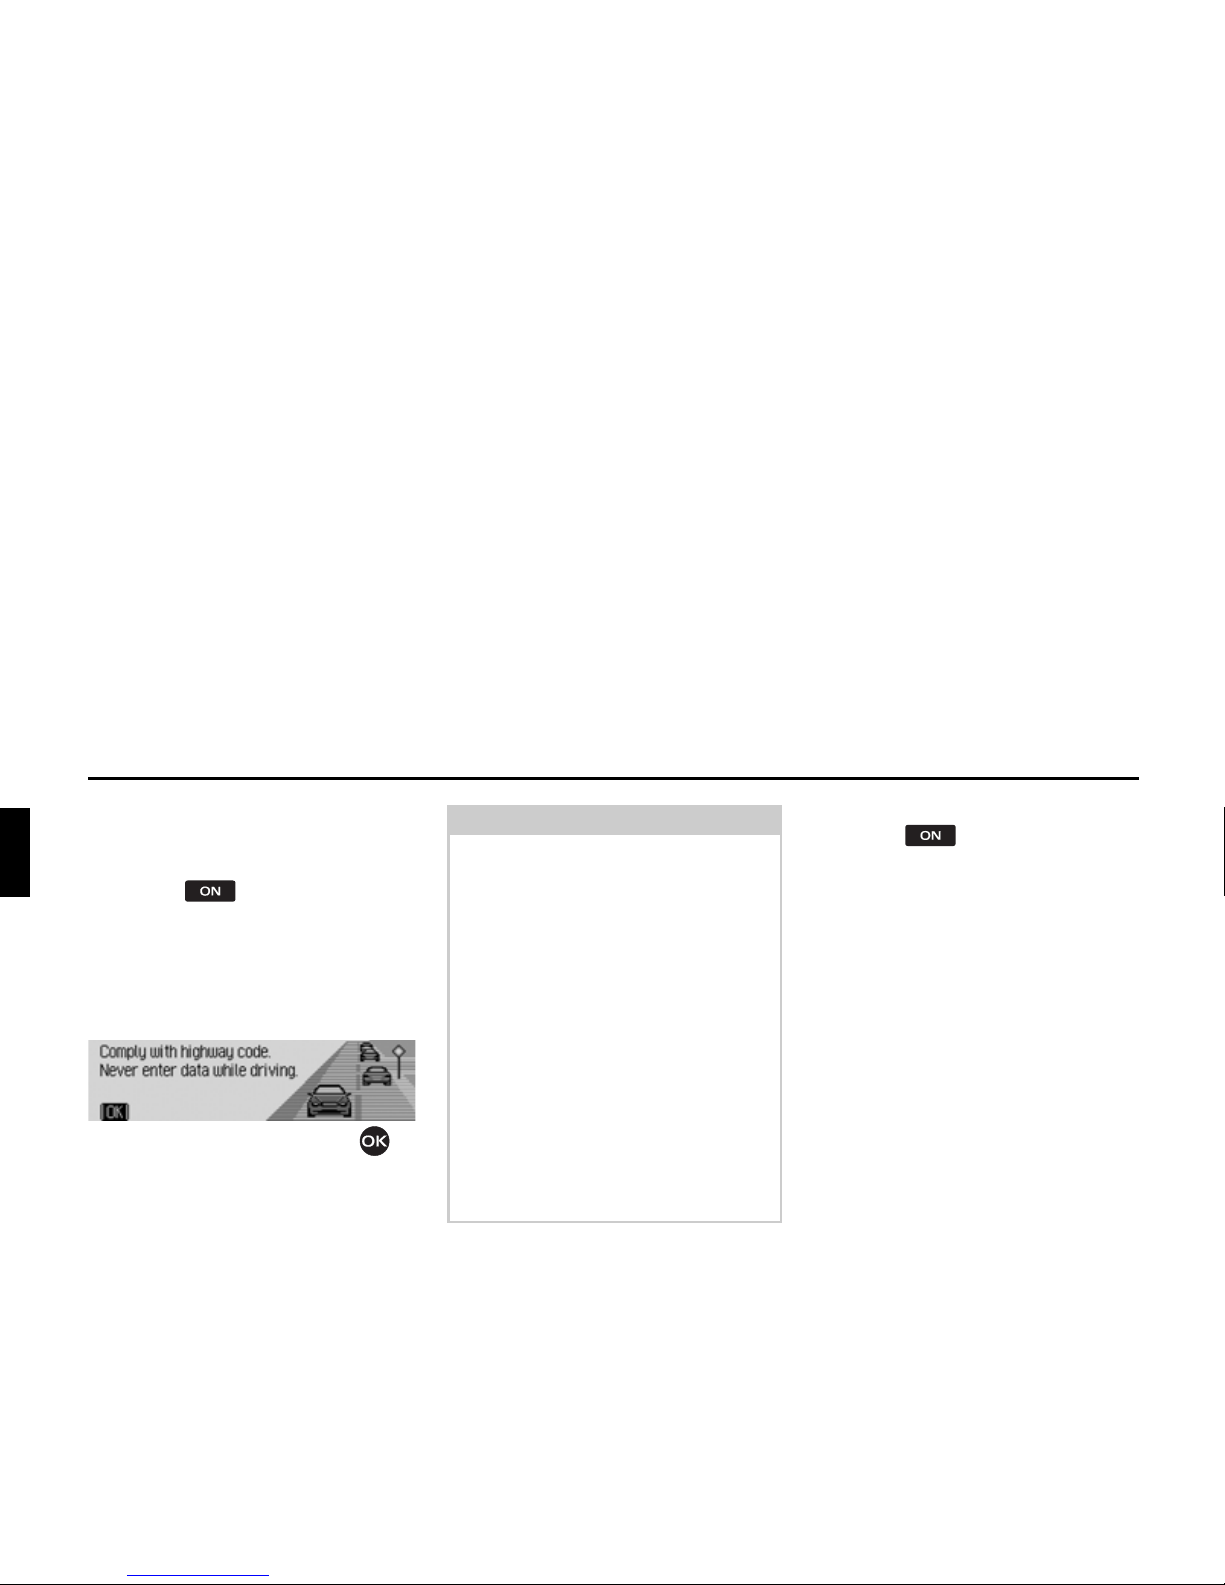
X Push the turn/push control to
confirm the indicated warning
message.
Switch off
X Press the button.
The Infotainment will be switched into
the standby mode if the ignition is on.
The display will darken and the sound of
the Infotainment will be turned off.
or
X Switch off the vehicle ignition.
The deactivation display with the Ferrari
logo will be displayed for 5 seconds.
During these 5 seconds the deactivation
may be prevented by pressing one of the
Infotainment system buttons or by again
switching on the ignition.
The Infotainment will then switch on
again and play the radio or media source
selected last.
1010
Note:
• If the warning message is not
confirmed, then the Infotainment
cannot be operated.
• The Infotainment will play the radio
or media source selected last after
switching on again. A possible
muting or pause function is cancelled.
• An active route guidance will start
again if no more than 2 hours have
elapsed after switching off.
• If the volume had been adjusted very
loud after the last instance of
switching off it will be re-set to
setting 26 after being switched on
again.
17
General operation
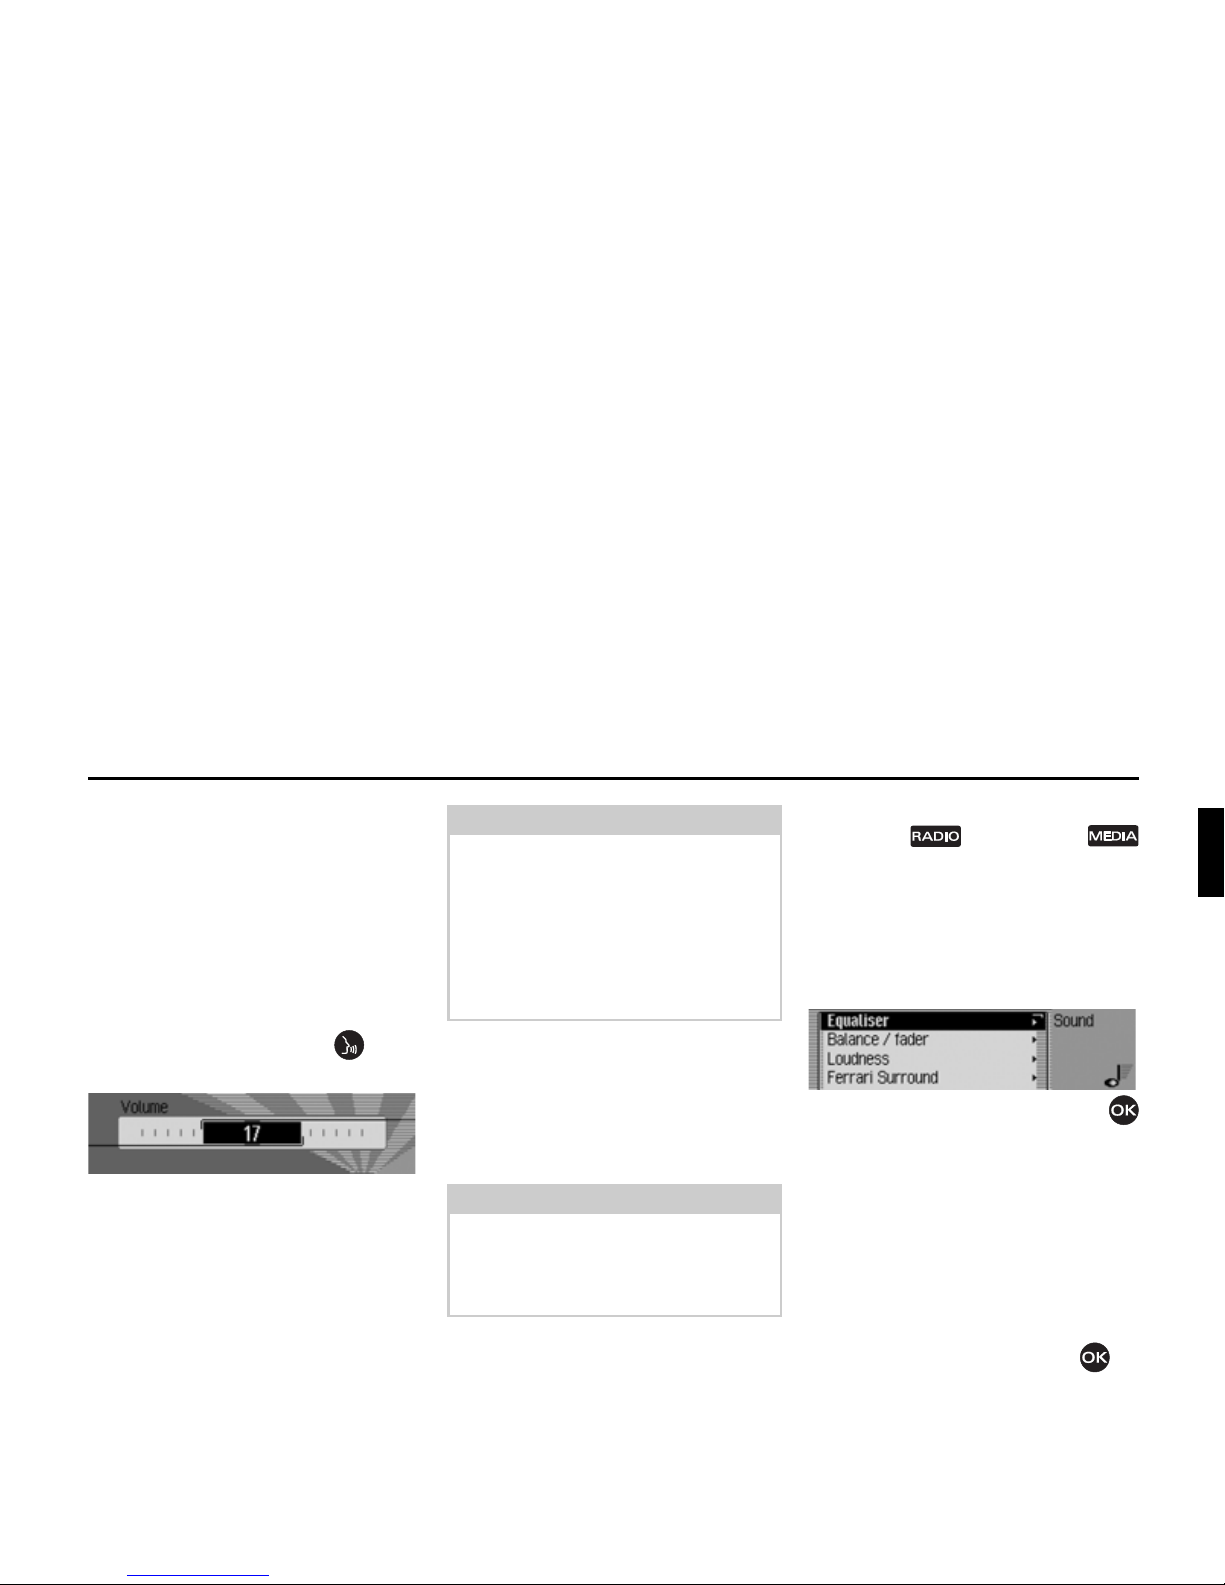
Set the volume
Volume adjustment occurs in
50 increments. The volume adjusted
applies to all radio and audio sources.
As described under “Display volume”
on page 129 you can adjust whether the
volume change is indicated graphically
or not.
X Turn the turn/push control to the
right or to the left.
X The volume is increased or decreased.
Sound settings
In the sound settings you can preset your
Infotainment sounds according to your
personal preferences. The adjustments
apply to all radio and audio sources.
Retrieving sound settings
X Press the button or the
button long enough until the sound
settings are retrieved.
or
X Select the entry 6RXQG in the radio or
audio main menu (radio main menu
page 58 or audio main menu page 78)
XBy turning the turn/push control
you can now select among
(TXDOL]HU,
%DODQFHIDGHU,
/RXGQHVV,
)HUUDULVXUURXQG,
6XEZRRIHU,
&URVVRYHU,
&RPSUHVVLRQ, and
5HVHWVHWWLQJV.
X Push the turn/push control to
confirm the selection.
1011
Note:
In different portions of the operating
manual you will find instructions on
volume adjustment of:
• Navigation announcements and
additional voice messages on
page 124.
• Audible signals on page 129.
Note:
If your Ferrari is equipped with a BOSE
Soundsystem, then the menu items
(TXDOL]HU, /RXGQHVV, )HUUDUL VXUURXQG, and
&RPSUHVVLRQ are not available.
1012
18
General operation
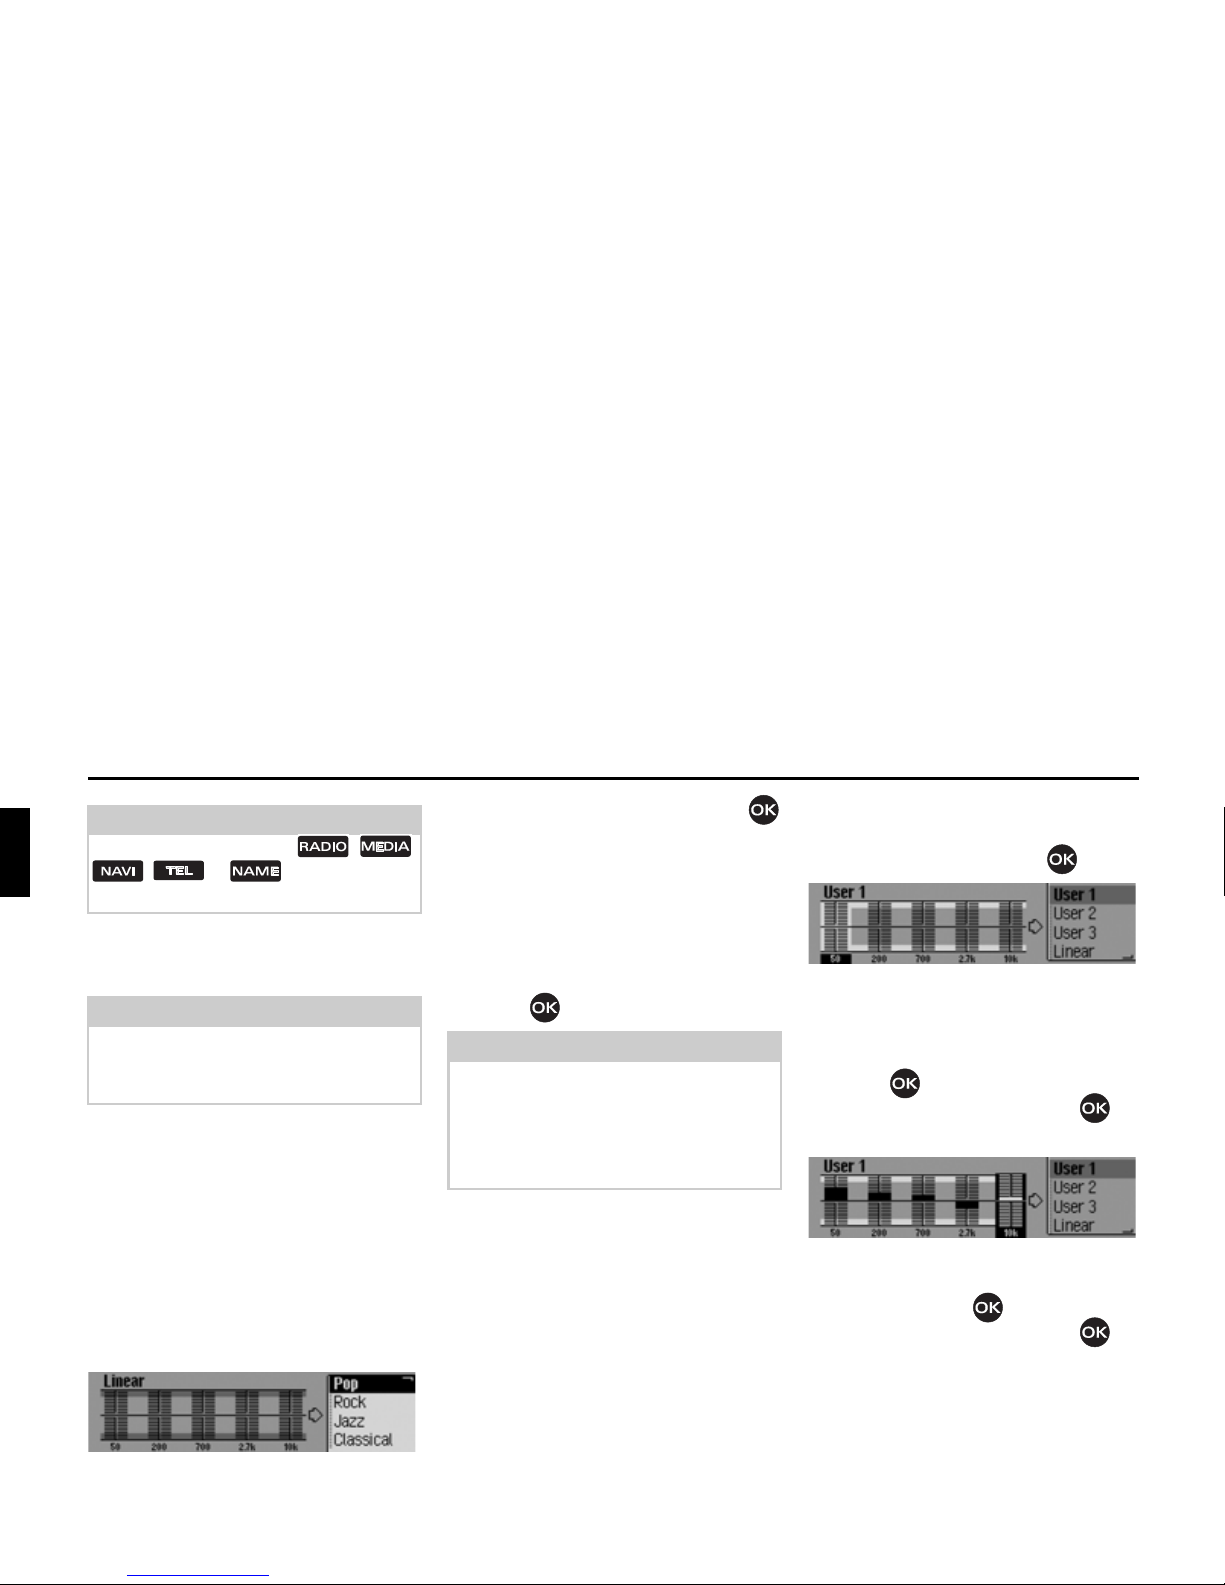
Set the equalizer
You can alter the sound characteristics
on five frequency bands using the
equalizer setting.
In addition, 4 preselected equalizer
settings (presets) are available to you.
As an additional option you can define
3 equalizer settings of your own.
X Select the sound characteristics in the
entry
(TXDOL]HU.
X By turning the turn/push control
you can now select from the four
predefined equalizer settings
5RFN3RS,
-D]], and &ODVVLFDO as well as your own
three equalizer settings
8VHU up to
8VHU or /LQHDU.
X The desired equalizer setting will be
accepted by pressing the turn/push
control .
Defining equalizer setting
X Select among 8VHU, 8VHU and 8VHU.
X Press the turn/push control longer.
The cursor will jump to the first
frequency band.
X Select the frequency band to be
changed by turning the turn/push
control .
X Push the turn/push control to
confirm the selection.
X Select the desired setting for the
selected frequency band by turning the
turn/push control .
X Push the turn/push control to
confirm the selection.
You may now complete additional
settings.
Note:
Press one of the buttons , ,
, or in order to leave
the sound settings.
Note:
If your Ferrari is equipped with the
BOSE sound system then this function
will not be available.
1013
Note:
The predefined equalizer settings
5RFN
3RS
, -D]] and &ODVVLFDO cannot be
changed.
By selecting
/LQHDU, the equalizer
settings will be set to a mean value.
1014
1015
19
General operation
Once you have completed the desired
settings:
X Press the turn/push control longer.
or
X Select the arrow next to the frequency
bands by turning the turn/push
control and pressing the turn/push
control .
You are now able to complete additional
equalizer settings or select one of the
predefined settings.
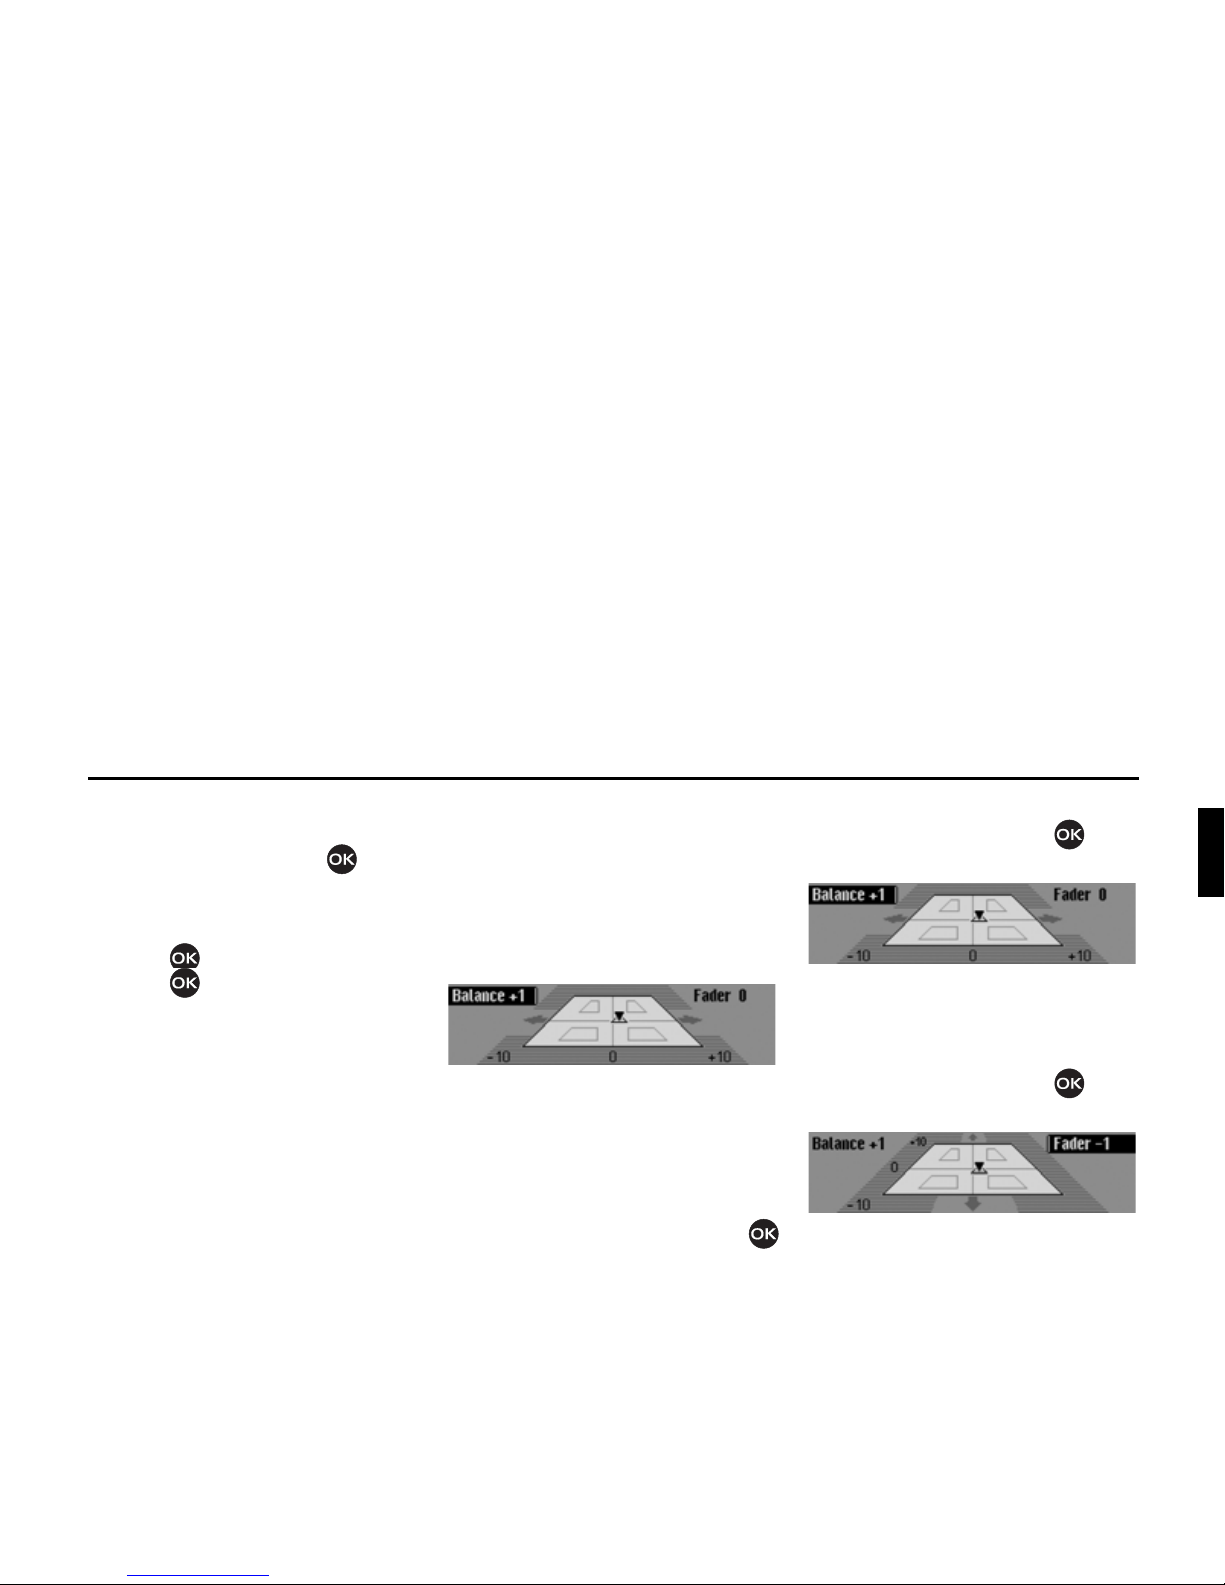
Adjusting balance and fader
You can move the center of sound
impact within the vehicle using the
balance and fader adjustment.
X Select the sound characteristics in the
entry
%DODQFH)DGHU.
The illustration symbolizes the vehicle
interior in direction of travel. The small
triangle symbolizes the actual position
of the center of sound impact.
The balance adjustment is active.
X By pressing the turn/push control
you can now select among
%DODQFH and
)DGHU.
Setting the balance
X Turn the turn/push control to the
right or to the left.
The center of sound impact is moved to
the right or left.
Fader setting
X Turn the turn/push control to the
right or to the left.
The center of sound impact is moved
forward or rearward.
1016
1016
1017
20
General operation
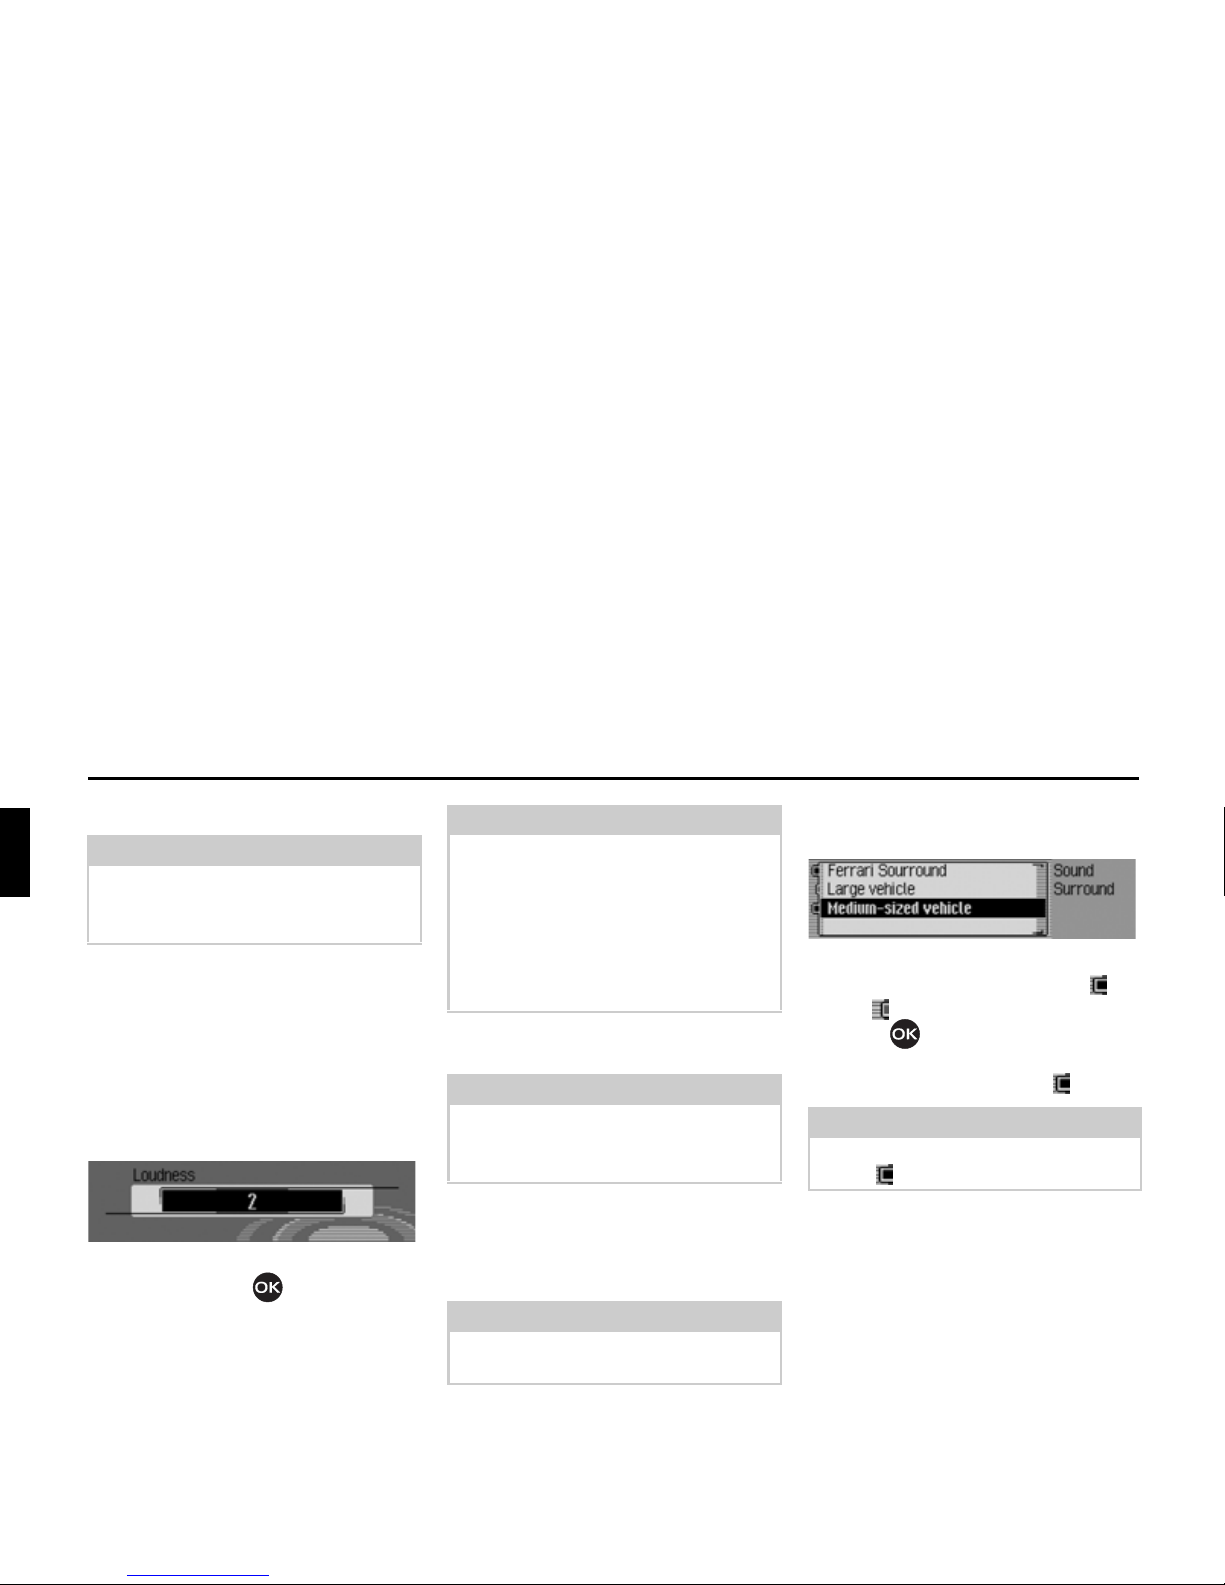
Switching loudness on / off
Loudness causes an elevation of low
frequencies proper to the hearing of the
human ear. Using the settings you can
adapt the loudness function to your
vehicle.
X Select the sound characteristics in the
entry
/RXGQHVV.
X Adjust the desired value using the
turn/push control .
Ferrari surround
You can activate the virtual acoustics
sound using this function and select the
vehicle size for optimizing the ambient
sound function.
X Select the sound characteristics in the
entry
)HUUDULVXUURXQG.
X Select the )HUUDUL VXUURXQG and switch
the virtual ambient sound on ( ) or
off ( ) by pressing the turn/push
control .
X Select among /DUJHYHKLFOH and 0HGLXP
VL]HGYHKLFOH
(switched on = ).
Note:
If your Ferrari is equipped with the
BOSE sound system then this function
will not be available.
1018
Note:
Using the setting “
”, an elevation of
higher frequencies will be selected,
using “
”, elevation of medium
frequencies is selected, and “
” causes
elevation of very low bass frequencies.
Selecting the adjustment
2)) will switch
off the loudness function.
Note:
If your Ferrari is equipped with the
BOSE sound system then this function
will not be available.
Note:
The Ferrari surround function is not
available for AM.
Note:
Only one vehicle type in the list can be
active ( ) at a time.
1019
21
General operation
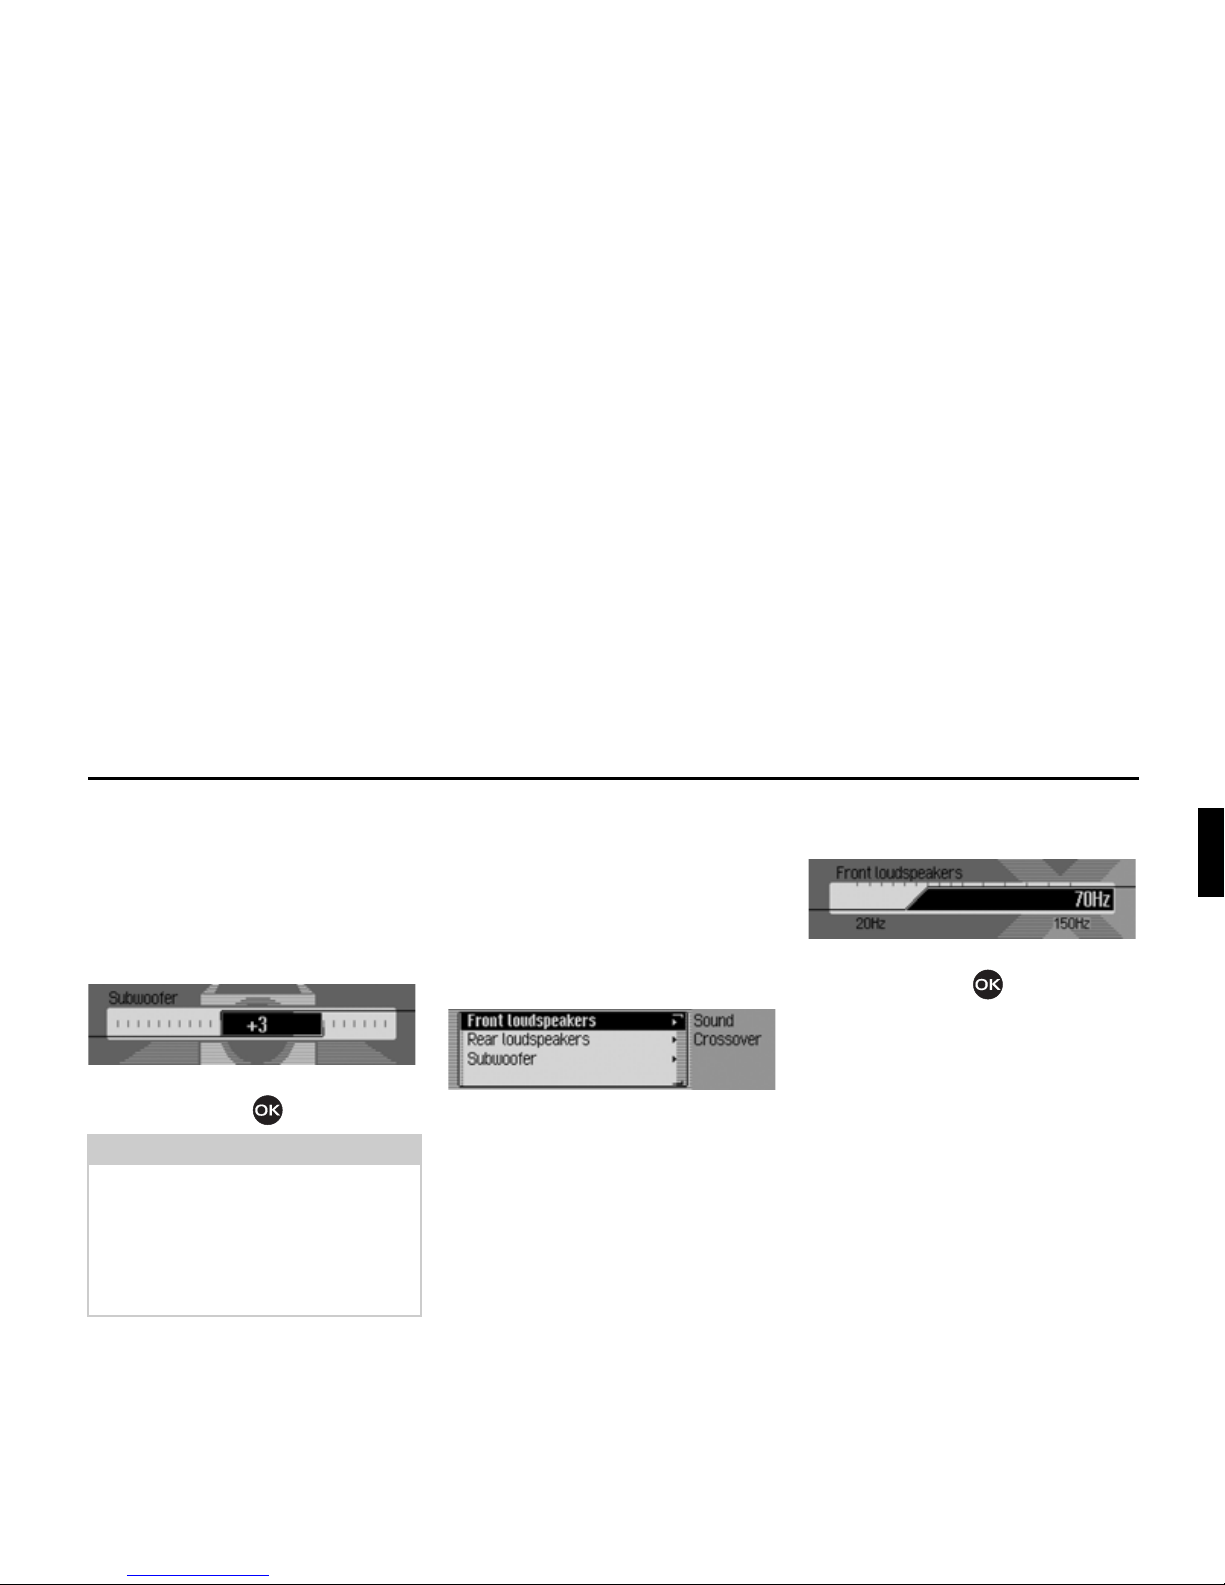
Subwoofer
You can adjust the volume level of the
subwoofer output or turn off the
subwoofer output.
X Select the sound characteristics in the
entry
6XEZRRIHU.
X Adjust the desired value by turning the
turn/push control .
Crossover
Using this function you can adjust the
limiting frequencies for the front
speakers, the rear speakers, or the
subwoofer.
X Select the sound characteristics in the
entry
&URVVRYHU.
X You can now select among the IURQW
ORXGVSHDNHU UHDU ORXGVSHDNHU
, and
6XEZRRIHU.
• )URQWORXGVSHDNHU, and UHDUORXGVSHDNHU
You can adjust the lower limiting
frequency of the front and rear
loudspeakers to a value between
2)),
20 and 150 Hz.
•
6XEZRRIHU
You can adjust the subwoofer limiting
frequency to a value between 50 and
150 Hz.
As an example you can see the
adjustment for the front loudspeaker:
X Adjust the desired value using the
turn/push control .
Note:
The adjustment “+10” means a higher
subwoofer volume.
Selecting the adjustment
2)) will switch
off the subwoofer output. In addition,
during crossover setting
WKH VXEZRRIHU
will be deactivated.
1024
1025
1026
22
General operation
Compression
Using this function you can switch the
dynamic audio signal bandwidth
reduction on or off.
X In the sound characteristics select the
entry
&RPSUHVVLRQ.
X Switch the function on ( ) or off ( )
by pressing the turn/push control .
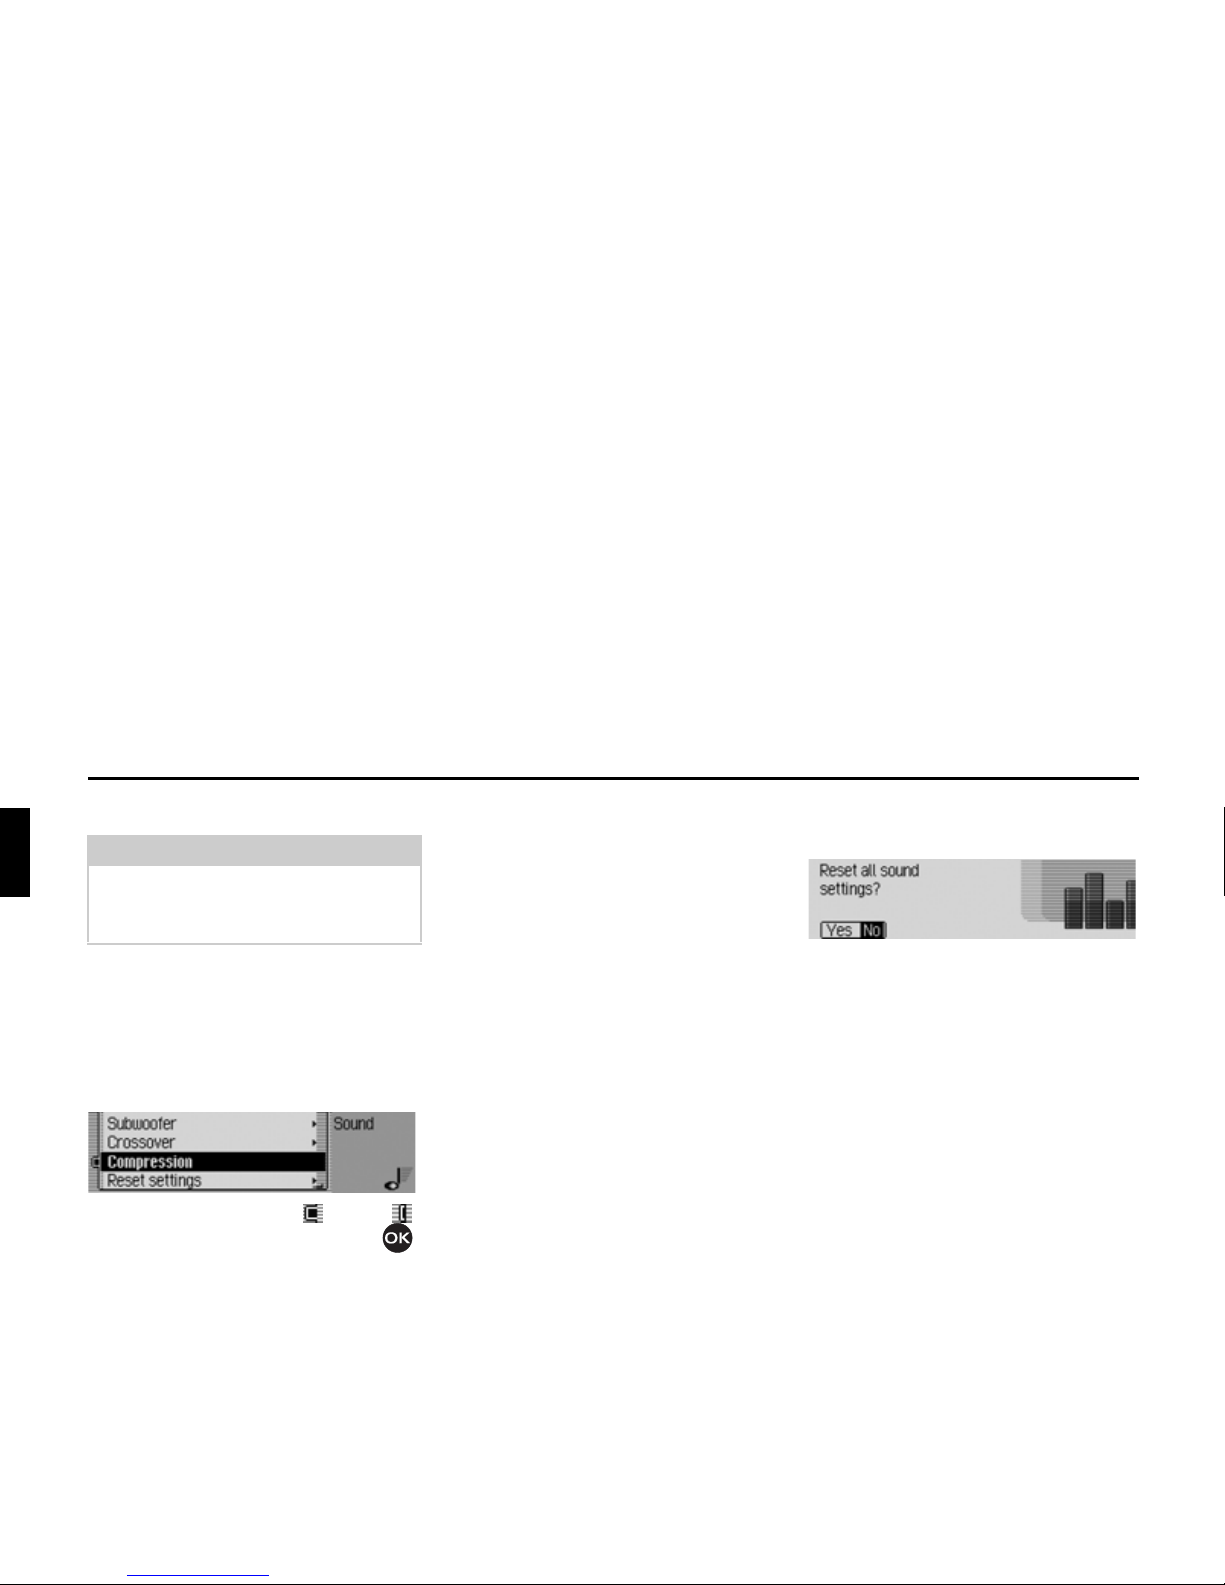
Resetting the settings
You can reset all sound adjustments to
the default adjustment.
The following settings are reset to the
respective default adjustments:
•
(TXDOL]HU: All preset settings are reset to
the original default values. The userdefined setting is reset to the zero
setting.
•
%DODQFHIDGHU to mean setting.
•
/RXGQHVV to 2)).
• )HUUDULVXUURXQG to 2)).
•
6XEZRRIHU to 2)).
•
&URVVRYHU front and rear speakers to
2)), subwoofer to 100 Hz.
• &RPSUHVVLRQ to 2)).
X Select the sound characteristics in the
entry
5HVHWVHWWLQJV.
X Select <HV for a reset of the sound
adjustments or
1R to continue without
any changes.
When selecting
<HV the sound
adjustments will be reset.
Note:
If your Ferrari is equipped with the
BOSE sound system then this function
will not be available.
1027
1020
23
General operation
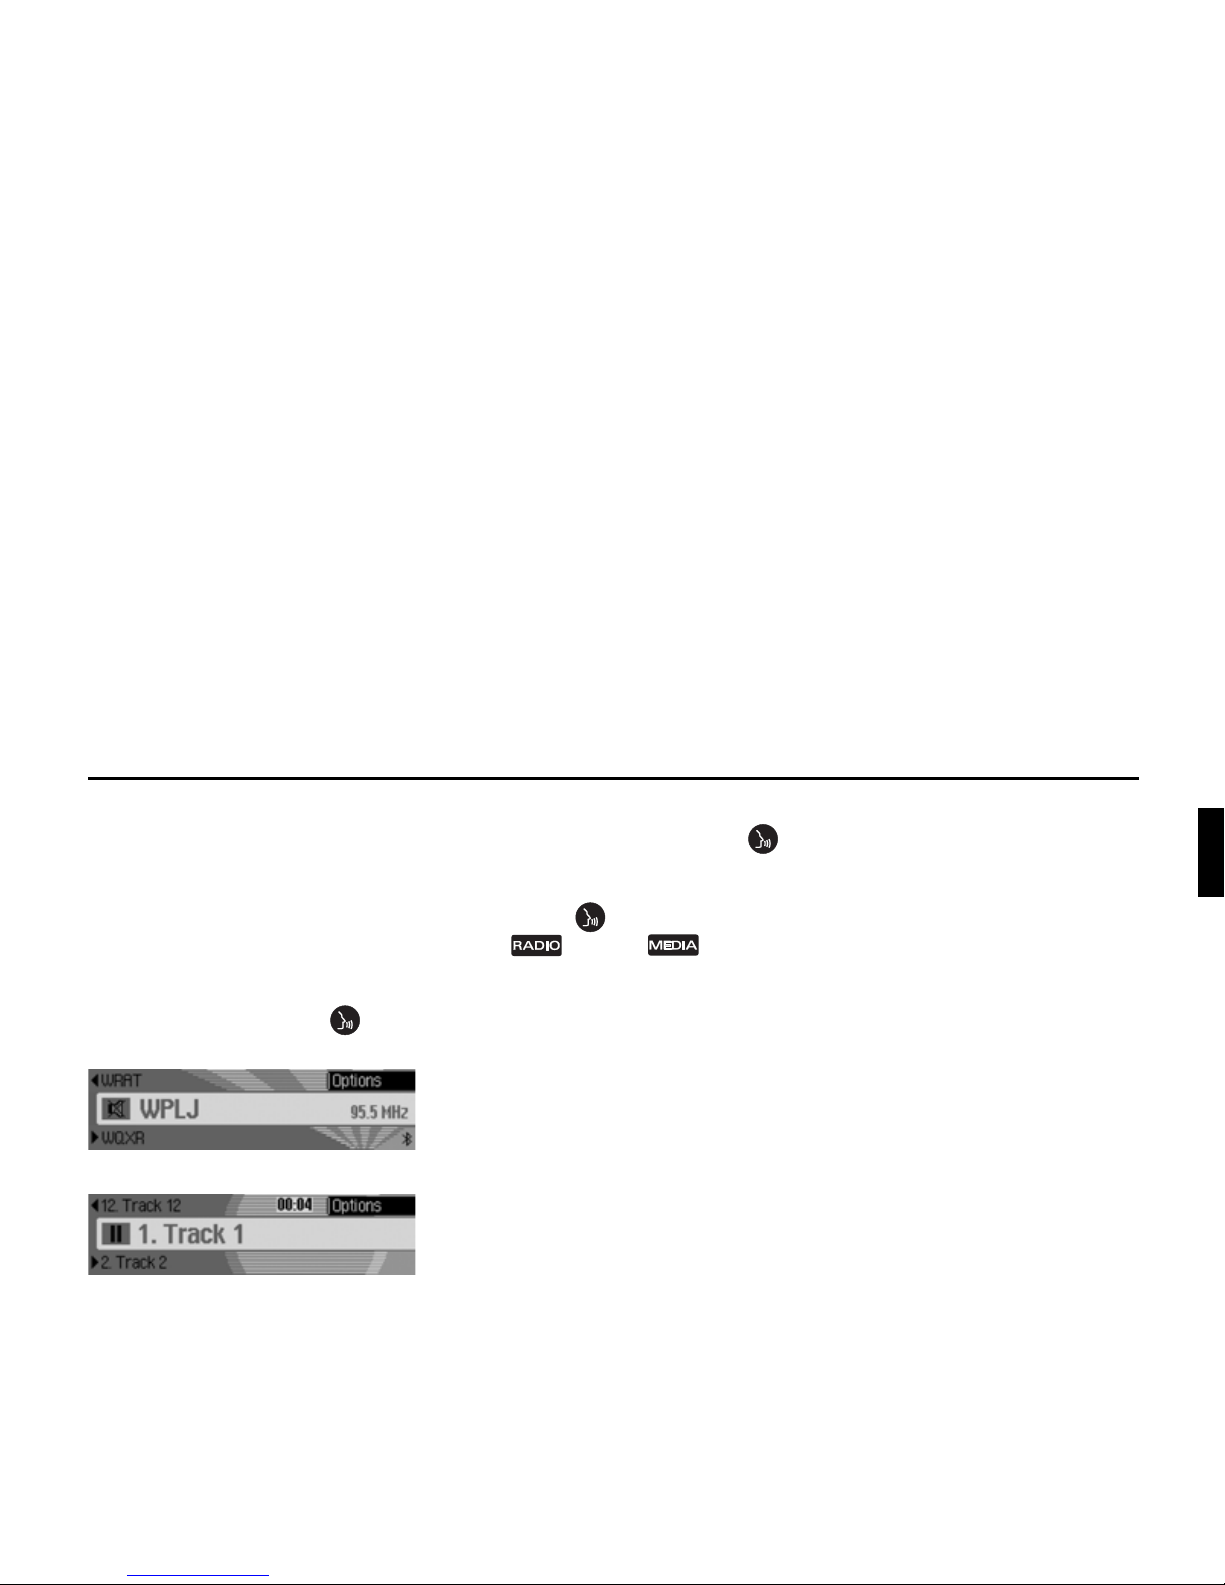
Mute
You can mute your Infotainment, i.e. the
sound of the current radio or media
source is switched off.
Navigation announcements and other
voice messages of the Infotainment will
however still be switched through.
X Turn the turn/push control longer
than 2 seconds.
Example for muted radio operation.
Example for muted media operation.
To deactivate the muting you can:
• Again press the turn/push control
longer than 2 seconds.
• Adjust the volume by turning the turn/
push control .
• Push button or button.
• Select another station or track.
• Turn the Infotainment off and on
again.
1021
1022

24
Using Navigation
Navigation Mode
What is navigation?
The term “navigation” (lat. navigare = to
travel by sea) is generally understood to
mean the determination of a vehicle’s
location, the determination of its
direction and its distance from the
desired destination and the required
route to get there. Stars, prominent
landmarks, compasses and satellites etc.
are used as navigation tools.
The Infotainment determines the
location using the GPS receiver (GPS =
Global Positioning System). It
determines the direction and distance
from the destination by means of a
digital road map, a navigation computer
and sensors. A speedometer and reverse
signal are also used to calculate and
follow the route.
For safety reasons, route guidance is
predominantly in spoken form,
supported by a direction indicator on the
display.
Navigations Daten
You need a CF memory card containing
a digitized road map to navigate with the
Infotainment.
Freeways, state and county roads, as
well as local roads are detailed in this
digitized road map. Larger cities and
communities are covered in their
entirety. For smaller towns and
communities, the regional and
municipial roads or main thoroughfares
and the town centers are included.
One-way streets, pedestrian zones, noturn intersections and other traffic
regulations are taken into account as far
as possible.
There may be discrepancies between the
data on the navigation CD and the actual
local situation, due to continuous
changes in road systems and traffic
regulations.
Safety Instructions
• Traffic laws and regulations always
have priority. The navigation system
is merely an aid, data/information
may in select cases be incorrect. The
driver must decide in each situation
by him- or herself if he or she will
follow the directions.
No liability will be assumed for
incorrect directions provided by the
navigation system.
• Observation of traffic signs and local
traffic regulations must always take
priority.
• Traffic guidance is restricted to
passenger vehicles. Special driving
recommendations and regulations for
other vehicles (e.g. commercial
vehicles) are not included.
• Destinations must only be entered
when the vehicle is stationary.
G
Note:
Navigation of the Infotainment will
only work with an original memory
card supplied by Ferrari.
Under no circumstances may you
undertake formatting of the original
Ferrari memory card.

25
Using Navigation
Insert memory card
The slot for insertion of the memory
card containing navigation data is
located unter the detachable control
panel of the Infotainment or under the
inserted blanking cover.
X Remove the control panel as described
under “Removing/inserting the control
panel” on page 14.
X Remove the blanking cover as
described under “Inserting/detaching
blanking cover” on page 15.
X Take the memory card with navigation
data from its protective cover.
X Insert the memory card into the slot
visible on the right.
X Carefully slide the memory card
forward.
The eject button placed in the upper left
is pushed outwards.
X Reinsert the blanking cover as
described under “Inserting/detaching
blanking cover” on page 15.
X Reinsert the control panel as described
under “Removing/inserting the control
panel” on page 14.
The memory card with the navigation
data is now ready for operation and the
system is able to access the navigation
data.
Remove the memory card
X Remove the control panel as described
under “Removing/inserting the control
panel” on page 14.
X Remove the blanking cover as
described under “Inserting/detaching
blanking cover” on page 15.
X Press the eject button located on the
upper left of the slot.
X The memory card is pushed forward
a small distance.
X Pull the memory card out of the slot.
X Insert the memory card with
navigation data back in its protective
cover.
X Reinsert the blanking cover as
described under “Inserting/detaching
blanking cover” on page 15.
X Reinsert the control panel as described
under “Removing/inserting the control
panel” on page 14.
Note:
The memory card may only be inserted
in one direction. The memory card´s
reverse side points to the left in that
orientation.
26
Using Navigation
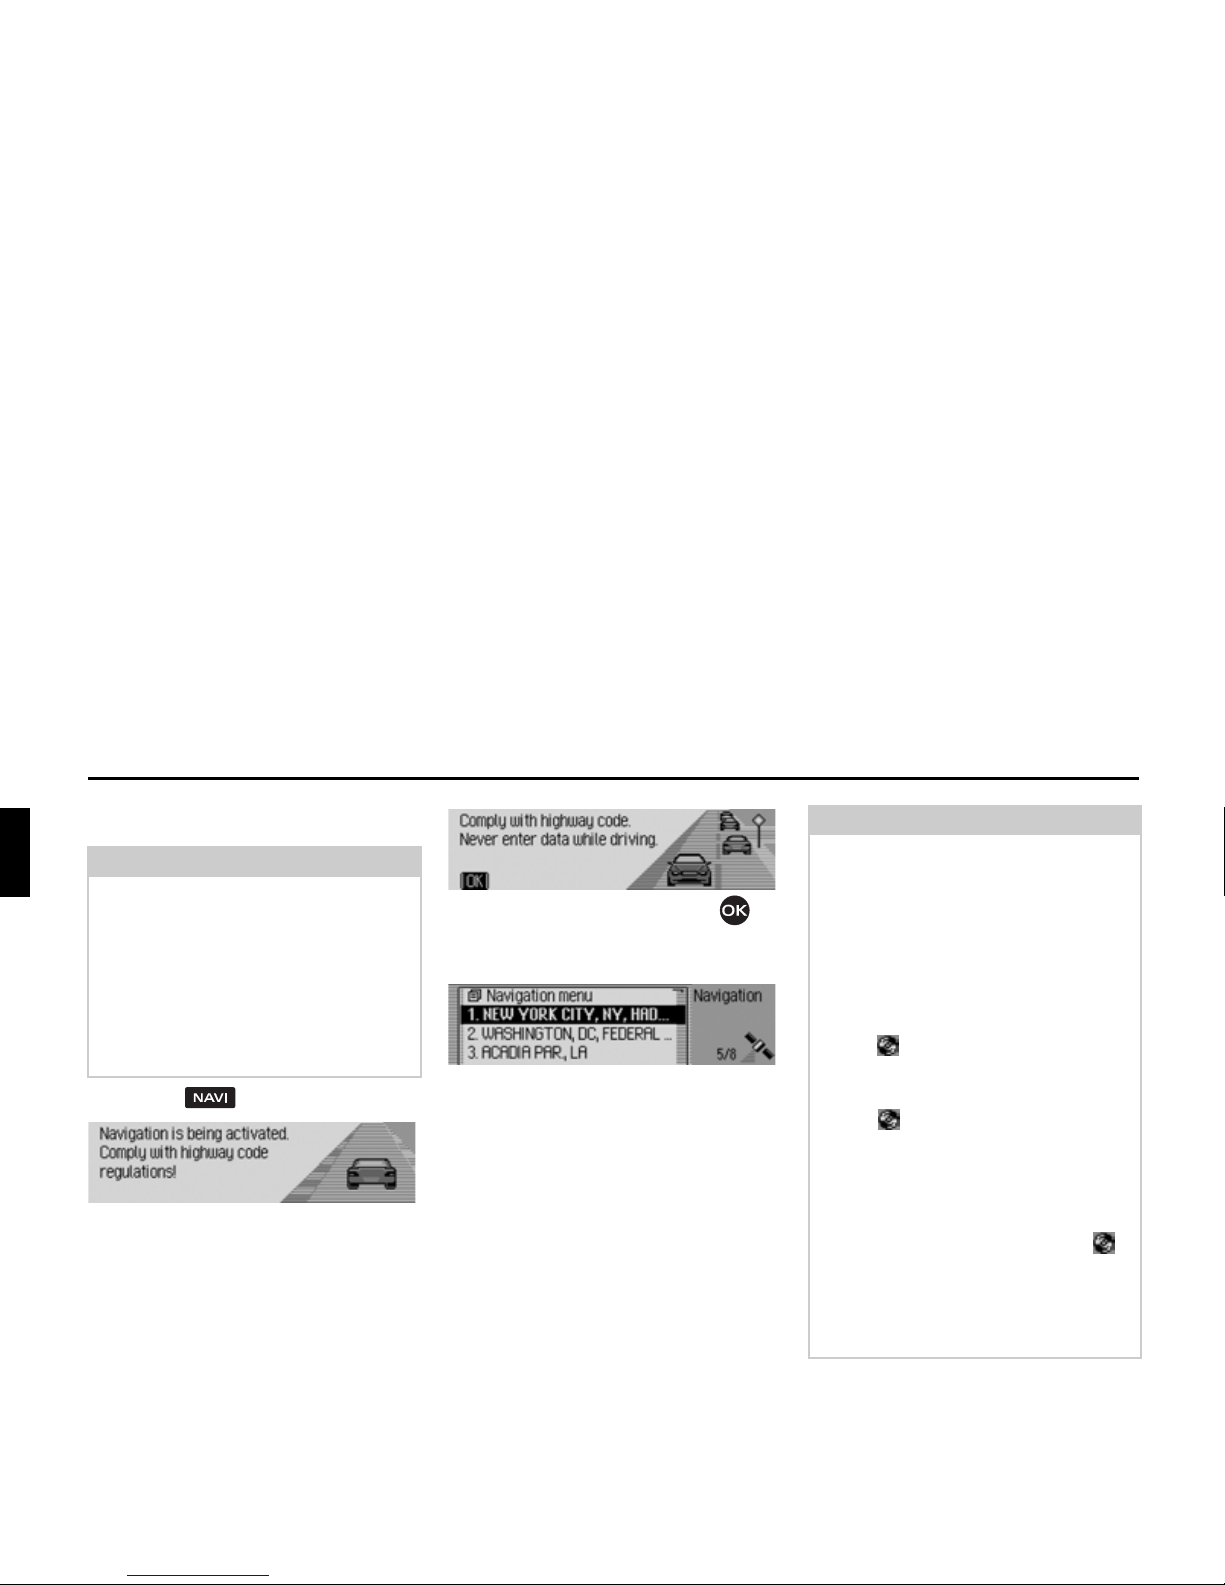
Selecting Navigation
X Press the button.
Navigation is initiated. The display is
only shown if the navigation has not
been activated since the last activation of
the Infotainment or if it is not yet ready.
A warning message warning of possible
dangers is displayed. This warning
message must be confirmed.
X Push the turn/push control to
confirm the indicated warning
message.
Then the quick access menu is
displayed. In the right hand portion of
the display you can see the number of
satellites received (in the example 5 of a
maximum of 8 receivable satellites are
received)
In the quick access menu you can select
the destinations entered last or the
destinations you have protected in the
quick access menu and head to those
destinations.
For further information, see “Navigation
quick access” on page 36.
Note:
Depending on your order your
Infotainment may have been supplied
without a navigation system. You will
then receive the message
3OHDVHFRQWDFW
\RXU )HUUDUL GHDOHU
when retrieving
a respective function. Please contact
your Ferrari dealer if you want to
retrofit the navigation function.
2001
1010
2002
Note:
The memory card with navigation data
must be inserted when starting the
navigation operation for the first time.
If a route calculation is started the
memory card with navigation data may
have to be inserted. If it is not inserted,
then you will be prompted to insert it.
During calculation of the route the
symbol will be displayed on the right
hand side of the display. Upon
completion of the calculation the
symbol will extinguish, the memory
card may now be removed and replaced
by an audio data memory card if so
desired.
When entering distant destinations it is
advisable to wait for the symbol to
disappear before departure. For distant
destinations you may be prompted to
resinsert the memory card at a later
time.
27
Using Navigation
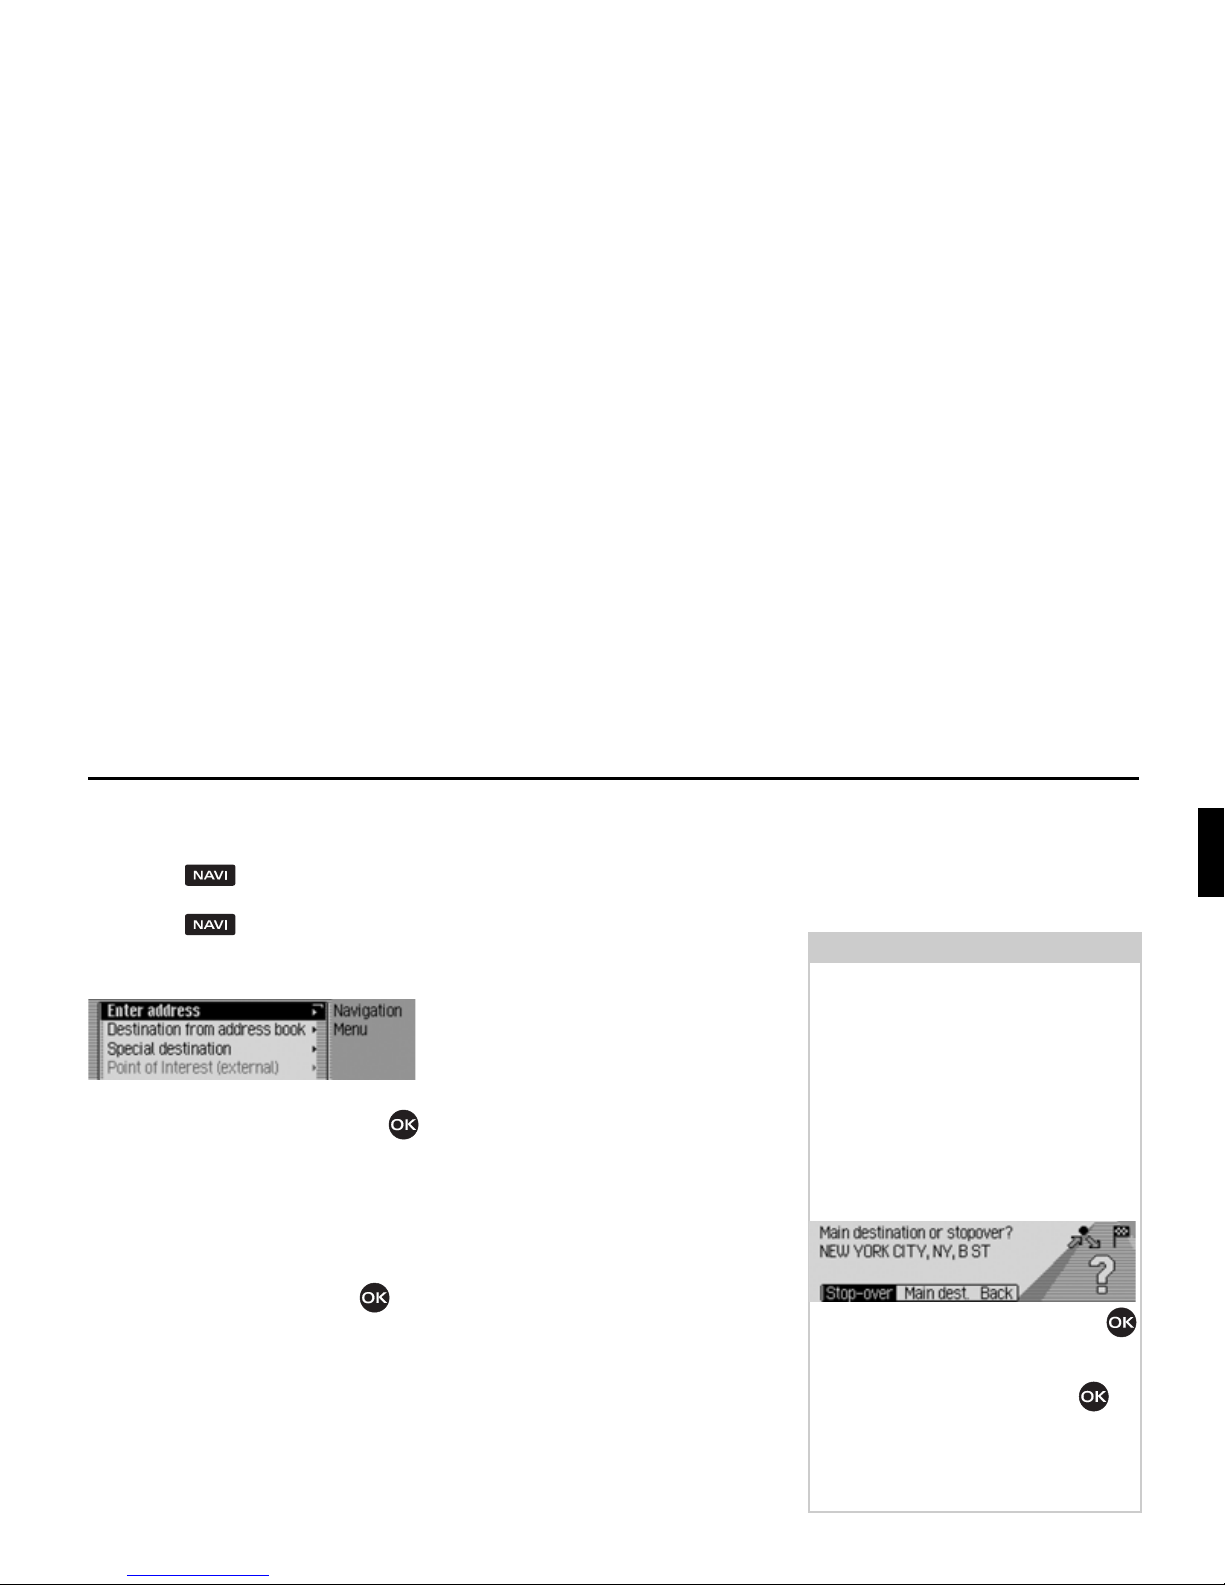
Calling up the navigation main
menu
X Press the button twice.
or
X Press the button.
You are in the quick access menu.
X Select the 1DYLJDWLRQPHQXentry.
The navigation menu is displayed.
X By turning the turn/push control
you can now select among
(QWHUDGGUHVV,
'HVWLQDWLRQIURPDGGUHVVERRN,
6SHFLDOGHVWLQDWLRQ,
3RLQWRI,QWHUHVWH[WHUQDO, and
6HWWLQJV.
X Push the turn/push control to
confirm the selection.
The desired function is retrieved.
•
(QWHUDGGUHVV
will lead you to the entry menu for the
destination address. See “Entering a
Destination” on page 28.
•
'HVWLQDWLRQIURPDGGUHVVERRN
You can select a destination from the
address book. See “Selecting a
destination in the address book” on
page 39.
•
6SHFLDOGHVWLQDWLRQ
will lead you to the menu for selection
of a special destination. Special
destinations may be e.g. gas stations,
airports or hospitals. See “Point of
interest” on page 40.
•
3RLQWRI,QWHUHVWH[WHUQDO
Guides you to the menu for selection
of a special destination, i.e. you can
select special destinations on a special
data disc. This menu item may only be
selected if e.g. a CD with external
special destinations has been inserted.
See “External special destinations” on
page 44.
•
6HWWLQJV
Guides you to the menu for
adjustment of settings relevant to
navigation functions. See “Settings”
on page 54.
Old
version
Note:
You can also, if one route guidance is
already in progress, initiate an
additional destination entry using
(QWHU
DGGUHVV
, 'HVWLQDWLRQIURPDGGUHVVERRN, and
6SHFLDOGHVWLQDWLRQ.
After selection of the destination you
are then prompted by the Infotainment,
if the new destination is to be used as
the main destination or as an interim
destination.
X By turning the turn/push control
you can now select among
6WRSRYHU
and 0DLQGHVW.
X Push the turn/push control to
confirm the selection.
The new destination will now, depending
on the selection, be used as an interim
destination or a new main destination.
2096
28
Using Navigation
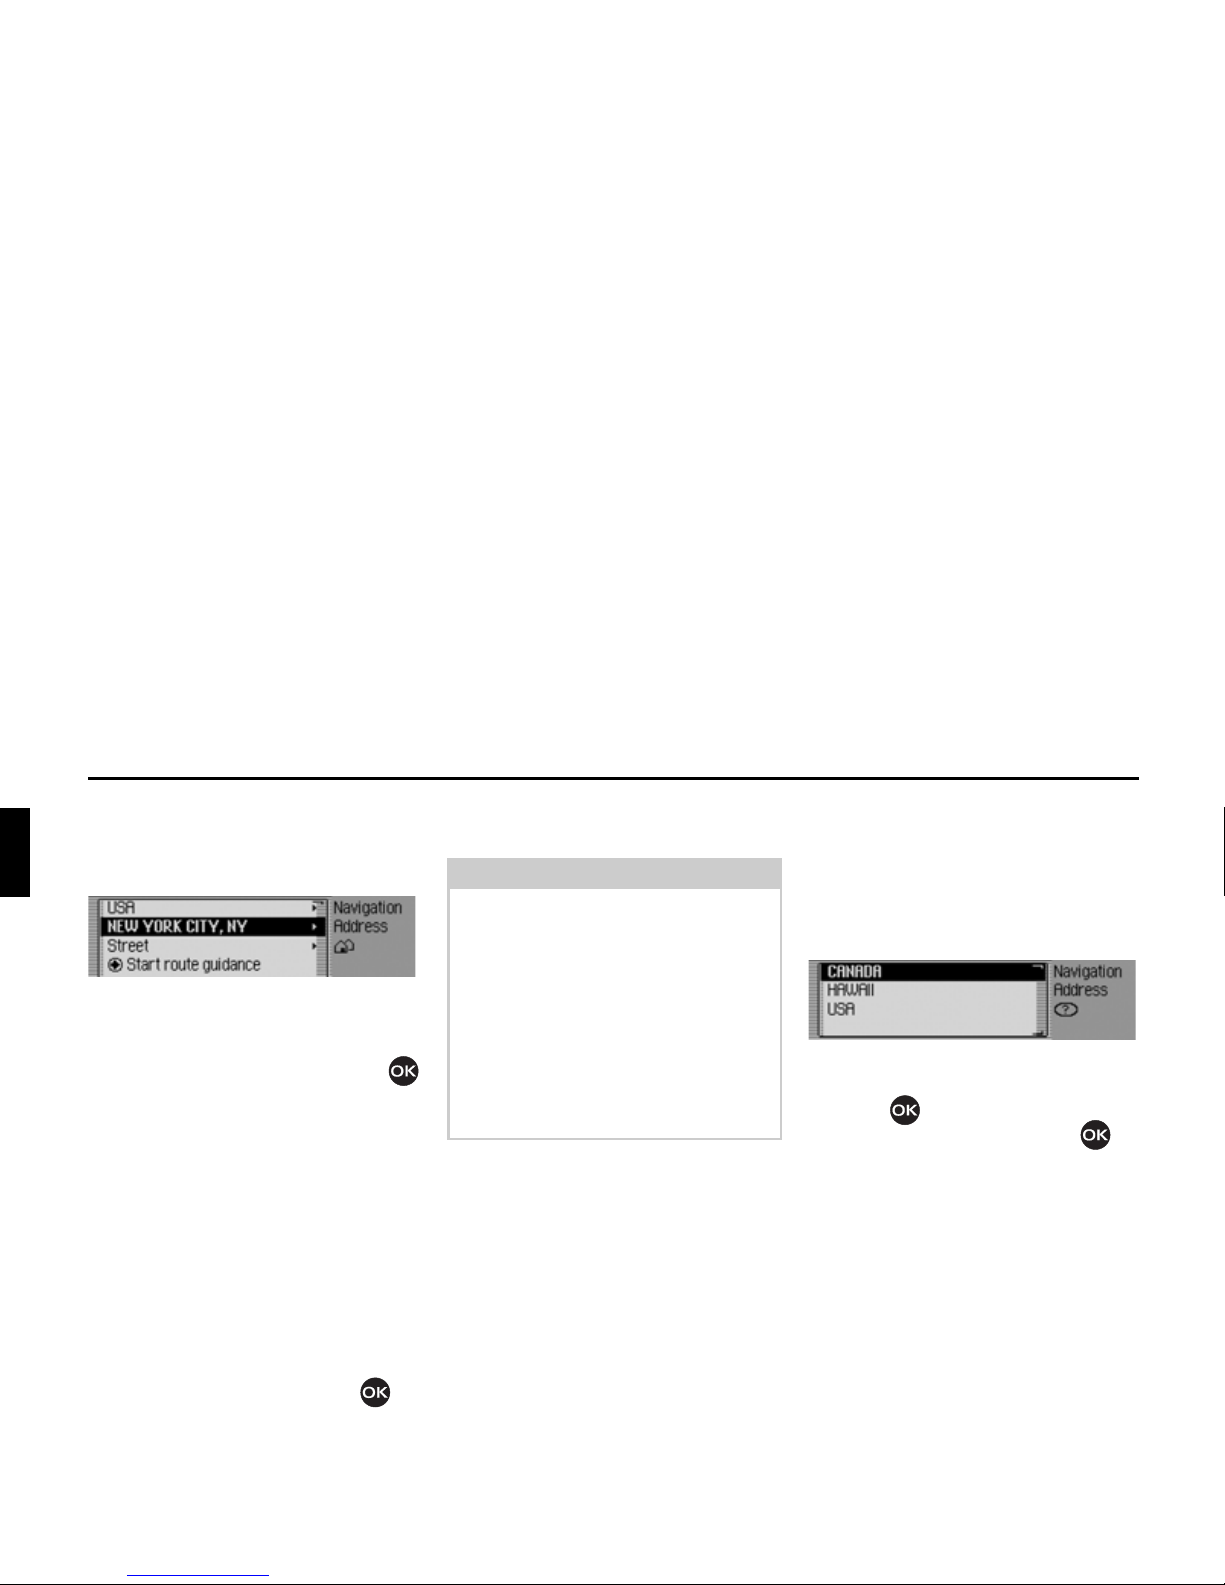
Entering a Destination
X Select the entry (QWHU DGGUHVV in the
navigation main menu.
The address entry menu is displayed.
The country selected last and the place
selected last will be displayed first.
X By turning the turn/push control
you can now select among
86$(Country as example),
1(:<25.&,7<(Place as example),
6WUHHW,
6WDUWURXWHJXLGDQFH,
=LSFRGH (Postal code),
+RXVHQXPEHU,
,QWHUVHFWLRQ,
&HQWHU,
*HRFRRUGLQDWHV,
5RXWHVKRUW or 5RXWHTXLFN, and
6DYHGHVWLQDWLRQ.
X Press the turn/push control to
confirm the selection.
The respective menu is called up and the
desired action is initiated.
Select country
If your destination is in another country
(in the sample display
86$) then you
must first select the desired country.
X Select the country in the address entry
menu (in the example
86$).
X You can now mark your destination
country by turning the turn/push
control .
X Press the turn/push control to
confirm the selection.
2004
Note:
Some entries in the address entry menu
cannot be selected directly. For
instance, no house number can be
entered if no street has been entered
beforehand. These unselectable entries
will be shown as shaded grey on the
display and are not selectable.
The entry is also shaded grey when no
house numbers are available for a certain
street.
2005
29
Using Navigation
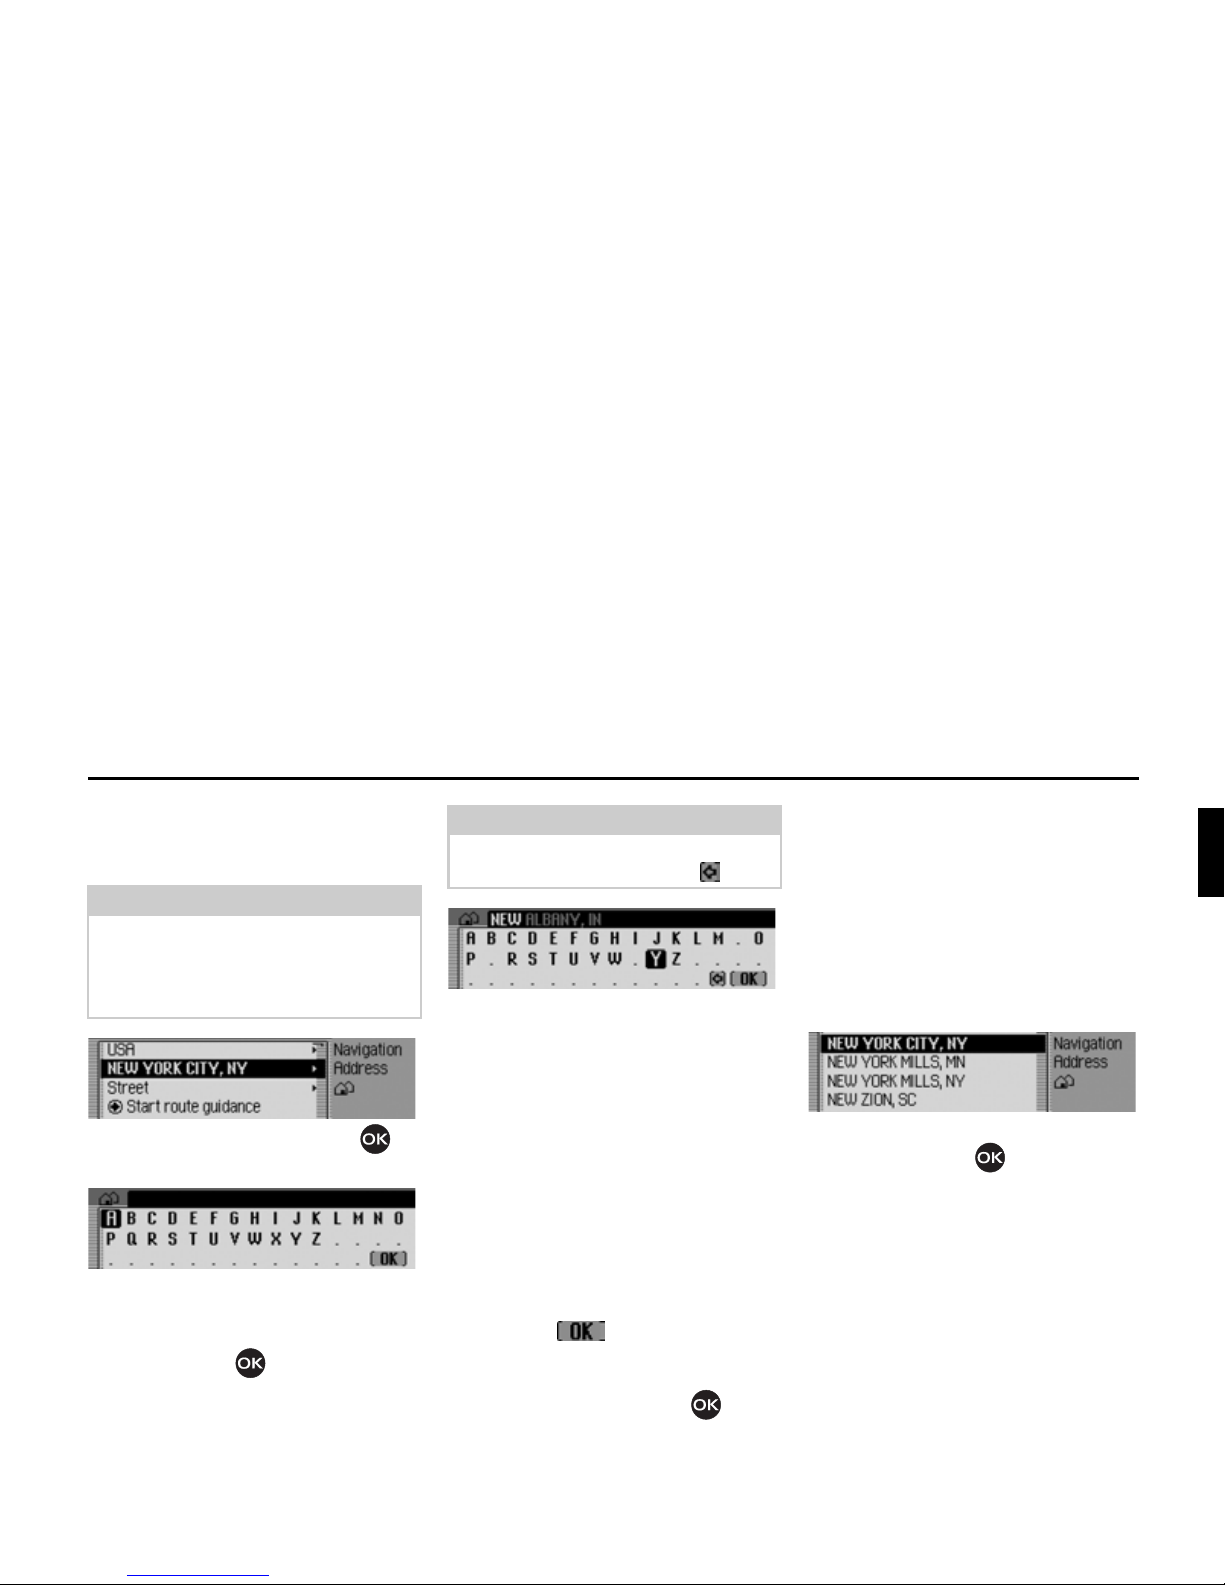
Enter the destination
X Mark the town in the address entry
menu (in the example
1(:<25.&,7<).
X Press the turn/push control to
confirm the selection.
The entry menu for the town (place) is
indicated.
X Select the letters by turning the turn/
push control and subsequent
pressing of the turn/push control.
The entry mark is behind the letters
already entered. To speed up selection,
the display shows the name of the
location most similar to the letters you
have entered so far. Also, the
Infotainment offers only letters for your
selection that make sense in completing
the location name. If all other
possibilities are eliminated, the
Infotainment completes the place name
automatically.
Accept entry:
X Select the symbol in the entry
menu.
or
X Press the turn/push control longer
than 2 seconds.
If the complete place-name was
previously entered or was automatically
completed, the program moves either to
the place-differentiation list or you can
continue directly with the entry of a street
or center.
If an incomplete location entry was
confirmed, the location selection list
appears.
X Select the desired place by turning the
turn/push control and subsequent
pressing of the turn/push control.
In case of a clearly defined entry you can
continue directly with the street or center
entry.
Note:
If your destination is in the same town
as the one indicated then you can
continue directly with the street or
center entry.
2004
2006
Note:
You can delete the last character of the
entry by selecting the symbol .
2007
2008
30
Using Navigation
The location differentiation list is
displayed if the selection is ambiguous.
X Select the desired place by turning the
turn/push control and subsequent
pushing of the turn/push control.
You can now continue with the street or
center entry.
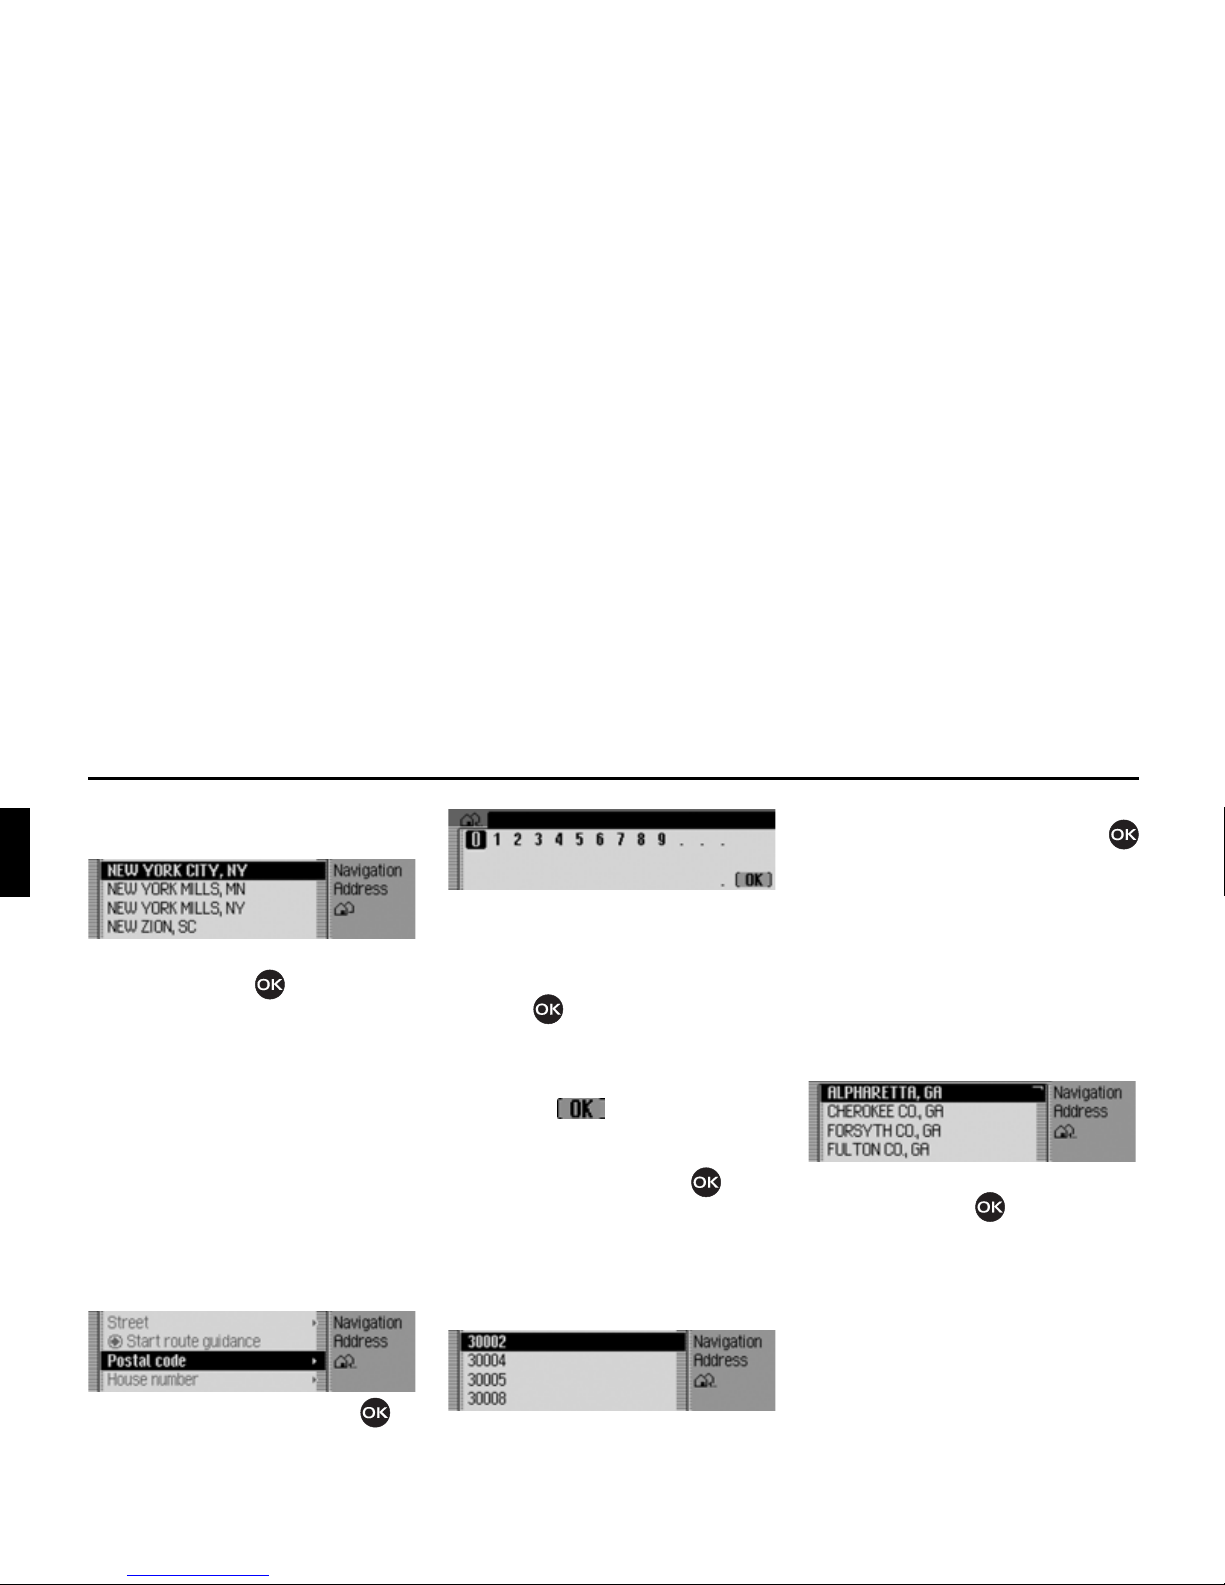
Select destination town or place
using ZIP or postal code
You can also select the destination by
using the ZIP or postal code of the
respective place or town.
X In the address entry menu mark =LS
FRGH
.
X Press the turn/push control to
confirm the selection.
The entry menu for the ZIP code (postal
code) is indicated.
X Select the letters and numerals in
sequence by turning the turn/push
control and subsequent pressing
of the turn/push control.
Accept entry:
X Select the symbol in the entry
menu.
or
X Press the turn/push control longer
than 2 seconds.
Should you not have entered the
complete ZIP or postal code then the ZIP
code selection list will be displayed.
X Select the desired ZIP or postal code
by turning the turn/push control
and subsequent pressing of the turn/
push control.
Now the town or place assigned to that
ZIP or postal code or, if several towns or
places are assigned to one ZIP or postal
code, a list of these towns and places,
will be displayed in the address entry
menu.
X Select the desired place by turning the
turn/push control and subsequent
pressing of the turn/push control.
You can now continue with the street or
center entry.
2008
2009
2010
2011
2012
 Loading...