

Page 1
SMILE VDS
SMILE VDS
Cod.97712 V08/13
BASIC SMILE VDS MONITOR
Buttons
wildcard
menu
lockreleases
audio
Audio and Hang-up Activation Button.
· Upon receiving a call
(the user has 30” seconds to answer before returning to standby. During
this time the blue led audio button will blink to report a pending call to answer),
press this button
to talk to the visitor. The audio channel is opened from street to residence,
(the blue led on
the audio button lights up steadily to indicate that it is in a conversation with the street and anything
said will be heard here)
, this works with handsfree.
· Press to complete the communication,
(upon completion the blue led audio light turns off again).
The monitor´s default internal timer is 90 seconds.
Wildcard button: Auto-Start / Main-Secondary Camera Selection.
· With the monitor on standby , press and hold the wildcard button
for 1 second to switch
the monitor on manually. To activate the audio, press the audio activation button
.
· With video, press and hold this button for 2 seconds to sequentially select between the
main camera and the secondary camera (where one exists).
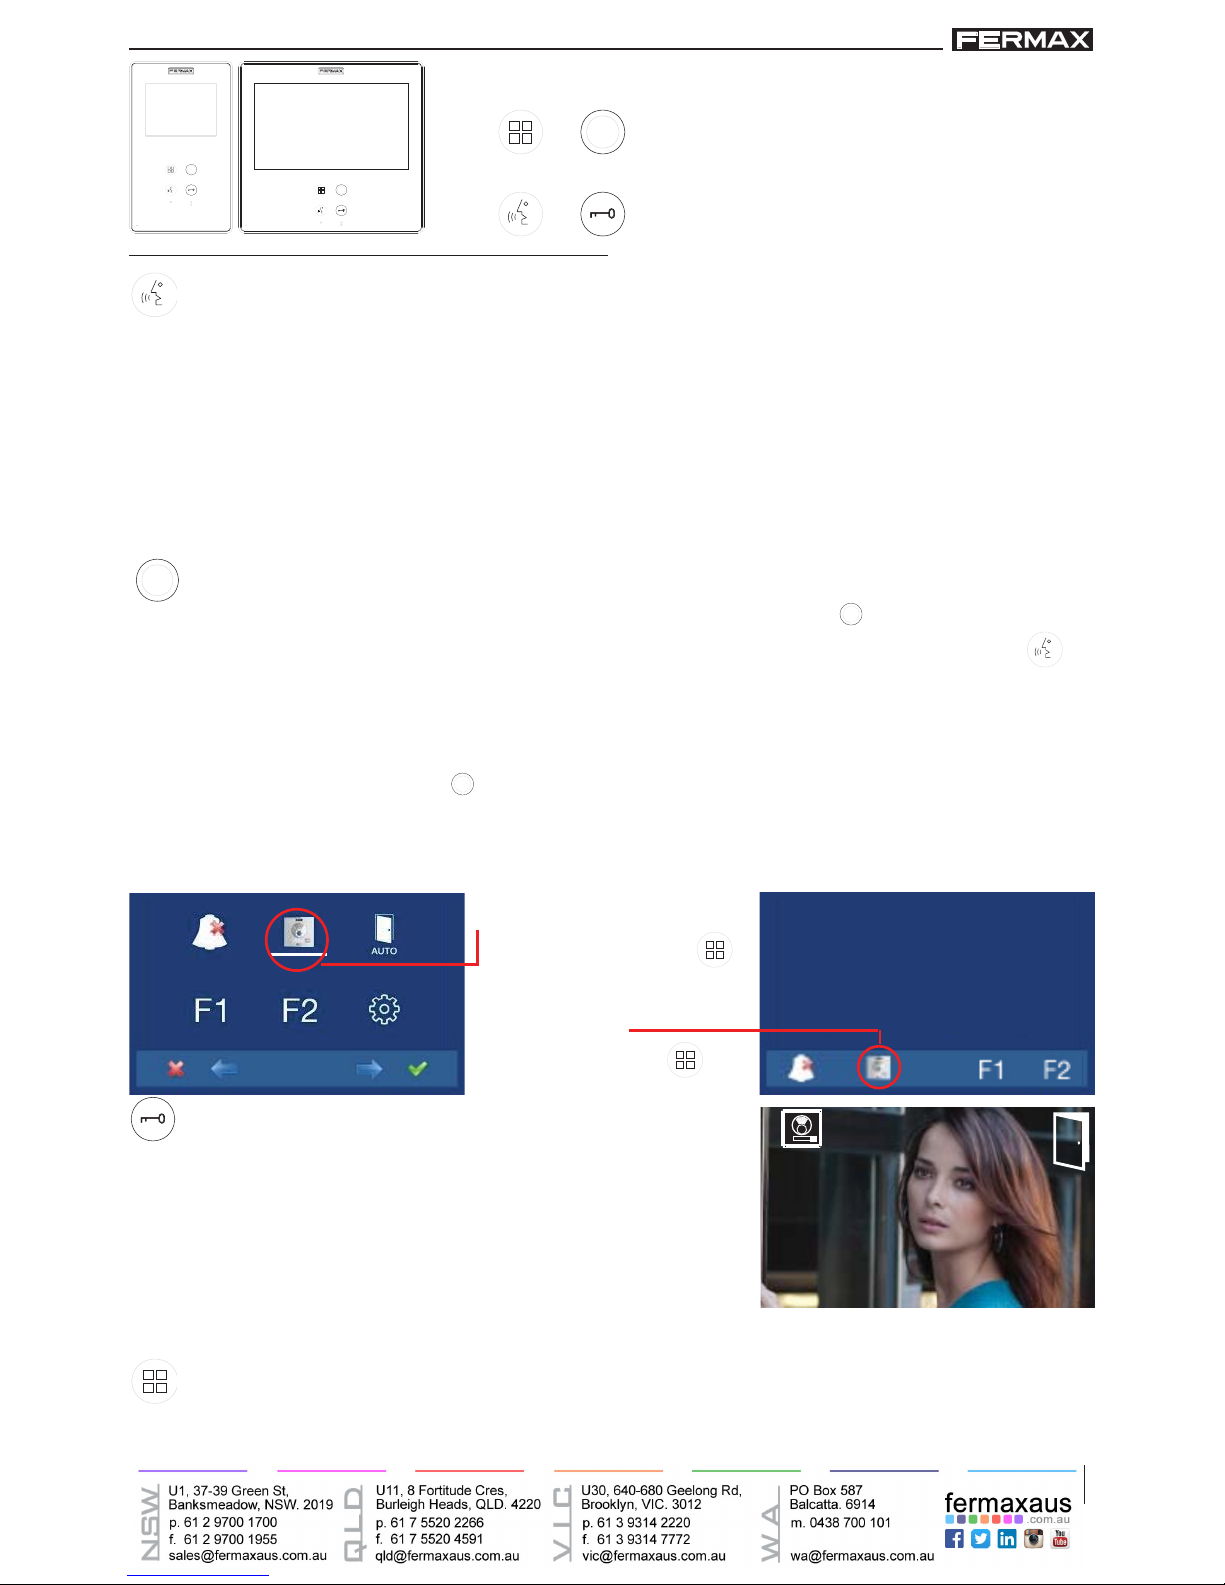
· In this case auto-start can be performed by the:
o Wildcard button
or
o By pressing the direct access button or
o By selecting the icon of the auto-start function on the menu
.
Via the MENU. (Pressing
“Menu” for 3 seconds
).
Shortcut buttons
(Short press “Menu”
).
Lock Releases / Call Guard Unit Button.
· Pressing this button whilst communicating with the Entry
Panel will activate the lock releases. The corresponding
icon will appear on the monitor.
·
Pressing this button whilst the monitor is on standby will
result in a call being made to the guard unit(where one
exists). If the channel is busy an error tone “BEEP” will
be generated and the call is not made.
1
Button Menu: Adjustments and confi guration.
·To access the Administrator menu and the User menu. From each of these you can access
the different customised adjustments.
ENGLISH
Page 2
SMILE VDS
SMILE VDS
Video adjustments: Brightness - Contrast - Colour
The monitor allows you to adjust brightness, contrast and colour while you have received a
call or performed an auto-start. Short-press the “MENU”
button and a menu appears on
the screen to adjust the image´s brightness.
ADJUSTMENTS: Video and Audio
1
Video adjustments
1. Select the video adjustments option with the corresponding
capacitive button. Brightness, contrast and colour settings
appear.
contrastbrightness colour
contrast
brightness
colour
1
2. Select the desired option and increase or decrease the video adjustments according to
the selected option.
- : button to decrease.
+ : button to increase.
⌧: return to the previous screen and confi rm the selection.
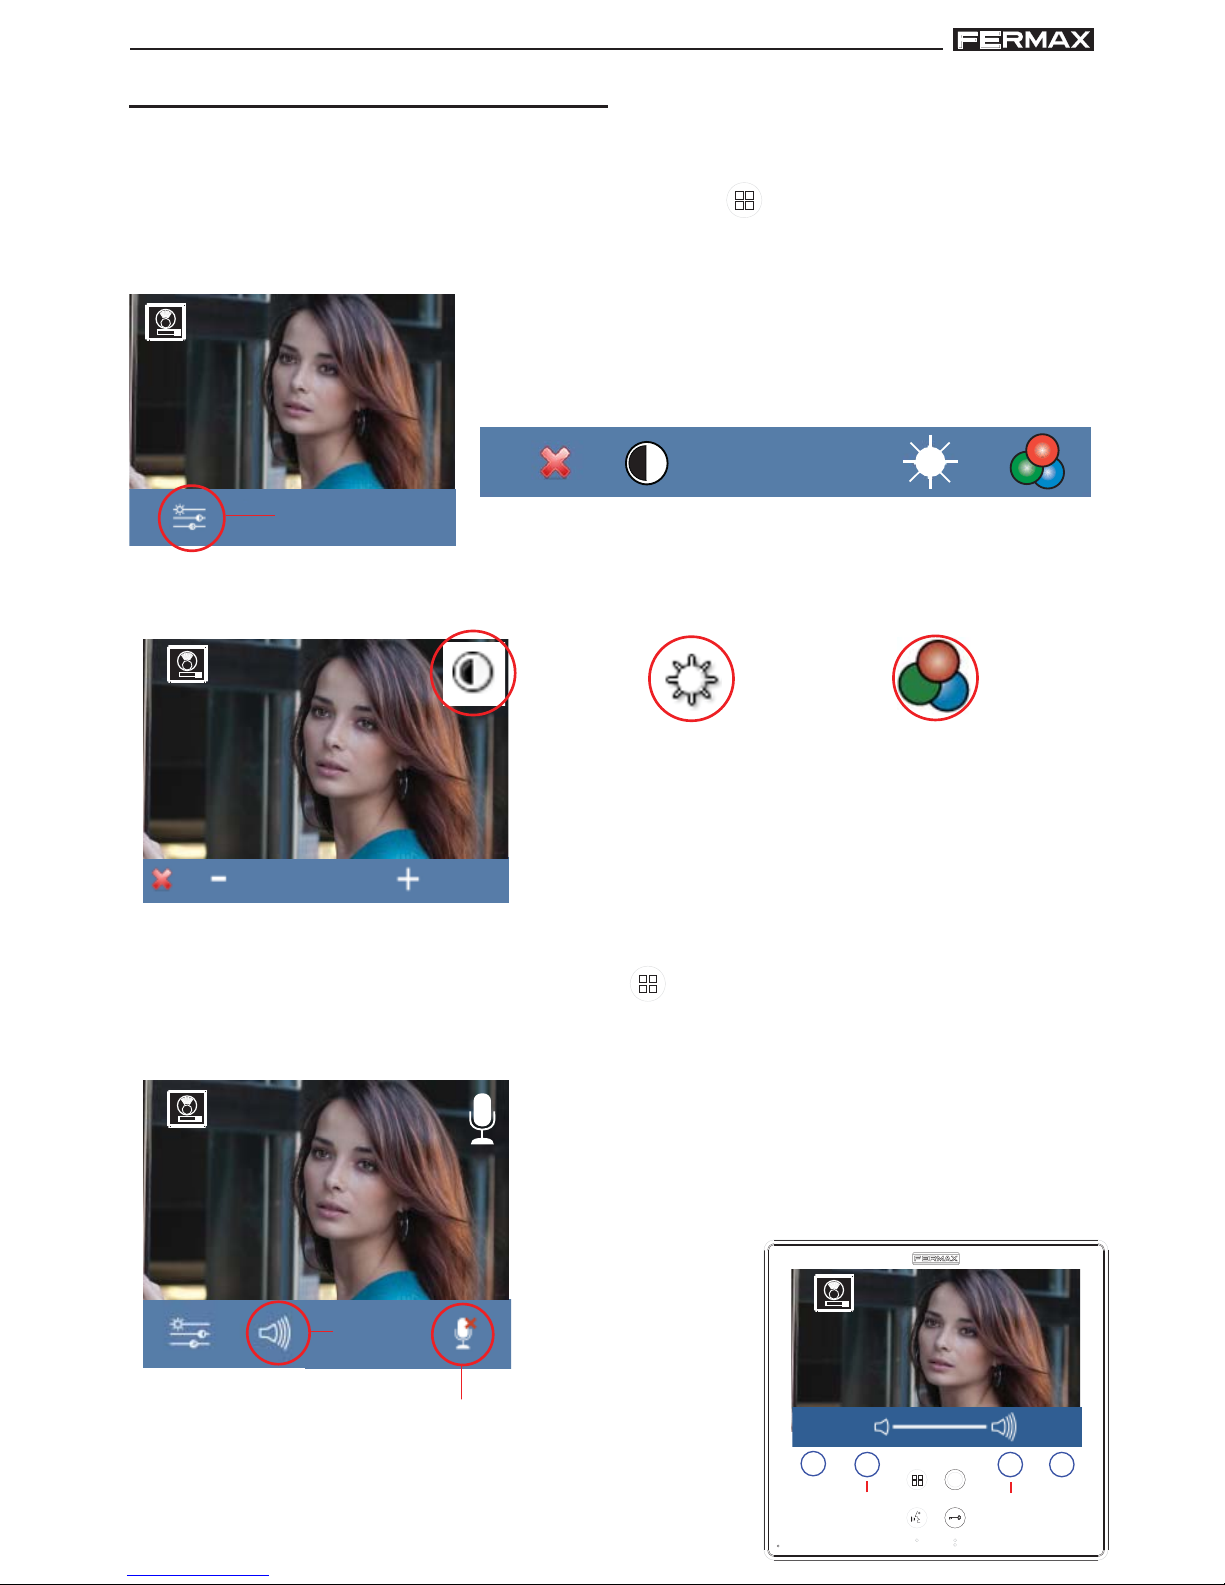
Audio Adjustments
While the audio channel is open the input audio´s volume can be regulated via a contextual
button and a menu appears on the screen menu on the screen. Short-press the “MENU”
to adjust the audio.
adjustments
audio
Select the audio adjustments option with the corresponding capacitive button.
While in audio adjustments, use the capacitive buttons
to obtain the desired settings. You will exit the audio
adjustments option after 60 seconds.
1
Mute function: activate/deactivate the corresponding
capacitive button. This function silences the audio. When
activated, the icon will disappear from the upper right of
the screen.
1
to
decrease
audio
to
increase
audio
 Loading...