

Fermax DUOX SYSTEM Installer Manual
DUOX SYSTEM
PLACA DIGITAL VIDEO
VIDEO DIGITAL PANEL
PLATINE DIGITAL VIDEO
VIDEO DIGITAL TÜRSTATION
MANUAL DE INST ALADOR
INST ALLER’S MANUAL
MANUEL D’INST ALLA TION
INST ALLA TIONSHANDBUCH
ESPAÑOL
ENGLISH
FRANÇAIS
DEUTSCH
987
654
321
A
B
0
1 2 3
4 5 6
7 8 9
0AB0A
B

Pag 2
Cod. 97761 V02_15
«MANUAL PLACA DIGIT AL VIDEO DUOX»
«DUOX VIDEO DIGIT AL PANEL MANUAL»
«MANUEL PLA TINE DIGIT AL VIDEO DUOX»
«HANDBUCH DUOX VIDEO DIGIT AL TÜRST A TION»
E
EN
F
D

Pag 3
¡ENHORABUENA POR DISPONER DE UN PRODUCTO DE CALIDAD!
Fermax Electrónica desarrolla y fabrica equipos de prestigio que cumplen los más
altos estándares de diseño y tecnología.
Esperamos disfrute de sus funcionalidades.
www.fermax.com
E
EN
F
D
CONGRA TULATIONS ON PURCHASING THIS QUALITY PRODUCT!
Fermax Electronics develops and manufactures reputable equipment which fulfils the
highest design and technology standards.
We hope you enjoy its range of functions.
www.fermax.com
FÉLICIT ATIONS ! VOUS VENEZ D’ACQUÉRIR UN VÉRIT ABLE PRODUIT DE QUALITÉ!
Fermax Electrónica développe et fabrique des équipements de prestige qui répondent
aux normes de design et technologie les plus développées.
Nous espérons que vous profiterez pleinement de toutes ses fonctions.
www.fermax.com
WIR GRA TULIEREN IHNEN ZUM KAUF DIESES QUALITÄTSPRODUKTS!
Fermax Electrónica entwickelt und fabriziert hochwertige Anlagen, die den höchsten
Technologie- und Designstandards entsprechen.
Überzeugende Funktionalität für Ihr Eigenheim!
www.fermax.com

Pag 4
Publicación técnica de caracter informativo editada por FERMAX ELECTRONICA S.A.U.
FERMAX ELECTRONICA, en su política de mejora constante, se reserva el derecho a modificar el
contenido de este documento así como las características de los productos que en él se refieren
en cualquier momento y sin previo aviso.
Cualquier modificación será reflejada en posteriores ediciones de este documento.
Technical document published for information purposes by FERMAX ELECTRONICA S.A.U.
FERMAX ELECTRONICA, in a policy of ongoing improvement, reserves the right to modify the
contents of this document and the features of the products referred to herein at any time and with
no prior notice. Any such modifications shall be reflected in subsequent editions of this document.
Publication technique à caractère informatif éditée par FERMAX ELECTRONICA S.A.U.
Conformément à sa politique de perfectionnement continu, FERMAX ELECTRONICA, se réserve le
droit de modifier, à tout moment et sans préavis, le contenu de ce document ainsi que les
caractéristiques des produits auxquels il fait référence. Toutes les modifications seront indiquées
dans les éditions suivantes.
T echnische V eröffentlichung zu Informationszwecken; Herausgeber: FERMAX ELECTRONICA S.A.U.
FERMAX ELECTRONICA, behält sich das Recht vor, den Inhalt dieses Dokument s sowie die technischen
Eigenschaften der erwähnten Produkte ohne vorherige Ankündigung zu ändern, um dadurch den
ständigen Weiterentwicklungen und den damit in V erbindung stehenden V erbesserungen Rechnung
zu tragen. Alle Änderungen finden Aufnahme in den Neuauflagen dieses Dokuments.
E
EN
F
D

Pag 5
INDICE - INDEX - SOMMAIRE - INHALT
DUOX TÜRST A TIONEN ................................................................................................ 6
Digital DUOX Türstationen ............................................................................. 6
Installation des Netzgeräts ............................................................................ 7
Installation der Türstation .............................................................................. 7
Konfiguration und Einstellungen der Türstation .......................................... 9
Technische Eigenschaften ............................................................................. 17
Verkabelungsschemas ................................................................................... 19
D
PLA TINES DUOX ....................................................................................................... 6
Platines DUOX Digital ..................................................................................... 6
Installation de l’alimentation .......................................................................... 7
Installation de la platine de rue ..................................................................... 7
Réglages de la platine .................................................................................... 9
Caractéristiques techniques .......................................................................... 17
Schémas de cablage ...................................................................................... 19
F
DUOX P ANELS ............................................................................................................. 6
DUOX VDS panels........................................................................................... 6
Power Supply installation ............................................................................... 7
Outdoor Panel installation .............................................................................. 7
Panel adjustment ............................................................................................ 9
Technical features ........................................................................................... 17
Wiring Diagrams.............................................................................................. 19
EN
PLACAS DUOX ............................................................................................................ 6
Placas DUOX Digital ....................................................................................... 6
Instalación del Alimentador ............................................................................ 7
Instalación de la placa de calle ..................................................................... 7
Ajustes de la placa .......................................................................................... 9
Características Técnicas ................................................................................ 17
Esquemas de cableado.................................................................................. 19
E

Pag 6
Video
E
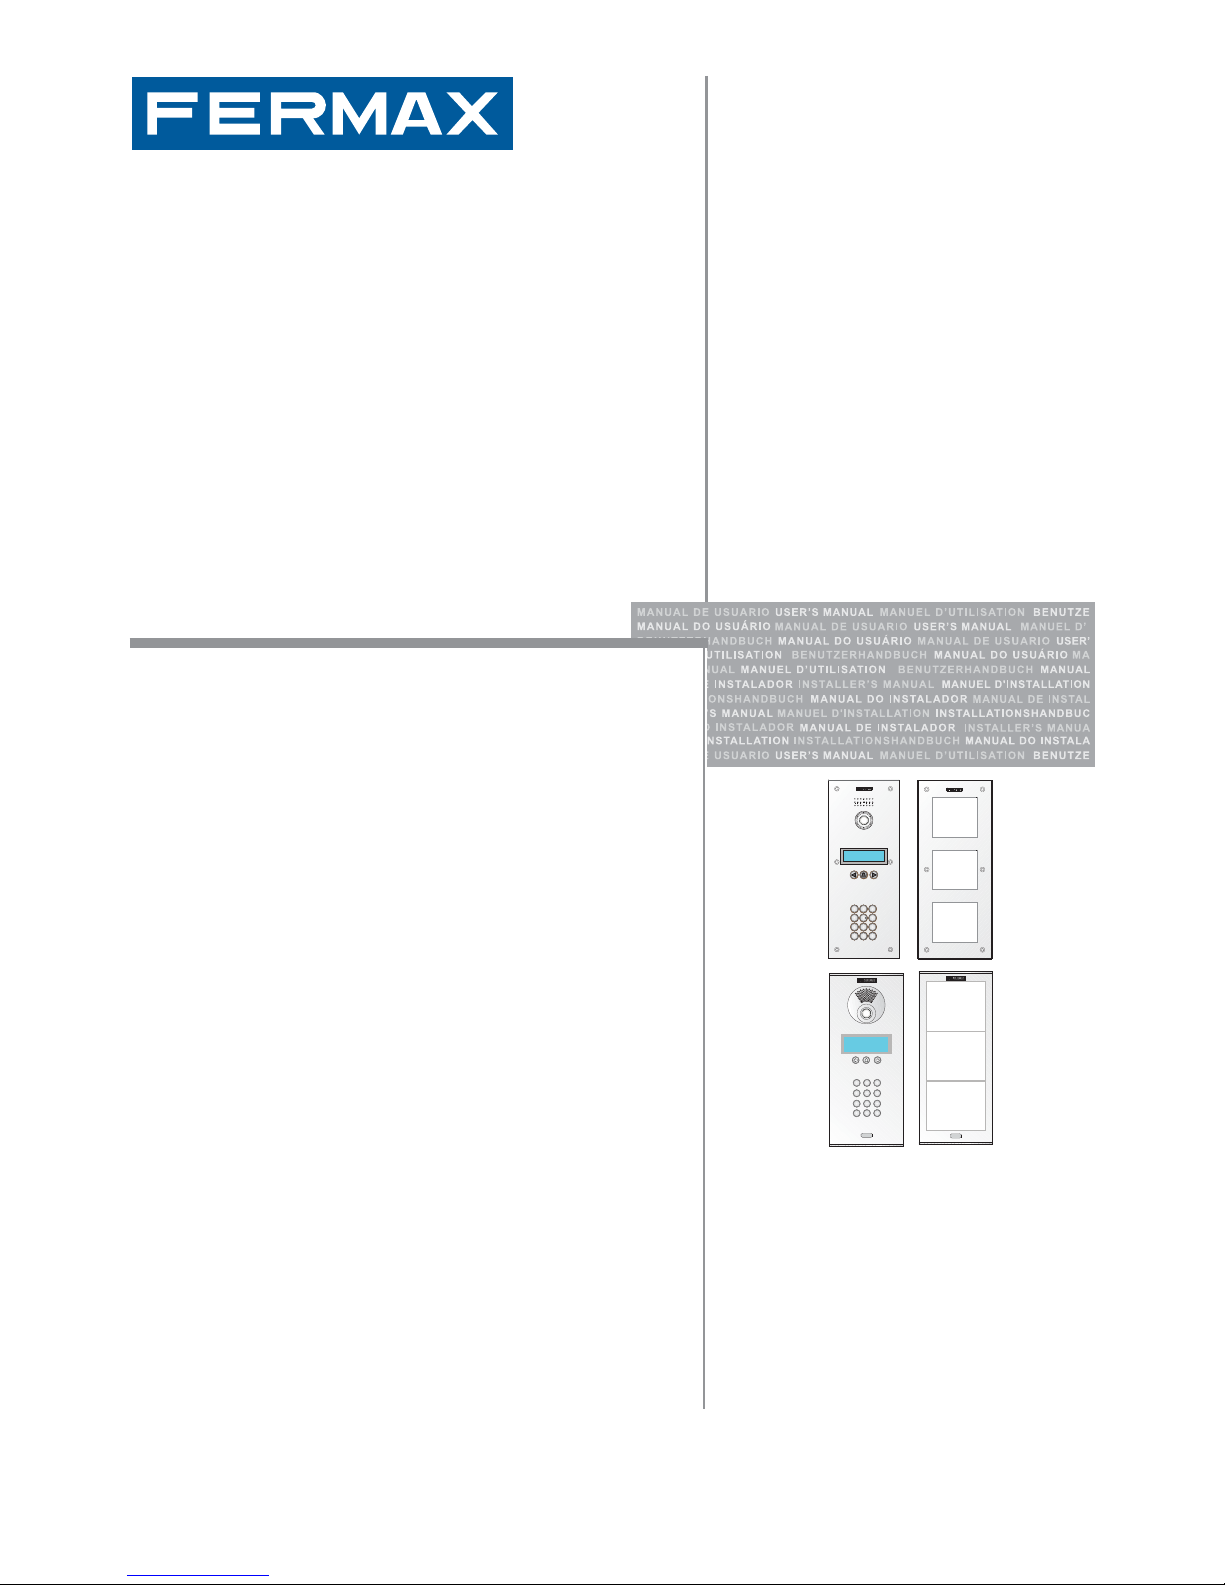
PLACAS DUOX DIGIT AL
EN
DUOX DIGIT AL PANELS
F
PLA TINES DUOX DIGIT AL
D
DUOX DIGITAL TÜRSTATIONEN
DIGITAL
Placa directorio
Directory panel
Platine répertorie
Namensverzaichnis
2
1
5
1. Amplificador / Amplifier / Amplificateur / Lautsprecher .
2. Amplificador-Telecámara / Amplifier-Camera / Amplificateur-Caméra / Lautsprecher-Kamera.
3. Telecámara / Camera / Caméra / Kamera.
4. Display digital / Digital display / Affichage numérique / Bildschirmanzeige
5. Teclado / Keypad / Clavier / Tastatur
PLACA DIRECTORIO / DIRECT ORY P ANEL / PLA TINE
RÉPERTORIE / NAMENSVERZAICHNIS
Video
Placa directorio
Directory panel
Platine répertorie
Namensverzaichnis
987
654
321
A
B
0
1 2 3
4 5 6
7 8 9
0AB0A
B
3
4
Pag 7
E
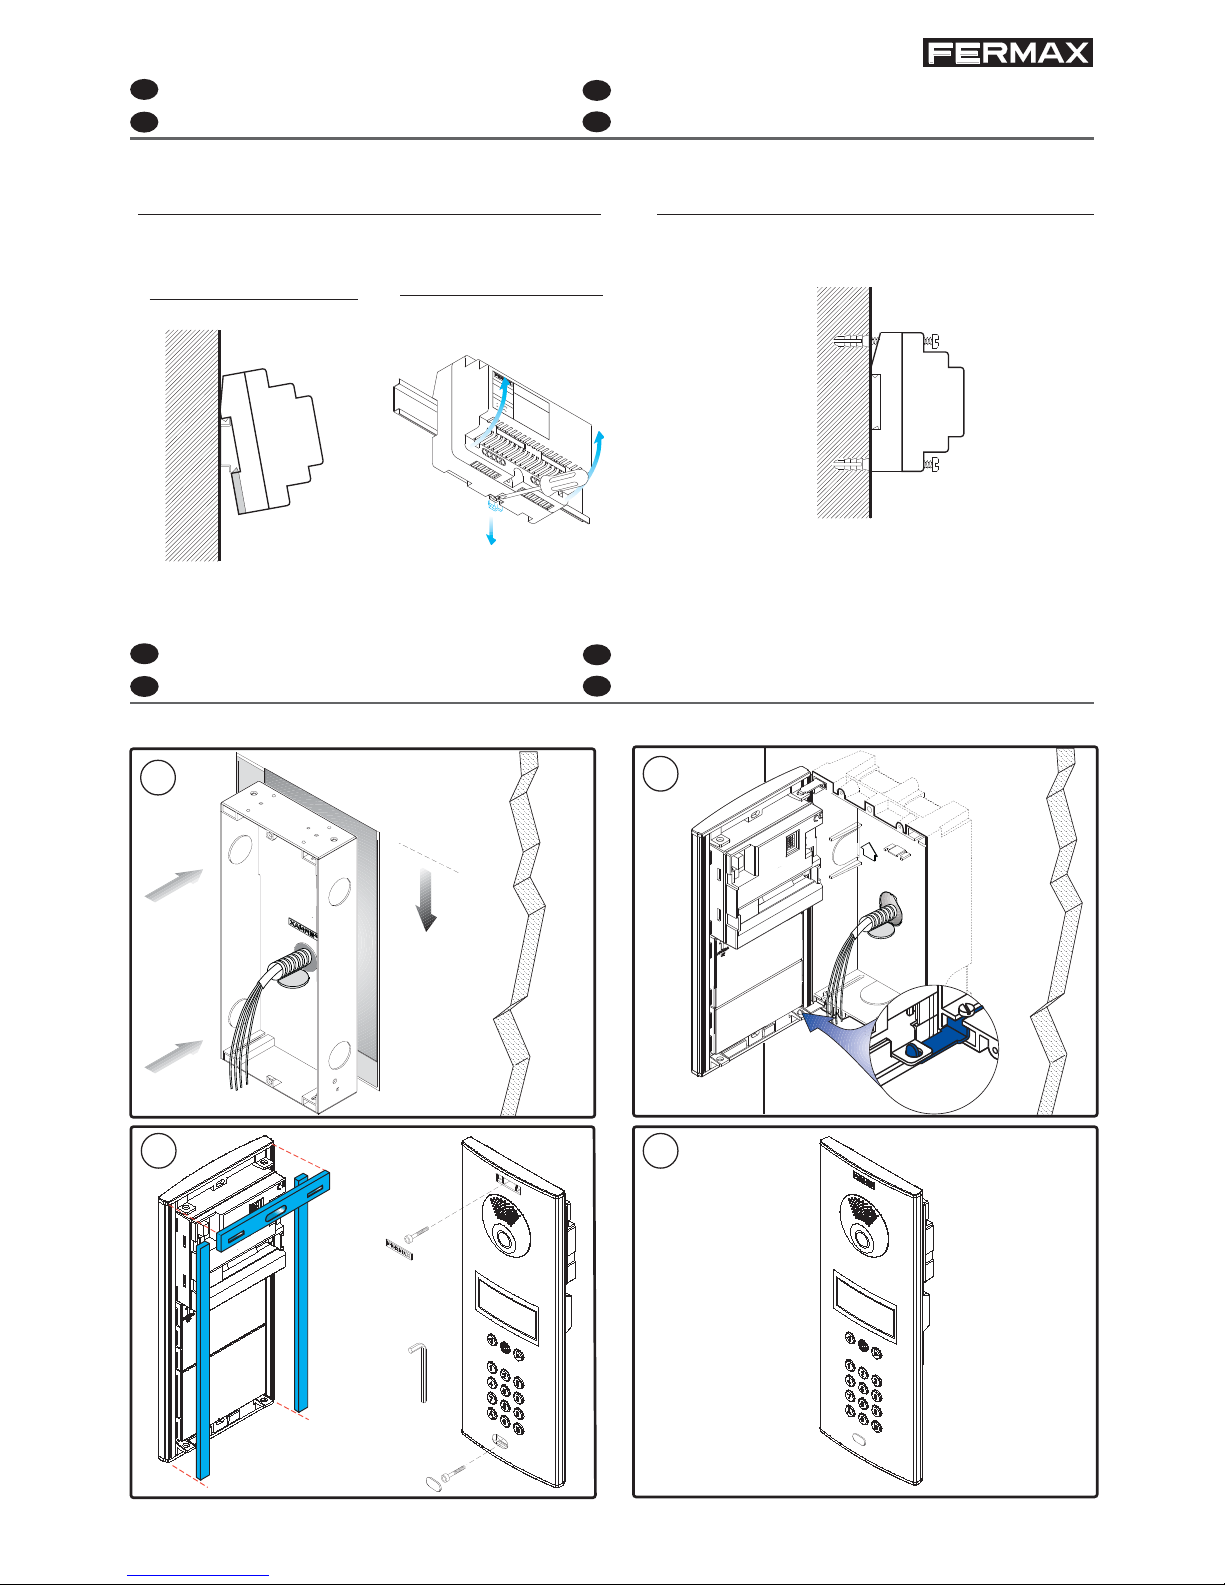
INSTALACIÓN PLACA DE CALLE
EN
OUTDOOR PANEL INST ALLATION
F
INSTALLATION DE LA PLATINE DE RUE
D
INSTALLATION DER TÜRSTATION
1.70m
1.57feet
1
2
3 4
Desmontaje - Disassembly
Démontage - Ausbau
Instalación en carril DIN - DIN rail Installation
Installation sur rail DIN - DIN-Schiene Installation
Montaje - Assembly
Montage - Einbau
Fijación con tornillos - Fixing with screws
Fixation au moyen de vis - Befestigung mit Schrauben
E
INSTALACIÓN DEL ALIMENTADOR
EN
POWER SUPPL Y INSTALLA TION
F
INSTALLATION DE L’ALIMENTATION
D
INSTALLATION DES NETZGERÄTS
+
1
8
V
1
.
5
A
5
0
6
0
H
z
.
5
0
V
A
M
A
X
.
1
2
V
1
A
F
U
E
N
T
E
A
L
IM
E
N
T
A
C
IO
N
K
IT
D
IG
IT
A
L
MADE IN SPAIN
CITYLINE
Pag 8
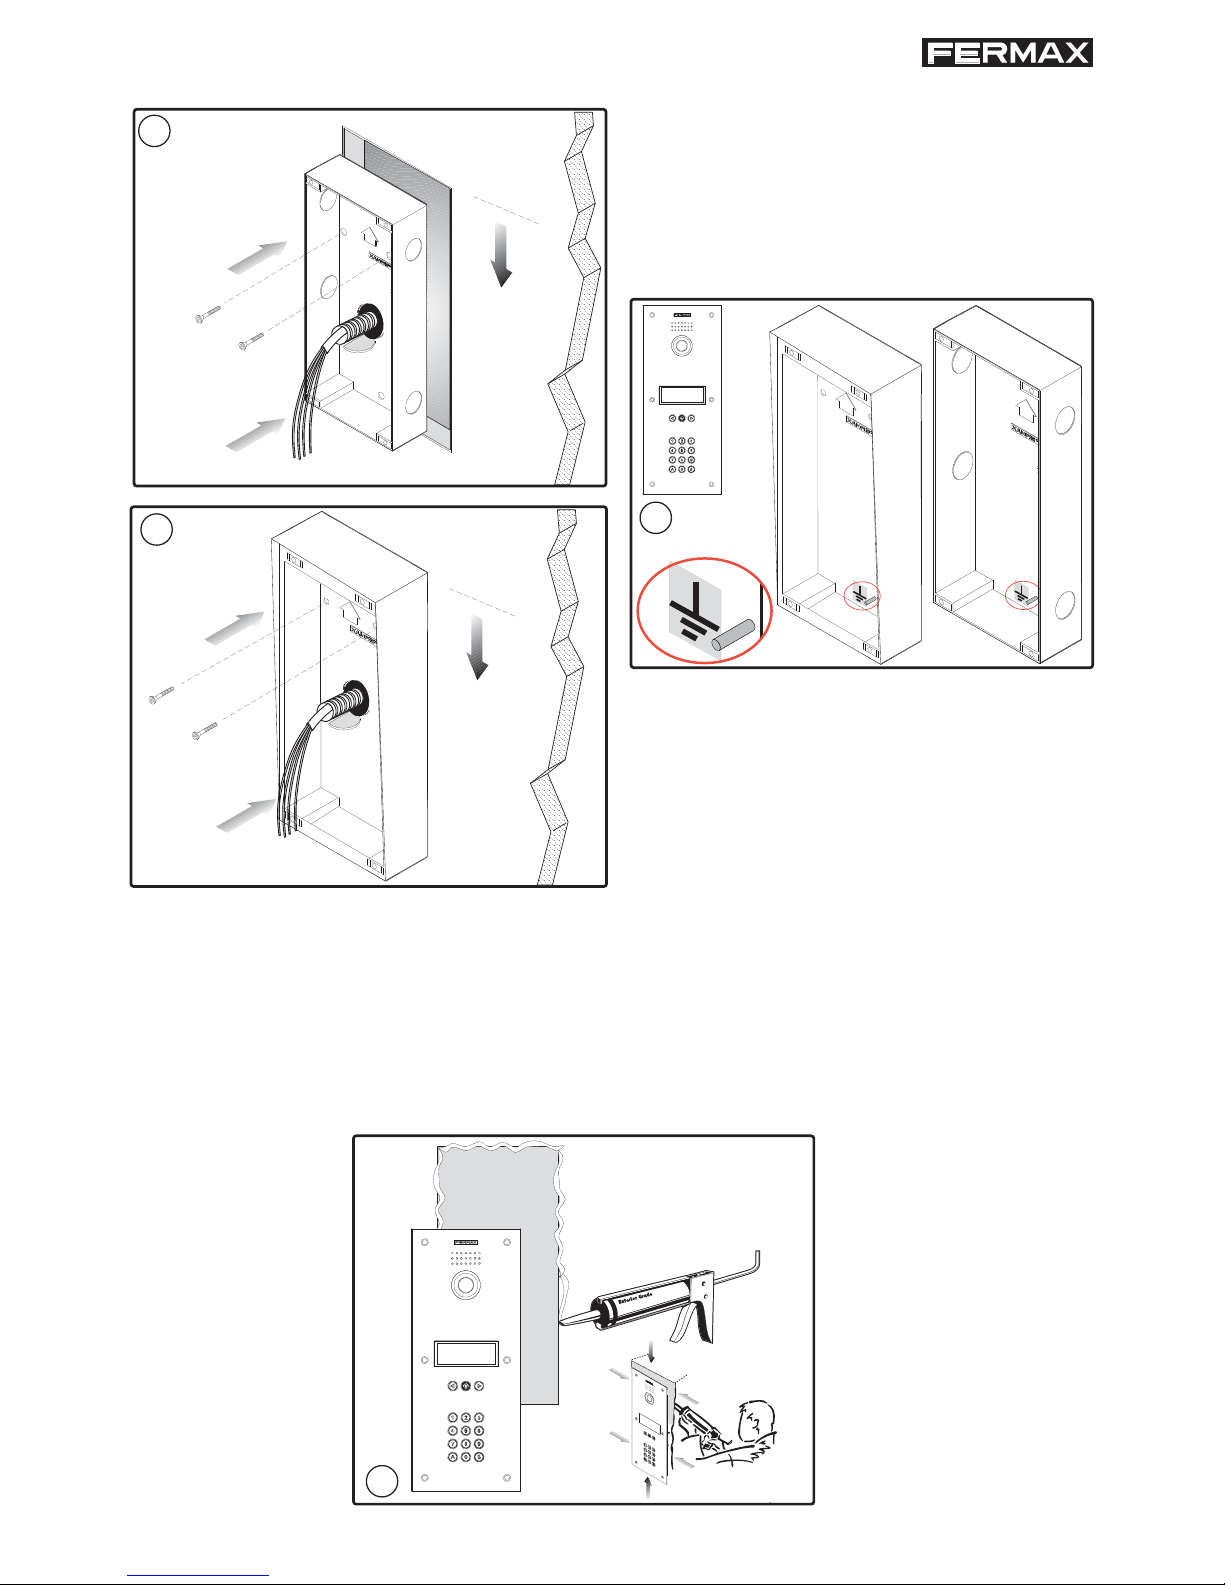
1.70m
5.57 feet
1.70m
5.57 feet
1b
- Instalación con CAJA de EMPOTRAR
- Installation with FLUSH-MOUNTED BOX
- Installation avec BOÎTIER ENCASTRABLE
- Installation mit UNTERPUTZKASTEN
- Instalación con CAJA de SUPERFICIE
- Installation with SURFACE-MOUNTED BOX
- Installation avec BOÎTIER EN SAILLIE
- Installation mit AUFPUTZKASTEN
Conectar a tierra / To connect to ground / Fair la
connexion a terre Zur / Erdungsklemme verbinden
1c
1a
MARINE
2
Aconsejamos sellar la placa con un cordón de silicona para asegurar una mejor estanqueidad de
ésta.
We advise you to seal the panel with silicon to ensure watertightness.
Nous vous conseillons de fixer la platine à l’aide d’un joint de silicone afin d’en garantir la parfaite
étanchéité.
Wir empfehlen, die Türstation mit einem Silikonrand zu versehen, um eine höhere
Wasserundurchlässigkeit zu gewährleisten.

Pag 9
4a
4b
- Cierre de placa con CAJA de EMPOTRAR
- Cover for panel with FLUSH-MOUNTED BOX
- Couvercle de platine avec BOÎTIER
ENCASTRABLE
- Abdichtung der Türstation mit
UNTERPUTZKASTEN
- Cierre de placa con CAJA de SUPERFICIE
- Cover for panel with SURFACE-MOUNTED BOX
- Couvercle de platine avec BOÎTIER EN
SAILLIE
- Abdichtung der Türstation mit AUFPUTZKASTEN
E
AJUSTES DE LA PLACA
EN
P ANEL ADJUSTMENT
F
RÉGLAGES DE LA PLA TINE
D
EINSTELLUNGEN DER TÜRST ATION
ON
B
D
A
C
E
F
PL
Nº
SB
BK
EG
Nº
TYPE
BK
DL2
CN9 TAMPER
CN1
PACK
EXTENSION
SW1 PROG
JP2
JP1
LEDS ON
TERM OFF
TERM ON
LEDS OFF
DUOX VIDEO
AMPLIFICADOR
AMPLIFIER
ALIMENTACION
POWER SUPPLY
18 Vdc
-+
JP1
JP2
-
BS
S
+12
C
NCNO
B
B
EXIT
MIC
AUDIO
LANGUAGE
IDIOMA
18Vdc
ONE
+
C
NC
NO
BUS
CN3CN2
TO
ONE
VERSION
:
GND
SW1
CN9
CN1
H)
E)
I )
J)
A)B)
D)
M)
F)
G)
K)
C)
L)
Pag 10
A)
E
EN
F
D
CN1
C)
E
Led de Modo:
• Intermitente lento (1 parpadeo / 1 seg): Programación Inversa o Secuencial. Ver
Manual Avanzado de Programación DUOX VIDEO cod. 97766.
• Apagado: reposo.
CN9
Conexión Tamper (mediante conector stocko macho paso 2mm).
Tamper Connection (via 2mm male Stocko connector).
Connexion Tamper (à l’aide du connecteur stocko mâle pas 2 mm).
Anschluss Tamper (mittels männlichem 2 mm Stocko-Stecker).
E
EN
F
D
EN
Mode Led:
• Slow flash (1 blink / 1 sec): Inverse or Sequential Programming. See VIDEO DUOX
Advanced Programming Manual cod. 97766.
• Off: Standby .
DL2
B)
Conexión pulsadores modulares, teclado, display.
Connection modular buttons, keypad, display.
Connexion boutons-poussoirs modulaires, clavier, affichage.
Anschluss Tastenmodule, Tastatur, Display.
F
DEL de mode :
• Clignotement lent (1 clignotement / 1 s) : programmation inverse ou séquentielle.
Voir Manuel avancé de programmation DUOX VIDEO code 97766.
• Éteint : en veille.
D
LED-Modusanzeige:
• Langsames Blinken (1-maliges Blinken/1 Sek.): Inverse oder sequenzielle
Programmierung siehe Anleitung für Fortgeschrittene VIDEO DUOX-Programmierung,
Kode 97766.
• Aus: Bereitschaftsmodus.

Pag 11
E
Placa MÁSTER:
•
La programación de terminales de vivienda se realiza siempre desde la placa
activada como MÁSTER.
• En cualquier instalación sólo puede haber una placa MÁSTER a la vez, ya sea una
instalación de un sólo bloque o de varios, ya esté configurada como placa de subbloque, de bloque o entrada general.
• Una placa de calle se configura como MÁSTER mediante el pulsador SW1 del
amplificador. Si se pulsa el botón SW1 3 veces consecutivas rápidas se activará la
placa como MÁSTER y se oirá un tono de confirmación (bip-bip), transcurridos 2
segundos.
• Cuando se selecciona una placa como MÁSTER, ésta avisa al resto de la situación
y si hubiera anteriormente una así configurada, dejará de serlo automáticamente.
• En caso de haber varios bloques en una instalación será recomendable utilizar la
placa de la entrada general como MÁSTER ya que permite programar todos los
teléfonos de ésta.
• Es recomendable una vez terminada la configuración de los terminales desactivar
la placa MÁSTER para evitar reprogramaciones de terminales accidentales.
• La placa se desactiva del modo máster siguiendo el mismo procedimiento de
activación: 3 pulsaciones seguidas rápidas del botón SW1. Se oirá un tono de
desactivación (bop), transcurridos 2 segundos.
D)
EN
MASTER Panel:
• Apartment terminals programming is always done from the panel activated as
MASTER.
• Any installation can only have one MASTER panel at a time, whether a single or
multiple block installation, once configured as a sub-block, block or general entrance.
• A street panel is configured as a MASTER via the SW1 amplifier button. If the SW1
button is pressed 3 times quickly, it is activated as a MASTER panel and a
confirmation tone sounds (beep-beep), after 2 seconds.
• When a panel is selected as MASTER, it notifies the rest of the situation and if
another was previously configured, it would automatically stop being so.
• If there are various blocks in an installation, we recommend using the general
entrance panel as MASTER since it allows you to program all of its telephones.
• Once having completed the terminal´s configuration, we recommend deactivating
the MASTER panel to avoid accidentally reprogramming terminals.
• The panel deactivates itself from master mode following the same activation
procedure: 3 quick presses of the SW1 button. A deactivation tone sounds (bop),
after 2 seconds.
F
Platine MASTER:
• La programmation des terminaux du logement se fait toujours à partir de la
platine activée en tant que MASTER.
• Quelle que soit l’installation (un seul bâtiment ou plusieurs), il ne peut y avoir
qu’une seule platine MASTER à la fois, qu’elle soit configurée comme platine
de sous-bâtiment, de bâtiment ou d’entrée générale.
 Loading...