

Feltest DigiMicro User Manual
User Manual

www.feltest.com
1
Contents
Welcome .............................................................................................................................. 3
1. Precaution ................................................................................................................... 3
2. Preparation ...................................................................................................................... 4
3. Key Features ..................................................................................................................... 5
4. Use the Microscope ......................................................................................................... 6
4.1 Installing the battery .................................................................................................. 6
4.2 Insert a MicroSD Card ................................................................................................ 6
4.3 Icons on the display & their meaning ........................................................................ 7
4.4 Turn on the Microscope ............................................................................................. 7
4.5 Turn off the Microscope ............................................................................................ 8
4.6 How to Capture .......................................................................................................... 8
4.7. Record Video ............................................................................................................. 9
4.8. Play Back ................................................................................................................... 9
4.9 Download data to a computer ................................................................................. 10
4.10 Preview on a computer .......................................................................................... 11
4.11 Charge the battery ................................................................................................. 11
4.12 Connect to a TV ...................................................................................................... 11
4.13 Mount Tripod ......................................................................................................... 12
5. Menu Introductions ....................................................................................................... 12
5.1 Main Menu - Image .................................................................................................. 12
5.2 Main Menu - Settings ............................................................................................... 14
6. Specifications ................................................................................................................. 16
7. Computer System Minimum Requirement .................................................................... 16
8. Troubleshooting ............................................................................................................. 17
PortableCapture Software Introduction ........................................................................... 18
1. Install Software .............................................................................................................. 18
2. Start Microscope ............................................................................................................ 18

http://www.feltest.com/
2
3. Software Introduction .................................................................................................... 19
3.1 Preview Size ............................................................................................................. 19
3.2 Rotate Image ............................................................................................................ 19
3.3 Date/Time ................................................................................................................ 19
3.4 Language .................................................................................................................. 20
3.5 Full screen ................................................................................................................ 20
3.6 Capture..................................................................................................................... 20
3.7 Edit Photos ............................................................................................................... 21
3.8 Edit videos ................................................................................................................ 22
Quit MicroCapture ......................................................................................................... 22
4. Measurement in a picture.............................................................................................. 23

www.feltest.com
3
Welcome
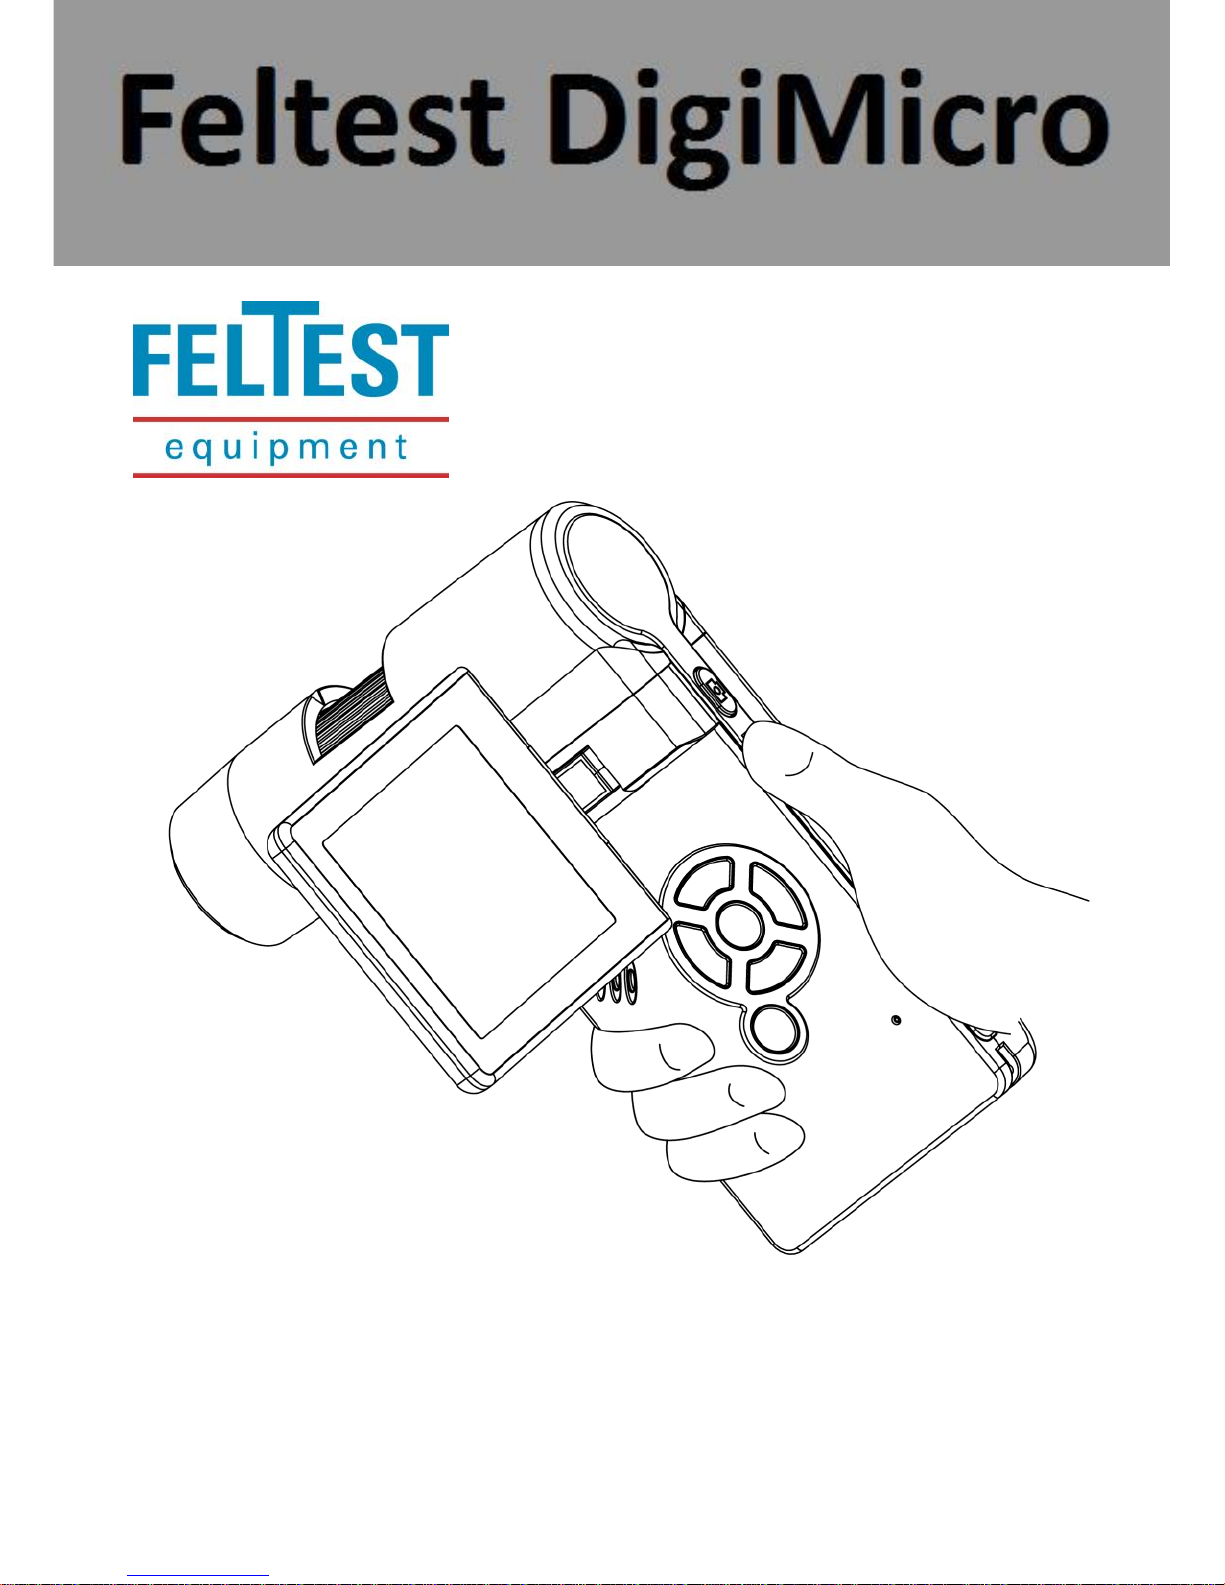
Thank you for purchasing the Feltest DigiMicro Portable Digital Microscope.
Please take a moment to read through this manual. Its contents will help you to get the
best use of the smart microscope.
1. Precaution
Before using this Portable Digital Microscope, please ensure that you read and
understand the safety precautions described below. Always ensure that the Feltest
DigiMicro is operated correctly.
Never operate the Feltest DigiMicro where operation of such devices is restricted.
Improper use creates the risk of serious accidents.
Do not try to open the case of the Feltest DigiMicro or attempt to modify it in any way.
Maintenance and repairs should be performed only by authorized service providers.
Keep the Feltest DigiMicro away from water and other liquids. Do not use the DigiMicro
with wet hands. Never use the DigiMicro in the rain or snow. Moisture creates the
danger of fire and electric shock.
Keep the Feltest DigiMicro and its accessories out of the reach of children and animals to
prevent accidents or damage to the DigiMicro.
If you notice smoke or a strange odor coming from the Feltest DigiMicro, turn the power
off immediately. Take it to the nearest authorized service center for repair. Never
attempt to repair the Feltest DigiMicro on your own.
The Feltest DigiMicro may become slightly warm during use. This does not indicate
malfunction.
If the exterior of the Feltest DigiMicro needs cleaning, wipe it with a soft, dry cloth.
FCC Notice
This equipment has been tested and found to comply with the limits for a Class B digital
device, pursuant to Part 15 of the FCC Rules. These limits are designed to provide
reasonable protection against harmful interference in a residential installation.
CAUTION
To comply with the limits for a Class B digital device, pursuant to Part 15 of the FCC Rules,
this device, when needed, must only be connected to computer equipment certified to
comply with the Class B limits.
http://www.feltest.com/
4
2. Preparation
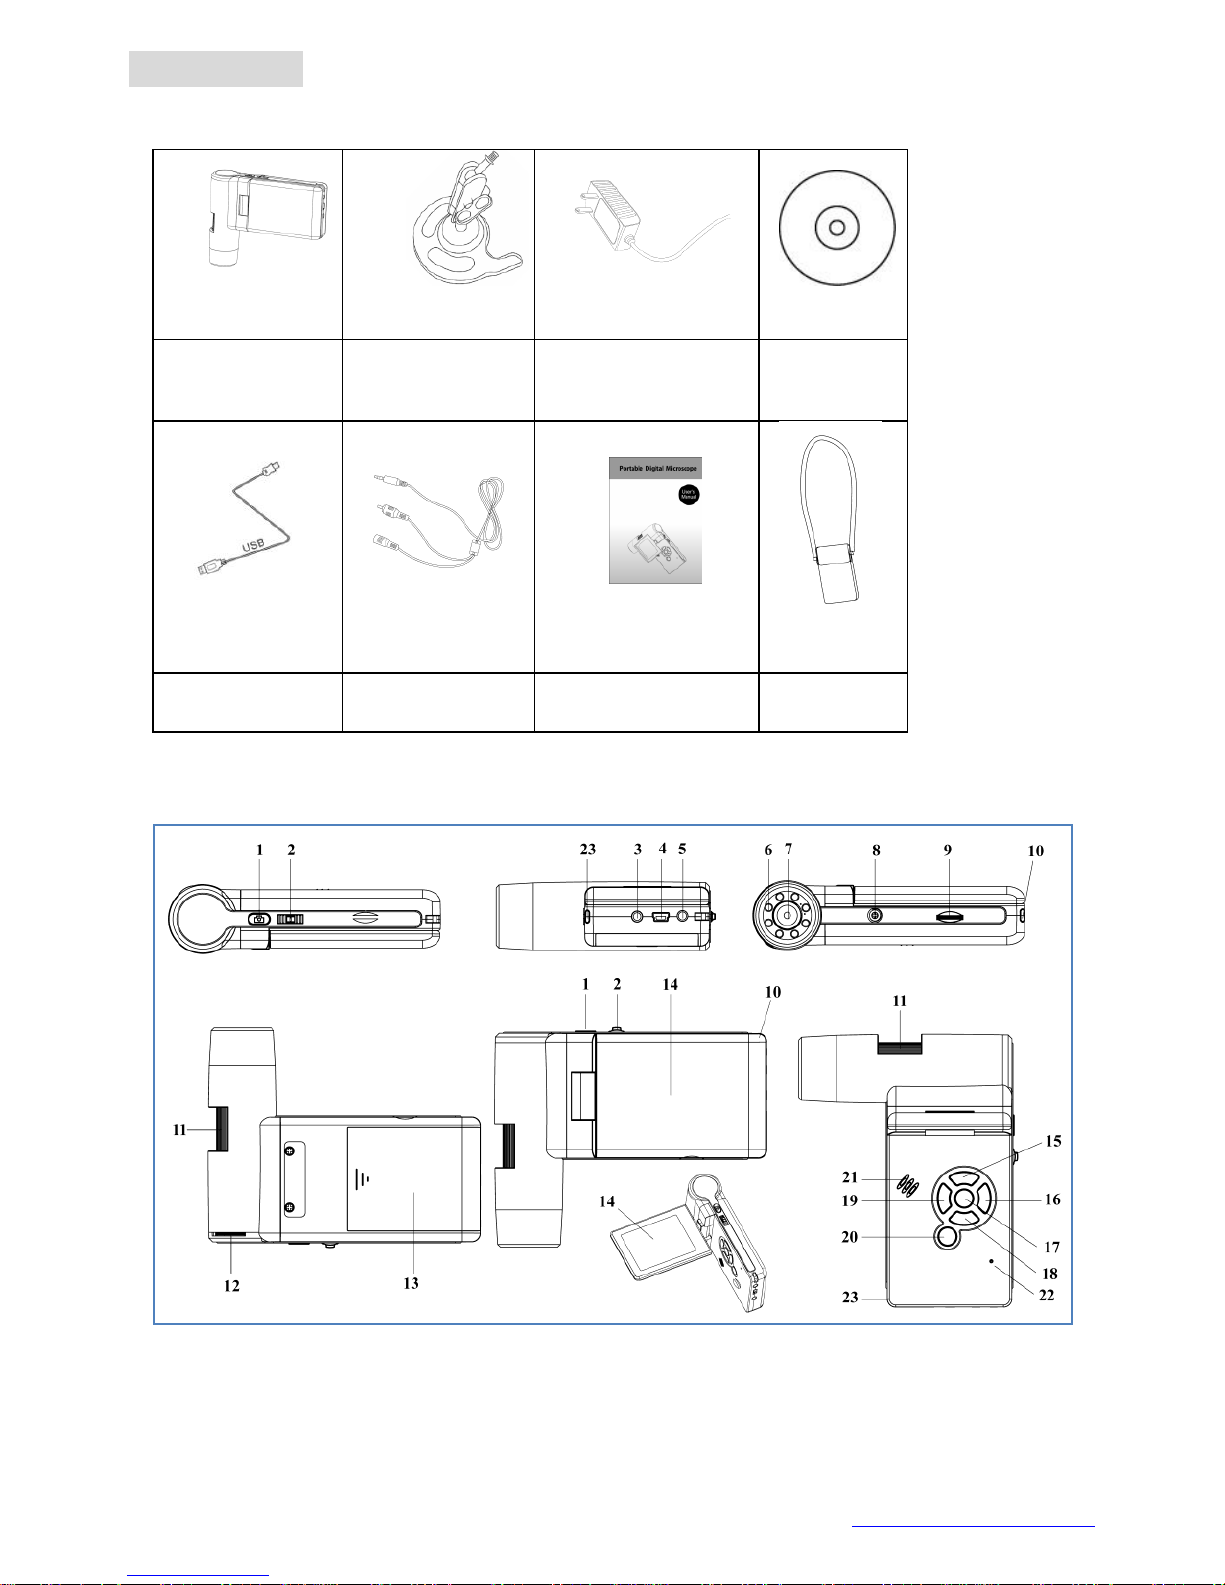
Standard accessories
Feltest
DigiMicro
Tripod
AC adaptor
CD
USB cable
AV-cable
Manual
Carry bag
Parts, names & functions

www.feltest.com
5
No.
Functions
Functions
1
Capture
12
LEDs brightness dial
2
Zoom in/out; show icons on/off
13
Battery compartment
3
AV-out
14
TFT display
4
USB port
15
UP / Color mode switch
5
DC-in
16
Menu setup
6
Aux LEDs
17
OK 7 Lens
18
DOWN
8
Tripod mounting hold
19
LEFT / BACK
9
MicroSD card slot
20
Power on/off
10
Wrist grip hook
21
Speaker
11
Focus wheel
22
Microphone
23
Battery charging indicator
3. Key Features
3inches TFT panel
5M high quality image sensor (up to 12M by interpolation)
20x-200x-optical magnification and up to 500x digital magnification
Photo & Video
Measurement (with the supplied software on a computer)
Support MicroSD card up to 16GB
Driver free to download for Windows XP SP2/Vista/Win7 and Mac OS 10.4 or above
(direct plug-in, driver installation not required)
Lithium battery (rechargeable & changeable)
http://www.feltest.com/
6
4. Use the Microscope
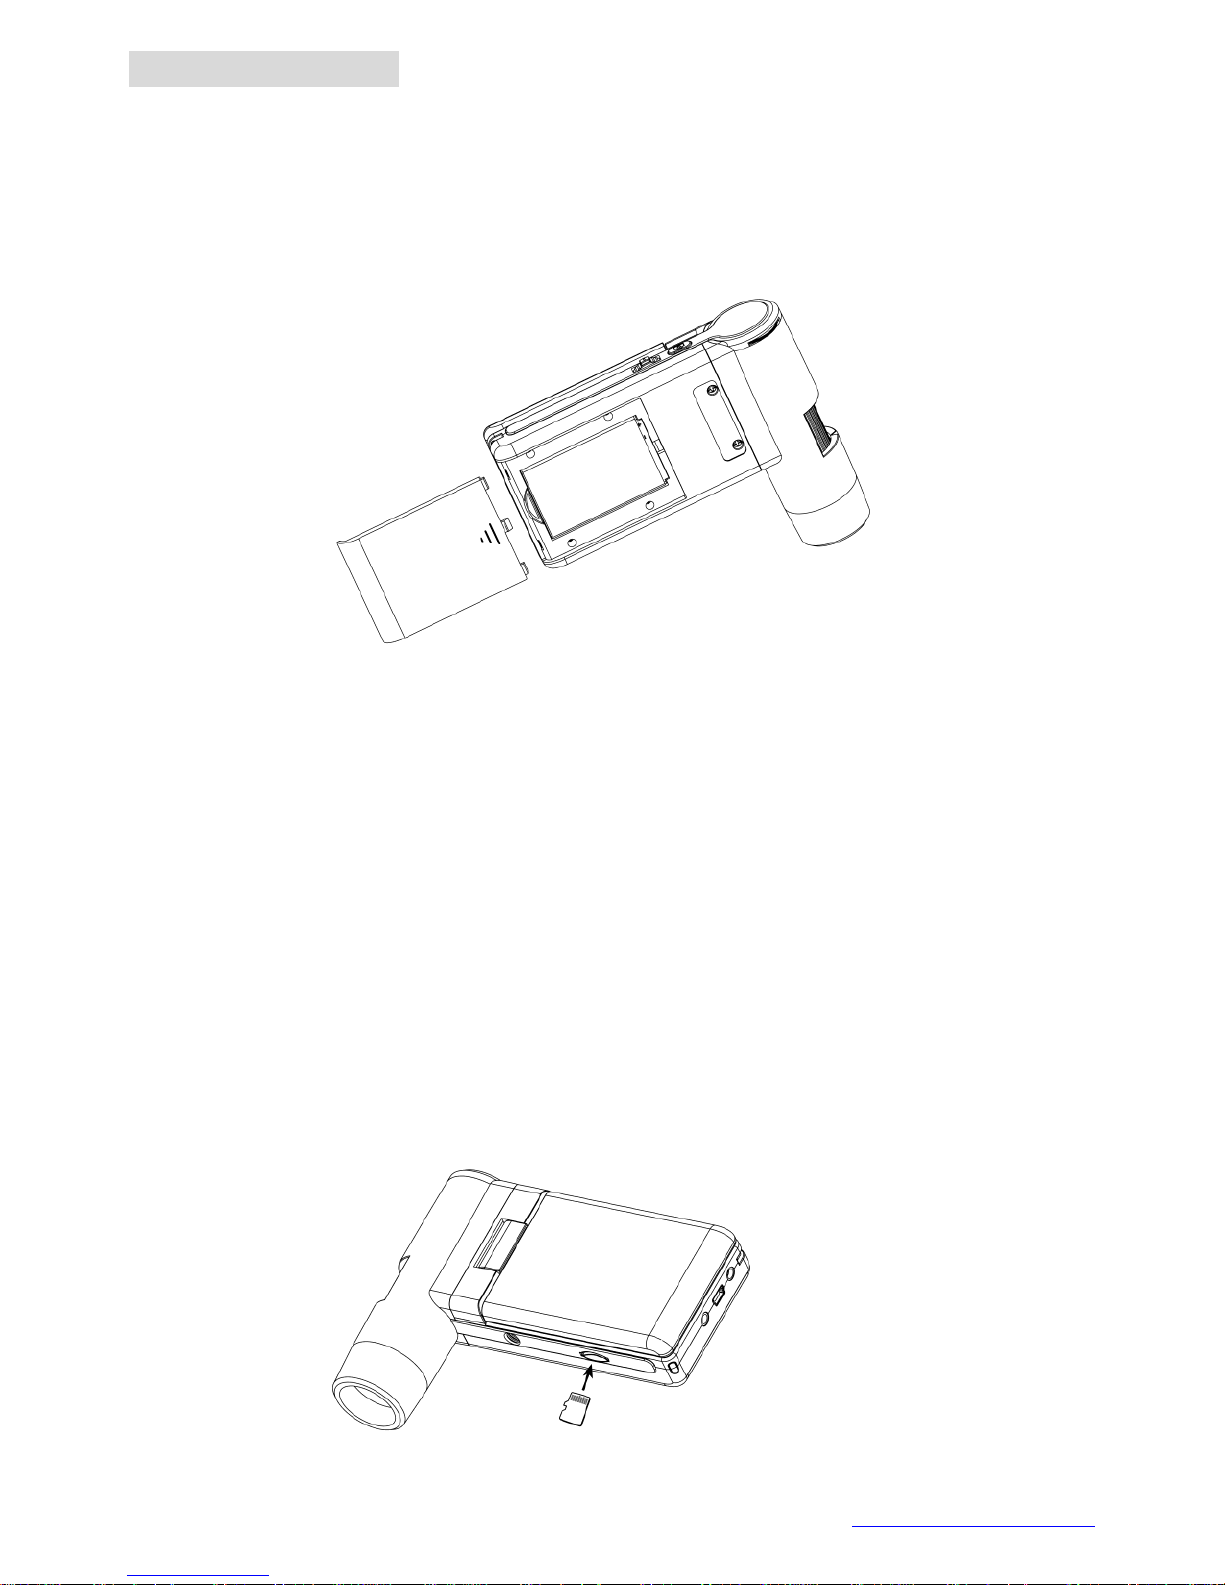
4.1 Installing the battery
1. Open the battery door by sliding it outward.
2. Insert the lithium battery to the battery compartment according to the polarities
shown in the compartment.
Note: Before using the microscope, you must charge its battery. Please refer to section
4.9 on how to charge the battery.
4.2 Insert a MicroSD Card
A MicroSD card must be placed to record and store your pictures and videos.
Inserting the MicroSD memory card:
1. Turn off the microscope
2. Insert the MicroSD card into the card slot; gently press in until the card is latched.
Note: do not force the card into the slot; forcing may damage microscope and the
MicroSD memory card. Align MicroSD card position (as marked) and try again. The
MicroSD memory card must be formatted before starting to capture images.
See the following instruction:
www.feltest.com
7
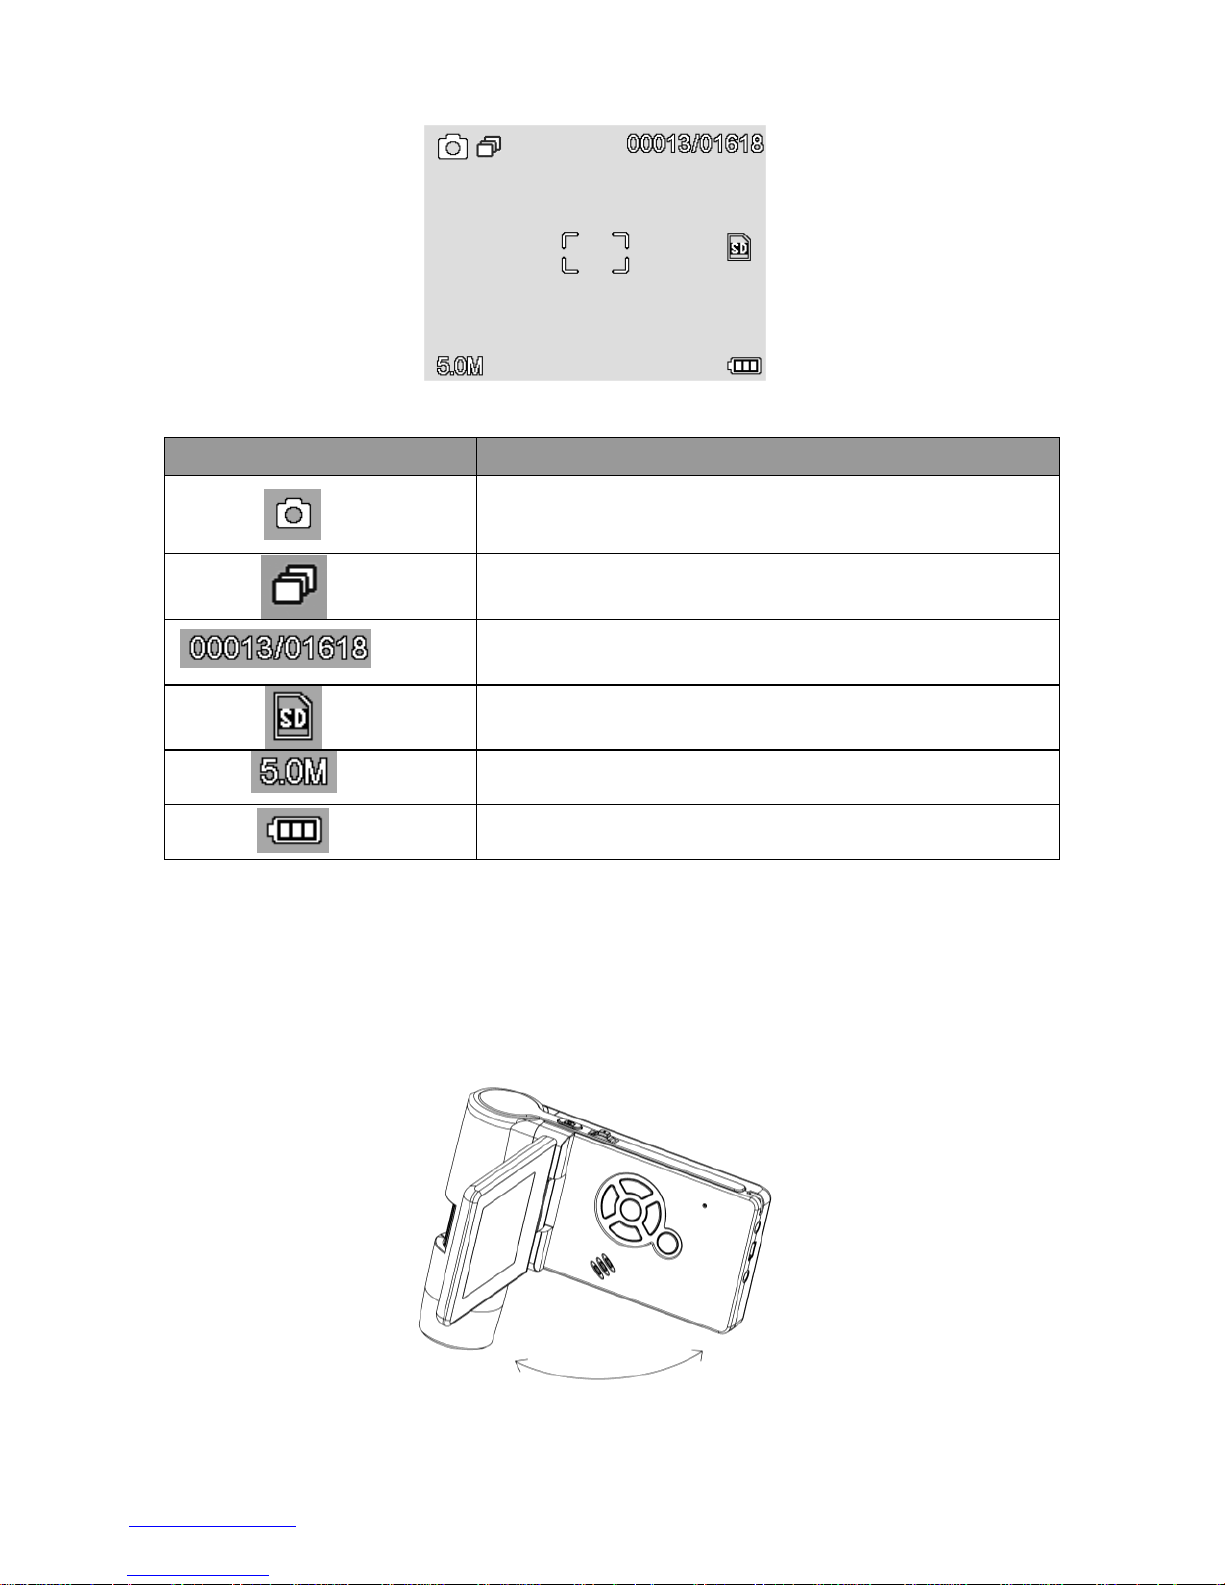
4.3 Icons on the display & their meaning
ICON
Meaning
Still image capture (photo)
Timer capture
Number of captured images/total qty that could be
captured (based on the current resolution)
MicroSD memory card is inserted
Current resolution
Battery level indicator
Note: the display of icons can be switched on/off by pressing the zoom wheel (2) down.
4.4 Turn on the Microscope
1. Unfold the display panel, and then the microscope will power on directly.
2. If need to power on when panel unfolded, press POWER ON/OFF button.
http://www.feltest.com/
8
4.5 Turn off the Microscope
1. Fold the display panel and then the microscope will turn off automatically
2. Press the ON/OFF button
3. By Power Save. Please refer to Section 5.2.2 for Power Save setup.
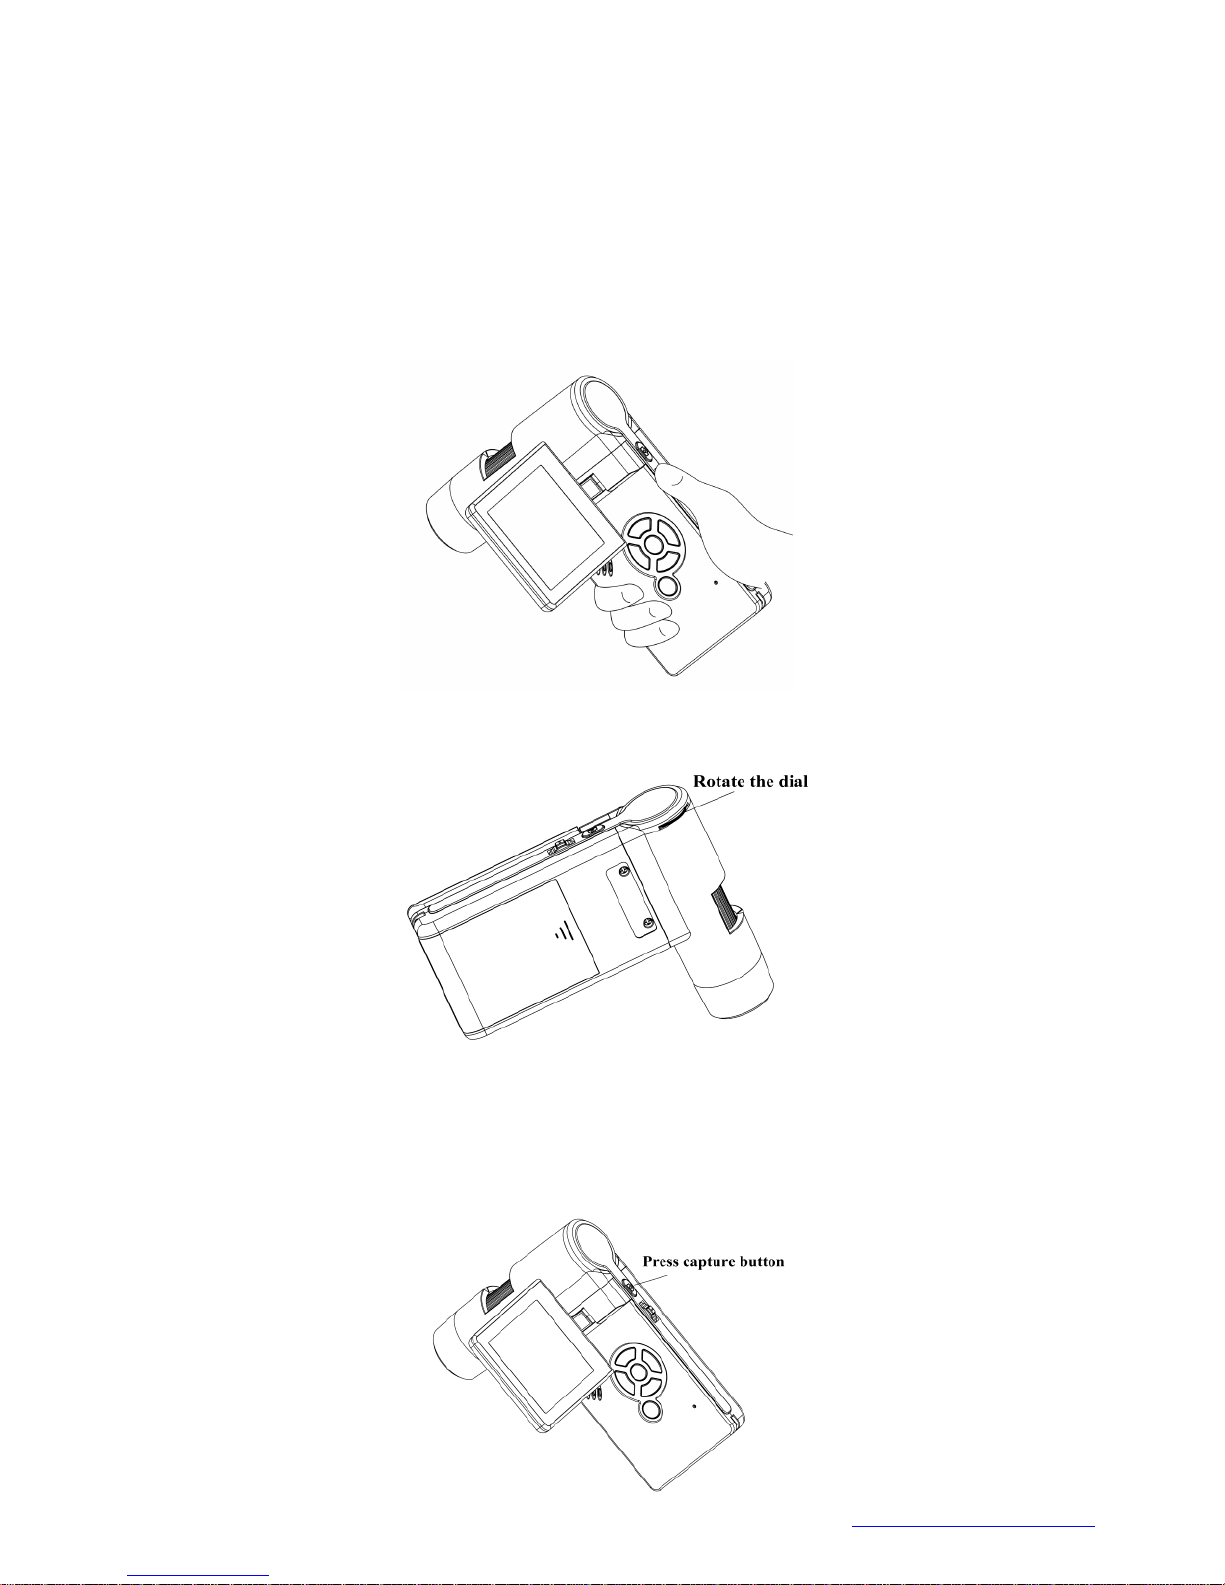
4.6 How to Capture
1. Turn on the microscope by simply unfolding its display panel to a proper position,
normally at an angle of 90 degree with the viewing end, as follows:
2. To get a proper brightness, adjust the lighting level by rotating the LED dial.
3. Hold the microscope main body with your right hand; put the viewing end
closely to the object; adjust the focus wheel (11) with the left hand.
4. When a clear image is displayed press the Capture button one time.
 Loading...