

Felt Virtue Nine Owner's Manual

Virtue Nine Manual
Equilink Suspension Manual
Virtue Nine Manual
1.
2.
3.
4.
5.
6.
7.
Congratulations on purchasing this high quality Felt Equilink equipped bicycle. As with
all of our bikes and components, our aim is to provide you, the rider, with the best
possible product and therefore the best possible riding experience.
Please read this Equilink Owner’s manual supplement thoroughly, as its purpose is
to help you better understand your bike, set it up correctly, and care for it. If there
are any questions that you still have after reading this guide, please contact your Felt
Equilink Authorized Dealer, or visit our comprehensive Equilink website at
Feltbicycles.com.
Happy Trails!
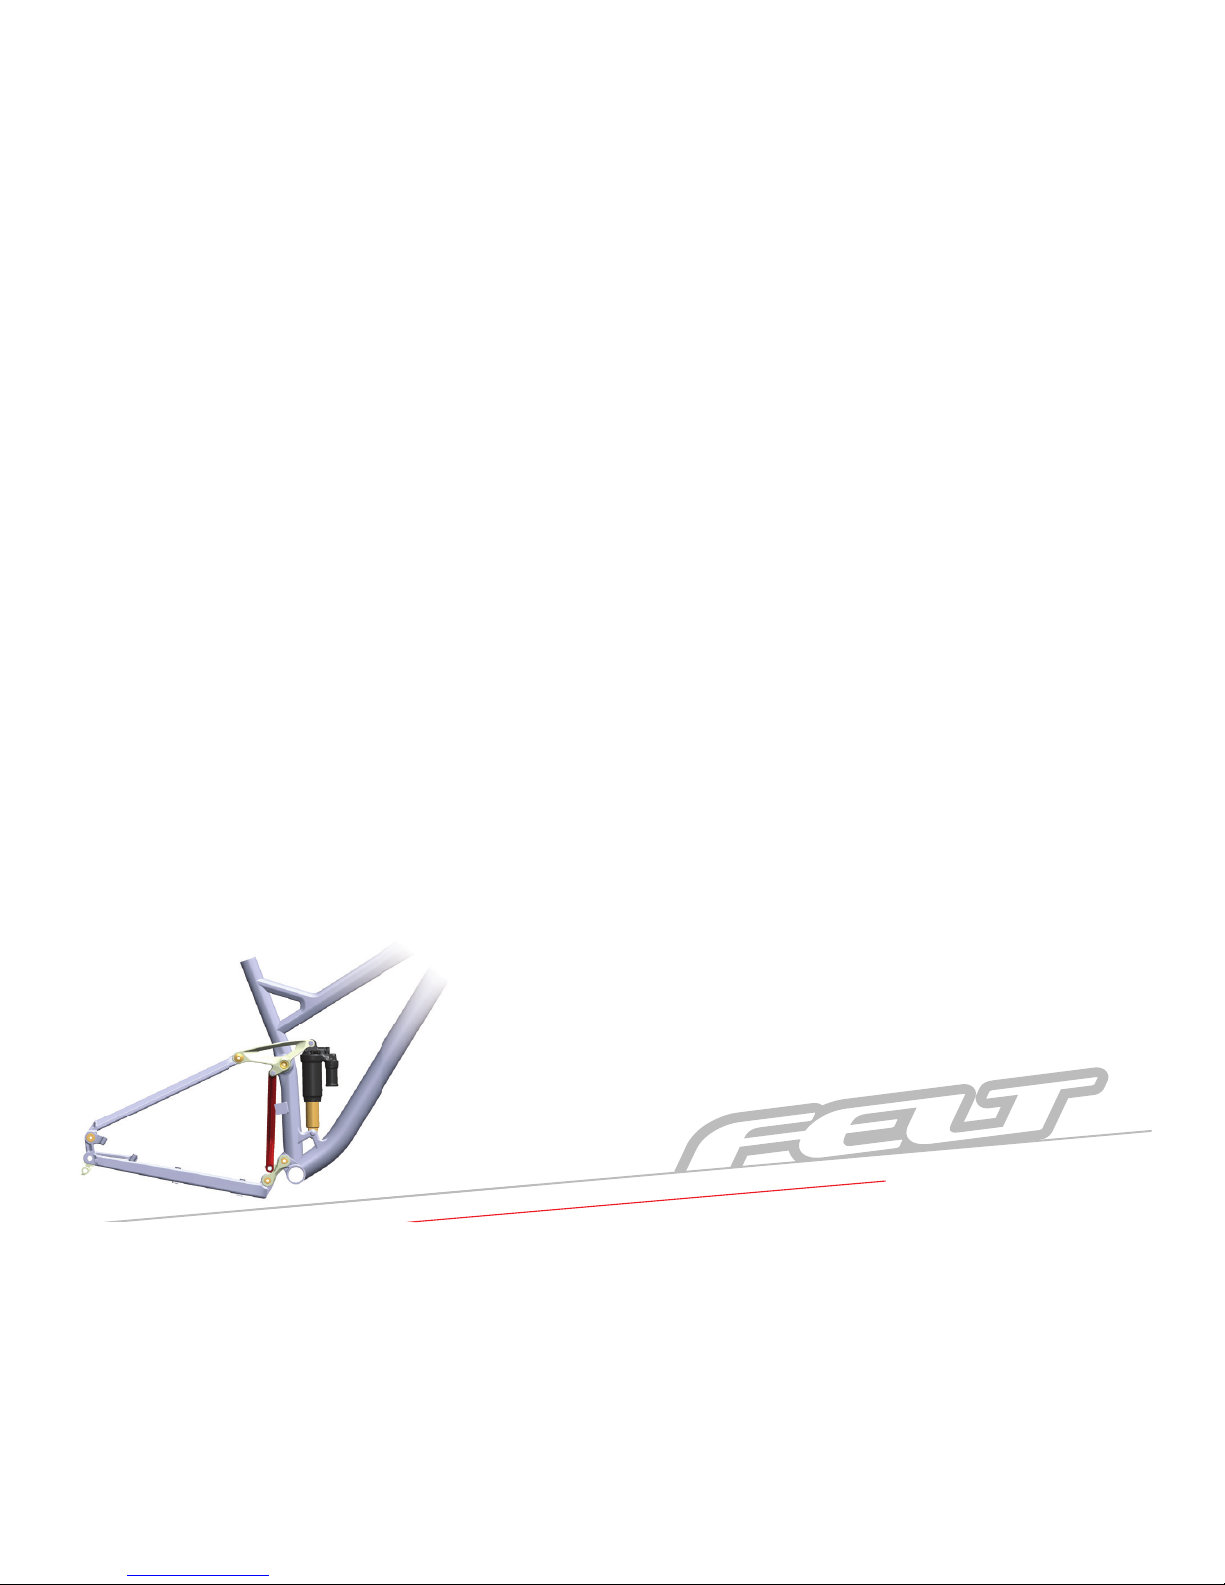
In this illustration notice the red Equilink located behind the seat tube.
The positioning of this special link counteracts weight transfer, so that the drivetrain
doesn’t have to.
As you pedal, the Equilink automatically pulls down on the upper horizontal link,
which instantly negates and equalizes weight transfer. The harder you pedal the
more weight transfer you initiate. The Equilink simply mirrors the effort, keeping a
constant state of equalization. By allowing the drivetrain to do what it was meant to do
(move you forward), we are able to maximize pedaling efficiency while allowing the
suspension to remain equalized, and stay ultra-compliant as it moves freely over even
the smallest of bumps.
Introduction
Equilink Function Simply Explained
Setup
Rebuild / Maintenance
Parts Lists
Carbon Care Guide
Cable Management
Contents:
1. Introduction To The Equilink:
2. The Equilink System Function Simply Explained:
Felt recommends that you start with between 20 and 30 percent sag. This will ensure
that you get optimal performance from your Equilink equipped bicycle.
To determine your actual sag you must first slide the travel indicator on the shock
absorber (the small “o”-ring on the effective shaft of the shock) upwards until it
rests against the larger part of the shock. Then, with both hands on the respective
handlebar grips throw a leg over the bike and gently allow your full body weight to
compress the suspension. Then, slowly roll off lifting your weight off the bike. When
you now look at the shock you will see that the o-ring has moved. The distance
between the o-ring and the top body of the shock is the actual shock sag dimension.
For the Virtue this measurement should fall between 10mm and 15mm. For the
Compulsion this measurement should be between 12mm and 18mm.
Important: Try not to “bounce” or sit up while applying weight to the bike. Doing so
can drastically throw off the resulting measurement. If you feel you have made an
error, you can easily slide the travel indicator up and start over.
Suggested sag settings should only be used as an initial starting point. In many
cases the actual settings that work best for you may be different than what works for
others due to riding style, terrain or simply personal preference. We suggest that you
experiment with air pressure and damping settings to arrive at “your” desired feel.
More sag (less air pressure) for a softer, suppler ride or less sag (more air pressure) for
a firmer ride.
WARNING: The bicycle should be considered as a system when setting air pressures.
Changing rear shock air pressure will effectively change the bikes geometry, so the
fork air pressure/preload should be checked at the same time for correct sag to
ensure proper geometry and handling. Failure to do so could adversely affect steering
and handling characteristics, resulting in possible loss of control, injury, or even death.
Refer to the fork owner’s manual for instructions on setting correct sag, air pressure
and damping settings. If you did not receive or misplaced your fork owner’s manual,
refer to the manufacturer’s website for details on proper care and
maintenance procedures.
3. Equilink Setup Guide:
1 2
Equilink Suspension Manual
Virtue Nine Manual
4. Maintenance Overview:
While all Felt frames are designed to be strong and durable, a little preventive
maintenance will protect your investment and provide endless hours of trail riding fun.
General Maintenance
All bearings used on Felt suspension frames are high quality sealed units. They are
designed to provide a long working life; however keeping the bearings clean will
extend their useful life.
When cleaning your bike, avoid the use of high pressure water or aerosol spray
cleaners. Doing so will drive contaminants into the bearings, causing premature
failure. The easiest and simplest way of cleaning the frame is using a bucket of soap
and water. This will remove all exterior dirt and grime, preserving the integrity of the
bearing seals.
When cleaning the frame it is good practice to periodically check for bearing wear.
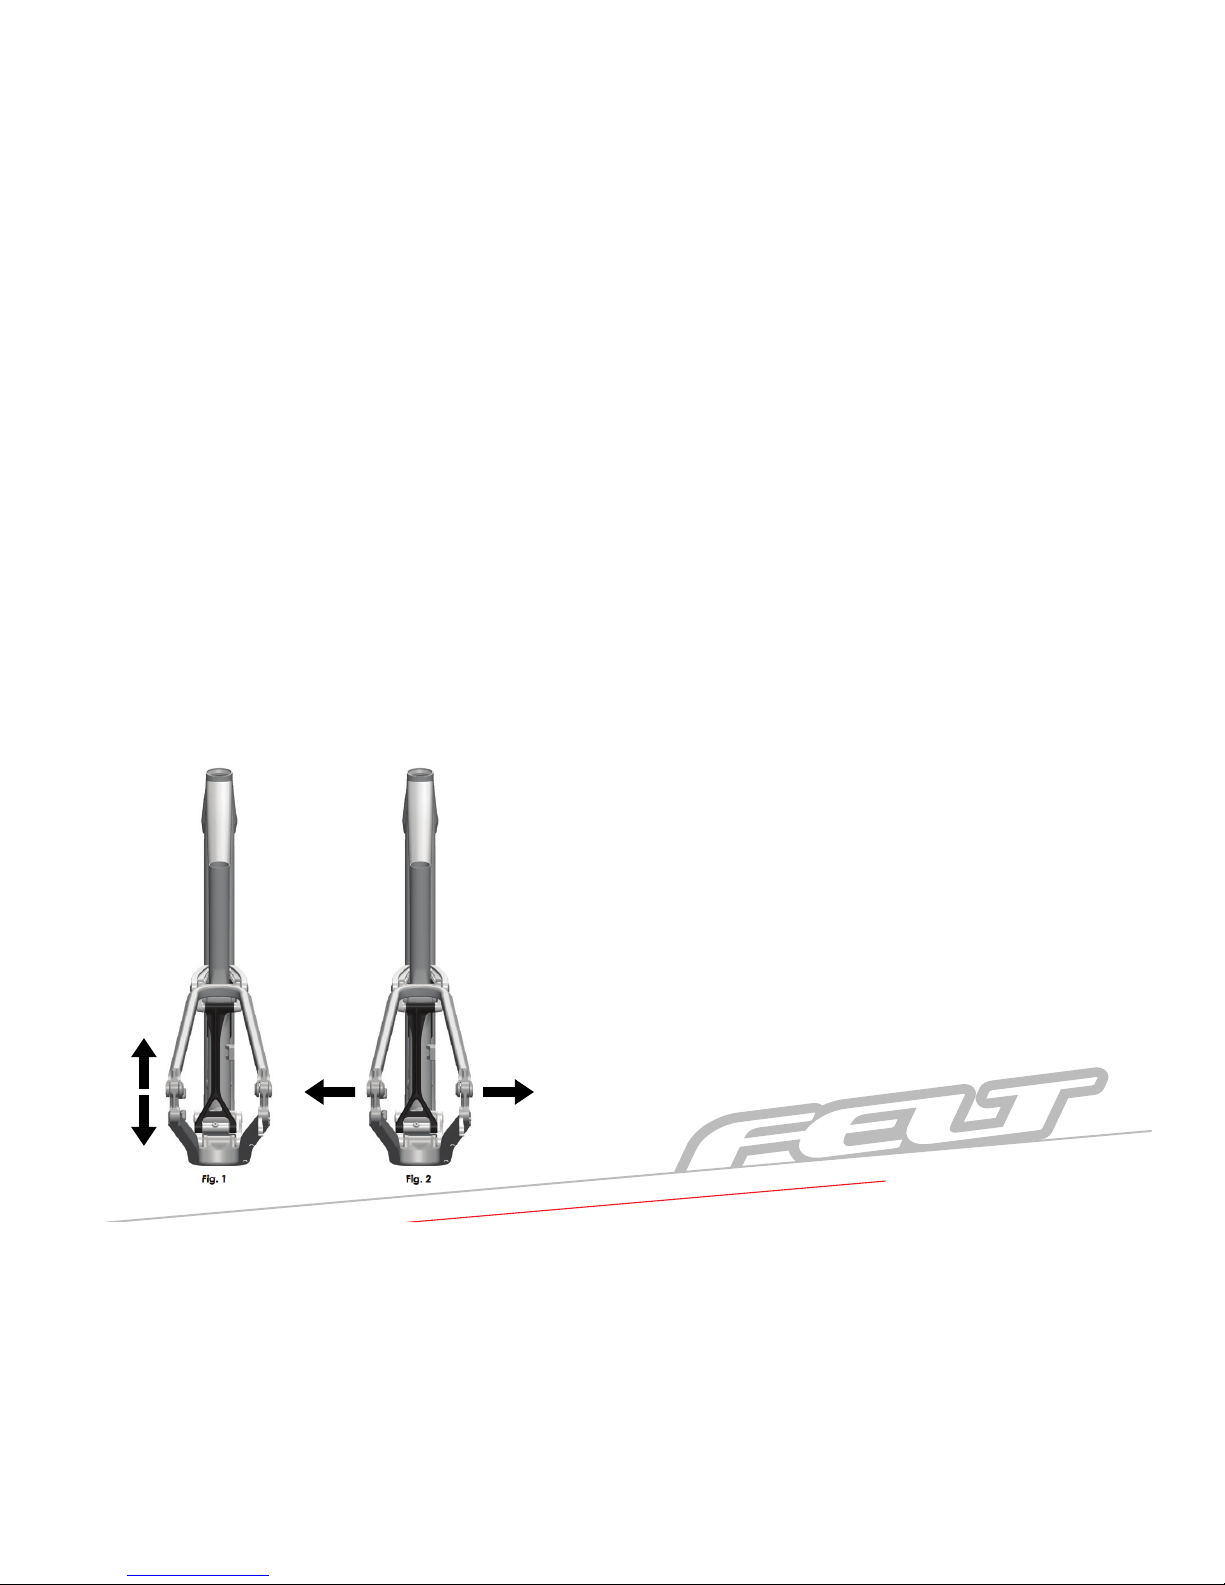
1. With the bike in a work stand, clamped by the seat post, remove the rear wheel and
deflate the rear shock.
2. Standing behind the frame, lift the rear dropouts, (Move suspension as shown
in Fig.1) it should feel smooth, (with light resistance from the carbon rear triangle).
Any grinding, notchiness or tight spots may be signs that the bearings need to be
overhauled.
3. If the suspension moves smoothly through its travel, check for any side to side
movement. Hold the dropouts and try and move them to the left and right. Any
looseness may be a sign of loose bearing bolts or worn bearings.
(Move suspension as shown in Fig.2)
4. Check the bearing bolts, if any are loose tighten them to the torque spec that is
conveniently laser etched into the dust shields. In some instances it may be necessary
to reapply a thread locker before you retighten the bearing bolts.
5. If you notice any wear or problems with the bearings your easiest course of action is
to replace them. Bearing replacement kits are reasonably
inexpensive and the procedure is fairly simple. Bearing kits and complete rebuild kits
are available through your local Felt Bicycles retailer.
6. For rear shock maintenance refer to the shock manufacturer’s owner’s manual
that was included with your bike. If you did not receive or misplaced your shock
owner’s manual, refer to the manufacturer’s website for details on proper care and
maintenance procedures.
3 4
 Loading...