

Felker Mason Mate II, SHD-143 II, SHD-145 II, SHD-203 II, SHD-205 II Operating Instructions And Parts List Manual

OPERATING INSTRUCTIONS AND PARTS LIST
INSTRUCCIONES DE OPERACIÓN Y LISTA DE PIEZAS
MODEL: SHD-143 II
SHD-145 II
SHD-203 II
SHD-205 II
0AF04119
Copyright © October 17, 2002 DBI
Printed in U.S.A.
1
17400 West 119th Street
Olathe, Kansas 66061
Customer Service ......800-365-4003
Corp. Office ...............913-928-1000
Cust. Service FAX......800-825-0028
Corp. Office FAX .......913-438-7951

Note:
Nota:
2

EVERY MACHINE IS THOROUGHLY TESTED BEFORE LEAVING THE FACTORY. EACH MACHINE IS
SUPPLIED WITH A COPY OF THIS MANUAL. OPERATORS OF THIS EQUIPMENT MUST READ AND BE
FAMILIAR WITH THE SAFETY WARNINGS. FAILURE TO OBEY WARNINGS MAY RESULT IN INJURY OR
DEATH. FOLLOW INSTRUCTIONS STRICTLY TO ENSURE LONG SERVICE IN NORMAL OPERATION
CONTENTS
Symbol Definitions............................................................................................................................................4-5
Safety Warnings - DOs & DO NOTs ................................................................................................................6-7
Decal Descriptions and Locations.....................................................................................................................8
Instructions
1 - Use................................................................................................................................................9
2 - Operating Instructions...................................................................................................................9-10
3 - Maintenance..................................................................................................................................10
4 - Important Advise ..........................................................................................................................10-11
5 - Repairs..........................................................................................................................................11
6 - Spare Parts....................................................................................................................................11
Diagrams and Spare Parts List...........................................................................................................................19-43
Wiring Diagrams...............................................................................................................................................44-55
ANTES DE SALIR DE NUESTRA FABRICA, CADA MAQUINA ES SOMETIDA A PRUEBAS EXHAUSTIVAS. CADA
MAQUINA DE CORTE ES ENTREGADA CON UNA COPIA DE ESTE MANUAL. LOS OPERARIOS DE ES TOS EQ UIPOS
DEBEN LEER Y FAMILIARIZARSE CON LAS INSTRUCCIONES DE SEGURIDAD. EL NO PRESTAR ATENCION A
ESTAS ADVERTENCIAS PUEDE OCASIONAR GRAVES LESIONES. SIGA ESTRICTAMENTE NUESTRAS
INSTRUCCIONES Y SU MAQUINA LE PRESTARA M UCHOS AÑOS DE SERVICIO EN CONDICIONES NORM ALES DE
USO.
CONTENIDO
Definiciones De Los Símbolos..........................................................................................................................4-5
Advertencias De Seguridad - HACER Y NO HACER......................................................................................12-13
Descripción Y Ubicación De Las Calcomanías .................................................................................................8
Instrucciones
1 - Uso.................................................................................................................................................14
2 - Instrucciones De Operación...........................................................................................................14-15
3 - Mantenimiento ............................................................................................................................... 15
4 - Observación Importante.................................................................................................................15-16
5 - Reparaciones..................................................................................................................................16
6 - Piezas De Recambio......................................................................................................................16
Diagrama Y Piezas De Recambio......................................................................................................................19-43
Diagrame De Cablado Eléctrico........................................................................................................................44-55
.
3

SYMBOL DEFINITIONS
DEFINICIONES DE SÍMBOLOS
--------------------------------------------------------------------------------------------------------------------
• Please read the instructions for use prior to operating the machine for the first time.
• Antes de poner en marcha por primera vez la máquina, lea detenidamente las instrucciones y
familiarícese con la máquina.
• Warning Tr iangle
• Triángulo D e Advertencia
• Wear Eye Protection
• Usar Protección Visual
• Wear Breathing Protection
• Usar Protección Respiratoria
• The Use Of Ear Protection Is Mandatory
• Es Obligatorio El Uso De Protección Auditiva
• Wear a Hard Hat
• Usar Casco Duro
• Wear Safety Shoes
• Usar Zapatos Protectores
• Wear Appropriate Clothing
• Usar Ropa Adecuada
• Remove The Blade Prior To Hoisting, Loading, Unloading And Transporting The Machine On Jobsite.
• Sacar La Hoja Antes De Elevar, Cargar, Descargar Y Transportar La Máquina En El Sitio De Trabajo.
• Use In Well Ventilated Area
• Usar En Un Área Bien Ventilada
• Do Not Use In Flammable Areas
• No Usar En Lugares Con Productos Inflamables
• Machinery Hazard, Keep Hands And Feet Clear.
• Maquinaria Peligro sa - Mantener Las Manos Y Los Pies Lejos De La Máquina
4

• No Non-working Personnel In Area
• Prohibido El Paso A Personas Ajenas A La Obra
• No Smoking
• No Fumar
• Do Not Operate Without All Guards In Place
• No Usar Sin Tener Todas Las Protecciones En Su Lugar
• Always Keep The Blade Guards In Place
• Mantener Siempre Las Protecciones De La Hoja En Su Lugar
• Keep Work Area Clean/Well Lit, Remove All Safety Hazards
• Mantener Limpio El Lugar De Trabajo/Bien Iluminado. Eliminar Todos Los Riesgos De Seguridad
• Repairs Are To Be Done By An Authorized Dealer Only
• Las Reparaciones Debe Efectuarlas Únicamente El Distribuidor Autorizado
5

SAFETY FIRST!
WARNINGS
DO's and DO NOT's
WARNING: FAILURE TO COMPLY WITH THESE WARNINGS AND OPERATING
INSTRUCTIONS COULD RESULT IN DEATH OR SERIOUS BODILY INJURY.
DO read this entire operator’s manual before operating this machine. Understand all warnings, instructions, and controls.
DO keep all guards in place and in good condition.
DO wear safety approved hearing, eye, head and respiratory protection.
DO read and understand all warnings and instructions on the machine.
DO read and understand the symbol definitions contained in this manual.
DO keep all parts of your body away from the blade and all other moving parts.
DO know how to stop the saw quickly in case of emergency.
DO turn the “ON/OFF” switch to the “OFF” position prior to connecting the machine to the power source.
DO inspect the blade, flanges and shafts for damage before installing the blade.
DO use only reinforced abrasive blades or steel center diamond blades manufactured for use on masonry saws.
DO use only the blade flanges supplied with the saw. Never use damaged or worn blade flanges.
DO use only blades marked with a maximum operating speed greater than the blade shaft speed. Verify speed by checking
bladeshaft RPM and pulley diameters.
DO verify saw drive configuration by checking blade shaft RPM and pulley diameters.
DO read all safety materials and instructions that accompany any blade used with this saw.
DO verify the blade arbor hole matches the machine spindle before mounting the blade.
DO inspect each blade carefully before using it. If there are any signs of damage or unusual wear, DO NOT USE THE BLADE.
DO mount the blade solidly and firmly, Wrench tighten the arbor nut.
DO make sure the blade and flanges are clean and free of dirt and debris before mounting the blade on the saw.
DO use the correct blade for the type of work being done. Check with blade manufacturer if you do not know if blade is correct.
DO use caution and follow the instructions when loading and unloading the machine.
DO operate this machine only in well ventilated areas.
DO instruct bystanders on where to stand while the saw is in operation.
DO establish a training program for all operators of this machine.
DO clear the work area of unnecessary people. Never allow anyone to stand in front of or behind the blade while the motor is
running.
DO make sure the blad e is not contact ing anything before starting the motor.
DO use caution and follow instructions when setting up or transporting the machine.
DO always tie down machine when transporting.
DO have all service performed by competent service personnel.
DO make sure electri c powered saws are p lugged into a properly grounded circuit.
DO make sure power cords are proper size and in good condition.
DO keep cord away from heat, oil and sharp edges.
DO maintain a secure grip on the material being cut.
DO clean the water tray frequently.
DO verify the blade arbor hole matches the machine spindle before mounting the blade.
DO clean the machine after each day’s use.
DO follow all electrical codes in your area.
DO disconnect tools from the power source when not in use, before service and when changing accessories
DO always give a copy of this manual to the equipment user. If you need extra copies, call TOLL FREE 1-800-365-4003.
DO
6

SAFETY FIRST!
WARNINGS
DO's and DO NOT's
WARNING: FAILURE TO COMPLY WITH THESE WARNINGS AND OPERATING
INSTRUCTIONS COULD RESULT IN DEATH OR SERIOUS BODILY INJURY.
DO NOT operate this machine unless you have read and understood this operator’s manual.
DO NOT operate this machine without the blade guard, or other protective guards in place.
DO NOT stand behind the blade path while t he motor is running.
DO NOT leave this machine unat tended while the moto r is running.
DO NOT work on this machine while the motor is running.
DO NOT operate this machine when you are tired or fatigued.
DO NOT use a wet blade without adequate water supply to the blade.
DO NOT exceed maximum blade speed shown for each blade size. Excessive speed could result in blade breakage.
DO NOT use damaged equipment or blades.
DO NOT use carbide tipped blades.
DO NOT use conventional abrasive blades with water.
DO NOT touch or try to st op a moving blade with your hand.
DO NOT transport a cutting machine with the blade mounted on the machine.
DO NOT use a blade that has been dropped or damaged.
DO NOT touch a dry cutting diamond blade immediately after use. These blades require several minutes to cool after each cut.
DO NOT use damaged or worn blade flanges.
DO NOT allow other persons to be near the machine when starting or when the machine is in operation.
DO NOT operate this machine in an enclosed area unless it is properly vented.
DO NOT operate this machine in the vicinity of anything that is flammable. Sparks could cause a fire or an explosion.
DO NOT allow blade exposure from the guard to be more than 180 degrees.
DO NOT operate this machine unless you are specifically trained to do so.
DO NOT use a blade that has been over heated (Core has a bluish color).
DO NOT cock, jam, wedge or twist the blade in a cut.
DO NOT jam material into the blade.
DO NOT grind on the side of the blade.
DONOT replace the motor with any motor that does not have a special grounding connection.
DONOT lay power cords in or near the water.
DONOT operate this machine while using drugs or alcohol.
DO NOT
*****************
This saw was designed for certain applications only. DO NOT modify this saw or use for any application other than for
which is it was designed. If you have any questions relative to its application, DO NOT use the saw until you have written
Diamant Boart, Inc. and we have advised you.
Diamant Boart, Inc.
17400 West 119th Street
Olathe, Kansas 66061
7

DECAL DESCRIPTIONS AND LOCATIONS
DESCRIPCIÓN DE CALCAMONIAS Y UBICACIONES
WARNING: Verify that all safety warning and operation decals are properly affixed to the unit
and are clearly legible. Replace any decals that have been damaged or removed.
P/N 046128 (Blade Guard)
P/N 177588 (Blade Guard)
P/N 187052 (Blade Guard)
P/N 170333 (Water Pan)
8

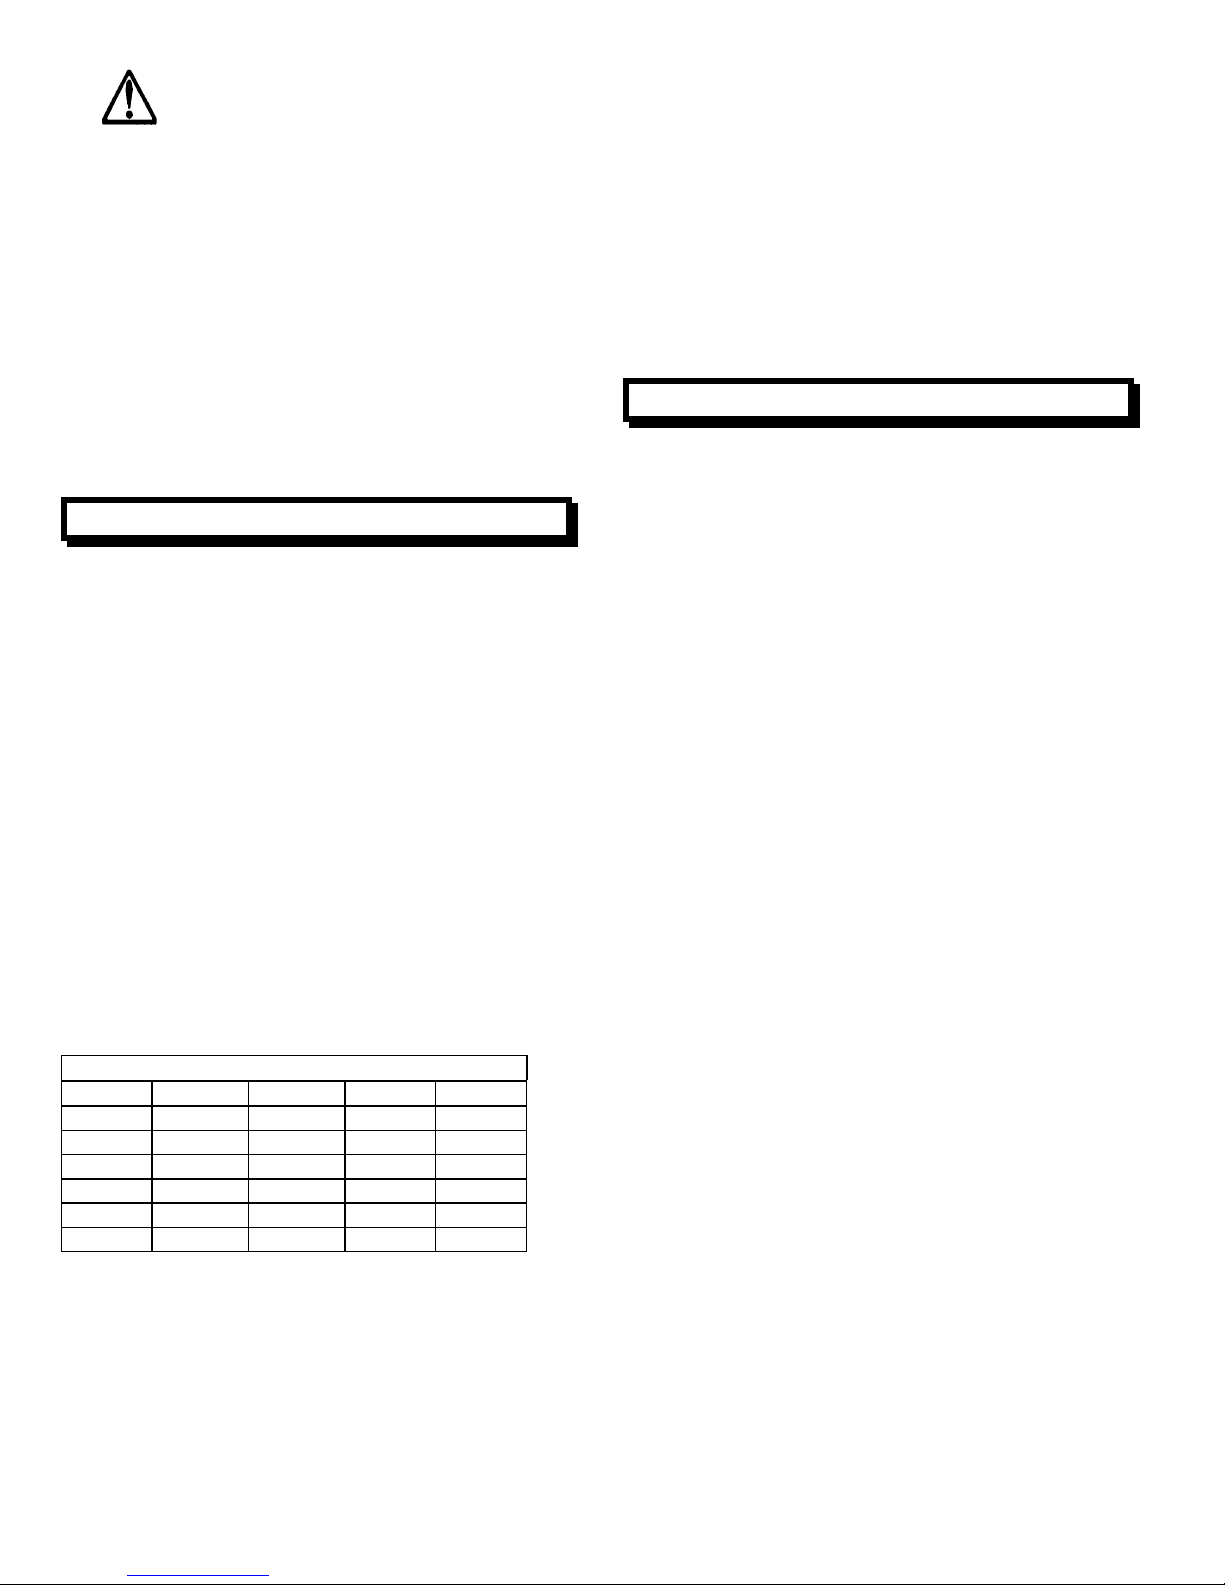
INDICATION
MANDATORY INFORMATION
Follow our instructions strictly and your machine
will give you long service in normal operating
conditions.
WARNING PROHIBITION
These signs will give
advice for your safety
Before leaving our factory every machine
is thoroughly tested.
1. Uses
Use: Wet or Dry sawing of masonry and
refractory.
Tools: Diamond blades -- dry or water cooled,
Ø: 14” & 20”
(For information contact your Felker supplier)
Depths of Cut (Maximum):
5.00” with Ø 14” or 8.00” with Ø 20”
Nominal Weight: 330 Lb.
Operating Weight: 330 Lb.
Dimensions (L x W x H): 48 x 22 x 58
Blade Shaft RPM: 14” - 3136
20” - 2352
Before starting up machine make sure
you read these instructions and are
familiar with the operation of this
machine.
The working area must be completely
clear, well lit and all safety hazards
removed (no water or dangerous objects
in the vicinity)
9
The operator must wear protective
clothing appropriate to the work he
is doing. We recommend hearing,
respiratory and eye protection.
Any persons not involved in the work,
should leave the area.
Use only blades marked with a
maximum operating speed greater
than the bladeshaft speed.
2. Operating Instructions
• The wooden skids on which the saw is mounted,
should be left permanently attached to the saw
legs.
• Remove the loose bolt in the cross tube. Raise the
tilting bar and connecting link to the upright
position, so that the bolt may be installed and
tightened.
• Before placing the cutting head on the frame, make
sure that the bearing rests are clean. Tighten holddown straps over bearings securely. Install the
connecting bar to the rear underside of the cutting
head by inserting the pin through the lugs and
connecting bar.
• Fasten the "Quick Disconnect" fitting on the
connecting link to the ball on the blade guard by
pulling back on the spring loaded sleeve while it is
placed over the ball; then release it. The length of
the link has been factory set for best blade guard
position. Adjustment may be modified should other
settings be desired by loosening the lock nuts at
the front and rear, and lengthening or shortening
the length of the link.
• For wet cutting, fill the water reservoir pan to within
one inch of the top. Be sure the water pump intake is fully covered by water at all times. Keep the
pump in-take free of accumulated sludge, and
other foreign material.
• FELKER single phase masonry saws are furnished
with the correct approved NEMA configuration plug
on the motor pigtail; the plug appropriate for the
voltage to which the motor is set. It will be
necessary to proved a matching NEMA
configuration connector on the extension cord into
which the pigtail from the motor is plugged. For
example: a 5 HP saw set for 230 Volt operation in
supplied with a NEMA #L6-30P plug on the pigtail.
The extension cord will require an L6-30C to make
the proper connection. Bear in mind, for the user
to meet the Code, the plug on the extension cord
should also be a NEMA number L6-30P, and
receptacle in the box into which this will be plugged
should be a NEMA number L6-30R.
WARNING: Always be sure that the
saw is connected only to a properly
grounded electrical outlet.
• Electric motors of any make can burn out
completely when the voltage supply falls 10%
below the voltage rating of the motor. Use proper
heavy duty fuses in the circuit.
• Have your electrician check the voltage right at the
motor when the saw is cutting.
• All FELKER single phase masonry motors are
equipped with manual reset overloads. When
overload trip, turn switch to "OFF" position, allow
the motor to cool for 5 to 10 minutes, then push the
reset button. A click indicates reset.
3. Maintenance
• Sludge that accumulates in the bottom of the water
reservoir pan is as abrasive as a cutting compound
and if it accumulates heavily, it will shorten the life
of the water pump and of the blade. Clean water
reservoir pan at least once a day - twice a day in
heavy cutting and refill with clean water.
• At the end of each day's use, clean the sludge from
the saw. Flush water through the pump and water
hoses every night.
• NOTE: When the saw is being put in a warehouse
waiting for the next job, use a wire brush to remove
hard, caked on sludge. Clean and thoroughly
lubricate moving parts - so the saw will be ready to
operate at top efficiency on the next job.
• Check extension wire size per chart. Undersize
wires will burn out expensive motors. Use 230
Volts wherever possible.
EXTENSION CORD SIZES
Motor Voltage 50' 75' 100'
1.5 HP 115 No. 10 No. 10 No. 8
1.5 HP 230 No. 14 No. 14 No. 14
2 HP 115 No. 10 No. 8 No. 6
2 HP 230 No. 12 No. 12 No. 12
3 HP 230 No. 10 No. 10 No. 10
5 HP 230 No. 8 No. 8 No. 8
• If you have motor problems, contact your
FELKER Dealer (or the FELKER Organization
direct in emergency) for the name of the nearest
Authorized Service Dealer. If motor is under
warranty, having it worked on by a non-authorized
Service Dealer voids the warranty.
• Never transport a masonry saw with the cutting
head in position on the frame. The severe
pounding and bouncing can knock the head out of
alignment.
• Keep Drive Belts tight! Do not operate on low
voltage!
• Provision has been made for adjustment of the
TOP wheel of the Stay Level Blade Guard
assembly should it be necessary to compensate for
wear. Loosen the nut securing the ball bearing
wheel slightly, then tighten the Allen Screw at the
top, until the desired tension is obtained.
4. Important Advice
10 Important Check Points for getting maximum
performance out of your saw and maximum blade
life and efficiency.
1. Full voltage is essential to economical operation.
Always use 230 Volts where available, with a heavy
duty extension cord. Have an electrician check the
incoming voltage at the saw motor.
2. Drive belts must be tight! Power goes from the
motor to arbor shaft. When the belts are loose,
power is lost. Replace worn belts without delay.
Replace V-belts in sets only.
3. The blade must fit the arbor snugly, especially
diamond blades. Otherwise, pounding will occur
and seriously damage the blades. If the arbor
shoulder is grooved where the diamond blade has
bound in the cut while the shaft has continued to
turn the arbor must be replaced or the blade life will
be severely shortened.
4. Blade flanges must be full diameter - Minimum, 4”.
Replace worn down flanges at once as undersize
flanges shorten blade life and cause breakage.
5. Check conveyor cart condition regularly. Replace
wheels and wood insert frequently.
6. Be certain cutting head is correctly aligned.
Misalignment through handling damage or
transporting the saw with cutting head on the frame
can seriously affect the blade life.
7. Replace noisy bearings at once! Worn bearings
will very quickly destroy the blade.
8. Flush clean water through the water pump and
spray assembly after every day's use. This
prolongs the water pump and blade life.
9. Check the blade guard for damage or wear.
Replace if necessary.
10

10. Check the water tubes for plugging or damage.
Water must be supplied to both sides of the blade.
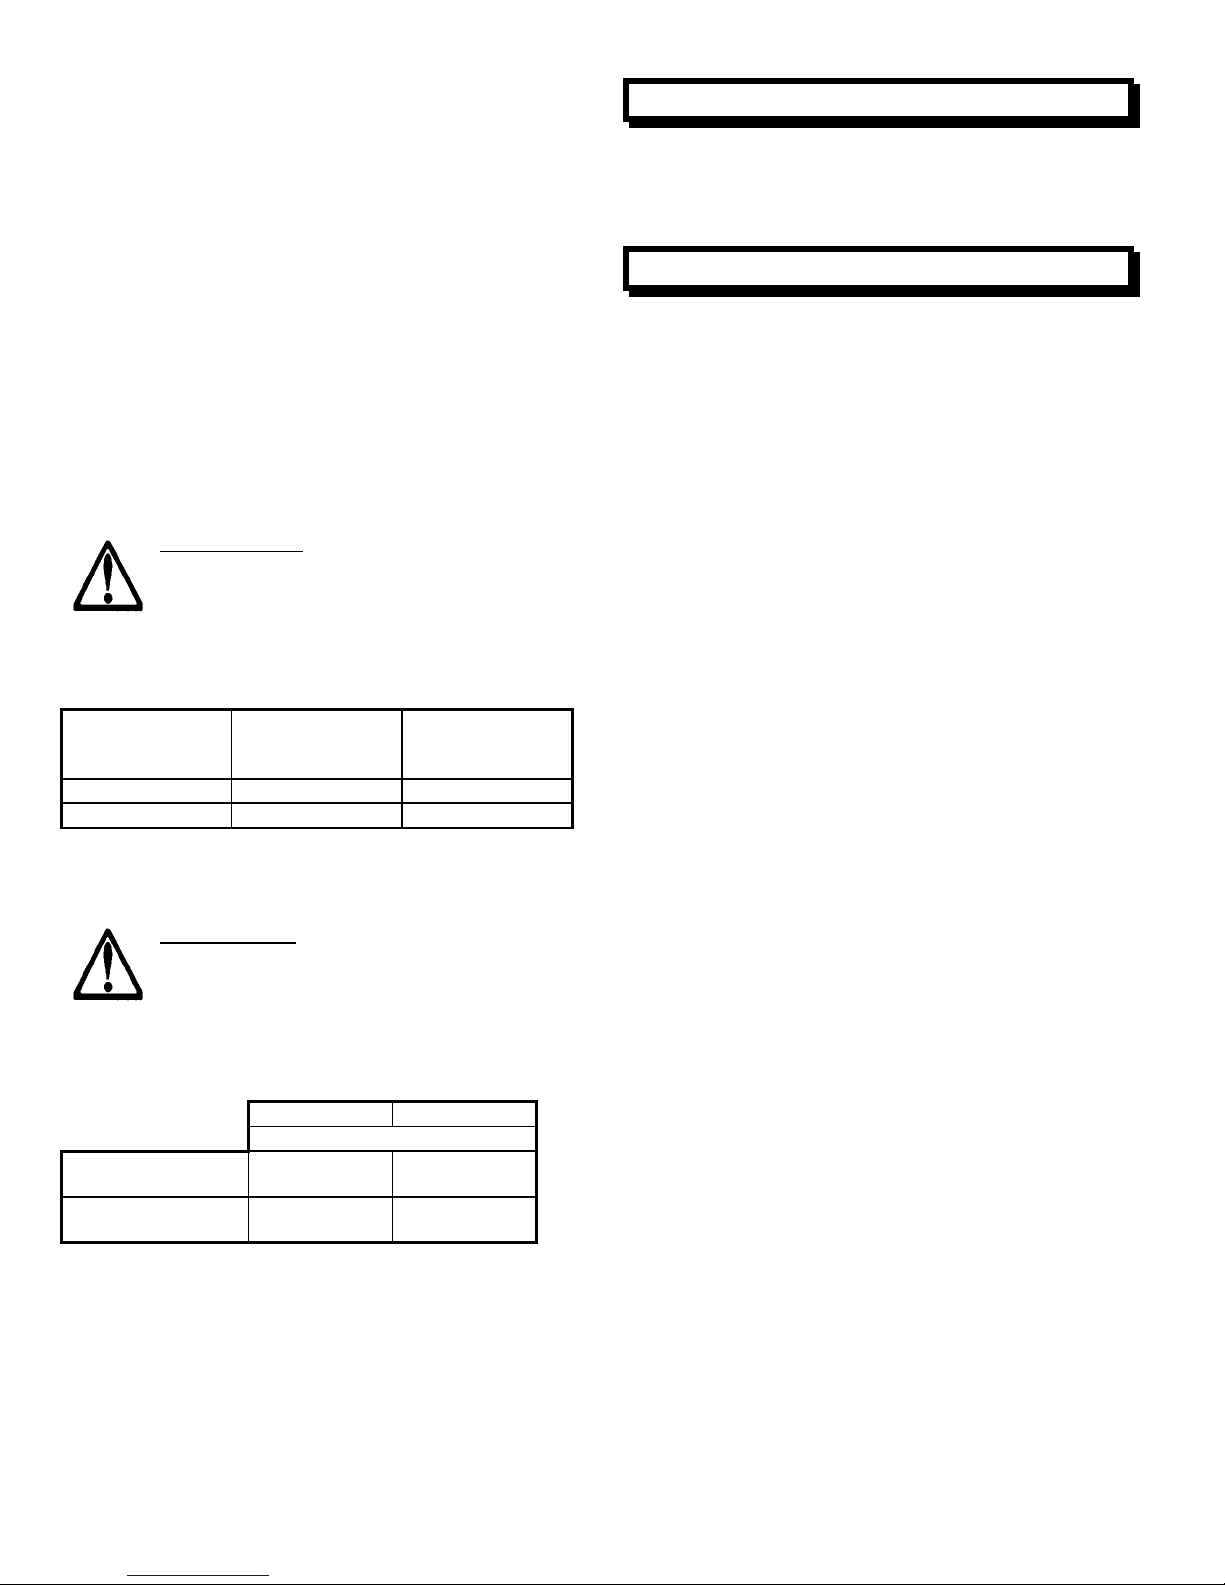
WARNING:
DO NOT EXCEED BLADE
SHAFT SPEED FOR EACH SIZE BLADE
DIAMETER SHOWN. EXCESSIVE BLADE
5. Repairs
We carry out all repairs in the shortest possible time
and at the most economic al prices . (See front page for
our address and phone numbers.)
Spare Parts
6.
SPEEDS COULD RESULT IN BLADE
BREAKAGE AND SERIOUS PERSONAL INJURY
OR DEATH.
BLADE
SIZE
BLADE
SHAFT
R.P.M.
MOTOR
R.P.M.
14” 3136 3450
20” 2352 3450
For quick supply of spare parts and to avoid any lost
time, it is essential to quote the data on the
manufacturers plate f ixed to the machine and the part
number to be replaced with every order.
The instructions for use and spare parts found in this document are for
information only and are not binding. As part of our product quality
improvement policy, we reserve the right to make any and all technical
modifications without prior notice
WARNING:
WHEN CHANGING THE
BLADE SIZE ON FELKER MASON-MATE
II, ALWAYS USE THIS TABLE TO SELECT
THE COMPONENTS THAT MUST BE
CHANGED.
14” 20”
5 HP
BLADE GUARD
MOTOR PULLEY
170330 170331
030931 030906
11

¡SEGURIDAD ANTE TODO!
ADVERTENCIAS
HACER y NO HACER
ADVERTENCIA: EL NO RESPETAR ESTAS ADVERTENCIAS E INSTRUCCIONES DE
OPERACION PUEDE PROVOCAR GRAVES LESIONES O LA MUERTE.
SI Lea todo el manual antes de manejar esta máquina. Entienda todas las advertencias, instrucciones y controles.
SI Mantenga siempre las protecciones en su lugar y en buenas condiciones.
SI Siempre use protecciones aprob ad as para los oídos, ojos, cabeza y respiración.
SI Lea y entienda todas las advertencias e instrucciones sobre la máquina.
SI Lea y entienda las definiciones de los símbolos que aparecen en este manual.
SI Antes de instalar la hoja, verifique que el agujero del eje de la hoja coincida con el eje portaherramienta de la máquina.
SI Mantenga todas las partes de su cuerpo alejadas de la hoja y de todas las piezas móviles.
SI Aprenda cómo parar la sierra rápidamente en caso de emergencia.
SI Ponga el interrumpor en la posición “OFF” antes de corectarlo a la fuente de poda.
SI Verifique que la hoja, las bridas y los ejes no estén dañados antes de instalar la hoja.
SI Use sólo discos abrasivos reforzad os o discos diamantados con núcleo d e acero fabricados para cortadoras de concreto.
SI Utilice hojas abrasivas, o bien, hojas diamantadas con centro de acero fabricadas para utilización en sierras para albañilería.
Verifique la velocidad comprobando las rpm del eje de la hoja y el diámetro de las poleas.
SI Verifique la configuración del motor de la sierra, comprobando la velocidad (rpm) del eje de la hoja y los diámetros de las poleas.
SI Lea toda la literatura e instrucciones de seguridad que acompañan a la hoja utilizada con esta sierra.
SI Inspeccione cuidadosamente cada h oja antes de usarla. Si se observan señales de daño o desgaste po co común, NO USE LA HOJA.
SI Instale la hoja firmemente. Apriete la tuerca del eje con un aprietatuercas.
SI Asegúrese que la hoja y las bridas estén limpias y libres de tierra y suciedad antes de instalar la hoja en la sierra.
SI Utilice la hoja correcta para el tipo de trabajo que se vaya a ejecutar. En caso de dudas, consultar con el fabricante de la hoja.
SI Tenga cuidado y siga las instrucciones cuando cargue y descargue la máquina.
SI Maneje esta máquina solamente en lugares bien ventilados.
SI Indique a las personas dónde situarse mientras la sierra está funcionando.
SI Establezca un programa de entrenamiento para todos los operadores de esta máquina.
SI Despeje el lugar de trabajo de personas innecesarias. No permita que nadie se sitúe delante o detrás de la hoja mientras el motor
está funcionando.
SI Asegúrese que la hoja no esté haciendo contacto con ninguna cosa antes de arrancar el motor.
SI Sea duidadoso y siga las instrucciones al instalar o transportar la máquina.
SI Siempre amarre bien la máquina cuando la transporte.
SI Deje que todos los trabajos de mantenimiento los haga personal especializado.
SI Asegúrese de enchufar las sierras eléctricas a un circu ito debidamente conectado a tierra.
SI Asegúrese que los cordones eléctricos sean del tamaño correcto y estén en buenas condiciones.
SI Aleje el cable del calor, eceite y de las aristas filudas.
SI Sujete bien el material que está cortando.
SI Limpie la bandeja de agua frecuentemente.
SI Antes de instalar la hoja, verifique que el agujero del eje de la hoja coincida con el eje portaherramienta de la máquina.
SI Limpie la máquina diariamente.
SI Cumpla con el reglamento eléctrico de su localidad.
SI Desenchufe los equipos cuando no los usa, antes de hacer mantenimiento y al cambiar accesorios.
SI Siempre entregar un ejemplar de este manual al usu ario del equipo si se neccsitan ejemplares ad icionales, lammar SIN CARGO
1-800-365-4003.
HACER
al
12

¡SEGURIDAD ANTE TODO!
ADVERTENCIAS
HACER y NO HACER
ADVERTENCIA: EL NO RESPETAR ESTAS ADVERTENCIAS E INSTRUCCIONES DE
OPERACION PUEDE PROVOCAR GRAVES LESIONES O LA MUERTE.
NO haga funcionar esta máquina sin antes haber leído y entendido este manual.
NO maneje esta máquina sin tener la protecció n de la hoja u otras protecciones instaladas en su lugar.
NO se sitúe detrás del paso de la hoja mientras el motor está funcionando.
NO deje esta máquina desatendida mientras el motor está funcionando.
NO trabaje en esta máquina mientras el motor está funcionando.
NO maneje esta máquina si está cansado o fatigado.
NO utilice una hoja de corte húmedo sin tener el suministro adecuado d e agua.
NO sobrepase la velocidad máxima indicada para cada tamaño de hoja. El exceso de velocidad puede causar la rotura de la hoja.
NO utilice equipos u hoj as q ue estén dañados.
NO use disco con puntas de carburo.
NO utilice discos abrasivos con agua convencion ales.
NO toque ni trate de parar con las manos una hoja en movimiento.
NO transporte una máquina de corte con la hoja instalada.
NO utilice una hoja abrasiva que haya sufrido una caída.
NO toque una hoja diamantada de corte en seco inmediatamente después de usarla. Estas hojas se demoran varios minutos en enfriarse
después de cada corte.
NO use bridas de hojas que estén dañadas o desgastadas.
NO permita que nadie se acerque a la máquina durante la puesta en marcha o mientras la máquina está funcionando.
NO maneje esta máquina en un lugar encerrado a menos que tenga buena ventilación.
NO maneje esta máquina cerca de ningún objeto que sea inflamable. Las chispas podrían causar un incendio o una explosión.
NO permita que la hoja sobresalga más de 180 grados del protector.
NO maneje esta máquina sin estar capacitado para hacerlo.
NO utilice una hoja que se ha sobrecalentado (el núcleo tiene un colo r azulado).
NO incline, atasque, encaje o tuerza la hoja en el corte.
NO atasque el material contra la hoja.
NO esmerile con el costado de la hoja.
NO cambie el motor pur alguno que no tenga una conexión especial de tierra de seguridad.
NO deje los córdones eléctricos en o cerca del agua.
NO maneje la sierra si está bajo la influencia de drogas o bebidas alcohólicas.
NO HACER
*****************
Esta sierra fue diseñada para ciertas aplicaciones solamente. NO la modifique ni utilice para ninguna otra aplicación salvo
aquéllas para las cua les f ue diseñada. En ca so de dudas respecto a su a plicación, NO use la sierra sin a ntes haber co nsultado por
escrito a Diamant Boart, Inc. y haber recibido nuestras indicaciones.
Diamant Boart, Inc.
17400 West 119th Street
Olathe, Kansas 66061
13

INFORMACION DE
OBLIGATORIO INDICACION
ADVERTENCIA PROHIBIDO
Estos símbolos darán
consejos para su seguridad
Antes de salir de nuestra fábrica, cada
máquina es sometida a pruebas
exhaustivas.
Siga nuestras instrucciones estrictamente nuestras
instrucciones y su máquina le prestara muchos
años de servicio en condiciones normales de uso.
1. Usos
Uso: Corte en húmedo o en seco de albañilería y
refractarios.
Herramientas: Hojas diamantadas -- en seco o
enfriadas por agua, Diámetro: 14" y 20"
(Para información diríjase a su proveedor Felker)
Profundidad del corte (máxima):
5.00" con hoja de 14" de diámetro u 8.00" con 20" de
diámetro
Peso normal: 330 lbs
Peso de operación: 330 lbs
Dimensiones (La x An x Al): 48 x 22 x 58
Eje de la hoja, rpm: 14" - 3136
20" - 2352
Antes de poner en marcha por primera vez
la máquina, lea detenidamente las
instrucciones y familiarícese con la
máquina.
El lugar de trabajo debe estar totalmente
despejado, bien iluminado y haberse
eliminado todos los riesgos de seguridad
(ni agua ni objetos peligrosos en la
cercanía)
El operador debe usar
ropa protectora
adecuada para el trabajo
que está haciendo.
Recomendamos usar
protección de los oídos,
respiración y ojos.
Prohibido el paso a toda persona ajena a la
obra.
Utilizar solamente hojas marcadas con
velocidad máxima de operación mayor que
la velocidad del eje de la hoja.
2. Instrucciones De Operación
• Los patines de madera sobre los cuales está montada
la sierra deben quedar permamentemente sujetos a las
patas de la sierra.
• Quitar el perno suelto situado en el tubo transversal.
Eleve la barra inclinable y el brazo de conexión a la
posición vertical, para poder instalar el perno y
apretarlo.
• Antes de colocar el cabezal de corte en la armazón,
asegúrese que los descansos de cojinetes estén
limpios. Apriete las bandas de sujeción sobre los
cojinetes firmemente. Instale la barra de conexión en la
parte inferior trasera del cabezal de corte, insertando el
pasador a través de las orejetas y barra de conexión.
• Fije el conector "Quick Disconnect" (desconexión
rápida) en el brazo de conexión a la bola en el protector
de la hoja tirando hacia atrás del manguito accionado
por resorte mientras se coloca sobre la bola, luego
suéltelo. El largo del brazo fue ajustado en la fábrica
para la mejor posición del protector de la hoja.
Este largo se puede variar para cambiar la posición del
protector, soltando las tuercas de seguridad adelante y
atrás, y alargando o acortando el brazo.
• Para corte en húmedo, llene la bandeja depósito de
agua hasta una pulgada (2,5 cm) del borde superior.
Asegúrese que la toma de agua de la bomba esté
siempre totalmente cubierta por agua. Mantenga la
toma de la bomba libre de barro y materias extrañas.
• Las sierras de albañilería monofásicas de FELKER
tienen el enchufe de configuración correcta aprobado
por NEMA a la salida del motor; el enchufe
correspondiente al voltaje para el cual está ajustado el
motor. Será necesario instalar un conector de
configuración NEMA idéntico en el cordón de extensión
al que está enchufada la salida del motor. Por ejemplo:
una sierra de 5 hp ajustada para 230 voltios viene con
un enchufe NEMA No. L6-30P en la salida. El cordón de
extensión necesitará un enchufe LC-30C para hacer la
conexión correcta. Tener en mente que para cumplir
con el código, el enchufe en el cordón de extensión
también tiene que ser un NEMA No. L6-30P y el
receptáculo en la caja al cual irá enchufado debe ser
NEMA número L6-30R.
ADVERTENCIA: Siempre verifique que la
cortadora esté conectada a un tomacorriente
con protección de tierra adecuada.
14

• Los motores eléctricos de cualquier marca se pueden
quemar totalmente cuando el suministro de voltaje
disminuye 10% por debajo del régimen nominal del
motor. Use fusibles de servicio pesado adecuados en el
circuito.
• Pida a un electricista que verifique el voltaje en el motor
mientras la sierra está cortando.
• Todos los motores monofásicos para albañilería de
FELKER tienen protectores de sobrecarga de
reconexión manual. Cuando se produzca una
sobrecarga, ponga el interruptor en "OFF" (apagado),
deje que el motor se enfríe por 5 a 10 minutos y luego
oprima el botón de reconexión. Un "clic" indica que está
reconectado.
3. Mantenimiento
• El barro que se acumula al fondo de la bandeja de agua
es tan abrasivo como el polvo para pulir y, si se
acumula en cantidad, acortará la duración de la bomba
de agua y de la hoja. Limpie el depósito de agua por lo
menos una vez al día - dos veces en uso prolongado- y
vuelva a llenar con agua limpia.
• Al finalizar la jornada, quite todo el barro de la sierra.
Haga pasar agua por la bomba y mangueras de agua
todas las noches.
• NOTA: Al almacenar la sierra mientras no se usa, use
un cepillo de alambre para quitar el barro endurecido o
pegado. Limpie y lubrique a fondo las piezas móviles así la sierra estará listar para realizar el próximo trabajo
con máxima eficacia.
• Consulte la tabla para la medida del cable de extensión.
Los cables de calibre inferior queman estos motores
costosos. Use 230 voltios siempre que sea posible.
TAMAÑO DE LOS CORDONES DE EXTENSION
Motor Voltaje 50 pies 75 pies 100 pies
1.5 HP 115 No. 10 No. 10 No. 8
1.5 HP 230 No. 14 No. 14 No. 14
2 HP 115 No. 10 No. 8 No. 6
2 HP 230 No. 12 No. 12 No. 12
3 HP 230 No. 10 No. 10 No. 10
5 HP 230 No. 8 No. 8 No. 8
• Si tiene problemas con el motor, contacte al
concesionario FELKER (o en caso de emergencia,
directamente a la Organización FELKER) para darle el
nombre del servicio técnico autorizado más cercano. Si
el motor está bajo garantía, el hacerlo reparar por
personas no autorizadas rendirá nula la garantía.
• Nunca transporte una sierra de albañilería con el
cabezal de corte montado en el armazón. Los golpes y
saltos del traslado pueden desalinear el cabezal.
• ¡Mantenga tensas las correas de transmisión! ¡No
trabaje con bajo voltaje!
• Se ha provisto el reajuste de la rueda SUPERIOR del
conjunto protector de la hoja si fuera necesario
compensar el desgaste. Afloje la tuerca, sujetando la
rueda del cojinete de bolas y luego apriete el tornillo
allen en la parte superior, hasta obtener la tensión
requerida.
4. Consejo Importante
10 verificaciones importantes para obtener el máximo
rendimiento de su sierra y la mayor eficacia y duración
de la hoja.
1. La tensión nominal es esencial para un trabajo
económico. Siempre use 230 voltios donde esté
disponible, con un cordón de extensión para trabajo
pesado. Haga que un electricista mida el voltaje que
llega al motor de la sierra.
2. ¡Las correas de transmisión deben estar tensas! La
potencia va del motor al eje de la hoja. Al soltarse las
correas, se pierde potencia. Reemplace las correas
desgastadas sin demora. Reemplace las correas
trapezoidales en juegos solamente.
3. La hoja debe encajar en el eje ajustadamente,
especialmente las hojas diamantadas. De otra manera,
habrá golpeteo con grave daño para las hojas. Si el
apoyo del eje tiene muescas como resultado del rebote
de la hoja diamantada durante el corte cuando el eje
todavía está girando, se debe reemplazar el eje pues la
duración de las hojas disminuirá considerablemente.
4. Las bridas de la hoja debe tener el diámetro máximo mínimo 4". Cambie las bridas desgastadas
inmediatamente pues las bridas de diámetro inferior
acortan la vida de la hoja y producen roturas.
5. Examine el estado del carro transportador
regularmente. Cambie las ruedas y el inserto de madera
frecuentemente.
15
6. Verifique la correcta alineación del cabezal de corte. La
desalineación causada por mala maniobra o transporte
de la sierra con el cabezal de corte instalado en el
armazón puede afectar seriamente la duración de la
hoja.
7. ¡Cambie los cojinetes ruidosos inmediatamente! Los
cojinetes desgastados destruyen rápidamente la hoja.
8. Haga circular agua a través de la bomba y del sistema
de aspersión al finalizar la jornada. Esto aumenta la
duración de la bomba de agua y de la hoja.
9. Revise el protector de la hoja en busca de daño o
desgaste. Cámbielo si es necesario.
10. Verifique que los tubos de agua no estén obturados o
dañados. Se debe suministrar agua a ambos lados de
la hoja.
ADVERTENCIA: NO EXCEDA LA VELOCIDAD
DEL EJE INDICADA PARA CADA DIAMETRO
DE HOJA. LAS VELOCIDADES EXCESIVAS DE
LA HOJA PUEDEN CAUSAR SU ROTURA Y
GRAVES LESIONES CORPORALES O
INCLUSO LA MUERTE.
5. Reparaciones
Hacemos todas las reparaciones en los plazos más breves
posibles, y a los precios más económicos. (Vea la portada
para nuestra dirección y número de teléfono).
Piezas De Recambio
6.
Para un suministro rápido de piezas de recambio y evitar
cualquier pérdida de tiempo, en cada pedido es esencial
mencionar los datos de la placa de fabricación fijada a la
máquina; y el número de pieza que se va a reemplazar.
Las instrucciones de us o y las piezas de recambio presentadas en
este documento son solamente para información y no constituyen
obligación ninguna. Como parte de nuestra polít ica de mejoramiento
de la calidad de nuestros productos , nos reservamos el derec ho de
hacer cualquiera y todas las modificaciones técnicas sin previo
aviso.
TAMAÑO DE LA
HOJA
EJE DE LA
HOJA,
RPM
MOTOR,
RPM
14” 3136 3450
20” 2352 3450
ADVERTENCIA:
AL CAMBIAR DE TAMAÑO DE HOJA EN LA
SIERRA MASON-MATE II FELKER, SIEMPRE
CONSULTE LA TABLA PARA SELECCIONAR
LOS COMPONENTES QUE SE DEBEN
CAMBIAR.
14” 20”
5 HP
PROTECTOR DE
LA HOJA
POLEA DEL
MOTOR
170330 170331
030931 030906
16

Note:
Nota:
17

Notes:
_________________________________
_________________________________
_________________________________
_________________________________
_________________________________
_________________________________
_________________________________
Serial Number Identification:
Saw Model No.
Saw Serial No.
Motor Mfg .
Specification No.
(See Motor Plate)
Engine Mfg.
Serial No.
Purchase Date:
___________
___________
___________
___________
______________
Other Reference Documents related to this machine:
Instruction Sheet: P/N 0A7810, Masonry Saw Handle Kit
Instruction Sheet: P/N 0A7873, Blade Shaft & Housing
Instruction Sheet: P/N 0A7830, Motor Switch Installation
18

Parts List
ITEM
The Item Number Shown
PARTS LIST
LISTA DE PIEZAS
Callout De signation:
The Quantity only at this location.
This the total quantity used
is not
throughout the entire diagram.
QTY
On The Diagram.
19

Diagram 1 – Frame Group
20

Diagram 1 – Parts List
ITEM P/N DESCRIPTION QTY
1 ------ Frame Assembly 1
2 161586 Frame Weldment, PC Yellow 1
3 030884 Skid, 2 x 4 x 47.5 Lg 2
4 020022 Bolt, Carriage .375-16UNC x 2.50 4
5 020743 Washer, Flat .375 Dia 4
6 020136 Nut, Std Hex .375-16UNC 4
7 032605 Water Pump Assy, 115V G300 (Includes Items 9 & 10) 1
- 032606 Water Pump Assy, 230V-50Hz G300 (Incl Items 9 & 10) 1
8 ------ Water Pump (See Diagram 7) 1
9 030654 Adapter, 1/4 NPT x 3/8 Hose Barb 1
10 161776 Tubing, Vinyl 3/8 ID x 42 Inch 1
11 177893 Conveyor Cart Assy (Does Not Include Item 25) 1
12 ------ Conveyor Cart Bench Assy 1
13 ------ Conveyor Cart w/Top 1
14 020763 Washer, Flat .312 SAE 4
15 030822 Wheel 4
16 032366 Nut, Keps .313UNC 4
17 032368 Backstop, Conveyor Cart 1
18 170038 Vinyl Tubing, 3/8 ID 2
19 177894 Wood Insert, 15.87” Lg 1
-- 032431 Wood Insert, 11.50” Lg (Older Model Conveyor Cart) 1
20 177904 Screw, Wood Rd Hd #8-32UNC x 1.25 Phil 3
21 020301 Capscrew, Hex Hd .250-20UNC x .625 4
22 020195 Locknut, Fiber .250-20UNC 4
23 177976 Decal, Ruler Set 1
24 020432 Screw, Pan Hd Slf Tap #10-24UNC x .38 Type D Phil 5 (Note 1)
25 030351 Guide, Measuring Assy (Includes Item 26) 1 (Note 2)
26 180987 Knob, Tee 5/16-18UNC x 1.00 (Later Models) 1 (Note 2)
-- 020600 Thumb Screw, .312-18UNC x 1.00 (Early Models) 1 (Note 2)
27 ------ Drain Plug Assembly 1
28 ------ Stopper, Lab 1
29 ------ Washer, Flat 1.50 OD x .281 ID x .062 Thk 1
30 ------ Washer, Flat .250 Dia 1
31 ------ Nut, Wing .250-20UNC Type A 1
32 ------ Screw, Mach Rd Hd .250-20UNC x 1.5 1
33 032342 Drain Hose 1
34 032372 Splash Curtain 1
35 177383 Wrench, 1/2 x 3/4 1
NOTES:
1. Screw (Item 24) Used Only With Aluminum Rulers That Were Used On Early Models (Aluminum Rulers Are
No Longer Available). The New Ruler Set (Decal) Requires No Mounting Screws.
2. Item 26: Thumb Screw (P/N 020600) Was Used On Early Models, and is Interchangeable with the Knob (P/N
180987) Used On Later Models. Item 25: Measuring Guide Assy (From Service Parts) Could Contain Either
The Knob Or The Thumb Screw.
21

Diagram 2 – Foot Pedal Group
22

Diagram 2 – Parts List
ITEM P/N DESCRIPTION QTY
1 ------ Tilt Bar Assy 1
2 175334 Tilt Bar Weldment 1
3 175333 Tilt Adjust Yoke 1
4 175332 Foot Pedal Weldment 1
5 040141 Flange Bearing 1
6 020306 Capscrew, Hex Hd .250-20UNC x 1.0 2
7 020762 Washer, Flat .250 SAE 2
8 020195 Locknut, Fiber .250-20UNC 2
9 032590 Adjustment Nut Assy (Includes Item 11) 1
10 ------ Adjustment Nut Weldment 1
11 040139 Fitting, Grease 1/8 NPT 1
12 160164 Pin, Clevis .50 Dia x 1.13 Lg 1
13 020612 Pin, Cotter .094 x .75 1
14 060305 Eyebolt, .312-18UNC X 1.00 1
15 020169 Nut, Jam Hex Hd .312-18UNC 1
16 020197 Locknut, Fiber .3125-18UNC 1
17 032570 Adjustment Screw 1
18 020010 Key, Woodruff #405 1
19 032580 Stop Sleeve 1
20 032240 Crank Handle Assembly (Includes Item 21) 1
21 032250 Handle Assy, Revolving 1
22 020766 Washer, Flat .500 SAE 1
23 020211 Nut, Acorn .500-13UNC 1
24 040184 Rubber Boot, 4 Inch (27 ribs) 1
25 020261 Clamp, Hose A22 2
26 020509 Capscrew, Hex Hd .375-16UNC x 2.00 1
27 020199 Locknut, Fiber .375-16UNC 1
28 030810 Spring, Foot Pedal 2
23

Diagram 3 – Foot Pedal Attaching Group
24

Diagram 3 – Parts List
ITEM P/N DESCRIPTION QTY
1 ------ Frame Parts (See Diagram 2) 1
2 162154 Foot Pedal Pin 1
3 020612 Pin, Cotter .094 x .75 2
4 020306 Capscrew, Hex Hd .250-20UNC x 1.0 2
5 020762 Washer, Flat .250 SAE 2
6 020175 Nut, Jam Hex Hd .625-11UNC 2
7 020024 Bolt, Carriage .625-11UNC x 2.50 1
8 160080 Pin, Snapper .375 Diameter 1
25

Diagram 4 – Head Platform Group
26

Diagram 4 – Parts List
ITEM P/N DESCRIPTION QTY
1 ------ Cutting Head Assy 1
2 180053 Platform Weldment 1
3 032501 Shim, Brass .005 Thick 1 (Note 3)
4 032502 Shim, Brass .015 Thick 1 (Note 3)
5 032503 Shim, Brass .020 Thick 1 (Note 3)
6 030822 Wheel 3
7 032366 Nut, Keps .313UNC 3
8 020548 Screw, Set Soc Cup Pt #10-24UNC x .375 1
9 030580 Bearing, Head Pivot 2
10 177696 Draw Bolt, 3/8-16UNC 1
11 020199 Locknut, Fiber .375-16UNC 3
12 180054 Shield, Blade Guard 1
13 020301 Capscrew, Hex Hd .250-20UNC x .625 2
14 020195 Locknut, Fiber .250-20UNC 2
15 186215 Handle 1 (Note 4)
16 020380 Capscrew, Hex Hd .375-16UNC x 1.75 2
17 139568 Grip, Handle 1 (Note 4)
18 195023 Blade Shaft Assy w/Outer Flange (Incl Items 19-29) 1 (Note 5)
19 ------ Shaft, Blade w/Hsg Assy 1 (Note 5)
20 195020 Housing, Shaft 1 (Note 5)
21 030004 Washer, Finger Spring 1
22 139273 Bearing w/seal 2
23 195017 Shaft, Blade 1 (Note 5)
24 177973 Collar, Inner 1
25 030951 Outer Collar 1
26 020378 Capscrew, Hex Hd .500-20UNF x 1.00 1
27 020742 Washer, Flat .313 Dia 4
28 020785 Lockwasher, Split .313 4
29 020316 Capscrew, Hex Hd .312-24UNF x 1.00 4
30 ------ Belt Guard Group 1
31 180055 Bracket, Belt Guard, PC Black 1
32 170320 Belt Guard, Yellow 1
33 ------ Belt Guard 1
34 020741 Washer, Flat .250 Dia 6
35 020195 Locknut, Fiber .250-20UNC 6
36 020370 Capscrew, Hex Hd .250-20UNC x .75 1
37 020302 Capscrew, Hex Hd .250-20UNC x .75 3
NOTES:
3. Shims are listed as required to align bladeshaft. Order qty. desired for alignment of a specific saw.
4. Handle and Grip Effective November 1999. Refer to Instruction Sheet 0A7810 for further Information, for
retro-fitting of new handle onto older units. Note that Older Handle (P/N 060390 – Not Shown) is a Straight
Pipe, and is No Longer Available (Replaced with Kit P/N 186218). Older Grip (P/N 043935 – Not Shown), is
for use with P/N 060390 (Old Handle) and is still available.
5. P/N 195023 Blade Shaft Assy Effective S/N 380821 (One Earlier Unit S/N 380814). First Production Unit
Built 04September 2002. Note that new Shaft (Item 23), and Housing (Item 20) ARE NOT for use on units
before the Effective S/N, unless they have had this blade shaft assembly field installed (through Service Parts).
Refer to Instruction Sheet 0A7873 for further information, and how to identify new / old blade shaft and
assembles (due to this change).
27

Diagram 5 – Head Platform Attaching Group
28

Diagram 5 – Parts List
ITEM P/N DESCRIPTION QTY
1 175335 Tilt Arm Weldment 1
2 020374 Capscrew, Hex Hd .312-18UNC x 3.00 2
3 020197 Locknut, Fiber .3125-18UNC 2
4 020306 Capscrew, Hex Hd .250-20UNC x 1.0 2
5 020762 Washer, Flat .250 SAE 2
6 032471 Bar, Bearing Clamp 2
7 032660 Clamp, Bearing 2
8 177721 Knob, 1.75 x 5/16-18UNC-2A 2
9 020612 Pin, Cotter .094 x .75 4
10 020742 Washer, Flat .313 Dia 2
29

Diagram 6 – Blade Guard, 14 inch & 20 Inch
30

Diagram 6 – Parts List
ITEM P/N DESCRIPTION QTY
1 170331 Blade Guard Assy-20”, PC Yellow (Incl. Items 2-15) 1
170330 Blade Guard Assy-14”, PC Yellow (Incl. Items 2-15) 1
2 ------ Blade Guard Weldment, 20” 1
------ Blade Guard Weldment, 14” 1
3 030860 Track 1
4 020762 Washer, Flat .250 SAE 14
5 020701 Pop Rivet, USM #D88BS 7
6 030875 Gasket, Water Manifold 1
7 030870 Manifold, Water 1
8 020813 Elbow, 90° Street, 1/4NPT male x 1/4NPT female 1
9 031039 Machined Ball Stud 1
10 090578 Water Valve, 1/4NPT male by 1/4NPT female 1
11 161176 Elbow, 90 Deg Barb, .375 Hose x .25 NPT 1
12 030891 Water Tube Assembly, 20” 2
030865 Water Tube Assembly, 14” 2
13 020171 Nut, Jam Hex Hd .375-24UNF RH 1
14 020425 Screw, Mach Rd Hd #10-32UNF x .50 2
15 020424 Screw, Mach Rd Hd #10-32UNF x .375 2
31

Diagram 7 – Water Pump Group
32

Diagram 7 – Parts List
ITEM P/N DESCRIPTION QTY
1 032088 Water Pump, 115V (Complete) 1
- 032087 Water Pump, 230V, 50Hz (Complete) 1
2 032124 Repair kit, G300 Water Pump (Includes Items 3-10) 1
3 032094 Gasket, G300 & G100 1
4 032093 Volute, G300 1
5 032123 Screw, Flat Hd Slf Tap #8-18 x 0.50 4
6 032072 Impeller, G300 1
7 161490 Front Plate, G300 1
8 032095 O-Ring, G300 1
9 032122 Screw, Rd Hd Slf Tap #8-18 x 0.50 3
10 050171 Screen, G300 & G100 1
33

Diagram 8 – Motor Group, 3HP & 5 HP
34

Diagram 8 – Parts List
17 October 2002
ITEM P/N DESCRIPTION QTY
1 030921 Pulley, 2G3V3.35-.75 (Incl Item 2) (14” & 20”, 60Hz) 1
- 060105 Pulley, 2G3V2.80-.75 w/ Hub (14”, 50Hz) 1
- 060106 Pulley, 2G3V3.15-.75 w/ Hub (20”, 50Hz) 1
2 020550 Screw, Set Soc Cup Pt .312-18UNC x .375 4
3 020062 Key, Square .188 x 1.25 Lg 1
4 030925 V-Belt, 3VX530 (Set of 2) 1
5 030931 Pulley, 2G3V3.00 - .875 (Incl Item 2) (14”, 60Hz) 1
- 030906 Pulley, 2G3V2.25 - .875 (Incl Item 2) (20”, 60Hz) 1
- 030902 Pulley, 2G3V3.15 - .875 Bore w/Hub (14”, 50Hz) 1
- 060139 Pulley, 2G3V2.65 - .875 (Incl Item 2) (20”, 50Hz) 1
6 020550 Screw, Set Soc Cup Pt .312-18UNC x .375 2
7 169622 Motor, 5hp 208-230/60Hz/1 Phase 1
- 000923 Motor, 5hp 208-230/460/60Hz/3 Phase 1
- 169656 Motor, 3hp 115/208-230/60Hz/1 Phase 1
- 000806 Motor, 3hp 208-230/460/60Hz/3 Phase 1
8 020743 Washer, Flat .375 Dia 4
9 020323 Capscrew, Hex Hd .375-16UNC x 1.00 4
10 020199 Locknut, Fiber .375-16UNC 4
11 030071 Switch Assy, 3 Phase Only 1 (Note 6)
- 180810 Switch Assy, 1 Phase Only 1 (Note 7)
12 020741 Washer, Flat .250 Dia 4
13 020489 Screw, HH Wash Self Tap .25-20UNC x .75 2
NOTES:
6. DO NOT use part number 030071 Switch Assy (3 phase) on the 5hp-3 Phase Motor if it is set to 230 Volts.
Use only on 3hp-3 Phase motor set to 230V or 460V and 5hp-3 Phase Motor set to 460V or 575V.
7. See Diagram 9 for service parts.
35

Diagram 9 – P/N 180810 Switch Assy, 3 hp & 5 hp / 1 Phase / 60 Hz Motors
Diagram 9 Parts List: Contents of P/N 180810 Switch Assy (For 3 hp & 5 hp 1 Phase Motors Only)
Ite
Qty Part No. Description
m
1 4 030085 Connector, Fork, 12-10Ga (Not Shown Above)
2 1 161581 Switch, 30A, 250V (for 3 hp & 5 hp, 1 Phase Motors Only)
3 1 176953 Locknut, ¾” Conduit
4 1 180809 Cable, #12,-5 Conductor x 33” Long
5 1 180810 Switch Assy, Motor
6 1 180814 Switch Box, ¾”NPT (Modified)
7 1 180815 Connector, ¾”NPT x 90 Degree
8 1 180818 Connector, Ring Terminal, #8, 12-10, Insulated (Not Shown Above)
9 1 032541 Cover Assy, Switch Box – Includes Gasket & four #6-32UNF Screws
10 2 020489 Screws, .250-20UNC x .75” Lg (Not Shown–Use To Install Switch Assy to Machine)
11 1 0A7830 Instruction Sheet, Switch Assy Installation (Not Shown Above)
Note: Refer To Instruction Sheet 0A7830 for Installation of 180810 Switch Assy.
36

Notes:
_________________________________
_________________________________
_________________________________
_________________________________
_________________________________
_________________________________
_________________________________
_________________________________
37

Diagram 10 – Motor Group, 7.5 HP
38

Diagram 10 – Parts List
ITEM P/N DESCRIPTION QTY
1 001265 Motor, 7.5hp 230V/460V 60 Hz, 3 Phase 1
- 001257 Motor, 7.5hp 575V 60 Hz, 3 Phase 1
- 162287 Motor, 7.5hp 415V 50 Hz, 3 Phase 1
- 001270 Motor, 7.5hp 220V-380V 50 Hz, 3 Phase 1
2 020743 Washer, Flat .375 Dia 3
3 020323 Capscrew, Hex Hd .375-16UNC x 1.00 4
4 020199 Locknut, Fiber .375-16UNC 4
5 041113 Pulley, 3G3V3.35OD x .75 Bore (Includes Item 9) 1
6 030920 Pulley, 3G3V2.25 ODx.875 ID (20”, 60Hz)(Incl Itm 10) 1
- 030916 Pulley, 3G3V3.00 ODx.875 ID (14”, 60Hz)(Incl Itm 10) 1
7 030930 V-Belt, 3VX530 (Set of 3) 1
8 020062 Key, Square .188 x 1.25 Lg 1
9 020541 Screw, Set Soc Cup Pt .250-20UNC x .375 2
10 020550 Screw, Set Soc Cup Pt .312-18UNC x .375 2
39

Diagram 11 – Motor Starter (On / Off Switch) – 7.5 HP Motor
40

Diagram 11 – Parts List
ITEM P/N DESCRIPTION QTY
1 190069 Bracket, Switch Box 1
2 186252 Starter Box, 7.5hp/3ph/575V 1 (Note 8)
190102 Starter Box, 7.5hp/3ph/460V 1 (Note 8)
190103 Starter Box, 7.5hp/3ph/230V 1 (Note 8)
3 197290 Washer, Flat M4 4
4 197293 Screw, Mach Pan Hd M4 x 0.70 x 16mm 2
5 167485 Locknut, Fiber M4 x 0.70 2
6 020370 Capscrew, Hex Hd .250-20UNC x .75 3
7 020195 Locknut, Fiber .250-20UNC 3
8 176933 Sealing Ring, 3/4 Conduit 2
9 176953 Locknut, 3/4 Conduit 3
10 182024 Strain Relief, 3/4 NPT 3
11 182018 Cord, Type SO - 12/4 x 38” (To Motor) 3.17 Feet
12 182018 Cord, Type SO - 12/4 x 42” (To plug) 3.50 Feet
13 090556 Connector, Wire, Yellow, 18-10 AWG 6
14 182021 Terminal Ring, Insulated #10 x 12-10GA 1
15 197101 Wire Tie, .094 x 8.0 Lg (Cord To Head Platform) 1
16 ------ Plug, Customer Supplied 1
NOTES:
8. See Wiring Diagrams (Diagrams 17-21) To Verify Proper Motor / Switch Box Combination.
41

Diagram 12 – Wheel Around Kit (Field Installed Accessory)
42

Diagram 12 – Parts List
ITEM P/N DESCRIPTION QTY
1 020766 Washer, Flat .500 SAE 18
2 034005 Lever Weldment 2
3 034002 Wheel, 10 Dia x 2 3/8 x 5/8 Bore 2
4 020767 Washer, Flat .625 SAE 8
5 020361 Capscrew, Hex Hd .625-11UNC x 3.25 2
6 020352 Capscrew, Hex Hd .500-13UNC x 5.00 2
7 020201 Locknut, Fiber .500-13UNC 2
8 034003 Stop Plate 2
9 167742 Plastic Spacer 4
10 020195 Locknut, Fiber .250-20UNC 4
11 195005 Screw, Mach Ft Hd .250-20UNC x 1.50 4
12 020764 Washer, Flat .375 SAE 2
13 034004 Hand Lever 2
14 048740 Capscrew, Hex Hd .375-16UNC x 1.25 4
15 020199 Locknut, Fiber .375-16UNC 4
43

Diagram 13 – Wiring Diagram 5 hp / 208-230V / 1 Phase / 60Hz Motor (169622)
17 October 2002
Diagram 14 – Wiring Diagram 5hp/ 208V-230V/460V/3 Phase/ 60Hz Motor (000923)
Contact Factory For Wiring Diagram
44

Diagram 15 –Wiring Diagram 3 hp/ 115V/208-230V /1 Phase/60 Hz Motor (169656)
Diagram 16 – Wiring Diagram 3 hp/ 230V/460V /3 Phas e/60 H z Motor (000806)
Contact Factory For Wiring Diagram
45

Diagram 17 – Wiring Diagram 7.5 hp / 230V / 3 Phase / 60 Hz Motor (001265)
(Ref: Dwg B-182128)
46

Diagram 17 – Parts List 7.5 hp / 230V / 3 Phase / 60 Hz Motor
(Ref: Dwg B-182128)
ITEM P/N DESCRIPTION QTY
1 001265 Motor, 7.5hp/230V/3ph/60hz/19.4A 1
2 190103 Motor Starter 1 (Note 9)
3 182024 Strain Relief, 3/4 NPT 3
4 176953 Locknut, 3/4 Conduit 3
5 176933 Sealing Ring, 3/4 Conduit 2
6 182018 Cord, Type SO - 12/4 x 38 (To motor) 3.17 Ft
- 182018 Cord, Type SO - 12/4 x 42 (To plug) 3.50 Ft
7 182021 Terminal Ring, Insulated #10 x 12-10GA 1
8 090556 Connector, Wire, Yellow, 18-10 AWG 6
9 ------ Plug, Customer Supplied 1
NOTES:
9. When replacing the motor starter, adjust the overload protection (remove cover of box) to the same value as
the Full Load Amp Value (Marked on the Motor Serial Number Plate).
47

Diagram 18 – Wiring Diagram 7.5 hp / 460V / 3 Phase / 60 Hz Motor (001265)
(Ref: Dwg B-182129)
48

Diagram 18 – Parts List 7.5 hp / 460V / 3 Phase / 60 Hz Motor
(Ref: Dwg B-182129)
ITEM P/N DESCRIPTION QTY
1 001265 Motor, 7.5hp/460V/3ph/60hz/9.7A 1
2 190102 Motor Starter 1 (Note 10)
3 182024 Strain Relief, 3/4 NPT 3
4 176953 Locknut, 3/4 Conduit 3
5 176933 Sealing Ring, 3/4 Conduit 2
6 182018 Cord, Type SO - 12/4 x 38 (To motor) 3.17 Ft
- 182018 Cord, Type SO - 12/4 x 42 (To plug) 3.50 Ft
7 182021 Terminal Ring, Insulated #10 x 12-10GA 1
8 090556 Connector, Wire, Yellow, 18-10 AWG 6
9 ------ Plug, Customer Supplied 1
NOTES:
10. When replacing the motor starter, adjust the overload protection (remove cover of box) to the same value as
the Full Load Amp Value (Marked on the Motor Serial Number Plate).
49

Diagram 19 – Wiring Diagram 7.5 hp / 575V-60 Hz & 415V-50 Hz Motor
(Ref: Dwg B-182133)
50

Diagram 19 – Parts List
7.5 hp / 575V / 3 Phase / 60 Hz Motor
ITEM P/N DESCRIPTION QTY
1 001257 Motor, 7.5hp/575V/3ph/60hz/7.4A 1
2 186252 Motor Starter 1 (Note 11)
3 182024 Strain Relief, 3/4 NPT 3
4 176953 Locknut, 3/4 Conduit 3
5 176933 Sealing Ring, 3/4 Conduit 2
6 182018 Cord, Type SO - 12/4 x 38 (To motor) 3.17 Ft
- 182018 Cord, Type SO - 12/4 x 42 (To plug) 3.50 Ft
7 182021 Terminal Ring, Insulated #10 x 12-10GA 1
8 090556 Connector, Wire, Yellow, 18-10 AWG 3
9 ------ Plug, Customer Supplied 1
NOTES:
11. When replacing the motor starter, adjust the overload protection (remove cover of box) to the same value as
the Full Load Amp Value (Marked on the Motor Serial Number Plate).
(Ref: Dwg B-182133)
7.5 hp / 415V / 3 Phase / 50 Hz Motor (Ref: Dwg B-182130 )
ITEM P/N DESCRIPTION QTY
1 162287 Motor, 7.5hp/415V/3ph/50hz/10A 1
2 190102 Motor Starter 1 (Note 12)
3 182024 Strain Relief, 3/4 NPT 3
4 176953 Locknut, 3/4 Conduit 3
5 176933 Sealing Ring, 3/4 Conduit 2
6 182018 Cord, Type SO - 12/4 x 38 (To motor) 3.17 Ft
- 182018 Cord, Type SO - 12/4 x 42 (To plug) 3.50 Ft
7 182021 Terminal Ring, Insulated #10 x 12-10GA 1
8 090556 Connector, Wire, Yellow, 18-10 AWG 3
9 ------ Plug, Customer Supplied 1
NOTES:
12. When replacing the motor starter, adjust the overload protection (remove cover of box) to the same value as
the Full Load Amp Value (Marked on the Motor Serial Number Plate).
51

Diagram 20 – Wiring Diagram 7.5 hp / 220V / 3 Phase / 50 Hz Motor (001270)
(Ref: Dwg B-182131)
52

Diagram 20 – Parts List 7.5 hp / 220V / 3 Phase / 50 Hz Motor
(Ref: Dwg B-182131)
ITEM P/N DESCRIPTION QTY
1 001270 Motor, 7.5hp/220V/3ph/50hz/18A 1
2 190103 Motor Starter 220V 1 (Note 13)
3 182024 Strain Relief, 3/4 NPT 3
4 176953 Locknut, 3/4 Conduit 3
5 176933 Sealing Ring, 3/4 Conduit 2
6 182018 Cord, Type SO - 12/4 x 38 (To motor) 3.17 Ft
- 182018 Cord, Type SO - 12/4 x 42 (To plug) 3.50 Ft
7 182021 Terminal Ring, Insulated #10 x 12-10GA 1
8 090556 Connector, Wire, Yellow, 18-10 AWG 4
9 ------ Plug, Customer Supplied 1
NOTES:
13. When replacing the motor starter, adjust the overload protection (remove cover of box) to the same value as
the Full Load Amp Value (Marked on the Motor Serial Number Plate).
53

Diagram 21 – Wiring Diagram 7.5 hp / 380V / 3 Phase / 50 Hz Motor (001270)
(Ref: Dwg B-182132)
54

Diagram 21 – Parts List 7.5 hp / 380V / 3 Phase / 50 Hz Motor (001270)
(Ref: Dwg B-182132)
ITEM P/N DESCRIPTION QTY
1 001270 Motor, 7.5hp/380V/3ph/50hz/10.5A 1
2 190102 Motor Starter 1 (Note 14)
3 182024 Strain Relief, 3/4 NPT 3
4 176953 Locknut, 3/4 Conduit 3
5 176933 Sealing Ring, 3/4 Conduit 2
6 182018 Cord, Type SO - 12/4 x 38” (To motor) 3.17 Ft
- 182018 Cord, Type SO - 12/4 x 42” (To plug) 3.50 Ft
7 182021 Terminal Ring, Insulated #10 x 12-10GA 1
8 090556 Connector, Wire, Yellow, 18-10 AWG 3
9 ------ Plug, Customer Supplied 1
NOTES:
14. When replacing the motor starter, adjust the overload protection (remove cover of box) to the same value as
the Full Load Amp Value (Marked on the Motor Serial Number Plate).
55

Revisions to this document:
Rev 0: First Release ECO 6234, 16 September 2002
Rev 1: ECO 6290, 17 October 2002. Rev Diagram 8 and Diagram 13.
Felker Corporate Office
17400 West 119th Street
Olathe, Kansas 66061
Customer Service ……….……………. 800-365-4003
Corp. Office ...………………………..... 913-928-1000
Cust. Service FAX …………………… 800-825-0028
Corp. Office FAX ..………………….... 913-438-7951
Cust. Service, Int'l. …………………… 913-928-1300
Int'l. E-mail ......……………….…. rcoats @db-inc.com
Western Division Center
17311 South Edwards Road
Ceritios, CA 90703-2427
Felker Latin America, Mexico, Caribbean,
Central and South America
17400 West 119th Street
Olathe, Kansas 66061
Phone ……………………………….…. 913-928-1255
FAX ………………………………….…. 913-438-7938
E-mail ……………………………. hleon@db-inc.com
Felker Canada
17400 West 119th Street
Olathe, Kansas 66061
Customer Service …………….…….... 800-365-4003
E-mail …………………………… rbaker@db-inc.com
Felker Hong Kong, China
Diamant Boart Pte Ltd.
Unit E, 13/F., Infotech Centre,
21 Hung To Road, Kwun Tong,
Hong Kong
Phone ……………………..…………. 852-2516-6602
FAX ………………………..…………. 852-2516-6605
E-mail …………………….... Targethk .netvigator.com
Felker Japan, Korea, Taiwan
1803-36 Oyama-Machi
Machida-Shi, Tokyo 194-0212
Japan
Phone ………………………………… 8142-797-0212
FAX …………………………………… 8142-798-75 15
E-mail ………………… fwnh9794@m b.infoweb.n e.jp
Felker Australia, New Zealand/Dembicon Pty. Ltd
29 Kinkaid Avenue
North Plympton, Adelaide SA 5037
Australia
Phone ………………….…………..…... 61-83751000
FAX …………………….………….…… 61-83710990
E-mail ……………….. enquiries@dembicon.com.au
Internet ……………….……. www.dembicon.com.au
Felker Brazil
Pix Do Brasil
Rua José de Oliveira Coutinho
São Paulo, Brazil CEP 01144- 02 0
Phone ………………………………. 55 11 3611-8383
FAX ………………………….……... 55 11 3619-30 22
E-mail …………………………. pixbrasil@uol.com.br
Felker Singapore, Thailand, Vietnam,
Malaysia, Indonesia
Phone ……………………………… ….. 65-9628-6175
FAX ……………………………………… 65-234-2896
e-mail …………………………. reeh@singn et.c om.sg
European Headquarters
DB Construction Business Group
Avenue Du Pont De Luttre, 74
1190 Brussels, Belgium
Phone ……………………………….. (32-2) 348-3669
FAX ………………………………….. (32-2) 348- 3136
Internet …………………….. www.diamant-boart.com
56
 Loading...