

Page 1
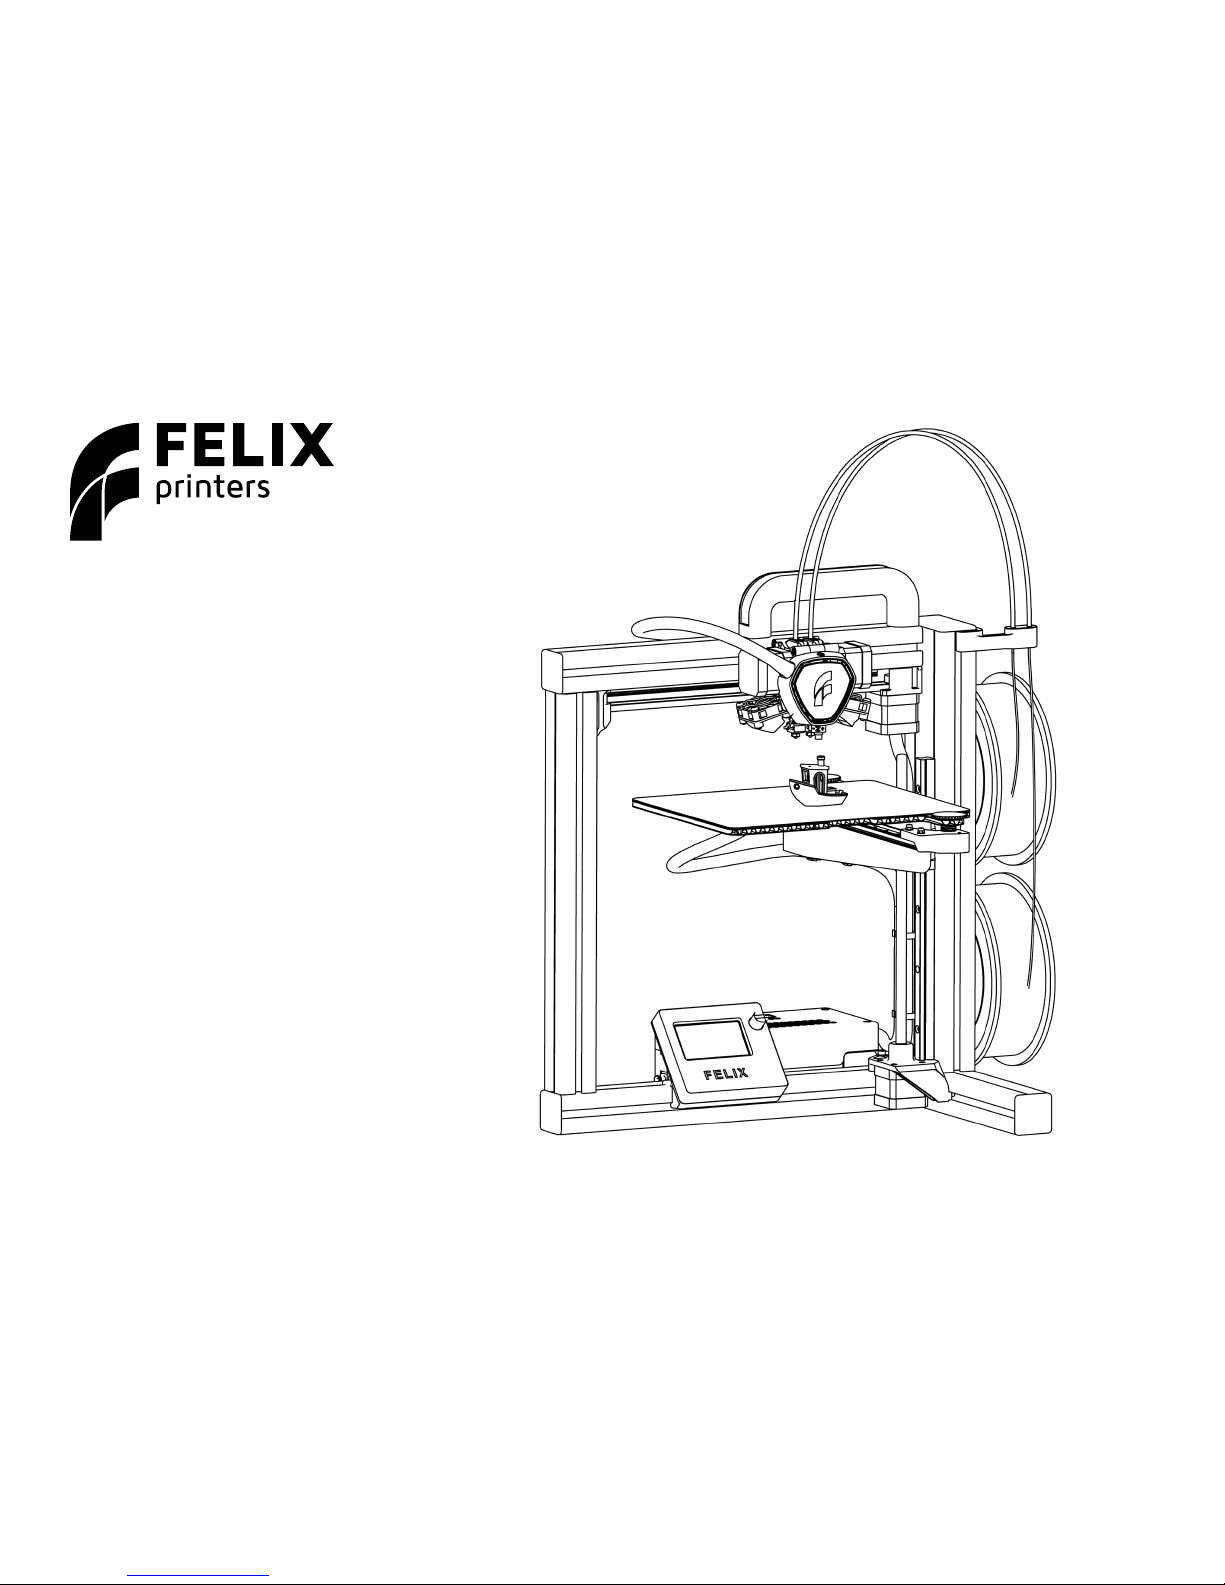
Quick Start Guide
Tec 4
www.felixprinters.com/support
support@felixprinters.com
Zeemanlaan 15
3401 MV IJsselstein
The Netherlands
Page 2
FELIXprinters Quick Start Guide for the FELIX Tec 4
General safety
Keep children under the age of 14 out of reach of the printer.
FELIXprinters are only suitable for professional use.
Considerations when in operation
Do not lean on the printer.
Be careful with long hair and loose clothes.
Do not transport the printer while working.
Make sure all moving parts can move without any obstructions.
Do not remove any objects from the hot plate while printing.
Caution with any moving parts that move in the X, Y and Z
direction. At the end of each moving part there is a pinching
hazard.
Electronic safety
Only use the power supplies and cables supplied by FELIXprinters. Always turn off and unplug the printer before doing
maintenance or modications.
The power supply meets all CE mark regulations and is
protected against short-circuit, overload, over voltage and over
temperature.
Printer placement
Place the FELIXprinter on a stable table/desk.
This will keep it safe from small children.
Use the FELIXprinter in a dry environment.
Ventilate
Good ventilation while printing is advised though printing
pure PLA is considered safe. When printing ABS, small
concentrations of Styrene vapour can be released. This
can (in some cases) cause headaches, fatigue, dizziness,
confusion, drowsiness, malaise, difculty in concentrating,
and a feeling of intoxication.
We recommend using lament types shown on the FELIXprinters website. Examples PLA, PETG, ABS, PVA etc. Other
types may be toxic. Please follow instructions from the
lament supplier.
Caution with heater elements
There is a potential risk of injury, as the print head can reach
temperatures of up to 275°C and the heated bed of up to
100°C. Don’t place objects on the heated bed that are not
being printed, not even when the printer is turned off.
We do not recommend to leave the printer unattended for
a very long period of time. If you do, it is recommended to
leave it in a properly conditioned room with distance from
highly amable objects.
Safety
Page 2
Page 3

FELIXprinters Quick Start Guide for the FELIX Tec 4
Thank you for choosing FELIX Tec 4.
This quick start guide contains the following information for you to familiarize yourself with your 3D printer, to use it to
its best advantages and to benet fully from all the functions and the technical developments it incorporates.
It is well worth taking a few minutes to read this guide to familiarize yourself with the information and guidelines it
contains about the machine and its functions.
More manuals and tutorials can be found on www.felixprinters.com/support
Page 3
Chapter 1 – Unboxing
1.1 What’s in the Box?
1.2 Unboxing
1.3 Installing the Handle
1.4 Installing Accesoires and Cables
Chapter 2 – Prepare
2.1 Level Build Platform
2.2 Calibrate Z-Probe
2.3 Change lament
Chapter 3 – Print
3.1 Ensure a Succesfull Print
3.2 Printing via SD Card
3.3 Remove a 3D Printed Object
3.4 Remove Support Material
INTRODUCTION & CONTENT
Chapter 4 – Software and maintenance
4.1 Print your own 3D Models
4.2 Calibrate XY Offset
4.3 Calibrate Z Offset
Require additional support?
Have a look at www.felixprinters.com/support
or at our user forum.
Page 4

FELIXprinters Quick Start Guide for the FELIX Tec 4
Page 4
FELIX Tec 4
System Specications
• Printer dimensions (L, W, H) 410 x 450 x 520 mm
• Weight 9 kg
• Power requirements: 220 V
Capabilities
• Build volume Single mode (L, W, H) 205 x 255 x 225 mm
• Build volume Dual mode (L, W, H) 205 x 240 x 225 mm
• Layer height range 0.05 - 0.25 mm
• Bed temperature: max. 90 °C
Extruders
• Diameter nozzle: 0.35 mm (optional 0.5mm)
• Max temperature: 275 °C
Website
www.FELIXprinters.com
Print materials
• Open source 1.75 mm filaments
• Tolerance: ± 0.15 mm
• PLA, PVA, ABS-X, PETG, PolyFlex, Wood, Glass
Connectivity
• Stand-alone micro-SD card printing
• USB cable connection
• Optional WiFi - The Element by Printr (external)
Software
• Optimized for Simplify3D and Repetier-Host
Contact
info@FELIXprinters.com
Zeemanlaan 15, 3401 MV IJsselstein, The Netherlands
Specs
Page 5

FELIXprinters Quick Start Guide for the FELIX Tec 4
The Basics
Nozzles / Extruders
Flexible BuildPlate
Build Platform
Power Switch
Power Connection
USB Computer Cable
SD Card Slot
Filament tubes
Filament guide
Thumb screws
Filament
Filament spool holder
Display unit
Page 5FELIXprinters Quick Start Guide for the FELIX Tec 4
Page 6
FELIXprinters Quick Start Guide for the FELIX Tec 4
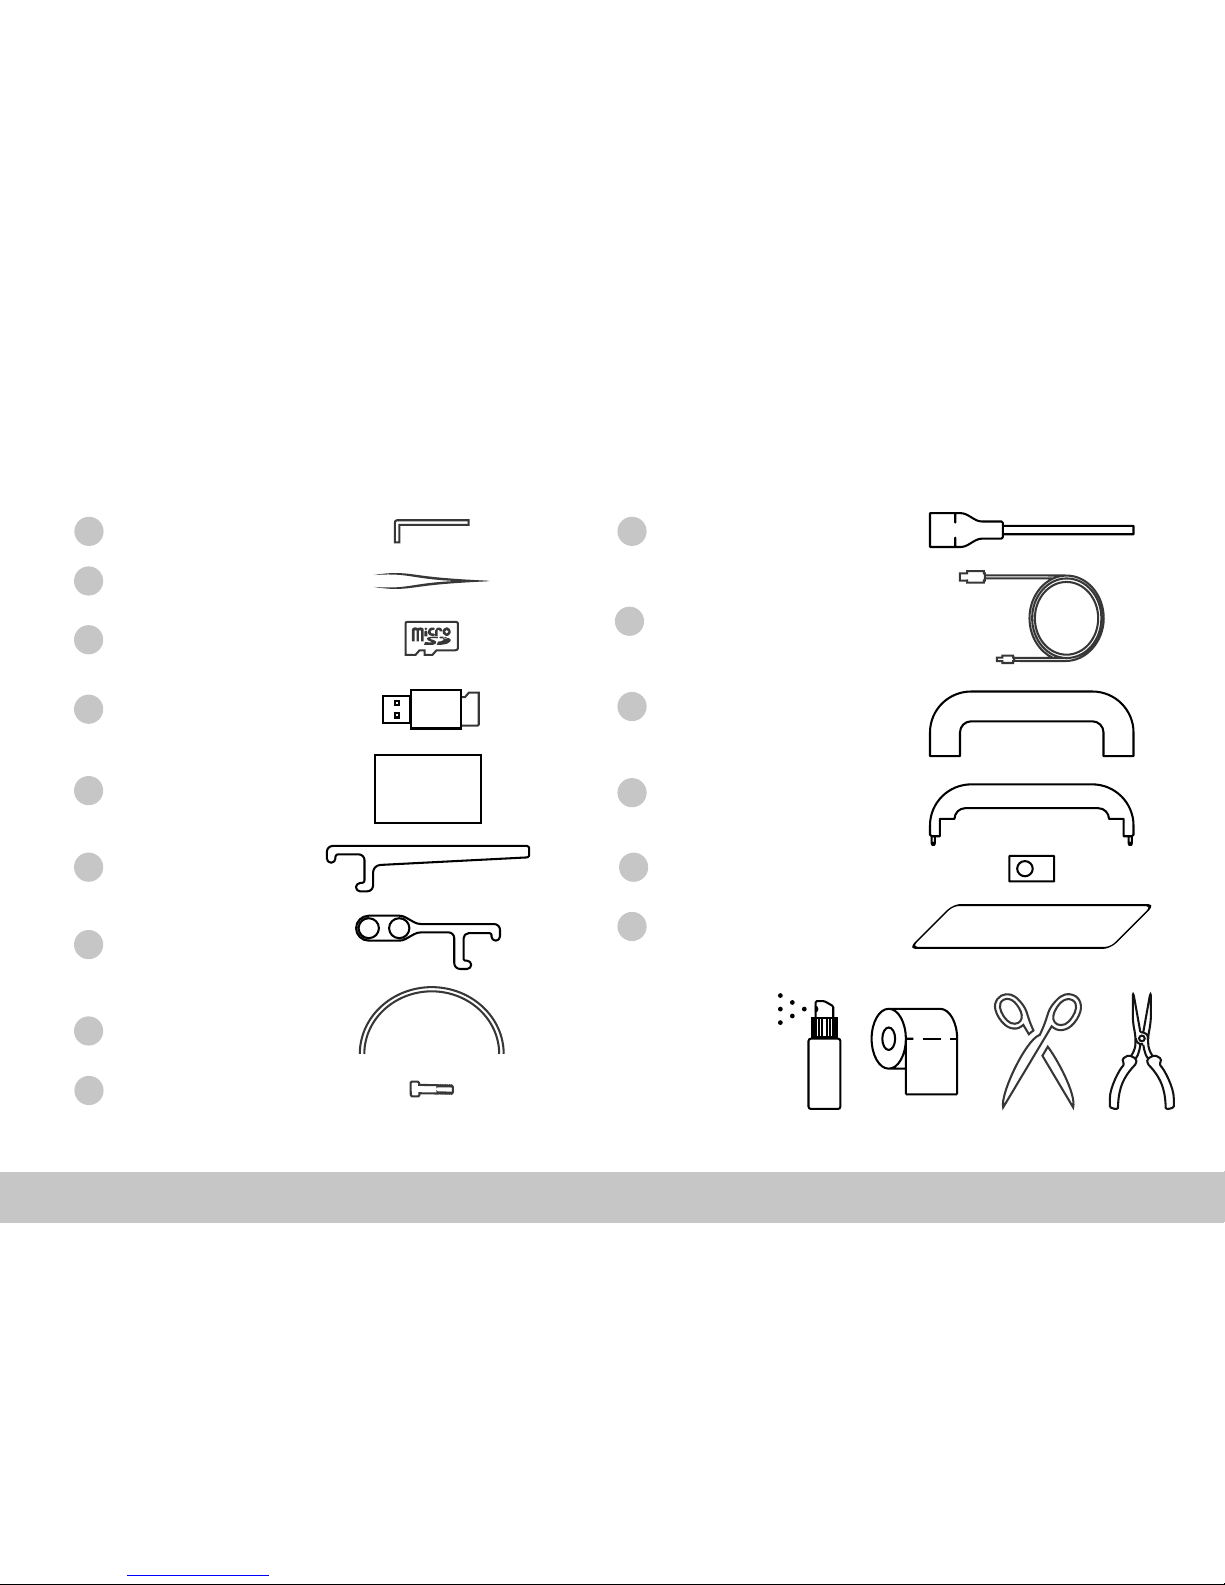
1.1 What’s in the Box?
*We recommend to use the following tools: Spray Container with Alcohol, Paper Cloth, Scissors and Long Nose Pliers
1 x Allen Key
2 x Spool Holder
1 x Filament Guide
1 x USB-SD Adapter
1 x Handle Cover
1 x USB Cable
1 x Power Cable
1 x Handle
1 x Tweezers
1 x Micro SD Card
2 x Filament Tubes
Chapter 1: Unboxing
Page 6FELIXprinters Quick Start Guide for the FELIX Tec 4
Recommended
tools:
A
B
C
D
F
G
H
I
M
L
K
J
2 x T-nut M8N
2 x M8x16 Screw
Calibration
Card
E
1 x Calibration Card
1 x Flexible BuildPlateN
Page 7
FELIXprinters Quick Start Guide for the FELIX Tec 4
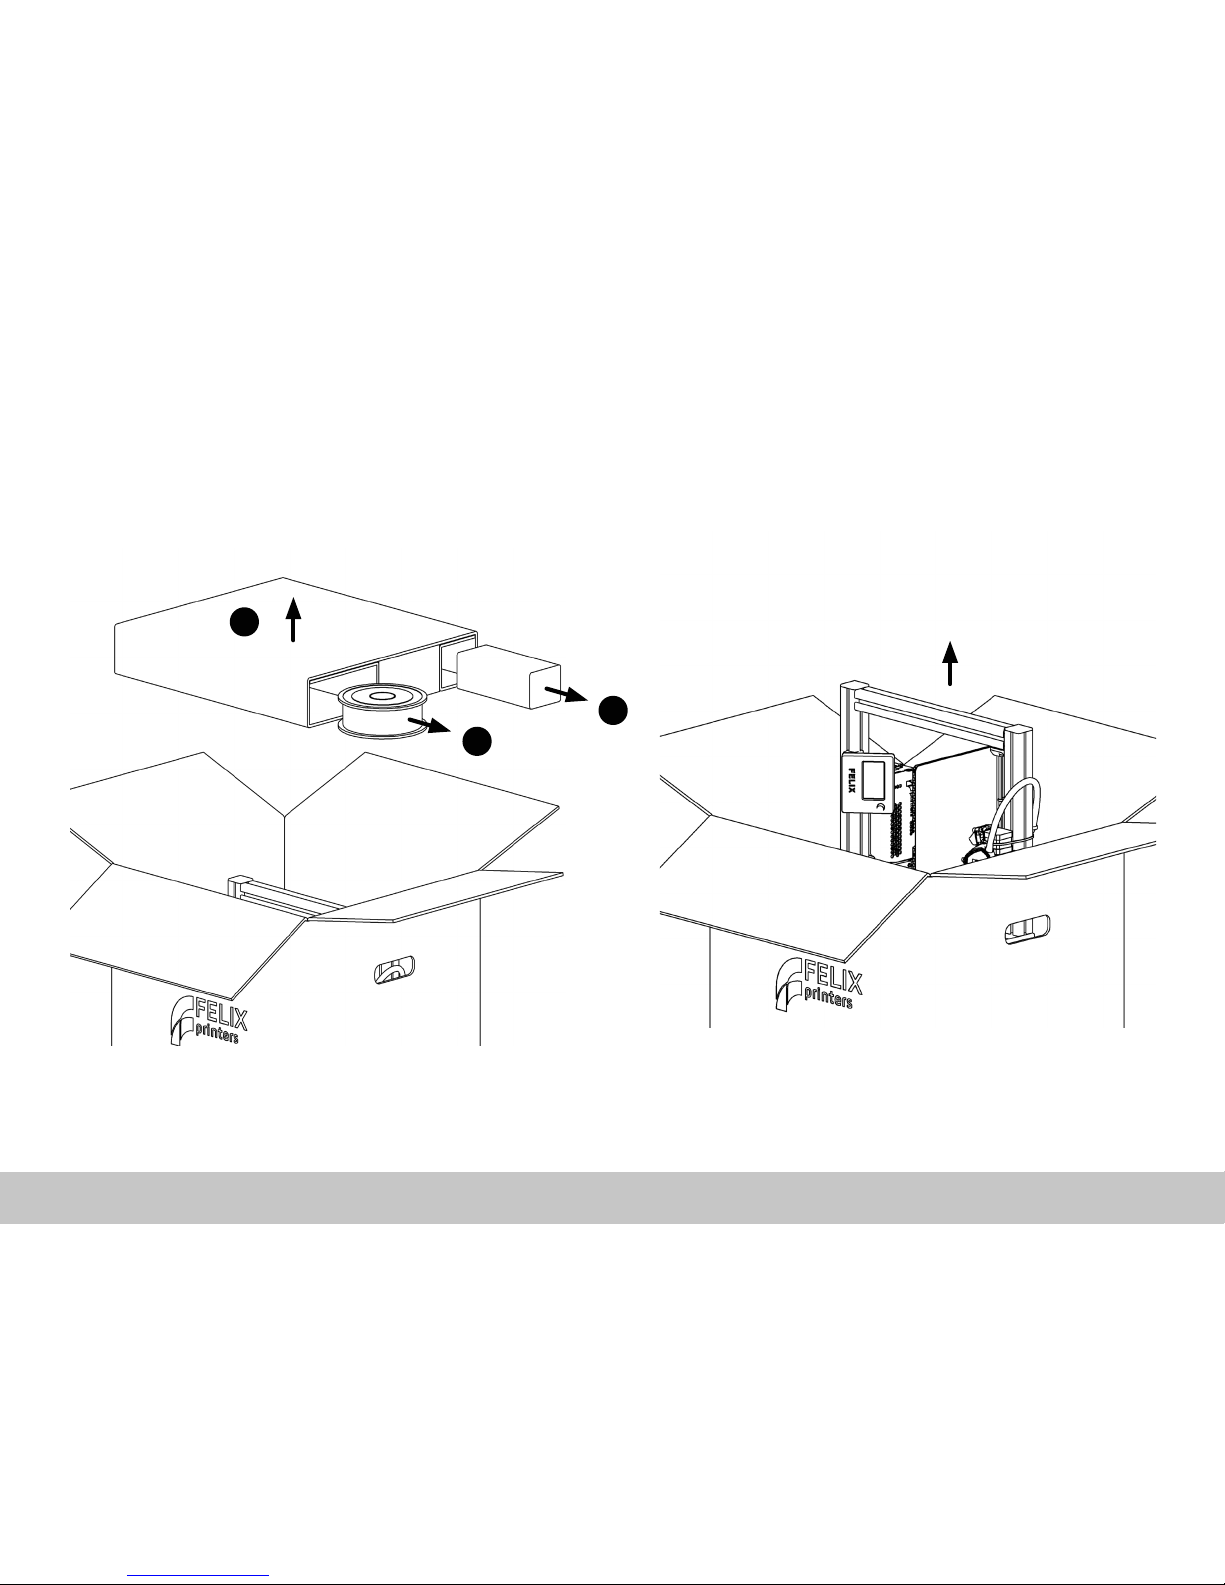
1.2 Unboxing
Chapter 1: Unboxing
Page 7Page 7FELIXprinters Quick Start Guide for the FELIX Tec 4
Open the box, remove the bumper and take out the
miscellaneous parts from the bumper.
Carefully remove the FELIX Tec 4 from the box.
1
2
2
Page 8

FELIXprinters Quick Start Guide for the FELIX Tec 4
Page 8
Chapter 1: Unboxing
Remove the foam protection from the printer frame. Remove the ve red protective cable ties using cutting
pliers or a scissor.
4 5
1
2
3
Page 9

FELIXprinters Quick Start Guide for the FELIX Tec 4
1.3 Installing the Handle
Page 9
Chapter 1: Unboxing
1. Put the T-nut upright into the T-slot of the prole.
2. Twist the T-nut 90 degrees in place.
3. Repeat this for both T-nuts.
1. Fix the handle against the vertical prole with the
two hexagon screws. Use a hex key size 5.
2. Press the handle cover on the handle
1
1
2
1
2
Page 10

FELIXprinters Quick Start Guide for the FELIX Tec 4
1.4 Installing Accesoires and Cables
Chapter 1: Unboxing
Page 10
≈ 12 cm
≈ 20 cm
1. Place the rear of the Flexible BuildPlate on the edge.
2. Lower the front of the Flexible BuildPlate and make
sure all edges are inside the build platform.
Install the lament guide and spool holder(s) by placing
one edge in the T-slot and twisting it in place.
1
2
Page 11

FELIXprinters Quick Start Guide for the FELIX Tec 4
Page 11
Chapter 1: Unboxing
E1:190°C E2:190°C B:55°C
X: 0.00mm
Y: 0.00mm
Z: 0.00mm
Printer Ready
Rotate the button to navigate
Push to enter the Main Menu
Current Temperature
Extruder 1 Extruder 2
Build PLT.
Status
1. Make sure the power switch is turned off.
2. Insert the power cable.
3. Insert the USB cable when printing via computer.
The unboxing is done, you can now switch on the
printer!
2
1
3
Page 12

FELIXprinters Quick Start Guide for the FELIX Tec 4
E1:21°C E2:21°C B:21°C
Build PLT.
Levelled Correctly
>>> OK <<<
E1:21°C E2:21°C B:21°C
Max. 10°
Turn back: 45° R
Turn front: 90° L
>Measure Again
Cancel
E1:21°C E2:21°C B:21°C
Measuring...
Please Wait...
E1:21°C E2:21°C B:21°C
Back
>Control
Print
Settings
Chapter 2: Preparation
Page 12
2.1 Level Build Platform
Enter the main menu by pressing the button,
select Control.
Scroll down and select Level Build Platform.
Shown are the correction values. These values
will be used to level the build platform by turing
the two thumbscrews.
Turn the front thumbscrew 90° to the left (counterclockwise), and turn the back thumbscrew
45° to the right (clockwise). Now select Measure
Again.
If the thumbscrews are adjusted correctly, the
process will nish automatically. If not repeat
steps 3 and 4 untill levelled correctly
1
2
4 5 6
Next the printer will start measuring the angle of
the build platform, this may take a few seconds.
E1:21°C E2:21°C B:21°C
Back
Preheat/Cool
Remove Build PLT.
Change Filament
>Level Build PLT.
2
3
Page 13

FELIXprinters Quick Start Guide for the FELIX Tec 4
www.felixprinters.com
Calibration Card
E1:21°C E2:21°C B:21°C
Z-Probe
Calibrated!
>>> OK <<<
E1:21°C E2:21°C B:21°C
Back
>Control
Print
Settings
Chapter 2: Preparation
Page 13
2.2 Calibrate Z-Probe
Enter the main menu by pressing the button,
select Control.
Next, scroll down and select Calibrate Z-Probe.
Scroll left to increase the friction, and scroll right
to decrease the friction on the Calibration Card.
When satised, press the button to continue.
You’ve now calibrated the Z-Probe. This will inuence the distance between the Flexible BuildPlate and the nozzle. This is important for the
rst layer to stick during printing.
1
3 4 5
Place the Calibration Card between the left
nozzle and the Flexible BuildPlate. Press the rotary button to continue.
E1:21°C E2:21°C B:21°C
Preheat/Cool
Remove Build PLT.
Change Filament
Level Build PLT.
>Calibrate Z-Probe
2
Always make sure the
exterior of the nozzles are
clean before calibrating the
Z-Probe
!
Page 14

FELIXprinters Quick Start Guide for the FELIX Tec 4
Chapter 2: Preparation
Page 14
2.3 Change Filament
Take the lament tubes and push the ends in
the lament guide and print-head. These will be
used to feed the lament to the print-head
Take the end of the lament, and create a clean
end, by cutting the lament with a scissor.
Place the lament into the print-head. We will
feed the lament completely through the extrud-
ers on the next page.
3
4 5
Place the lament spools on the spool holders.
1 2
Clean and replace the dust
lter periodically to improve
the lifetime of the extruders
and nozzles.
i
Page 15

FELIXprinters Quick Start Guide for the FELIX Tec 4
E1:21°C E2:21°C B:21°C
Change Filament
Back
>PLA
PETG
PV A
E1:21°C E2:21°C B:21°C
Back
Preheat/Cool
Remove Build PLT.
>Change Filament
Level Build PLT.
Chapter 2: Preparation
Page 15
Enter the main menu by pressing the button,
select Control.
Scroll down and select Change Filament.
Select the material you want to load. If you’re
not sure, check the side of the lament spool for
more information. Press to continue.
Feed the lament through the extruder by
rotating the button clockwise until a small thread
comes out of the nozzle. Use the tweezers to
remove the thread of lament.
6 2
9 10
Select the extruder which you want to load. For
single head printers only extruder 1 can be used.
7 8
E1:21°C E2:21°C B:21°C
Back
>Control
Print
Settings
E1:21°C E2:21°C B:21°C
Change Filament
Back
>Extruder 1
Extruder 2
When changing to a new
material with a lower tem-
perature, purge the extruder
with the previous tempera-
ture to prevent clogging.
i
Page 16

FELIXprinters Quick Start Guide for the FELIX Tec 4
3.1 Ensure a Succesfull Print
Clean Nozzles
Remove plastic residue from the nozzle using the
tweezer. Select Preheat/Cool in the Control Menu to
make the residue soft and easy to remove.
Clean Build Platform
Degrease the Flexible BuildPlate using alcohol,
methylated spirit or acetone and wipe it clean with a
paper towel.
Page 16
Chapter 3: Print
Page 17

FELIXprinters Quick Start Guide for the FELIX Tec 4
22
E1:144°C E2:21°C B:39°C
Benchy Single PLA
00.0%
Heating up...
E1:21°C E2:21°C B:21°C
Back
Benchy Dual PLA-PLA
>Benchy Single PLA
Chapter 3: Print
Page 17
3.2 Printing via SD Card
Enter the main menu and select Print. Select
Benchy Single PLA
for a single colour
sample. If you prefer a dual colour sample
select
Benchy Dual PLA-PLA
.
1
4 5
Insert the FELIX SD card into the slot located
above the power plug. This SD card contains the
Benchy Gcodes which is the rst test print.
3
E1:21°C E2:21°C B:21°C
Back
Control
>Print
Settings
If you want to Stop printing, press the rotary
button and select Cancel Print.
Make sure your rst layer is nished properly
before leaving your printer unattended. Make
sure the material sticks properly to the Flexible
BuildPlate.
E1:185°C E2:21°C B:55°C
Back
>Cancel Print
Pause Print
Change Filament
Z-Offset: 0.00mm
Printing via SD card (instead
of USB cable) improves
reliablity, and is advised for
long print jobs.
i
Page 18

FELIXprinters Quick Start Guide for the FELIX Tec 4
3.3 Remove a 3D Printed Object
Page 18FELIXprinters Quick Start Guide for the FELIX Tec 4 Page 18
Caution: Hot!
Page 18
Chapter 3: Print
Remove the Build Plate
To remove the Flexible BuildPlate lift up the front end using
the notch in the build platform. Now you can easily remove
the Flexible BuildPlate by pulling it fowards.
Remove Printed Objects
To remove printed objects simply bend the Flexible
BuildPlate at both ends.
POP!
1
1
1
2
Page 19

FELIXprinters Quick Start Guide for the FELIX Tec 4
Page 19
3.4 Remove Support Material
Chapter 3: Print
FELIXprinters Quick Start Guide for the FELIX Tec 4
Same Material Support
Remove the same material support structures by pulling on the endes of the structure that are not connected to the 3D model using long nose pliers.
PVA Water Soluble Support
When using PVA Water Soluble Support simply dissolve
the support structure in water overnight. Do not use
warm water since this could warp the 3D model.
Support structures are used
to support 3D geometries
that angle up and outwards
more than 45 degrees.
i
Page 20

FELIXprinters Quick Start Guide for the FELIX Tec 4
Page 20
4.1 Print your own 3D Models
Chapter 4: Software and maintenance
Page 20
Repertier-Host
For experienced users who love to tweak we also
support repertier-host open source 3D software.
www.felixprinters.com/repetier-host
Simplify3D
Simplify3D is the recommended software to operate
the FELIX Tec 4.
www.felixprinters.com/simplify3d
Benchy.STL Benchy.Gcode
3D Model Slicer 3D Printer
Page 21

FELIXprinters Quick Start Guide for the FELIX Tec 4
1
E1:21°C E2:21°C B:21°C
Back
>Calibrate XYe all
>Home All
Chapter 4: Software and maintenance
Page 21
4.2 Calibrate XY Offset (Dual only)
Select: Control -> Calibrate Extruders -> Calibrate XY.
Choose the beste aligning lines for both the X
and Y value. In this example the best aligning
Y value is 3.
Enter both the X and Y values and select
continue.
3 4
To start the XY-Calibration, rst load PLA in both
extruder 1 and 2. Also make sure the build platform is properly levelled.
2
Only perform this calibration
after removal or replacement
of the hot-ends and nozzles.
!
E1:21°C E2:21°C B:21°C
Back
Preheat/Cool
Remove Build PLT.
>Change Filament
Level Build PLT.
E1:21°C E2:21°C B:21°C
Choose the Best
Aligning XY Values
>X Value 8
Y Value 3
Continue
In case the values go out of
range simply select the best
aligning value and repeat
steps 1 to 4 untill both
values are 5.
i
Page 22

FELIXprinters Quick Start Guide for the FELIX Tec 4
E1:21°C E2:21°C B:21°C
Back
>Home Allome all
Home X
Home Y
Home Z>Home All
Chapter 4: Software and maintenance
Page 22
4.3 Calibrate Z Offset (Dual only)
Select: Control -> Move -> Home All. Make
sure the build platform is properly
levelled and the nozzles are clean.
Loosen the right hex screw slightly by turning it
counterclockwise with a hex key size 3.
Adjust the height of the right extruder by turning
the hex screw with a hex key size 2.5. Turn
clockwise to lower the right extruder.
3 4
Turn the printer off and manually move the right
extruder to position A. Now remove the fan cover
by pulling it forward.
1
A
Use the Calibration Card to adjust the right
extruder to the same height as the left extruder.
If satised tighten the hex screw size 3 and put
the fan cover back in it’s original position.
5
2
Only perform this calibration
after removal or replacement
of the hot-ends and nozzles.
!
Page 23

FELIXprinters Quick Start Guide for the FELIX Tec 4
Page 23
Page 24

Quick Start Guide FELIX Tec 4
Zeemanlaan 15
3401 MV IJsselstein
The Netherlands
www.felixprinters.com/support
support@felixprinters.com
Review our products
Help us to improve our products and services. It only takes a few minutes!
www.felixprinters.com/survey
(a small reward is waiting for you)
Manuals & tutorials
www.felixprinters.com/support
FELIX Community
www.felixprinters.com/community
V1-2017
 Loading...