

Felix Instruments F-920 Instruction Manual

Table of Contents
Table of Contents ......................................................................... 1
Introduction ................................................................................. 1
Features & Specifications ............................................................ 2
Unpacking the F-920 Check It! ..................................................... 3
Operating Instructions ................................................................. 4
Loading the Battery ................................................................. 4
Basic Operation ........................................................................ 5
Measurement Modes .............................................................. 6
Continuous Mode .................................................................... 7
Trigger Mode ........................................................................... 7
Taking a Measurement ............................................................ 8
Setup Menu ............................................................................... 10
Setup > Mode ......................................................................... 10
Setup > Parameters ............................................................... 11
Setup > Calibration ................................................................ 11
Setup > Set Zero ..................................................................... 13
Setup > Date and Time........................................................... 13
Setup > GPS ............................................................................ 14
Setup > Language ................................................................... 15
Setup > Factory Setup ............................................................ 15
File Menu ................................................................................... 15
File > Select ............................................................................ 16
File > Create ........................................................................... 16
File > Delete ........................................................................... 16

................................................................................................17
File > Review...........................................................................17
Transferring Files ....................................................................17
Wireless SD Memory Card Operation ....................................19
F-920 Check It! Menu Map .........................................................22
Gas Analysis Software (G.A.S.) ...................................................23
Firmware Update .......................................................................32
Maintenance of your F-920 Check It! Gas Analyzer ...................34
Replacing the Oxygen (O₂) Sensor..........................................34
Calibration ..............................................................................36
FAQ .............................................................................................41
Guide for Purchasing Standardized Gases for Calibration .........42
Warranty Information ................................................................45
Warranty Registration Card .......................................................47
F-920 Production Test Check Sheet ...........................................49
F-920 Instruction Manual rev. 5/10/2017
1554 NE 3rd Ave, Camas, WA 98607, USA 1
Phone: (360) 833-8835
sales@felixinstruments.com
www.felixinstruments.com
Introduction
Congratulations on the purchase of
your new F-920 Check It! Gas
Analyzer.
The F-920 Check It! Gas Analyzer is
designed for continuous or spot
measurement of carbon dioxide
(CO2) and oxygen (O2) in
headspace gas. The Check It!
rapidly measures O2 and CO2 from
0-100% for fast and accurate
sampling of sealed packages or
open atmosphere. The built-in data logger stores thousands of
data points and conveniently communicates data through USB
or Bluetooth onto a PC or tablet for later analysis. Each data
point records concentrations of O2 and CO
2,
flow rate,
temperature, relative humidity, GPS location, date and time.
Controller software for easy calibrating the F-920 is available for
download at www.felixinstruments.com.
With its rapid response time and lightweight handheld profile,
the F-920 provides a fast, portable verification process for
atmosphere quality control. Easy to use straight out of the box
with little or no training, the F-920 is ideal for verifying CO2 and
O2 levels in Modified Atmosphere Packaging (MAP) applications,
packing lines, laboratories, import/export surveys, distribution
centers, retail centers, storage facilities, ripening rooms and
shipping containers.
We hope you enjoy using your F-920 Check It! Gas Analyzer.
F-920 Instruction Manual rev. 5/10/2017
1554 NE 3rd Ave, Camas, WA 98607, USA 2
Phone: (360) 833-8835
sales@felixinstruments.com
www.felixinstruments.com
Features & Specifications
The F-920 features include:
Measurement of CO
2
and O2 concentrations from 0-
100%
Results are displayed in 6-9 seconds
Previous records available for review on device
Handheld and lightweight (less than 1 kg)
Battery lasts for 8+ hours
Sunlight-visible transflective LCD display easily viewed
in any environment
Functional across broad temperature and humidity
ranges
Bluetooth enabled for rapid data transfer
Controller software for easy calibration available online
F-920 Specifications
Air Sampling Rate
70 mL/min
Measuring Rate
Automated, 1 second intervals to SD
in Continuous Mode
Data Storage
Removable 4 GB SD and Bluetooth
Display
Sunlight visible transflective LCD
Operating environment
0°C - 45°C (0-90% relative humidity,
non-condensing)
Power Source
Removable rechargeable lithium-ion
battery
Dimensions
18cm x 13.5cm x 5.5cm
Weight
0.95kg
Enclosure
Powder coated aluminum
Warm-up time
< 3 minutes
F-920 Instruction Manual rev. 5/10/2017
1554 NE 3rd Ave, Camas, WA 98607, USA 3
Phone: (360) 833-8835
sales@felixinstruments.com
www.felixinstruments.com
Sensors
Carbon Dioxide (CO₂)
SENSOR
Infrared sensor, pyroelectric detector
Nominal Range
0-100%
Full Scale Resolution
0.01% absolute
Accuracy – Trigger
Mode
±.5% absolute and ±3% of measured
value
Accuracy – Continuous
Mode
±.01% absolute and ±3% of measured
value
Lower Detection Limit
.01%
Sampling Time
10 seconds
Zero Interval
Weekly
Calibration Interval
12 Months
Lifetime
5 years
Oxygen (O₂) Sensor
Electrochemical
Nominal Range
0-100%
Full Scale Resolution
0.1% absolute
Accuracy – Trigger
Mode
±0.3% absolute and ±2% of measured
value
Accuracy – Continuous
Mode
±0.1% absolute and ±2% of measured
value
Lower Detection Limit
0.1%
Sampling Time
10 seconds
Zero Interval
Weekly
Calibration Interval
6 months
Lifetime
2 years
Unpacking the F-920 Check It!
The F-920 arrives with a hard-sided carrying case, two sets of
batteries and a charger, a removable 4 GB SD card, and several
F-920 Instruction Manual rev. 5/10/2017
1554 NE 3rd Ave, Camas, WA 98607, USA 4
Phone: (360) 833-8835
sales@felixinstruments.com
www.felixinstruments.com
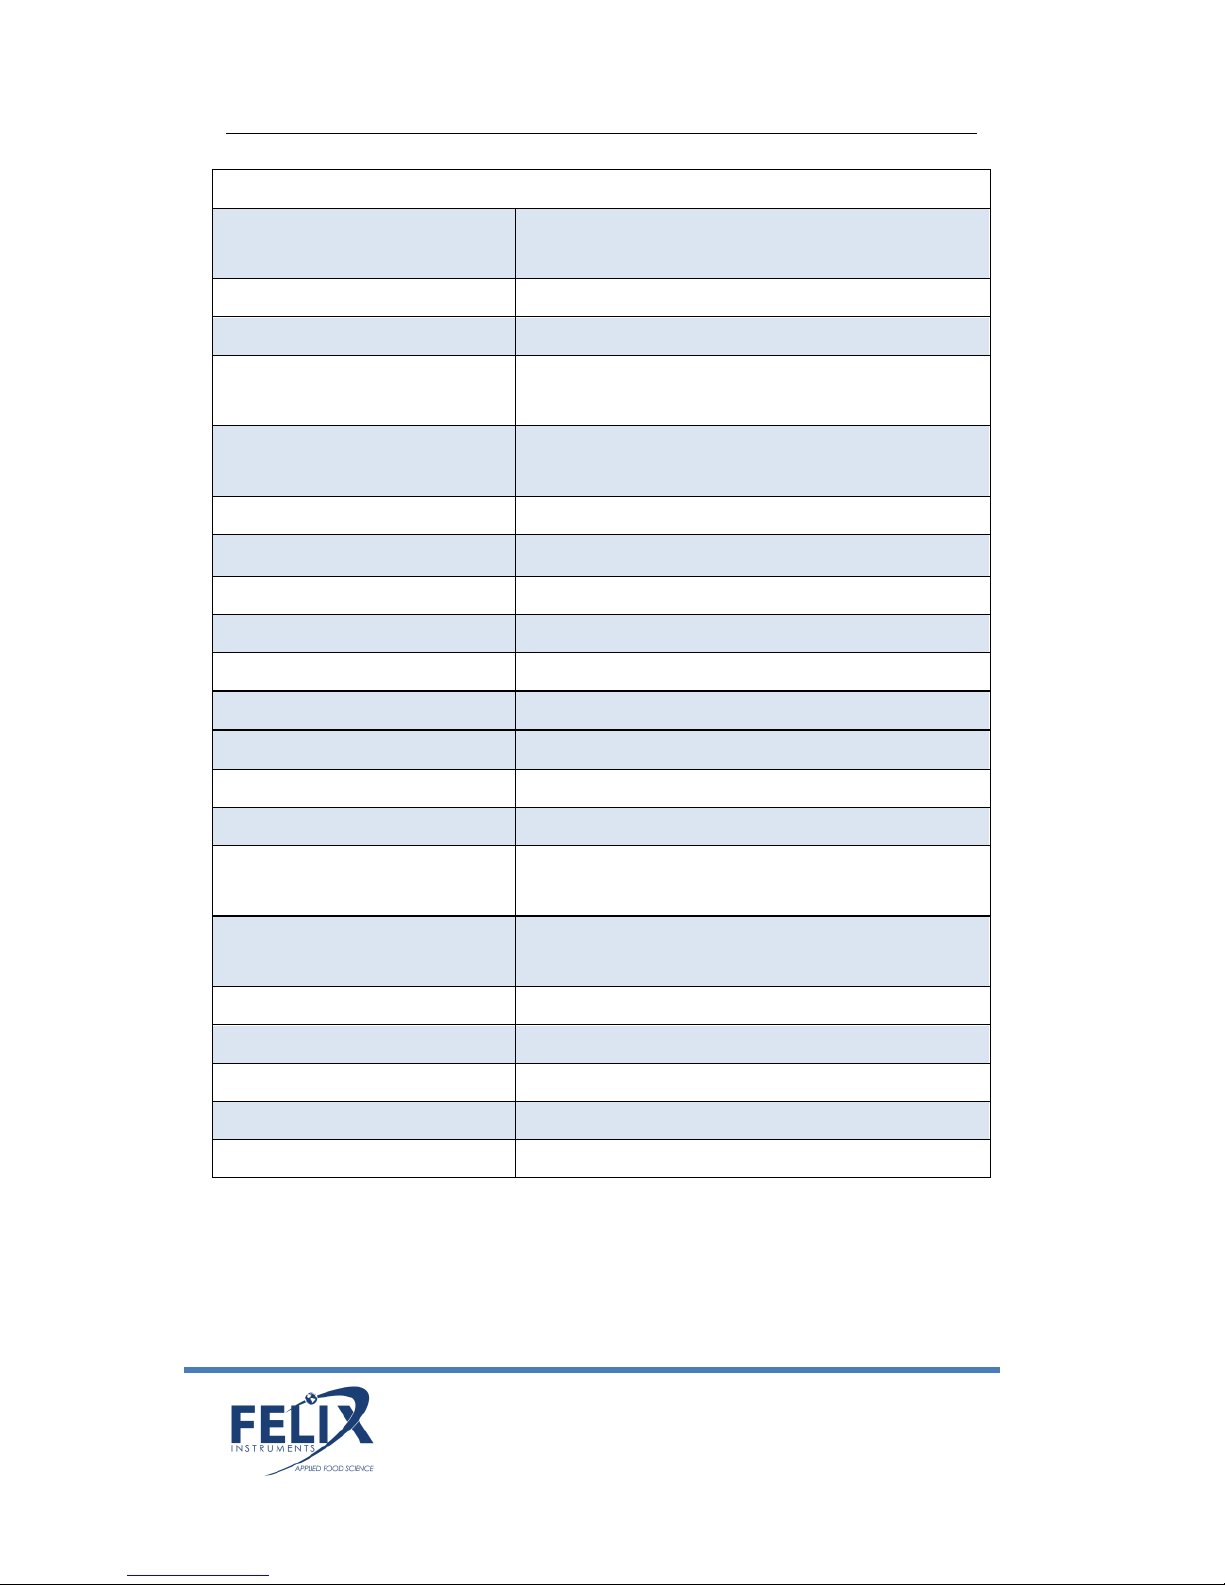
accessory parts. A sampling port with needle is included for
taking non-destructive samples from packaging. The sampling
port is pictured below, connected to the intake.
Operating Instructions
WARNING: Spring-loaded battery cartridge
Loading the Battery
The F-920 uses 18650 Li-ion 3.7V
3100mAh rechargeable batteries. For
longer lifespan, charge the batteries at
0.25A. For a faster charge, charge at
1A. The batteries must be removed
from the F-920 to be charged. If the
batteries of the F-920 discharge during
storage, replace with charged batteries.
The Li-ion batteries have little selfdischarge and a lifetime of ~ 3 years.

F-920 Instruction Manual rev. 5/10/2017
1554 NE 3rd Ave, Camas, WA 98607, USA 5
Phone: (360) 833-8835
sales@felixinstruments.com
www.felixinstruments.com
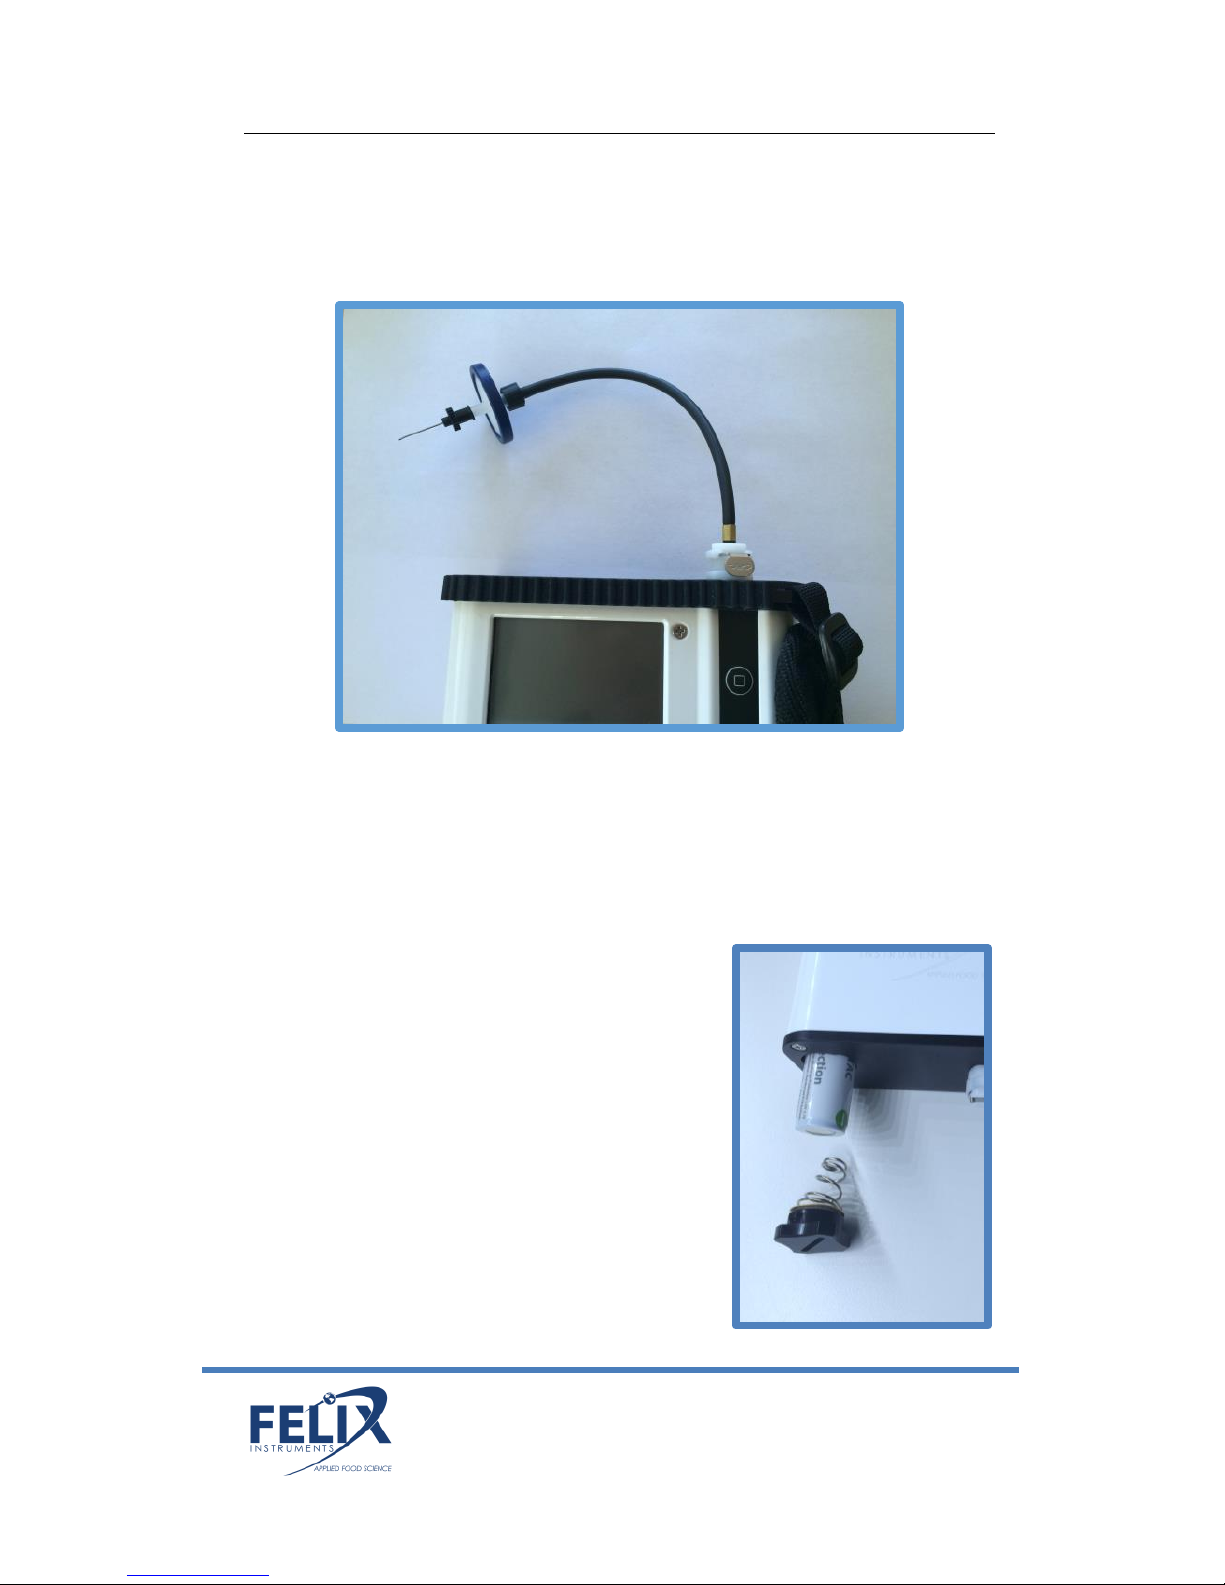
To remove the batteries, twist the battery compartment cap,
located on the bottom of the case. The cap can be twisted with
fingers or a screw-driver to tighten or loosen it. Take care when
removing batteries, as the cap is spring loaded. Both batteries
should be inserted into the unit positive (+) side first (towards
intake or top).
Additional button-top 19670 (or protected 18650) batteries can
be purchased from your preferred battery vendor if
replacements are needed.
Basic Operation
To turn the instrument on, press the green power button. The
current version of firmware the unit is running is displayed in
the lower Left hand corner.
For information on the latest firmware version, please visit the
F-920 support webpage: www.felixinstruments.com/support/F-
920.
The battery meter is listed on the lower right hand side of the
display.
The main menu displays the following options: Measure, Setup,
and File. If the power button is pressed, the display will prompt
for confirmation before shutting down the F-920.
To scroll between menu
items in the list, use the Up
and Down arrows. To select
an option from the menu
list, use the Right arrow. To
exit, use the Left arrow.
Felix Instruments
Measure
Setup
File
F-920 Vx.x.x.x

F-920 Instruction Manual rev. 5/10/2017
1554 NE 3rd Ave, Camas, WA 98607, USA 6
Phone: (360) 833-8835
sales@felixinstruments.com
www.felixinstruments.com
Measurement Modes
Two measurement modes are incorporated into the F-920
Check It!
Continuous mode
Trigger Mode
Continuous mode measures the air entering through the input
of the instrument. Continuous mode can be used with or
without the sample port attached to the front of the
instrument. Data is saved to a file every one second on the F-
920.
Trigger mode measures the air entering through the input of
the instrument. The pump will run and the sample will enter
until a stable reading has been achieved. The final values will be
displayed on screen and saved to the SD card. The pump will
then turn off until the user initiates a new measurement.
Trigger mode can be used with or without the sample port
attached to the front of the instrument.
To change between modes, Navigate to Setup > Mode from the
main menu.
Measure
From the main menu, press the right arrow when the word
‘Measure’ is highlighted to enter the measurement display
screen. All measurement parameters are saved to the SD card
every 1 second in continuous mode. When the SD card is not
present, the data will not be saved. The unit also comes
equipped with Bluetooth technology, designed for wireless
transfer of data (see Transferring Files, page 15).
F-920 Instruction Manual rev. 5/10/2017
1554 NE 3rd Ave, Camas, WA 98607, USA 7
Phone: (360) 833-8835
sales@felixinstruments.com
www.felixinstruments.com
If sampling very high concentrations followed by very low
concentrations, allow the instrument to purge internal gas for
the most accurate measurements.
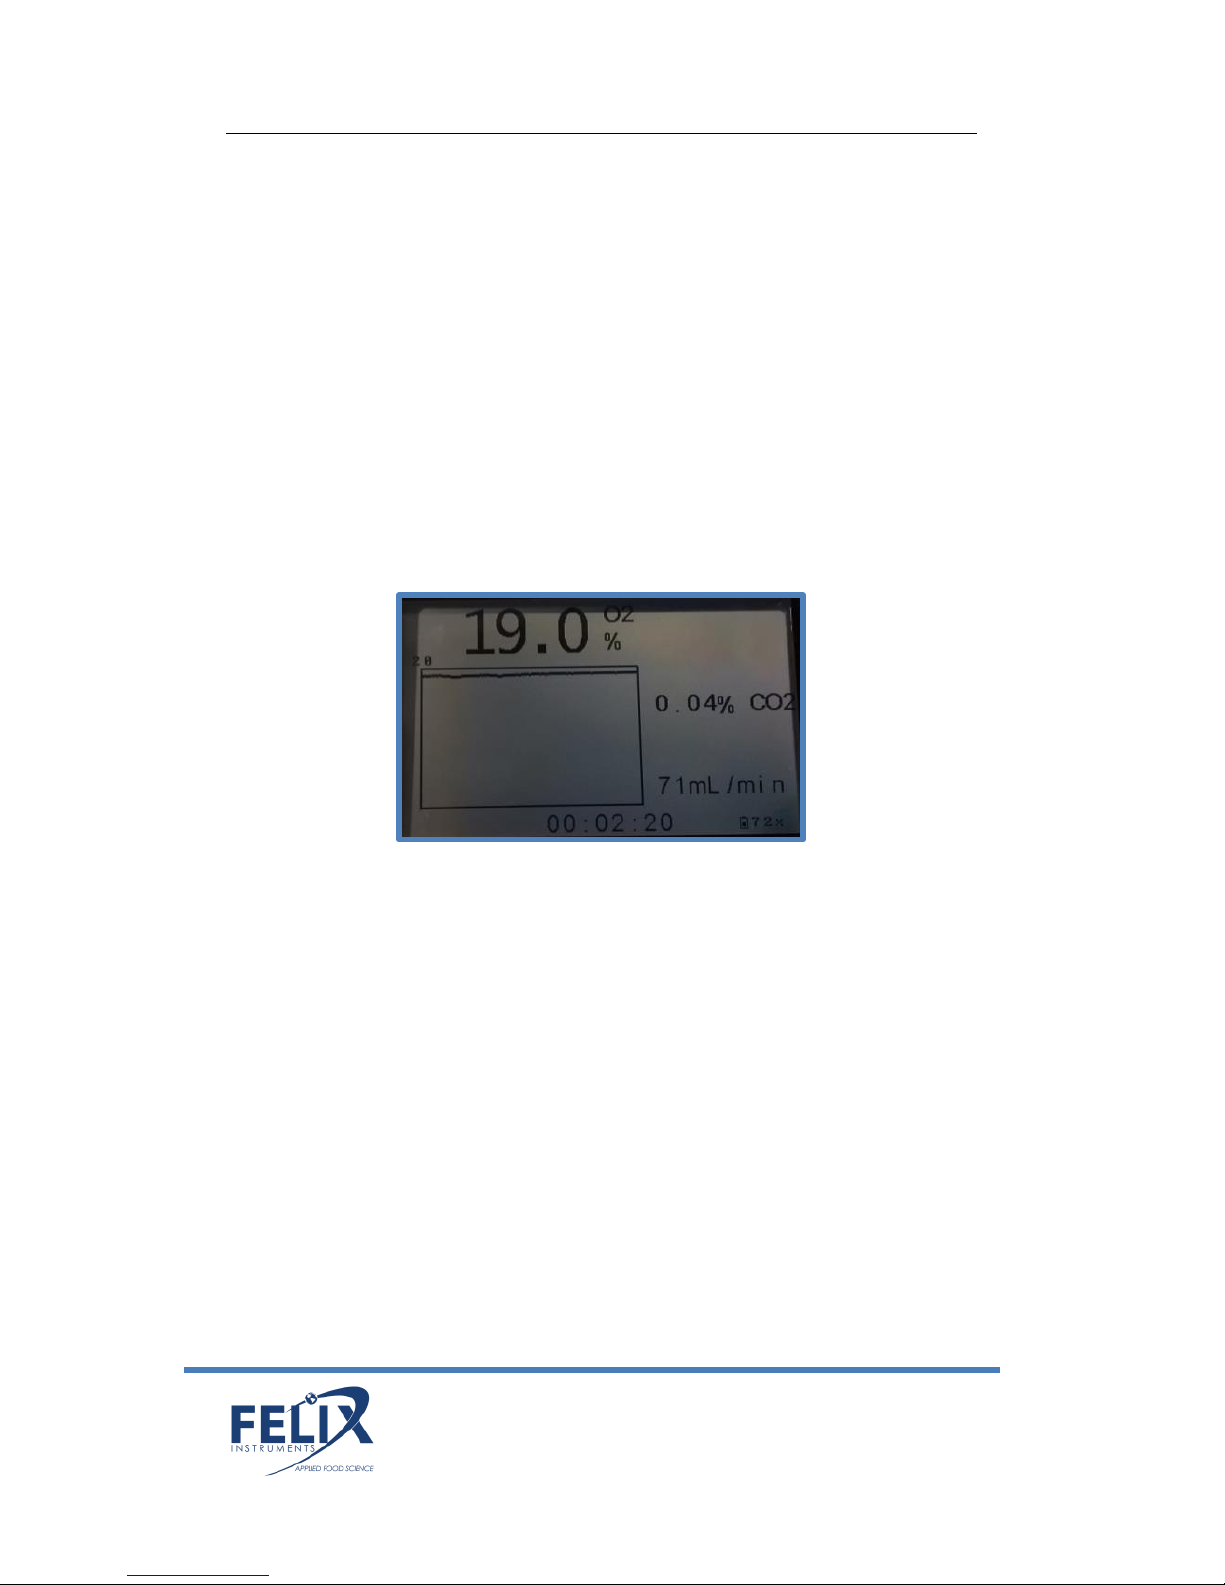
Continuous Mode
When in continuous mode, a graph of the concentration of each
gas can be viewed over time. The default graph shown is the O2
concentration in ppm. To view the CO2 graph, simply use the up
and down arrows to scroll through the graphs. The current gas
being graphed is shown on the top of the screen with the
concentration in large font as shown below.
The x-axis of the graph is time. The y-axis of the graph displays
the range of the concentration in % for CO2 and O2, and the
dynamic range is labeled at the top. The y-axis scale is set by the
highest value shown in the buffer.
The graph begins on the Left side and moves towards the right
as more data points are added. The total measurement time is
displayed below the graph. The flowrate (mL/m) is displayed at
the bottom.
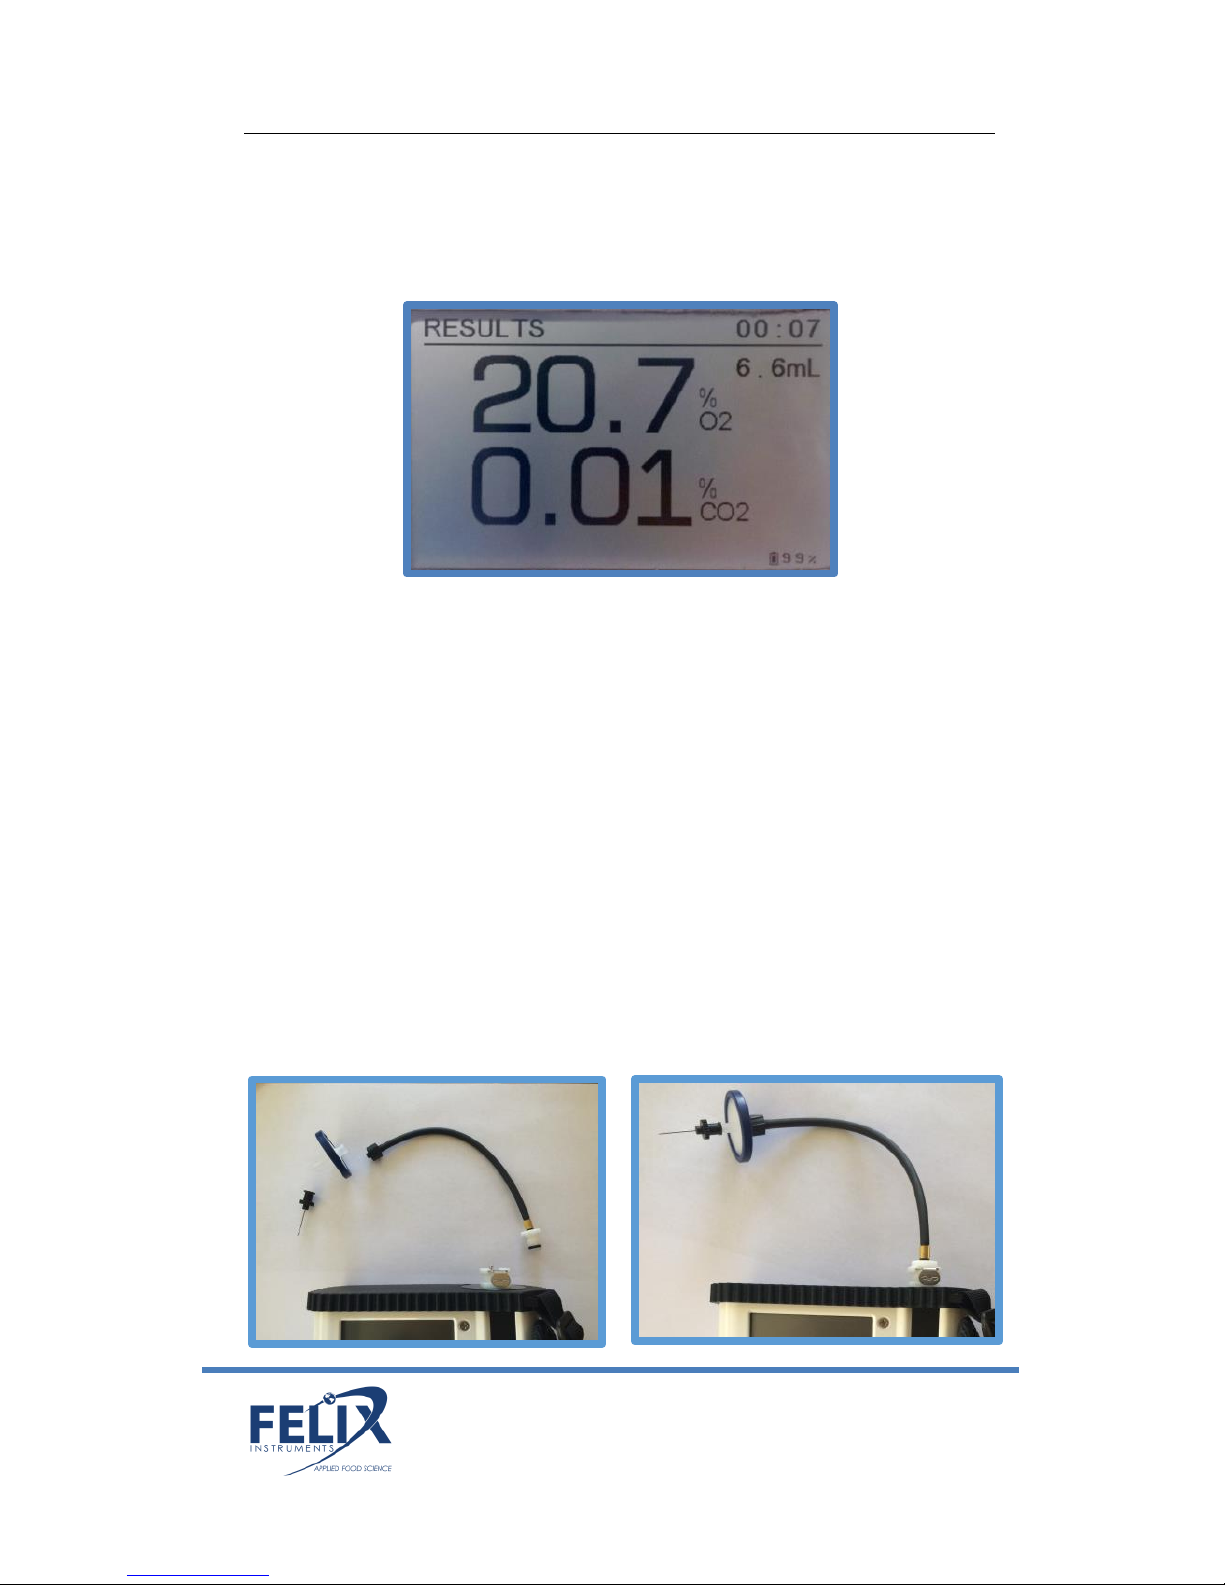
Trigger Mode
A measurement in trigger mode will initiate a small volume
sample taken over several seconds until the reading is stable. To
begin, press the square start button as prompted to measure.
F-920 Instruction Manual rev. 5/10/2017
1554 NE 3rd Ave, Camas, WA 98607, USA 8
Phone: (360) 833-8835
sales@felixinstruments.com
www.felixinstruments.com
This will turn on the pump before drawing in sample gas. Trigger
mode will take longer to stabilize if the concentration is in a
different range from the last sample.
The results will be saved to the SD card. Press the square start
button to begin another measurement. Press the Left arrow to
exit to the main menu.
Taking a Measurement
Assemble the probe and connect the needle probe tubing to the
intake of the F-920. Twist on a hydrophobic filter to the end of
the tubing. [NOTE: Failure to use a hydrophobic filter risks
drawing liquids into the instrument, which will potentially
damage the instrument.] The filter will prevent any moisture or
debris from entering the instrument. Finally, attach a sterile

F-920 Instruction Manual rev. 5/10/2017
1554 NE 3rd Ave, Camas, WA 98607, USA 9
Phone: (360) 833-8835
sales@felixinstruments.com
www.felixinstruments.com
needle to the filter. Depending on the application, needles can
be re-used.
From the main screen, select ‘Measure’ and then the right
arrow button. This will initiate a measurement in either mode.
The F-920 will run either continuously (continuous mode) or
until the minimum stable sample volume has been reached
(trigger mode). Press the Left arrow button to return to the
measurement screen.
Passcode Protection
Certain menu systems on the F-920 are protected by a passcode
setting. These menu systems include Parameters, Set Zero,
Calibration, and Factory Setup. The default code for entry is
‘1111’. The passcode only needs to be entered once for each
reboot of the device. If the device is powered off, the passcode
will need to be entered again for entry into the menu systems
described above.
To set the passcode to a four-digit code other than the default
setting, please follow the steps below.
1. Open SD card on PC
2. Click the ‘View’ tab in the taskbar
3. Click ‘Options’ in the far right of the toolbar
4. Open the ‘View’ tab
5. Scroll down and uncheck the box named ‘Hide
protected operating systems (Recommended)’
6. Check the box named ‘Show hidden files, folders, and
drives’
7. Click ‘Yes’
8. Click ‘Apply’ and then click ‘OK’

F-920 Instruction Manual rev. 5/10/2017
1554 NE 3rd Ave, Camas, WA 98607, USA 10
Phone: (360) 833-8835
sales@felixinstruments.com
www.felixinstruments.com
9. Open the Config.txt file that should now appear inside
the SD card
10. Alter the ‘1111’ to four-digit numeric passcode desired
11. Save the changes
12. Insert SD card back into Gas Analyzer
Setup Menu
Use the right arrow to enter the Setup Menu from the Main
Menu screen. The following options are available:
Mode
Parameters
Set Zero
Calibration
O2 Calibration in Air
Date & Time
GPS
Language
Factory Setup
Setup > Mode
The Mode menu contains two options:
Measure: switches between Continuous and Trigger mode.
Connection: switches between USB Storage (default), Bluetooth
(enabled in future versions), or USB Ctrl (enables
communication to controller software).
To change, use the Up/Down arrows to cycle through the mode
options. Press the Left arrow to exit to the main menu.

F-920 Instruction Manual rev. 5/10/2017
1554 NE 3rd Ave, Camas, WA 98607, USA 11
Phone: (360) 833-8835
sales@felixinstruments.com
www.felixinstruments.com
Setup > Parameters
The parameters option allows the user to control the sample
volume from 10.0 mL up to 29.9 mL when using Trigger mode.
The default volume is 10 mL.
Setup > Set Zero
The set zero process sets a new baseline, or zero, for the
sensors:
CO2
O2
Set zero should take place weekly for both the Oxygen (O2)
sensor and the Carbon Dioxide (CO2) sensor to maintain
maximum performance. To set zero, first press the right arrow
to select the sensor. Wait for a beep to verify the set zero
process was completed. The set zero process requires the use of
100% nitrogen gas for O2, and an external conditioning
chamber full of Soda Lime to set zero for CO2. Setting zero is
important in establishing a daily zero baseline for the sensors.
Mode
Measure Trigger
Connection USB Storage

F-920 Instruction Manual rev. 5/10/2017
1554 NE 3rd Ave, Camas, WA 98607, USA 12
Phone: (360) 833-8835
sales@felixinstruments.com
www.felixinstruments.com
For the O2 sensor, an alternative calibration, O2 calibration in
air, can be used instead of setting zero with 100% N2 gas. Please
see the ‘O2 Calibration in Air’ section for more details on this
process.
The following instructions can be followed to set zero for the
CO2 sensor:
The F-920 is shipped with an external conditioning tube and a
jar of Soda Lime. Fill the conditioning tube with the Soda Lime
granules, keeping the ends packed with the cotton ball filters.
Connect the external conditioning tube to the inlet and outlet of
the F-920, seen below. Continue through the standard set zero
process. The F-920 will prompt the user to use “0ppm/N2”. The
Soda Lime external conditioning tube creates a 0 ppm CO2
environment, alternatively, the user can connect N2 gas, which
provides a 0 ppm CO2 environment as well.
*The Soda Lime external conditioning tube is used for the CO2
Set Zero process only.

F-920 Instruction Manual rev. 5/10/2017
1554 NE 3rd Ave, Camas, WA 98607, USA 13
Phone: (360) 833-8835
sales@felixinstruments.com
www.felixinstruments.com
Next, verify the set zero calibration by measuring ambient air.
Run the set zero calibration again if the verification is not
successful.
Setup > Calibration
The calibration feature allows the user to set zero and set span
without the use of a computer or Gas Analysis Software (G.A.S.).
Unlike Setup > Set Zero in the next section, a zero-standard gas
is required as well as standard gases for the set span process.
The F-920 Check It! Will prompt the user to set up a zero gas,
which can be achieved by feeding 100% Nitrogen to the intake.
The unit will countdown to set zero. The following screen will
prompt the user to setup a span gas, which is a known standard
gas used for the span calibration process. For more information
on standard gases used for calibrating the Check It! Refer to the
calibration section in the ‘Maintenance of your F-920 Check It!’
section.
Setup > O2 Calibration in Air
Alternative to setting zero for the oxygen sensor weekly with
100% N2 gas, a user can use the O2 calibration in air menu
option to calibrate the O2 sensor using ambient air.
Right arrow on this menu option to begin the calibration. The
display will read, ‘Use fresh air (20.9%) Please wait…’. The F-920
will beep upon completion of the O2 calibration in air.
Setup > Date and Time
To adjust the date and time, use the Right and Left arrows to
move between Month/Day/Year and Hour/Minute/Second and
use the Up and Down arrows to change the values. To exit, use

F-920 Instruction Manual rev. 5/10/2017
1554 NE 3rd Ave, Camas, WA 98607, USA 14
Phone: (360) 833-8835
sales@felixinstruments.com
www.felixinstruments.com
the Left arrow to back out of the screen and return to the Setup
menu.
Setup > GPS
The GPS sensor inside of the F-920 Check It! can be used to
record latitude and longitude +/- 10 meters. The instrument
should be operated outside, without overhead obstruction for
best GPS performance. The Setup > GPS menu turns on/off the
GPS sensor and displays the current GPS data. Data is also
saved to the SD card as a .csv file.
GPS
Enable GPS Yes/No
Acquiring GPS data…..
Longitude 122.558
Latitude 45.59
Date & Time
MM/DD/YYYY hh : mm : ss
04/21/2016 17 : 01 : 43
 Loading...