

Page 1
!
WARNING !WARNING !
MiNi 2D 2-Axis Brushless Gimbal For Aircraft
Suitable For Gopro4 / Gopro3+ / Gopro3 or the cameras with the similar size
1
Introduction
Manual Version 3.0
GoPro camera must be installed
1.
before supplying power to the
Gimbal. Failure to do so will result
in damage to the gimbal motors.
Make sure that the connection to
2.
the computer is done by the
USB Connector
2
Install Step
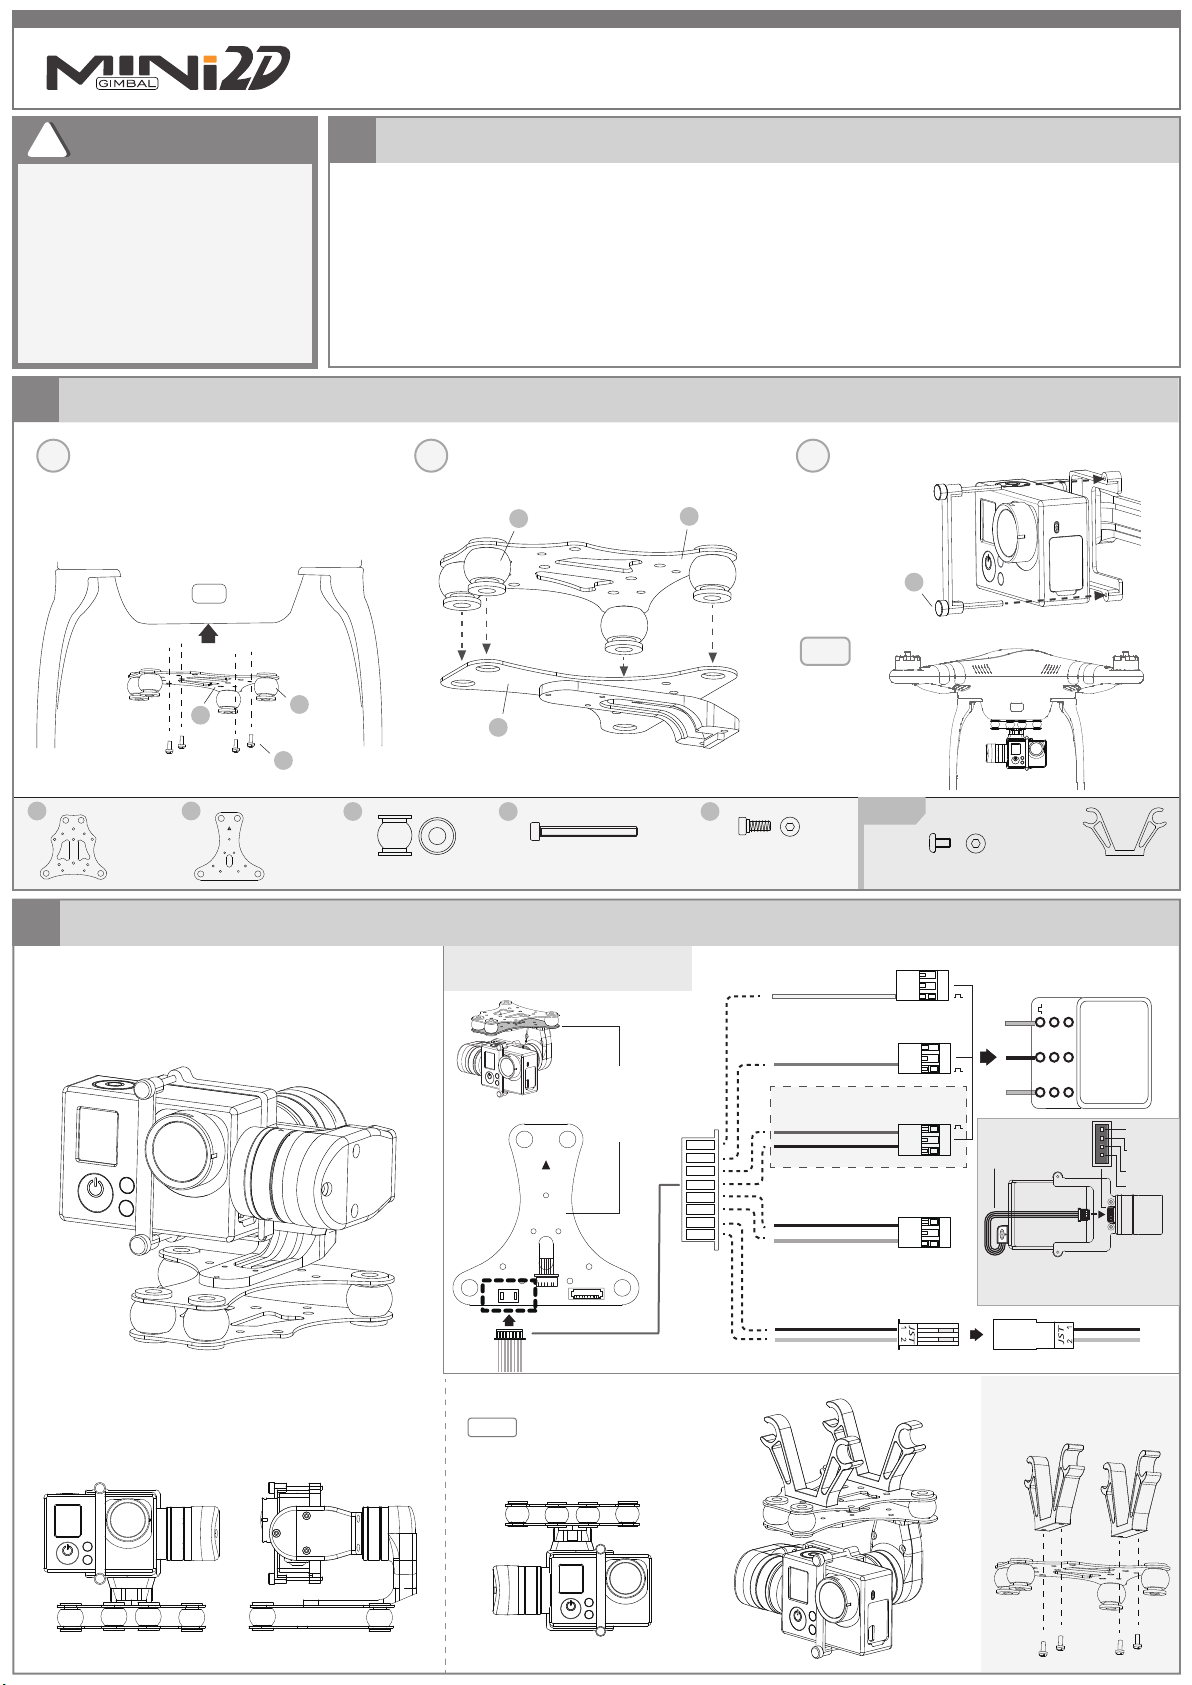
Install the damping ball to the adapter (Up),
Ⅰ
then install the adapter (Up) to the aircraft.
MiNi 2D 2-Axis Brushless Gimbal ( For aircraft ) suitable for GoPro4,GoPro3+ / 3 or cameras with similar size.
Can be easily mounted in fixed wing, multirotor, helicopter for aerial photography, and can work
independently only need power supply.
You can assemble the gimbal properly according to the drawing, and then install the video camera on it.
There is no need to set up and adjust the parameter. For the first use, power on the Gimbal, and then
keep it static for a while, after its reset, the gimbal will be in a level position automatically. Then you can use
it normally.
V hanger is optional part to use if necessary.
1
3
5
Install the damping ball to the Adapter(Down)
Ⅱ
3
2
Install the camera
Ⅲ
1
4
END
1 2
Adapter
( Up )
3
Install Mode
Vertical Installation Diagram
Adapter
( Down )
3 4 5
Damping Ball
M2×25mm
Knurled Thumb Screw
Gimbal Connection Diagram
Adapter
(Down)
Screw
(Not Included)
Mode Switch
( Only use in 3-axis gimbal )
V Hanger
Hexagonal Socket Head Cap Screw
Roll Control
White
Pitch Control
Blue
Brown
Black
Black
Yellow
Black
Red
Video Output
Power Connection
M2.5×5mm
Note: RC receiver needs to be
powered separately
-
+
Video Output And
-
Camera Charging
Cable
-
This interface can be output 5
voltage and input analog video
signal of GoPro camera
Black
V Hanger
RC Receiver
5V
Video
Control
Video
GND
Red
Inverted Installation Diagram
Default
Install "V" Hanger
Page 2
4
Mode Selection Instructions
Manual Version 3.0
MiNi 2D 2-Axis Brushless Gimbal For Aircraft
Suitable For Gopro4 / Gopro3+ / Gopro3 or the cameras with the similar size
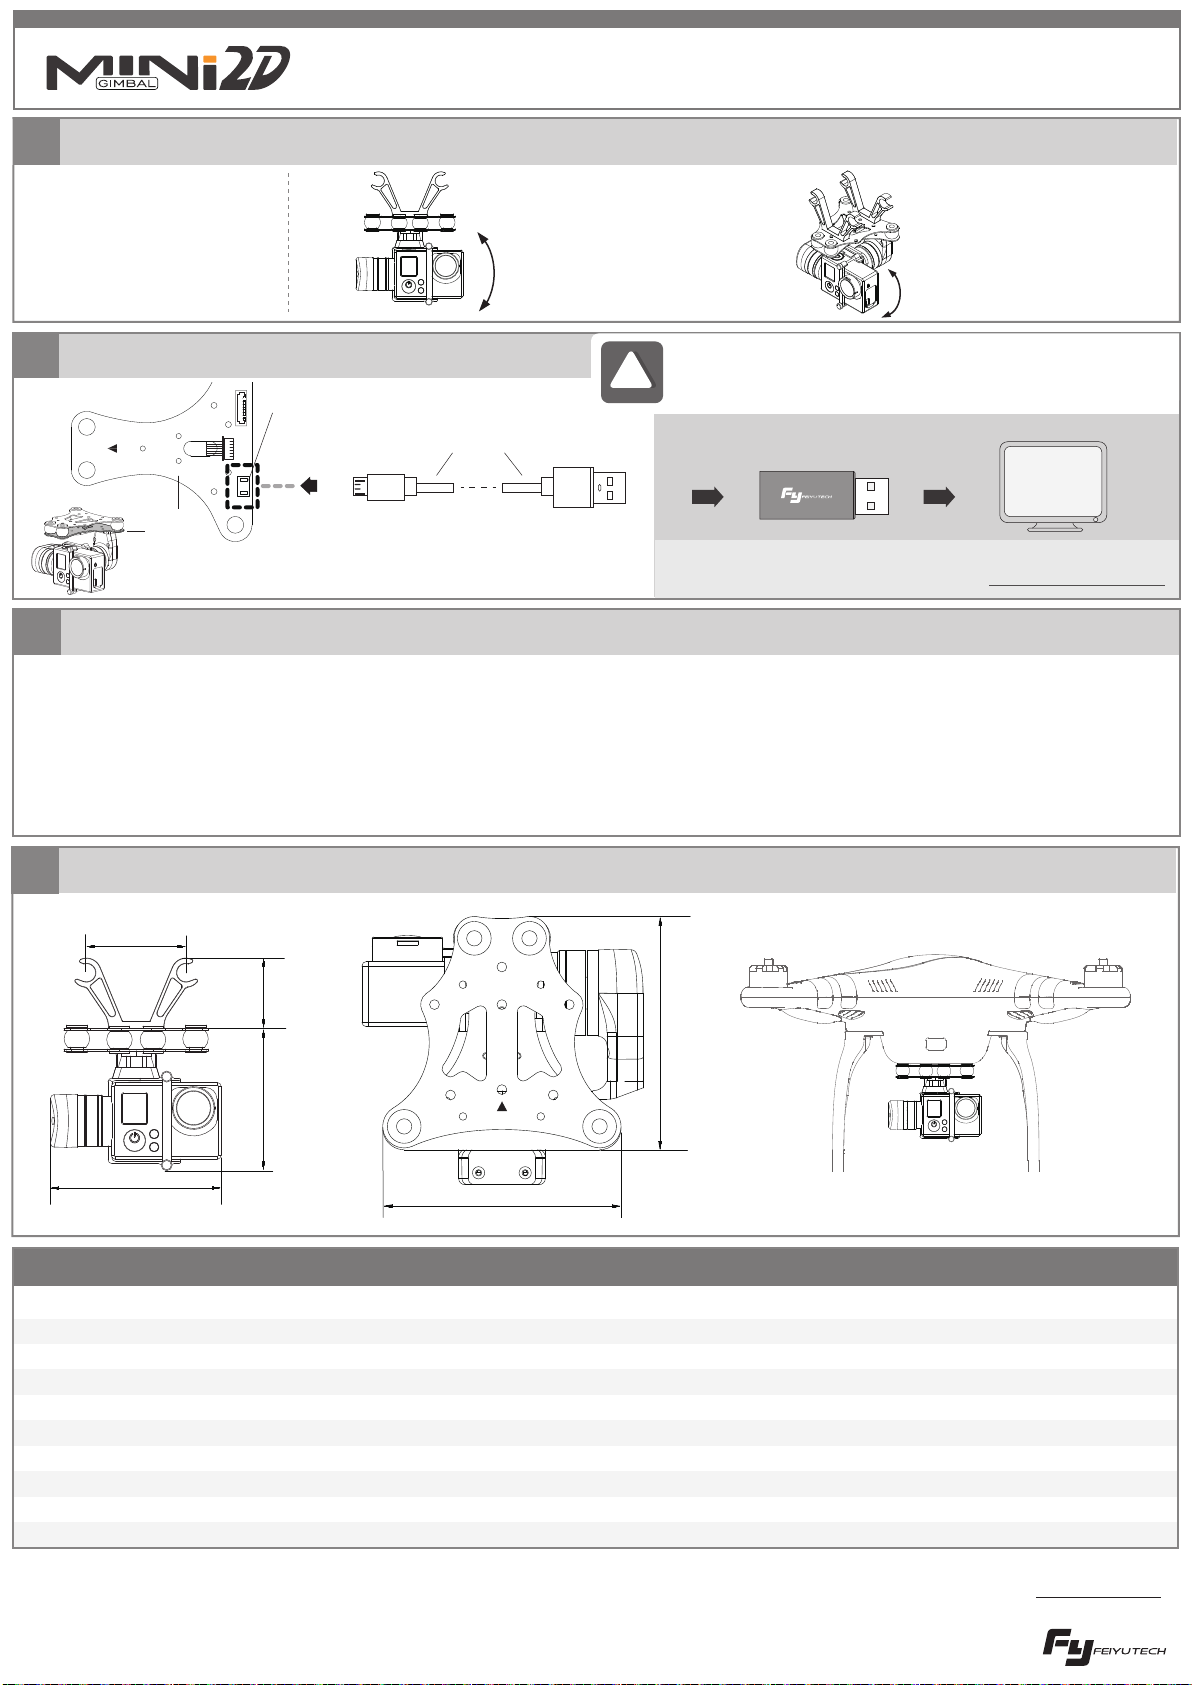
The gimbal can be control
pitching and roll by
connectting to RC receiver.
5
Firmware Upgrade
Adapter
(Down)
6
Initialize The Gimbal
Micro USB
USB Cable
Gimbal Connection To PC Diagram
The angle of the roll
depends on the position
of the joystick on the
remote control.
Attention: Make sure that the connection to the
!!
computer is done by the USB Connector !
The Gimbal supports firmware upgrade: You can download the
upgrade software and the latest firmware from www.feiyu-tech.com
USB Connector
MiNi 2D Gimbal Initialization Instructions:
Keep the gimbal motionless, then power on, keep the gimbal steady and it will initialize automatically.
Once complete the camera will be level with the horizon in pitch and roll angles and it will be in Heading Follow Mode.
In addition to initial power on,the Gimbal needs to be initialized whenever the following situations appear:
1. After power on, the angle of pitch is not level with the horizon line.
2. After power on, the angle of roll is not parallel with the horizon line.
3. When the gimbal is in heading lock, the angle of heading moves frequently (heading is not stationary)
The angle of the pitching
depends on the position
of the joystick on the
remote control.
P C
7
Diagram
53.4 mm
91mm
Specification
Items
Working Voltage
Static Attitude Tracking Accuracy
Motion Attitude Tracking Accuracy
Overload Current Protection
Pitch Angle
Roll Angle
Pitching Angle Control Rate
Weight
75.4 mm
74.5 mm 37.5 mm
77.8 mm
Min Standard Max Remarks
7.0V
0.01
0.1
-90°(Down)
-45°
8.4V
0.02
0.2
800mA
0°(Horizontal)
0°(Horizontal)
110g
17.0V
0.05
0.5
+45°(Up)
+45°
30°/Sec
Gimbal in static mode
Motor overload<2G
Without camera
If any comments or suggestions please do not hesitate to e-mail us directly: [email protected] Please visit the official website of Feiyu Tech to get related information : www.feiyu-tech.com
Feiyu Tech reserves the right to amend this manual and the terms and conditions of use the gimbal at any time.
 Loading...