

Page 1
ASSEMBLY INSTRUCTIONS FOR SF215, SF216
REV (E) 9/13/06
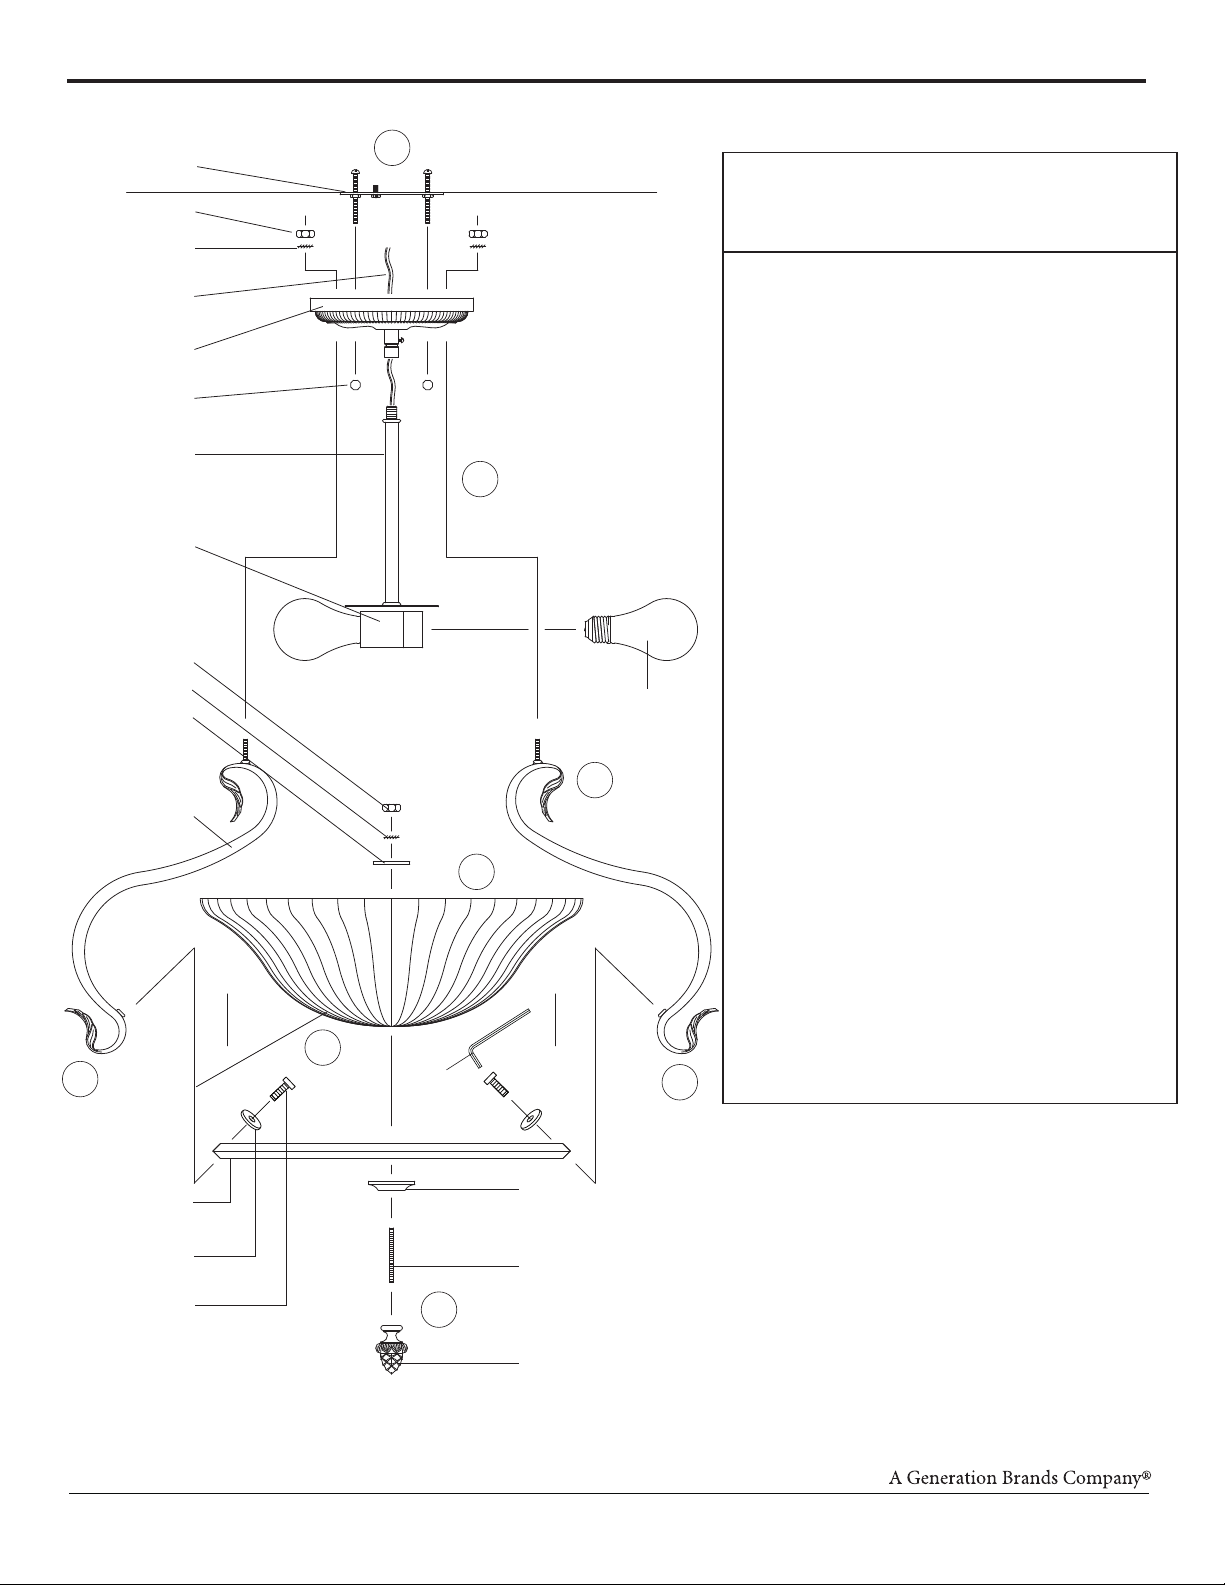
Mounting Plate
Hex Nut
Lock Washer
Fixture Wires &
Ground Wires
Fixture Plates
Cap Nut
Center Pipe
Socket
Hex Nut
Lock Washer
Flat Washer
Arm
7
IMPORTANT:
TURN OFF POWER AT MAIN FUSE OR
CIRCUIT BREAKER BOX BEFORE
STARTING INSTALLATION
1. Carefully remove all parts from box and remove
wrappings. NOTE: DO NOT YET REMOVE
WRAPPING SURROUNDING THE GLASS
SHADE. Carefully lay parts on a non-abrasive
surface and identify all parts before assembly.
Bulb not included.
2. Screw center pipe onto fixture plate while
removing any slack in wires in between parts.
2
Bulb
(Not Included)
3D
4
3. Install arms:
A. Install three out of four arms onto the ring
by fastening bottom section with lock washer
and hex head screws. See illustration for
correct position of arms.
B. Take the glass shade and gently slip through
until it locates at center inside of ring.
C. Install last arm onto the ring.
D. Install upper section of arms onto fixture
plate by fastening with small lock washer
and small hex nut.
E. Use enclosed hex key to tighten hex head
screws.
4. Carefully remove wrapping from glass shade.
5. Install threaded stud into finial. Then slip the
threaded stud through cap and bottom hole of
glass shade. Lock all together by fastening with
flat washer, lock washer, and hex nut from
above. Do not over tighten.
3C
©MURRAY FEISS IMPORT LLC.
Shade
Ring
Washer
Screw
3B
Hex
Key
6. Install light bulb (not included). See relamping
label located at socket area for type and
maximum allowed wattage.
7. Follow enclosed supplement installation
instructions for electrical and fixture installation
onto house outlet box. If you do not have an
outlet box at desired location to attach the fixture
3A
Cap
Threaded Stud
than hire a qualified electrician to create one
5
Finial
M U R R A Y F E I S S
 Loading...