

Page 1
Assembly Instructions For
Require
d
Extra
1
2
x 6
x 6x 1
1 1 1
3
4
12mm
6 4 24
Inner Assembly
P1178
5 6 7
14mm
4
(E) 5/29/09
8
Extra PIN
Qty.
4
22mm18mm
26mm
4
8
4
12
IMPORTANT
TURN OFF THE POWER AT THE MAIN FUSE OR
CIRCUIT BREAKER BOX
BEFORE STARTING INSTALLATION
PIN
PART
DESCRIPTION
Rectangular
Crystal Hook
S Hook
Small Bead
Used on # 4
Used on
# 5, 6, 7, 8
PIN
Hook
Ball
Cap Screw
Outer
Assembly
Lower
Assembly
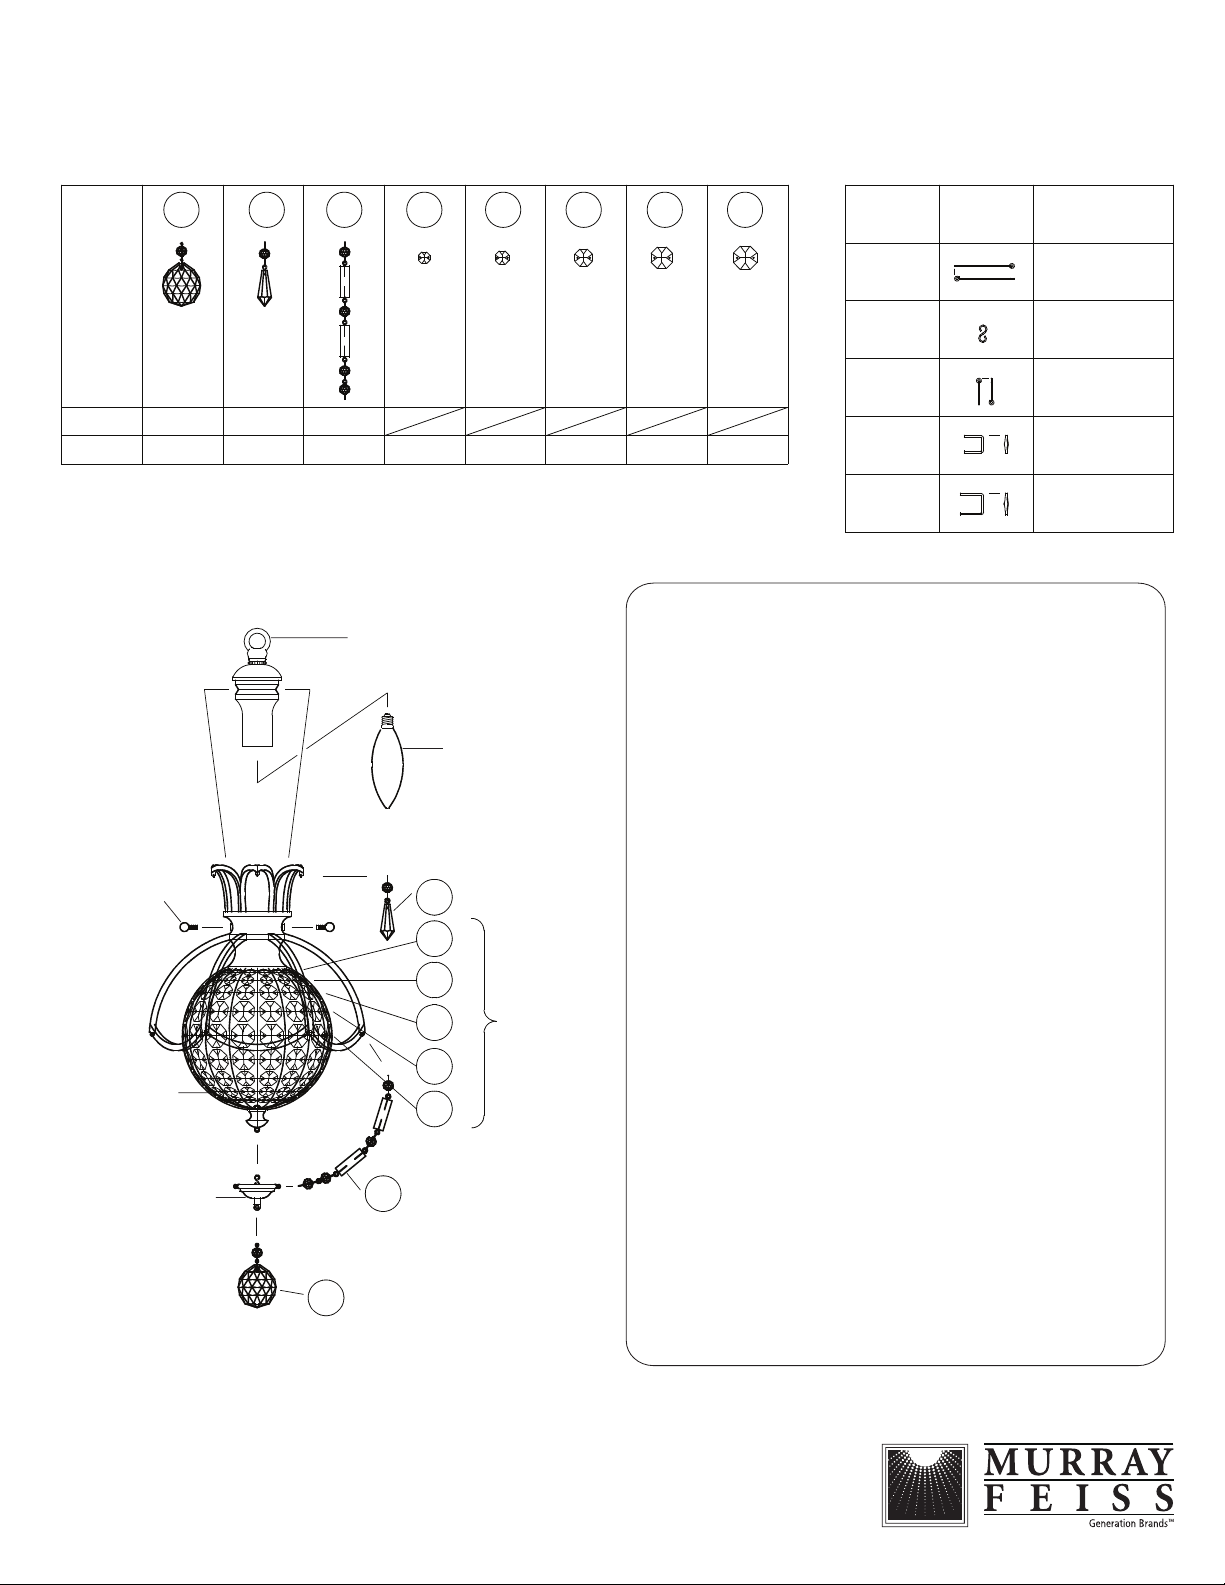
Carefully unpack and identify all parts before assembly.
Bulb
(not included)
2
4
5
6
FACTORY
INSTALLED
7
8
3
1
Bulbs not included.
1. Follow enclosed supplement installation instructions for
electrical and fixture installation onto house outlet box. If
you do not have an outlet box at desired location to attach
the fixture than hire a qualified electrician to create one.
IMPORTANT: WHEN FOLLOWING SUPPLEMENT
INSTRUCTIONS STEP #6, MAKE CERTAIN TO SLIDE
DECORATIVE BOBECHE (IN BETWEEN COLLAR RING
AND CANOPY) DOWN THE CHAIN. See above
illustration.
2. Install candelabra base, of 60 Watt maximum bulb (not
included).
3. Slip outer assembly through inner assembly, and secure
them at top section by fastening with ball cap screws.
4. Install lower assembly by hooking onto finial. NOTE: Bend
tight open hook in order to prevent from getting loose.
5. Hang all crystal glass parts as shown on drawing.
NOTE:
A. For easier installation of crystal chains #3, hook all
chains first onto the lower assembly and then proceed to
hook onto the outer assembly.
B. To replace broken crystal or pin, extras are included in
hardware bag. Replace by gently bending open pin, remove
broken crystal or pin, hook new one, then close back pin.
Avoid bending pin into sharp angle.
 Loading...