

Page 1
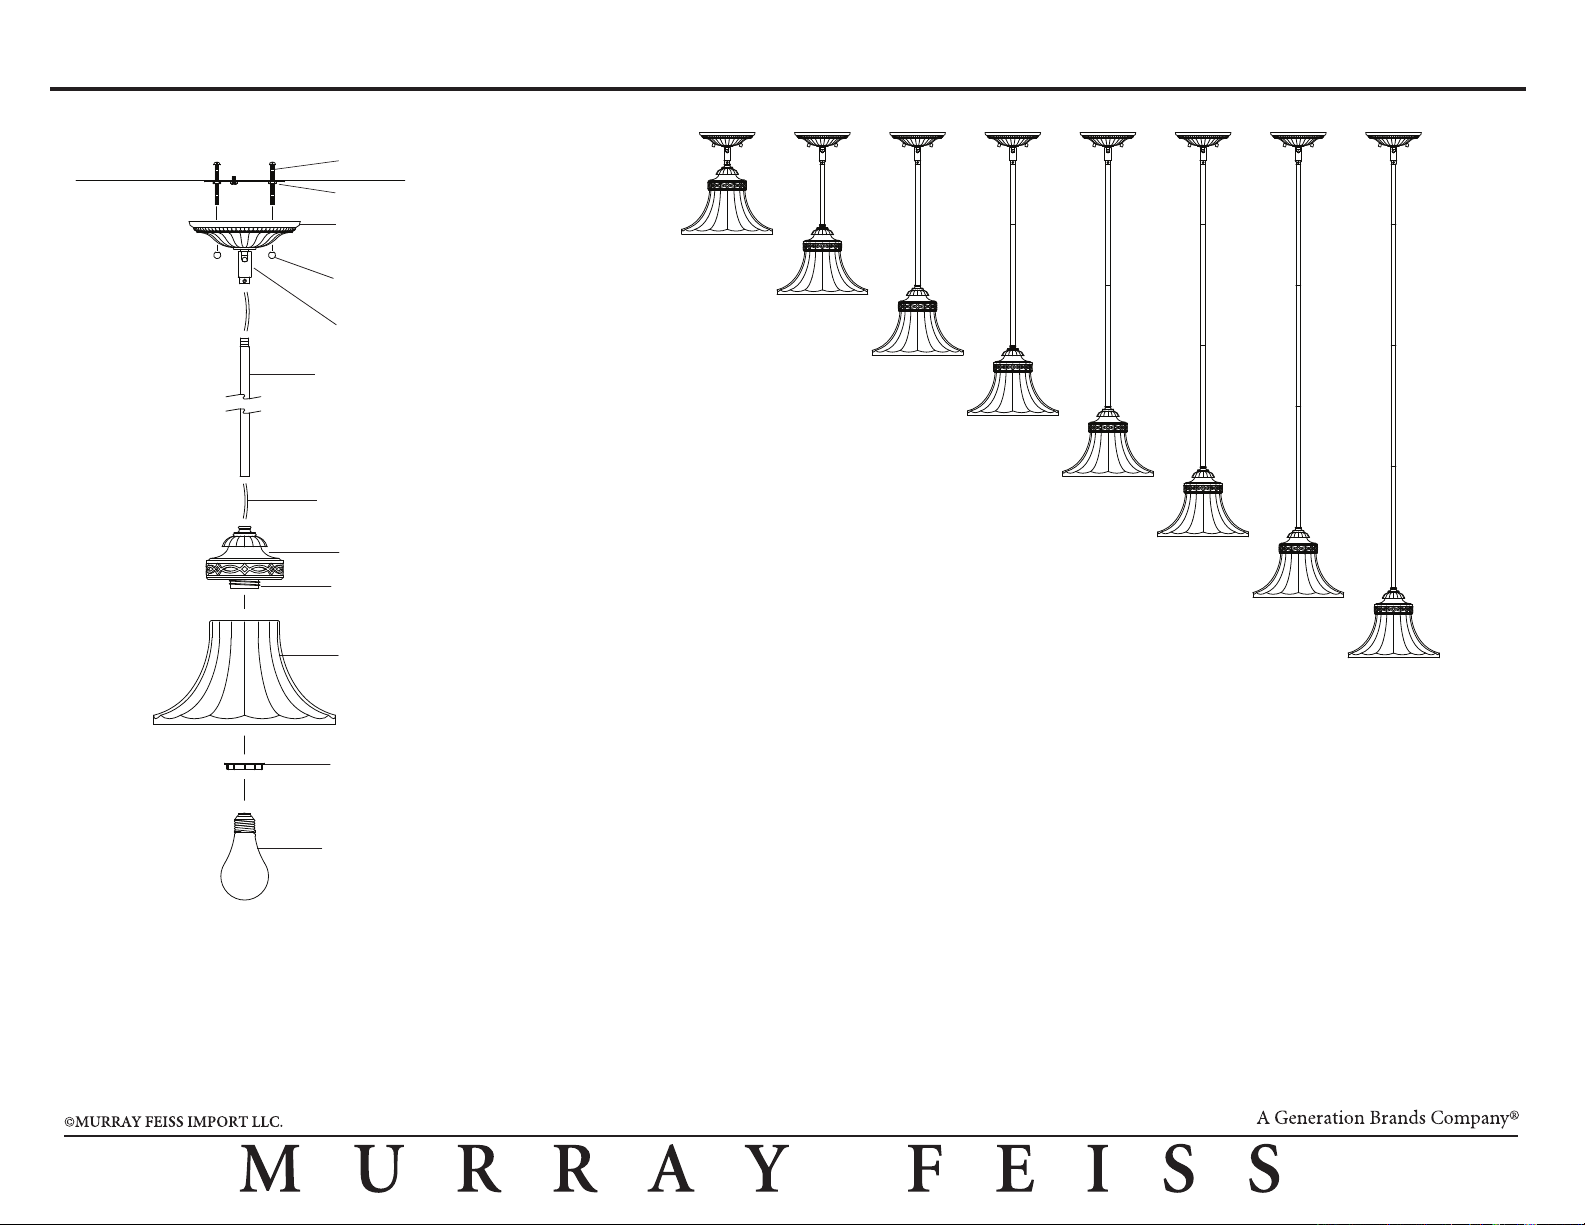
ASSEMBLY INSTRUCTIONS FOR P1114
Mounting Screws
Mounting Plate
Fixture Plate
(Canopy)
Ball
Cap Nuts
Swivel
10"
(E) 4/07
16"
Stem
(3) 12 in. Long
(1) 6 in. Long
Fixture Wire &
Ground WIre
Fitter
Socket
Shade
Counter
Ring
Bulb
(not included)
22"
28"
34"
IMPORTANT:
TURN OFF POWER AT MAIN FUSE OR CIRCUIT
BREAKER BOX BEFORE STARTING INSTALLATION
40"
Carefully unpack and identify all parts before assembly.
Bulb not included.
1. STEM HUNG INSTALLATION:
A. Choose desired installation height from dimensions shown in above diagram.
Thread fixture wires through each stem to be used. Please note correct position of stems
from left diagram. Screw all stems together until secure.
FLUSH MOUNT INSTALLATION:
A. Remove stem attached above fitter. Make certain to keep threaded pipe protruding
above fitter.
B. Thread fixture wires, which are located above fitter, through swivel.
C. Screw fitter into swivel.
2. Measure 6" of wires from end of canopy and cut off remaining wires. Split wires and
then strip off 3/4" (19 mm) of insulation from each end.
3. Follow enclosed “Multiple Standard Installation Instructions” for electrical and fixture
installation onto ceiling outlet box.
46"
52"
4. Install glass shade onto fitter by locking with counter ring.
5. Install light bulb (not included). See relamping label at socket area for type and maxi-
mum allowed wattage.
 Loading...