

Page 1
ASSEMBLY INSTRUCTIONS FOR P1113
(E) 4/07
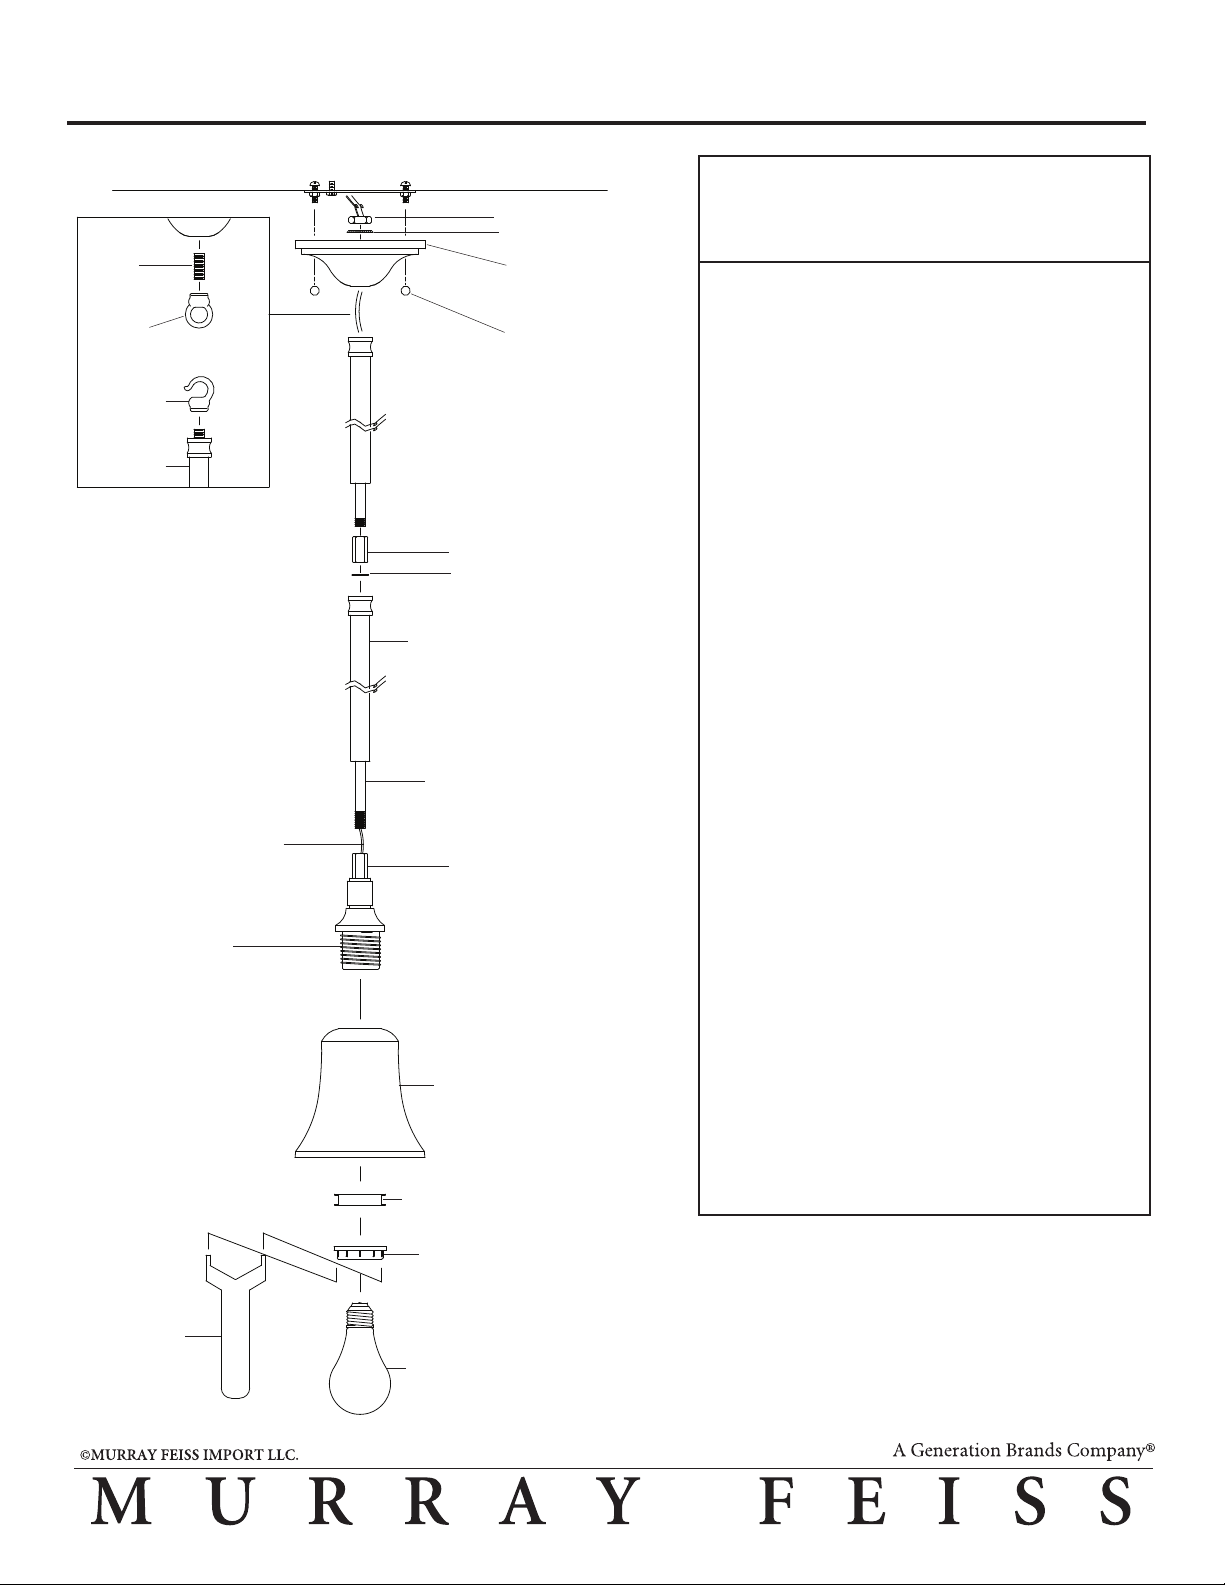
Short
Threaded
Pipe
Canopy
Loop
Hook
Stem
VAULTED CEILING
INSTALLATION
Fixture Wires
& Ground Wire
Hex Nut
Lock Washer
Canopy
(Fixture Plate)
Ball Cap Nut
Coupler
Lock
Washer
Square Stems
(3) 12 in. long
(1) 6 in. long
Center Pipe
Coupler
TURN OFF THE POWER AT THE MAIN FUSE
IMPORTANT
OR CIRCUIT BREAKER BOX
BEFORE STARTING INSTALLATION
Carefully unpack and identify all parts before assembly.
Bulbs are not included.
1. Install stems:
A. Choose desired installation height from any
combination of stems provided. Additional stems can
be purchased to increase installation height. However
do not add more stems than will allow 6" (15 cm) of
fixture wires above fixture plate.
B. Thread fixture wires through a center pipe. Install
center pipe by screwing into coupler.
C. Slip square stem through the installed center pipe.
Note correct position of stem from left diagram.
D. Lock stem into position by fastening with a lock
washer and coupler onto protruding center pipe. Note:
make certain center pipe is protruding about 3/8" (10
mm) above stem. If not then twist center pipe to loosen
in order to increase to desired height.
E. Repeat above steps B - D for additional stems.
F. For flat ceiling: After final stem installation, install
fixture plate on top of stem by fastening with lock
washer and hex nut onto protruding center pipe.
For vaulted ceiling (kit included in hardware bag):
After final stem installation, install hook on top of stem
by screwing onto protruding center pipe. Install short
threaded pipe into loop. Install loop onto bottom of
fixture plate by fastening with lock washer and hex nut
from above. Thread fixture wires through installed loop
center hole. Then while pulling wires from above,
attach hook onto loop.
Wrench
(included)
Socket
Shade
Spacer Tube
Counter Ring
Bulb
(not included)
2. Measure 6" of wire from end of fixture plate and cut off
remaining wire. Split wires and strip off 3/4" of
insulation from each end.
3. Follow enclosed "Multiple Standard Installation
Instructions" for electrical and fixture installation onto
ceiling junction box.
4. Place Shade over threaded socket then spacer tube and
secure with counter ring, using supplied wrench.
5. Install bulbs (not included). See relamping label located
at socket area for type and maximum allowed wattage.
 Loading...