

Page 1
Installation Instructions for
OL9113
Dockyard 1 Light Outdoor Flushmount
Outdoor
GP I :ENERAL RODUCT NFORMATION
This product is suitable for damp locations.
This product may be dimmed with a standard incandescent dimmer.
This instruction shows a typical installation.
1A
This product requires installation by a qualified electrician.
Before installing be sure to read all instructions and
TURNTHE POWERTOTHE ELECTRICAL BOX OFF.
OL9113_
CAUTION - RISK OF FIRE
1.0
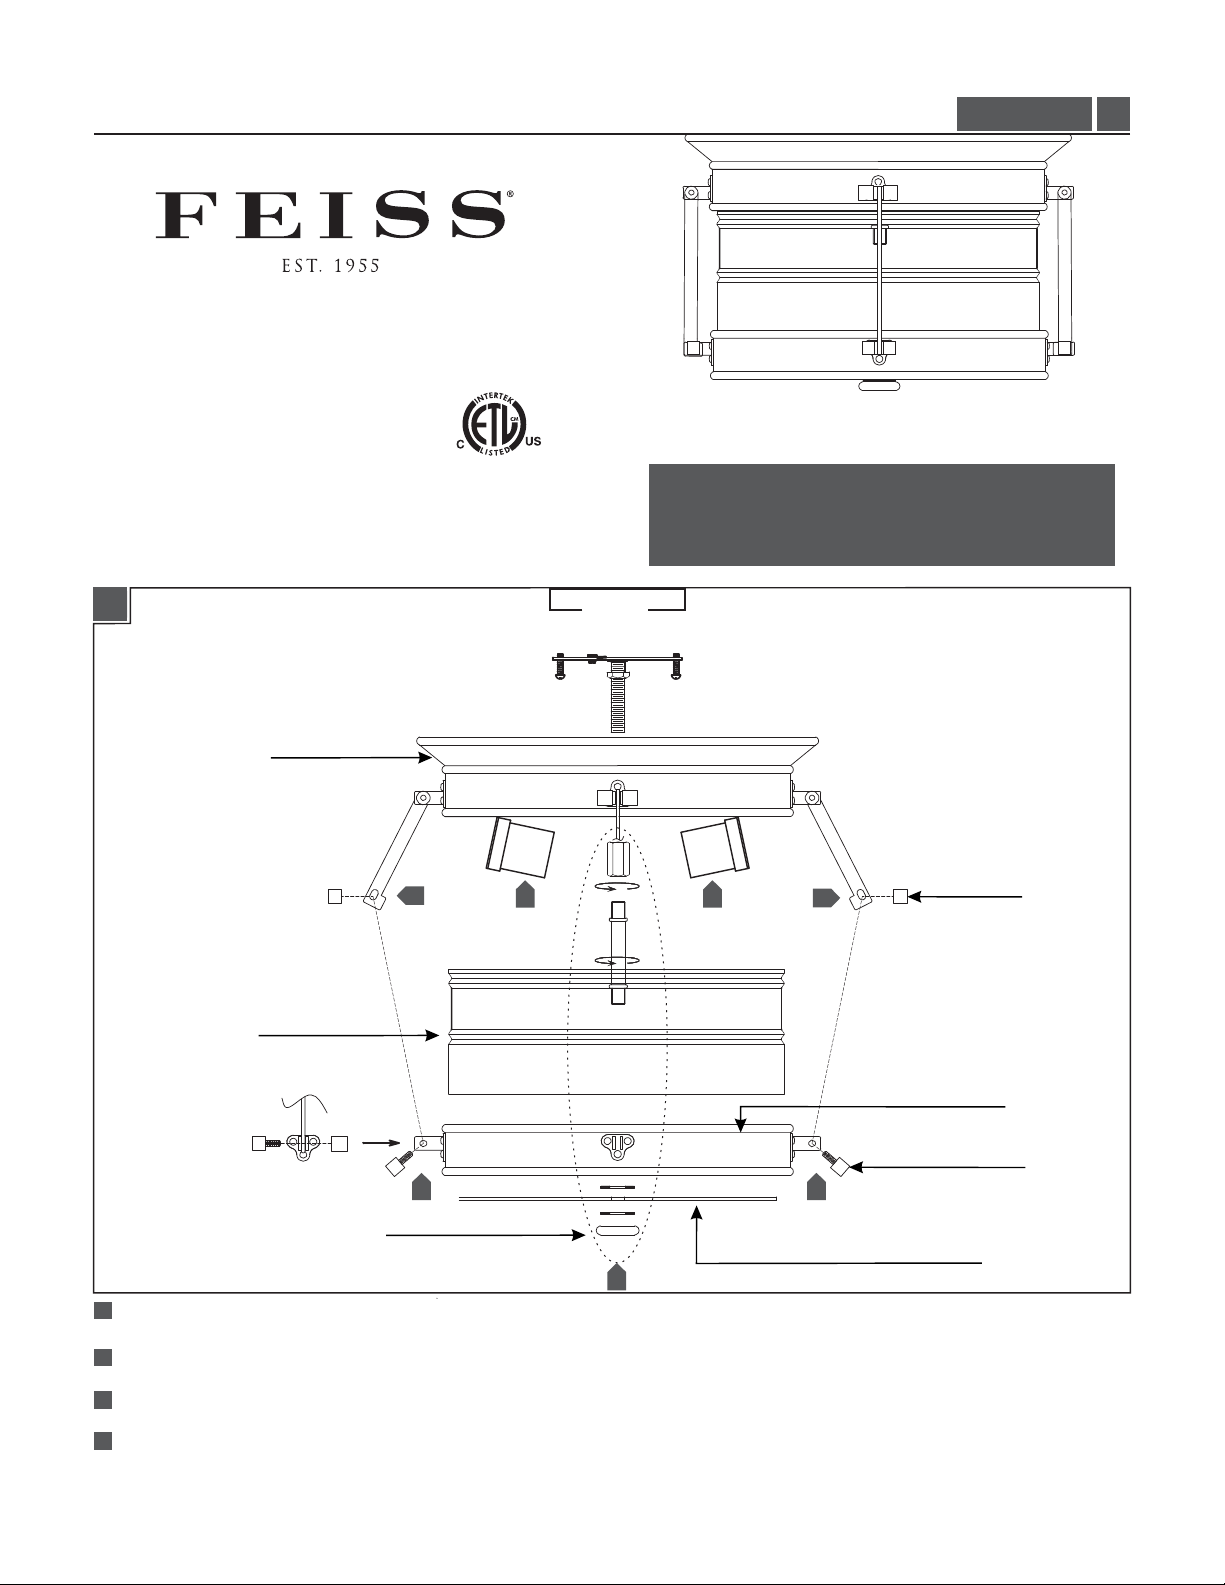
FIXTURE TOP
3
SHADE
3
FINIAL SET
1
Follow enclosed supplement installation instructions for electrical and fixture installation onto house outlet box.
2 2
4
3
3
CAP NUT
FIXTURE BASE
CAP SCREW
BOTTOM COVER
Install the lamp by screwing it into the socket. Refer to the label on the lamp socket for Max Wattage information.
2
Install shade by placing it in the fixture base and secure it to the fixture top with the provided cap screws and nuts.
3
4
Install the bottom cover by securing it to the fixture base with the finial set.
1
Page 2

1A
Ce produit nécessite une installation par un électricien
ATTENTION – RISQUE D’INCENDIE
qualifié.Avant d'installer assurez-vous de lire toutes les
instructions etTOURNER LE POUVOIR DE LA BOITE
ELECTRIQUE OFF
HAUT FIXATION
3
OMBRE
3
SET FLEURON
1
Follow enclosed supplement installation instructions for electrical and fixture installation onto house outlet box.
Install the lamp by screwing it into the socket. Refer to the label on the lamp socket for Max Wattage information.
2
Install shade by placing it in the fixture base and secure it to the fixture top with the provided cap screws and nuts.
3
4
Install the bottom cover by securing it to the fixture base with the finial set.
2 2
4
3
3
COUVERCLE INFÉRIEUR
CAPE ÉCROU
BASE DE FIXATION
CAPE VIS
2
Page 3

1A
FIXTURE SUPERIOR
PRECAUCION – RIESGO DE INCENDIO
Este producto requiere la instalación por un electricista
calificado.Antes de instalar,asegúrese de leer todas las
instrucciones y APAGUE EL PODER DE LA CAJA
ELÉCTRICA NO.
3
SOMBRA
3
CONJUNTO DE FINIAL
1
Follow enclosed supplement installation instructions for electrical and fixture installation onto house outlet box.
Install the lamp by screwing it into the socket. Refer to the label on the lamp socket for Max Wattage information.
2
Install shade by placing it in the fixture base and secure it to the fixture top with the provided cap screws and nuts.
3
4
Install the bottom cover by securing it to the fixture base with the finial set.
2 2
4
3
3
CUBIERTA INFERIOR
TUERCA DE
CAPUCHON
BASE DE
TORNILLO DE
CAPUCHON
3
Page 4

SAVE THESE INSTRUCTIONS!
555 Theodore Fremd Ave Suite B101 Rye, NY 10580
800.969.3347
www.Feiss.com
© 2012 Feiss.All rights reserved.The "Feiss" graphic is a
registered trademark of Feiss. Feiss reserves the right to
change specifications for product improvements without notification.
A Generation Brands Company
4
 Loading...