

Page 1
Assembly Instructions For
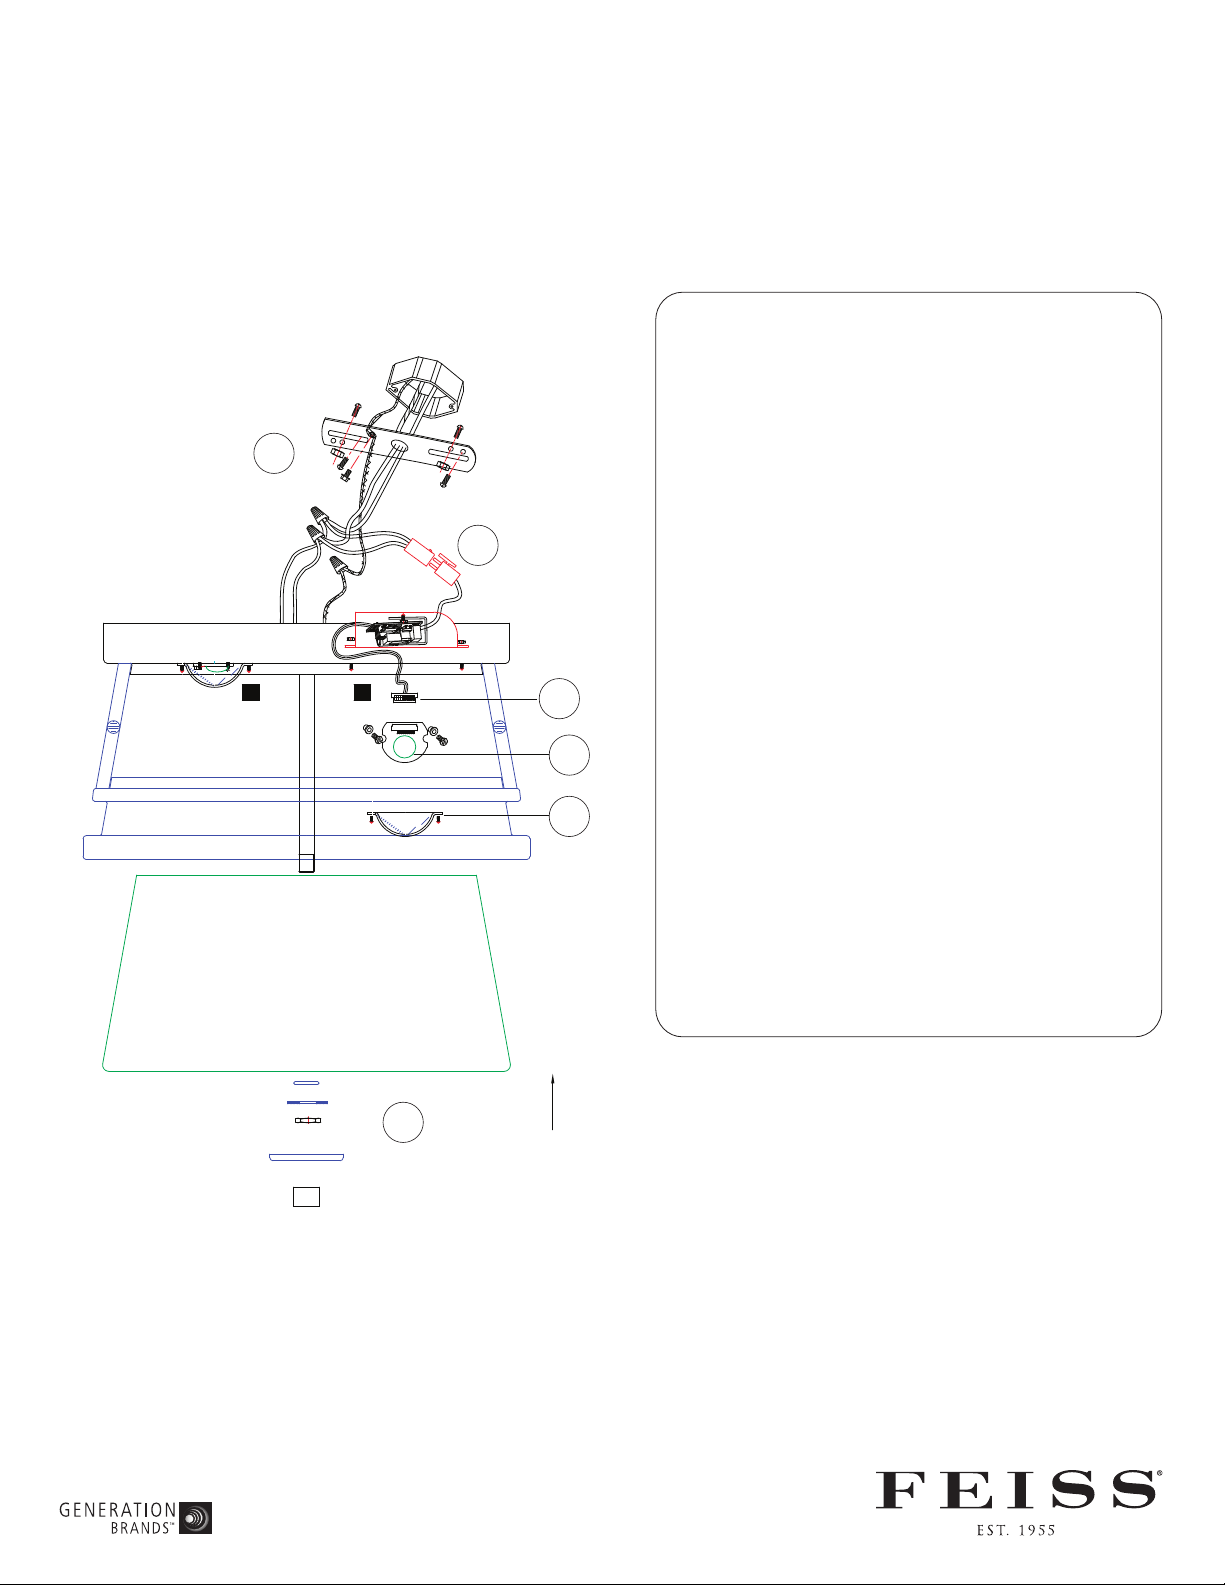
OL8213
TURN OFF THE POWER AT THE MAIN FUSE
1
2D
2C
2B
2A
Carefully unpack and identify all parts before
assembly.
1. Follow enclosed supplement installation
instructions for electrical and fixture
installation onto house outlet box. If you do
not have an outlet box at desired location to
attach the fixture then hire a qualified
electrician to create one.
2. LED bulb and driver replacement:
A. Unscrew the 3 screws for the lens and
remove the lens.
B. Unscrew the 2 screws from the LED bulb
housing and remove LED bulb.
C. Unplug the connection marked 2C and
replace with a new LED bulb.
D. Unplug the connections marked 2C & 2D
and replace with a new driver.
(E) 12/11
IMPORTANT
OR CIRCUIT BREAKER BOX
BEFORE STARTING INSTALLATION
3. Slip glass shade through long threaded pipe
until it checks inside of main frame and
fasten with lock washer and hex nut. Then
slip cover and lock into position by fastening
with finial. Do not over tighten.
3
 Loading...