

Page 1
ASSEMB LY I NST R U C T I ONS FOR OL3404
(E) 4/06
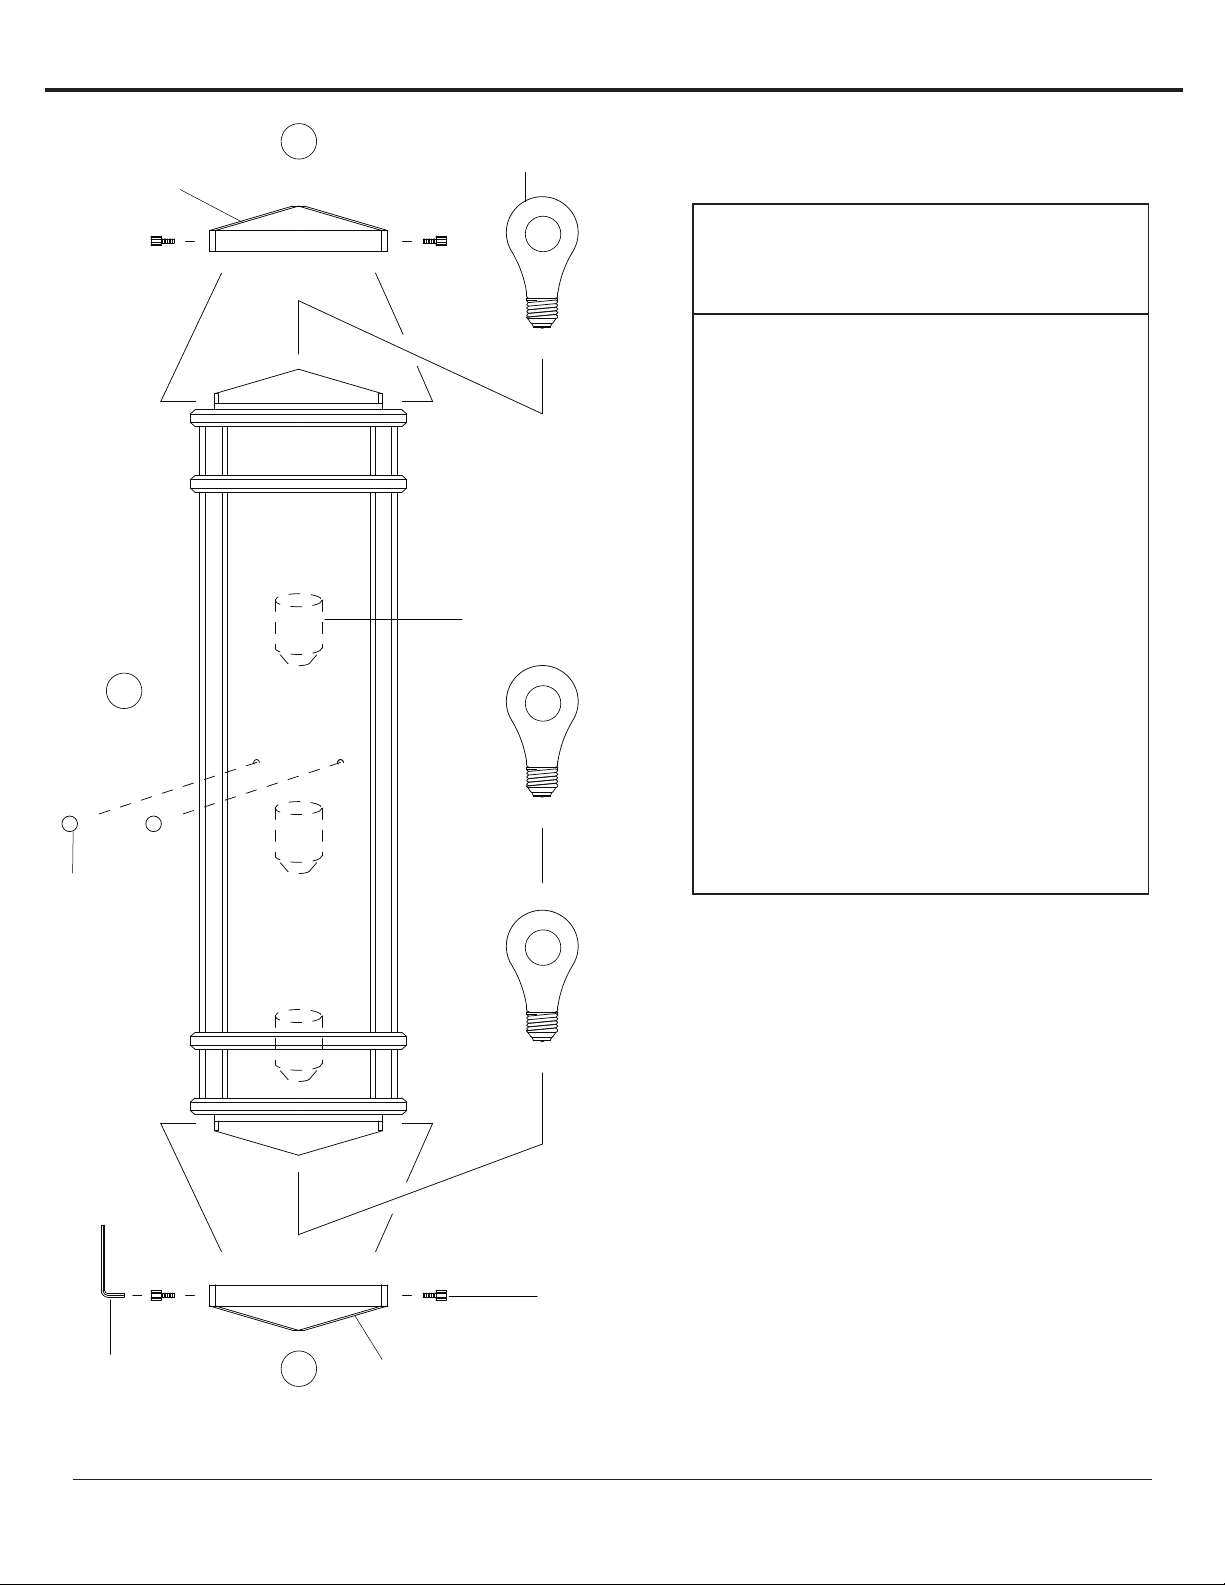
Cover (without drain hole)
1
Ball
Cap Nuts
3B
Bulb
(not included)
2A
Socket
2B
IMPORTANT
TURN OFF THE POWER AT THE
MAIN FUSE OR CIRCUIT BREAKER
BOX BEFORE STARTING INSTALLATION
Carefully unpack and identify all parts before
beginning assembly. Bulb not included.
1. Follow enclosed supplement installation
instructions for electrical and fixture installation
onto house outlet box. If you do not have an
outlet box at desired location to attach the fixture
than hire a qualified electrician to create one.
2. Install bulbs (not included) - use type-A of 60
Watt maximum medium base bulbs:
A. Install a bulb into upper socket by slipping
through top opening.
B. Install another bulb into middle socket by
slipping either through bottom opening.
C. Install last bulb into lower socket by slipping
through bottom opening.
3. Install covers:
A. Install bottom cover (with a drain hole) by
fastening with screws onto bottom of lantern.
Use enclosed hex key to tighten the screws.
NOTE: Make certain to use the cover with small
hole at center. The hole is to drain any water
accumulating at bottom inside of lantern.
B. Install top cover (without drain hole) onto top
of lantern.
Hex Key
©M UR RA Y F EI SS I MP OR T LL C .
3A
2C
Screw
Cover (with drain hole)
A Quality Home Brands Company®
MU R R AY FEI SS
 Loading...