

Page 1
Installation Instructions for
FM377
Cumberland 2 Light Flush Mount
Flush Mount
GP I :ENERAL RODUCT NFORMATION
This product is listed by one of the following
“ ationally ecognized esting aboratory”NR TL
This product is suitable for damp locations.
This product may be dimmed with a standard incandescent dimmer.
This instruction shows a typical installation.
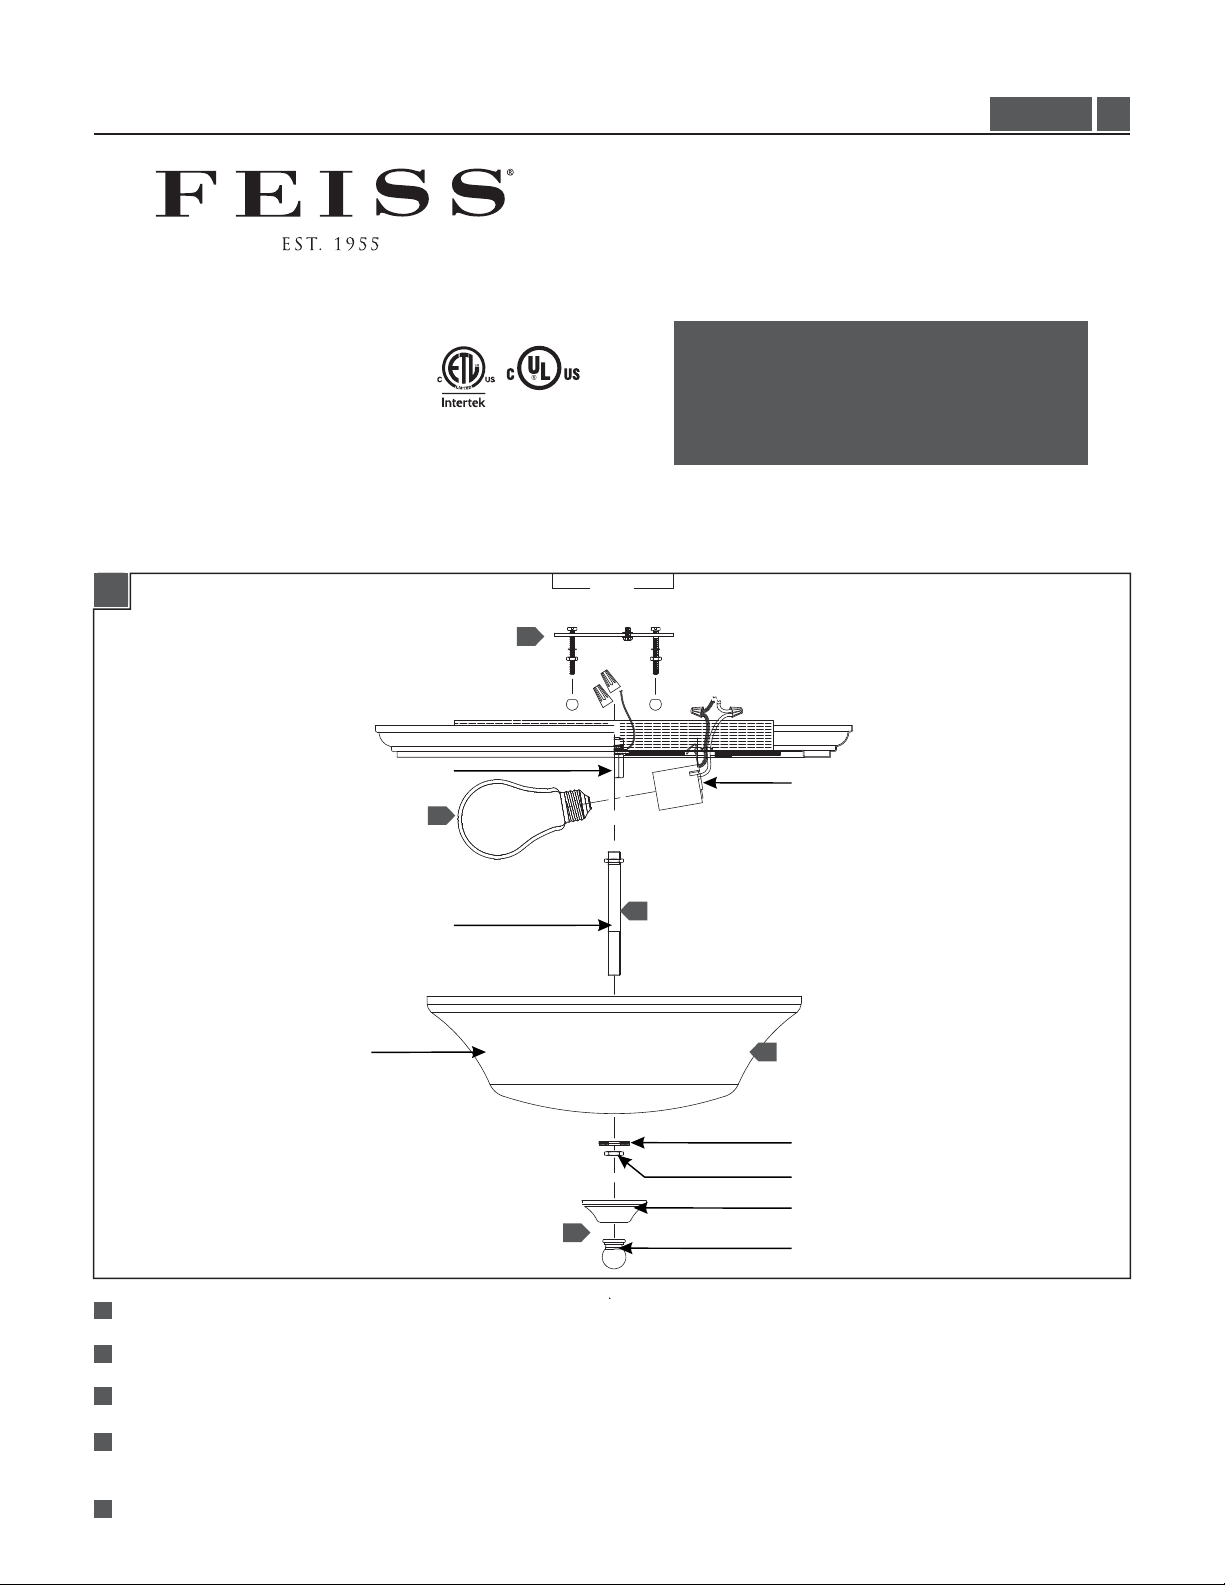
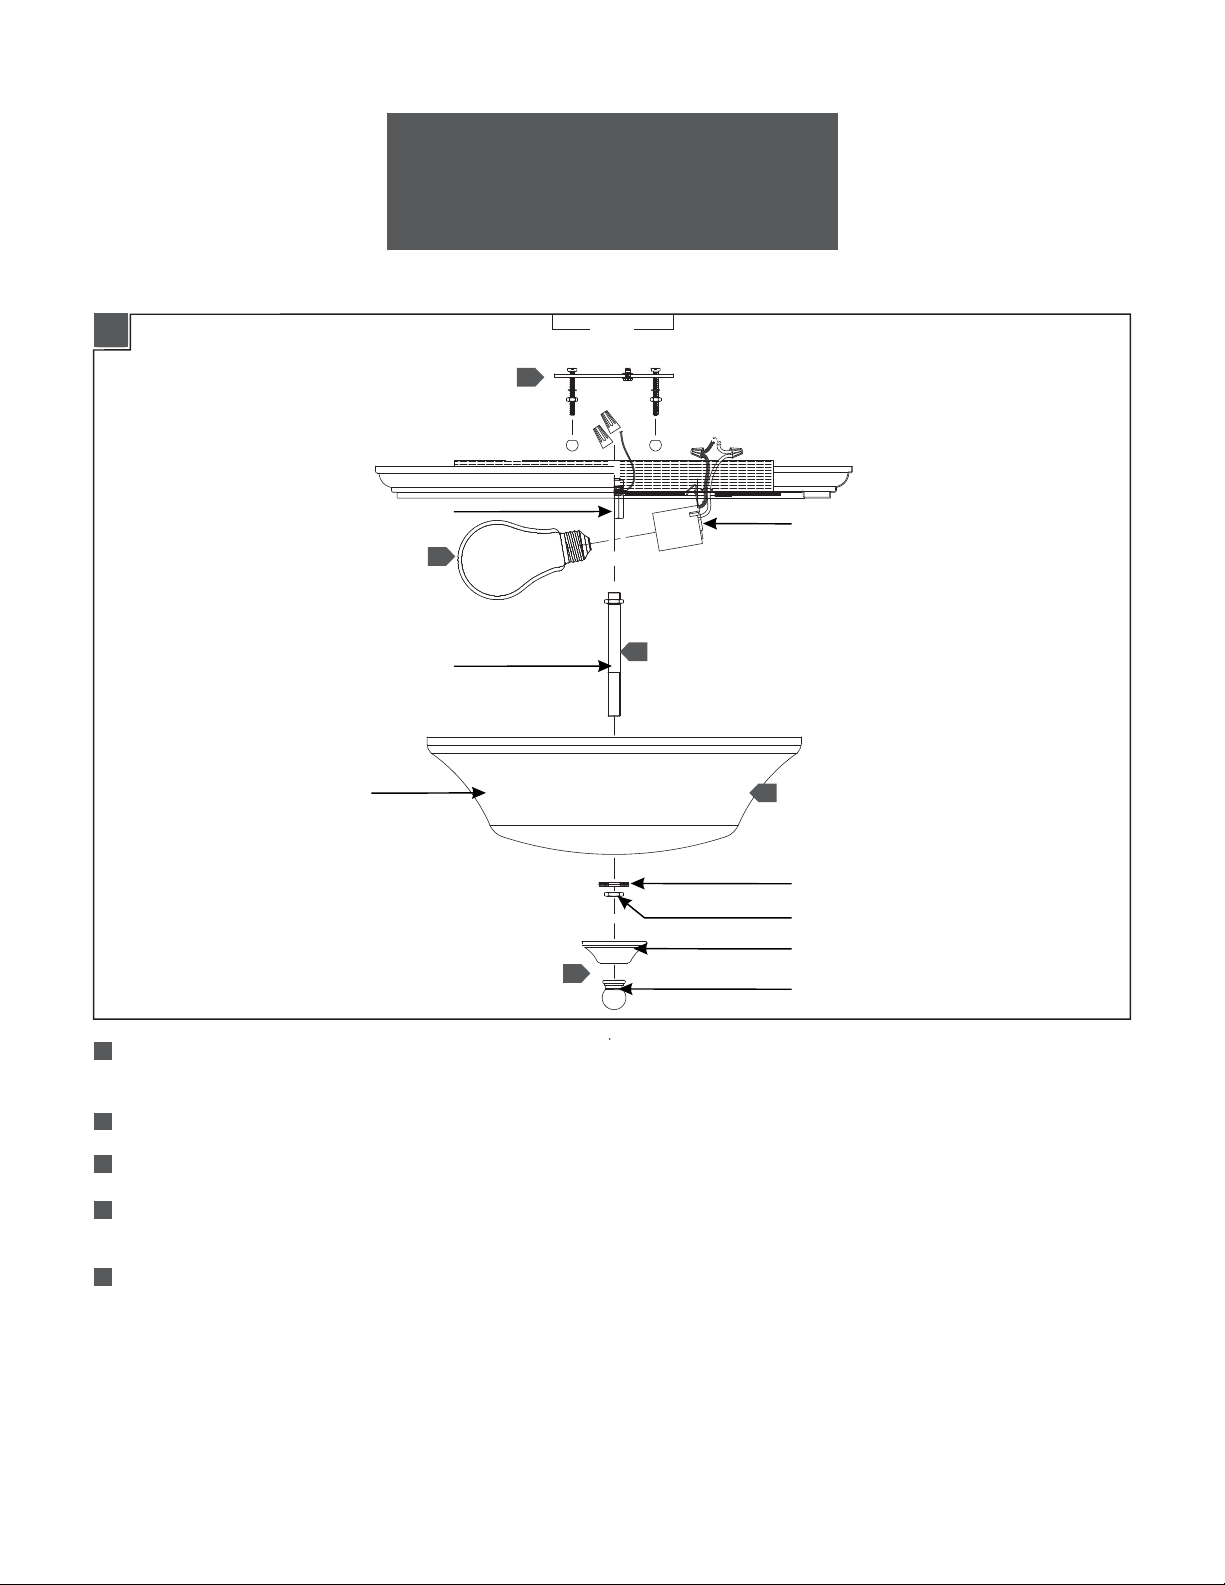
1A
1
FM377_
CAUTION - RISK OF FIRE
This product must be installed in accordance with
the applicable installation code by a person familiar
with the construction and operation of the product
and the hazards involved.
Use minimum 90°c supply conductors.
1.0
COUPLER
3
THREADED PIPE
SHADE
4
1
Follow enclosed supplement installation instructions for electrical and fixture installation onto house outlet box.
2
SOCKET
4
WASHER
HEX NUT
FONT
FINIAL
2
Screw the threaded pipe to the coupler.
3
Screw the lamp into the socket. Refer to the label on the lamp socket for Max Wattage information.
4
Install the shade by placing it over the threaded pipe. Then secure the shade in place with the washer and hex nut (Do not
over tighten).
5
Install font by fastening with finial.
1
Page 2

1A
MISE EN GARDE - RISQUE D'INCENDIE
Ce produit doit être installé selon le code d’installation
pertinent , par une personne qui connaÎt bien le produit et
son fonctionnement ainsi que les risques inhérents
Les fils d’alimentation doivent convenir pour
90°c.
1
COUPLEUR
3
TUYAUTERIE FILETÉ
OMBRE
4
1
Suivez les instructions d'installation du supplément fermés pour l'installation électrique et de fixation sur boîte de sortie
2
DOUILLE
4
RONDELLE
ECROU HEXAGONAL
FONTE
FLEURON
maison.
2
Vissez le tube fileté au coupleur.
3
Vissez la lampe dans la douille. Reportez-vous à l'étiquette sur la douille de la lampe pour obtenir des informations
Puissance max.
4
Installez l'ombre en le plaçant sur le tube fileté. Ensuite, fixez l'ombre en place avec l'écrou de la laveuse et hex (Ne pas trop
serrer).
5
Installer la police en fixant avec fleuron.
2
Page 3
1A
ADVERTENCIA - RIESGO DE INCENDIO
Este productor debe ser instalado segun el codigo de
instalacion aplicable por una persona que conozca la
constussion y el funcionamiento del producto y los riesgos
que supone.
Conductores de alimentacion 90°c Min.
1
ACOPLADOR
3
TUBO ROSCADO
SOMBRA
4
1
Siga las instrucciones de instalación de suplementos suministrados para la instalación eléctrica y el aparato en la caja de
2
ENCHUFE
4
ARANDELA
TUERCA HEXÁGONO
FUENTE
FINIAL
salida casa.
2
Enrosque el tubo roscado al acoplador.
3
Atornille la lámpara en el zócalo. Consulte la etiqueta de la toma de la lámpara para obtener información Max Potencia.
Instale la sombra, colocándolo sobre el tubo roscado. A continuación, fije el tono en su lugar con la tuerca y arandela
4
hexagonal (No apriete demasiado).
5
Instale la fuente sujetando con finial.
1
3
Page 4

SAVETHESE INSTRUCTIONS!
555 Theodore Fremd Ave Suite B101 Rye, NY 10580
800.969.3347
www.Feiss.com
© 2013 Feiss.All rights reserved.The "Feiss" graphic is a
registered trademark of Feiss.Feiss reserves the right to
change specifications for product improvements without notification.
A Generation Brands Company
4
 Loading...