

Page 1
Installation Instructions for
F2795-3
Alston 3 Light Chandelier
Chandelier
GP I :ENERAL RODUCT NFORMATION
This product is suitable for dry locations.
This product may be dimmed with a standard incandescent dimmer.
This instruction shows a typical installation.
1A
F2795_
CAUTION - RISK OF FIRE
This product requires installation by a qualified electrician.
Before installing be sure to read all instructions and
TURNTHE POWERTOTHE ELECTRICAL BOX OFF.
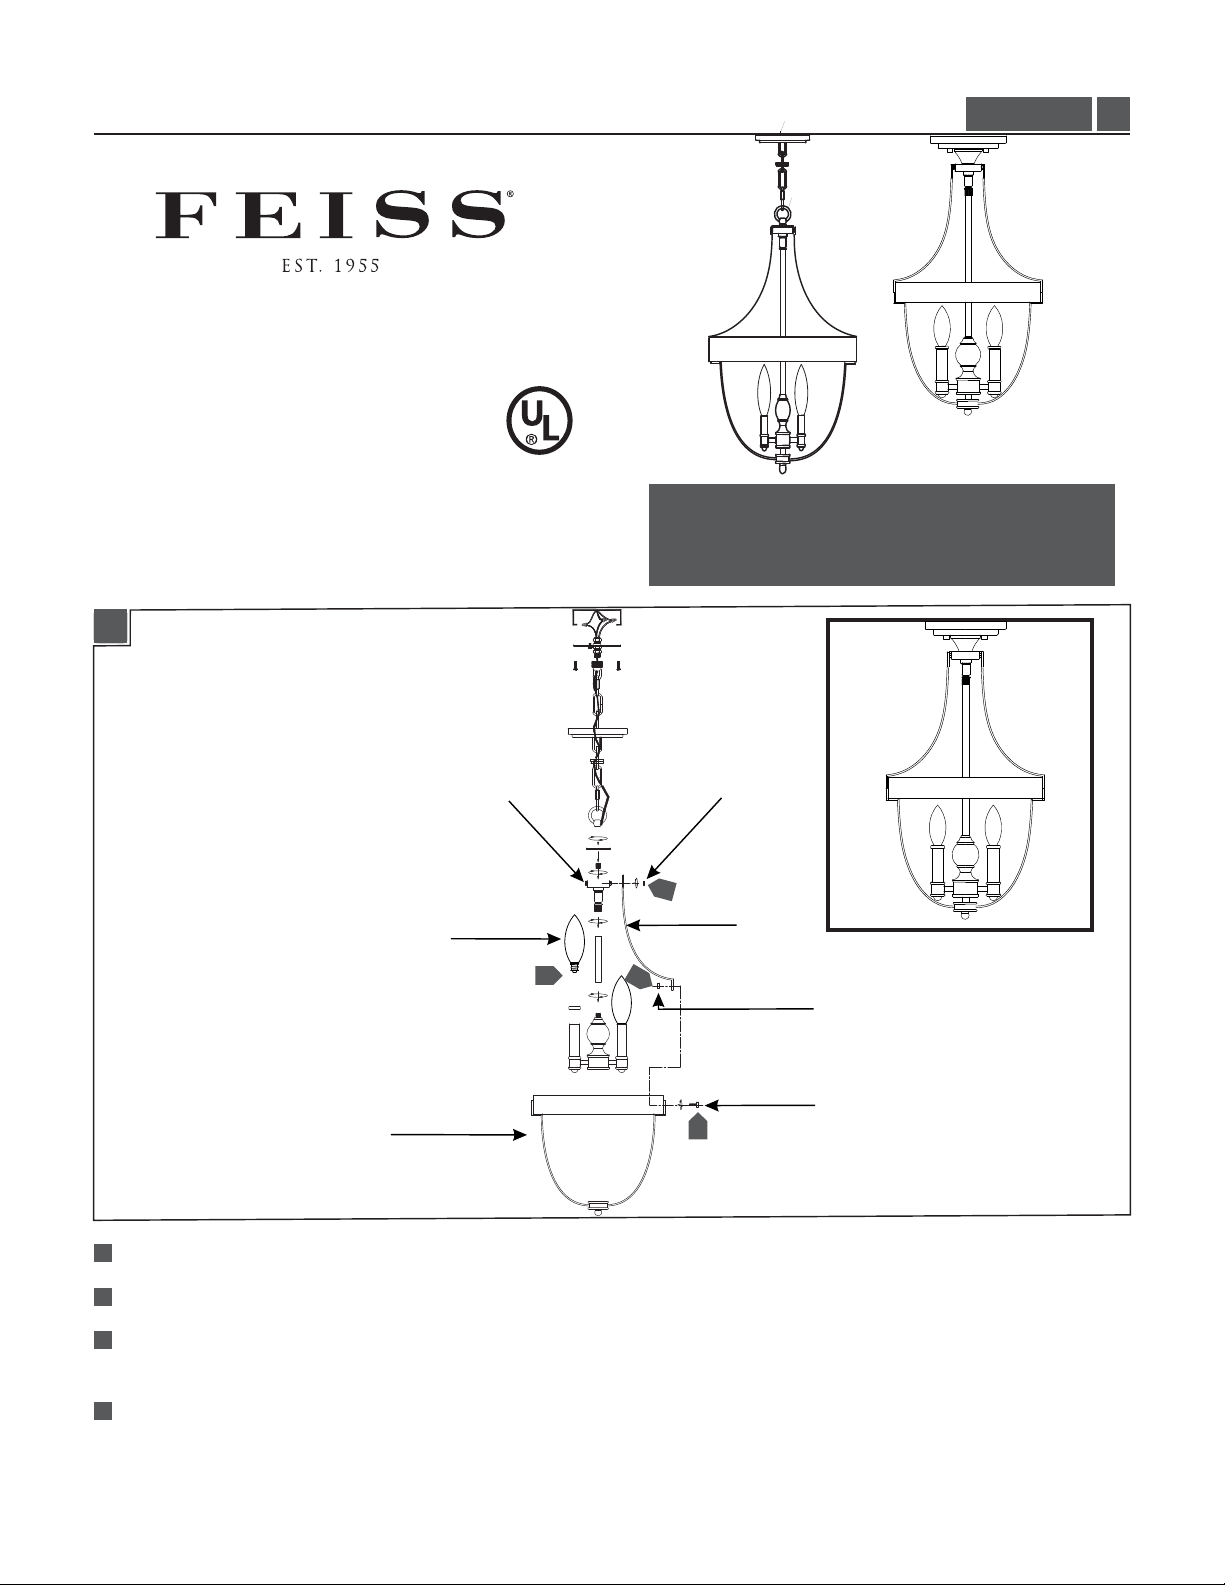
1.0
FIXTURE
LAMP
4
FRAME
1
Mount and secure all arms to the top of the fixture by tightening caps.
2
Mount and secure the frame to the arms by tightening the cap screws and nuts.
3
Install the lamp by screwing it into lamp into the socket. Refer to the label on the lamp socket for Max Wattage
information.
3
CAP
2
ARM
SEMI-FLUSH MOUNT INSTALLATION
NUT
CAP SCREW
3
Depending on desired mounting (chain or semi-flush), follow enclosed supplement installation instructions for electrical
4
and fixture installation onto house outlet box.
1
Page 2
1A
Ce produit nécessite une installation par un électricien
ATTENTION – RISQUE D’INCENDIE
qualifié.Avant d'installer assurez-vous de lire toutes les
instructions etTOURNER LE POUVOIR DE LA BOITE
ELECTRIQUE OFF
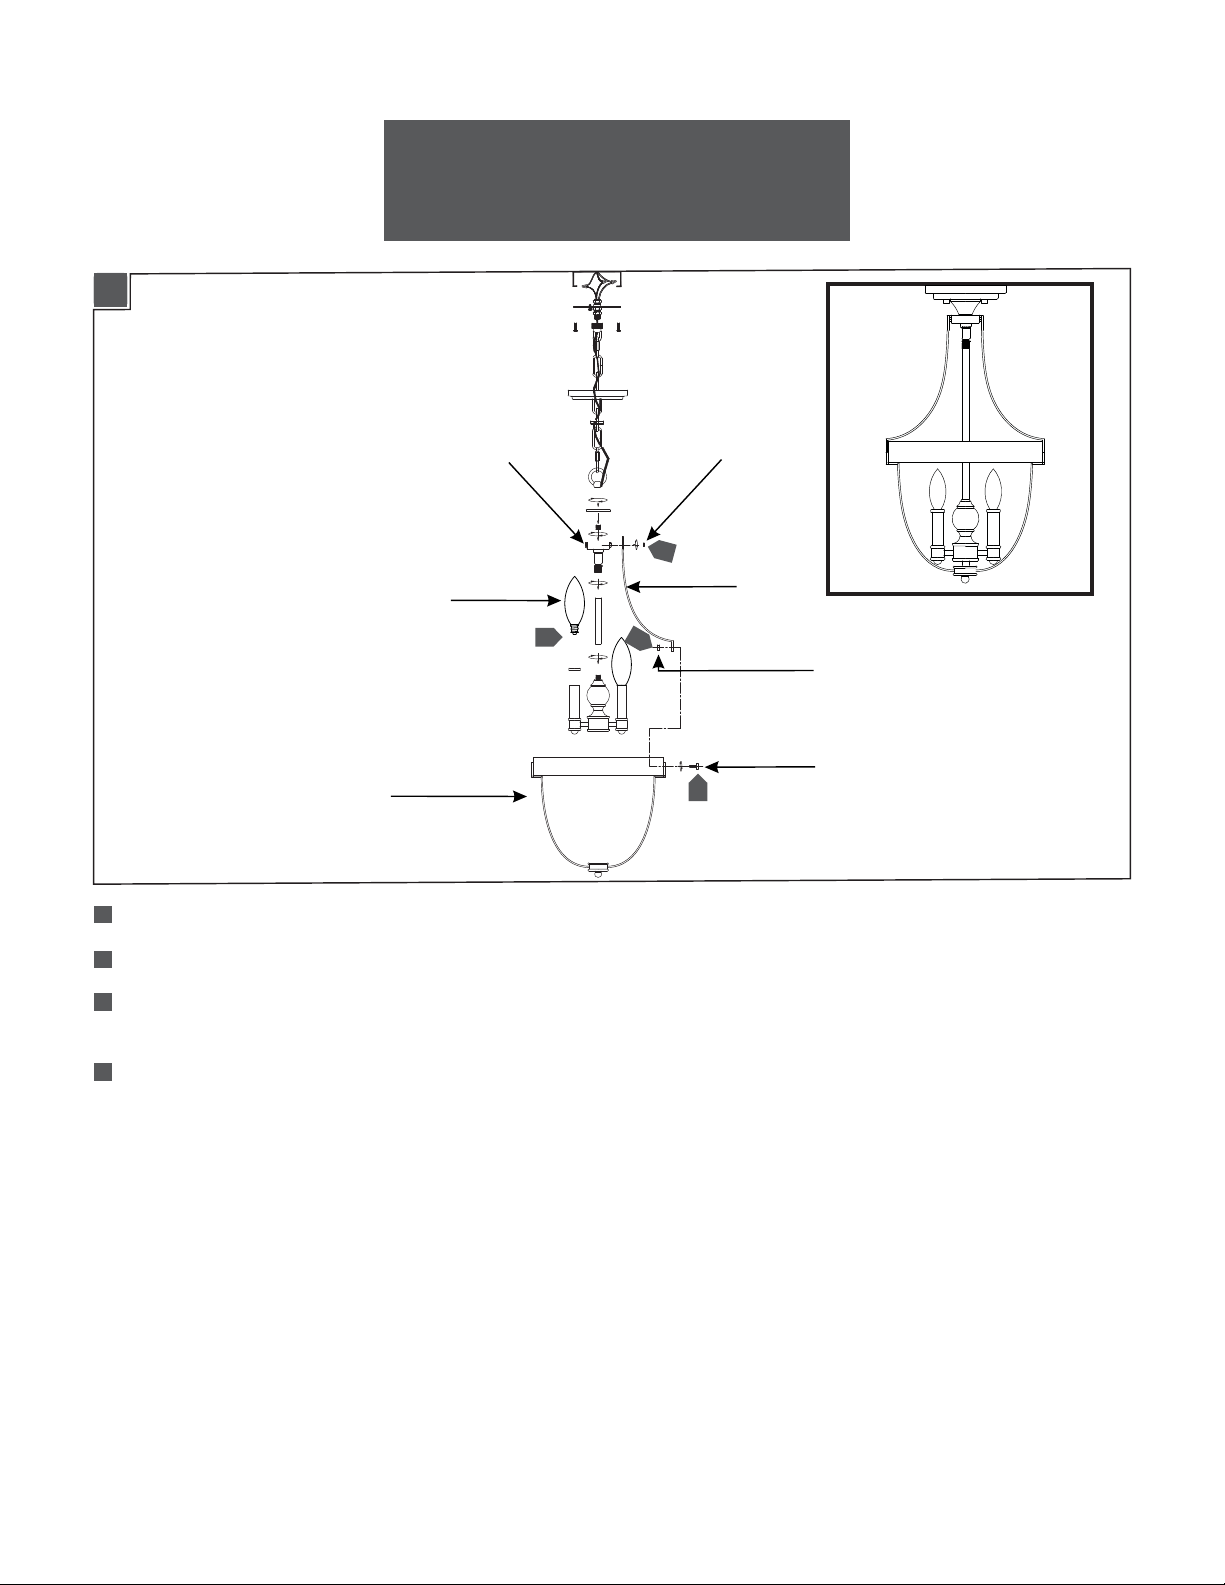
LUMINAIRE
AMPOULE
4
CADRE
1
Monter et fixer toutes les armes à la partie supérieure de l'appareil en serrant bouchons.
2
Monter et fixer le cadre pour les bras en serrant les vis et les écrous.
3
Installez la lampe en le vissant dans la douille. Reportez-vous à l'étiquette sur la douille de lampe Puissance max pour plus
CASQUETTE
2
BRAS
INSTALLATION MONTAGE SEMI-FLUSH
3
ÉCROU
CASQUETTE VIS
3
d'informations.
4
Selon le montage souhaités (chaîne ou semi-encastré), suivez les instructions d'installation jointes supplément pour
l'installation électrique et luminaire sur maison de la boîte de sortie
Page 3

1A
PRECAUCION – RIESGO DE INCENDIO
Este producto requiere la instalación por un electricista
calificado.Antes de instalar,asegúrese de leer todas las
instrucciones y APAGUE EL PODER DE LA CAJA
ELÉCTRICA NO.
FIXTURE
BOMBILLA
4
MARCO
1
Montar y asegurar todas las armas a la parte superior del aparato apretando las tapas.
2
Montar y fijar el marco a los brazos apretando los tornillos y las tuercas.
3
Instale la lámpara enroscándolo en la toma de corriente. Consulte la etiqueta del casquillo de la lámpara para obtener
3
TAPÓN
2
BRAZO
SEMI-FLUSH MOUNT INSTALACIÓN
TUERCA
TORNILLO
3
información Potencia Max.
4
Dependiendo de montaje en cadena que desee (o semi-flush), siga las instrucciones de instalación adjuntas suplemento
para la instalación eléctrica y el aparato en casa caja de salida.
Page 4

SAVE THESE INSTRUCTIONS!
555 Theodore Fremd Ave Suite B101 Rye, NY 10580
800.969.3347
www.Feiss.com
© 2012 Feiss.All rights reserved.The "Feiss" graphic is a
registered trademark of Feiss. Feiss reserves the right to
change specifications for product improvements without notification.
A Generation Brands Company
2
 Loading...