

Page 1
Assembly Instructions For
EXTRA
Ø4
Ø8
×2×5×1 ×1 ×1 ×1 ×1
×2
×6
A
×3
B
×6
C
F2725/6+3
Ø16
Ø28
×1
3
× 2
EXTRA
× 2 ×5 ×1 ×1 ×1 ×1 ×1
TURN OFF THE POWER AT THE MAIN FUSE
(E) 12/11
Ø4
IMPORTANT
OR CIRCUIT BREAKER BOX
BEFORE STARTING INSTALLATION
Ø16
Ø8
Ø28
D
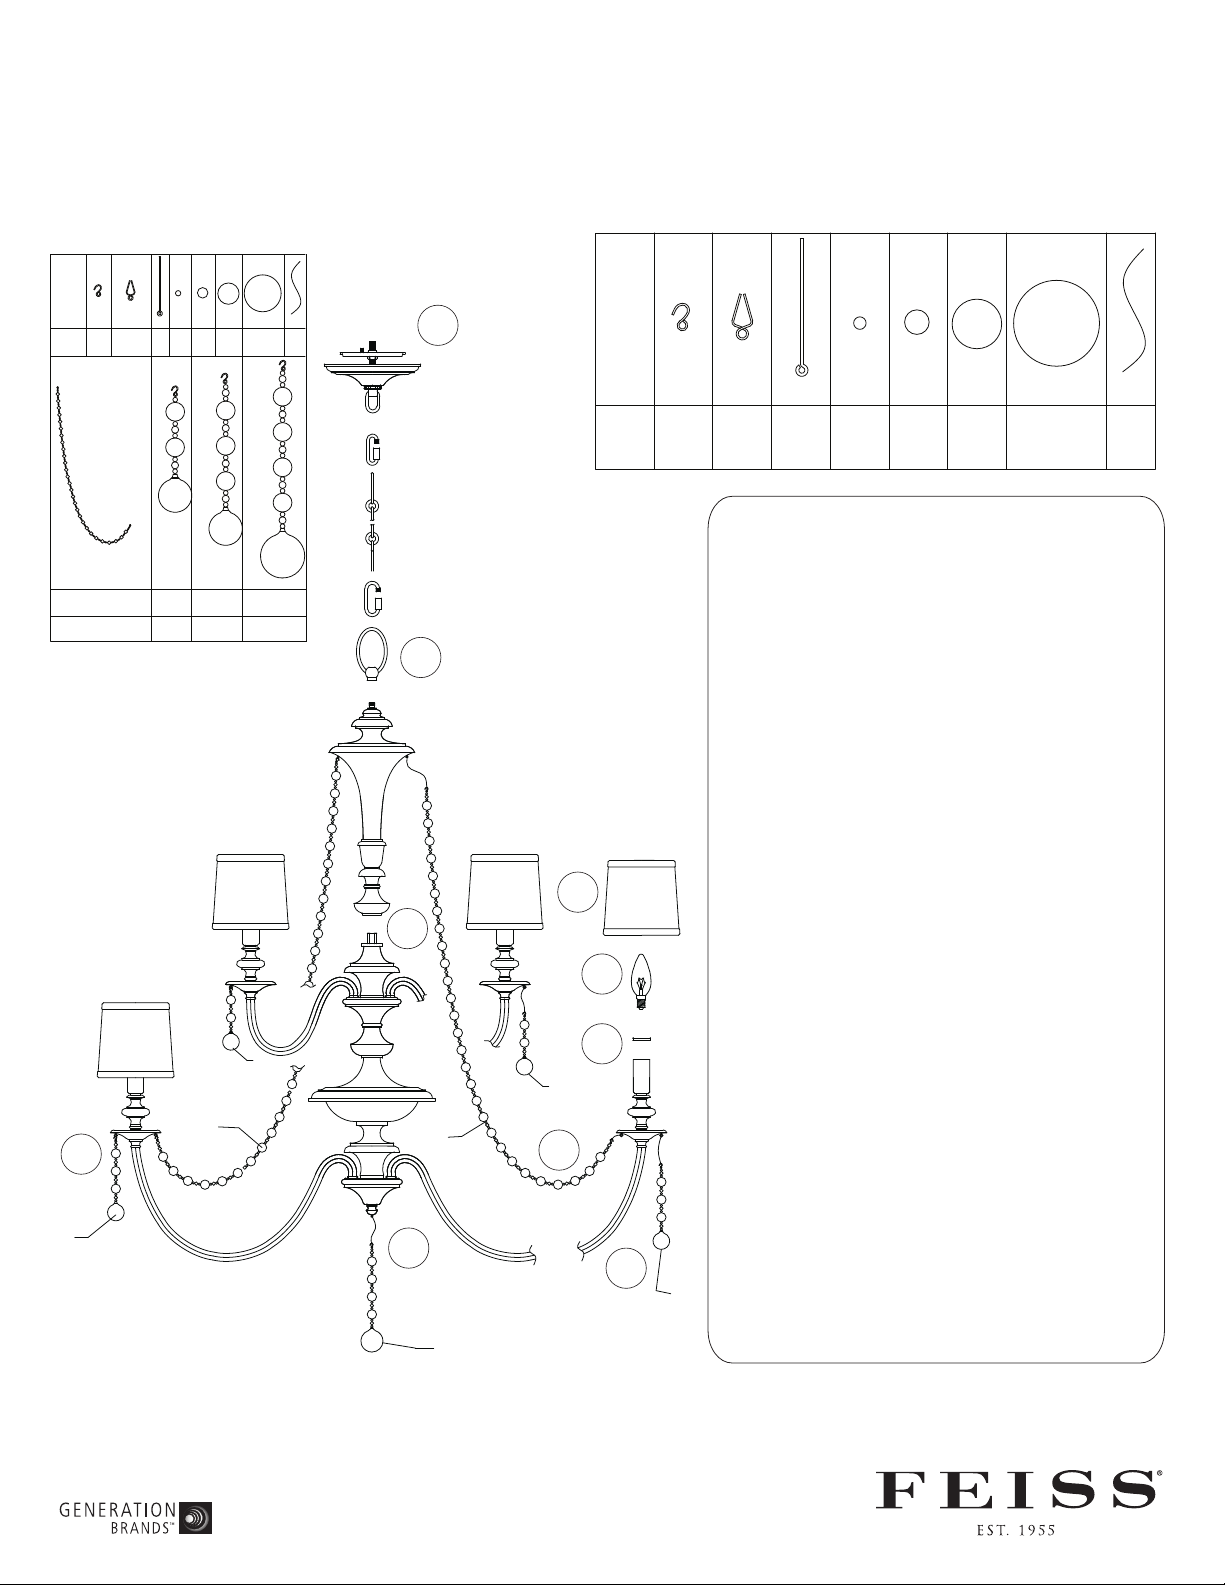
1
Carefully unpack and identify all parts
before assembly. Bulbs not included.
1. Install the fixture loop onto the top of the
fixture.
2. Install the top column onto the top of the
fixture.
3. Follow enclosed supplement installation
instructions for electrical and fixture
4C
2
installation onto house outlet box. If you
do not have an outlet box at desired
location to attach the fixture then hire a
qualified electrician to create one.
4B
4. A. Slip candle follower on top of candle
tubes.
B
A
A
5
C
5
4A
B
5
5
D
B. Install light bulb (not included). See
relamping label at socket area for type
and maximum allowed wattage.
C. Install the shade onto the bulb.
5. Hang all crystal glass parts as shown on
drawing.
NOTE: To replace broken crystal or pin,
extras are included in hardware bag.
Replace by gently bending open pin,
remove broken crystal or pin, hook new
C
one, then close back pin. Avoid bending
pin into sharp angle.
 Loading...