

Page 1
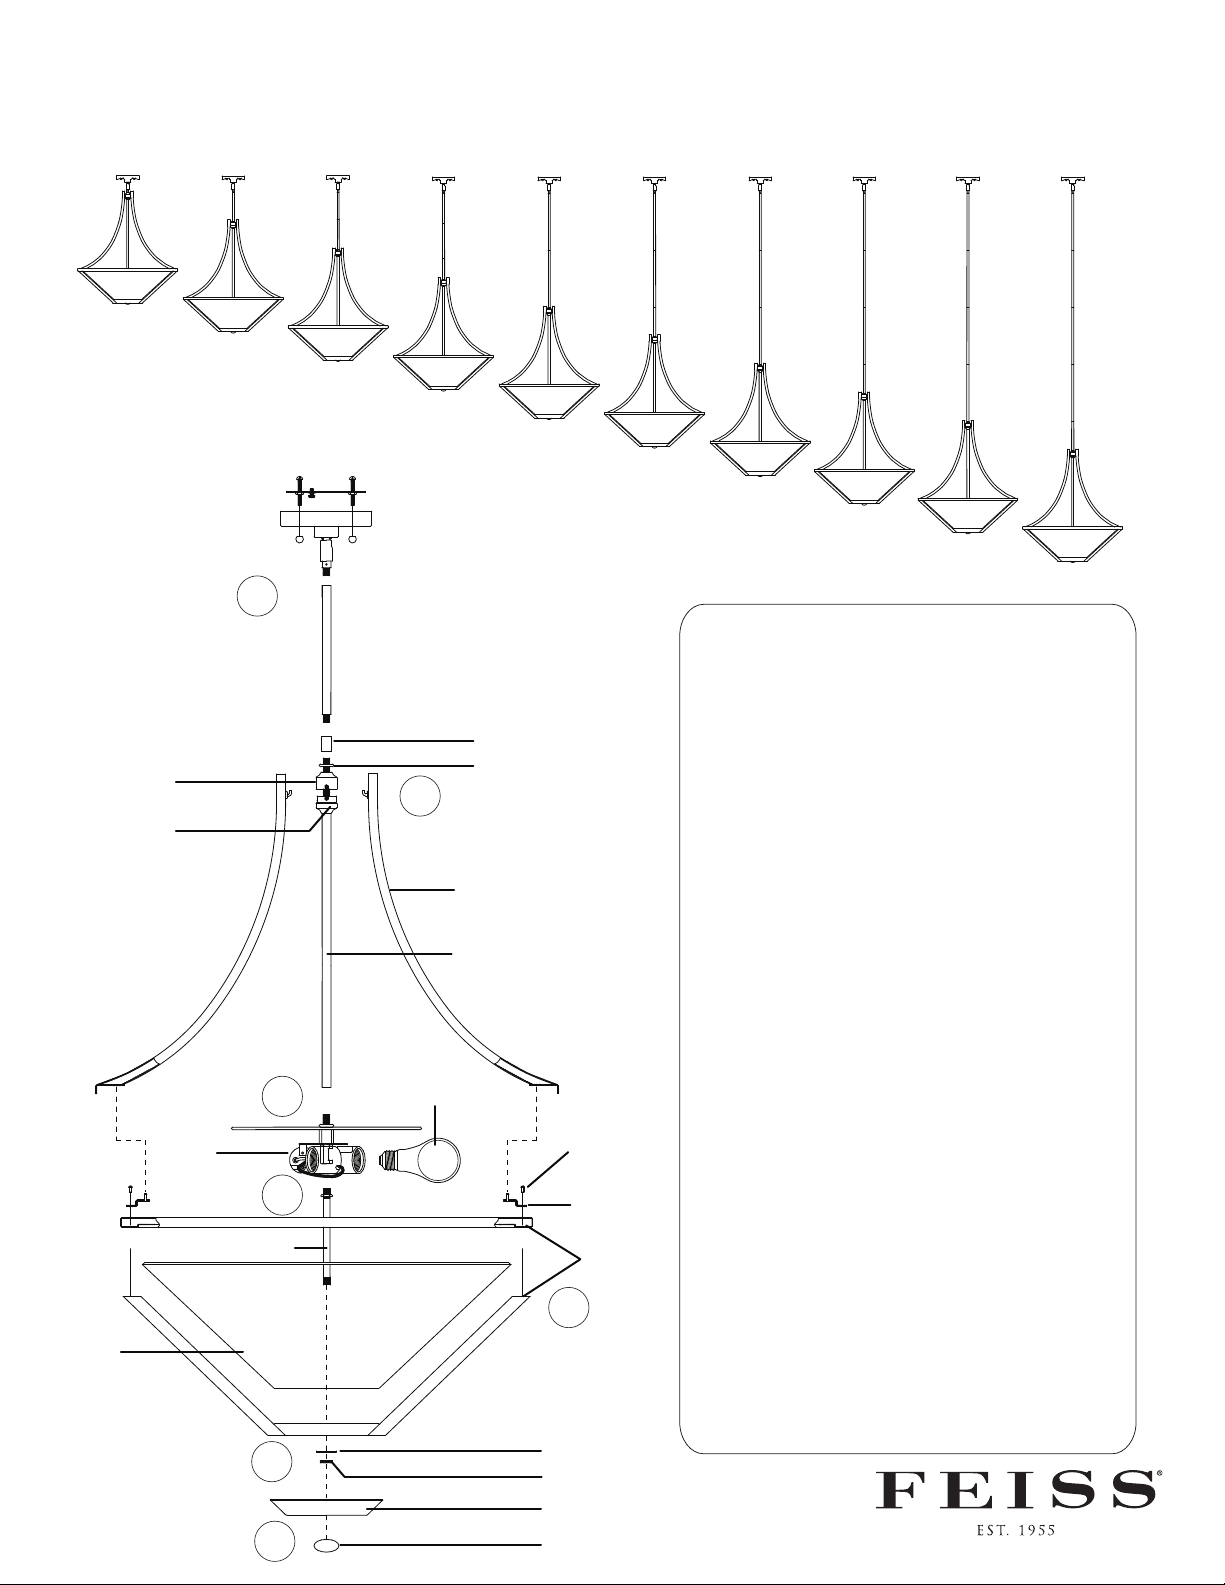
Assembly Instructions For
27 1/2"
33 1/2"
F2673/3
39 1/2"
45 1/2"
51 1/2"
57 1/2"
(E) 5/13
63 1/2"
69 1/2"
75 1/2"
81 1/2"
2
IMPORTANT
TURN OFF THE POWER AT THE MAIN FUSE OR
CIRCUIT BREAKER BOX
BEFORE STARTING INSTALLATION
Notched Cap
Center Body
Shade
Socket
Threaded Pipe
Coupler
Decorative Bead
3
Arm
Carefully unpack and identify all parts before
assembly. Bulbs not included.
1. Install socket assembly onto center pipe.
2. Follow enclosed supplement installation
instructions for electrical and xture installation
onto house outlet box. If you do not have an
outlet box at desired location to attach the
xture then hire a qualied electrician to create
one.
Center Pipe
3. Hook arms onto notches located at center
body. Then lock arms into position by lowering
notched cap onto center body and fastening
with coupler.
4. Install lamp (not included). See relamping label
1
Lamp
Screw
4
5
Bracket
Frame
at socket area for type and maximum allowed
wattage.
5. Screw the long threaded pipe into coupler
located at bottom of socket assembly. Note
correct position of threaded pipe at illustration.
6. Insert the shade into the frame and install the
brackets to the frame using the screws to secure
them together. Then secure the arms to the
brackets.
6
7. Slip shade through the threaded pipe until it
securely checks into bottom of crown. Then
secure into position by fastening with the
washer and knurled nut.
7
Washer
Knurled Nut
8. Install notched cover by fastening with nial.
Notched Cover
8
Finial
 Loading...