

Page 1
Assembly Instructions For
1C
1B
1D
F2641/3
5
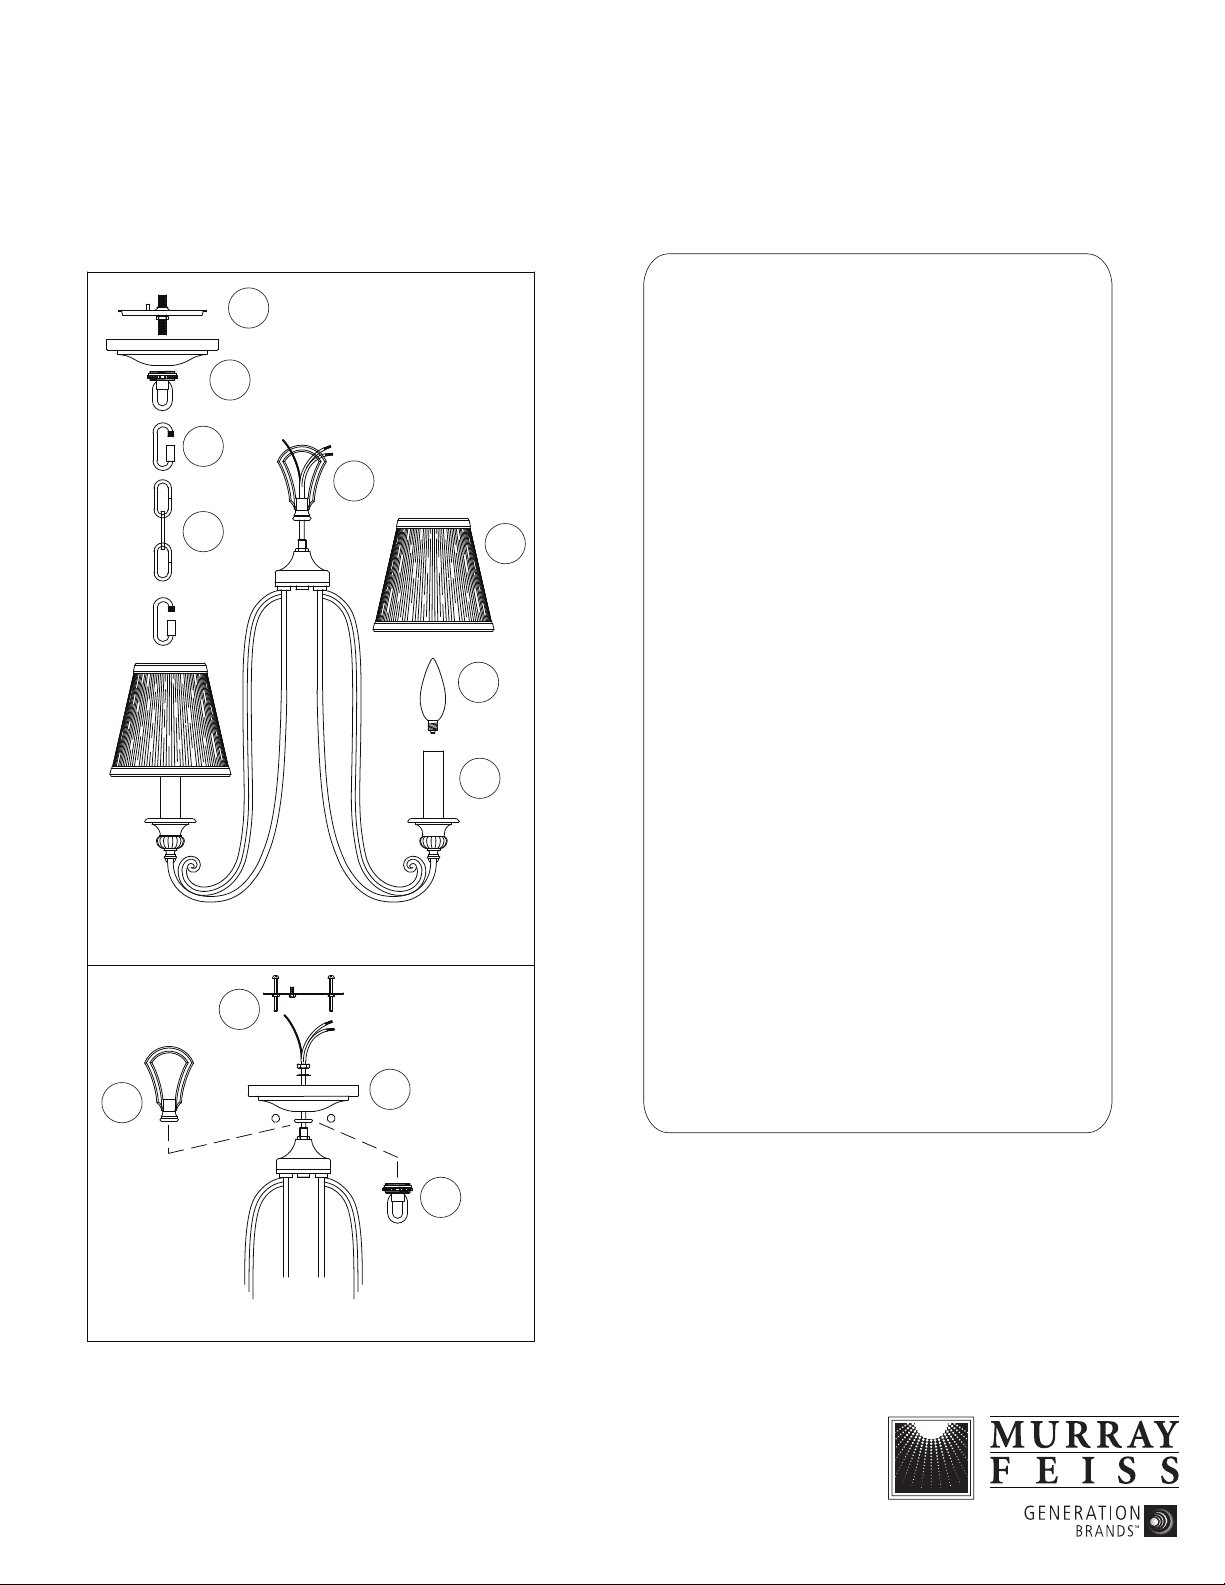
Carefully unpack and identify all parts before assembly.
1. This fixture can be mounted onto ceiling either as
1A
4
3
CHAIN HUNG INSTALLATION- Fig. 1:
A. Pass fixture wires through fixture loop. Then install
B. At this point, determine the desired length of chain
C. This fixture is supplied with two adjustable chain
D. Take ground wire (without plastic insulation) and
(E) 12/10
IMPORTANT
TURN OFF THE POWER AT THE MAIN FUSE
OR CIRCUIT BREAKER BOX
BEFORE STARTING INSTALLATION
Bulbs not included.
chain hung or flush mount:
fixture loop by screwing on top of fixture.
to hang. Remove any unwanted links with chain pliers.
links. These links are opened and closed by twisting
cylinder. One adjustable chain link should be installed
onto loop on top of column and the other should be
installed onto canopy loop. The standard chain should
be installed in between these two adjustable chain links.
weave through above chain links, then thread through
center hole in canopy loop. Repeat with fixture wires
(with plastic insulation).
FIG. 1
CHAIN SUSPENDED
INSTALLATION
5
1E
FIG. 2
FLUSH INSTALLATION
1F
1E
2
FLUSH INSTALLATION- Fig. 2:
E. Remove and discard fixture loop and canopy loop.
F. Thread fixture wires through canopy and hex nut.
Lock all together on top of fixture by tightening hex
nut onto protruding threaded pipe.
2. Install candle tube onto fitter.
3. Install light bulb (not included). See relamping label at
socket area for type and maximum allowed wattage.
4. Place shade onto bulb.
5. Follow enclosed supplement installation instructions
for electrical and fixture installation onto house outlet
box. If you do not have an outlet box at desired
location to attach the fixture then hire a qualified
electrician to create one.
 Loading...