

Page 1
Assembly Instructions For
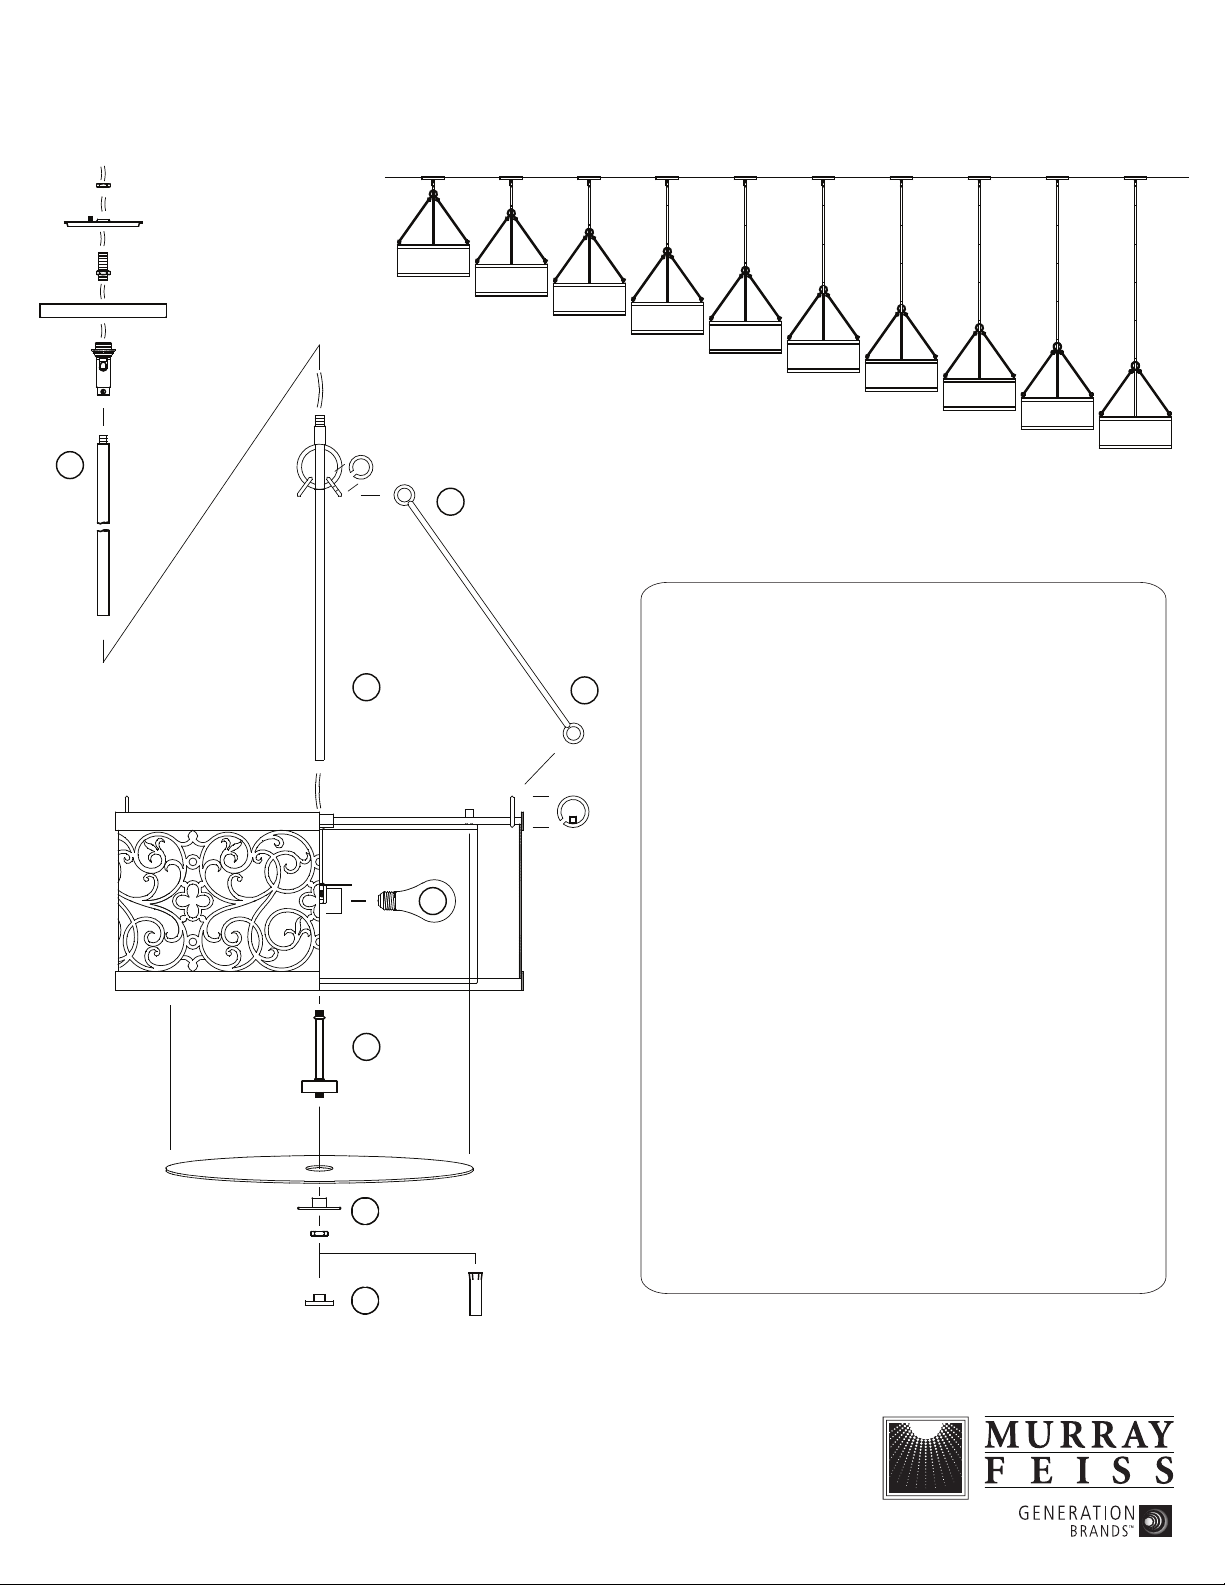
F2537/4
31-1/4"
3
1
2B
37-1/4"
43-1/4"
2A
49-1/4"
TURN OFF THE POWER AT THE MAIN FUSE OR
Carefully unpack and identify all parts before assembly. Bulbs
not included.
(E) 12/09
55-1/4"
61-1/4"
67-1/4"
73-1/4"
79-1/4"
85-1/4"
IMPORTANT
CIRCUIT BREAKER BOX
BEFORE STARTING INSTALLATION
1. Slip upper column through fixture wires and fasten by
screwing on top of main frame.
2. Install suspensions arms:
A. Hook suspension arm onto loop at top of main frame.
B. Hook top of suspension arm onto loop at upper column.
5
4
6
7
3. Follow enclosed supplement installation instructions for
electrical and fixture installation onto house outlet box. If
you do not have an outlet box at desired location to attach
the fixture then hire a qualified electrician to create one.
4. Install center pipe by screwing into bottom of socket
assembly.
Note: correct position of center pipe at illustration.
5. Install bulb (not included). See relamping label located at
socket area for type and maximum allowed wattage.
6. Install glass plate onto center pipe by holding with cover and
fastening with a hex nut. Before tightening hex nut, make
certain glass plate is centered inside of fabric shade by sliding
the plate accordingly. Use enclosed wrench to tighten hex
nut. IMPORTANT: DO NOT OVER TIGHTEN.
NOTE: Smooth and clear side of glass plate should be
installed facing outside.
7. Install finial by screwing onto protruding threaded pipe.
 Loading...