

Page 1
Assembly Instructions For
15"
21"
27"
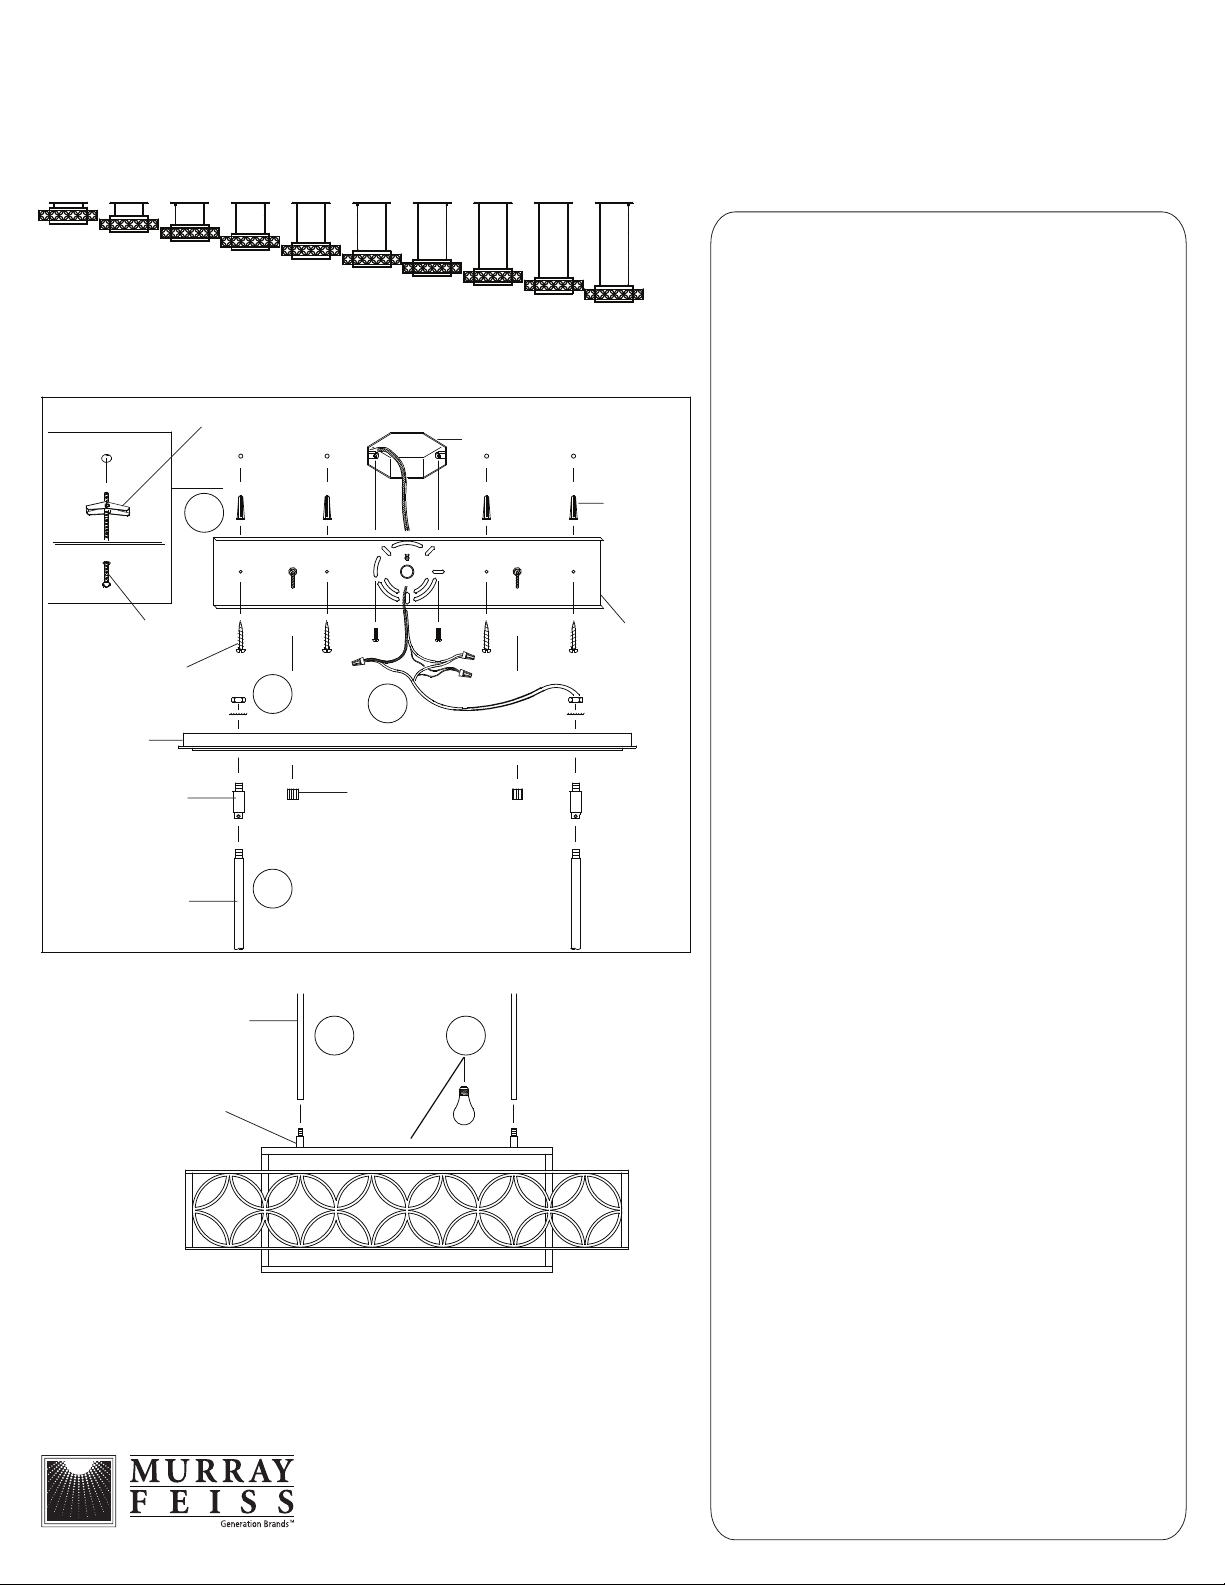
Butterfly Anchor
3
Long Machine Screw
Sheet Metal Screw
Canopy
Swivel
Stems
Stems
Fixture
33"
F2468/4
39"
5
2
Cap Nut
2
45"
51"
57"
63"
69"
Outlet Box
Plastic
Anchor
Mounting
Plate
4
1
(E) 5/09
TURN OFF THE POWER AT THE MAIN FUSE OR
CIRCUIT BREAKER BOX BEFORE STARTING
Carefully unpack and identify all parts before assembly. Bulbs
not included.
1. Install light bulb (not included). See relamping label at socket
area for type and maximum allowed wattage.
2. Install stems:
A. Choose desired installation height from dimensions shown
in above diagram. Thread fixture wires through each stems to
be used. Note correct position of stems from left diagram.
Screw all stem together until secure.
B. Pass fixtures wires located above the assembled stems
through a swivel. NOTE: Correct position of swivel from left
diagram. Install swivel by screwing onto top end of stem. Install
another swivel onto opposite stem assembly.
C. Pass fixture wires located above swivel and pass through a
hole in canopy. Lock them together by fastening with a lock
washer and hex nut from above. Repeat other side (without
wires).
3. Install mounting plate:
A. Test install the mounting plate onto ceiling outlet box by
fastening with two screws supplied with the outlet box.
B. Mark with pencil the two holes on mounting plate.
C. Remove mounting plate.
D. IF SHEET ROCK CEILIGNG: Drill marked holes using 3/8"
drill bit.
IF MARKED HOLES FALL DIRECTLY BELOW WOODEN
CEILING BEANS: Drill marked holes using 1/8" drill bit.
IF CONCRETE CEILING: Drill marked holes using 3/16" drill
bit (for masonry or concrete type).
NOTE: If in doubt what type of ceiling then consult a qualified
contractor or electrician for installation.
E. Before fastening the mounting plate, pass supply wires and
ground wire from ceiling outlet box through center hole in
mounting plate.
F. IF SHEET ROCK CEILING: Insert long machine screws into
holes in mounting plate. Attach butterfly anchors by screwing
onto protruding screws as shown on diagram. Pinch together
the ends of butterfly anchors and push into drilled holes until
anchors spring open inside of ceiling. While gently pulling
mounting plate away from eiling, tighten screws with a screw
driver.
IF MARKED HOLES FALL DIRECTLY BELOW WOODEN
CEILING BEANS: Insert sheet metal screws through holes in
mounting plate. Fasten screws directly into drilled holes.
IF CONCRETE CEILING: Insert plastic anchors into drilled
holes. Insert sheet metal screws through holes in mounting
plate. Fasten screws into plastic anchors.
4. Connect electrical wires:
A. Cut any excess fixture wires and ground wire leaving only
about 8" (20 cm) length from top of canopy. Then split fixture
wires (with plastic insulation) and strip off 3/4" (19 mm) of
plastic insulation from each end.
B. Connect fixture wires (with plastic insulation):
Connect fixture wires with tracer (square and ridged) to white
wire from outlet box. Connect fixture wires without tracer
(round & smooth) to black wire from outlet box.
NOTE: Black outlet box wire may be red, round and smooth
and/or have copper conductor. White outlet box wire may be
square and ridged and/or have a silver conductor.
C. Connect ground wire:
Connect fixture ground wire to supply ground wire (usually
with green insulation) with wire connector. Note: If there is no
supply ground wire at outlet box then attach fixture ground
wire securely onto green grounding screw located at mounting
plate.
IMPORTANT: Never connect ground wire to black or white
supply wires (from outlet box).
5. Install canopy:
While carefully tucking all electrical wires inside of canopy,
install the canopy onto the mounting plate by fastening with
two cap nuts.
IMPORTANT
INSTALLATION
 Loading...