

Page 1
Assembly Instructions For
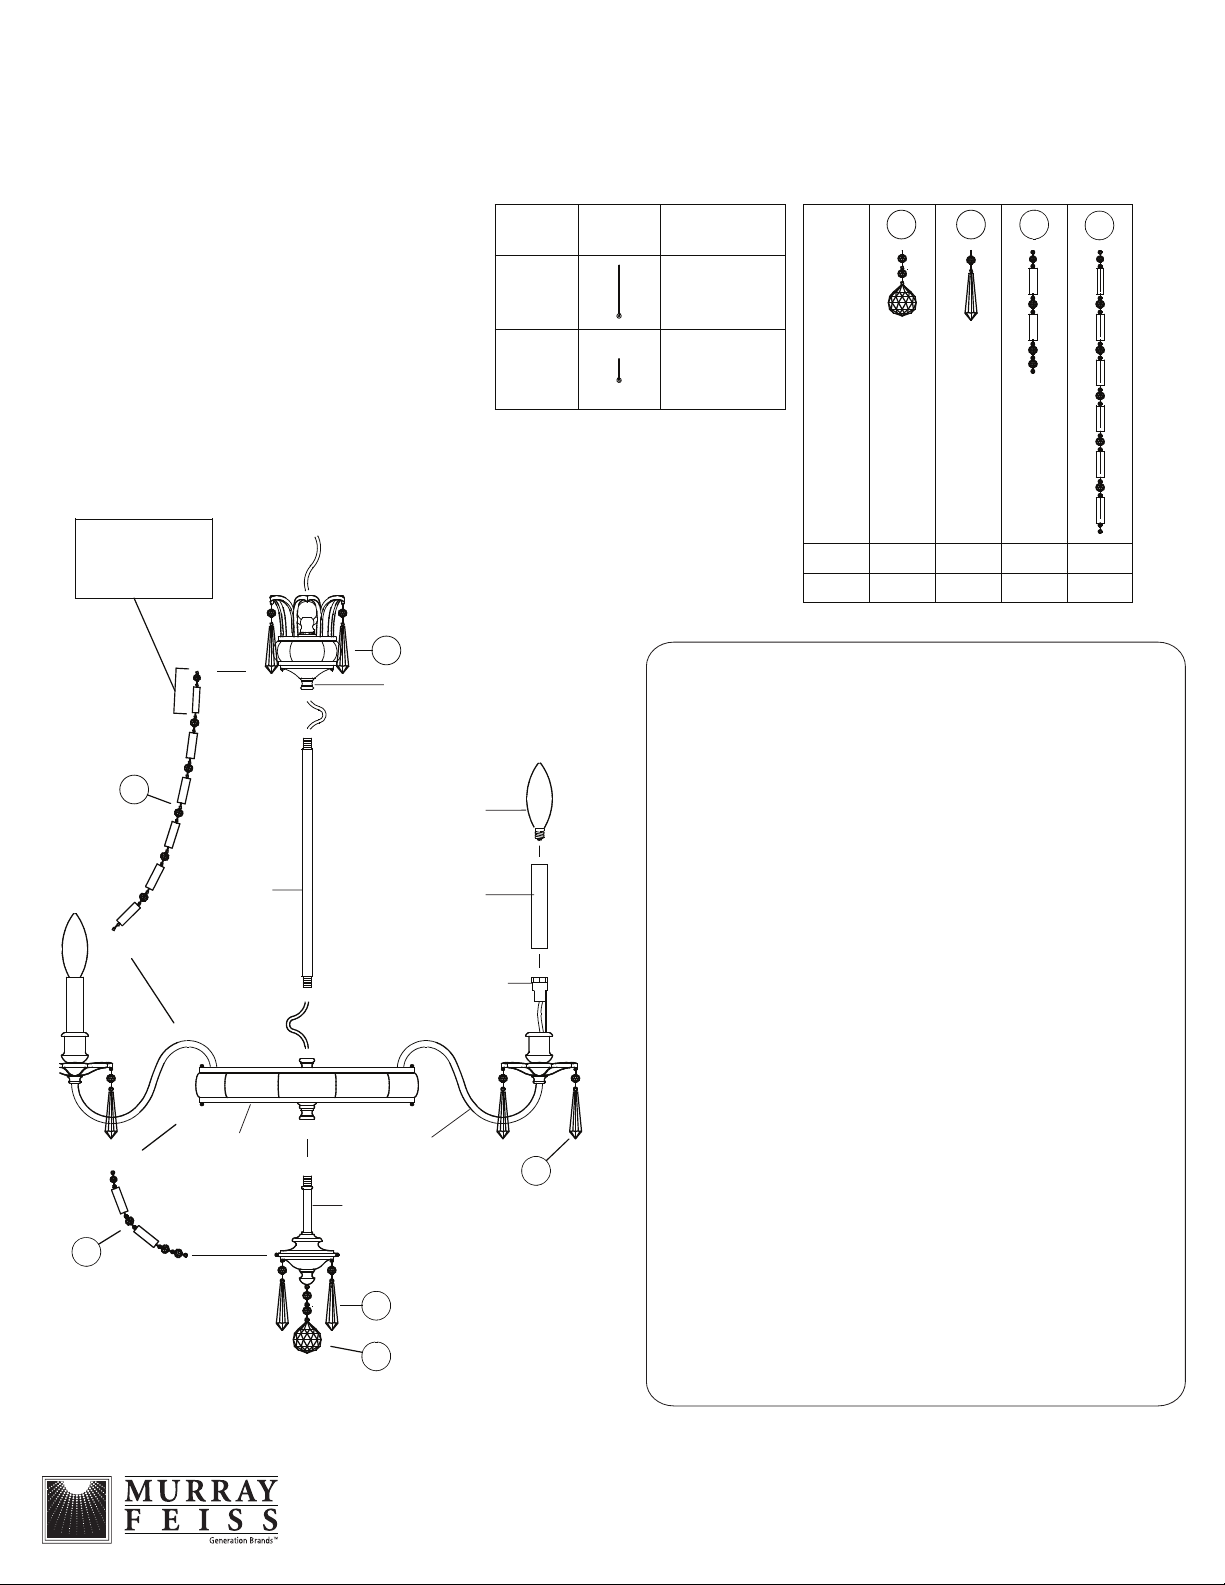
NOTE:
SMALLER
RECTANGULAR
CRYSTAL MUST BE
INSTALLED AT TOP
2
Upper Assembly
F2461/6
Extra PIN
Qty.
12
24
PIN PART
DESCRIPTION
Rectangular
Crystal Hook
Small Bead
Hook
TURN OFF THE POWER AT THE MAIN FUSE OR
(E) 5/09
PIN
Required
Extra
CIRCUIT BREAKER BOX
BEFORE STARTING INSTALLATION
1
X1
1
IMPORTANT
2
4 3
3
X24X34
4
X24
3
Carefully unpack and identify all parts before assembly. Bulbs not
4
Bulb
(not included)
Center Pipe
Candle
Tube
Socket
Middle
Assembly
Arm
2
Lower
Assembly
3
2
1
included.
1. A. Slip center pipe through fixture wires and then secure by
screwing onto top of middle assembly.
B. Slip upper assembly through fixture wires and then secure by
screwing onto top of center pipe.
2. Follow enclosed supplement installation instructions for electrical
and fixture installation onto house outlet box. If you do not have
an outlet box at desired location to attach the fixture than hire a
qualified electrician to create one.
3. Turn arms so they are equally spaced apart from each other.
4. Install lower assembly by screwing onto bottom of middle
assembly.
5. A. Install candle tube by slipping through sockets.
B. Install type-B, candelabra base, of 60 Watt maximum bulbs (not
included).
6. Hang all crystal glass parts as shown on drawing.
NOTE:
A. For easier installation of crystal chains #3, hook all chains first
onto the lower assembly and then proceed to hook onto the
middle assembly.
B. For easier installation of crystal chains #4, hook all chains first
onto the upper assembly and then proceed to hook onto the
middle assembly.
C. To replace broken crystal or pin, extras are included in
hardware bag. Replace by gently bending open pin, remove broken
crystal or pin, hook new one, then close back pin. Avoid bending
pin into sharp angle.
 Loading...