

Page 1
ASSEMBLY INSTRUCTIONS FOR F2185/3
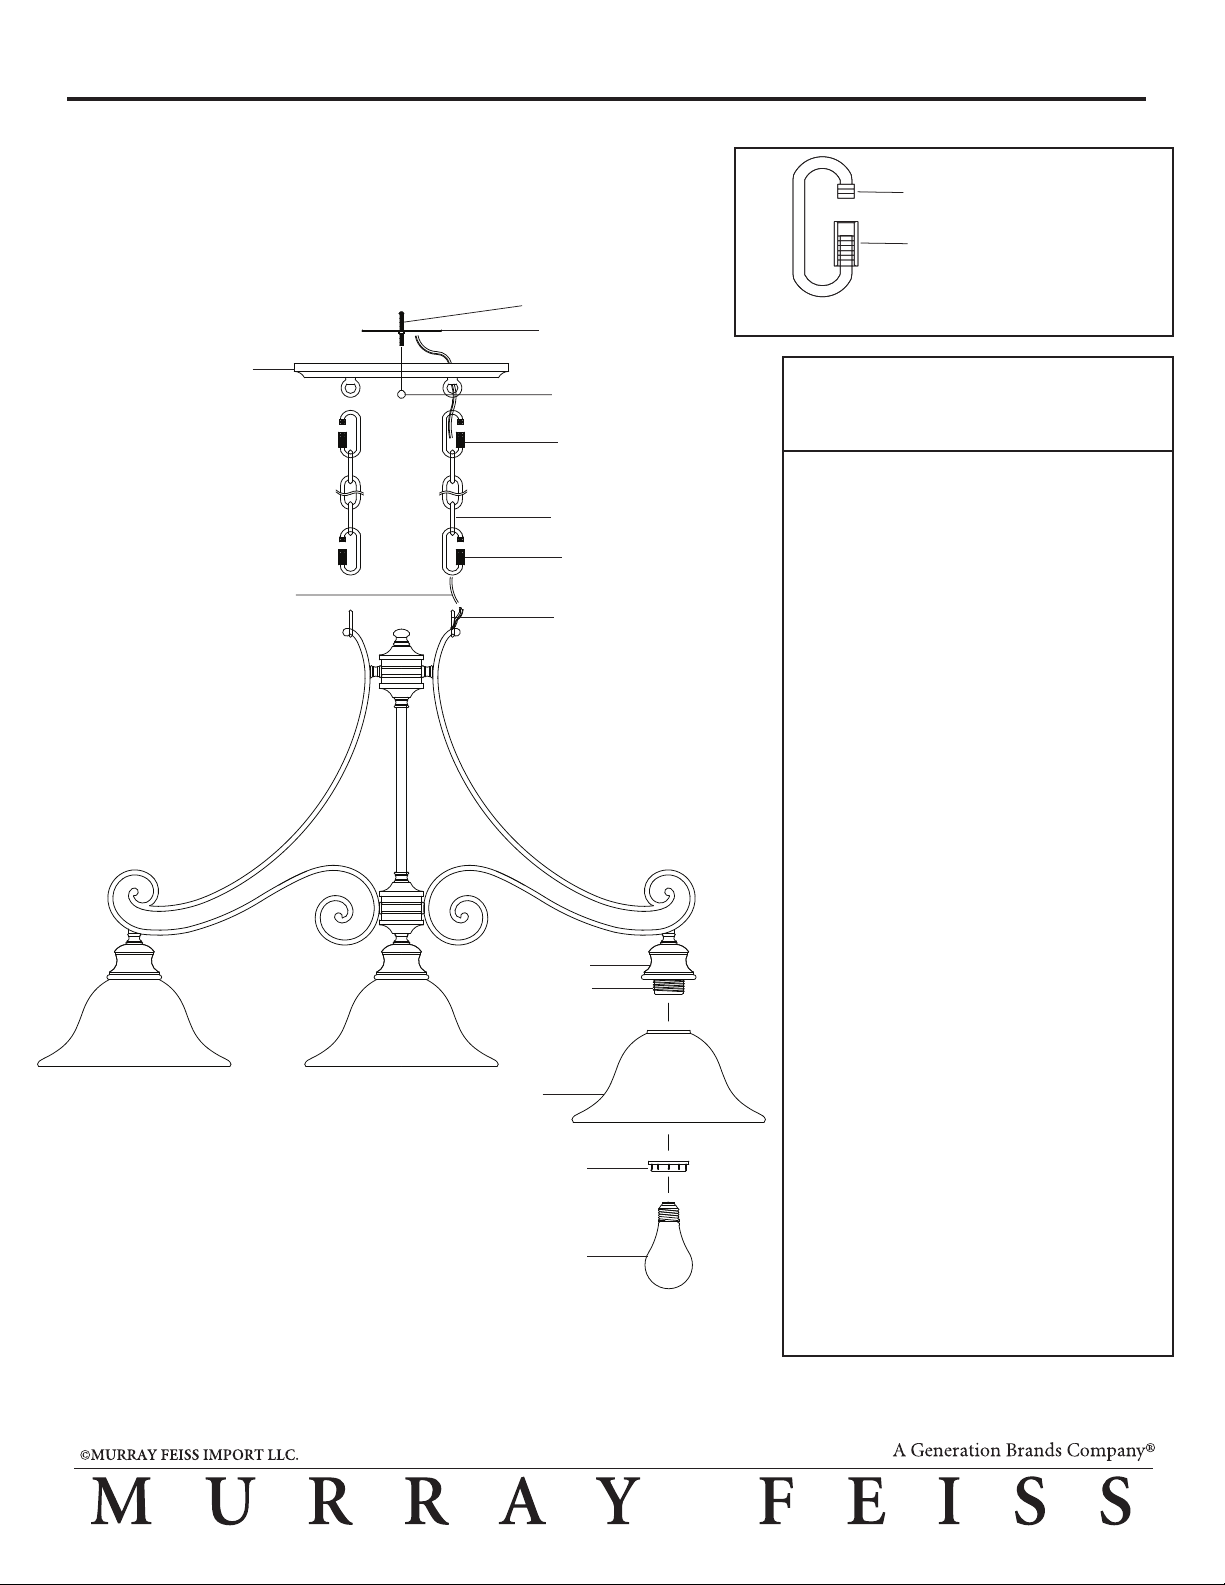
Mounting Screws
Mounting Plate
Diag. A
(E) 4/07
Threaded Chain Link
Twist to open or close
chain link.
Fixture Plate
Fixture Wire &
Ground Wire
Ball Cap Nuts
Adjustable
Chain link
Chain
Adjustable
Chain link
Fixture Loop
Fitter
Socket
Shade
Counter
Ring
Bulb
(not included)
TURN OFF THE POWER AT THE MAIN
FUSE OR CIRCUIT BREAKER BOX
BEFORE STARTING INSTALLATION
Carefully unpack and identify all parts
before assembly. Bulbs are not
included.
1. Attach Chains:
A. Open adjustable chain links by
turning small round tube at one side.
B. Hook chain onto open adjustable
chain link. Then attach adjustable chain
link onto loop located at fixture plate.
Close adjustable chain link by turning
back small round tube.
C. Repeat other side.
D. At this point determine the desired
length of chains to hang. Remove any
unwanted chain links by following
diagram A. Additional chains can be
purchased through your local Murray
Feiss retailer.
E. Hook another open adjustable chain
link at bottom of each chain. Then attach
adjustable chain links onto loop located at
top of fixture arm curls. Close adjustable
chain links by turning back small round
tube.
2. Take ground wire (without plastic
insulation) and weave through above
chain links. Then thread through hole in
fixture plate loop. Repeat with fixture
wires (with plastic insulation).
IMPORTANT
3. Follow enclosed “Multiple Standard
Installation Instructions” for electrical
and fixture installation onto ceiling
outlet box.
4. Install shades onto fitters by fastening
counter rings onto threaded sockets.
5. Install bulbs (not included). See
relamping label located at socket area
for type and maximum allowed wattage.
 Loading...