

Page 1
ASSEMBLY INSTRUCTIONS FOR F2112/3
TURN OFF THE POWER AT THE MAIN
FUSE OR CIRCUIT BREAKER BOX
BEFORE STARTING INSTALLATION.
(E) 10/06
IMPORTANT:
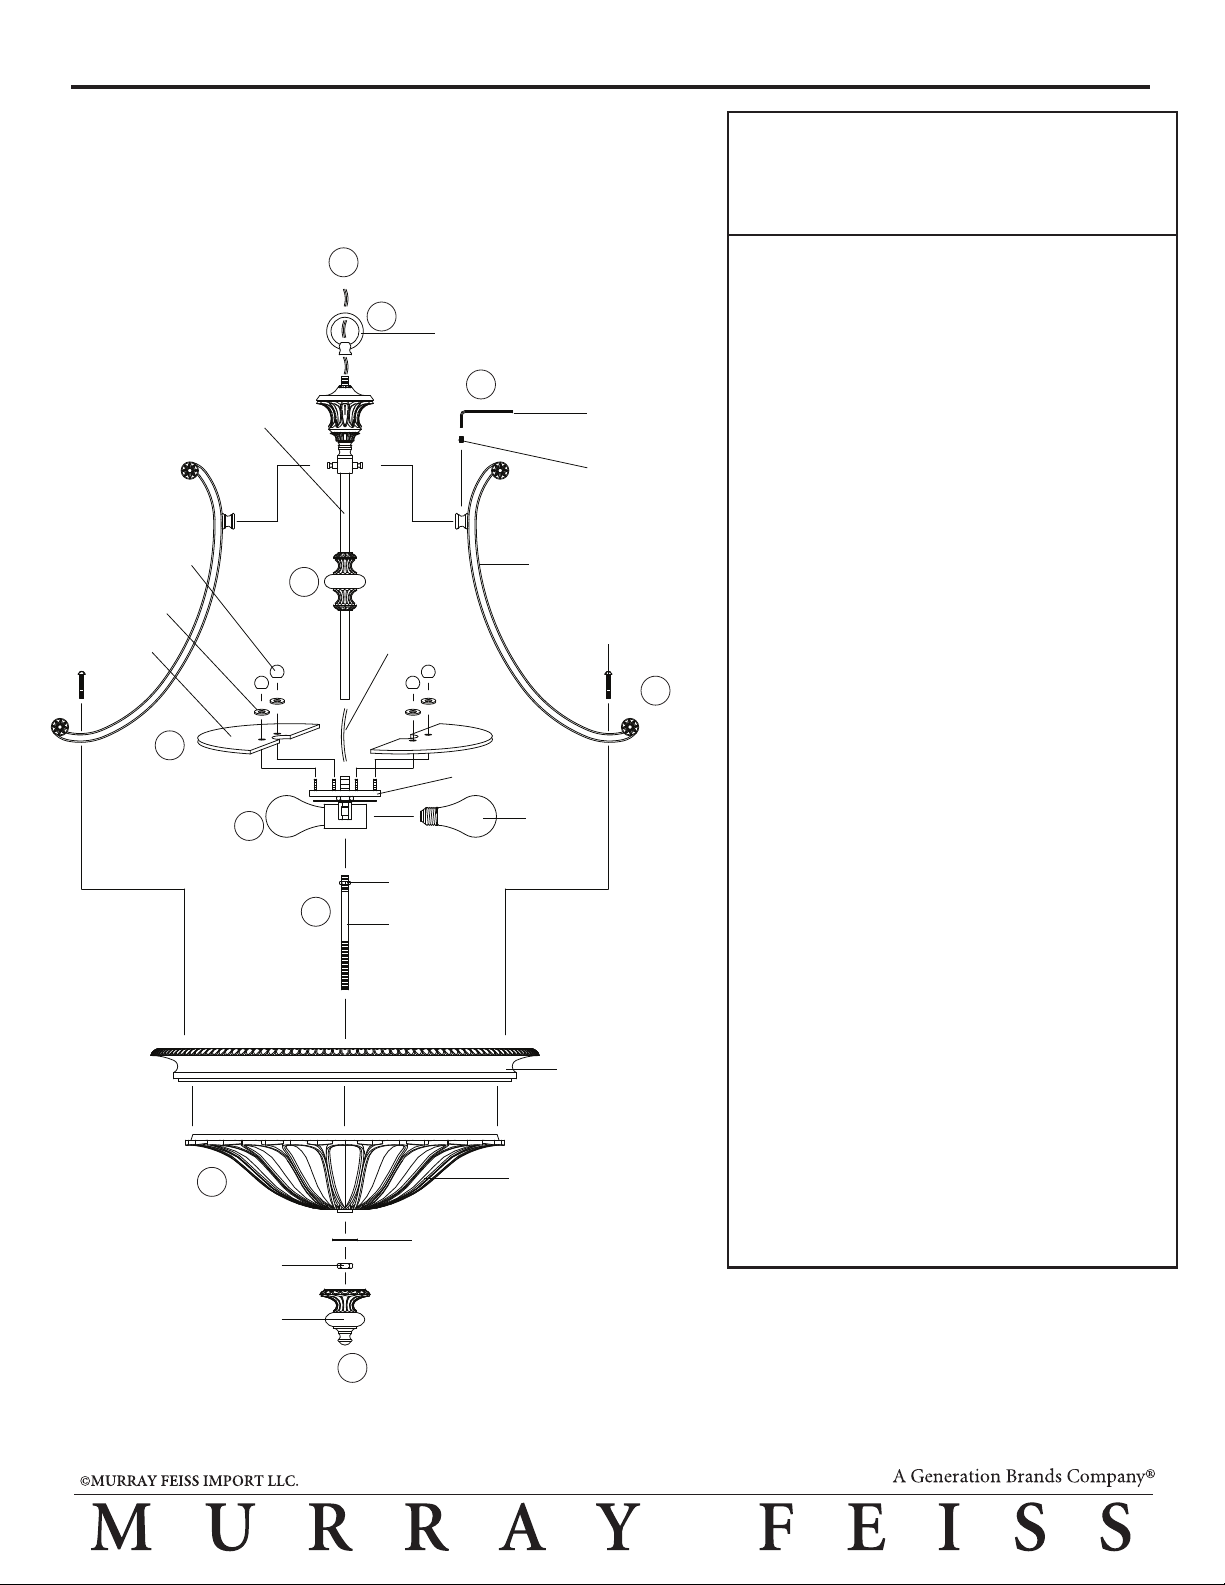
Ball Cap Nuts
Rubber Washer
Glass Plate
9
Center Pipe
8
5
1
Fixture Wire &
Ground Wire
4
3
Hex Nut
Long
Threaded
Pipe
Fixture Loop
2a
Arm
Machine Screw
Socket Assembly
Bulb
(not included)
Hex Key
Set Screw
2b
Carefully unpack and identify all parts
before assembly. Bulbs are not included.
1. Screw center pipe onto top of socket
assembly while removing any slack in
wires in between parts.
2. Install arms:
A. Install upper section of arms onto studs,
which are located at top section of center
pipe, by tightening set screw. Use enclosed
hex key to tighten.
B. Install lower section of arms onto pan
by fastening with machine screws.
3. Carefully thread fixture wire and ground
wire through fixture loop. Screw fixture
loop onto top threaded pipe until secure.
4. Install a hex nut onto one end of long
threaded pipe leaving about 1/2” (13 mm)
thread exposed. Screw same end of
threaded pipe into coupler. Tighten hex nut.
5. Follow enclosed “Chain Suspended
Fixture Installation Instructions” for
electrical and fixture installation onto
ceiling outlet box.
6. Slip glass shade up till it checks into
bottom of pan. Then lock into position by
fastening with flat washer and hex nut.
Do not over tighten.
6
Hex Nut
Finial
7. Install finial by fastening onto bottom of fixture.
Pan
Glass Shade
Flat Washer
7
8. Install light bulb (not included). See
label located at socket area for type and
maximum allowed wattage.
9. Install two glass plates onto top of socket
assembly by placing holes in plates
through four screw studs and securing
with four ball cap nuts. Do not over
tighten.
 Loading...