

Page 1
ASSEMBLY INSTRUCTIONS FOR F1889/3
TURN OFF THE POWER AT THE MAIN
FUSE OR CIRCUIT BREAKER BOX
BEFORE STARTING INSTALLATION
Carefully unpack and identify all parts
before beginning assembly. Bulbs are not
included.
1. Carefully thread fixture wire and ground wire
through fixture loop. Screw fixture loop onto
top threaded pipe until secure.
2. Install bulbs (Not Included) into socket. See
relamping label located at socket area for type
and maximum allowed wattage.
3. Slip threaded studs of arm brackets through
holes in outside of glass. Secure with rubber
washer and knurled cap nuts.
(E) 03/04
IMPORTANT
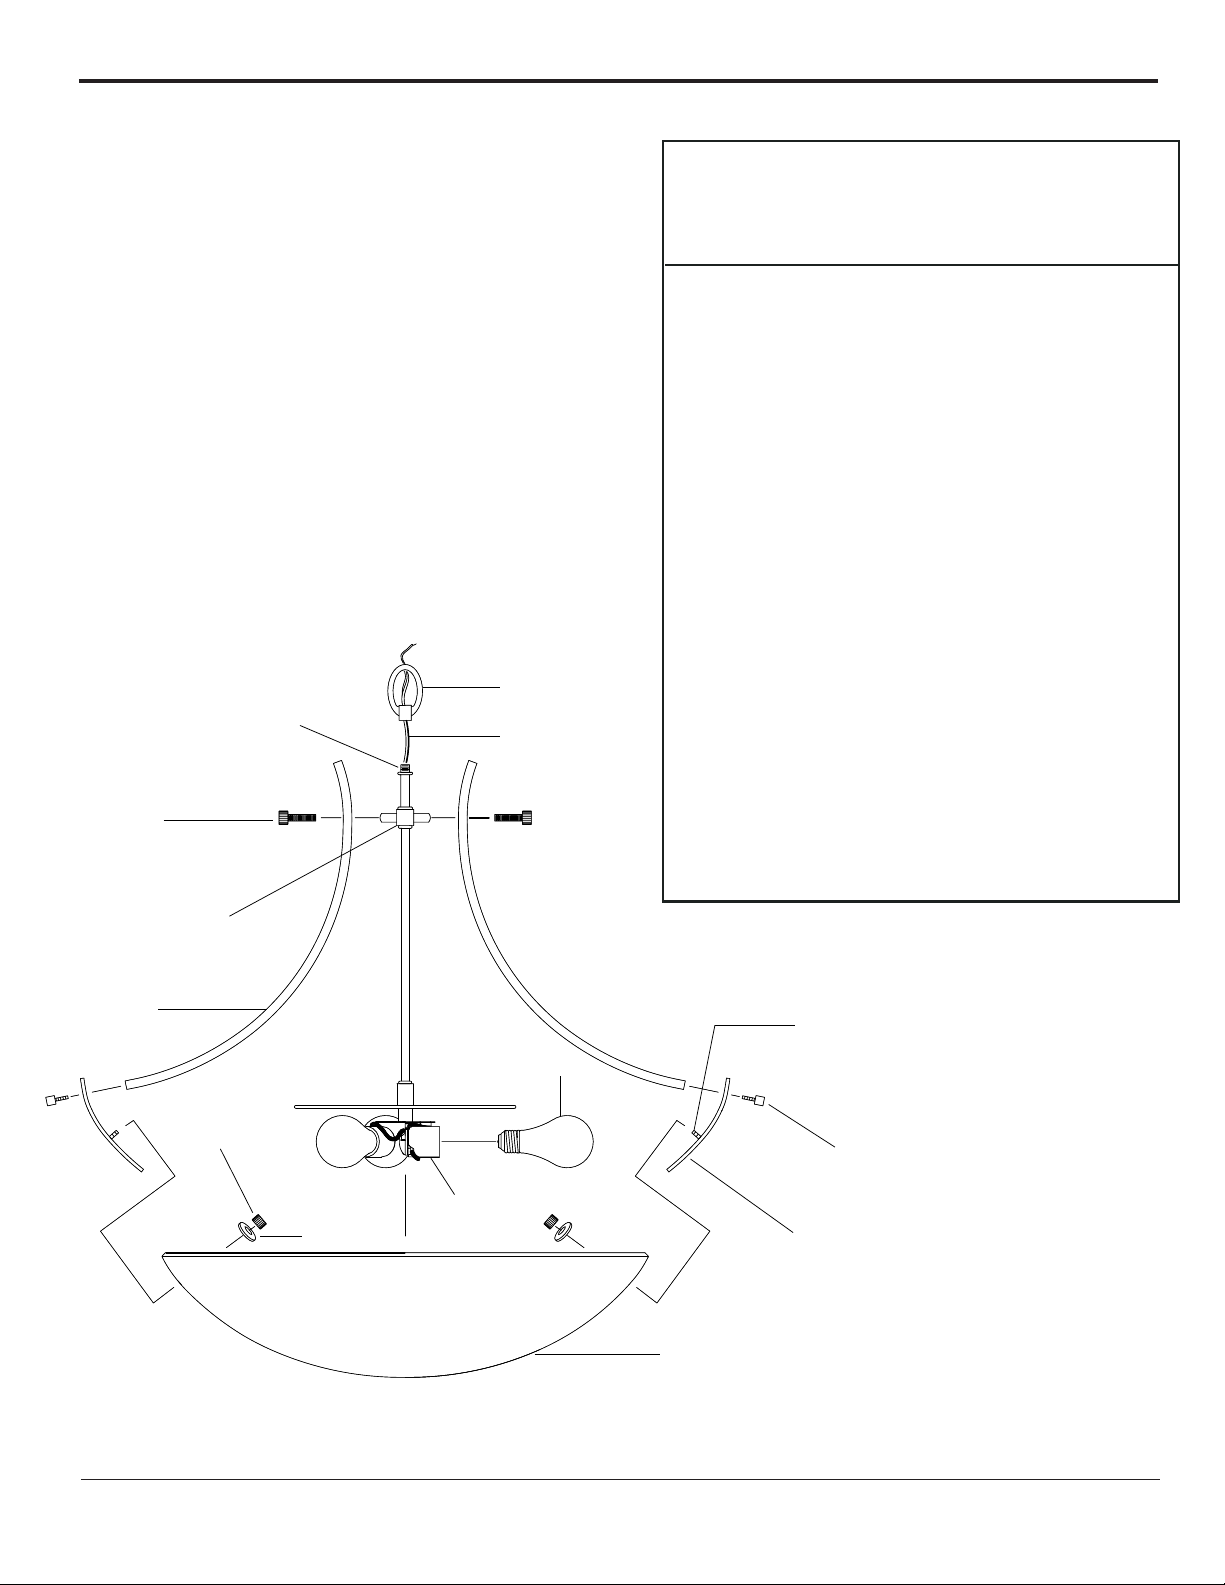
Top Threaded Pipe
Knurled Cap
Nut Screws
Center Body
Arm
Knurled Cap
Nut
Rubber
Washer
Fixture Loop
Fixture Wire &
Ground Wire
Bulbs
(not included)
Socket
4. Align holes in arm brackets with holes in
bottom of arms. Secure with cap nut screws.
5. Align holes in top of arms with holes in center
body. Secure with knurled cap nut screws.
6. Follow enclosed “Chain Suspended
Installation Instructions” for electrical and
fixture installation onto ceiling outlet box.
Threaded Stud
Cap Nut Screws
Arm Bracket
Glass Shade
©MURRAY FEISS IMPORT CORP.
MURRAY FEISS
 Loading...