

Page 1
Assembly Instructions for
10240
1 LightTable Lamp
Table Lamp
GP I :ENERAL RODUCT NFORMATION
This product is suitable for dry locations only.
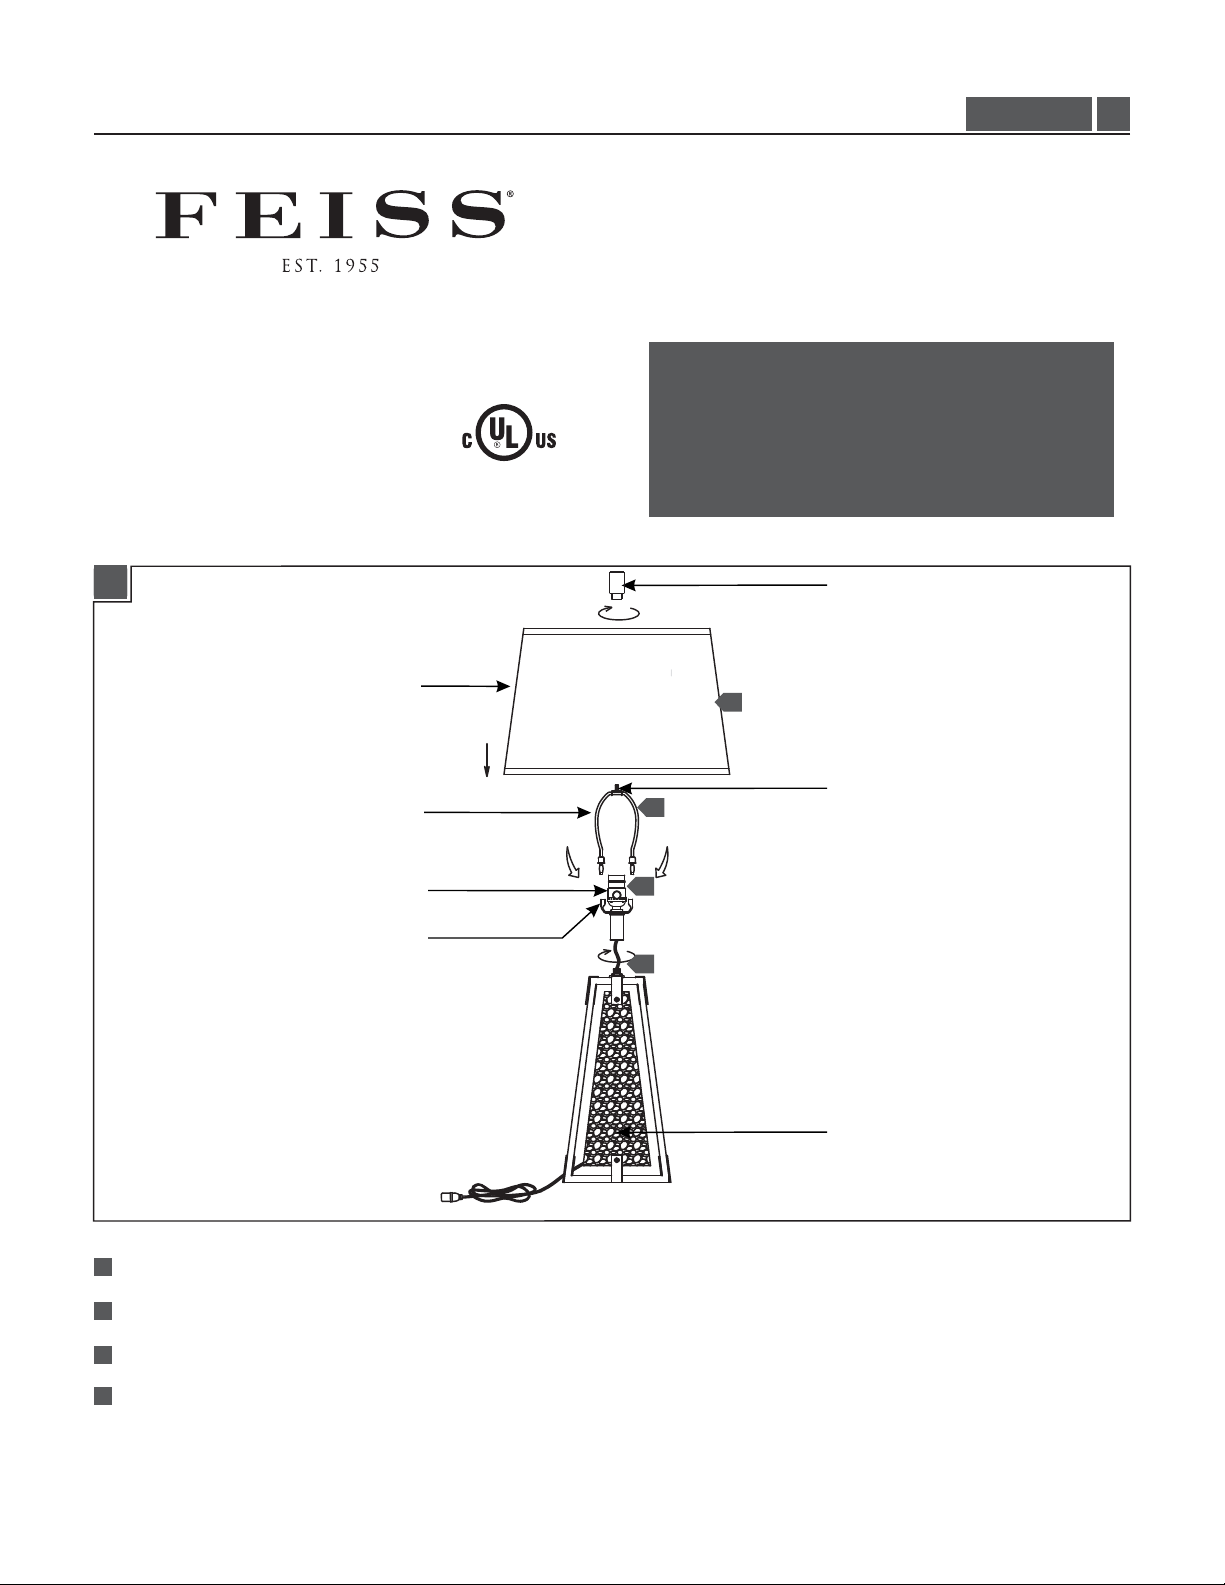
1A
SHADE
10240_
IMPORTANT SAFETY INSTRUCTIONS
This portable lamp has a polarized plug (one blade is wider
than the other) as a safety feature to reduce the risk of
electric shock.This plug will fit in a polarized outlet only
one way. If the plug does not fit fully in the outlet, reverse
the plug. If it still does not fit contact a qualified electrician.
Never use with an extension cord unless plug can be fully
inserted. Do not attempt to defeat this safety feature.
FINIAL
4
1.0
HARP
SOCKET ASSEMBLY
YOKE
1
Screw the socket assembly to the fixture base.
2
Install the harp by inserting it in the yoke.
3
Install lamp by screwing it into the socket. Refer to the label on the lamp socket for Max Wattage information.
2
3
1
THREADED NIPPLE
FIXTURE BASE
4
Install the shade by unscrewing the finial, placing the shade over the threaded nipple, and re-tightening the finial to secure
the shade.
1
Page 2
CONSIGNES DE SÉCURITÉ IMPORTANTES
Cette baladeuse possède une fiche polarisée (une lame est
plus large que l'autre) par mesure de sécurité pour réduire
le risque de choc électrique. Cette fiche s'adaptera dans
une prise polarisée que dans un sens. Si la fiche n'entre pas
complètement dans la prise, inversez-la. Si elle ne rentre
toujours pas, contactez un électricien qualifié. N'utilisez
jamais de rallonge à moins que le bouchon peut être
insérée complètement. Ne pas tenter de vaincre cette
fonctionnalité de sécurité.
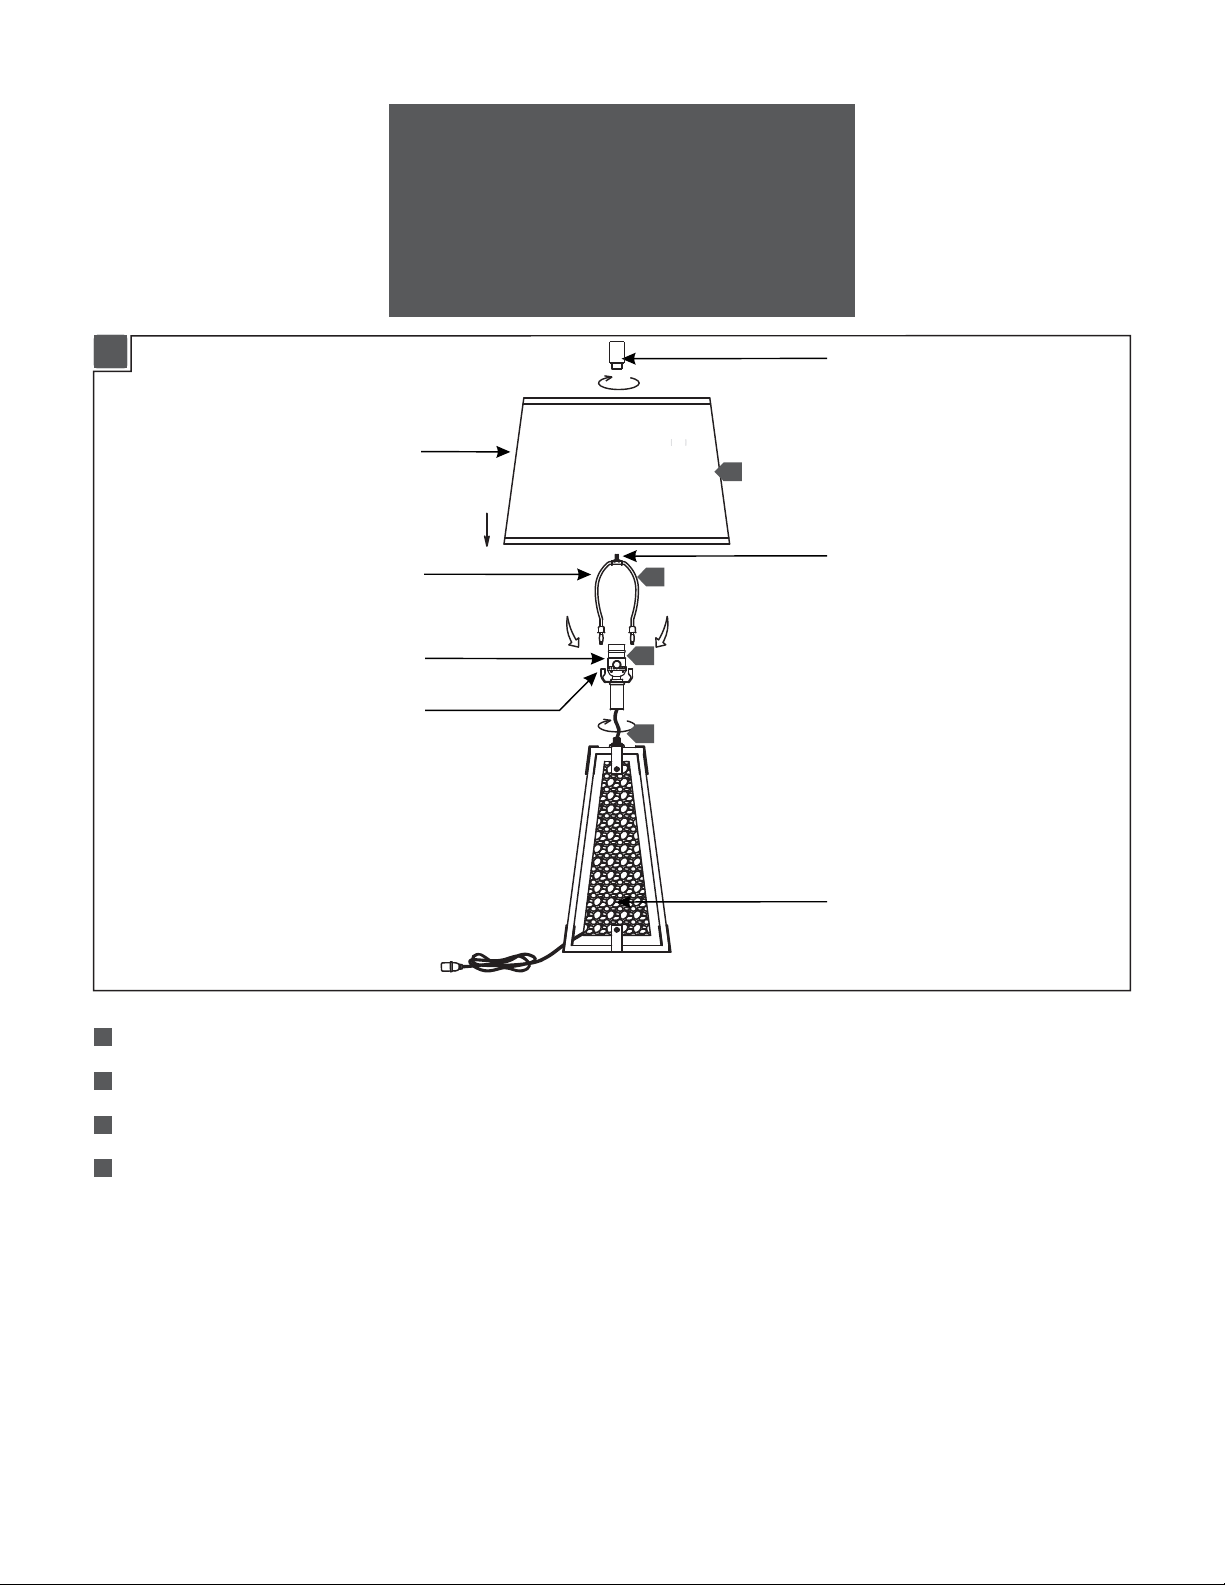
1A
ABAT-JOUR
SUPPORT D’ABAT-JOUR
ASSEMBLÉE DE DOUILLE
JOUG
CAPUCHON
4
4
RACCORD À VIS
2
3
1
BASE DE LUMINAIRE
1
Visser la douille à la base de .luminaire
2
Installez la harpe en l'insérant dans le joug.
3
Installer lampe en le vissant dans la douille. Se référer à l'étiquette sur la douille de lampe pour informations Max Wattage.
4
Installez l'ombre en dévissant l'embout, plaçant l'ombre sur le raccord et resserrer le fleuron pour sécuriser l'ombre.
2
Page 3

INSTRUCCIONES IMPORTANTES DE SEGURIDAD
Esta lámpara portátil tiene un enchufe polarizado (una
clavija es más ancha que la otra) como medida de seguridad
para reducir el riesgo de choque eléctrico.Este enchufe
encajará en un tomacorriente polarizado solamente de una
manera. Si el enchufe no encaja en el tomacorriente, invierta
el enchufe. Si todavía no encaja en contacto con un
electricista calificado. Nunca use un cable prolongador a
menos que el enchufe se puedan insertar completamente.
No trate de derrotar a esta característica de seguridad.
1A
PANTALLA
SOPORTE
ASAMBLEA DE ZÓCALO
YUGO
CAPUCHON
4
4
NIPLE ROSCADO
2
3
1
BASE DEL LUMINARIA
1
Atornille la a la base de la luminaria.asamblea de zócalo
2
Instale el soporte en el yugo.
3
Instale la lámpara enroscándolo en el zócalo. Consulte la etiqueta en el zócalo de la lámpara para información de Max
Wattage.
4
Instale la sombra desenroscando el remate, colocando la sombra sobre el niple roscado, y volver a apretar el remate para
asegurar la sombra.
3
Page 4

SAVETHESE INSTRUCTIONS!
555 Theodore Fremd Ave Suite B101 Rye, NY 10580
800.969.3347
www.Feiss.com
© 2013 Feiss.All rights reserved.The "Feiss" graphic is a
registered trademark of Feiss. Feiss reserves the right to
change specifications for product improvements without notification.
A Generation Brands Company
4
 Loading...