

Page 1
3 41 01 116 06 0 - Umschlag.fm Seite 1 Freitag, 17. Dezember 2010 12:36 12
FEIN Service
USA
FEIN Power Tools Inc.
1030 Alcon Street
Pittsburgh, PA 15220
Telephone: (412) 922-8886
Toll Free: 1-800-441-9878
www.feinus.com
Canada
FEIN Canadian Power Tool
Company
323 Traders Boulevard East
Mississauga, Ontario L4Z 2E5
Telephone.:(905) 8901390
Toll Free: 1-800-265-2581
FEIN Canadian Power Tool
Company
2810 De Miniac
St. Laurent, Quebec H4S 1K9
Telephone: (514) 331-7390
Toll Free: 1-800-789-8181
www.fein.com
Headquarter
C. & E. FEIN GmbH
Hans-Fein-Straße 81
D-73529 Schwäbisch Gmünd-Bargau
www.fein.com
© C. & E. FEIN GmbH. Printed in Germany. Abbildungen unverbindlich. Technische Änderungen vorbehalten. 3 41 01 116 06 0 BY 2010.12 DE.
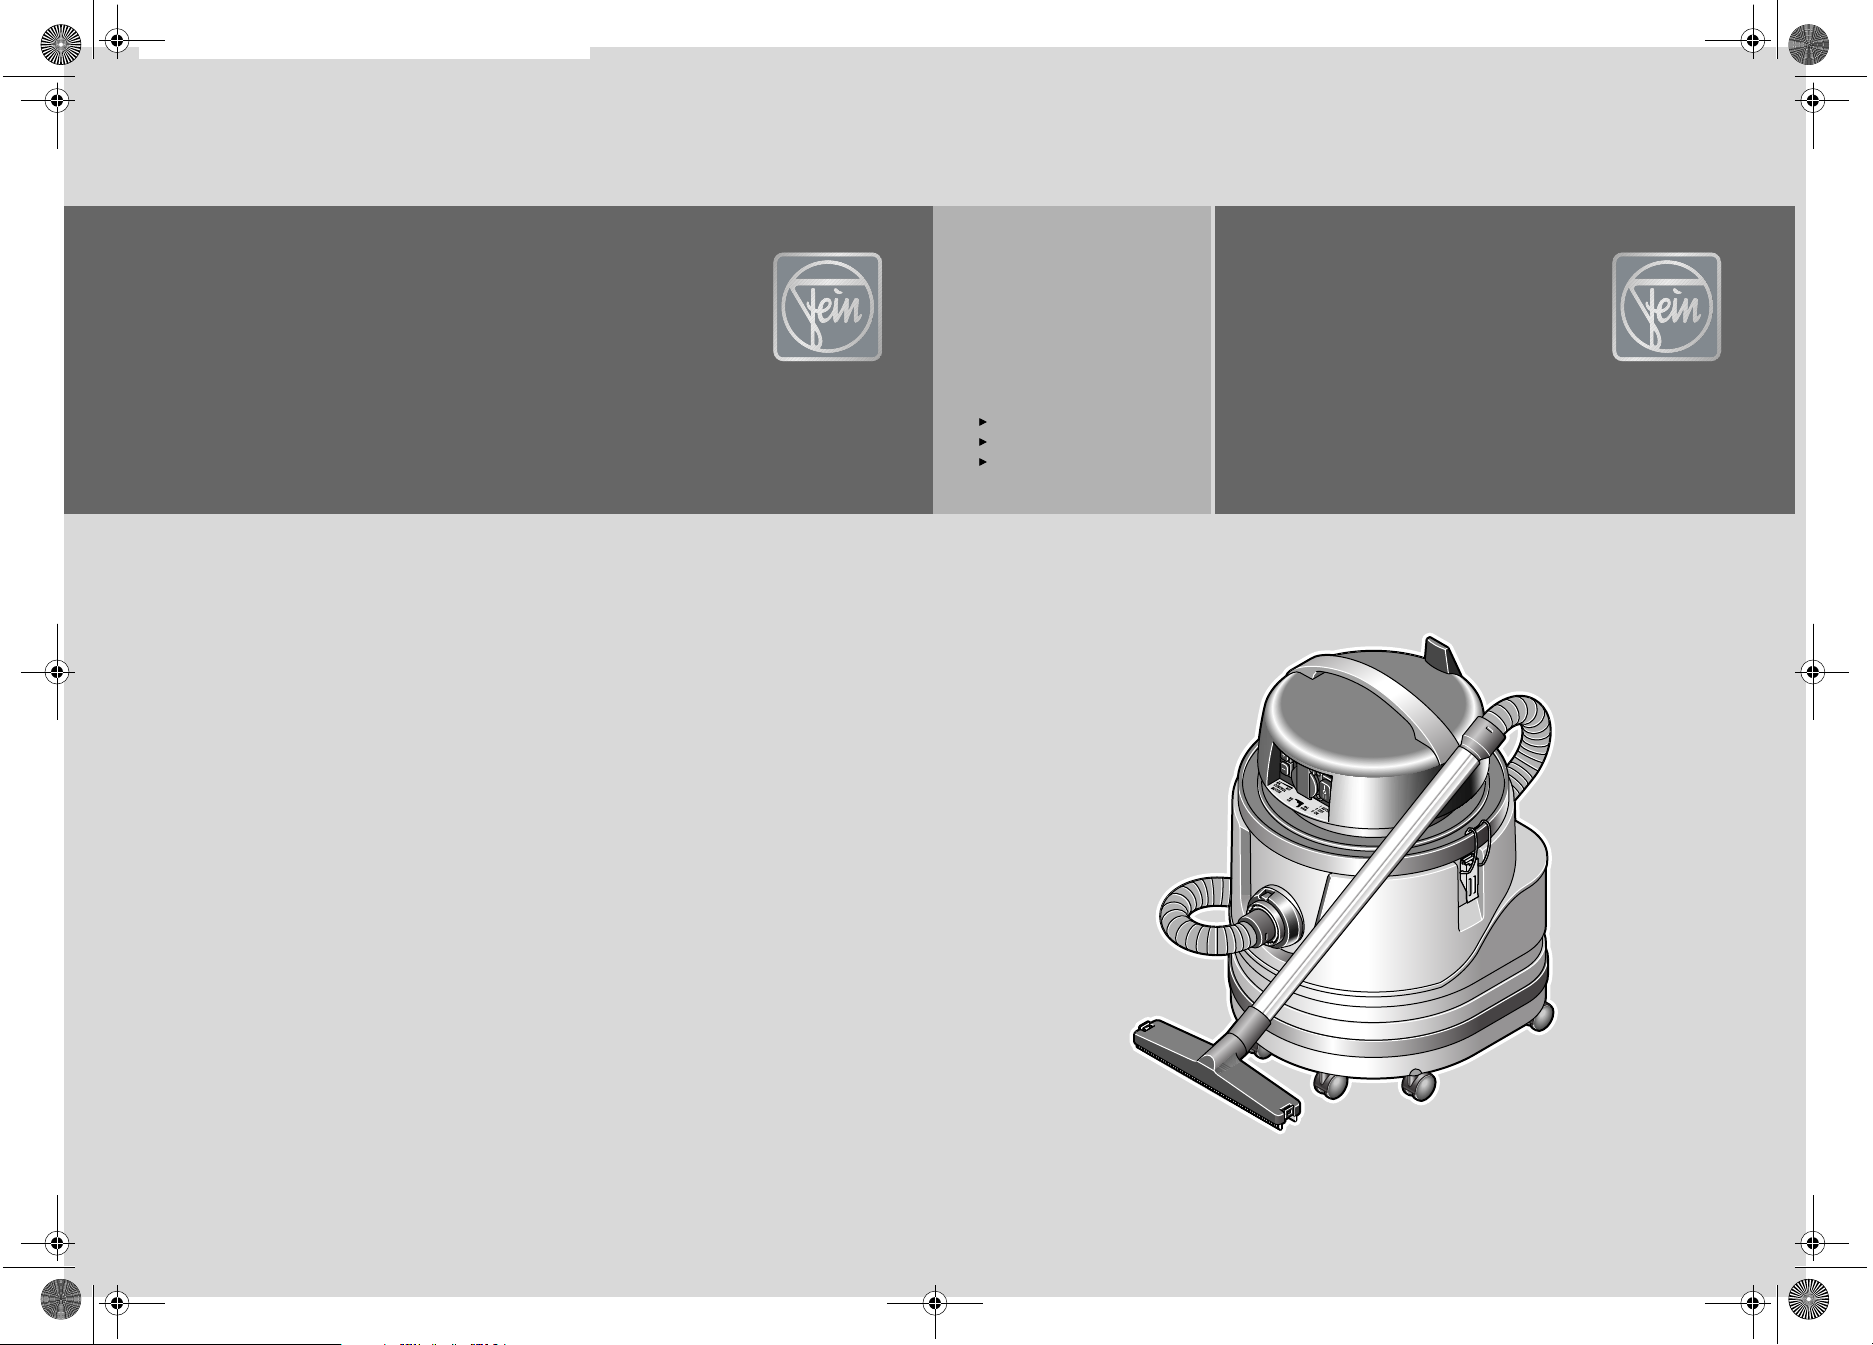
Turbo I
Turbo II
Turbo III
9 20 24
9 20 25
9 20 26
Page 2
3 41 01 116 06 0.book Seite 3 Freitag, 17. Dezember 2010 12:42 12
For your safety.
WARNING
low the warnings and instructions may result
in electric shock, fire and/or serious injury.
Save all warnings and instructions for future
reference.
Do not use this vacuum cleaner before
you have thoroughly read and completely
understood this instruction manual. The documents mentioned should be kept for later use
and enclosed with the vacuum cleaner, should
it be passed on or sold.
Read all safety warnings and
all instructions. Failure to fol-
Special safety instructions.
Operate the vacuum cleaner only from socket
outlets that are grounded. Only use undamaged
power supply cords and regularly checked
extension cords with grounded contact. A pro-
tective conductor without continuity can lead
to electric shock.
Operate the vacuum cleaner only off power
supplies whose voltage and frequency values
correspond with the values on the type plate of
the vacuum cleaner.
When wet vacuuming, operate the vacuum
cleaner only when the container is level. Oth-
erwise there is danger of electric shock from
water penetrating into the vacuum cleaner
motor.
Do not misuse the power supply cord to pull the
vacuum cleaner around or pull the plug from
the socket outlet. Keep the power supply cord
away from heat, oil, sharp edges, or rotating
parts. Do not drive over or pinch the power supply cord. Damaged or entangled power supply
cords increase the risk of an electric shock.
Before replacing accessories, pull the plug
from the socket outlet. This safety measure
reduces the risk of electric shock.
Do not vacuum materials that are hazardous to
one’s health, e. g., dust from beech or oak
wood, masonry dust, asbestos. These materials
are considered carcinogenic.
en
Only carry out such operations with this vacuum cleaner as intended for by FEIN. Only
use application tools and accessories that have
been released by FEIN.
Please also observe the relevant national
industrial safety regulations.
Non-observance of the safety instructions in
the said documentation can lead to an electric
shock, burns and/or severe injuries.
This Instruction Manual should be kept for
later use and enclosed with the power tool,
should it be passed on or sold.
SAVE THESE INSTRUCTIONS.
Do not vacuum inflammable or explosive fluids;
for example, gasoline, oil, alcohol, solvents. Do
not vacuum hot or inflammable dusts. Do not
operate the machine in rooms where the danger of an explosion exists. The dusts, vapors or
fluids can ignite or explode.
This appliance is not intended for used by
persons (including children) with reduced
physical, sensory or mental capabilities, or
lack of experience and knowledge, unless
they have been given supervision or instruction concerning use of the appliance by a person responsible for their safety.
Children should be supervised to ensure that
they do not play with the appliance.
Do not rivet or screw any name-plates or signs
to the vacuum cleaner. If the insulation is dam-
aged, protection against an electric shock will
be ineffective. Adhesive labels are recommended.
Do not use accessories not specifically
intended and recommended for this vacuum
cleaner by FEIN. Just because the accessory can
be attached to your vacuum cleaner, it does
not assure safe operation.
3
Page 3
≤
≤
≤
≤
3 41 01 116 06 0.book Seite 4 Freitag, 17. Dezember 2010 12:42 12
4
en
Before putting into operation, check the connection and the plug for damage.
Please also observe the operating instructions
and safety warnings of the power tool being
connected to the socket outlet of the vacuum
cleaner.
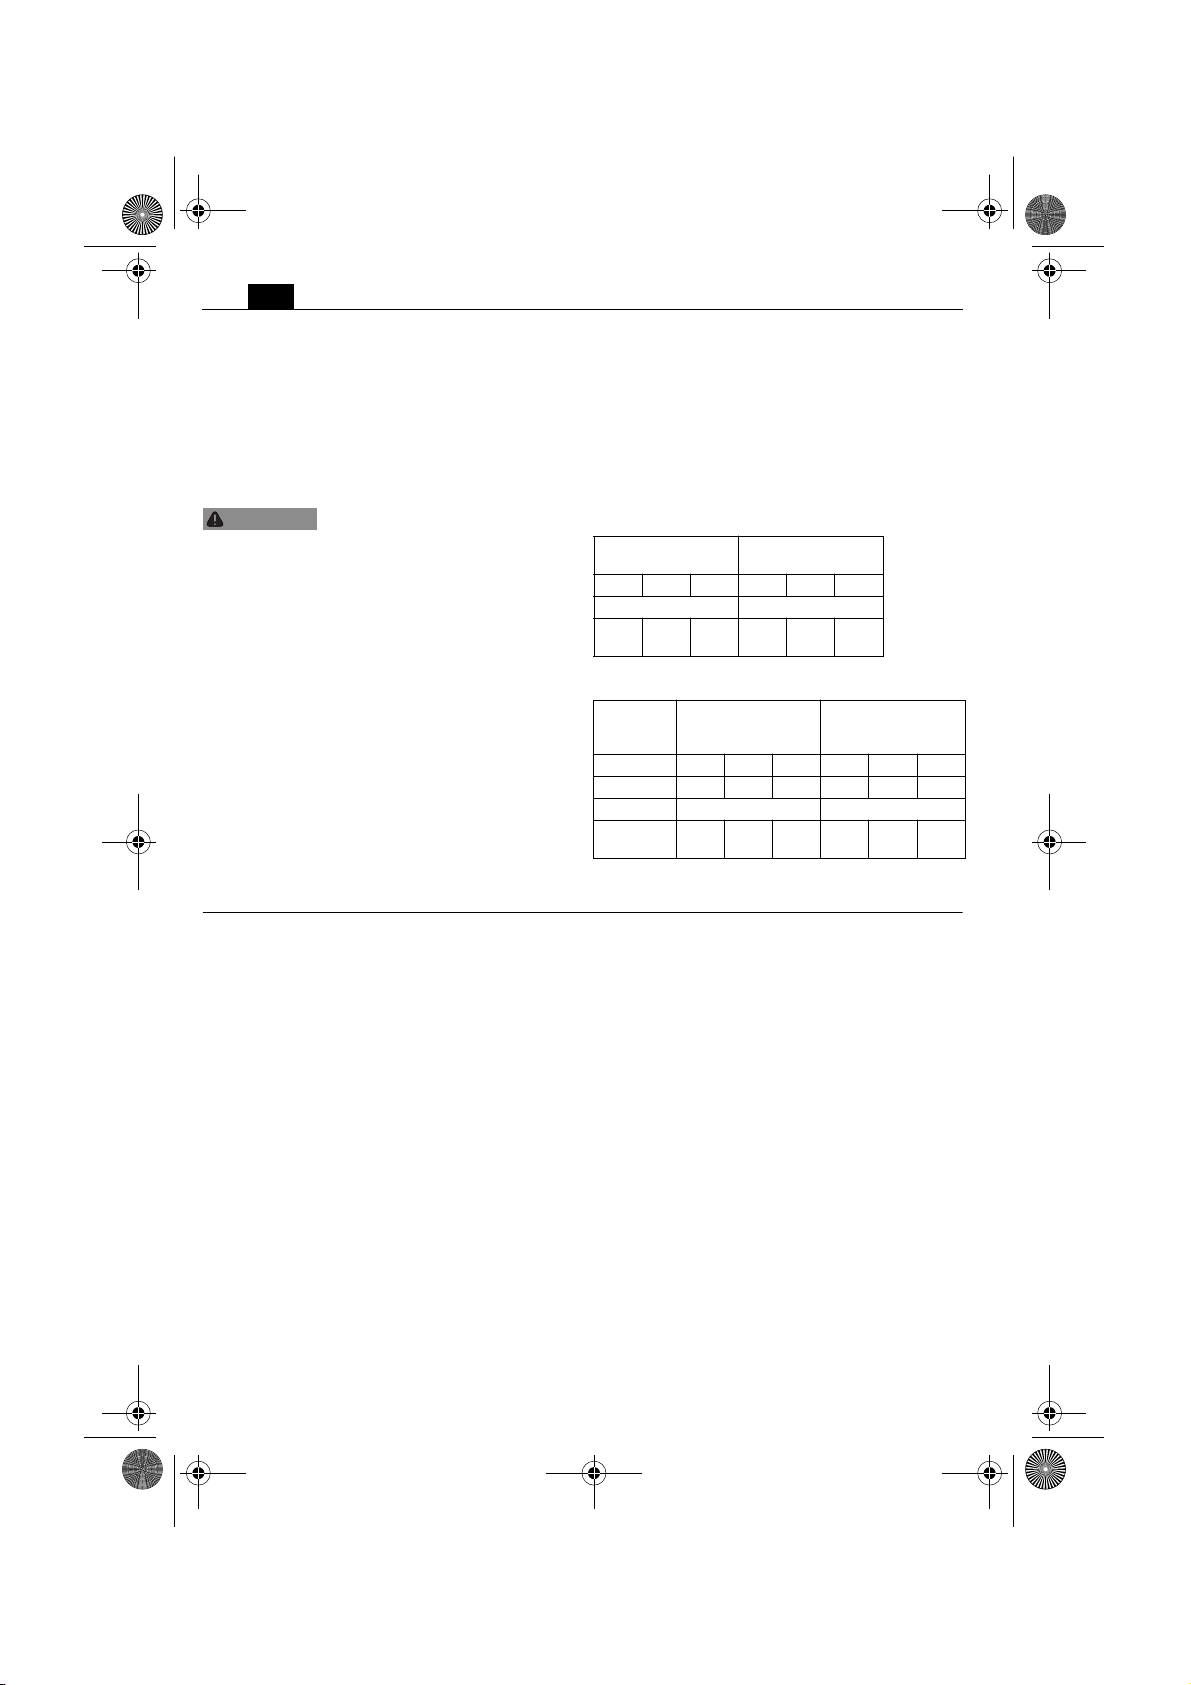
Extension cord
WARNING
ductor cross-section must be adequate for the
applicational case, in order to prevent a voltage drop in the extension cord, power loss and
overheating of the power tool. Otherwise, the
extension cord and power tool are liable to
electrical danger, and the working efficiency is
impaired.
Recommended dimensions of extension cords
at an operating voltage of 120 V – single-phase
a. c.:
If the use of an extension cord
is required, its length and con-
Vakuumcleaner without power tool
Min. conductor size
(A.W.G.)
16 14 12 1.5 2.5 4
Cord Length in Feet Cord Length in Meters
100 100–
200
200–
300
Conductor Size in
2
mm
30 30–6060–
100
Vakuumcleaner with power tool
Power consumption
10–13 16 14 12 1.5 2.5 4
13–18 1412– 2.54 –
Min. conductor size
(A.W.G.)
Cord Length in Feet Cord Length in Meters
100 100–
200
Conductor Size in
mm
200–
300
2
30 30–6060–
100
Intended use of the vacuum cleaner.
Wet/dry vacuum cleaner for vacuuming and
extraction of dry, non-hazardous dusts,
minor dust particles, particularly when carrying out dust-forming work with a power tool,
and non-combustible liquids, in weather-protected environments using the application
tools and accessories recommended by FEIN.
Page 4
Ø
3 41 01 116 06 0.book Seite 5 Freitag, 17. Dezember 2010 12:42 12
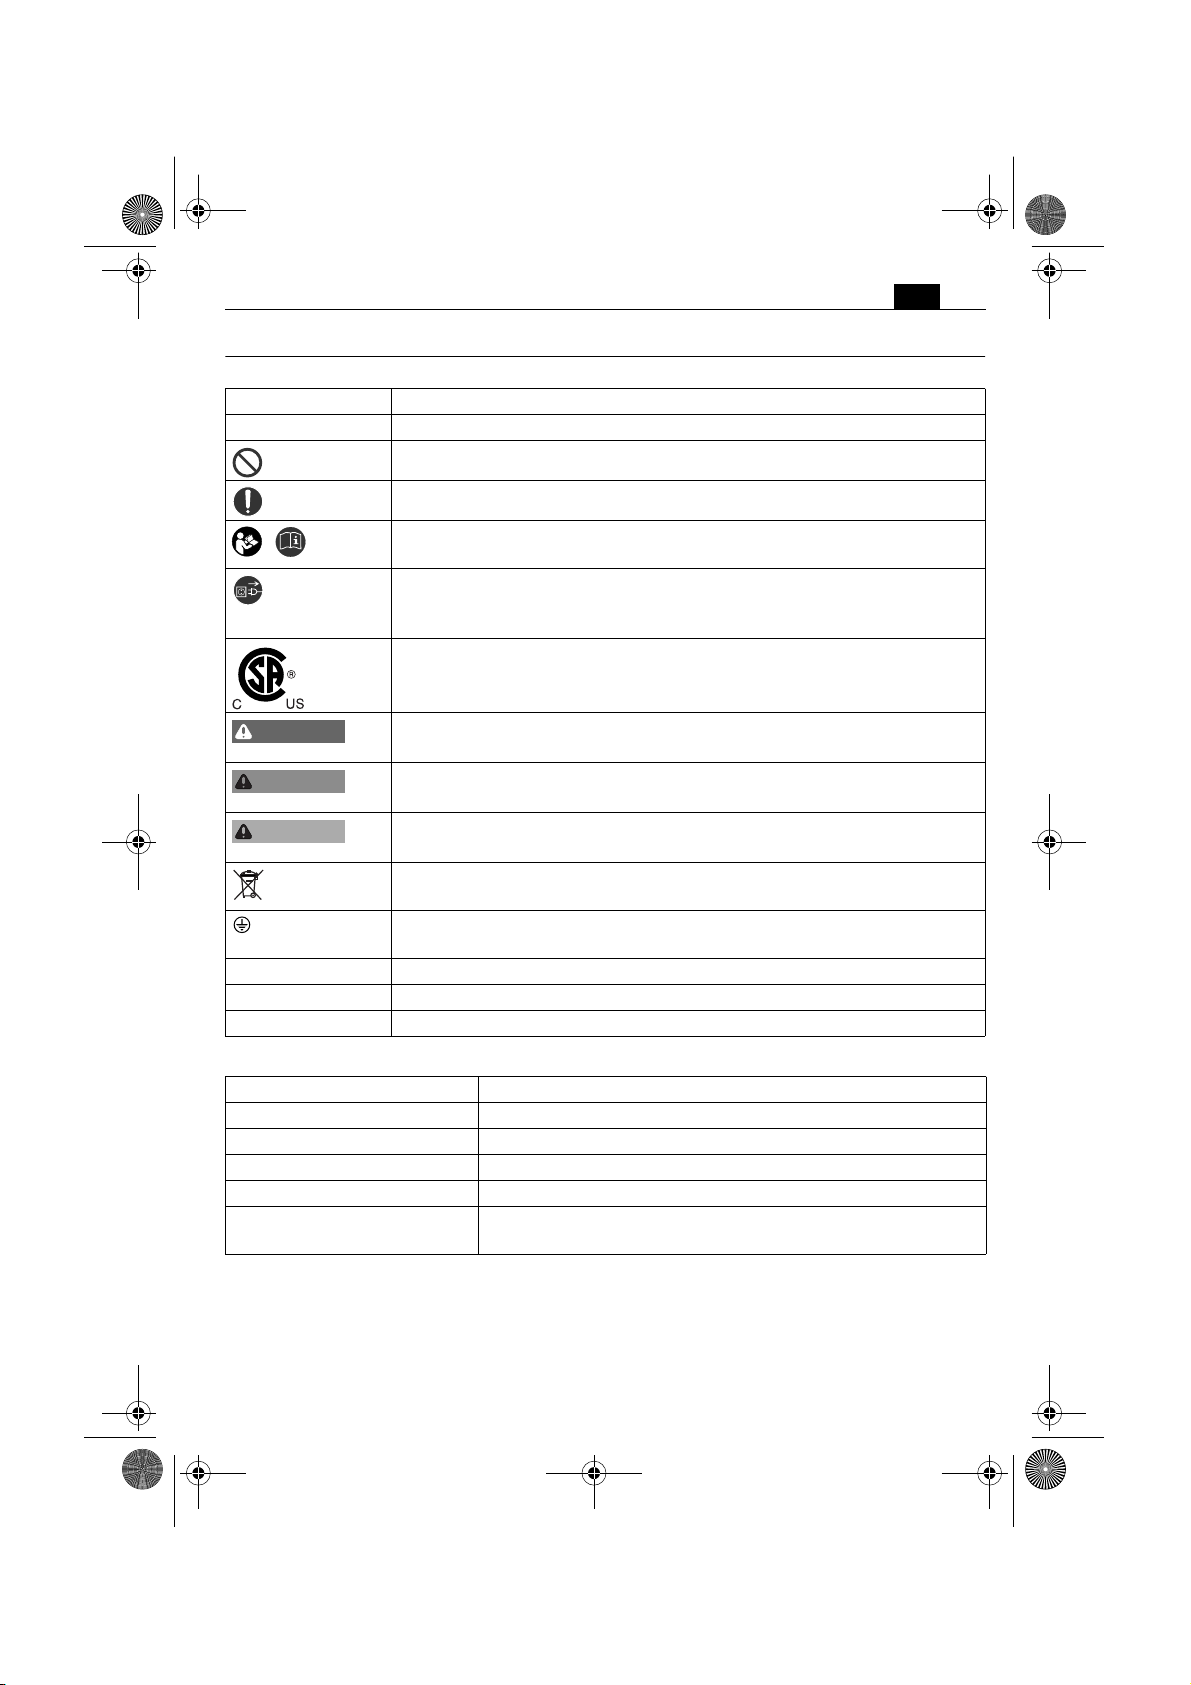
Symbols.
Symbol Explanation
➤
DANGER
WARNING
CAUTION
Action to be taken by the user
General prohibition sign. This action is forbidden!
Observe the instructions in the text or graphic opposite!
Be absolutely sure to read the enclosed documentation such as the
Instruction Manual and the General Safety Instructions.
Before commencing this working step, pull the plug out of the socket.
Otherwise there may be danger of injury caused by unintentional starting of the vacuum cleaner.
This symbol confirms the certification of this product for the USA and
Canada.
This sign warns of a directly imminent, dangerous situation. A false reaction can cause a severe or fatal injury.
This sign indicates a possible dangerous situation that could cause severe
or fatal injury.
This sign warns of a possible dangerous situation that could cause injury.
en
5
Worn out power tools and other electrotechnical and electrical products should be sorted separately for environment-friendly recycling.
Product with basic insulation and exposed (touchable), conductive parts
additionally connected to the protective earth conductor.
~ or a. c. Alternating current
1 ~ Alternating current single-phase
Diameter of a round part
Unit of measure, national Explanation
W Unit of measure for electrical power
l Unit of measure for volume
l/min Unit of measure for air flow (air volume)
mbar Unit of measure for pressure
m, s, kg, A, mm, V, W, Hz, N,
°C, dB, min, m/s
2
Basic and derived units of measure from the international system of units SI .
Page 5
3 41 01 116 06 0.book Seite 6 Freitag, 17. Dezember 2010 12:42 12
6
en
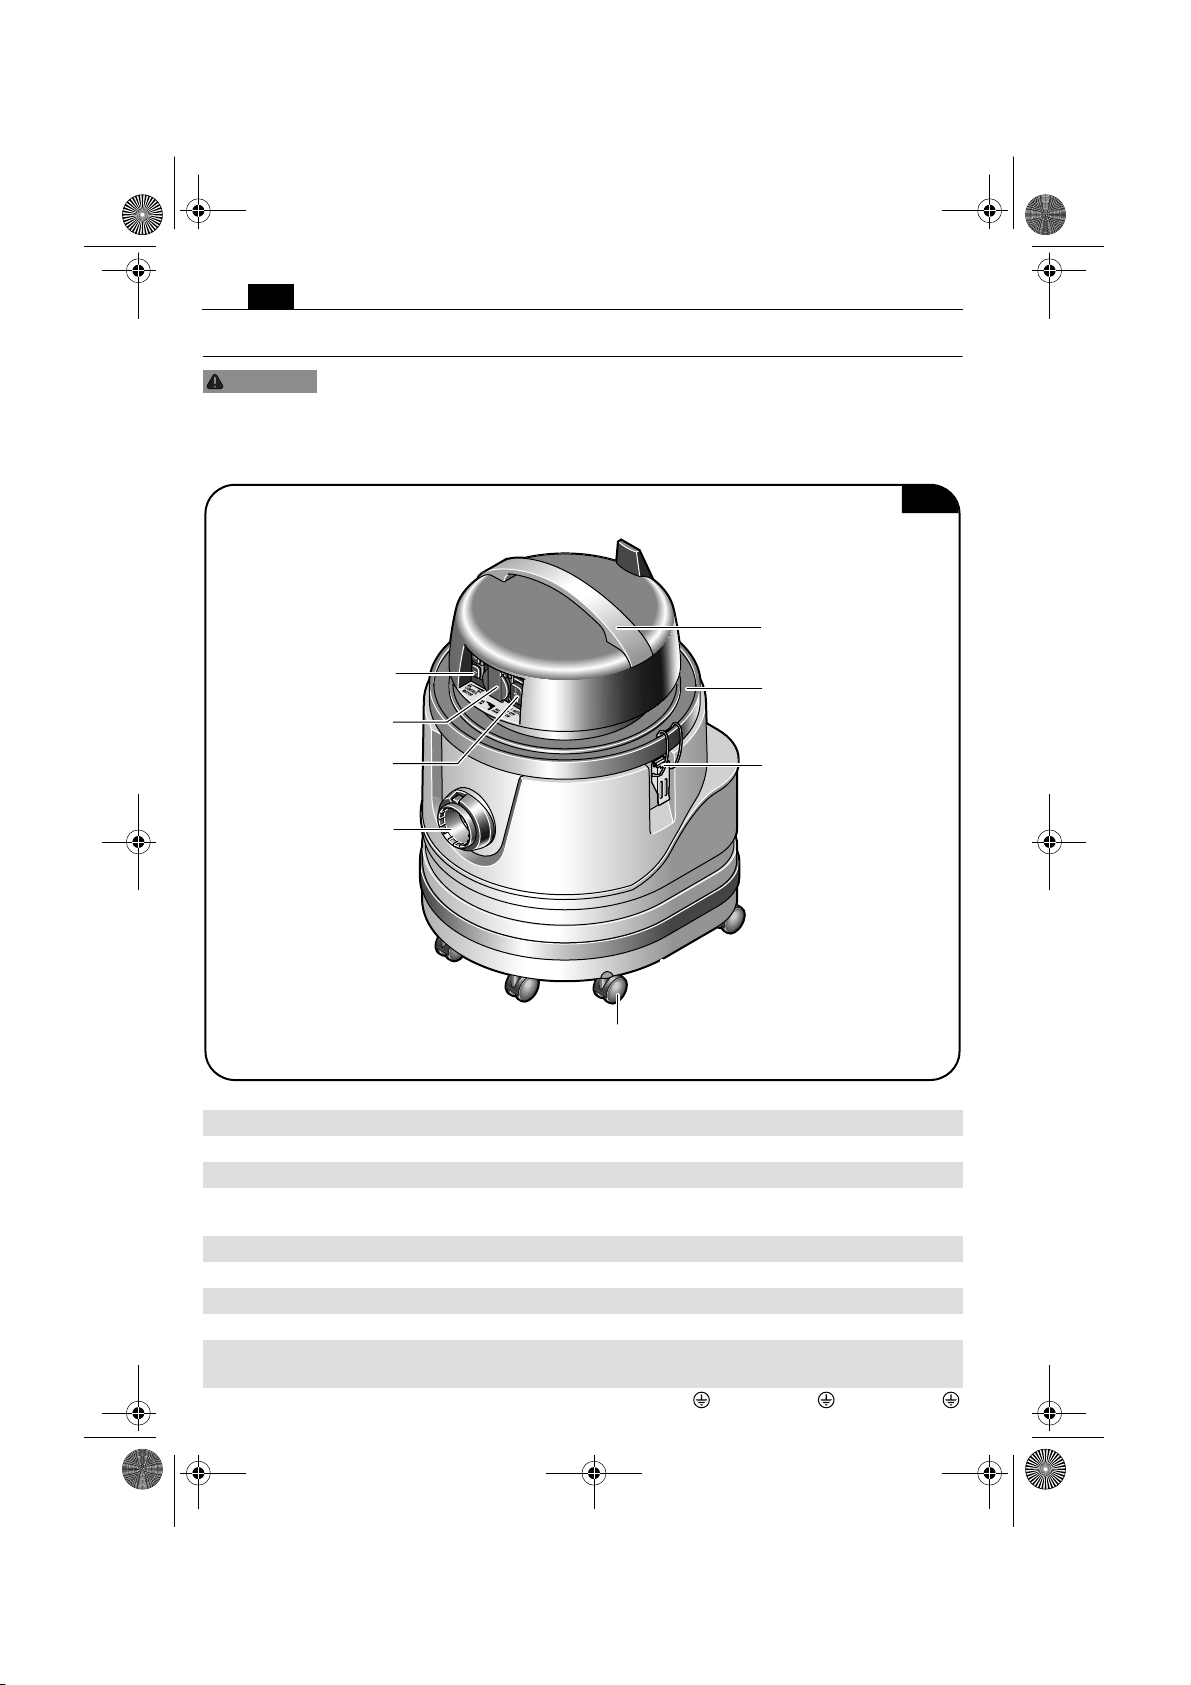
Technical description and specifications.
WARNING
Before mounting or replacing accessories, pull the plug. This preventive safety
measure rules out the danger of injuries through accidental starting of the vacuum cleaner.
Your vacuum cleaner may include only a part of the accessories described or shown in this
instruction manual.
Fig. 1
Handle
Air-flow regulator
Cord holder
Integrated socket
outlet
On/Off switch
Fastener
Hose connection
socket
Casters
Type Turbo I Turbo II Turbo III
Reference number 9 20 24 9 20 25 9 20 26
Power input 1000 W 1050 W 1200 W
Max. connected load of the integrated socket
outlet 1800 W 1800 W 1800 W
Power supply type 1 ~ 1 ~ 1 ~
Container volume 24 l 35 l 55 l
Air flow 3200 l/min 3200 l/min 3500 l/min
Max. pressure difference 230 mbar 230 mbar 250 mbar
Weight according to
EPTA-Procedure 01/2003 9.8 kg 10.5 kg 11.6 kg
Class of protection I I I
Page 6

3 41 01 116 06 0.book Seite 7 Freitag, 17. Dezember 2010 12:42 12
Removing accessories (
Figure
2).
Upon delivery, all accessories are inside the
vacuum cleaner.
Open the fasteners on both sides and
➤
take off the vacuum cleaner lid.
Remove the accessories from inside
➤
the vacuum cleaner (the figure aside is
symbolic).
Assembly instructions.
Fig. 2
en
7
Vacuum
cleaner
3.
4.
lid
Fastener
2.
1.
WARNING
Before mounting or replacing accessories, pull the plug. This preventive safety
measure rules out the danger of injuries through accidental starting of the vacuum cleaner.
Use the textile permanent filter only for dry vacuuming.
Emptying the vacuum cleaner
(Figure 3).
Open the fasteners on both sides and
➤
take off the vacuum cleaner lid.
➤
Remove the textile permanent filter
upward and clean it, if heavily soiled or
when the vacuuming performance
decreases.
➤
Empty the contents of the vacuum
cleaner base into a waste or trash can.
WARNING
The 5 micron textile permanent
filter is only suitable for nonhazardous dusts.
Fig. 3
Textile
permanent
filter
Page 7

3 41 01 116 06 0.book Seite 8 Freitag, 17. Dezember 2010 12:42 12
8
en
Inserting a paper-dust bag (Figure 4).
Use the paper-dust bag in conjunction
with the filter cartridge only for dry vacuuming.
When inserting a paper-dust bag, take care
that the cardboard flange and the paper-dust
bag face completely against the inside wall of
the container.
➤
Open the fasteners on both sides and
take off the vacuum cleaner lid.
➤
Grasp the new paper-dust bag by the
cardboard flange, first at the bottom then
at the top, and slide it over the cog.
➤
Mount the vacuum cleaner lid again
and close the fasteners.
The paper-dust bag is removed in reverse
order.
Changing the filter cartridge (Figure 5).
Use the filter cartridge with or without
additional paper-dust bag only for dry
vacuuming!
Keep the filter cartridge dry and clean it regularly.
Replace the filter cartridge when the vacuum
performance decreases.
Open the fasteners on both sides and
➤
take off the vacuum cleaner lid.
Screw the nut at the bottom side of
➤
the filter cartridge counterclockwise and
remove the filter cartridge.
Mount the new filter cartridge cen-
➤
tered and screw the nut clockwise to the
stop.
After removing the paper-dust bag, seal it
with the closing cover in order to avoid
debris.
Fig. 4
Paperdust bag
➤
Mount the vacuum cleaner lid again
and close the fasteners.
Fig. 5
2.
Nut
1.
Filter cartridge
Page 8

3 41 01 116 06 0.book Seite 9 Freitag, 17. Dezember 2010 12:42 12
Mounting/dismounting the vacuum
hose (Figure 6).
Turbo I, Turbo II:
➤
Insert the vacuum hose to the stop in
the hose connection socket until tightly
seated.
➤
To remove the vacuum hose, press the
release button and pull the vacuum hose
out.
Turbo III:
➤
Insert the vacuum hose into the hose
connection socket until tightly seated.
➤
To remove the vacuum hose, hold
hose close to the vacuum body and twist
hose while pulling.
Working instructions.
WARNING
The motor of the vacuum cleaner is equipped
with a soft-start function.
The vacuum cleaner starts with the last set
suction capacity.
Before mounting or replacing accessories, pull the plug. This preventive safety
measure rules out the danger of injuries through accidental starting of the vacuum cleaner.
en
➤
Mount accessories applying only slight
pressure. For disassembling, turn the
parts somewhat against each other and
pull apart.
Fig. 6
Hose
connection
socket
Vacuum hose
9
Switching on and off without a power
tool connected (Figure 7).
WARNING
Switching ON
➤
Set the On/Off switch to ( II ).
Switching OFF
➤
Set the On/Off switch to ( O ).
First check that the power
cord and power plug are not
damaged.
:
:
Fig. 7
On/Off switch
Page 9

3 41 01 116 06 0.book Seite 10 Freitag, 17. Dezember 2010 12:42 12
10
en
Switching on and off with a power tool
connected (Figure 8).
Switch the vacuum cleaner off before connecting a power tool to the integrated vacuum cleaner socket outlet. Make sure that the
power tool is switched off when inserting its
plug into the vacuum cleaner socket outlet.
The vacuum cleaner is automatically switched
on and off via the power tool connected to
the integrated socket outlet.
➤
Plug the plug of the power tool into
the integrated socket outlet.
➤
Set the On/Off switch to ( I ).
➤
Switch the power tool on/off – the
vacuum cleaner automatically starts/
stops.
➤
After switching off a power tool connected to the vacuum cleaner socket
outlet, the vacuum cleaner will run on
for approx. 5 seconds and then automatically switch off.
Integrated socket outlet
Fig. 8
On/Off switch
1.
2.
3.
Regulating the air flow (Figure 9).
The air flow can be increased or decreased
over 5 levels.
➤
To increase the air flow, press the air-
volume regulator to (+).
➤
To decrease the air flow, press the air-
volume regulator to (–).
Fig. 9
Air-flow
regulator
Page 10

3 41 01 116 06 0.book Seite 11 Freitag, 17. Dezember 2010 12:42 12
Vacuuming fluids.
Before vacuuming fluids, always remove
the paper-dust bag or the textile permanent filter, and check the operation of the
float.
When wet vacuuming, the air flow is interrupted by means of a float after reaching the
maximum filling height. Switch off the vacuum cleaner immediately, pull the plug from
the socket outlet and empty the container.
When foam or water comes out, switch off
the vacuum cleaner immediately and empty
the container.
Emptying the container on the Turbo I:
➤
Switch the vacuum cleaner off.
➤
Open the fasteners on both sides and
take off the vacuum cleaner lid.
➤
Empty the container.
en
11
Emptying the container on the Turbo II and
Turbo III (Figure 10):
➤
Switch the vacuum cleaner off.
Empty the container after vacuuming fluids.
Afterwards, run the vacuum cleaner with the
accessories connected for several minutes in
order to dry them.
➤
Pull off the protective cap.
➤
Pull the lever toward the front to open
the valve in order to drain the dirty
water.
➤
After draining the dirty water, push
the lever toward the rear again in order
to shut the valve, and reattach the protective cap.
Fig. 10
Vacuuming dry materials.
For dry vacuuming, insert the filter cartridge
in the vacuum cleaner.
For dry vacuuming, additionally use the paper
or the textile dust bag.
Empty the container each time after using and
remove coarse debris and dust.
Protective capLever
Page 11

3 41 01 116 06 0.book Seite 12 Freitag, 17. Dezember 2010 12:42 12
12
en
Trouble-shooting.
Malfunction Description Possible Cause Corrective Action
Vacuum cleaner cannot be
switched on.
Reduced vacuuming capacity. Vacuum cleaner not fitted
No suction capacity when wet
vacuuming.
Circuit breaker has tripped. Ensure power supply.
Vacuum cleaner in remote
control operation.
correctly.
Vacuum system clogged. Clean vacuum hose and
Paper-dust bag full. Replace paper-dust bag.
Filter cartridge or textile per-
manent filter soiled/dirty.
Container full. Empty container.
Set On/Off switch to “I”.
Mount vacuum lid and shut
both fasteners completely.
extension tubes.
Clean or renew filter cartridge
or textile permanent filter.
Maintenance.
WARNING
Before mounting or replacing accessories, pull the plug. This preventive safety
measure rules out the danger of injuries through accidental starting of the vacuum cleaner.
Service
WARNING
nel. Incorrectly mounted conductors and components can cause serious injuries. Have the
required service carried out only through a
FEIN customer service agent.
When replacing the power tool’s cord is
required, have this carried out by FEIN
or by an authorized FEIN Service Agent, in
order to avoid hazardous situations.
Have maintenance carried out
only through qualified person-
Cleaning
WARNING
uum cleaner from the power supply in order to
avoid accidents.
Prior to any cleaning or maintenance, disconnect the vac-
Do not use cleaning agents and solvents
that can cause damage to plastic parts.
These include: Gasoline, carbon-tetrachloride, chloric solvents, ammonia and domestic
cleaning agents that contain ammonia.
Warranty and liability.
The warranty for the product is valid in
accordance with the legal regulations in the
country where it is marketed.
In addition, FEIN also provides a guarantee in
accordance with the FEIN manufacturer’s
guarantee. For further details on this, please
contact your specialist dealer, your national
FEIN representative, or the FEIN customer
service center.
Environmental protection,
disposal.
Packaging, worn out vacuum cleaners and
accessories should be sorted for environment-friendly recycling.
Page 12

3 41 01 116 06 0.book Seite 13 Freitag, 17. Dezember 2010 12:42 12
Provided accessories.
Turbo I
Vacuum hose
Textile permanent
filter
en
Fig. 11
13
Connection piece
Crevice nozzle
Hand-brush, round
Page 13

3 41 01 116 06 0.book Seite 14 Freitag, 17. Dezember 2010 12:42 12
14
en
Turbo II
Fig. 12
Vacuum hose
Textile permanent
filter
Connection piece
Page 14

3 41 01 116 06 0.book Seite 15 Freitag, 17. Dezember 2010 12:42 12
Turbo III
Vacuum hose
Textile permanent
filter
en
Fig. 13
15
Connection piece
Connection piece
 Loading...